In this episode, we finish up the first world of the game while collecting all of the stuff for a full clear and also finding all the warp barrels.
All maps by Shiny.
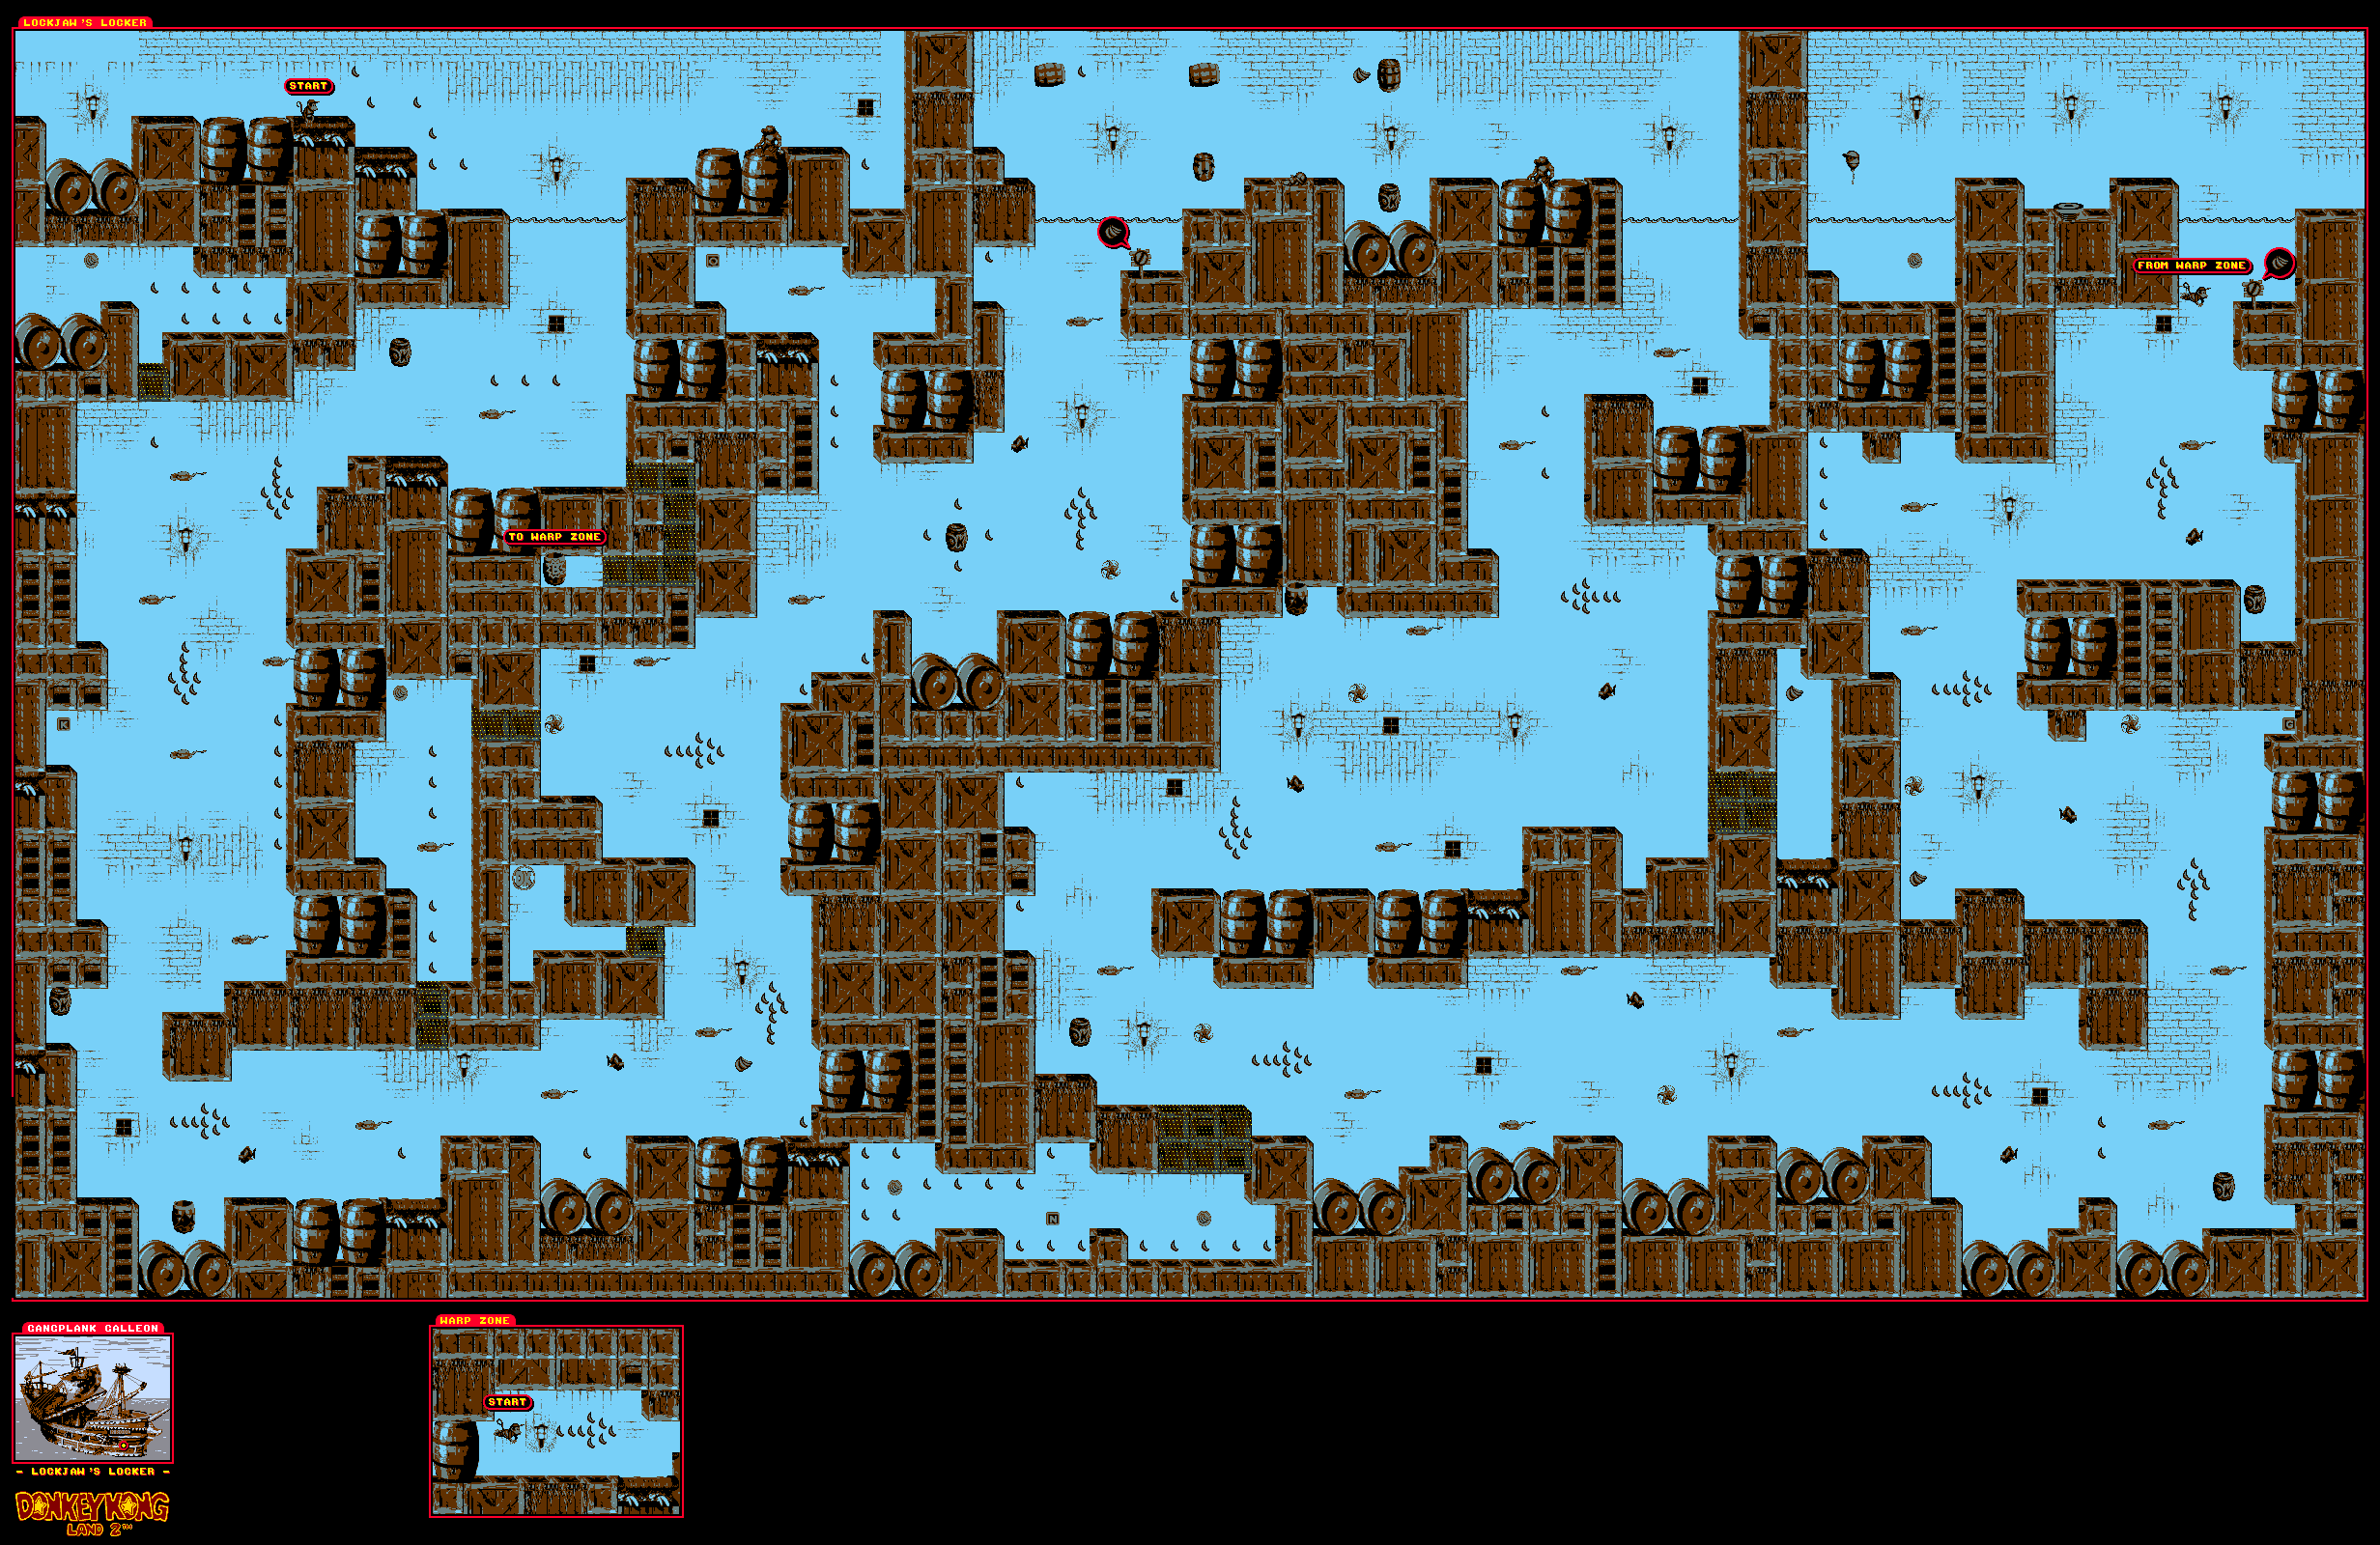
Lockjaw's Locker
Bonus areas: none
To find the warp zone, go down and to the right as soon as you go underwater at the start. You'll be able to go through some crates and find a path leading to it.
Swimming is easy to do. Just keep pressing A to ascend when you need to, use Left and Right to switch directions and hold Down to descend quickly when you need to.
There are some hidden walls if you know where to look, and these hidden compartments lead to Banana Coins as well as the N and a DK Coin. To find the DK Coin, go left directly after the first "up arrow" made out of bananas and go through the wall. You'll find the DK Coin. Thankfully, the path here is very linear despite the fact that there are banana arrows telling you where to go.
The swordfish barrel lets you play as Enguarde. You can move in any direction with the Control Pad while playing as Enguard. Use B to stab enemies, and hold Select to do the supercharge, which lets you run through multiple enemies until you hit a wall or touch the Control Pad.
Enemies returning here include Flotsam the manta ray (who moves back and forth), Shuri the starfish (who careens at you when you get too close) and Lockjaw (the fish the slowly moves back and forth and tries to take a bite out of you if you get too close).
There is a 1-Up to the left of the exit. If you're quick and you can use Dixie's helicopter spin, you can get it.
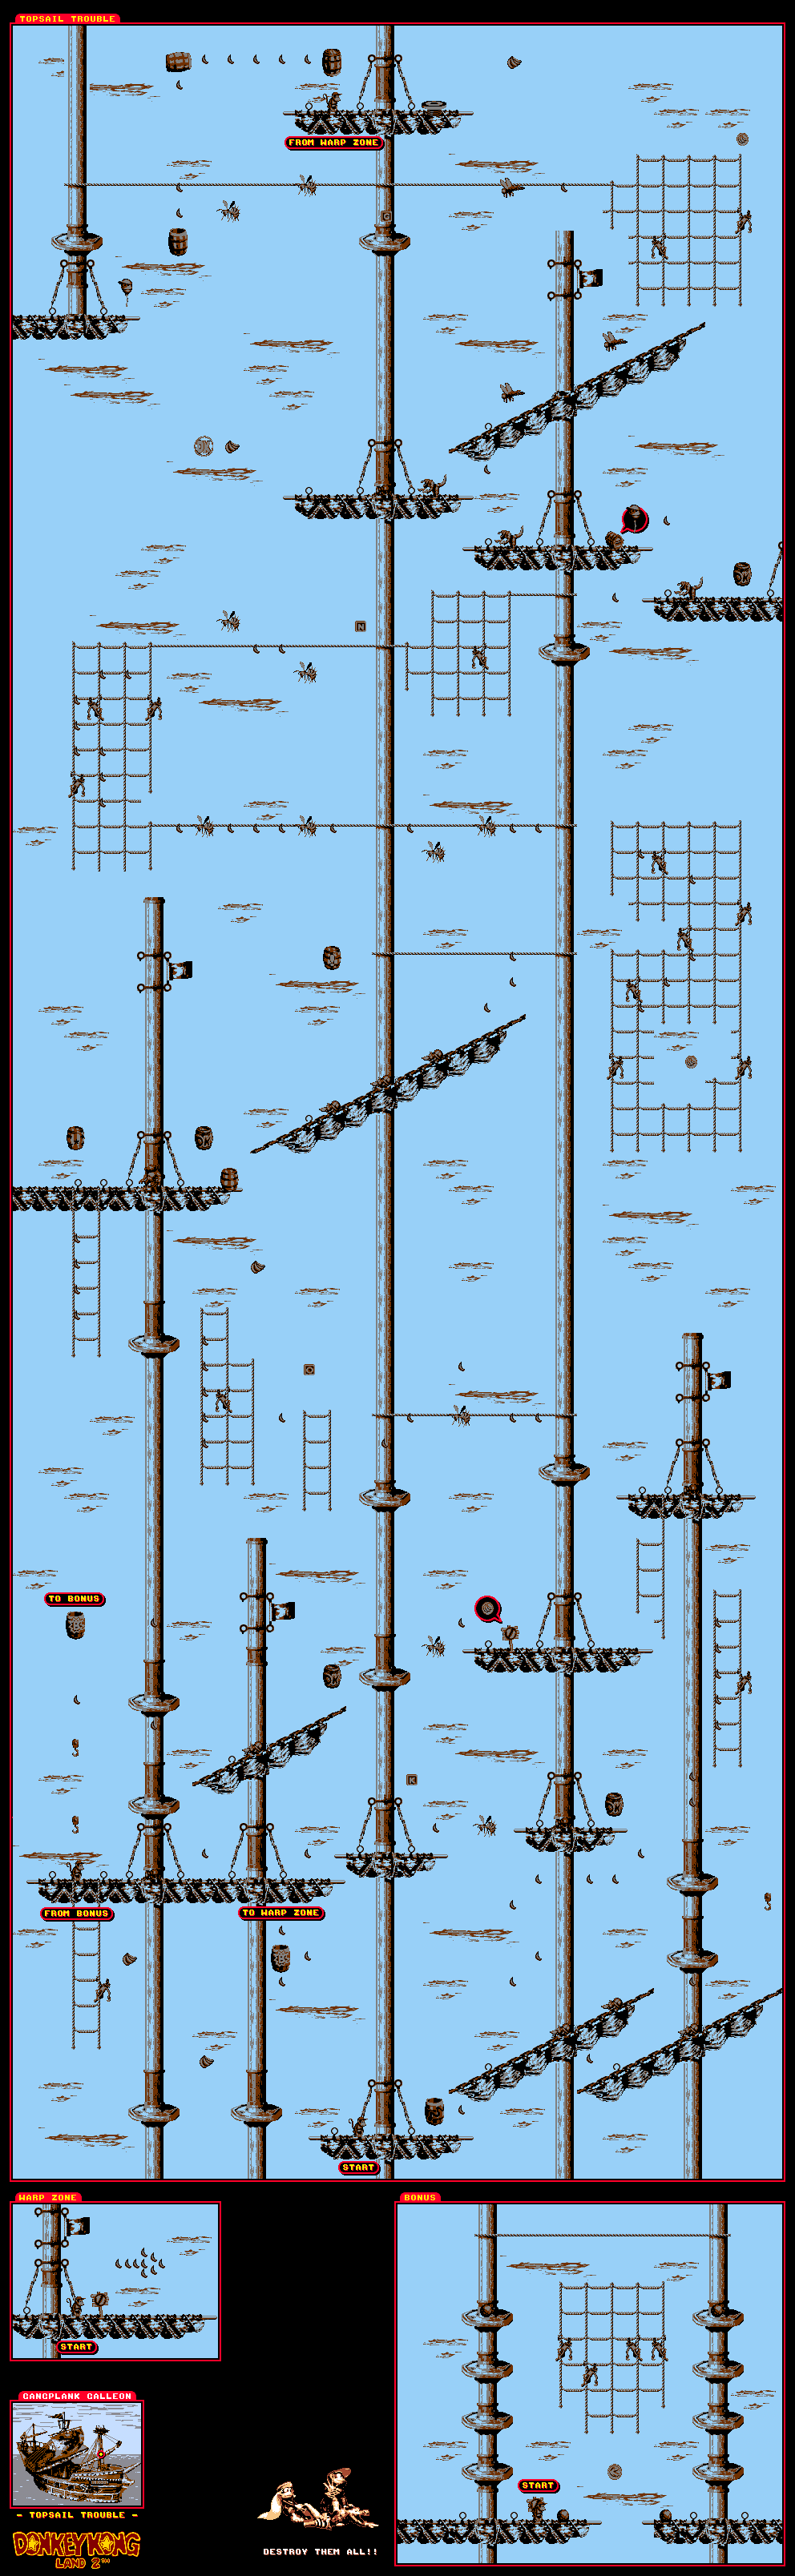
Topsail Trouble
Bonus areas: One (1)
This time around, you'll be playing as Rattly. You can attack enemies by jumping, and holding Select down until Rattly bobs up and down very fast allows you to do a superjump straight up into the air. Rattly's jump attack will also allow you to defeat Zingers without taking damage and use them as platforms to where you need to go next.
The Warp Zone is above the platform to the left of the start. Superjump up with Rattly and stay to the right side of the mast in the background to find it. The bananas will clue you in on where to move.
Further to the left of the Warp Zone is a rope ladder with a Klinger, and directly above it is the bonus area for this stage. You can get there the hard way with Rattly, but you can get there as the Kongs provided you use the nearby hooks. When you reach that area, you'll have to superjump to another platform above, then jump to the left to get there. Destroy all four Klingers with the cannonballs, and the Kremkoin will be yours.
In the second half of the level, you'll be doing a lot of rope climbing and a lot of Klinger dodging. Remember, if you can shit to another rope and move right into a Klinger, you can bump the Klinger off. There is a "!" barrel that gives you temporarily invincibility if you know where to look, and you can burn through the early part of the second half of the level with it.
There is a chest with a 1-Up inside. To break the chest and get the contents, just toss it into an enemy like you would a crate or a barrel. Further to the left is the DK Coin. You can use Dixie's helicopter spin to get it.
If you see the barrel cannon below the horizontal rope, go further to the left and drop to the nearby platform to find an easy-to-miss 1-Up.
Funky's Flights
If you've completed more than one world - and you can get to it - you can pay Funky Kong two Banana Coins to go to a previous world to load up on more lives or find missed bonus areas and DK Coins.
Funky and Wrinkly Kong are the only two Kongs in this game; you won't be able to get hints from Cranky Kong or answer questions with Swanky Kong in this one.
Krow's Nest
To beat Krow, jump over him as he swoops down with the egg, then wait for him to drop the egg. Grab the egg when it stops moving, then hit Krow with it.
After two hits, eggs will rain down one at a time after Krow rams the mast in the background. One will eventually land on the floor, and you'll be able to tell which one it is as that egg will not be spinning on its way down. Grab it, and send it back at Krow. After the fourth hit, Krow is history.
It should be mentioned that whenever you enter a boss level, you will automatically have both Kongs when the boss level starts.
After the boss battle, you'll be able to go to Krem Cauldron, which combines levels from Crocodile Cauldron and Krem Quay. Before you go there - or any other freshly unlocked world - go back to the previous one and save your game at Kong Kollege.
No comments:
Post a Comment