In this entry, we finally take on Turtle Rock.
The telepathic message tile at the beginning tells you that if you don't have the Medicine of Magic, then you shouldn't go any further.
Agreed.
Turtle Rock
All maps by Iron Knuckle.
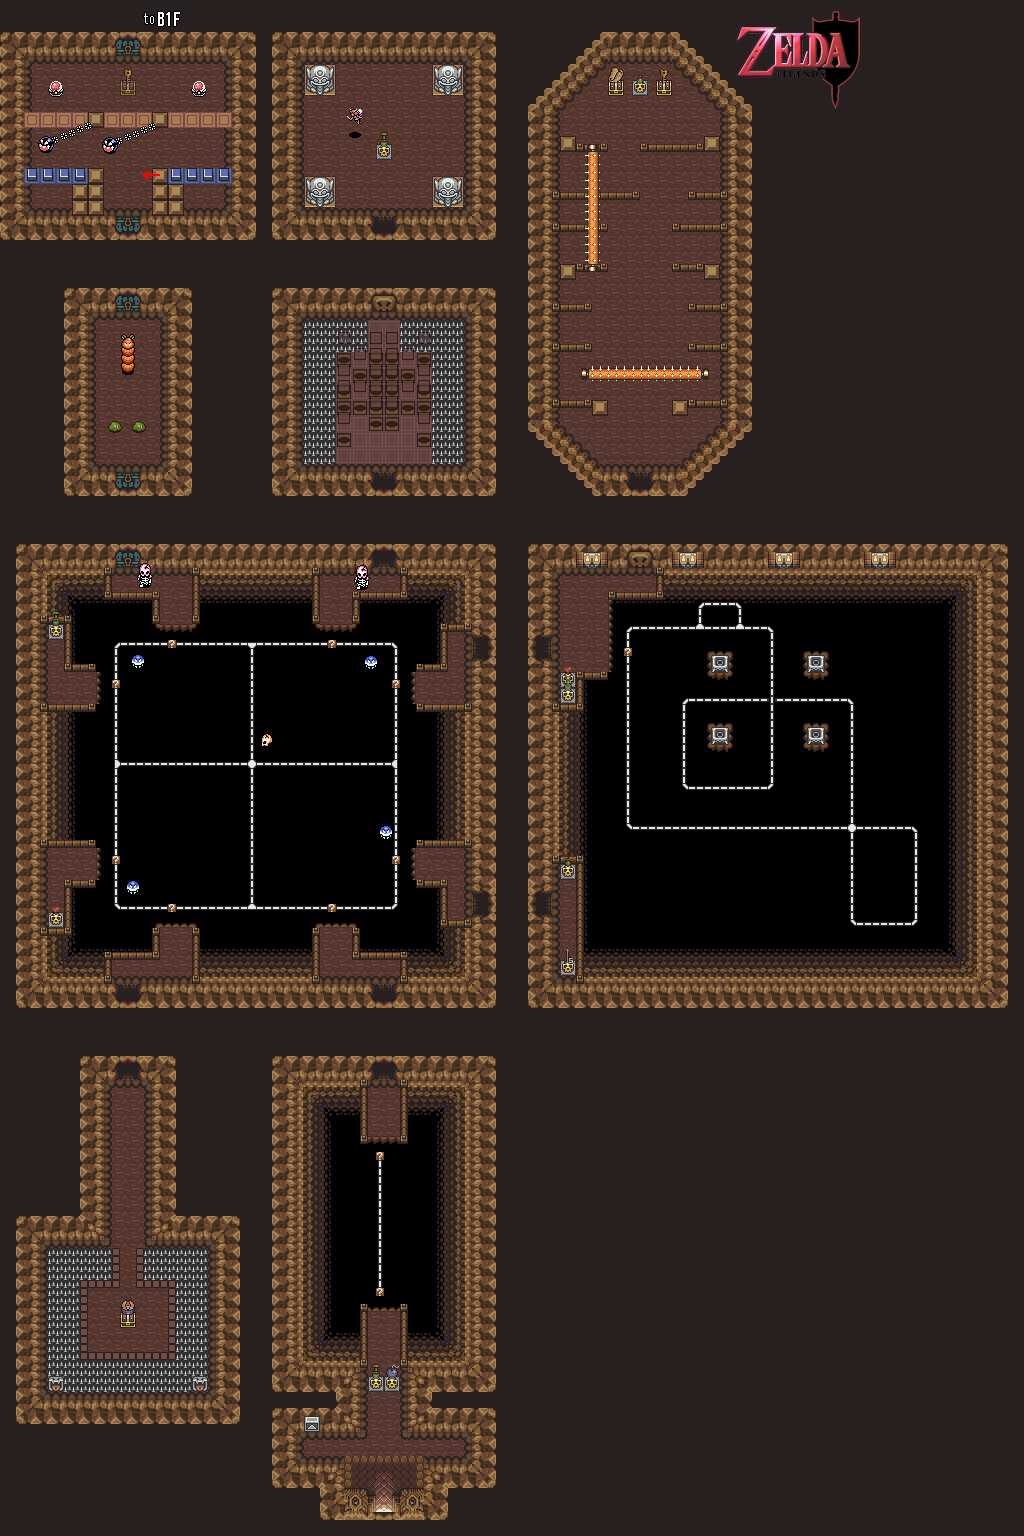
When you enter the dungeon, you'll be faced with a bottomless pit with very little clue as to how to get anywhere. If you have the Cane of Somaria, you can use it on the question mark block at the very end of the dotted line and use it to create a platform. Step on, and you'll be able to move to the other side of the room.
You can only make a platform at the question marks, and you can only change directions at the junctions in the dotted lines.
The door that leads to the compass disappears when you face it after entering the room. Even worse, the eye above the door will fire lasers. If you turn away from the wall by powering up for the Whirlwind Slash and move towards it, the door will appear again. It also makes it so the eyes above the doors won't fire lasers. Nice.
To open the door activated by lighting the four torches, make a platform and equip the Fire Rod. Light the upper-right lantern, then light the bottom ones at the same time. You can then get the upper-left one and make it into the doorway.
The spiked crushers inside can be avoided with the Magic Cape. You could use the Cane of Byrne, but the Magic Cape lets you move through them, which makes things a lot simpler.
The leaping orange caterpillars can be best taken out with the whirlwind slash.
Here's an interesting enemy: the Chain Chomps from the Mario games. They would be friendly in Link's Awakening, but here they're enemies. All you can do is avoid them.
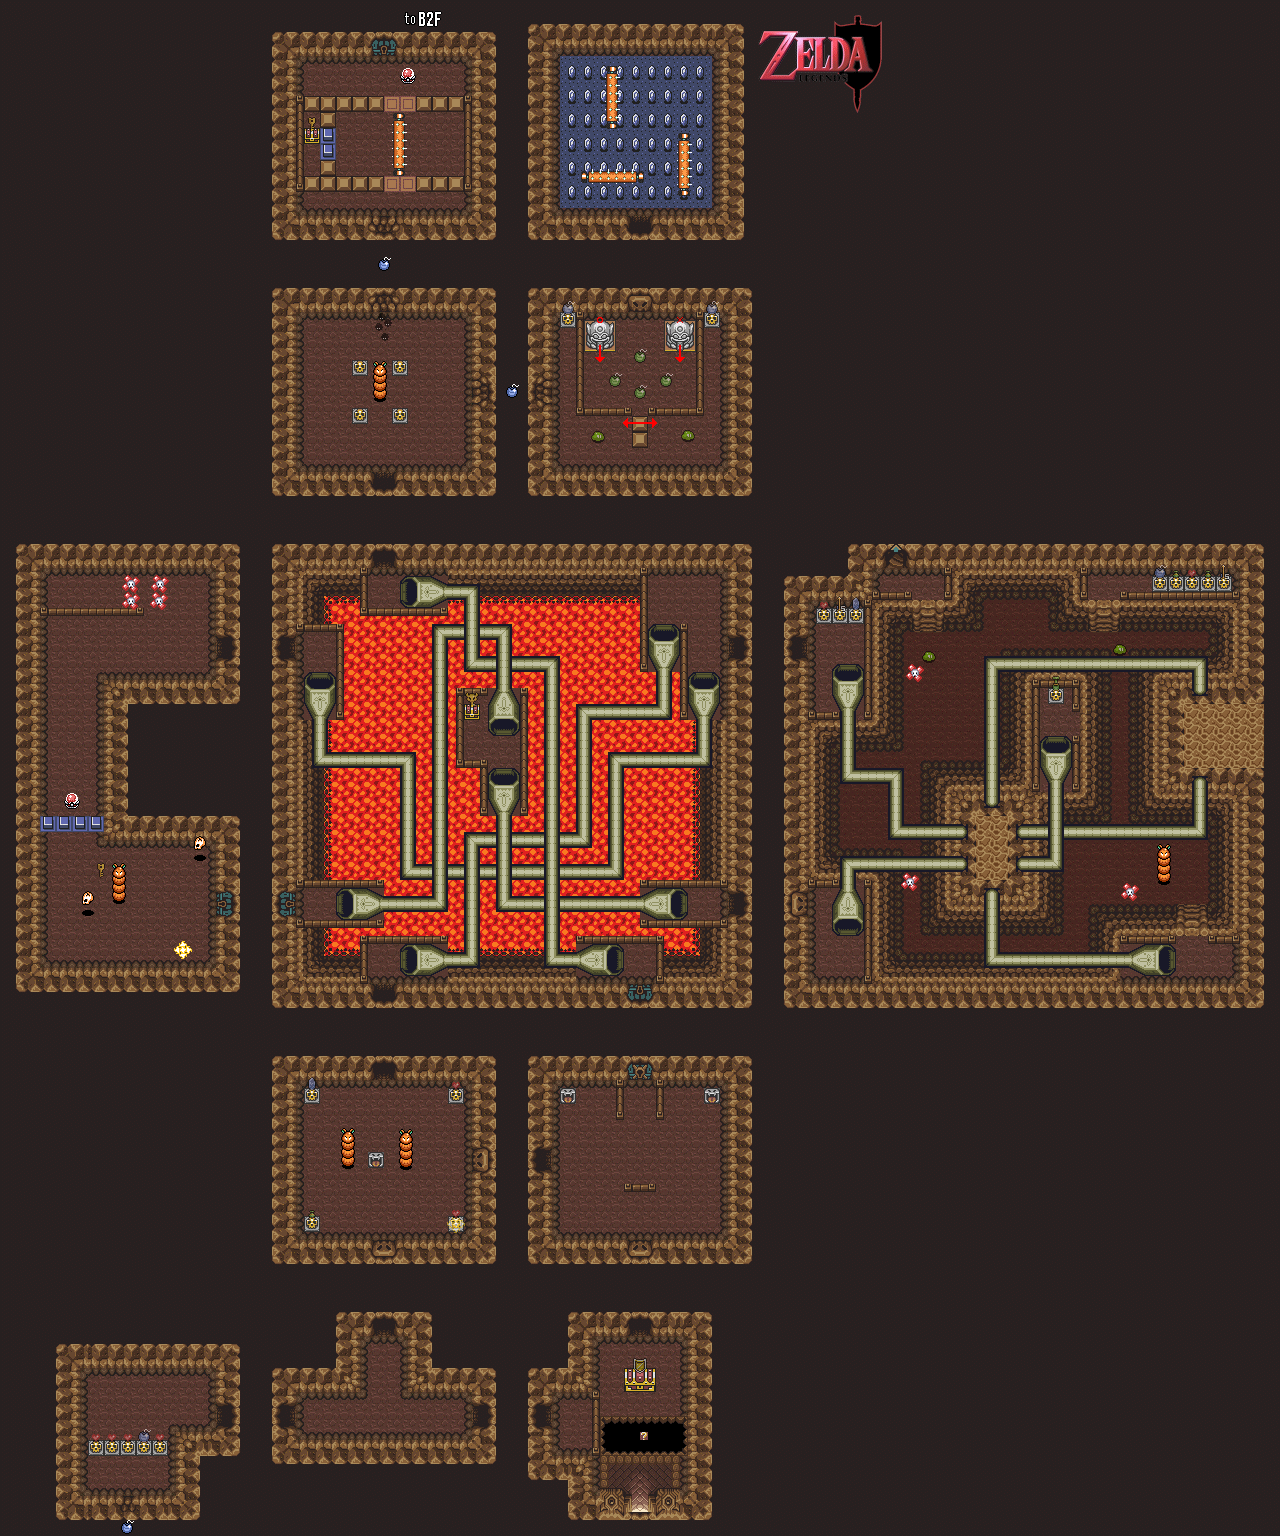
The pipes whisk you away to another part of a room. Just walk in and the game takes care of the rest.
At one point in the dungeon, you'll be able to blow up a crack in the wall and reappear in a cliff on Death Mountain that you couldn't normally reach. Keep in mind that while you're blowing a hole in this cracked wall, some eyes will fire lasers when you look at them while some fire lasers when you look away from them. This dungeon actually has a decent security system, believe it or not.
.png)
.png)
.png)
.png)
When you're at this cliff, go all the way to the cave entrance to the right and use the Magic Mirror. You'll reappear at a part of the mountain in the Light World that you can't otherwise reach. Go inside this cave, take aim with your Bow and Arrow to take out all the monsters and you'll find the 24th and last Heart Piece in the game.
Return to the Dark World and head into the Cave. If you've explored the entire dungeon up to this point, you'll have the Big Key ready to open up the Big Chest here. Inside is the Mirror Shield, which allows you to deflect the beams shot at you by the eyes.
One of the rooms has nothing but three crushers and 270 Rupees. That's 45 blue Rupees in six rows with nine each. Fill up your Magic, don the Magic Cape and get rich quick in case you're low on money and need to fill up on potions after this dungeon is over.
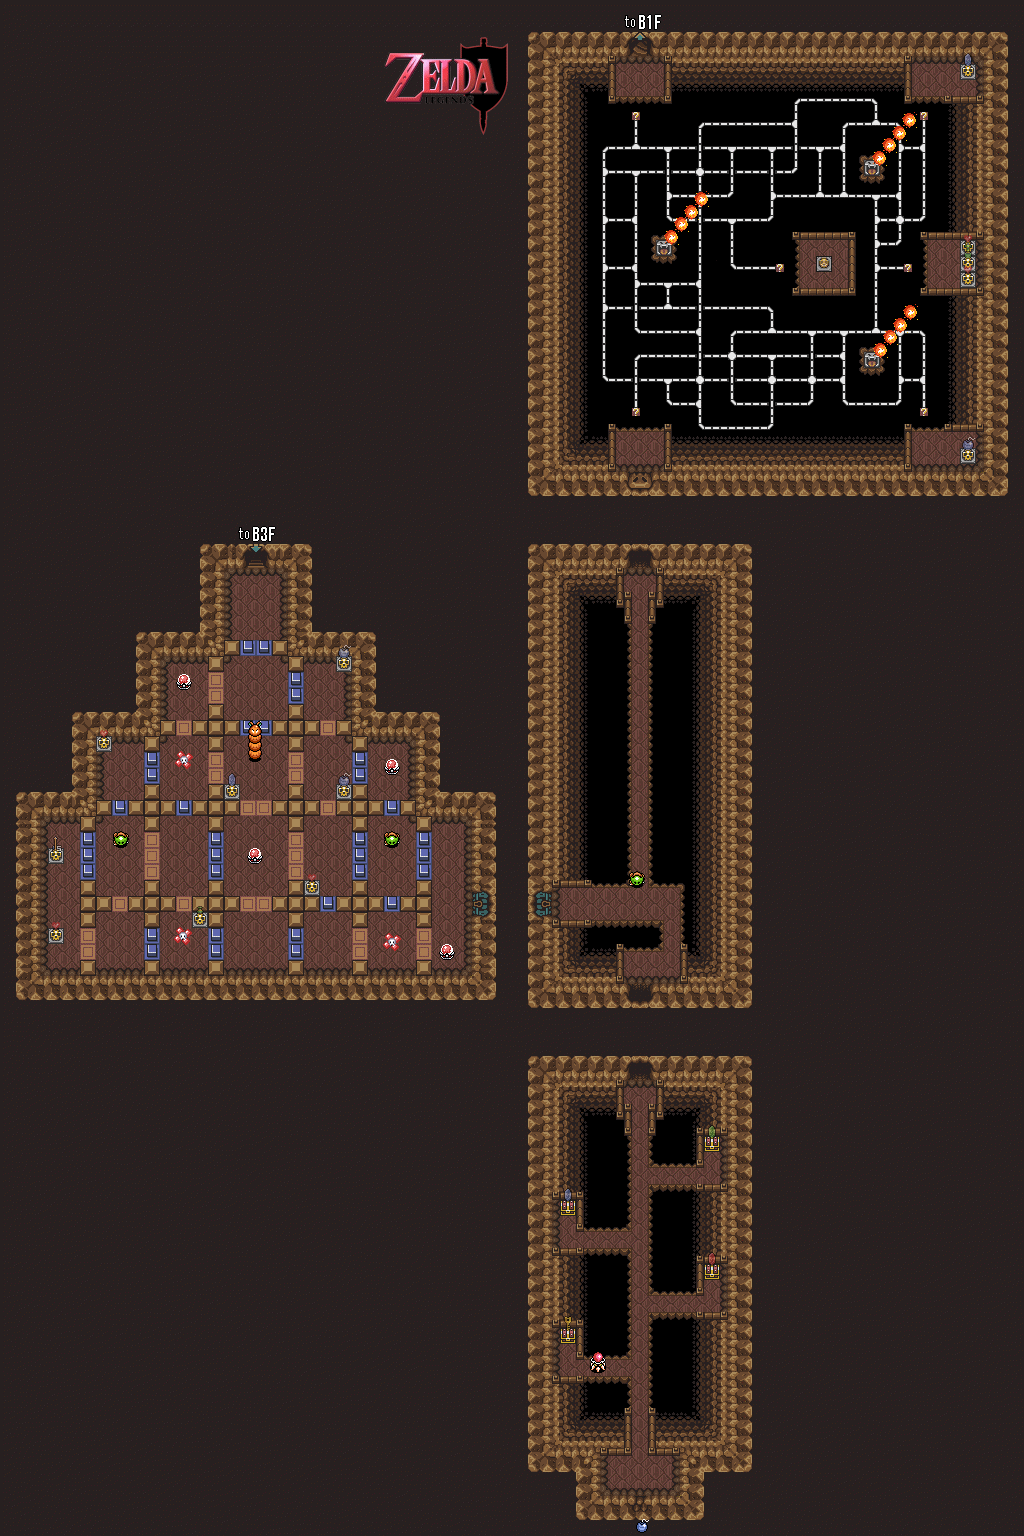
In one room, you'll be riding around in a platform you'll make with the Cane of Somaria...in the dark. The door in the lower left leads to some chests guarded by eyes that fire lasers when you get close enough. Face south and charge up the sword to block the lasers that come from the right to guard against the lasers now that you have the Mirror Shield. If they're at the left, face north before doing this.
No comments:
Post a Comment