TIL you can get the Ice Rod shortly after the beginning of the game. I've just never tried it so early.
Also, TIL other stuff. Game, Y U SO SECRETIVE?
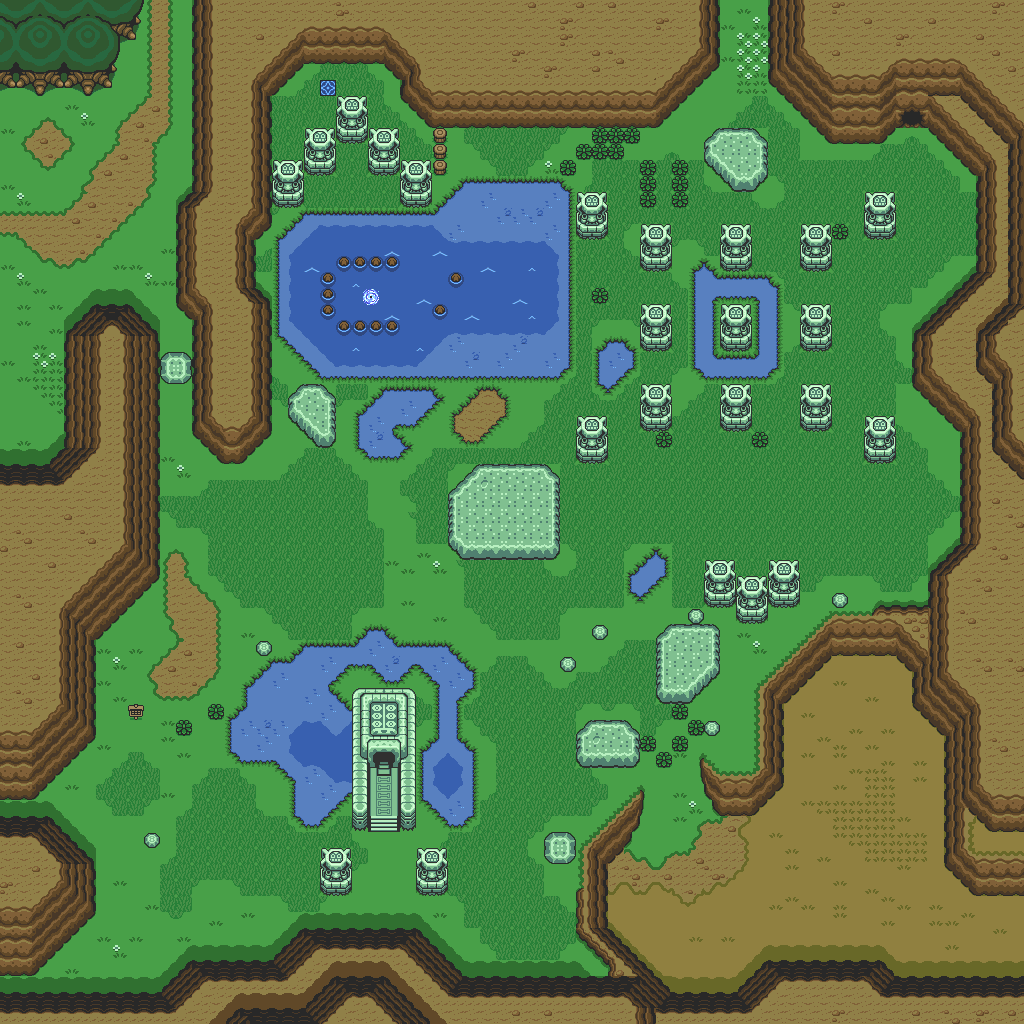
Go west from that drainage pond in the Great Swamp and you'll find a crack in the wall to your north. Bomb it, but don't go in. Yet.
From there, just go north and follow the land. You'll eventually see an inflated Octorok (that splits into six smaller ones when hit) and crabs that charge at you when they move towards you. I swear that after he kills them, he makes another reference to DeceasedCrab. This isn't the first time he says such a thing...remember Final Fantasy: Mystic Quest?
You'll find a cave at the end. When you enter, you'll find out it's ice blue instead of the regular cave brown. If you enter the room to the north and dash into the statue, you'll get a bee that sparkles and flashes light blue. Unlike other bees, this one is pretty fast, follows you around, and actually follows you between screens. Thankfully, it's a good bee, and if you catch it with the Bug Catching Net, put it in the Magic Bottle and sic it on enemies, it will go through them very quickly.
The chest is to the left, but you won't be able to reach it. Leave the cave and go slightly east to find a crack in the stone wall. Bomb it and you'll be able to get the Ice Rod. This will freeze any enemy that the ice beam comes in contact with (and instantly destroys some of them, too), but it eats through magic power like nobody's business.
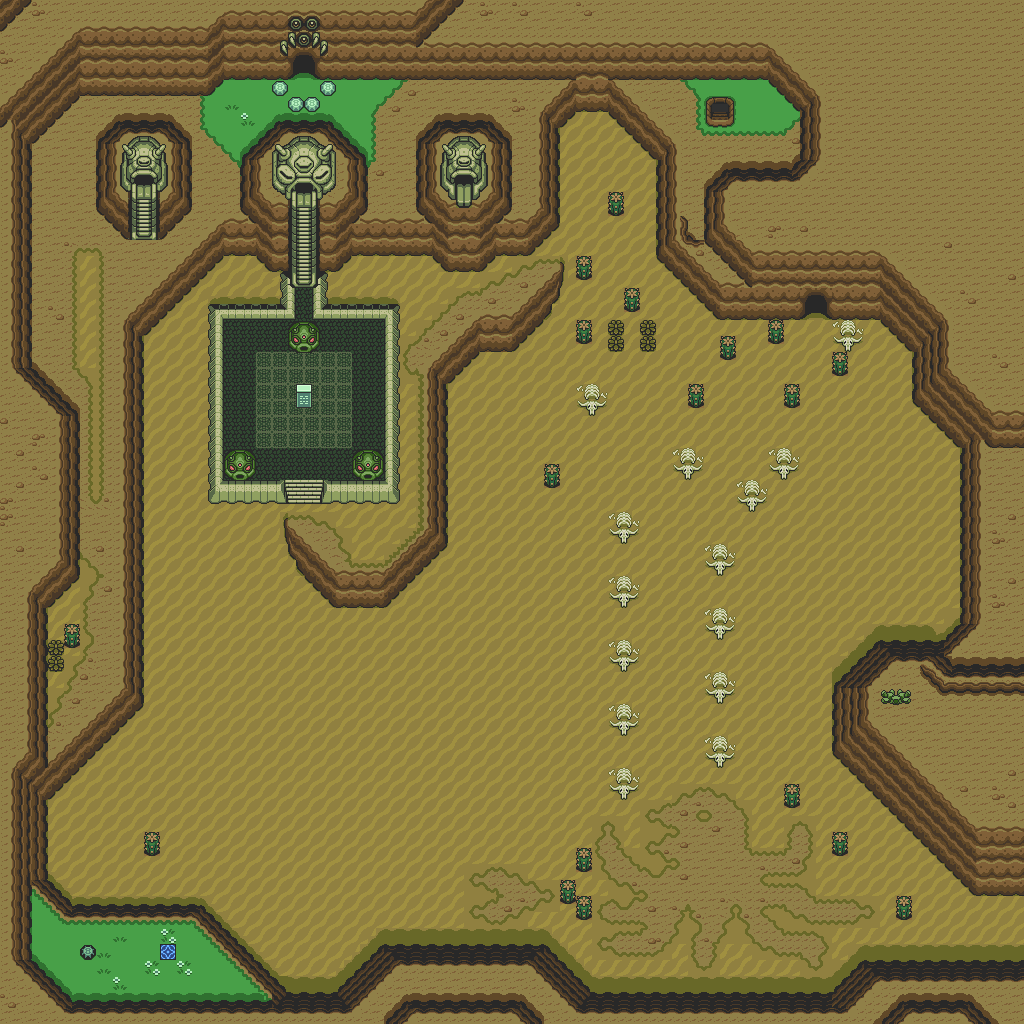
All right, let's go back to that bombed crack that we didn't enter initially. Defeat the four worms here to open the door, then enter the next room. Talk to the guy in here to get 300 Rupees. You'll also find Bombs, arrows and more Rupees in this room.
Now it's time to return to the desert. If you see any sand monsters pop out, hit them with the whirlwind slash. You'll eventually find the entrance to the Desert Palace. Use the Book of Mudora to translate the stone slab here, and you'll be able to enter the Palace.
Desert Palace
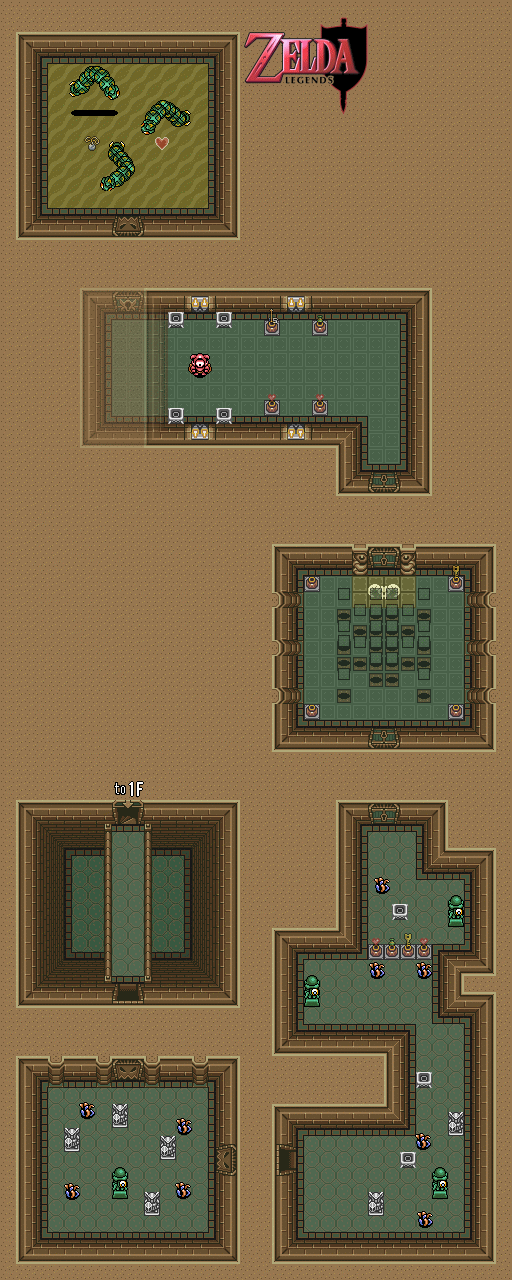
Maps by Iron Knuckle.
The plant-like creatures that pop in and out of the sandy ground can easily be killed with the whirlwind slash. Ditto for the monsters that pop out and produce the circles of sand that draw you towards them if you get too close.
The statues with the eye circling around them will shoot lasers at you if they see you. If you're hiding behind something, you'll be safe. There's a trick to it, though: it has to be the same size as the statue or larger. Large torches and other statues? Okay. Pots? You're going to be zapped.
There's a key in the room with the telepathic hint tile, and you'll have to dash into the lit lamp to get it.
To get past the statue heads moving across the walls that shoot the iron balls, dash with the Pegasus Boots. With these, you'll easily be able to get to the other side to get the Big Key for this dungeon.
The Big Chest contains the Power Glove. This glove allows you to grab the light-colored rocks much like you can bushes and signs. (You may have noticed some dark-colored rocks. You won't be able to pick these up until later in the game.)
There are actually three entrances. The other two on the sides are the huge statues to the sides of the main entrance. The right one does nothing, but the left one leads you outside. Go south from there to pick up your eighth Heart Container. You now have seven hearts to fight the next boss with. You'll also be able to pick up the rocks and enter the second floor, now that you have the Power Glove.
No comments:
Post a Comment