Instead of going straight to the second dungeon, we go straight into the dungeon at the Village of Outcasts. What obstacles await us there?
Blind's Dungeon
Maps by Iron Knuckle.
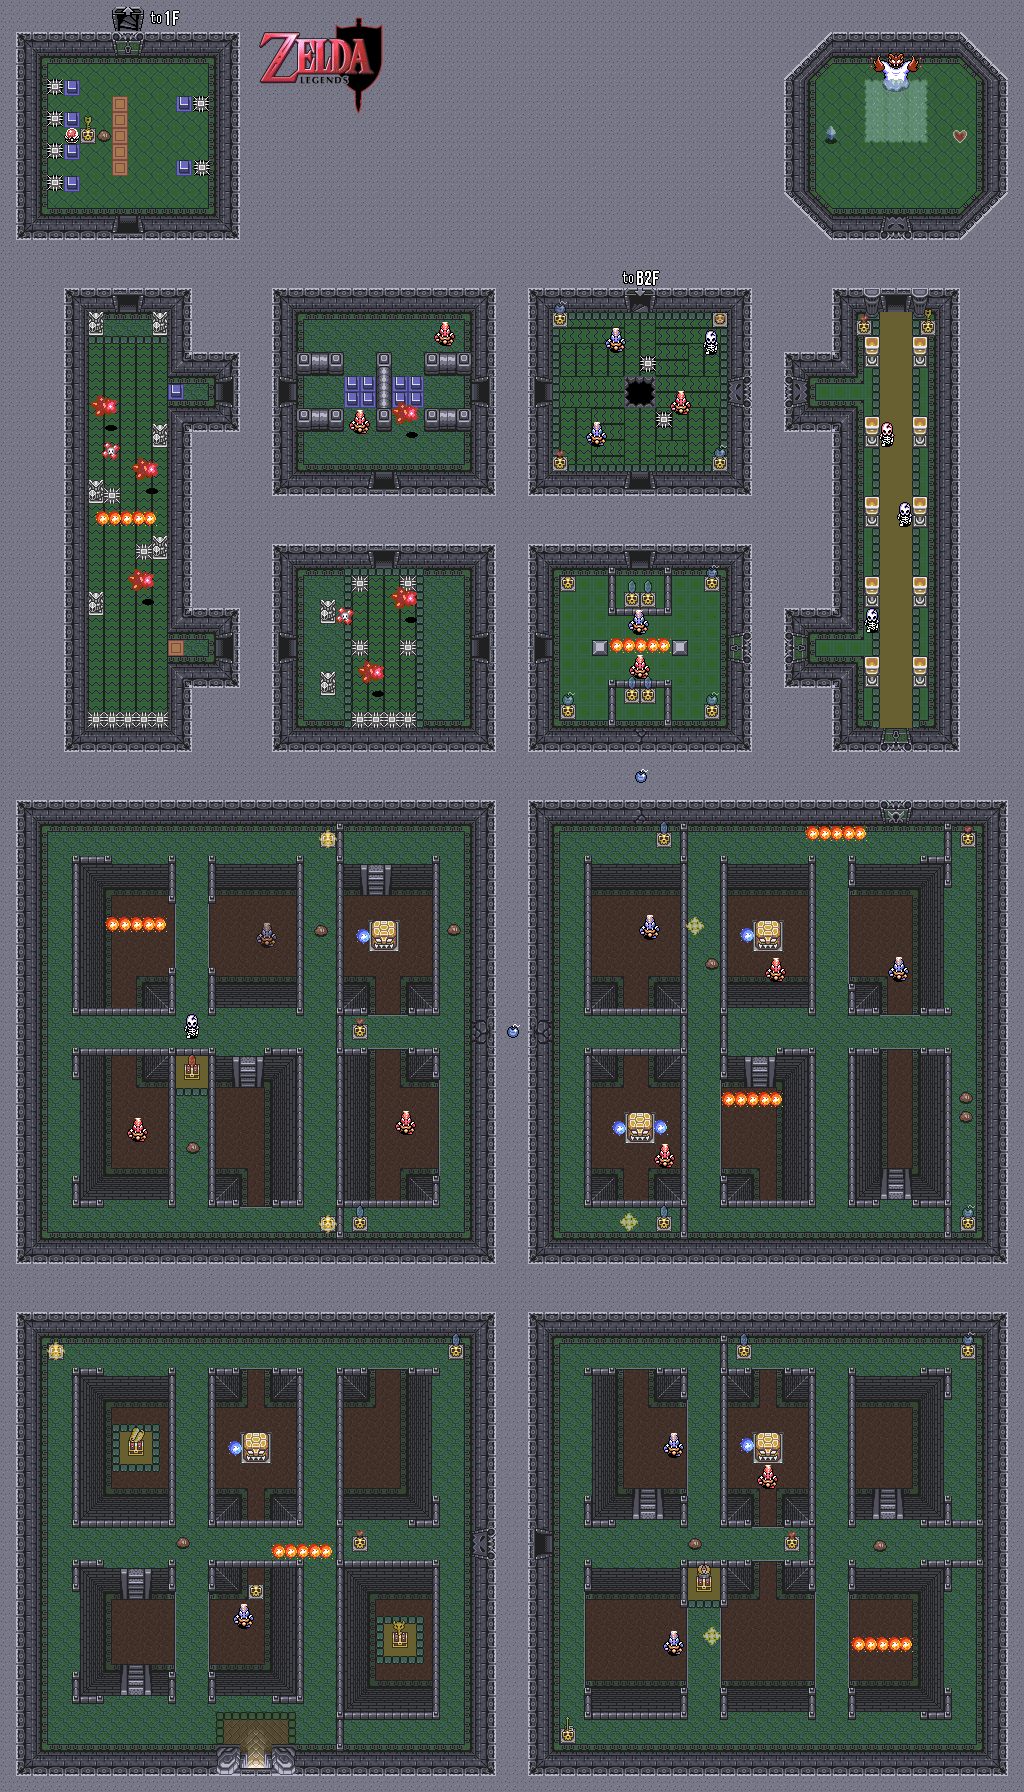
The first item you're going to need is the map, and you'll be able to find it in a chest right after you enter the dungeon.
There are men with horse heads that walk around in the stage much like the skeletons. The red ones spit fireballs at you when they see you.
The red blobs pop out of the ground and follow you around, but they're not that hard to deal with.
Some of the pots in this dungeon contain a yellow magical wisp. The wisp will follow you, and if you run away from it long enough or it runs into a wall, it will disappear. If it touches you, however, Link will turn back into the bunny, and the Moon Pearl will be negated for a few seconds. It doesn't last very long, though, so more often than not you won't have to worry about running into a situation where your bunny form will render you helpless.
You'll also see these wisps when you pass through certain areas in the lower level of the first basement floor, so keep an eye on your surroundings if you have to go under for anything.
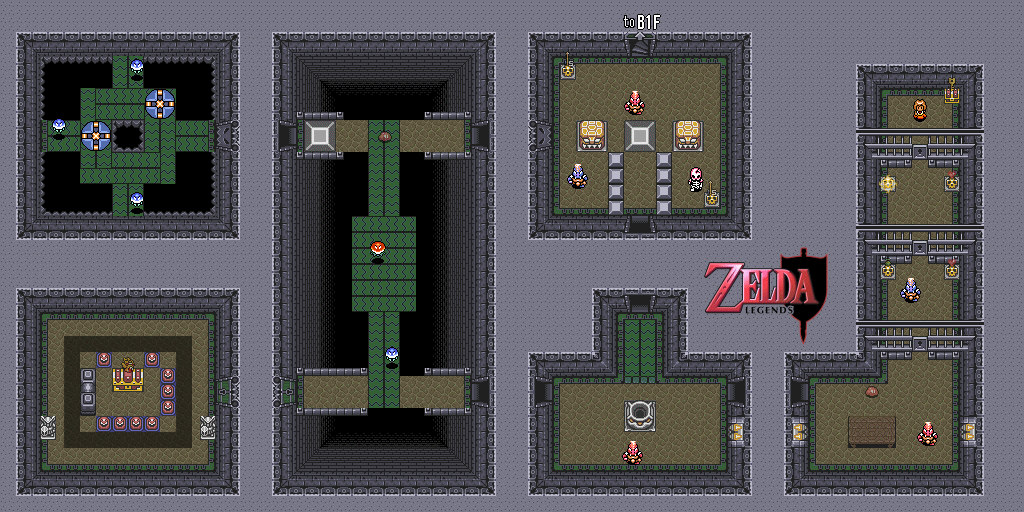
You'll be able to enter the boss room right away as soon as you find the Big Key. There's just one problem: the boss isn't in there at all and it's just an empty room that you can enter and leave as you please.
The conveyor belts come back with a vengeance, and there are rooms in this dungeon where the floors are nothing but conveyor belts that move you in a random direction depending on where you're standing.
The translucent red blobs have a solid red core inside of them, which they shoot out a few feet before traveling back to it. If you hit the core with the whirlwind slash, you'll get rid of the blob itself.
Apparently, if you have a fairy onscreen at the same time as one of the yellow blobs, the fairy is translucent just like the blob. I'm not sure if this is an emulation error of if this is actually part of the game.
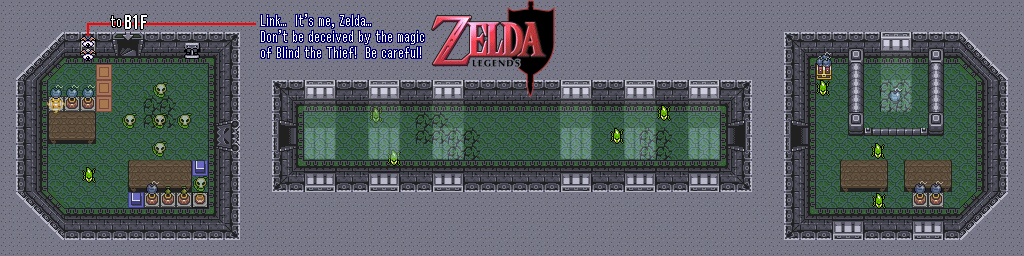
In the telepathic message tile, Zelda tells you not to be deceived by Blind's magic.
The green lizards just follow the walls like the rats; the only difference is that they take more damage before dying.
You'll see a crack in the wall awash in sunlight from a nearby window. Throw a bomb at it and let it break the cracks in the floor. You'll need this hole for later.
The huge version of the dungeon pushblocks can be picked up and grabbed with the A button. They're like the large rocks, so you'll be stuck in one place before you throw it.
If you have the Big Key, you can open the jail doors much like you did in Hyrule Castle when you rescued Zelda. At the last door will be a young woman, who seems to look like one of the Maidens. She'll ask you to take her outside.
You'll need the Magic Hammer to get to the Big Chest, which isn't much of a problem at all. When you open the Big Chest, you'll get the Titan's Mitt. This works just like the Power Glove, except this time you'll be able to lift the dark-colored rocks and gain access to more areas and secrets. Just be quick near the chest, because the floor will start to crumble away in a clock-wise pattern from the top-left after you enter the room.
If you go to the exit, she tells you not to go this way. Before you actually throw up your Yao Ming face, remember the boss room. You're actually supposed to head there instead. Since you've bombed the crack in the wall that was covered by the sunlight, there will now be a swath of sunlight in the center of the room. Put the girl in the sunlight, and you'll fight some red monster. I'm assuming this is Blind the Thief.
He'll float around and shoot lasers out of his eyes as well as multiple Zora-style fireballs. Hit him in the head with the whirlwind slash a few times, and his white shirt will fall to the ground, causing only his floating head to remain. Another Blind head will pop out of the shirt and you'll be dealing with the head and Blind himself. Attack the new Blind like normal. Now you'll have two heads floating around. After a few more hits, Blind will be out of commission.
You'll get another heart container before saving another Maiden.
No comments:
Post a Comment