We're off from the Witch's house to the Elder's hiding place in this entry...
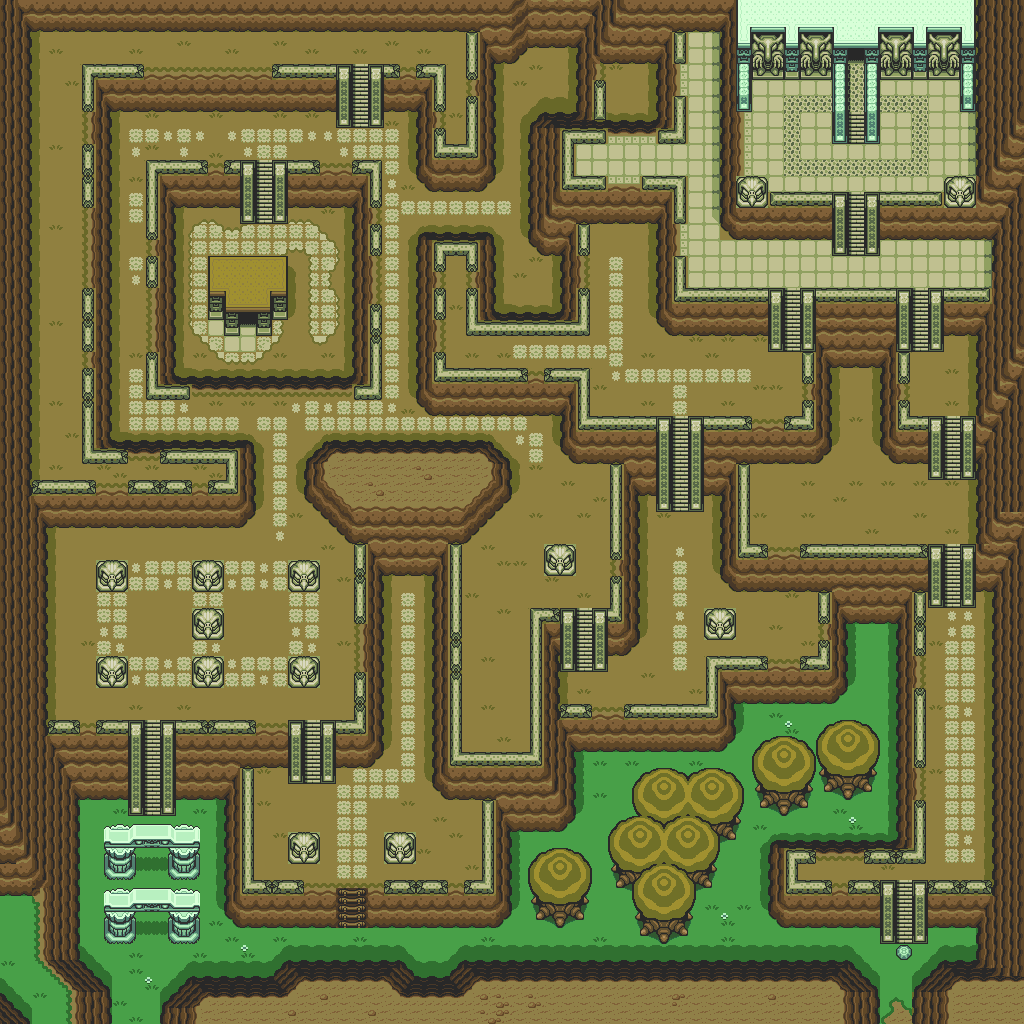
Just southeast of the witch's house is the elder's hiding place.
The Octoroks are back, and this time around they can spin around and shoot rocks as they do so. They don't do it very often, but at least the rocks are easy to deflect: just face the rocks and stand perfectly still. The shield will do the work. No additional button presses necessary!
This is Sahasrahla, the Kakariko Village elder and a descendant of the Seven Wise Men. He'll tell you that to find the Master Sword, you must find the three Pendants. Your first test will be to go to the Eastern Palace and retrieve the Pendant there. Your reward will be more of the legend as well as a magical artifact.
Bomb the crack in the north wall to find 100 Rupees and some Bombs.
If you check your world map, you'll now know the location of the three pendants as well as the Master Sword.
The Armos Statues do not need to be touched to be disturbed and come to life; instead you can pass closely by and they will still wake up.
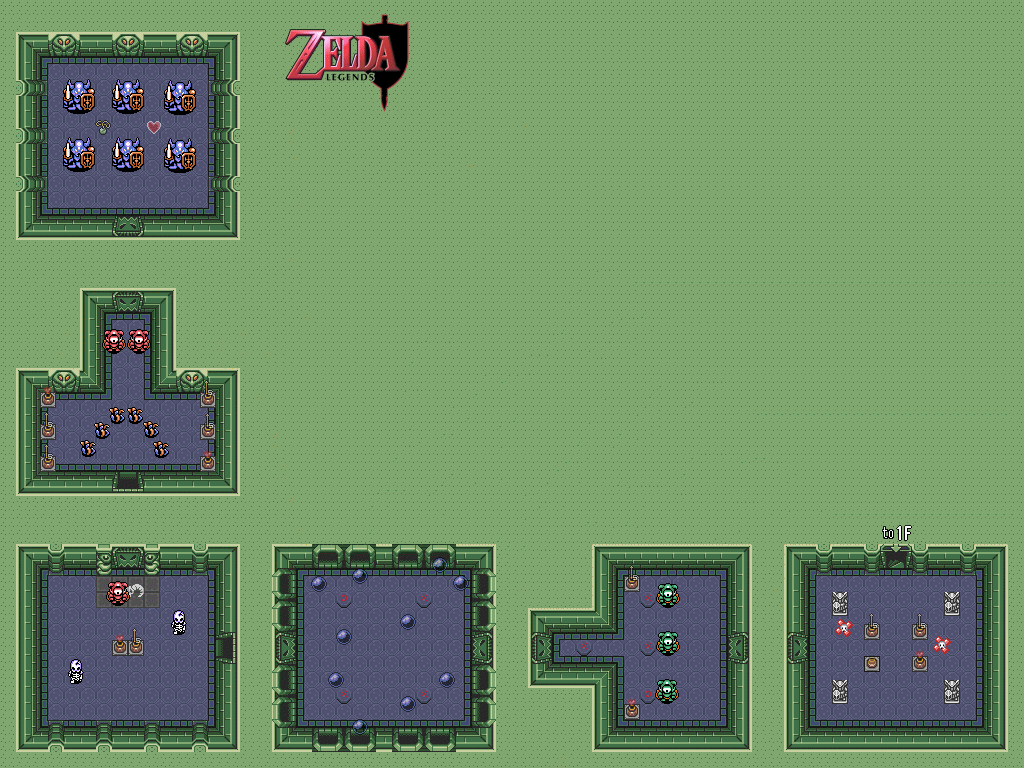
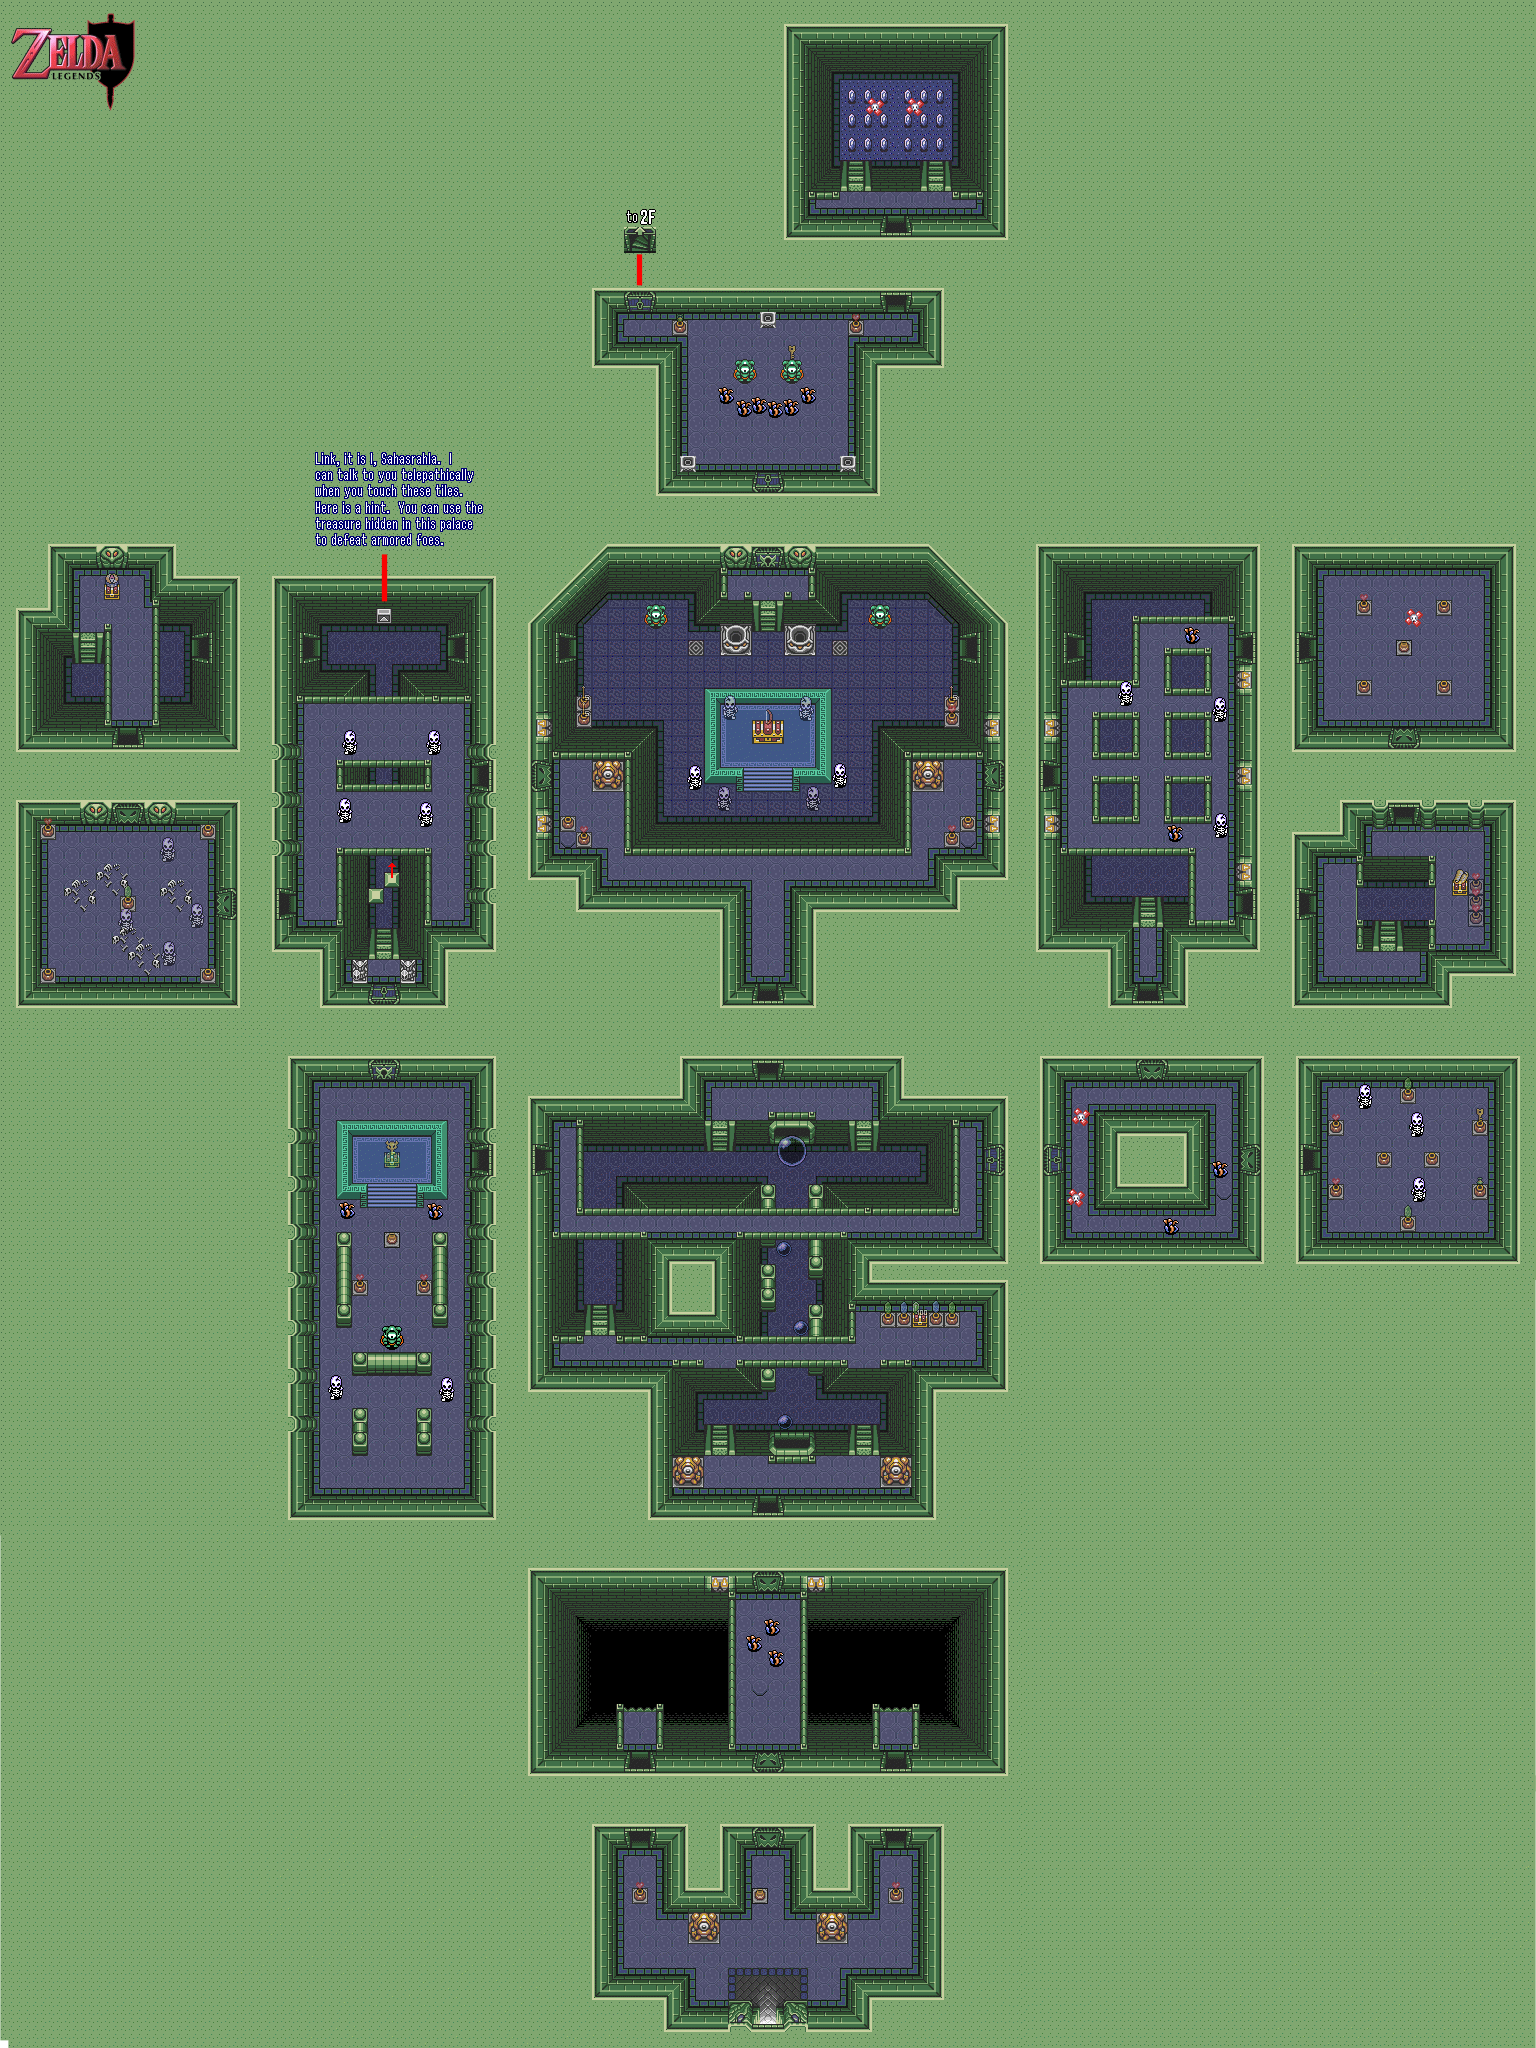
Eastern Palace
Maps by Iron Knuckle.
Remove the pot near the center door to find a floor switch that will open it.
The pink-and-blue seaweed-like monsters are easy to kill.
For the corridor with the balls, there are gaps in the sides that you can stand near. That's good, because there aren't any other way to avoid the big balls that come out of the hole in the wall on the other side every so often.
Pay attention to the floors, as there are floor switches that blend in with the floors. These switches will always open a nearby door.
If you find any keys in a dungeon, use them in the dungeon you found them in. They're there for a reason.
The skeletons jump back when you swing at them. Use the whirlwind slash to kill them. The boomerang will kill them, even if it doesn't stun them, and you can use your normal slash repeatedly if you can back them against a wall.
The Anti-Faeries bounce around the walls at 45-degree angles. Be careful, as you can lose magic power from touching them.
Just like in other Zelda games, there are rooms where you will have to kill all the enemies to move on.
The Compass is used to mark the location of the Dungeon boss.
The grey block with the triangle on the wall is a telepathic message from Sahasrahla. Press A when in front of it to read it. He'll tell you the treasure you find here will defeat armored foes.
The Big Chest can only be opened with the Big Key. The Big Chest will contain an item that's not only useful for the dungeon, but also for the whole game! It can also unlock the Big Doors, which are the doors with the huge locks on them.
If you leap into the pots across from the sides of the dais where the Big Door is, you'll find a hidden room with two Faeries. They refill seven hearts of life, but if you catch one with your Bug Catching net and place one in a bottle, set it free and die while the Fairy is still onscreen, you'll be revived and get seven harts back.
If you're going for a no-death clear (which gives you a special ending, by the way), keep in mind that any faerie-based resurrections DO NOT count towards your death total. Save and Quits also count as deaths, but only on the Super Nintendo version. GBA players, you're safe.
To get the Big Key, you'll have to kill all the enemies in the room to cause the Anti-Faeries surrounding the pot to split apart in seperate directions. This pot hides a floor switch which, when activated, causes a chest to appear. This chest contains the Big Key.
The armored guys with one-eye wake up when you get near them. You can kill them with a pot, but you'll find another weapon here that will get rid of them more easily.
The Big Chest contains the Bow. Besides using it with the arrows to get rid of the green armored guys in this dungeon, you can also take down anything from a distance.
No comments:
Post a Comment