Part nostalgia-bomb, part note-taking and part FAQ, what started in GameTrailers as a video game blog is now on Blogger. This blog is a look back at video games, both popular and obscure, from the video game industry's infancy all the way to the previous console generation.
Each weapon has a specific attack, but Cure Arrow is the worst, as it damages you while it recovers 1000 HP for the Dark King.
Keep the Flares and Whites coming, and keep your health above half.
Dark King - Third Form
He's a giant spider. Great.
His Mega White does damage to both part members, so keep both of your party members' HP high. The Lazer can do over 800 HP worth of damage, while Mega Flare can do 900 on Phoebe.
He also has a Petrify attack with the Golden Web, but it seems he doesn't pull it out too often. When he does, and it actually Petrifies, it's a pain.
Dark King - Fourth Form
Tentacles? Could he get any uglier?
He has the same attacks as the third form, so use a Seed on each party member, heal up and Flare and White him into oblivion!
The Cheap Way
To kill him off really easily, just have Benjamin cast Cure on the Dark King four times. (Don't use Phoebe; she'll actually heal him.) The Dark King is actually considered an undead enemy by the game. You'll not only defeat the Dark King is seconds and skip his fourth form entirely, you'll see Limit Breaks before the term "Limit Break" was even invented. Almost 30,000 damage? Done!
When you beat the game, the old man on the cloud magically appears before he turns into a Crystal. He was the Crystal of Light the entire time!
Enjoy the ending. I don't want to spoil any more than I already have, so...enjoy the world tour!
Go to the right, then jump up. When you reach the upper-left corner, go down, then go right...and then it takes care of itself as the path basically becomes clear from there. There are more Cerberuses (Cerberii?) here as well.
Twinhead Hydra
Strong against: Fire
Talk to the Twinhead Hydra to trigger the battle.
He'll have a Stheno and an Iflyte backing him up, so use Benjamin's meteor and Phoebe's White to finish his minions off.
Just keep using Meteor and Phoebe's White on him. He has a Poison Gas attack, but it's not even that serious. This one's really easy.
After this, go left. The rest of the terrain is self-explanatory.
Doom Castle - 6F
Do not fall off the edge, or you'll fall to 5F and have to start over. (At least you won't fall into lava.)
After a slight doozy of a maze where you go through tunnels, you'll eventually meet Zuh.
Zuh
Weak against: Wind, Shoot
Strong against: Blind
Kill the minions with a single-target Aero (for Chimera) and a single-target Thunder (for Thanatos).
Benjamin's Flare and Phoebe's White do excellent damage on Zuh. He still has the Psychshield, so be prepared to attack physically with Benjamin and heal the party with Phoebe until he takes it down. (You can also do the reverse, since Phoebe's bow does more damage.)
Unlike Pazuzu, he can cast Doom Dance, and he also attacks with the Psychshield. It only does 1 HP of damage, but it's really annoying, since the attack can confuse you if you read the messages way too fast.
Now you can fall off the edge on the lower-level paths.
Doom Castle
The last door is a re-stock room. Talk to the statue, and you'll be able to get potions and arrows...as well as 25 Seeds!
Go through the next door, and you'll meet the Dark King.
Now that we've rescued Captain Mac, it's finally time to do what must be done.
Windia
Meet Phoebe at the Inn. She'll order Reuben to bed, then she'll tell you to gee Captain Mac about the Prophecy before she re-joins you.
Go upstairs and talk to Captain Mac. He'll mention the lost part of the Prophecy that mentions the Dark Kind, and he'll tell you that he's in the Focus Tower. He also lets you use his ship. To do that, go back to the Ship Deck and press A at the steering wheel.
Phoebe is stronger than ever now. Her new Ether Shield protects against Paralyze, Sleep and Shoot attacks, and her spell-casting abilities have gotten better too. She has heal, Cure, Life, Blizzard, Fire, Thunder and White. With all but five spells, as well as 40 White charges, 20 Black charges and 10 Wizard charges, plus almost 1500 HP and upgraded stats, she's a walking tank compared to last time.
Go back to the ship and press A at the steering wheel to take the ship to Focus Tower. If you need Cure or Heal Potions, you can go downstairs and find two guys that sell just that...though you're more likely to stock up on them for free or have more than enough for this last part of the game, anyway.
Get off the ship, and you'll be at the underground Focus Temple entrance.
Surprise! You're to the left of the same place you found Aero at. Now you know the true meaning behind Doom Castle!
The Shadows are back, but since you've dealt with them before, you know what to do.
Go up and walk down the left-most set of stairs and move two steps to the right. You'll be stopped by a pile of bones. You'll have to make all the right moves to outsmart the giant conveyor belt of sand. Use the Dragon Claw to grab the hook, then go up. This lets you fight some more Shadows and replenish on Refreshers.
Go to the set of stairs that is second from right after this. Go all the way down and use a bomb on the skull. You'll get a chest that gives you the last piece of armor in the game: the Aegis Shield. It's more powerful than the Venus Shield and you're finally protected against Paralyze and Petrify. Gee, thanks, game.
Go left, swing the Dragon Claw upwards to go back, and then take the right-most set of stairs and go straight down. Step once to the right, grab the hook with the Dragon Claw and go up. Make your way to the Minotar Zombie, defeat the monsters, climb down and go straight down again. Step to the right (open the chest for Cure Potions if you need them) then step left, switch to the Mega Grenade and throw to blow up the Skull. Hook with the Dragon Claw, go up. You're finally face-to-face with Skullrus Rex. Press A to talk to Skullrus Rex to trigger the battle.
Skullrus Rex
The Shadows are harder than the boss, believe it or not. If you hit Skullrus Rex with the Dragon Claw, get a critical hit and Petrify him, he'll just fall to pieces and die. All you'll have to worry about are the Shadows multiplying on you as you finish them off.
If for some reason, you're forced to get rid of the Shadows first and fight him the hard way, keep hitting Skullrus Rex with Benjamin's Flare and Phoebe's White. He'll fall in minutes, but be sure to keep your party healed.
Go up and make your way to Focus Tower. Since you have the Sky Coin, that green door that's been taunting you all game finally gets opened.
You'll have to go through each door and and fight the bosses in order to remove the barricades blocking your path and continue on. You've already re-done Bone Dungeon, so to speak...
Doom Castle - 4F
Ice Pyramid? Ice Pyramid.
The Cerberus are weak to Fire, so a single Fire from Phoebe can insta-kill them.
You'll be hitting statues with the sword, jumping and using the Dragon claw, but overall this isn't too difficult compared to the last dungeon. It's very linear. If you hit a switch, the door it triggers will be nearby.
Just like the Bone Dungeon part of Doom Castle, you'll be fighting the original Ice Pyramid enemies in this section. They aren't very plentiful, so you won't really have any worries about getting killed here.
When you've made your way to the far north part of this dungeon, you'll face the Stone Golem. Talk to the Stone Golem to trigger the battle.
Stone Golem
Strong Against: Fire
Stone Golem can Confuse with a Stare, and his Stone Block is pretty powerful. Keeping your party's health high here is a must, in case he throws that attack out...it can kill you at half health!
Have Phoebe attack with White. Even though the Stone Golem is strong to Fire, Flare still does some good damage, so give that a shot.
When you leave the Ice Pyramid area, the barriers blocking the stairs will be gone. You'll finally be able to move on.
All the enemies here are from Pazuzu's Tower, so there are no new enemies.
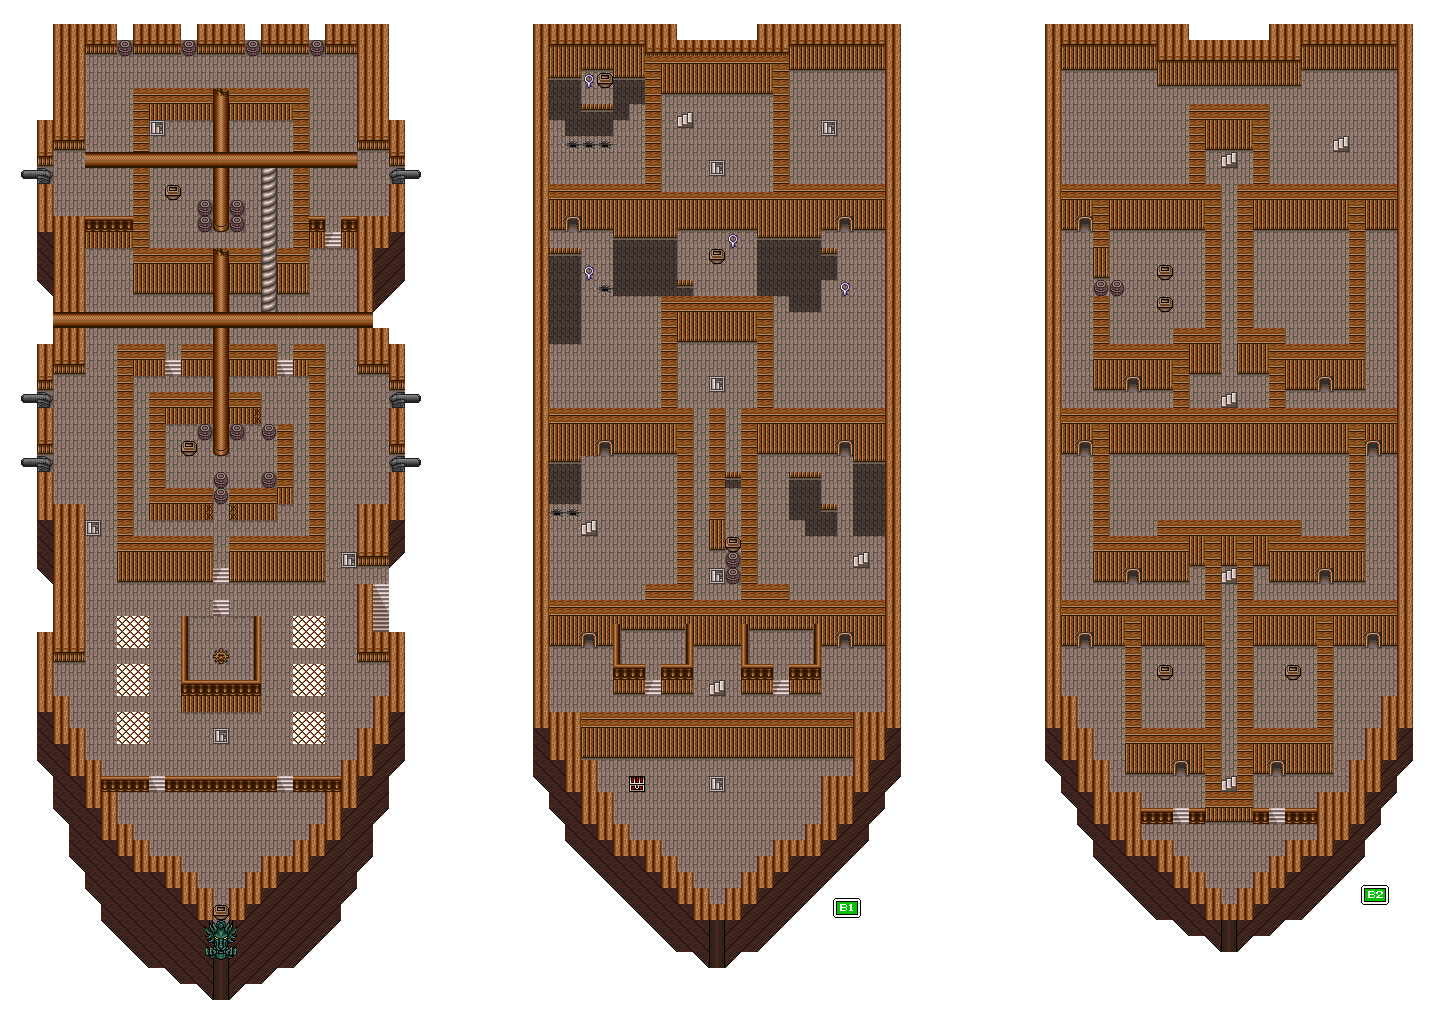
Deck
When you're at the Ship Dock, go to the ship. All of the monsters here are the ones you've fought in Pazuzu's Tower. hey, at least you get to hear the music from the Bone Dungeon one last time.
To get around the ship, you can walk up to the masts and climb up them just by walking into them. You do not need to equip a Claw weapon; just walk into them and you'll be able to do it. The coiled white rope will take you between the masts.
Take the stairs up to the left of the steering wheel.
Mac's Ship - B1
Go all the way up and fall into the pit. This will take you further into the ship.
Mac's Ship - B2
The Shadows that you saw in Doom Castle show up here as well. As mentioned earlier, they are weak to thunder. They can multiply like the Ghosts, so the quicker you kill them, the better.
When you're done with all the monsters here, go back to where you fell to and go right to head back up to B1.
Mac's Ship - B1
Finish the monsters off here, then go back upstairs.
Deck
Go to the mast (it's further up-screen) and walk into it; no Claw or holding of the A button is required. When you walk into the mast, you'll be able to climb onto it. You'll find a stairway leading all the way down to the basement of the ship, which leads to that walled-off center portion of B2, which leads to...Captain Mac!
The chest here has the Gaia's Armor. It's like the Noble Armor, except it also protects against Wind and Sleep attacks.
Talk to Captain Mac, and he'll recognize his Captain Cap. Kaeli will show up to see if he's all right, but he has some bad news. He'll mention the Dark King before you all return to Windia.
Reuben will fall over. He hasn't really fully recovered from that fall off the Rope Bridge.
Ship Dock
When you leave the Ship, you'll see Spencer and Tristam again. You'll find out Phoebe wants to talk to you in Windia.
Taking the stairs near the switch takes you down to 2F. The stairs going down near the sealed door takes you to a walled-off part of 1F where you can stock up on items. Head back up to the 4th floor after fighting all the monsters.
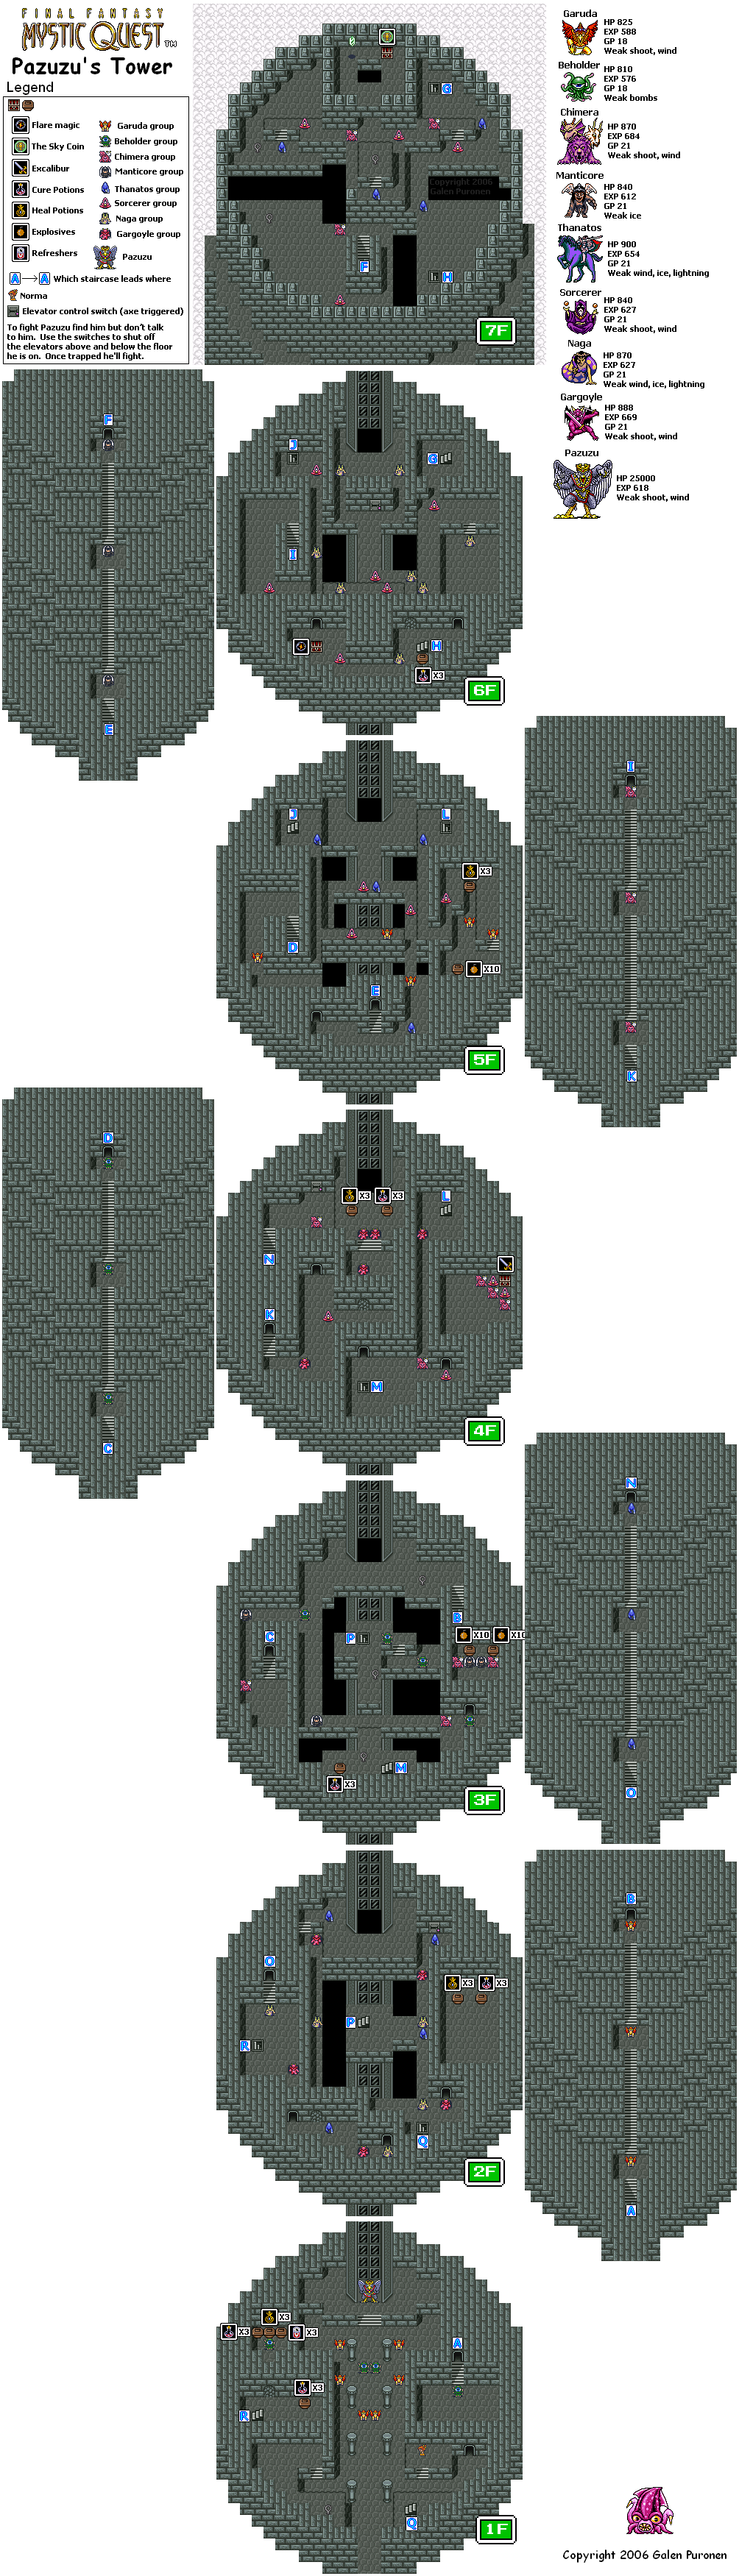
Pazuzu's Tower - 4F
There's another set of stairs at the lower-right corner that takes you to 3F.
Pazuzu's Tower - 3F
Use the Dragon Claw to take care of the monsters and go down to 2F.
Pazuzu's Tower - 2F
Go up to find the switch. Go down to reach the first floor. Go through the tower again and talk to Pazuzu when you find him. Now you can fight him!
Pazuzu
Weak against: Wind
Though he's not weak to Fire, Benjamin's new Flare spell will do more than 2000 damage on him, so let loose with that while using Kaeli's Aero spell, which does just as much damage.
Keep your party's HP as high as possible, as even Pazuzu's non-elemental attacks deal some impressive damage. He can Petrify you with Stone Beak, too...but all of that is nothing when uses the Psychshield.
This attack basically forces you to hit him with physical attacks...it's basically a prototype of Heckran's "C'mon! Try and attack!" message in Chrono Trigger. If you attack him with Magic while the Psychshield is up, he'll reflect all the damage back on you and instantly kill you. Wait for him to take the Psychshield down, and then you can pelt him with magic again. While it's up, have Benjamin attack with Excalibur and have Kaeli heal the party, since Benjamin can deal more damage in this situation.
When you beat Pazuzu, you'll finally go all the way up the elevator to 7F. You'll see the Wind Crystal being freed, and you'll finally be able to open that chest. It has the Sky Coin!
Windia
Talk to Otto again, and he'll help you find Captain Mac. Reuben makes an appearance again! Surprise!
He'll tell you that on his way back from the bottom the cliffs near the Rope Bridge, he's found a stairway to the top of Focus Tower.
Otto will then tell you to refill the dry lake so Captain Mac can be rescued. All you have to do is set a bomb in Spencer's tunnel, and the water from the upper lake will fill that black void that surrounds the entire region. Since it's caved in, you'll need the Thunder Rock so that the Rainbow Road can tunnel through the cave-in.
Kaeli will tend to Norma, so she'll leave your party and will be replaced with Reuben. Aside from having higher stats and the Life and White spells, he's not really that much stronger.
Fireburg
Go back to Reuben's house and talk to Arion, and you'll get the Thunder Rock just like that.
Some fetch quest.
Windia
Give the Thunder Rock to Otto, and you'll automatically trigger a shortcut to Spencer's Place north of Pazuzu's Tower.
Reuben will throw a Mega Grenade, causing the lake to spill into the black abyss and fill up with water, causing Captain Mac's ship to float to Windia.
before you leave, climb down to the water and go left. Throw a Mega Grenade at the sealed door, then run all the way back to the entrance, go left, break the other sealed door with a Mega Grenade and step on the Libra tile. You'll then be able to move to the Mobius tile...but don't step on it yet. There's a red chest nearby, and opening it gives you the Mobius Crest. Using it will warp you close to the entrance. Now you can leave.
One more new enemy to cover - the Naga. They're weak to Thunder, Wind and Water, but Thunder will instantly kill them. They can put you to Sleep with Sleep Lure, just like the Lamias.
Go down and you'll find a path to the switch as well as the path to the red chest upstairs as well as the red chest nearby. The chest here will give you the last spell in the game: Flare. You finally have all the spells in the game!
You won't be able to take the chest on 7F even though you can access the stairway up to it. You'll have to beat Pazuzu before you can get what's inside.
Pazuzu's Tower - 5F
Nothing interesting here. Just find the stairway to 4F.
Pazuzu's Tower - 4F
The Gargoyles attack with Water, but they're weak against Wind. They can also Silence you, too.
Don't pass up the red chest shortly after you enter this floor. This has the last weapon in the game, the mighty Excalibur! This is the only useful sword in the game - heck, it's even more powerful than the Giant's Axe, and that's saying something right there!
There's another switch on the other side of this floor, so hit it with the axe and go further down the tower.
You'll see new enemies right out of the gate, starting with the Beholders. They can Blind you, and even thought it won't work on Benjamin anymore, it can still work on Kaeli. Even though they are weak to Wind, using Aero against them is not advised as they can reflect it back at you for immense damage. They can also cast Selfdestruct for immense damage in an attempt to take you with them.
You'll see Pazuzu behind the Beholders, but don't talk to him. Doing so will cause him to vanish to another floor, and you want to trap him.
Take the stairs to the right of the entrance and you'll go to the third floor. You'll have to fight monsters before you can reach the top floor and get to the even-numbered floors.
Pazuzu's Tower - 3F
The little grey things that look like magnifying glasses sticking out of the ground are hooks for the Dragon Claw.
Pazuzu is here, but once again, don't talk to him unless you want him to appear on some random floor.
The Manticors (Manticores? Yet another weird spelling error...) are weak to Water. They can also Petrify you, too, so be on the lookout for that.
Pazuzu's Tower - 5F
The Garudas are weak to Wind, but they can lower your defense. They're probably the weakest enemies in the Tower, though, so they're not too bad.
Pazuzu will keep following you up the tower. Don't worry about him.
Pazuzu's Tower - 7F
If you haven't talked to Pazazu by the time you get here, you will talk to him automatically once you reach him.
All that's left here are five enemies. Two of them are the Sorcerer and the Chimera. They're both weak to Wind, but the Chimera can counter with Poison Touch and Poison you if you don't kill it in one blow. You can also use White against them to great effect. The Sorcerers can Silence you with Muffle, but at this point Benjamin is immune to nearly all status ailments.
There's also Thanatos. He's weak to Thunder, so use that to finish him off quickly before he can do any real damage. You can also single-target Thanatos with White to take him down instantly.
There's a chest there, but you won't be able to reach it from here. Go down to the sixth floor.
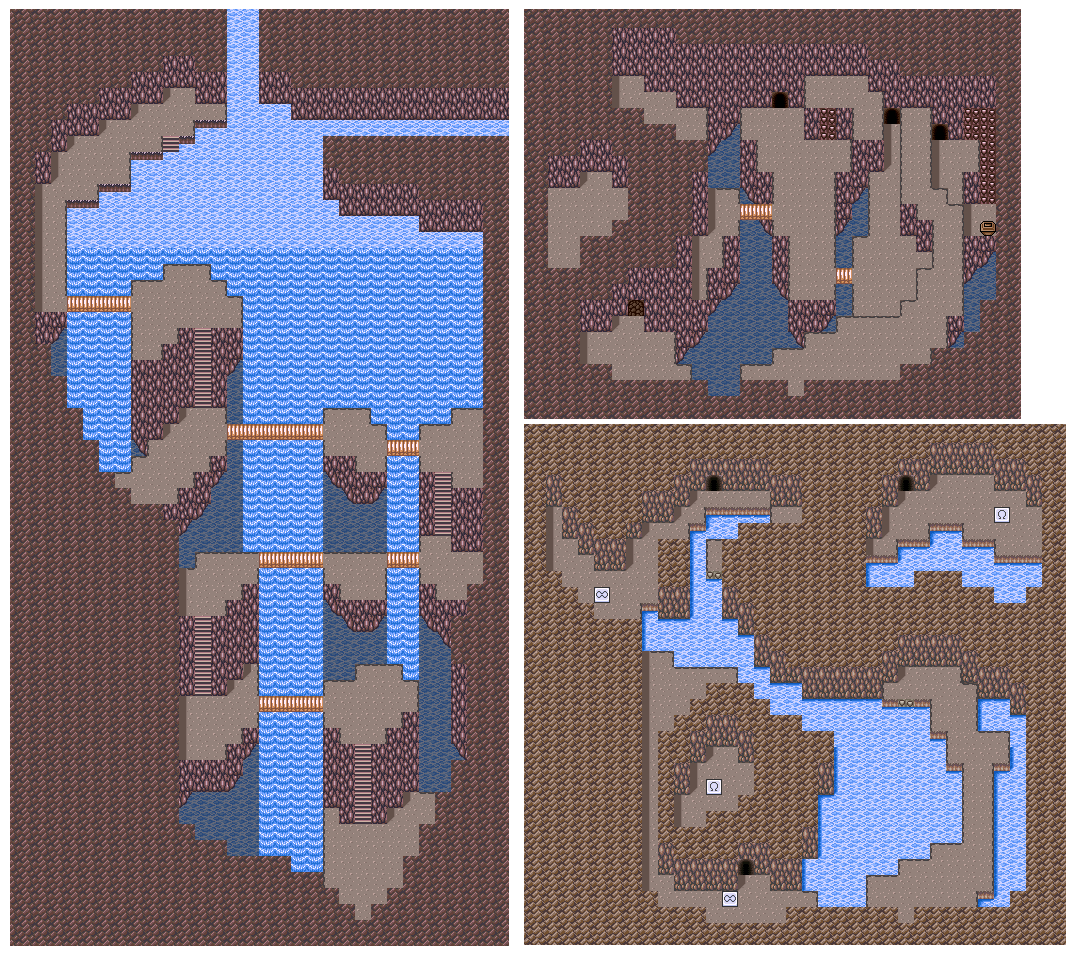
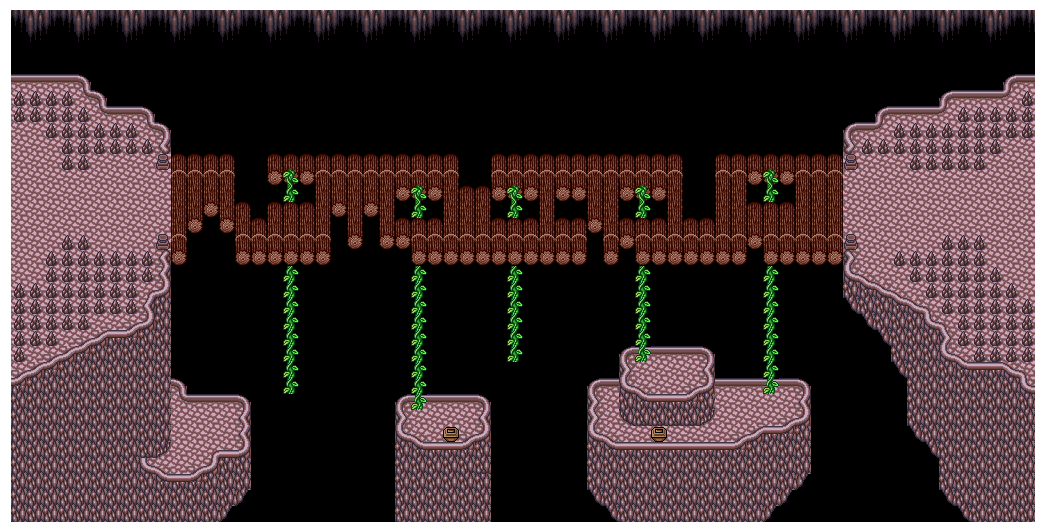
There are a lot of paths here. Check them all out to find all the treasure and clear Mount Gale of monsters.
If you take the top of the wooden bridge, you'll get the Apollo Helm for Benjamin. It's just like the Moon Helm, but it has an even higher defense total. This is the last helmet you'll get in the game, so get ready to turn Benjamin into a walking tank by the time you get the rest of the armor.
Go down and to the left after crossing the bridge, and you'll meet Dullahan!
Dullahan
This boss fight is nuts.
The two Vampires will definitely add to your troubles, so take them out first.
Dullahan doesn't have any elemental weaknesses, so use Meteor and Kaeli's Aero spell, and watch your health. He can also use Doom Dance against you, so be ready to use Life after he connects with it to stay in the battle.
Windia
Dullahan may not have used up the power of the Wind Crystal, but nevertheless the wind has died down. Talk to Otto, and he'll give you safe passage to Pazuzu's Tower. He also tells you about the switches on even-numbered floors, and that you should hit them with the axe to keep the elevator from going past that floor.
The pit you couldn't cross earlier will now have a passage to Pazuzu's Tower.
The first house you see (the one on the left) has a woman who will sell you the Cupid Locket for 300 GP. It protects Benjamin from Silence, Confusion and Blind, making it worth the purchase.
You'll notice that it's really windy in the town of Windia. One of the two houses with the Chocobo weather vane on the roof (it's the lower one, by the way) is home to Otto, a very clever man whose Rainbow Road offers passage to Pazuzu's Tower. His daughter Norma went there, but she can't return because the powerful wind from Mt. Gale broke the road-making machine. You'll have to stop the wind so he can use the Rainbow Road again.
The two houses to the north have that tile again. The old man in the house to the right will tell you the Mobius Crest is buried in Spencer's place, and that it can grant you access to the Ship Dock. Ah, so that's what it's called.
Kaidge Temple Battlefield
The Water Hag is weak to Fire, and can also self-cure with Cure and counter physical attacks if not killed immediately.
For clearing this battlefield, you'll earn 2808 EXP.
It should be mentioned that if you level up on the last battle of a battlefield before getting more experience as the clear bonus, you'll level up a second time due to the game not calculating how much experience you need for the next level until after you leave the battle screen.
Windia Battlefield
You'll meet another new enemy here: the Vampire.
For clearing this battlefield out, you win 2700 EXP. Sadly, this is the last battlefield in the game, so if you want to level up from here on out, you'll have to go through hell.
Windhole Temple
There's a chest containing Heal Potions, but not much else.
The Skuldiers are weak to Wind, but they can also Confuse, so attack them with Aero whenever possible. They also have Doom Power, which is a Death spell, so finish them off before they can attack!
Giant Tree - 5F
You'll finally meet the boss here...finally, the last of the monsters!
Gidrah
Weak against: Wind
Finally! We fight a chimera!
Finish off the Skudliers, and then use Aero as much as possible on Gidrah. Gidrah can cause a lot of chaos if you're not ready. He can Paralyze you with the Para Gas, and his own Wind magic is pretty powerful. Keep your part healed and wail on him with Aero, and you'll cruise to victory.
When you beat Gidrah, you'll take a ride on the Gaint Tree to Windia. If you pay attention to the background, the trees spell out the message "Go On Kid!!" Is this your doing, Tristam? XD
Kaidge Temple
You'll meet the old man on the cloud again. He'll tell you that Captain Mac will tell you about the Prophecy before he flies off again.
That tile you don't have the Crest for shows up again here. Don't worry...you'll get that Crest soon!
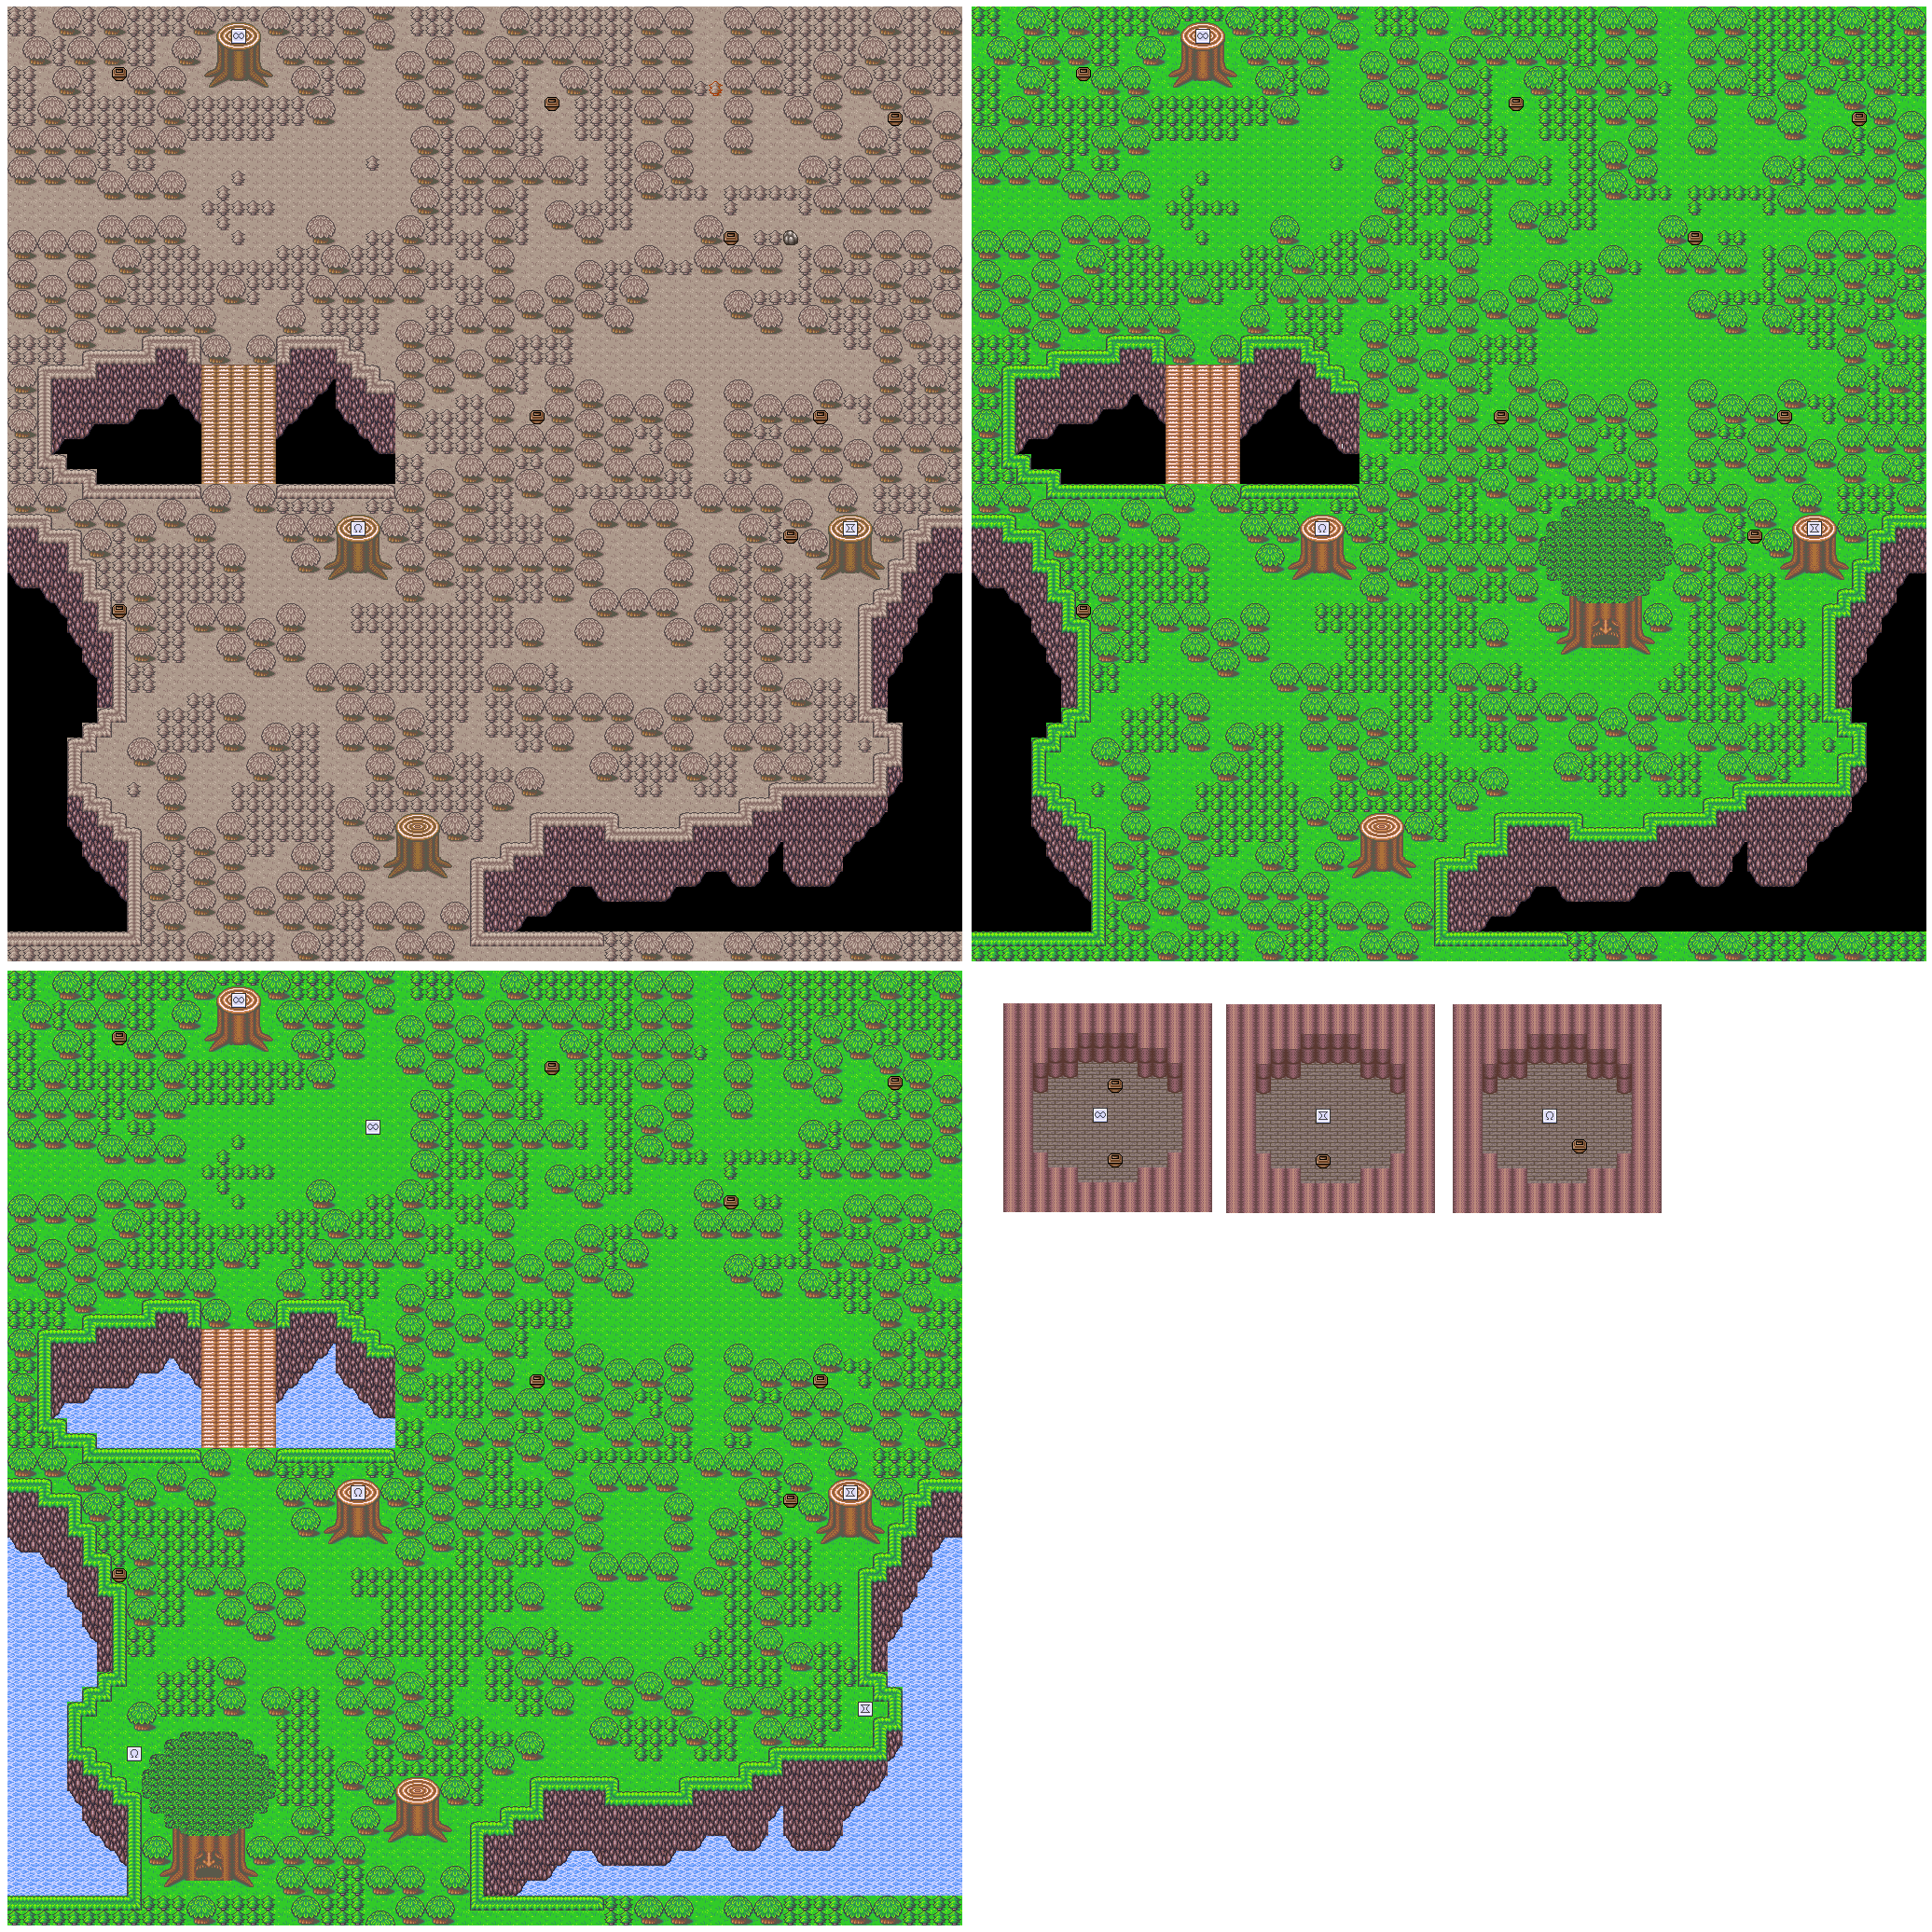
The Y's on the ground are branches. If you grab them with the Dragon Claw, you can clear some huge gaps between platforms and reach previously unreachable areas.
Kaeli now has Cure, Heal and Aero, so she can nuke some of the enemies in one attack as well.
The Live Oaks are, just like its earlier variants, weak to Axes. The Snipions are weak to Fire, but you're better off hitting them with Kaeli's axe or something else, since they have relatively low HP compared to the other monsters here.
Giant Tree - 2F
The vine takes you back down to 1F, so don't bother climbing it.
The Mad Toads are weak to Water, and while they are not weak to Wind, Kaeli can kill them in one hit with Aero as well. They can also Petrify and Paralyze you.
The mushrooms can be cut down with the axe, just like the small trees.
The red chest here gives you a Wizard spell for Benjamin: Meteor. This one does impressive damage, so save it for later.
To open the closed mouths of the faces in the wall, hit them with your sword (just like the statues in the Ice Pyramid) to open them. Now you can continue on.
Giant Tree - 3F
Two new enemies here. The Leech is one of the few monsters in the game that are weak to Earth, while the Oozes are immune to and will repel magic attacks, turning a fraction of the damage dealt back onto you. They are weak to Bombs, though.
Take the vine in the left end of this floor to reacha no otherwise unreachable area of 2F.
To climb that long wall, press A to drop down and hold it again when you're on the lower climbable area.
Equip the Battle Axe and get ready to cut some trees!
When you find a lone tree, cut it down. You'll find a tile you can stand on that will take you to secret treasure rooms if you have the respective crest. They're not very impressive, really...usually Potions, Ninja Stars or Refreshers, depending on the crest.
If you go all the way south, you'll get the Giant's Axe. With an attack power of nearly 200, this weapon is worth having.
There's a giant tree with a face on it in the middle of the forest. If you talk to it, you won't really get much out of it. In fact, you won't get anything out of it at all. Tristam will tell you to go find Kaeli. Back to Aquaria!
Aquaria
Go back to Phoebe's house and you'll find Kaeli resting in bed. Go back into the tunnel and talk to Spencer. The tunnel still isn't finished, and he needs the help of Otto, who is in Windia. He'll then talk to Tristam, and they'll both go out treasure hunting.
Before he leaves you again, Tristam will finally give you the treasure he found in the Bone Dungeon...the Dragon Claw! It basically does everything the Charm Claw does plus Petrify!
Phoebe then shows up and decided to use a bomb to open up the tunnel, causing the tunnel to collapse. FFFFFUUUUU
Head back upstairs and talk to Kaeli; she'll join you again.
The Dragon Claw can extend six spaces ahead. Keep this in mind; you'll definitely be taking advantage of this later.
Anyway, Kaeli has a Giant's Axe, and she's more powerful this time around. Now you can talk to the tree in Alive Forest.
Alive Forest
Go back to the giant tree, and it will take you to Windia...if you can destroy all the monsters inside of it. It will then open its mouth, and you can go in.
When you cross the Rope Bridge, a monster will appear out of nowhere. When Reuben steps up to fight it, it'll knock him off the bridge and onto a platform below. Fight this thing off, then climb down the nearby vine and talk to him. You'll fight a single Mummy, which can be defeated easily with Aero. A little later, you'll be fighting these things in groups, and they can Petrify you if you don't take them out quickly.
Reuben will tell you he's alright and that he'll catch up. When you climb back up, you'll meet Tristam again. Now he'll join back up with you.
The second vine takes you to some Cure Potions, while the fifth vine takes you to some Seeds! Finally, a place that's really easy to stock up on Seeds at!
Tristam is a little stronger this time around. His new helmet protects him against Fire and raises his defense, but it's the only new armor he has. Nevertheless, he still has the same elemental and special defenses.
There are a lot of Cure and Heal Potions here, so stock up when you see the brown chests.
For some reason, the part where you meet the boss here reminds me of StarTropics...except you can't die on the way to meeting him.
The boss here is the Dualhead Hydra.
Dualhead Hydra
Strangely enough, the boss isn't weak against Water, so pound him with White and Reuben's Morning Star. The Dualhead Hydra's Para-breath can Paralyze, the Poisonbreath Poisons you, and the Stone Gas will Petrify you. Hope you've got a lot of Heal Potions!
As the battle wears on, the Hydra will lose one of its heads, then it loses the second neck entirely. C'mon, I wanna fight a headless boss!
When you defeat it, you'll free the Fire Crystal. Reuben will mention someone from Windia mentioning a Crystal...then lava will flow out of the volcano, giving you access to another battlefield.
Open the chest nearby to get the Sun Coin, then get out of there by taking the stairs to the right.
Lava Dome Battlefield
This one is a bit difficult for the game's standards. You'll usually get hit first, and also Paralyzed and Petrified often. You'll be fighting either Iflytes or Sthenos, often two at a time, so rest often if you need to.
You're done with the Fire Crystal region, so it's time to go back into the Focus Tower.
Open the purple door with the Sun Coin, and you'll meet the old man on the cloud yet again. He'll tell you to be on the lookout for Captain Mac's ship before he speeds off yet again.
Doom Castle - 2B
Head down the stairs first. Head down to the other side and you'll find yourself in a blocked off section of a place known as the Doom Castle. Yes, there's a castle of doom underneath the Focus Tower. You'll find there's a chest, but you'll have to fight monsters to get it. You'll fight a Minotar Zombie, an Iflyte...and a Shadow. Finish the Shadow off with first, using either Thunder or Water (they're also weak against Wind, but you don't have a Wind spell yet). They can not only multiply themselves like the Ghosts, they can also cast Doom Dance, which insta-kills if it connects.
You won't see the Shadow again for quite a while, so when we meet it again in a main area, I'll treat it as a new enemy again.
You may also fight the Chimera, which you won't see until Pazuzu's tower. The Chimera is weak to Wind, but it can counter with Poison Touch to Poison you if you don't kill it off immediately. This will also be treated as a new enemy later on.
After this fight, you'll be able to open the chest and get Aero for Benjamin. Finally a wind elemental spell! Now you have all the Black spells in the game!
Go down the stairs and you'll be able to access the Lava Dome. Restock on items if you need to, and rest at the Inn, because you'll need all the strength you can muster.
Once again, there are more new enemies here.
The Hot Wings aren't weak to Water, and you don't have a Shoot attack, but they're weak, so who cares? They can Cure themselves, but you'll more than likely be too busy beating them to the punch to notice.
The Ninjas can put you to sleep with Lullaby, so putting them out of commission as soon as possible is a high priority when one pops up. They can also Blind you.
The Fangpires can Confuse, so be on your guard and take them out quickly as well.
Even more new enemies abound, including another Medusa-like creature, the Stheno. Her Bad Breath can Paralyze you, but it doesn't do any damage. She can also Petrify you if you don't destroy her as quickly as possible.
The Mega Grenade can blow up the rocks if you throw one at them. For once, the throw that comes with the Mega Grenade outside of battle is useful. (Strangely, I don't figure this out until the next video despite having notes.)
The Iflytes can put you to Sleep just like the Ninjas can. Thankfully, they're not as bad as Jinn.
Avizzards can be easily killed off with White, especially in groups. They aren't weak against it, but it works. They can also Silence you if given the chance.
You'll be able to find the Moon Helm for Benjamin, which protects against Fire.
Upon further exploration of the Lava Dome, you'll find a switch that opens a pair of double doors nearby. You'll also find the Life spell for Benjamin. Congratulations, you have all the White Magic in the game.
Our adventure takes us down into the volcano, where the Fire Crystal lies. Before we can get inside, though, we have to get past whoever is blocking the front door.
If you talk to Arion, he'll tell you the Fire Crystal is in the Lava Dome.
The Gemini symbol in the house where you go the Battle Axe will take you back to Aquaria. You can now switch between the second and third regions without going through the Focus Tower.
Fireburg Battlefield 6
The new enemy is the Ghosts. These guys are pains in the butt. They can multiply and attack you on the same turn, and they will counter with Confuse Touch if you attack them with a Sword or Axe or if they are left alone long enough.
If they multiply, their clones will be around the same HP range as the original, so don't worry about being bombarded endlessly by Ghosts. They can, of course, be killed off with Cure. Hope you have plenty of Seeds!
Cleaning this battlefield out awards you with 1200 EXP.
There are a lot of monsters in this area, so be prepared to heal yourself every once in a while.
The red chest at the beginning contains another spell for Benjamin: White. This is exactly the same as Holy. (It was called White in America back in the day because Nintendo censored out any and all religious references in a game. Yeah, Nintendo was evil back then. I don't care if they didn't want to offend Americans, they were still evil.)
The music here is pretty good, you'll get to hear it again when you're at the Lava Dome.
There are plenty of new enemies here. A lot of them, not surprisingly, are weak against Water, so your Blizzard spell will be getting a workout here.
The Nitemares can put you to Sleep, so be careful. Also the Were Wolves can cast Quake on you if you don't take care of them immediately.
Parts of the Volcano are foggy, and if you don't have the Mask, you won't be able to see the monsters...basically a repeat of the Magic Mirror in the Ice Pyramid. You'll be treading throw both foggy and un-foggy areas to get the Mask, so be ready to fight.
When you reach the end, you'll fight the Medusa.
Medusa
Take out the Were Wolves, then focus on the Medusa. She'll Petrify you with the Stone Gaze, so carry plenty of Heal Potions in case she decides to use it on Reuben.
Keep hitting here with White and Reuben's Morning Star and you'll do the most damage in fewest hits. The shorter this fight goes, the better.
You'll fight some new enemies again here, and the first two you'll meet are the Zombie and the Red Bone. The Zombies can be killed with Thunder and Cure even though they're easy, and the Red Bones are weak against Water. The Red Bones can put you to Sleep with Sleep Powder.
Anyway, you're better off going up first before you go anywhere else, you'll find more objects in that direction.
The conveyor belts can easily take you where you want to go. If you get in the buckets, you'll take a one-way downward trip further into the Mine.
One of the caves you can blow up an entrance to with your bombs contains a chest that will net you the Charm Claw. It works like the Cat Claw both in and out of battle, but the Charm Claw can also Blind, Confuse and put enemies to Sleep.
Before you can go further, you'll have to face the Jinn.
Jinn
Finish off the Red Bones first; you don't want them giving you any trouble, obviously. Jinn has no elemental weaknesses, and he can put you to Sleep
If you need to, use Reuben's Life Spell to get Benjamin back to full health. Jinn isn't hard, but his attacks can do a fair amount of damage.
When you're done, you'll be able to rescue Reuben's dad Arion.
Fireburg
The Gemini symbol in the house where you go the Battle Axe will take you back to Aquaria. You can now switch between the second and third regions without going through the Focus Tower.
Sealed Temple
Now that you've moved the boulder with the Mega Grenade, you can access the Sealed Temple.
You'll meet the old man on the cloud again. He'll ask you for 10 GP for a cup of coffee, then he flies off. (This has nothing to do with the story whatsoever, so I have no idea why he even asks you that.) Now that you have the Gemini Crest, stepping on the Gemini symbol on the ground will let you reach the blocked-off room in the Wintry Temple. If you want to stock up on both Cure and Heal Potions, going back and forth here is your best option, especially for Heal Potions.
When you enter the Hotel, you'll find a man that sells Seeds, so if you're running low, you can buy some here. You'll also run into Tristam at the bar. Long time no see!
The band here plays a variation of "Johnny B. Good" (or some other Chuck Berry song) which is rather interesting to listen to, to say the least.
The house next to it is Reuben's house. Talk to him, and you'll find out you'll have to rescue his dad from the Volcano. He'll then join your party. You'll have to find his dad's friend to get the Mega Grenade.
Reuben's Flame Armor protects him from Fire, which works quite nicely here. Just remember to save and reset the game for it to take effect. His Morning Star is considered an Axe weapon, and it's pretty powerful. His HP is also quite high. His only spell is Life, which is better than nothing.
A house in the south has a woman who will sell her Battle Axe for 500 GP. Take it, it's much stronger than Kaeli's axe. Going downstairs here displays yet another warp tile...and it's that same symbol. Hmmm...
The house in the bit near the hotel has the guy you're looking for, but the door's locked. Head back to the Hotel and talk to Tristam; he'll give you the Multi-key so you can pick the lock.
Go in, and talk to the guy inside. He'll give you your third Bomb weapon: the Mega Grenade. These are even more powerful than the Jumbo Bomb. He'll then tell you to go through the Mine to reach the boulder that's strapping Reuben's father, Arion. Going downstairs here will give you another symbol tile. I wonder...
Anyway, pressing A with the Mega Grenades equipped will throw one Mega Grenade four spaces ahead in whatever direction you're currently facing, which is pretty nifty. Remember that for later, as you'll need to throw it to reach some sealed doors.
Fireburg Battlefield 1
New enemies here: Jelly and Sting Rats. The Mega Grenade makes quick work of the Jellies, while the Sting Rats can Poison if given the chance.
Clearing this battlefield gives you 900 GP.
Fireburg Battlefield 2
There's a lot of new enemies near Fireburg, so getting your practice in on them is well-advised.
Clearing this battlefield gives you the Gemini Crest! Use these where you saw those three symbols and see what happens!
By using the Gemini Crest in Fireburg, you'll end up in Aquaria.
Fireburg Battlefield 3
The Plant Man is easily destroyed by Axe attacks. The Plant Man can also Paralyze you with Bad Breath and Poison you with Poison Thorn.
Clearing this battlefield out gives you 816 EXP.
Fireburg Battlefield 4
The Flazzards are weak against Water, so your Blizzard attack will work wonders against them.
Clearing this battlefield gives you 1200 GP.
Fireburg Battlefield 5
The Red Caps can be de-commissioned the same way as the Flazzards. The big difference is that the Red Caps can Confuse you, so be careful.
Clearing this battlefield out gives Benjamin the Thunder spell! Finally, Benjamin has a Wizard attack!
Take the path downward and you'll meet Spencer, who will tell you about a shield in Focus Tower. He'll give you the Venus Key so you can access it. He'll also tell you about a ship that you'll be able to access later.
He'll also tell you the Fireburg has had some strong earthquakes recently. Another corner of the world needs your help!
Libra Temple Battlefield 3
Nothing here in the way of new enemies.
Clearing this one out gives Benjamin the Exit spell, which allows you to instantly exit dungeons! Yay!
Libra Temple Battlefield 4
Once again, nothing but familiar territory.
Clearing this battlefield out rewards you with 744 EXP.
Wintry Temple
There's not much here for now. That same symbol from that house in Aquaria is there. Perhaps this is the other side of that warp...?
You'll meet the old man on the cloud again. He'll mention that Captain Mac left for a reason, and that you should seek Reuben in Fireburg. He also mentions the statue next to him before he flies off.
Bomb the sealed hole in the wall, and open the chest. Since you have the Venus Key, you'll be able to open it and get the Venus Shield. It protects Benjamin from Paralyze ailments, which is pretty useful.
Moving the statue will get you where you want to go, so push it to the gap between the two parts of the second floor you can't access...yet. After that, go west to find a chest that contains the Blizzard spell.
Leave Focus Tower, then re-enter from the point that you entered this region from in the first place. Open the blue door with the River Coin, and you'll finally be able to hop across. The stairs to the third floor now give you the best Cure Potion restock point in the entire game, so make good use of it.
On your way to Fireburg, the ground will shake. Ignore the battlefields for now and head to Fireburg.


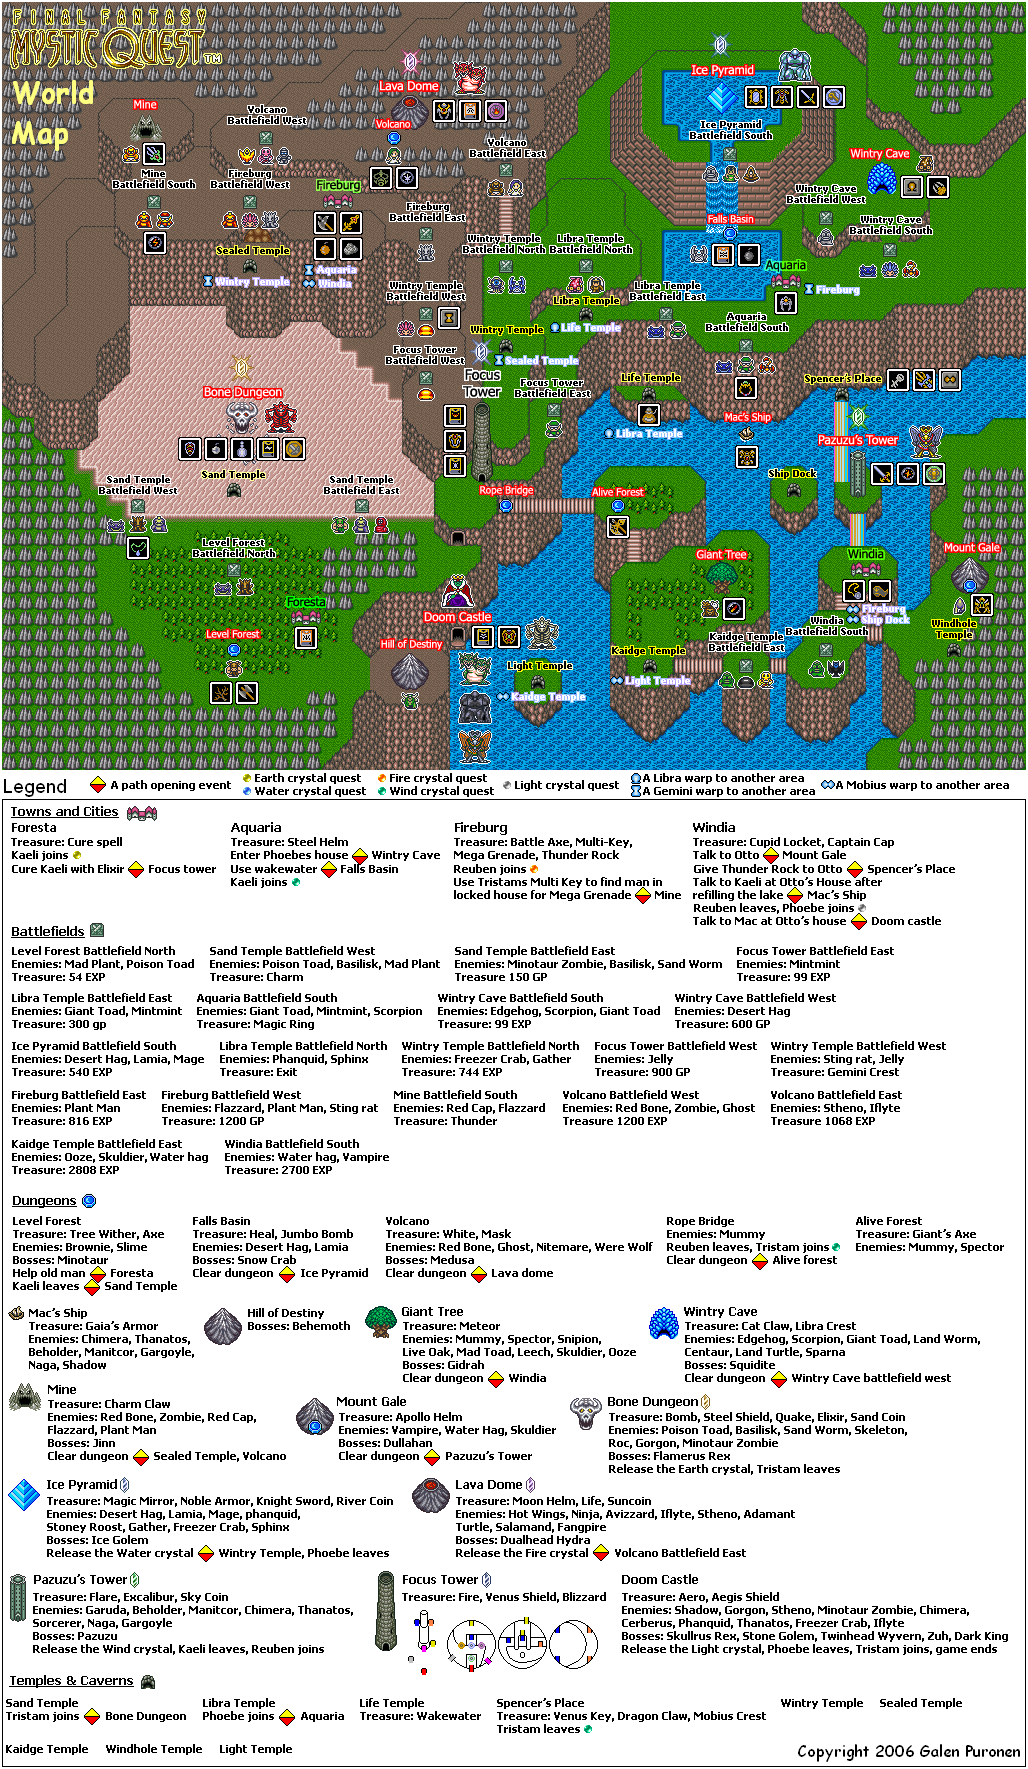
.png)