In this entry, we cover the last stretch of World 1 before continuing on to World 2.
All maps by Shiny.
Riggin' Rumble
Bonus areas: Two (2)
This is going to be the hardest stage yet.
At the start, you can bounce off the flying pig to land on top of the column at the start, then jump in a barrel cannon to soar across the stage to the first continue point.
If you take the low road after the first continue point, you can get a 1-Up.
In this stage, there are areas where Slippas will spiral down the ropes, and if you run into them, they will take one of your Kongs out of commission. Even worse, there are times where if you drop past the bottom of the screen while dying, you lose a life as well as your other Kong. (This gets fixed in the sequels.) If you make your way to the top of the ropes, you won't have to deal with these Slippas some of the time.
The first bonus area is after the O. Look for a bunch of bananas below the left edge of a platform, then drop down. You'll enter a bonus area with two bonus coins and a bunch of bananas.
The second bonus area is inside what looks like a grate in the floor, and if you leap into it from high enough, you'll reveal the rope below. Ride it up to another area with a few bonus coins.
Before the G, you can bounce to the left off a tire to find a bunch of bananas as well as a continue point that's possible to miss. Hitting that continue point is essential in case you die near the end.
Congo Carnage
Bonus areas: Two (2)
The first bonus area is below where the first rope ends. If you have to, jump onto the ground after that rope, then roll off the edge and get underneath it to get to the barrel cannon and find a few coins and Mincers.
You'll see the steel keg for the first time here, and just like in Donkey Kong Country, you can jump on top of it to ride it.
Necky makes his debut in this stage, and he will through nuts at you just like in Donkey Kong Country, so hurry on past.
After the checkpoint, take the low road. The barrel cannon will take you to the second bonus area, which is a coin mini-game.
After the second bonus game, you can throw the steel keg into the wall for a tunnel. Sadly, this is the only time the game (or series) does something like this.
Arctic Barrel Arsenal
Bonus areas: Two (2)
Launch yourself to the left out of the barrel cannon with A at the start. You'll find the first bonus area, which is another coin mini-game.
After this, you'll have to jump into some barrel cannons that automatically move one way to the other and press A to launch yourself from one barrel cannon to another once you're all lined up.
The Klap-Traps make their debut here. Never roll into them; they will bite you and you will lose a Kong.
At the barrel cannons immediately after the checkpoint, wait for the third barrel cannon to go low after going as high as it can go before launching yourself out of it. You'll enter another barrel cannon that takes you a screen full of bananas that spell out the word "KONG" as well as the N.
After this, you'll have more barrel cannon, and this time, Zingers are involved. There will also be a barrel cannon that spins around, and if you can time your shot right, you can launch yourself to the right. These barrel cannons are easy (but still heart attack inducing), but they get harder later on.
Wild Sting Fling
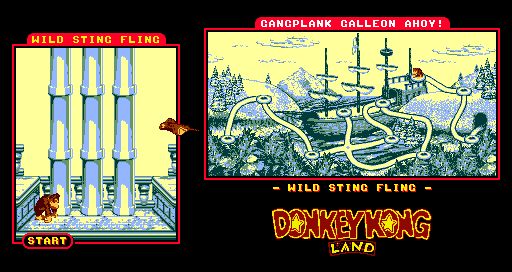
Wait for the manta ray to drop to your level, then jump on him. The manta ray gets faster and faster, but you'll always enter with both Kongs when you go into this stage and you'll usually be able to hit him. When you beat the boss, you'll get a few banana bunches as a reward before going to the next stage.
No comments:
Post a Comment