MrWhitman plays Rosella off like Keyboard Cat this time while showing off all the ways to die in the fourth game of this trailblazing series.
Showing posts with label King's Quest IV. Show all posts
Showing posts with label King's Quest IV. Show all posts
Friday, April 22, 2016
How to die in King's Quest IV
MrWhitman plays Rosella off like Keyboard Cat this time while showing off all the ways to die in the fourth game of this trailblazing series.

Dilandau3000 plays King's Quest IV: The Perils of Rosella - Part 17 of 17
asdf
All maps by Dan_.
Tamir (Day)
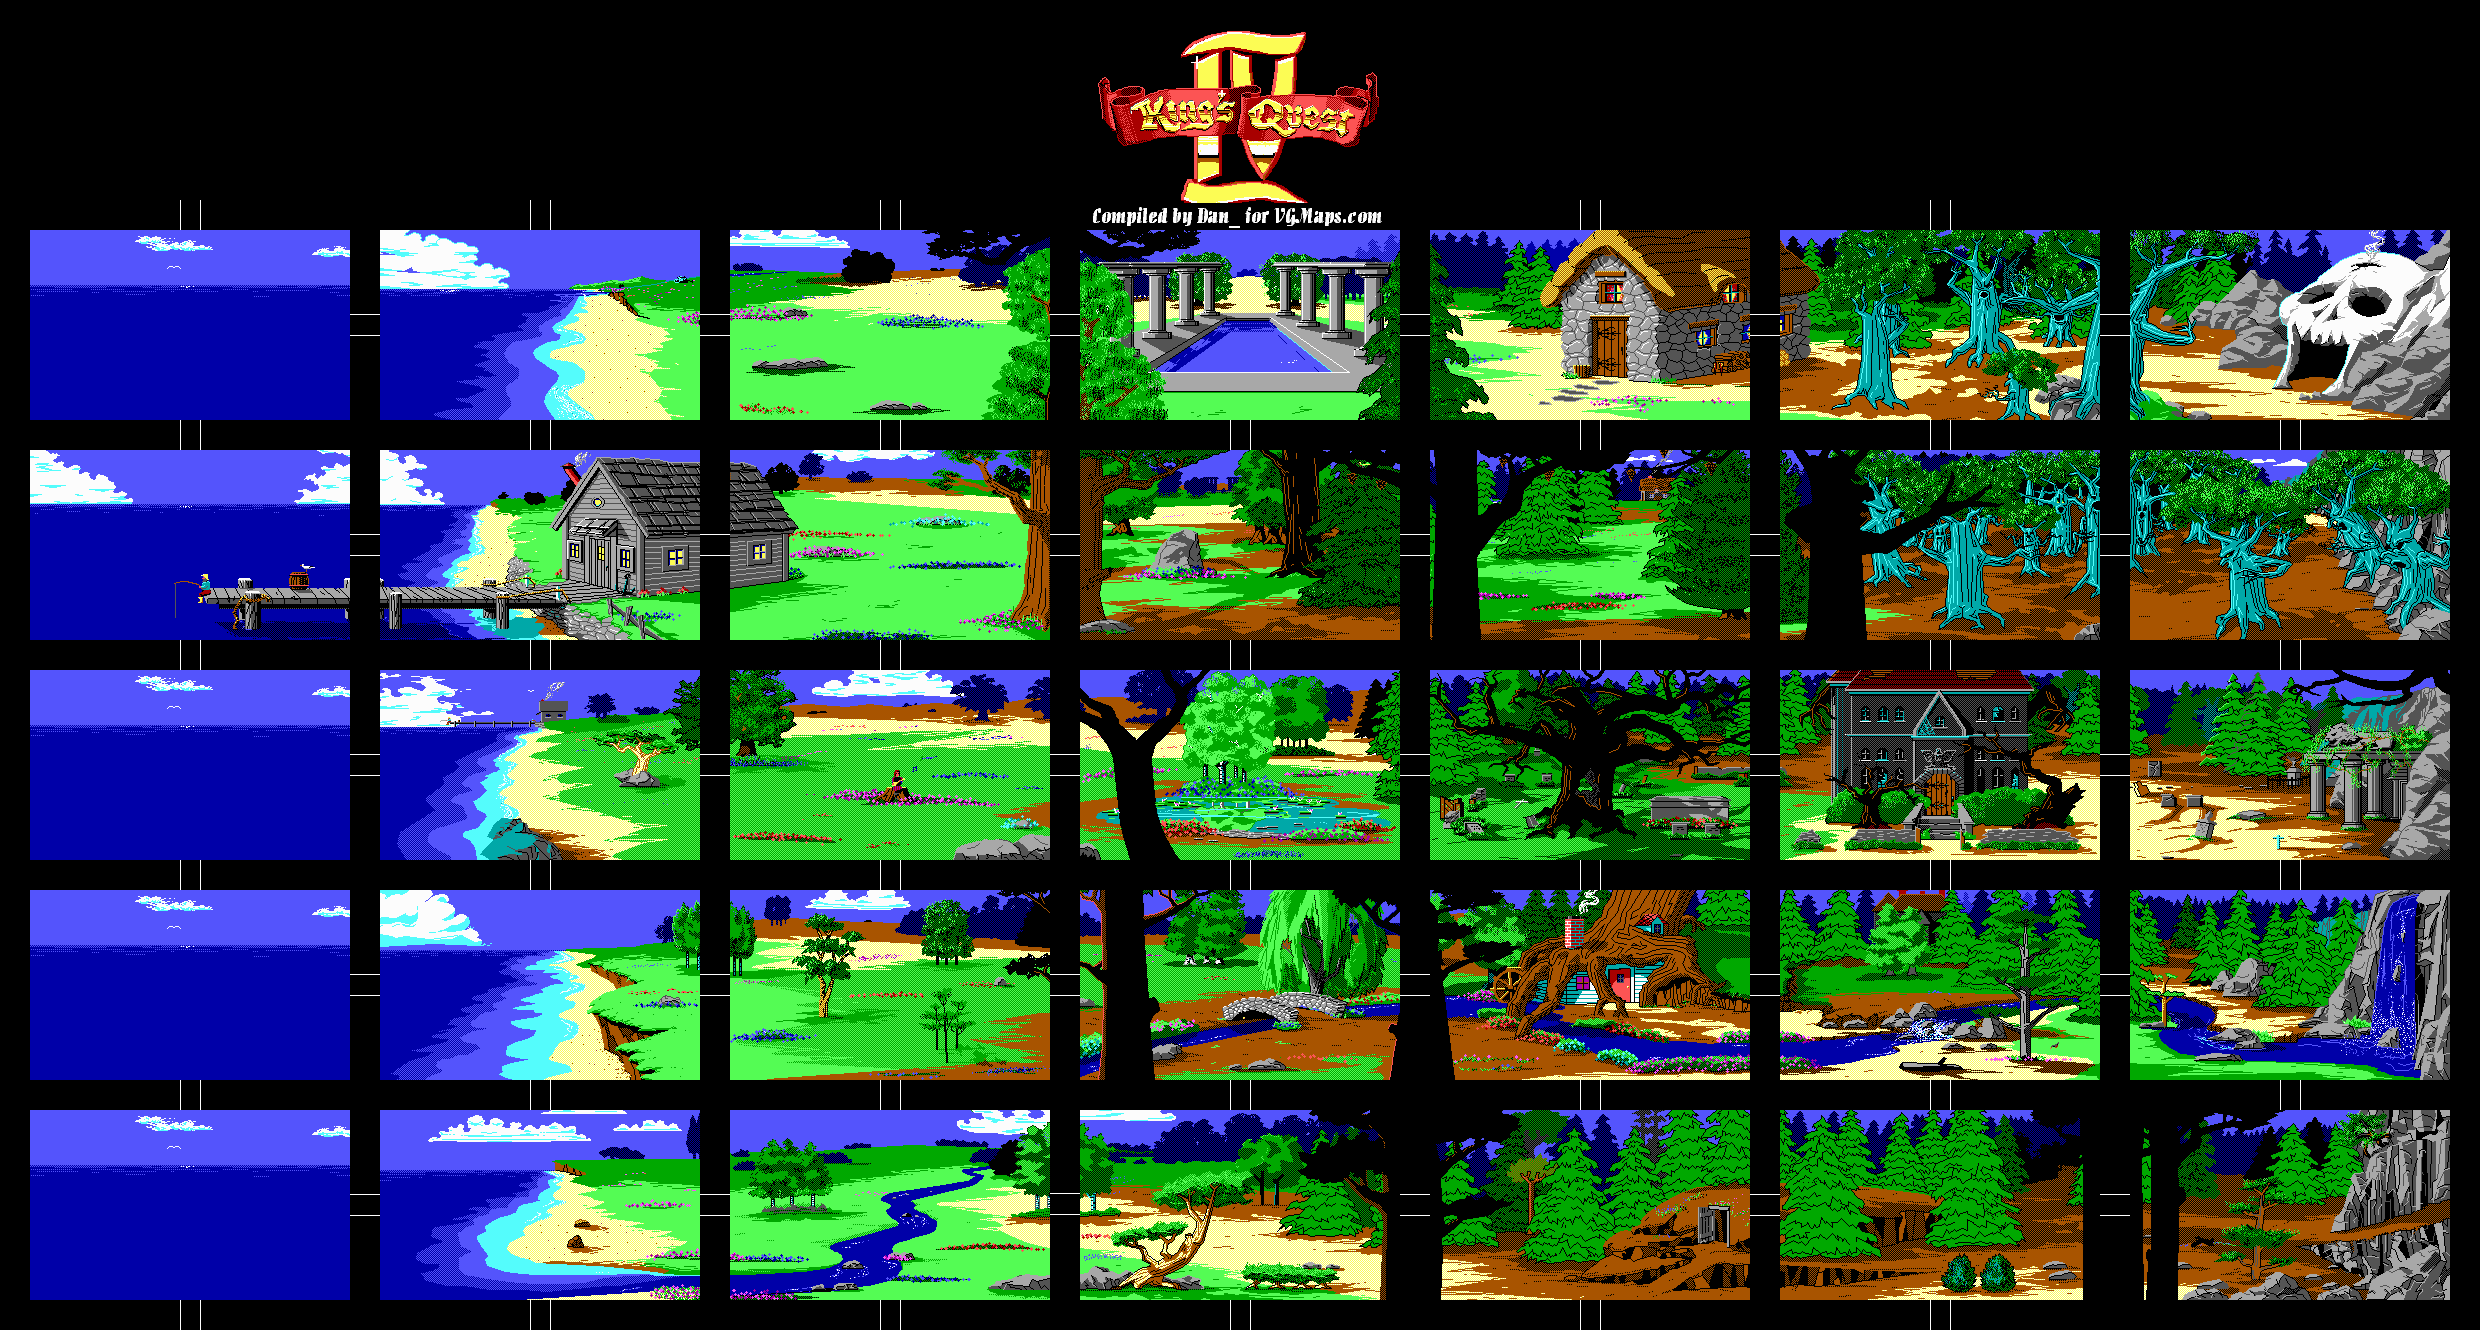
Road to Lolotte's Castle/Outside
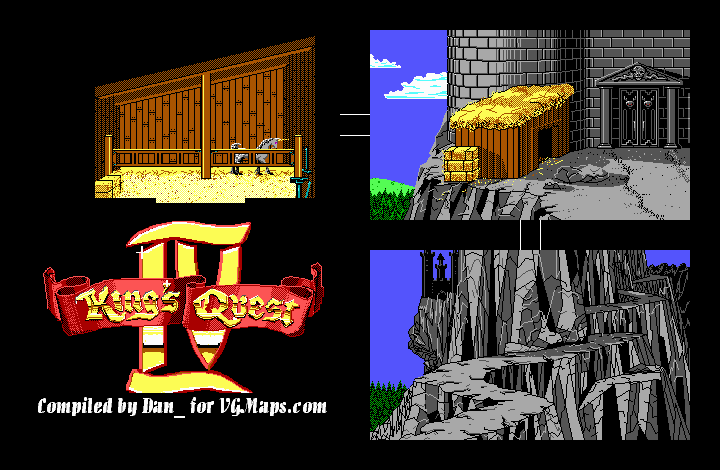
Lolotte's Castle
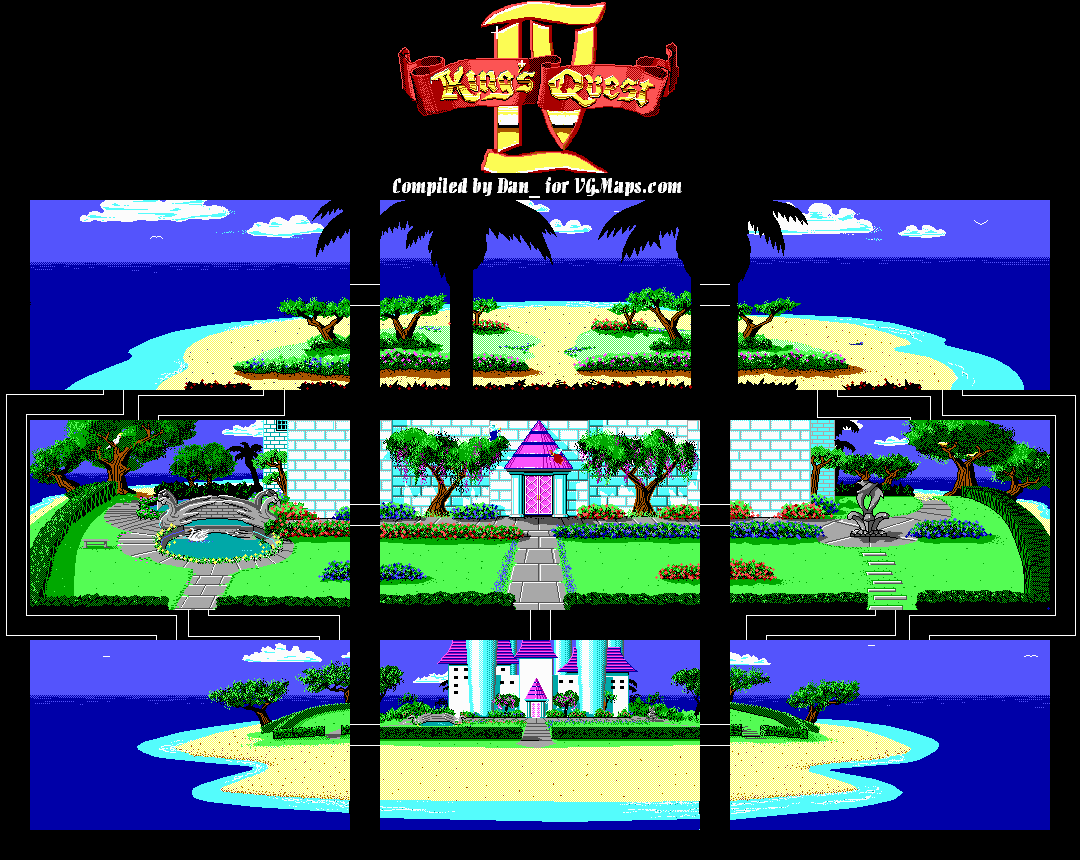
Genesta's Island
Time to go ahead and head out, but before we do that, we'll have to free the unicorn. Be careful going down the stairs, then leave the castle through the throne room and head into the stable to the left. Open the gate and the unicorn will trot out. Now you'll have to go down the mountain path on foot. This is a job for the mouse. Just remember that Rosella will walk in a straight line to where your cursor is, even if it means falling over the edge...so be smart about it.
Head back to the crypt and place Pandora's box back in the crypt at the lower-right corner of the room. From there, close the crypt door and lock it. You'll automatically get rid of the skeleton key, too.
Now you can head back to the pier west of the fisherman's house and swim west until you reach Genesta's island. Enter Genesta's castle, go up the stairs to meet Genesta and give her the talisman. You'll bring her back to normal again, and she'll congratulate you on your victory! But you're still missing two points...
Don't worry, all will be revealed in time.
Genesta will go outside, and Rosella will be zapped outside with her. Genesta will also be glad that you found her hen. Rosella will give it to her and explain where she found it. Now you have all the points!
Genesta will be able to bring you back home to Daventry, but first the peasant robe will be replaced with the royal gown again. Then, she summons Edgar to the island with the wave of a wand...and transforms him into a human. Edgar wants to marry her, but Rosella politely declines and says that perhaps they meet again (and they will). Then, it's back to Daventry. Rosella gives the fruit to King Graham and saves his life.

Thursday, April 21, 2016
Dilandau3000 plays King's Quest IV: The Perils of Rosella - Part 16 of 17
We finally deal with Lolotte once and for all!
All maps by Dan_.
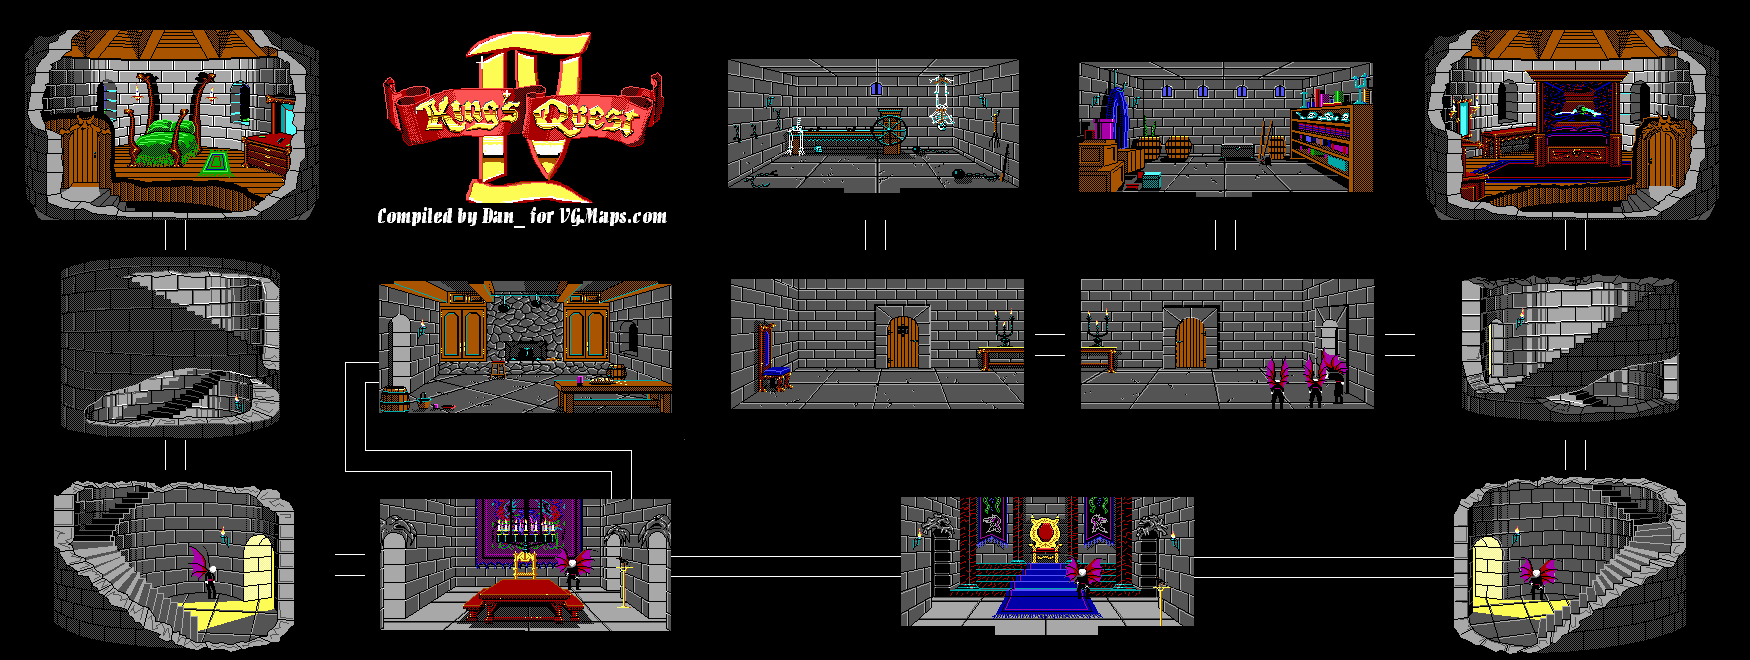
Lolotte's Castle
All right, let's not get near that henchman.
When you reach the dining room on the next screen, there are two doors. Enter the one on the upper-right corner. Don't worry, you won't wake the henchman as long as you're careful. Open the cabinet on the right and voila! There's your stuff! Take it all!
Now let's take the path next to the kitchen. This is the throne room. Go east without waking the guard here to find another tower similar to the one that led to the bedroom the goons locked you in. Don't wake the goon, and go up the stairs without dying. There is a door midway, but you're better off not entering it as the goon there will be wide awake and can chase you between screens.
Welcome to Lolotte's bedroom. Unlock the door with the gold key, then open the door and step inside. If you look at Lolotte, you'll notice she's wearing Genesta's talisman around her neck. If you go for the talisman, you'll wake Lolotte up and seal your fate. However...if you use the bow and arrow on her, she'll be killed by the power of love from the arrow, and you'll be able to get the talisman from her dead body. Edgar will show up and acknowledge Lolotte's death after night turns back into day. You're now free to move about the castle.
Go back to the hall between the stairs. The goons won't even do anything to you now. In fact, they now bow to you! Go ahead and open the door here. This is the storage room. Go in and take the hen and Pandora's Box, then leave. Going west here will take you to the prison where you were initally shoved into when you first met Lolotte. If you stand in the hallway near the door, type in "beam me". You'll get an easter egg that I'll mention in the epilogue.
Dilandau3000 plays King's Quest IV: The Perils of Rosella - Part 15 of 17
Well, at least we don't have to deal with ghosts anymore.
All maps by Dan_.
Tamir (Night)
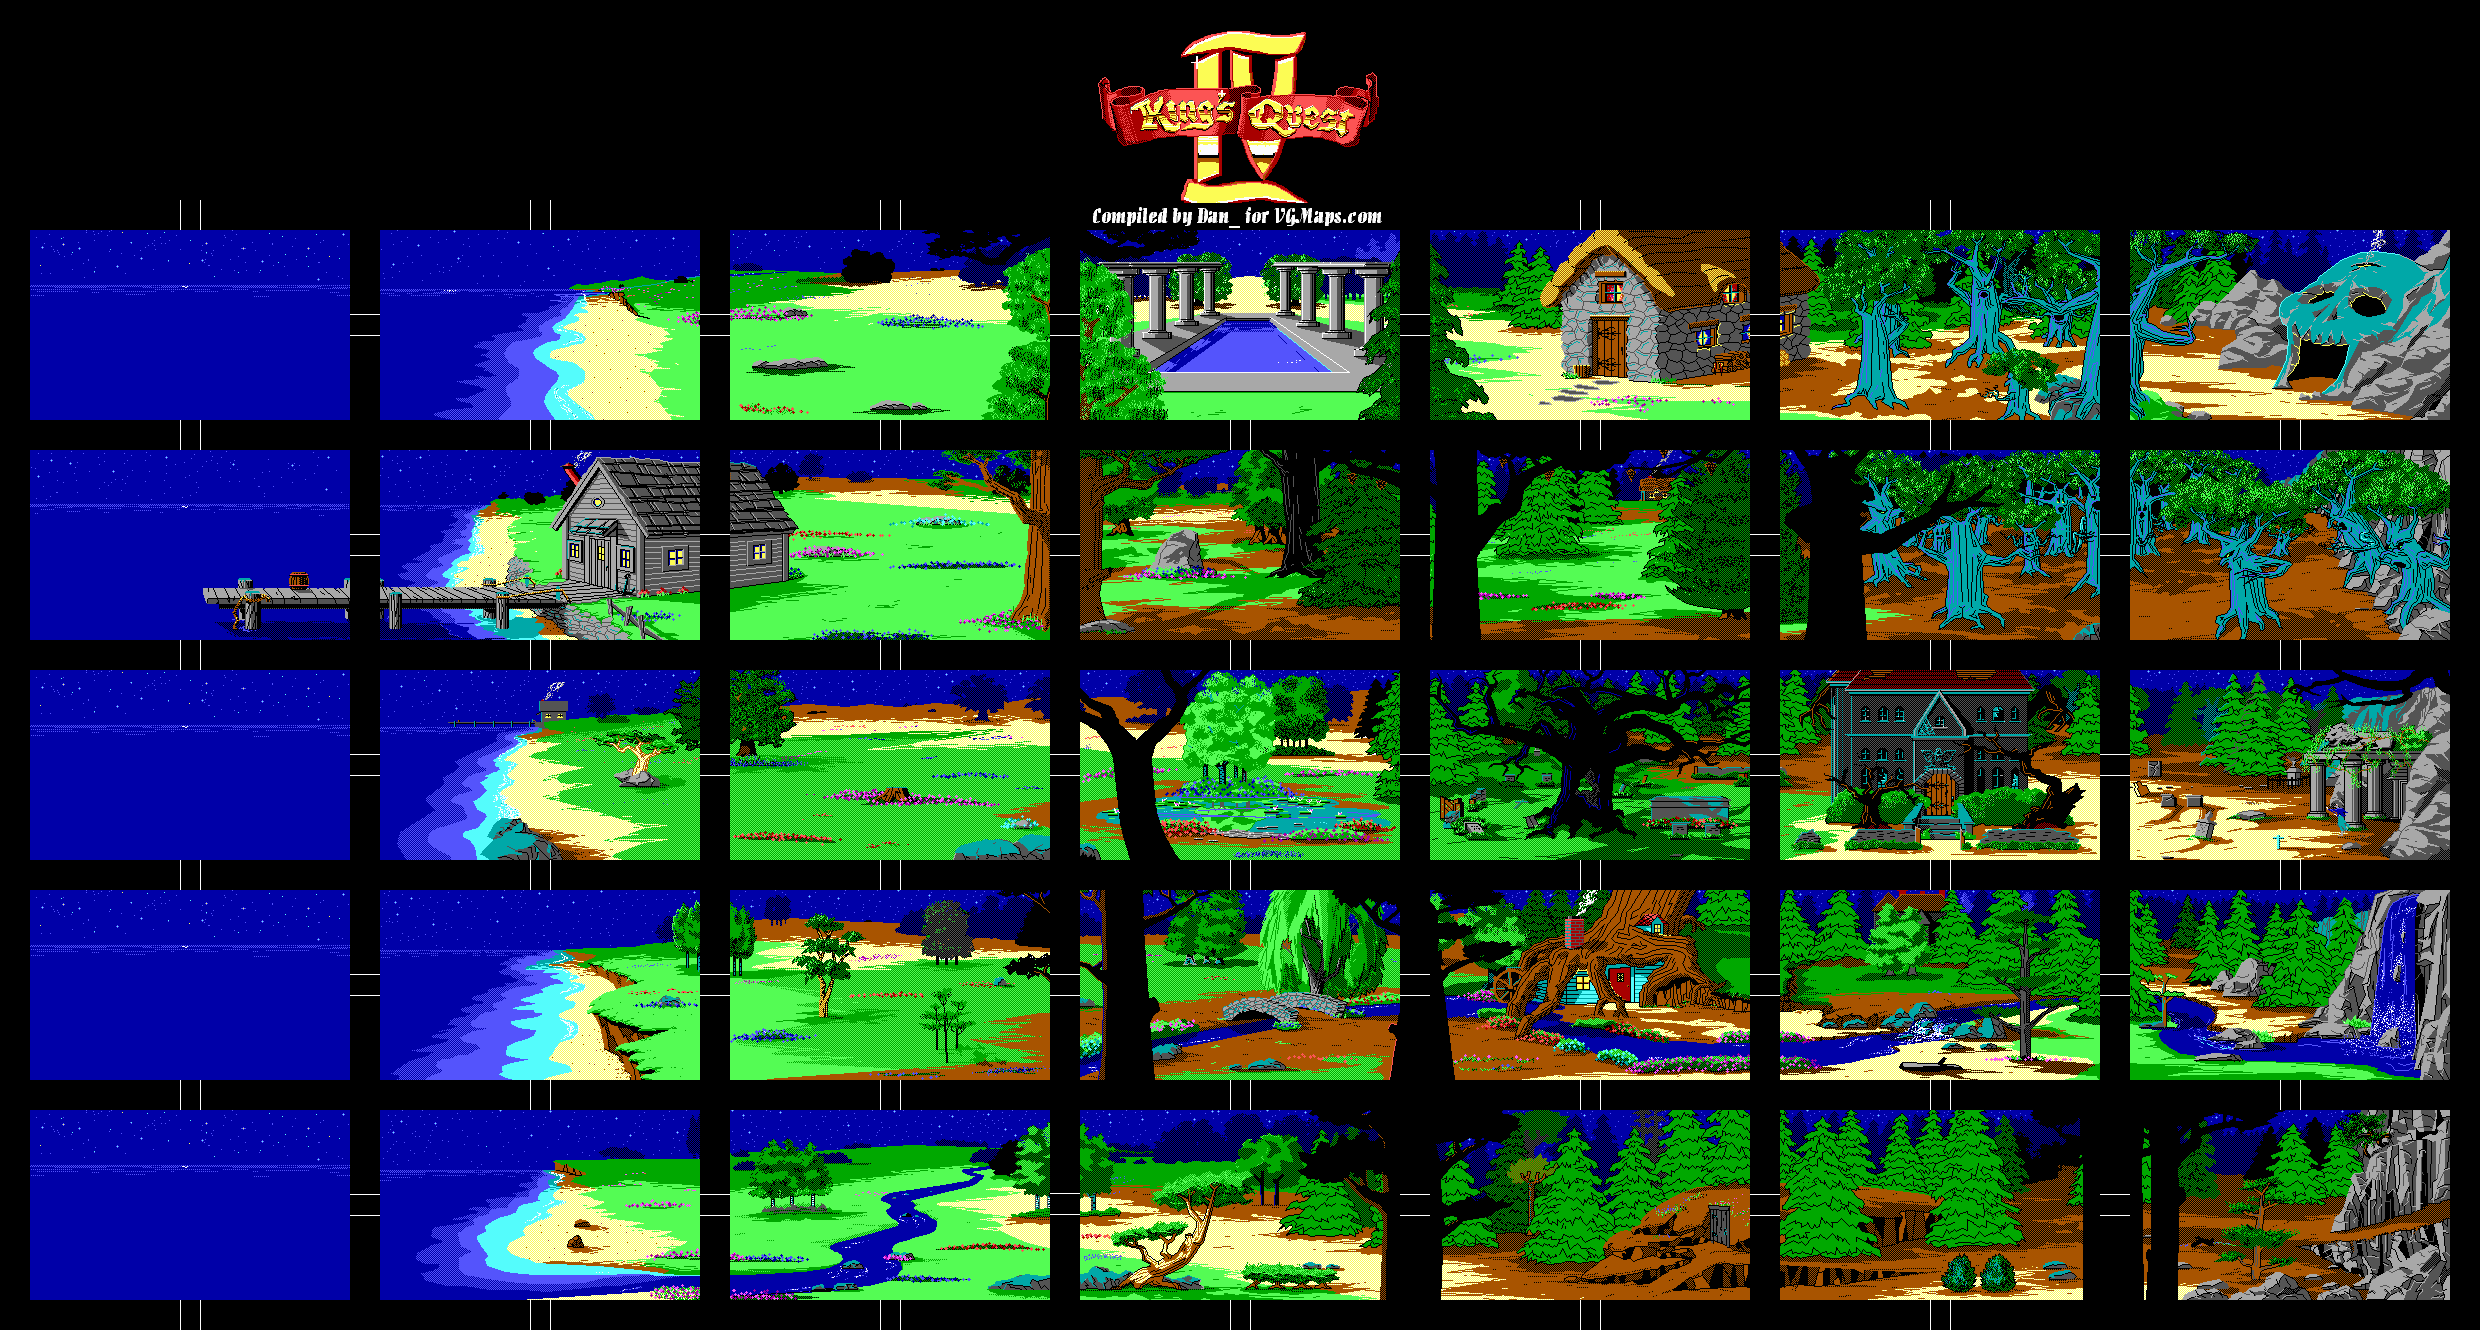
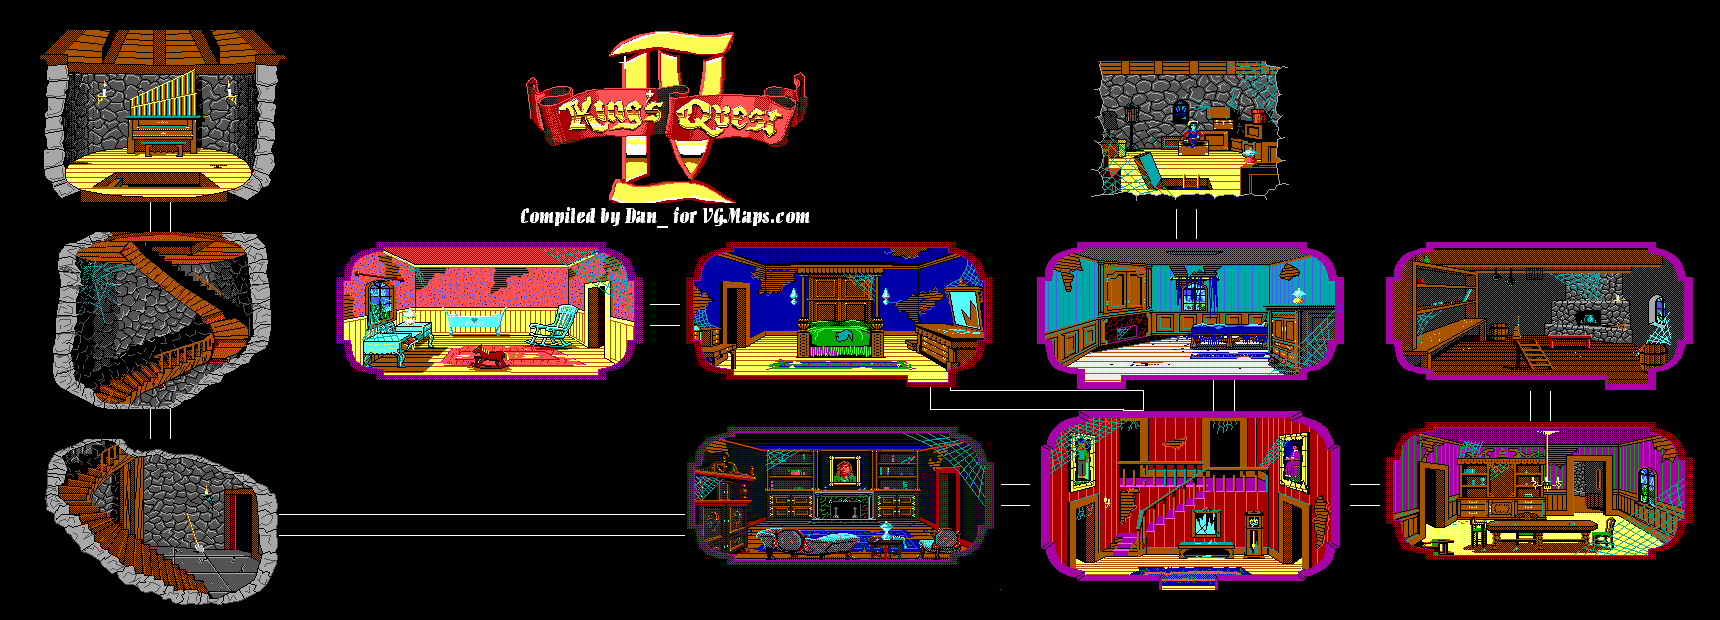
Haunted Mansion
Road to Lolette's Castle/Outside
Lolette's Castle
Now that you're done, go ahead and stand up from the organ. Head out of the mansion. Be careful with those stairs!
Head back to the crypt. Unlock it with the skeleton key. Open the door, and you'll finally be able to go in. Grab the rope in order to climb your way down, and get Pandora's box. Don't worry about the mummy. Since you have the scarab, even the mummy won't do anything to you! Go ahead and leave.
Head back to Lolotte's castle. You finally get your "reward:" being married to Edgar first thing in the morning. You also get all of your inventory taken from you by one of Lolotte's goons as well.
Once you're in Edgar's bedroom, wait for him to show up and place a flower underneath the door. Walk over it and Rosella will automatically take it. If you look at it in the inventory, you'll notice there is a key attached to this rose. Take the key off of the rose and use it to unlock the door.
You'll now be dealing with another spiral staircase. Tap Down briefly, then Right so you hit the wall when you're on the upper segment. Press Left to get to the other side of the staircase. Now you can move normally.
When you reach the bottom, you'll see the floor...and one of Lolotte's goons! He's asleep, but if you get too close, he will wake up! You'll lose both the rose and the gold key as well as your one chance to escape, and you'll automatically get the alternate bad ending where Rosella is married to Edgar! Better luck next time!
Wednesday, April 20, 2016
Dilandau3000 plays King's Quest IV: The Perils of Rosella - Part 14 of 17
Guess what, guys? More ghosts!
All maps by Dan_.
Tamir (Night)
Haunted Mansion
When you give the locket back to the woman's ghost, she'll disappear. You'll then get another ghost - this time it's wailing downstairs! Wait for him to show up at the foyer...it's the Lord of the Manor! (He can also show up in other rooms, but the foyer seems to be the most common.) His tombstone will be on the west side of the house, and here is what his tombstone reads:
Lord Coningsby
1559 to 1626
Sleepeth here in peace:
an honorable man, a valiant soldier.
He served his country well.
Dig near this grave to find a Medal of Honor, and bring it back to Lord Coningsby's ghost. He'll disappear, then a young boy ghost shows up! Where are all these ghosts coming from?
The boy's ghost will run into the right-hand upstairs bedroom...and then climb up a ladder that wasn't even there before! Use the climb command, and you'll be in the attic, and the ghost will stay here this time. There's a chest there, but the boy is sitting on it. Use the climb command to climb back down, as you can die just from walking to the ladder and past it.
The boy's grave will be on the east side of the house. Here's what his tombstone says:
1546
Reader, here lies -- but forbear,
To read more without a tear,
One -- I cannot read the rest,
You may weep. I'll smite my breast,
Grief preventing, and this stone,
Too small to be written on.
Only this -- a little boy,
Willy -- in Abram's bosom's laid.
You'll find a toy horse near this grave when you dig at it. Give it back to the boy's ghost and he will disappear. This will be the last ghost puzzle you'll need to deal with thankfully. If you dig once more in the graveyard, you'll break the shovel. Thankfully, you won't need it anymore, and since you've dug in all the right spots, it won't be a problem!
Open the chest and look inside. You'll automatically take the sheet music in the chest. Go back to the organ in the tower and play the sheet music. Of course, this means you'll have to go up the spiral staircase and deal with the wonky controls on the second level once again. Use Up and Right on the arrow keys to get upstairs when the controls reverse.
When you play the sheet music (you have to actually type "play sheet music" for this), you'll open a secret drawer in the organ. Look inside to find a skeleton key. Take it.
Dilandau3000 plays King's Quest IV: The Perils of Rosella - Part 13 of 17
"Fun fact I forgot to mention in the video: all of the epitaphs, except for the ones for the ghosts, are real epitaphs, and even the ghosts' were adapted from real epitaphs."
Thank you, Sven.
All maps by Dan_.
Tamir (Night)
Haunted Mansion
An interesting thing about night in Tamir: you can actually look around where people in this island live and see them doing other things. Some of them actually sleep, however.
Go to the haunted mansion. If you check the time, you'll see it's after 9 PM, as night falls at nine o'clock at night. Now that it's nighttime, you'll be noticing "activity" in the house. You'll hear a baby crying upstairs. Head back to the baby's room, and you'll see the crib rocking back and forth. There's a clue on one of the tombstones to the west of the mansion:
To the ever living memory of Hiram Bennet,
baby son of Edward and Sarah Bennet,
who by sudden-surprize fell asleep,
the 11th day of November, 1553
Aged 6 months.
Since you have a shovel, dig at the baby's grave, and you'll find a silver rattle. Keep in mind that you can only use the shovel a few times before it finally breaks, so be sure to save before you use it. Return to the baby's room and place the rattle in the crib. The baby's ghost will find peace, but then you'll hear the rattling of chains and loud moaning downstairs. Return to the foyer and you'll see the ghost of an old miser.
There's another grave for this guy, who happens to be a reference to Ichabod Crane of A Christmas Carol by Charles Dickens. This grave is also on the west side of the house.
1643
Here lies Newberry Will,
His life was finished 'cause he took ill,
But none will miss him, he should've been wiser,
'Tis his own fault, for bein' such a miser.
Dig near this grave to find a bag of gold coins. Since you have the scarab, these graveyard fetch quests are actually doable.
Go back into the house, go into another room, and you'll hear the miser's ghost again. Go back to the foyer and hand him the coins when he's close enough to you, and he'll disappear.
You'll then hear weeping from upstairs. Go to the right-hand room on the upstairs room and you'll eventually see a woman on a rocking chair. This is a reference to a tombstone which is on the east side of the cemetery:
Betty Cowden
1650 to 1669
Here lieth the body of Betty Cowden
Who would live longer but she coulden;
Sorrow and grief made her decay
When she lost her lover at sea one day.
Dig near this grave to find a locket, then take the locket back to the woman's ghost.
Tuesday, April 19, 2016
Dilandau3000 plays King's Quest IV: The Perils of Rosella - Part 12 of 17
We can finally see what's behind all of those evil trees!
All maps by Dan_.
Tamir (Day)
Tamir (Night)
Go to any of the screens with the evil trees in them and use the axe. This will scare the trees and cause them to not bother you. From there, you'll be able to get past the trees and see what they've been guarding this entire time: a cave entrance that looks like a skull!
When you enter, one of the three witches will try to chase after you. If this witch catches you, you'll be placed in a boiling hot cauldron and killed. Instead, get between the two other witches and take the glass eye. They'll be blind and helpless. When you do this, the third witch will stop chasing you, and the witches will beg for you to give them back their glass eye. Leave the cave, then go back in. They'll plead again, then they'll throw an item towards you that wards off the undead. You'll find that this is an obsidian scarab if you look at it while it is on the floor. Take it.
After this, give the eye back to them from afar. They'll want you to come closer. Don't do it, or else they'll kill you. You'll have to give the eye back and then run to get maximum points.
Once you're done with the witches and all of the other day tasks (or if you wait long enough in game), night will fall. It is now night on Tamir. If you haven't gotten the magic fruit yet, you're out of luck - the game won't let you take it.
Now that you have the scarab, you can go to the crypt area and the zombies that come out of the ground near it won't even be able to affect you.
Dilandau3000 plays King's Quest IV: The Perils of Rosella - Part 11 of 17
Time to get that golden hen.
All maps by Dan.
Tamir (Day)
Road to Lolette's Castle/Outside
Let's head back to the house near the evil trees. If you see the ogre or the ogress, switch between screens until neither of them show up. When that happens, open the door. KNOCKING ON THE DOOR WILL CAUSE YOU TO DIE.
A bulldog may appear. When that happens, throw the bone to the dog and he'll stop chasing you. From here, you can do basically anything. Don't enter the open doorway to the right, though, as the ogress will see you and it will basically be instant death as she can chase after you between screens.
Go upstairs and grab the axe. Then go back downstairs and check out the closet. There's nothing in here, but the game mentions the keyhole of the door. You can look inside the keyhole to see if anything is happening. When you get the message that says that you can hear the ogre in the house, look through the keyhole. You'll be able to spy on him. He'll eat the deer, then he'll get the hen to lay an egg on command. (Kinda hilarious how the hen just nonchalantly turns around and lays a golden egg at the same time.) The ogre will then fall asleep.
Leave the closet and get the hen when it gets close to you, then open the front door to get out. The hen will wake the ogre, but if you leave the house and get away from it, you'll be free of the ogre. Mission accomplished.
Bring the hen back to Lolotte. She'll give you one more task: bring her Pandora's Box. (Lolotte wants the purest form of evil. Go figure.)
Monday, April 18, 2016
Dilandau3000 plays King's Quest IV: The Perils of Rosella - Part 10 of 17
Now that we've taken care of some stuff, let's go find that unicorn.
All maps by Dan_.
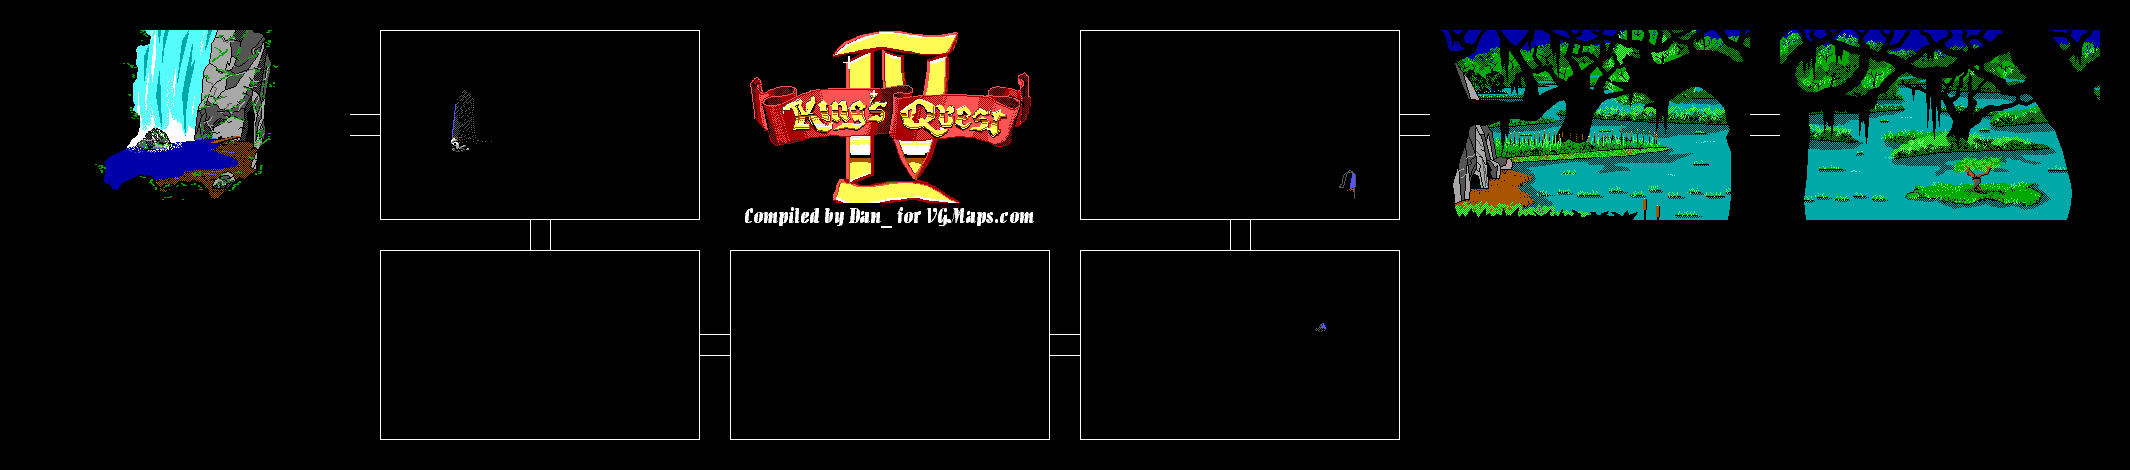
You can beat the game without getting the magic fruit, but it gives you the bad ending where King Graham dies. You can also eat the fruit and force a bad ending...and also lose ten points. Do yourself a favor: don't eat the fruit.
To leave the cave, just swim into the waterfall. You'll be swept back out automatically.
Now, you'll have to find the unicorn. Waiting for it to show up randomly won't help, so you'll have to remember the screen you last found it in as well as the direction it took off to when it ran away. When you find the unicorn, shoot at it with the bow and arrow. Then, get in front of the unicorn and place the golden bridle on the unicorn. Now you can ride it. Rosella will get on and automatically take it to the mountain path, and you'll taken to Lolotte by her goons.
She's almost convinced you're innocent, but she wants you to perform another tasks: bring her the goose that lays the golden eggs. The goose is held by the ogre and his wife.
Sunday, April 17, 2016
Dilandau3000 plays King's Quest IV: The Perils of Rosella - Part 9 of 17
We've found a cave, but what lies on the other side?
All maps by Dan_.
Before you go anywhere, pick up the old board next to the entrance to the next room.
When you go to the next room, it will be dark. Go ahead and light the lantern. Don't worry, if you've looked at it in the inventory, you'll know that some flint comes with it. Get the bones next to the entrance while you're at it, too.
Getting through the cave will not be easy. Even with the lantern lit, you still won't be able to see anything unless you're near or behind a wall. Even worse, there's also a cave troll patrolling the caves that will show up at random, and he will kill you if he gets his hands on you. To avoid him altogether, save your game before you enter a new screen. The troll can also follow you between screens, making escape from him virtually impossible, so restore if he shows up. He shows up immediately, so if you see him, restore and try again.
First, go east from the entrance. Go east halfway through the screen, then go south. Go south to the next screen, and walk southeast until you're close to the east side of the screen. Go straight east from there. You'll notice a tiny blue shape, which is the opening on the other side. You'll want to be careful here, as you can fall into a chasm that you can't easily see and die. What you'll have to do here is place the board over the chasm, and you'll have to be close enough to the chasm in order to do it. This will take some slight moving around as well as approximating where the chasm is, but it can be done. Go straight east. Rosella will pick the board back up when you're on the other side. From there, stay close to the east side of the screen and go north towards the hole. From there, you can just walk up to the hole, which Rosella will automatically crawl through.
Unlight the lantern before you do anything else, since you will have to use the lantern again. Jump onto the tufts of grass, as walking into the swamp will suck you under and kill you.
On the other side is the tree with the magic fruit! Before you can get it, however, you'll have to deal with the giant black cobra that protects the tree. Put down the board first, since you can't jump the distance from the last tuft of grass to the small island without dying. Then, get on the island (carefully) and play the flute. You don't have much time to get the fruit, so grab it and get away from the cobra before it snaps out of the trance.
With that done, go back to that last tuft of grass and get the board again. Then, jump back to the cave. You'll have to head back to the other side of the cave, using the opposite of the directons that you go to the fruit from. Remember to use the board to get over the chasm and to save before every screen in case the troll shows up.
When you're back at the cave entrance, extinguish the lantern again.
Dilandau3000 plays King's Quest IV: The Perils of Rosella - Part 8 of 17
In this entry, we get swallowed by a whale and turn into a frog. Not at the same time, but that would be interesting.
All maps by Dan_.
Alright, let's go back east. We should see the whale on the next screen. Stay there and wait for a whirlpool to open up. When you do, go in and you'll be in the whale's mouth.
You'll see a bottle floating near the boat with the skeleton in it. When you moves towards it, you'll be wading in more shallow water. Go ahead and get the bottle. There will be a note inside if you look at the bottle form the inventory, so go ahead and open the bottle and then read the note...repeatedly. It's a plug for Police Quest, The Black Cauldron, Leisure Suit Larry, Space Quest and other King's Quest games. D'oh!
Now to get out of the whale. To do that, you'll have to get on the left side of the whale's tongue and work your way to the center. Saving often as you inch your way up and right works well here. When Rosella stops climbing and stands up, just walk to the center and then towards the uvula. Tickle the feather with the uvula and you're finally out!
You'll see an island to the north when you get out of the whale's mouth. Be sure to save here, as you may get eaten by a shark at random. (Yes, there is a shark near this island.) When you swim to it, you'll notice that you're somewhere completely different.
Whatever you do, do not approach the pelican. If you do, you'll scare it off and you'll have no way of getting off the island. Instead, throw the fish to the pelican before he flies away on his own. It will drop a whistle as it eats the fish, then it will take off. Take the whistle, then look at the ground behind the wreckage of the boat to the right of where the pelican was. You'll find a golden bridle, which Rosella will automatically take.
Now you can blow the whistle. When you do, a dolphin appears. Move towards the dolphin and ride on it. You'll be at the shore and north of the fisherman's house. There's just more meadow one screen east of here, so keep going east.
You'll show up at a pool one screen later. Cupid will drop his bow and arrow and go for a swim, but he'll take off without it when you get close. Take the bow and arrow. Don't go east, because you might run into the ogre. Instead, go north. The unicorn may show up here as well. We're not going to deal with the unicorn yet; instead, we're going to go west until we reach the mountain path entrance and then go north to the waterfall. Wear the crown that the frog prince gave you and you'll be able to swim through the waterfall and find a cave!
Saturday, April 16, 2016
Dilandau3000 plays King's Quest IV: The Perils of Rosella - Part 7 of 17
Let's check out Genesta's island! Yep, Genesta actually lives on a nearby island, believe it or not.
All maps by Dan_.
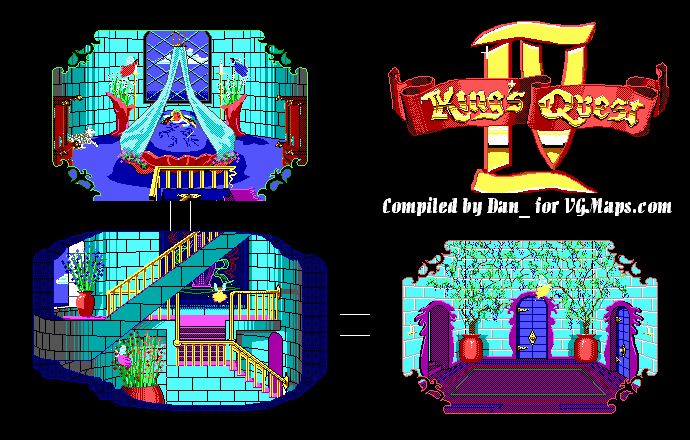
Now that we have the fishing pole, head west to the end of the dock and use the fishing pole. If you don't use the worm, you'll get a boot that you'll end up throwing out, so go ahead and use the worm. If you don't catch anything, keep trying. You'll eventually be able to get a fish.
If you swim west from the dock, you'll be able to reach an island. If you see a whale, go to another edge of the screen and off-screen the whale. You'll be meeting the whale again soon enough, and he'll come into play for something.
Anyway, two screens west of the dock is an island. You'll be able to go inside the ivory tower in the center and see Genesta. There is also a peacock that sometimes shows up south of the entrance, though the peacock is unimportant (like the rest of the birds on this island).
You can enter the castle, but you won't be able to do anything here...at least, not yet. Also, you can't die on the stairs because of the handrails. How convenient.
The north tip of the island has a peacock feather on the ground. Take it.
Dilandau3000 plays King's Quest IV: The Perils of Rosella - Part 6 of 17
We finally help out some of the locals again...
All maps by Dan_.
Unlike the other half of the cemetery, there is a crypt built into the mountainside on the other half. Unfortunately, you won't be able to enter it quite yet.
When you go north of this screen, you'll be in a bit of a spot if you're not careful here: the evil trees will grab you and end your journey. We're better off just avoiding them and heading west...
...and we see more of them. Just stay near the south edge of the screen and go west. You'll be fine.
You'll then be in a thick pine forest with a house to the north. We'll see the house later, don't worry.
Further west is more forest. You'll see a pool to the north, which we'll also see shortly.
The next screen west takes you behind a house. Go west and you'll be able to enter the house.
The screen southwest of the one behind the house also has the minstrel. Give him the Shakespeare book. He'll find out he's better as an actor than as a minstrel, and he hands you his lute before heading off.
Alright, back to behind the house. You'll randomly encounter Pan the satyr here. (Finally, a satyr appears in this one.) He'll be dancing around playing the flute, and if you play the lute, he'll stop in his tracks. Give him the lute, and he'll give you the flute. (Nice rhyme, there.)
Now that Pan's danced away with a new instrument, and you've got a nice trade-off, head west to the entrance to the house. If you walk on the dock to the west, you'll finally meet the fisherman. Stand there for a few moments and he'll pick up his fishing pole, stand up and enter the house. Follow him to the house and open the door to go in. Talking to his wife won't do much good, but if you talk to the fisherman, he'll be worried that the fish aren't biting. Hand him the diamonds, and he'll thank you by letting you have the fishing pole.
Friday, April 15, 2016
Dilandau3000 plays King's Quest IV: The Perils of Rosella - Part 5 of 17
We explore the haunted, abandoned mansion...
All maps by Dan_.
Apparently, the house here is really a mansion. Not surprisingly, everything here is smashed up and/or torn up.
The grandfather clock in the foyer is the only way of knowing what time it is in the game. There are some tasks that you can only do in the daytime that must be done. Not surprisingly, there are some things you can only do at night.
Going left from here takes you to the parlor. There is a book on the shelf that will catch your attention when you look at it. Take the book. Reading it gives you Shakespeare quotes, as expected.
If you look at the painting, you'll notice that the eyes are focused on the left wall of the parlor. Examine the left wall and you'll find a latch. Move it to open a secret door. Go in.
Take the shovel, and use the mouse to go up the spiral staircase. When you reach the top half of the second screen involving this staircase, use Right and Up instead of Left and Down, or else you're going to be going nowhere fast. (Yes, the controls reverse when the staircase twists. This basically makes the stairs here even worse than the last three games. It's like the game is saying "You're used to these games. Let's see what we can do about that." At the same time, the game is smiling with malicious glee.)
At the top of the spiral staircase is an organ. If you sit down at the organ and play it, Rosella will actually play it. (At least she's better than that guy with the lute.) Too bad there's nothing else here, so go ahead, stand up and get back on with the game. Remember to press Right and Down, and be careful when going down the stairs so you don't fall!
Head back to the foyer and take the left door on the second floor. You'll be in the master bedroom. The room to the left is the baby's room. There's nothing in either of these rooms, sadly.
The room to the right on the second floor is another bedroom. There's nothing here, either.
Go back downstairs and enter the room to the right. This is the dining room. The kitchen is across from it. There's nothing in these rooms, either. (Sheesh, what are we doing here?)
Leave the house and go east. You'll enter the other half of the cemetery.
Dilandau3000 plays King's Quest IV: The Perils of Rosella - Part 4 of 17
Time for more exploring and item collecting! Let's see what more fairy tale references we can find in Tamir!
All maps by Dan_.
You may notice that there's something gold underneath the bridge. Cross the bridge, go up to the other side, and look under it. You'll automatically take the small golden ball underneath the bridge.
Going west takes you to another beautiful meadow. You may also find the unicorn here.
Going west again takes you to the cliff at the seaside. Whatever you do, don't walk off the cliff, because you will die.
Go north now. Once again, it's more of the seaside, and you'll also see a house complete with a dock and some guy fishing. Nice. We'll get there later. For now, let's go east.
The next screen east is another meadow, as well as a tree stump in the center. Sometimes, a young minstrel playing a lute will show up sitting on the stump, though he shows up in other locations as well. Talk to him and he'll play a tune for you. Unfortunately, he's not very good. If you keep talking to him, he'll play bad renditions of other songs, some of which are previous [i]King's Quest[/i] songs.
East of this tree stump is a swamp. Here, you'll notice a frog wearing a small gold crown on its head. If you try to approach it, you'll scare it away, but it will come back if you get back and wait a little while. Throw the golden ball in the pond, and you'll "accidentally" drop it in the pond. You can pick up the frog and take its crown, but that doesn't give you the most points. Instead, pick up the frog and kiss it. Just like the fairy tale of the frog prince, the frog changes into a prince. He's surprised that you're a peasant girl and not a princess (hey, the disguise worked), but he gives you the crown anyway. Go ahead and get the ball back off the ground.
To the east of this is a cemetery. You can read the tombstones, all of which have epitaphs that are either snarky or hilarious. One of them reads:
I planted these shrubs upon your grave, dear wife,
That something on this spot may boast of life.
Shrubs must wither and all earth must rot;
Shrubs may revive, but you, dear wife, will not.
Keep this in mind, as this will come into play later.
One screen east is the haunted house. This is the last place we'll see, and it'll come into play later as well.
Thursday, April 14, 2016
Dilandau3000 plays King's Quest IV: The Perils of Rosella - Part 3 of 17
Time to see more of Tamir and see how we can get that unicorn.
All maps by Dan_.
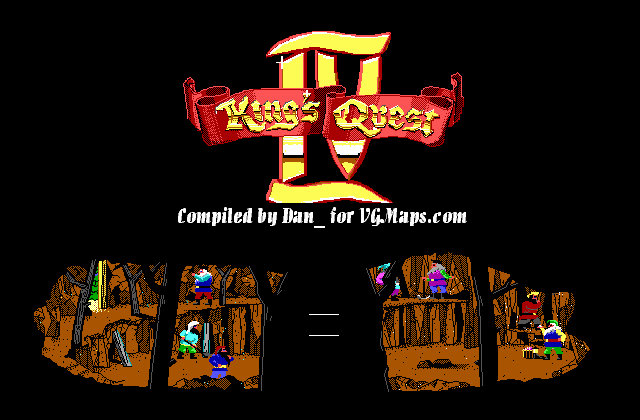
Let's go west, since we can't go east any further. You'll see a house in the distance, but there's nothing to do here. Go west again.
You'll now be at a house inside of a tree. Since you're north of the mines, this might just be the dwarves' house. When you go inside and look around, you'll notice that the house is a mess. Type in "clean house." (Once again, ignore the quotations.) Rosella will instantly clean the house. At least it's automatic this time around!
When Rosella is done cleaning, the dwarves will come in and get a bowl of soup and sit at the table. When they're all ready to eat (one of them gets double helpings of soup!), they invite you eat with them as thanks for tidying their house. Then you'll watch as Rosella and the dwarves eat (you can talk to them if you like), then they'll leave. If you want, you can "clean house" again, and although you won't get extra points for it, it'll make it easier to notice the blue pouch on the table. Take it. Check it out in the inventory and you'll find out it's full of diamonds.
Head out of the house, go south and enter the mine. This time around, the dwarves won't kick you out. Head to the right and give the pouch to the dwarf that is looking at the diamonds. He'll let you keep it, and also let gives you an extra lantern. (I'm guessing there were eight dwarves at one time, since they also had eight dishes on the table before you cleaned their house for them.) Head out of the mine.
Go back north to the dwarves' house, then go west. This takes you to a bridge.
Dilandau3000 plays King's Quest IV: The Perils of Rosella - Part 2 of 17
We meet Lolotte! That didn't take long...but that's just the icing on the cake! Read on!
All maps by Dan_.
At least we can walk across the stream. (Of course, the game calls it a river.)
You may notice the unicorn when you make your way east again. Just like last time, it will run away when you get close enough.
The next screen east is a mine shaft. Be sure to use the mouse if you plan on walking diagonally, as the manual keyboard controls are slightly off in this game. Don't even bother going in, as you'll be forced to leave as soon as you enter. All of the men in here are dwarves. (A Snow White reference, perhaps?)
The next screen east will feature a bird pecking at the ground. Walk towards the bird to scare it away, then get the worm it was going after. You finally have some points on the board as well as an item. That was easy. (It should be noted that is one of a few locations where the bird and the worm shows up, but this is the easiest one to get to.)
Go east again and you'll find a mountain path. If you go to the next screen, Lolotte's goons will pick you up and take you to Lolotte herself.
Lolotte can't tell if you're just some dumb peasant girl or if Genesta sent you here as a spy. She'll place you in a prison cell. There are balled chains, a torture rack, and even a cat-o'-nine-tails on the wall. After a couple of seconds (where you can look around), a henchman will let you out and take you to Lolotte.
Lolotte's son, Edgar, has taken a liking to you, and has given you a chance to prove your innocence. (Well, this is convenient. Also, how does a fairy have a human son?) She'll then tell you she wishes to own the unicorn that inhabits the meadowland. Bring her the unicorn, and she'll not only free you, but reward you as well. Her goons then take you back to the forest where you entered the mountain path from. (If you go back to the mountain path, the goons will just drop you back off.)
Going north of this screen takes us to a waterfall. You can swim just by walking into water. The waterfall will push you back if you swim towards it.
Wednesday, April 13, 2016
Dilandau3000 plays King's Quest IV: The Perils of Rosella - Part 1 of 17
Oh, snap! More King's Quest action coming your way!
All maps by Dan_.
Need the manual to get past the copy protection? Here you go.
Anyway, there are a few things to mention here. First...the fourth game is easier compared to the third. Second, William Goldstein is the composer of this game, and he has also worked on the score to the TV series version of Fame (yes, it's based on the movie of the same name starring Irene Cara). Third, there's really no prologue to this as it's all the stuff from the last three games. At least you can read the prologue in the manual, which I've provided a link to.
Anyway, the game begins exactly where King's Quest III ends: King Graham tosses the adventurer's cap to pass the adventuring on to his children, Rosella and Alexander. When he tosses it, however, King Graham suffers a near-fatal heart attack.
A grief-stricken Princess Rosella runs from Graham's bedroom, and she sits on the throne wishing she could help her father. Suddenly, a fairy named Genesta from the island of Tamir appears in the magic mirror. She tells Rosella of a tree that bears a single fruit every 100 years. This fruit will instantly cure her father King Graham and give him good health and long life for many years...but there's trouble in Tamir, as the evil fairy Lolotte has taken the talisman that is the source of Genesta's power and plans to use it to spread evil throughout Tamir. Even worse, Rosella has a day to get both of these things before Genesta dies, and without the talisman, Rosella cannot return to Daventry. Genesta then disguises Rosella as a peasant girl so as not to attract attention.
The tree is located on a tiny island within a vast swamp on the other side of the mountains. Within these mountains, overlooking Tamir, is Lolotte's castle. You'll have to find both the fruit and the talisman in order to set Tamir straight and save King Graham!
Well, we're on our own.
Go east on the starting screen, since there's nothing you can do here.
You'll then come across a lovely stream as well as a unicorn. This unicorn will come into play a little later. When you take a few steps toward it, you'll scare it off.
Subscribe to:
Posts (Atom)