Some of these levels are nuts.
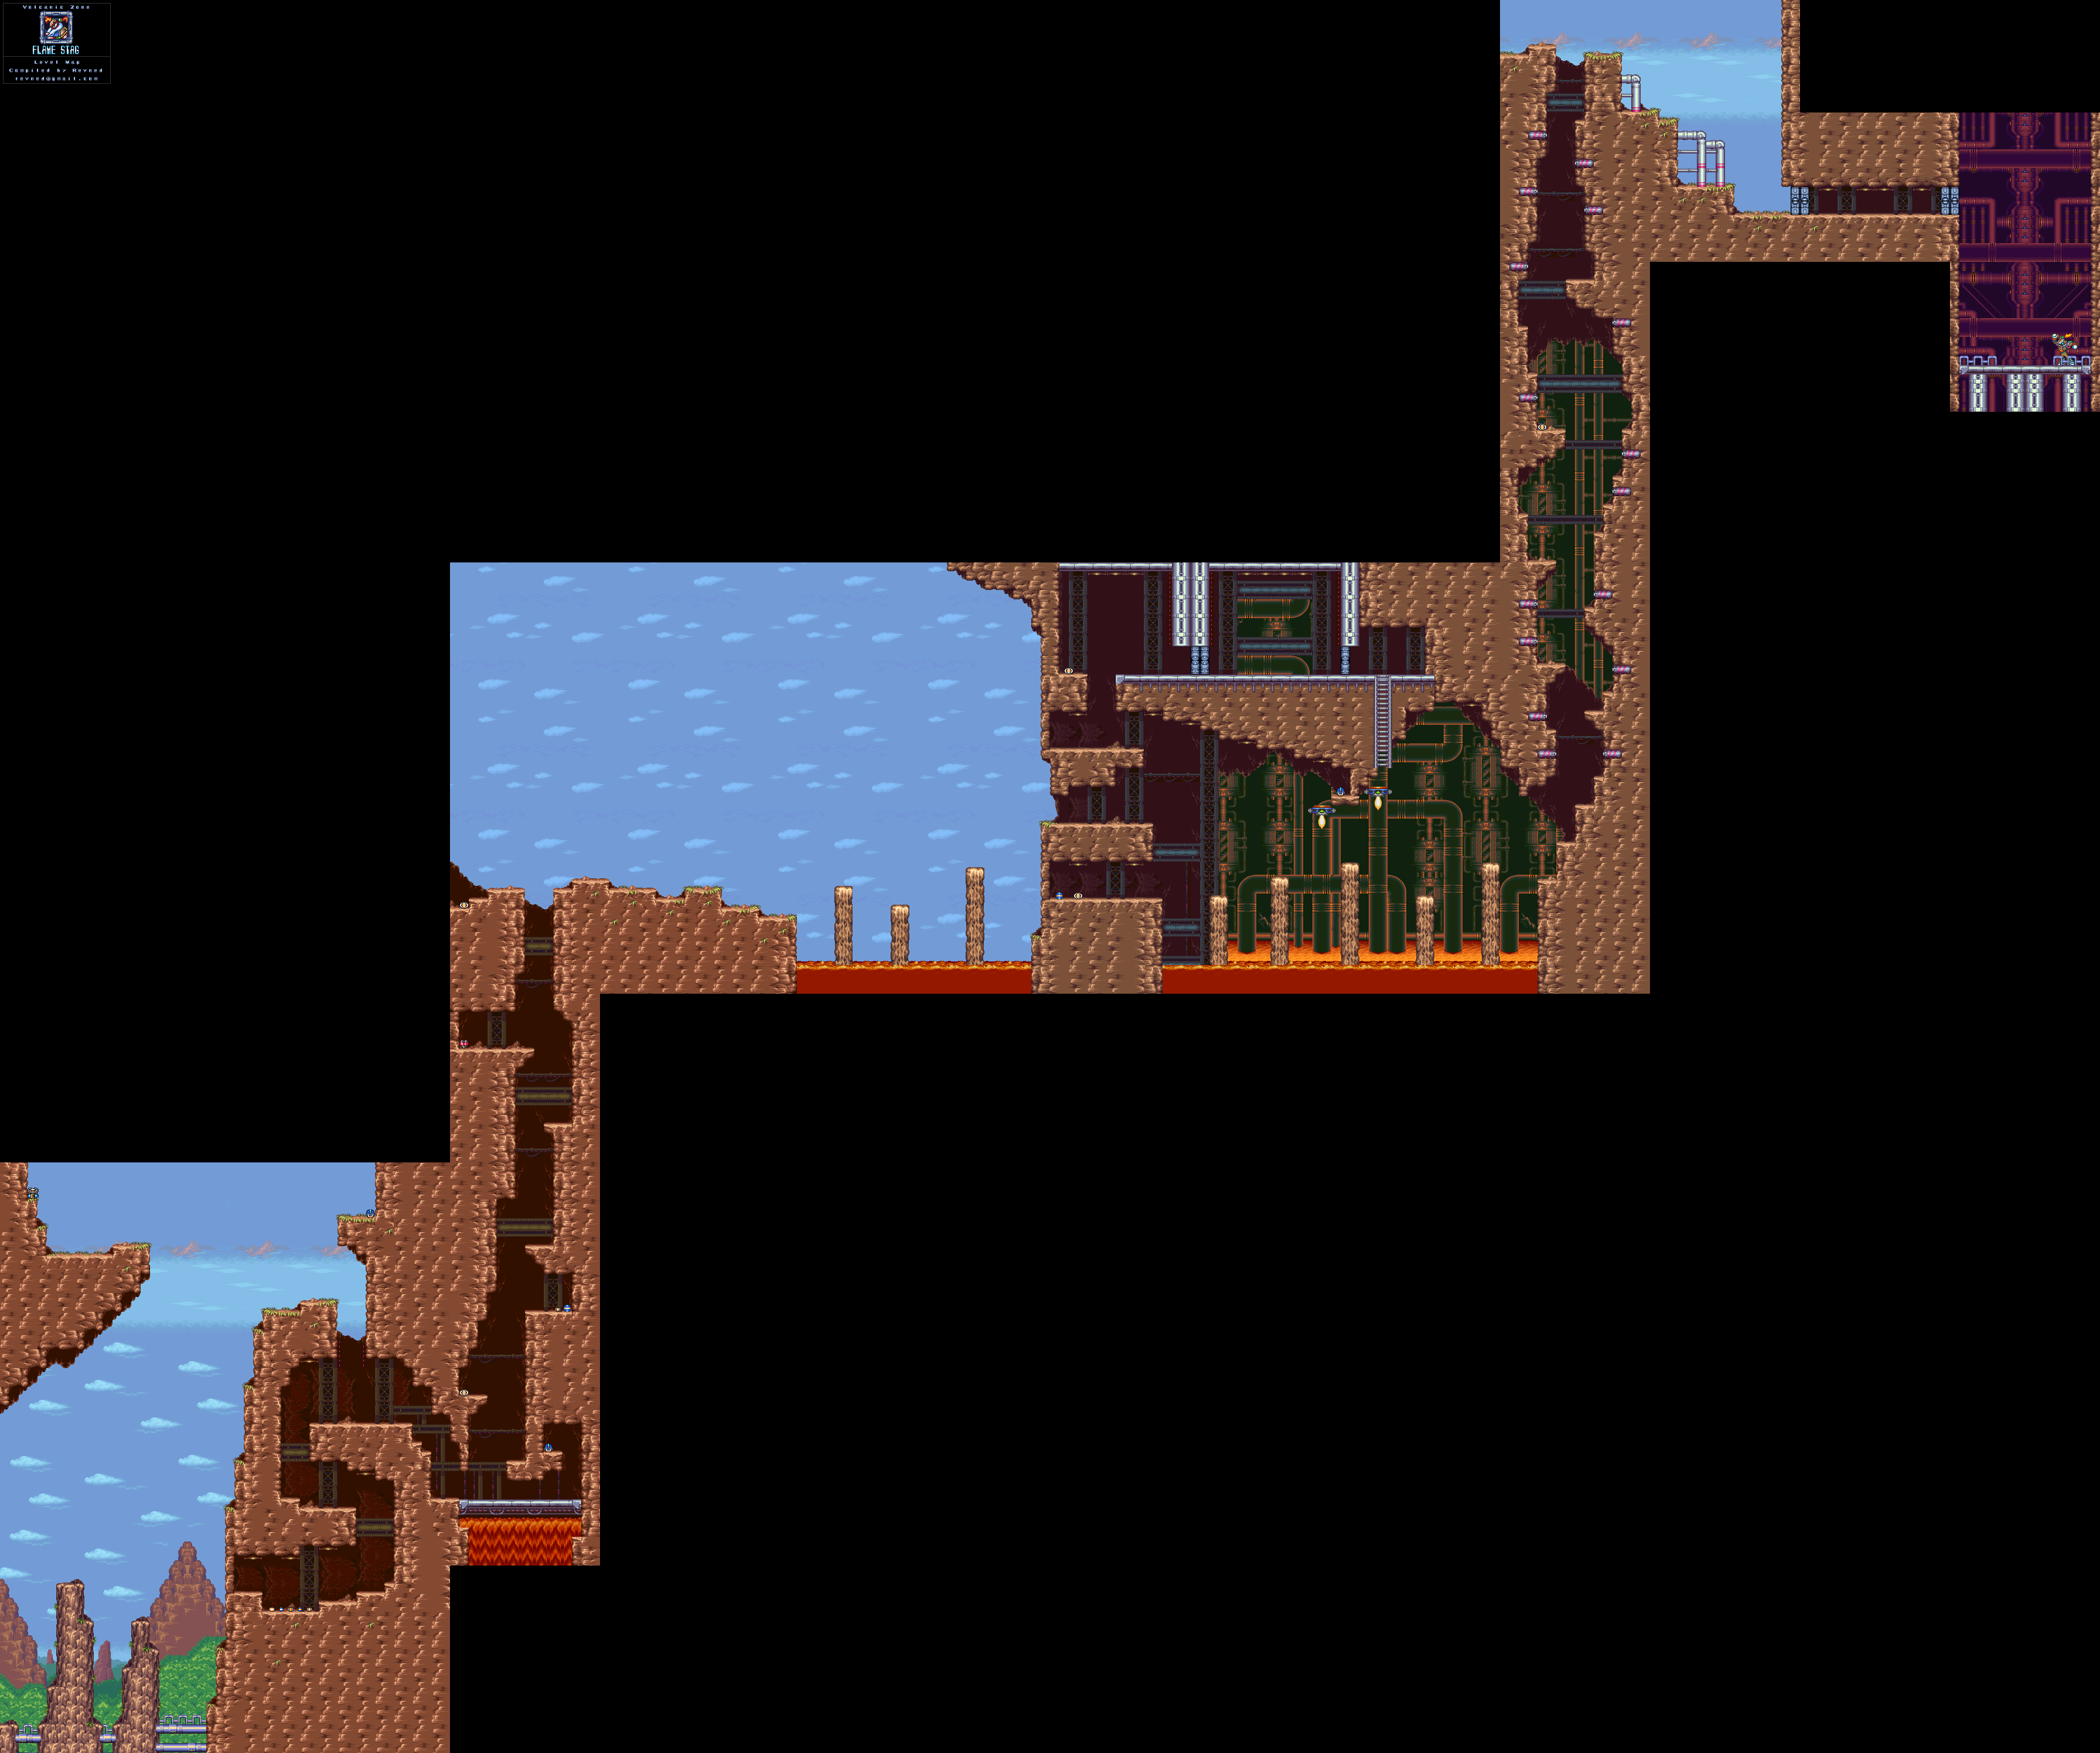
Flame Stag (continued)
Once you make it away from that volcanic eruption waiting to happen, you'll be able to continue to the right. If you even do so much as do a wall kick on the column-like platforms, you'll cause them to sink into the lava with a mighty quake.
The vertical shaft with the pipes with the pink stripes in the walls may seem harmless at first, but the lizards that walk down the walls and glide their way down turn the fumes into the flames if they're not trying to hit you with three-way shots.
If you're wondering why the area where you fight Flame Stag is huge, well, that's because Flame Stag will wall jump to you until he hits you. You're going to be moving around quite a bit as you fight him.
Do you have the Bubble Splash? If you do, just shoot him with it and jump over the fireball he throws before shooting him again. It won't take long at all to get him in a loop like this and get rid of him very, very easily.
Beating Flame Stag will give you the Speed Burner - a much larger version of Flame Stag's fireball that quickly travels across the screen. Powering it up lets you rocket forward, much like on Flame Stag's regular attacks.
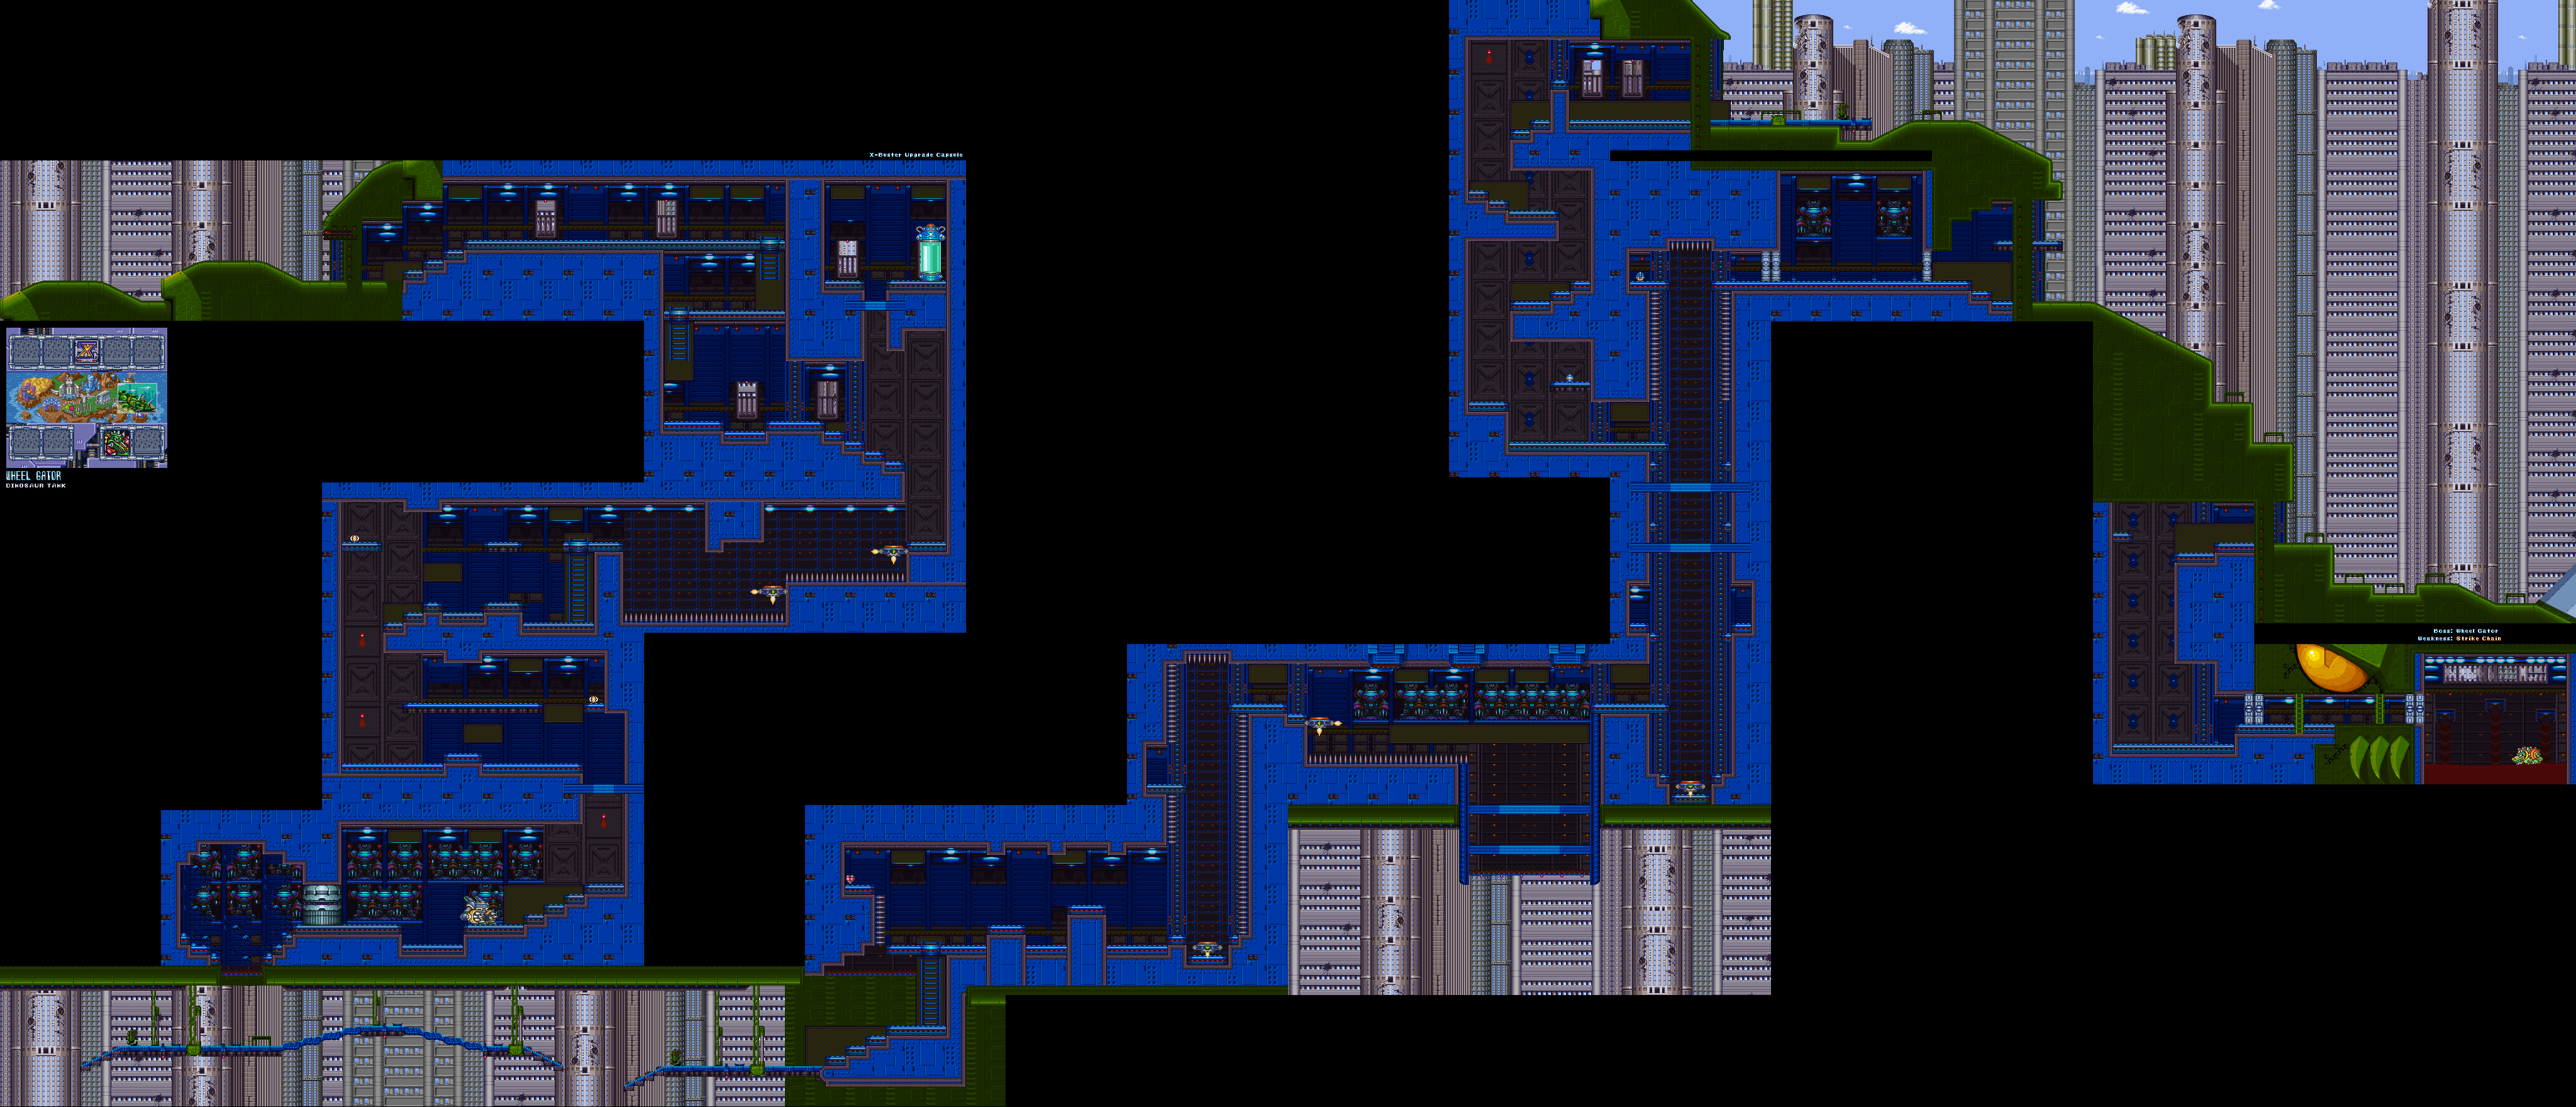
Wheel Gator
You will need the X-Buster upgrade for this.
Head back to where the Heart Tank is. It's that spiked wall to the left of the top of a ladder shortly after the beginning. Jump to the platform to the right, then charge up your newly-acquired Speed Burner and leap to the left before releasing Y. If you do it right, you'll rocket all the way to the Heart and get over the spikes to acquire the Heart Tank.
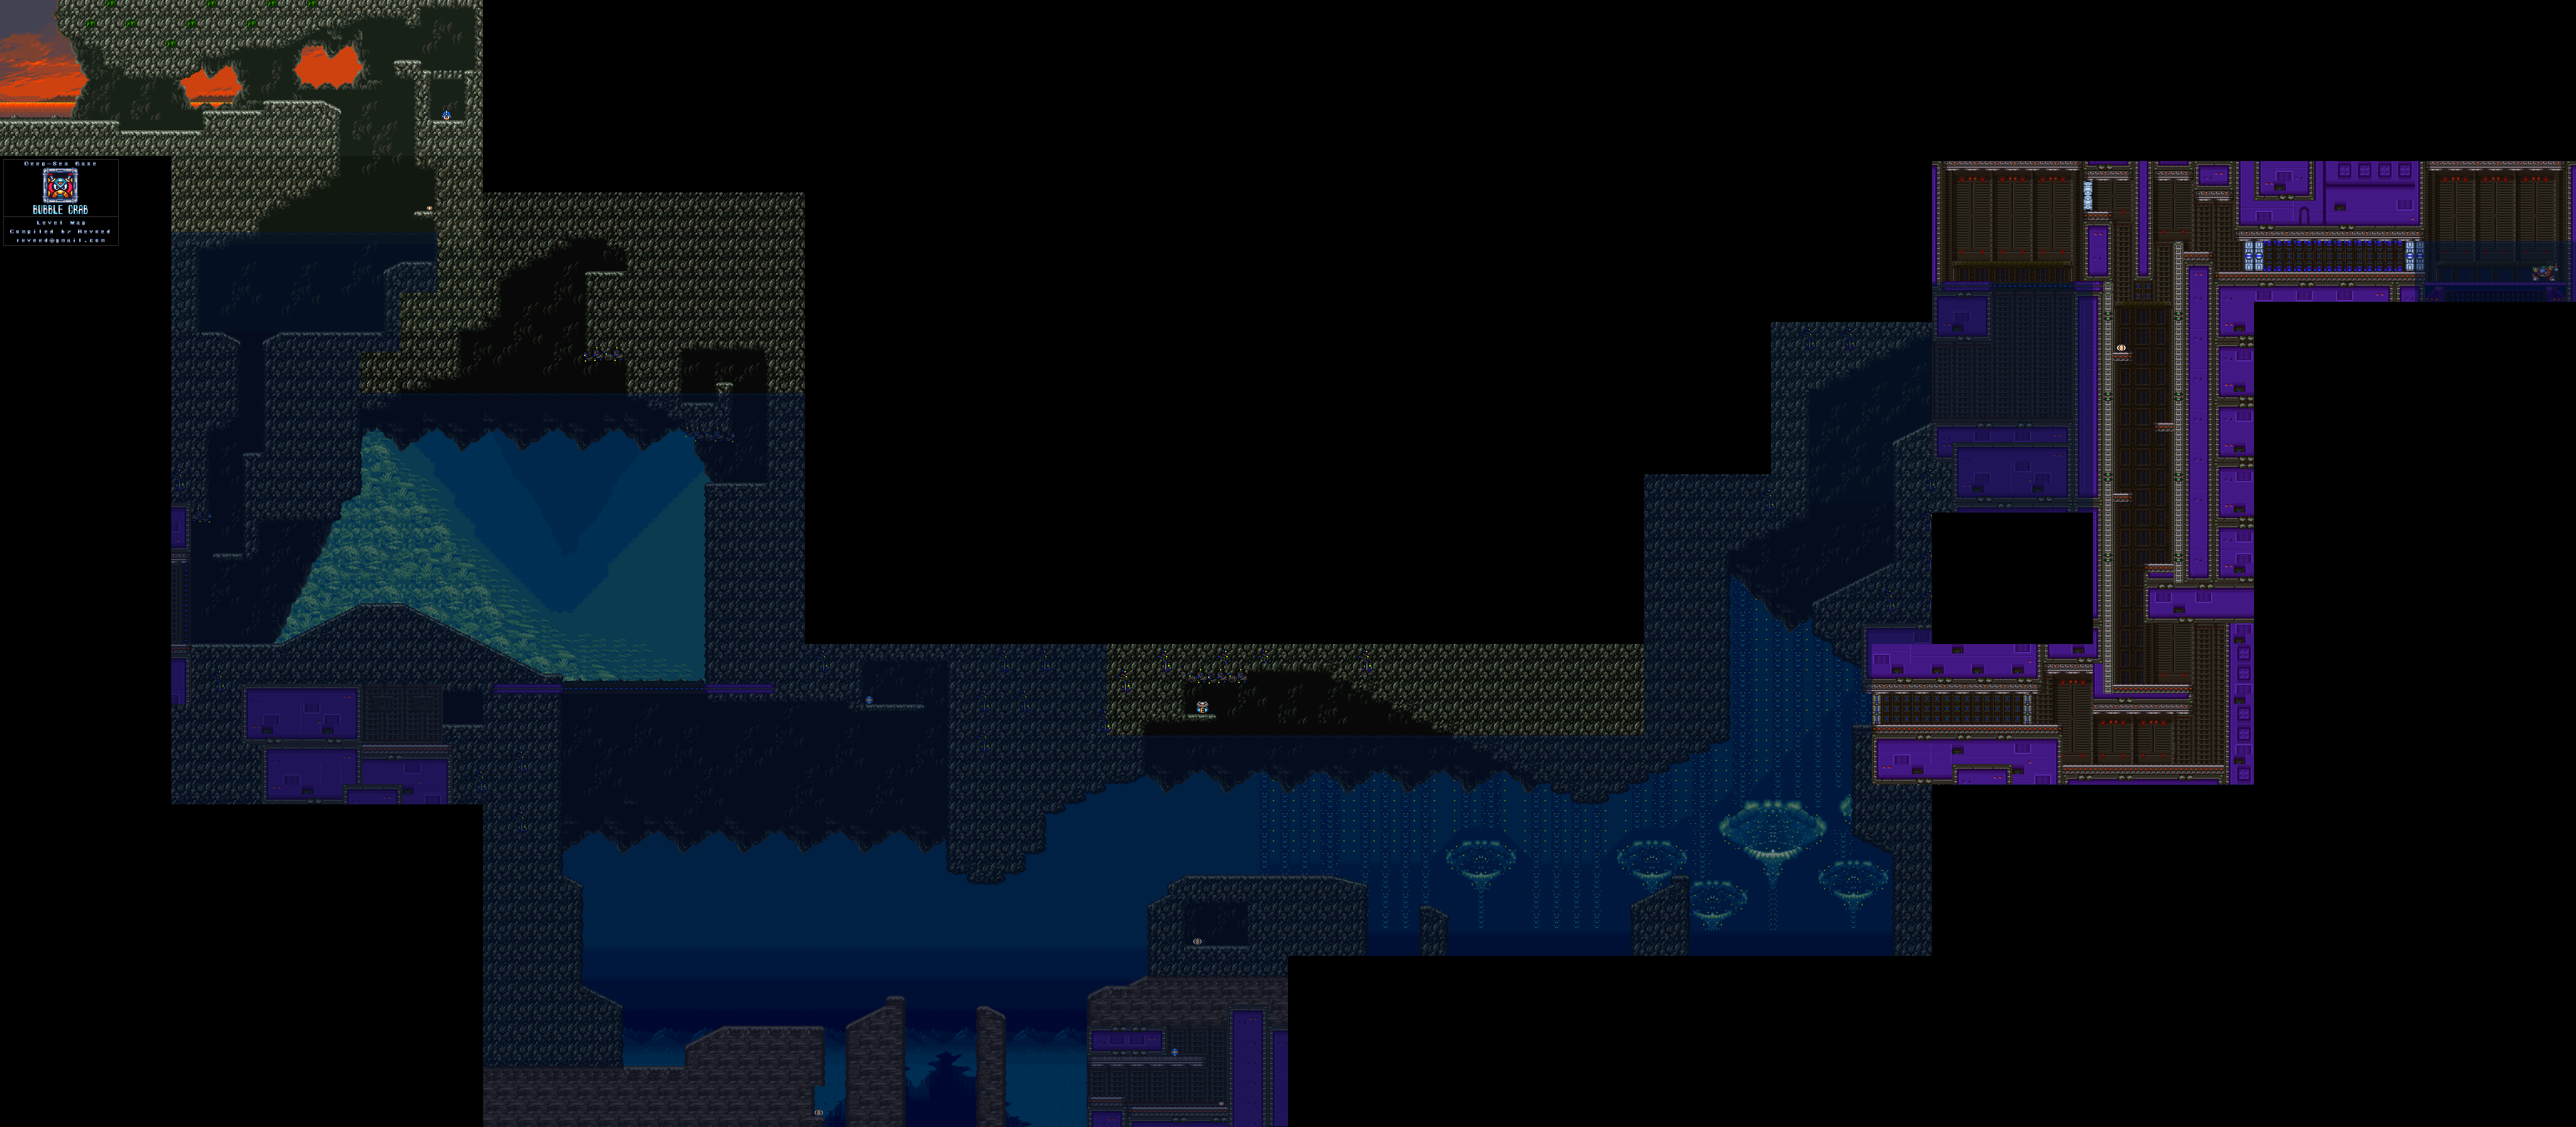
Bubble Crab
You will need the X-Buster upgrade for these.
Make your way through the stage until you start seeing the columns that make up the undersea colonies in the background. When you do that, charge up Bubble Splash and release the Y button. Bubbles will rotate around you, allowing you to jump even higher in the water. From there, you'll want to get to the surface and keep jumping, so you can double jump on the water. Once you get the hang of it, you'll be able to get the Sub-Tank from this level.
For the Heart Tank, you'l want to head back to the open area where the fish submarine sinks back into door in the ground. Head to the right and charge up Bubble Splash, then use the bubbles to dash to the left and leap to some columns that will act as platforms. From there, it's an easy route to the Heart Tank.
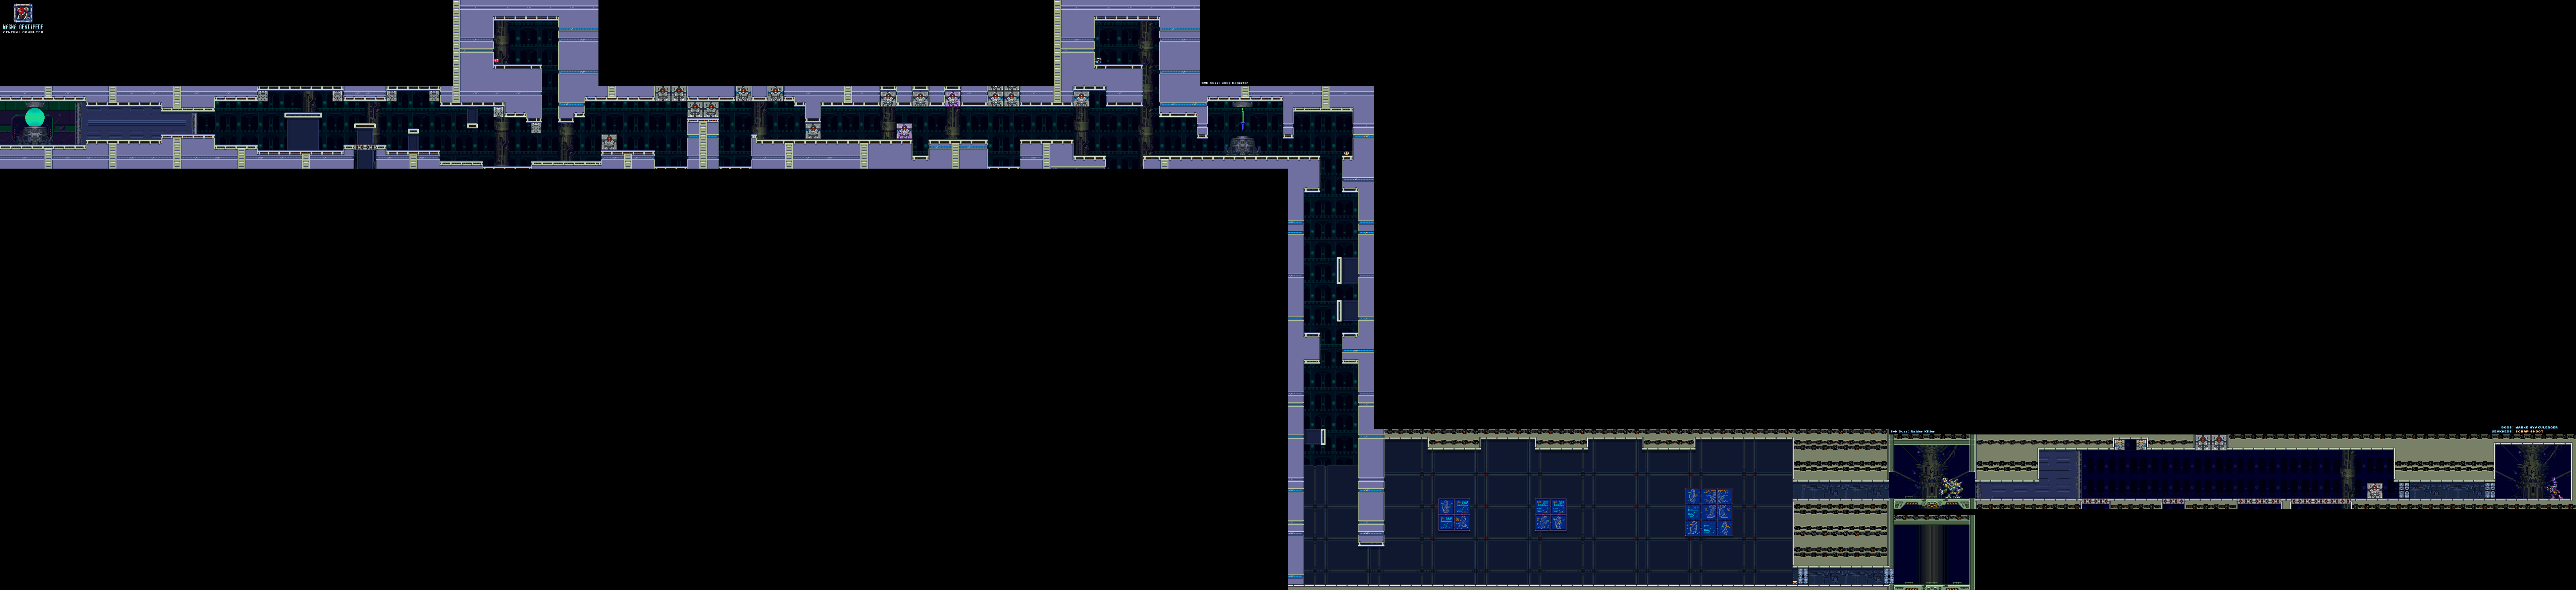
Magna Centipede
The purple robots that fly back and forth are as quick as they are irritating. Hit them with a fully charged X-Buster shot, then shoot them while they're stunned with their shields down.
Avoid the searchlights, too. They cause the grey blocks to come down from the ceiling and shoot at you. If you off-screen them, they'll return back to their normal positions.
There's a passageway leading up shortly after the beginning. You'll need the X-Buster upgrade for this. Charge up the Speed Burner so that you can launch yourself to the grey block to the left of this passage. From there, you can wall jump to the Heart Tank.
You'll also want to do this for the Sub-Tank in this level as well. You're supposed to use the blocks before the passage going upwards just before the mini-boss room, but if you can time it right, it's definitely doable.
Wait for the large grey blocks to stop moving before you continuing. If any of these big blocks are a pale pink, shoot at them to break them. Some of them may also contain power-ups.
The mini-boss is a hologram of a sword. You'll want to hit the handle as it swings back and forth and flies toward you. The blade is completely invulnerable.
After taking out the boss, you'll go down another vertical shaft full of flying robots and searchlights. Then, you'll be dealing with falling rocks that transform into floor segments. If the target reaches X, it will read his data, but it won't shoot at him or anything.
If you can make it to the end in time, you can enter the X-Hunter segment (if you need to). Otherwise, you'll have to take the top path to succeed.
The robot here will jump back and forth and shoot at X. It falls after 11 hits from the Speed Burner. If the target read your data, the robot becomes faster and harder to fight, but it still takes 11 Speed Burner shots to kill it.
From there, you'll have to deal with the blocks that shoot you, falling bridges and the big grey blocks trying to push you into open pits.
No comments:
Post a Comment