Part nostalgia-bomb, part note-taking and part FAQ, what started in GameTrailers as a video game blog is now on Blogger. This blog is a look back at video games, both popular and obscure, from the video game industry's infancy all the way to the previous console generation.
If you want to see that bomb shooting enemy fall to one Magnet Mine, the path below the one that leads to the Shoryuken, Overdrive Ostrich falling to the Crystal Hunter, Wheel Gator falling to the Strike Chain, the battle with Zero and the alternate ending, this is the video for you! Sadly, no Sonic Slicer use against Sigma, but I make Sigma my bitch here compared to the previous video.
If you didn't put Zero back together, you'll have to fight the real Zero. He'll dash around, shoot multiple shots and punch the ground to cause parts of the ground to fly upwards in an attempt to hit you out of the air if you try to dash over him. The X-Buster upgrade is really good here, as you can store two shots and keep one of them if you get hit. Your projectiles from the upgrade's full charge will go through the ones Zero shoots, so take advantage of that.
Also, Zero can destroy the computer in the background with relative ease during his Maverick-induced rage with his ground pound attack, which is actually pretty impressive.
When you nearly kill Zero, Zero will come back to his senses and he will help destroy the computer. You'll still have to drop down and face Sigma as normal.
Interestingly, Zero showed up either way for me, but if you don't have any of the enhancements, Zero doesn't show up in the ending. Weird.
Sigma's back, and he is more dangerous than before...but he is beaten once again.
X-Hunter Fortress - Stage 5
Okay, this is really bizarre.
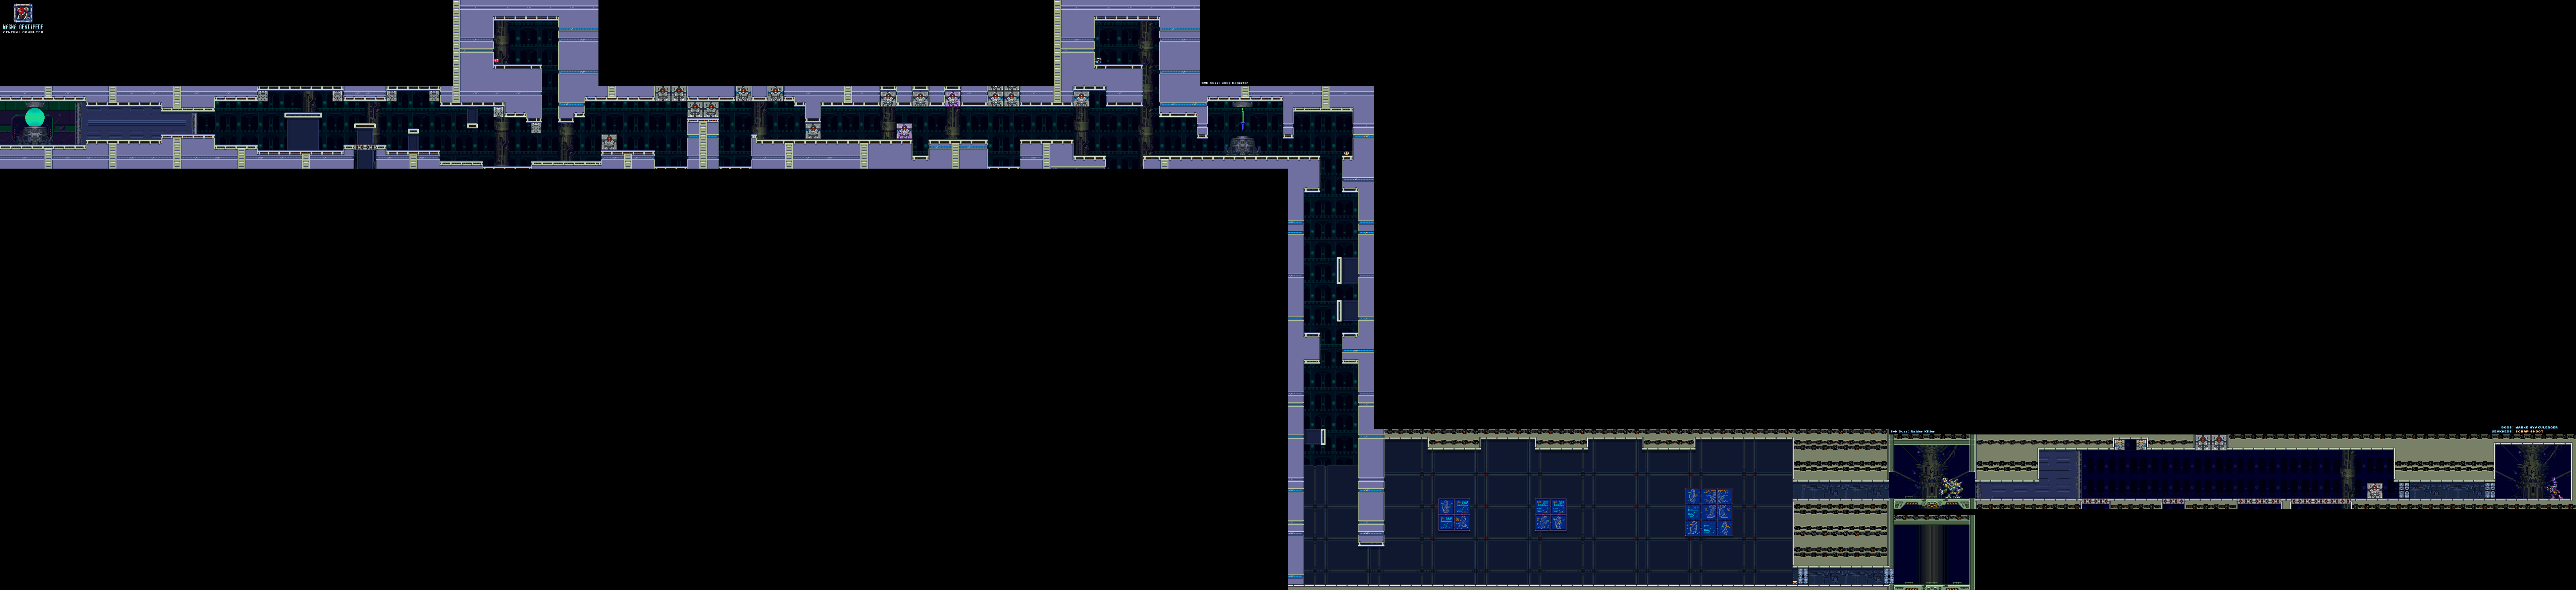
The stage is exactly the same as Magna Centipede's, right down to the spotlights and the traps. The only difference is that the music is from the intro stage.
When you make your way to the mini-boss room where you fought the sword, you meet Sigma...and Zero? Why is Zero here standing next to Sigma? More importantly, why is he gray? (A precursor to Black Zero from Mega Man X4?)
Sigma is about to send this gray Zero at you, but before that can happen, a few powered-up buster shots ring out from behind X and destroy him before anything can even happen. It's the real Zero, and he's back and better than ever! Sigma then mentions that Zero was born to follow him. (This is barely hinted at in this game, but is fleshed out a lot more in subsequent games.) Zero then goes after the main computer and asks you to go after Sigma.
Afterwards, go down the hole Zero makes to meet Sigma again. Claws will come out of knuckles, making it look like Sigma is going through some sort of Wolverine phase. Or something. I dunno.
The Sonic Slicer is his weakness...and you'll want to use it as wisely as possible as you stay on the move. You cannot afford to stay in one spot during this fight as you will get hit.
Anyway, Sigma will leap off the walls before disappearing after the second one. He'll re-converge and drop down where you're at. You'll want to stay away from him at all times as you hit him with the Sonic Slicer. This is especially during his reappearance, because his standing claw swipe will knock you into the wall and then into the ceiling, which can be more aggravating than not.
The five projectiles that Sigma will send at you will track your current positions. They're tough to dodge. Hope you have four full Sub-Tanks.
If Sigma glows yellow once while he stands still, wall jump out of the way immediately, as Sigma is about to shoot out some Hadouken-like projectile of his hands.
When you beat Sigma, he explodes just like the rest of the Mavericks...only for some disembodied, see-through, wire-frame Sigma head to come out of nowhere and immediately aim for X as it twitches around.
Sigma's floating head flies from left to right while frying the ground with eye lasers when it's not flying at you trying to go for a direct hit. It can also spawn blue cubes that can transform into either the birds from the bird-spawning pads, the fish from the Bubble Crab stage or the screwdriver robots. The small enemies may drop power-ups, which makes this a tad easier...but not by much!
The only weapons that will do any damage are the Strike Chain and the fully-charged shots from the X-Buster upgrade. That is it.
Despite having no visible health bar, you can still damage Sigma's disembodied noggin. As a matter of fact, you're supposed to. The head changes from green to blue to purple to orange to red. When he turns red, he starts teleporting around the room. If he gets on top of you, he'll slowly drain your life. When that happens, hit him repeatedly with the Strike Chain.
When you beat Sigma's head, you'll destroy the computer that it came from along with it. Sigma will tell you that Zero is the last of "the doctor's" creations. (This also gets fleshed out somewhat as the series progresses.)
X and Zero (if you saved him) watch the sun rise and X questions his destiny yet again, then X rides away on a jet bike as the enemy roll call runs. Then, Zero shows up on the "Thank you for playing!" screen and does his triple shot before standing there. If you saved Zero, the real Zero shows up. If you didn't, it's the black Zero. (Why it works that way, I'll never know.)
Everything's all good and everything...then you reach the platform. We've seen the platform here before, but in order to get where you need to go, you need to jump and quickly orientate the platform so that the green triangle in the center is pointing where you want it to go. The directions go right, down, left and up. It goes clockwise as you keep jumping on it, so you'll have to time your jumps and do them quickly if you want to get anywhere in one piece.
When you make it to the top of that shaft that requires the flying platform, you'll see two ladders - one leading up and one leading down. Lure the two bats towards you and hit one of them with the Crystal Hunter. Use the crystallized bat as a platform to the ladder leading up. You'll find two large health pick-ups and an extra life, but that's not all!
Keep going right, and charge through the spike pit with the charged-up Speed Burner. Take the wheel enemies out, make a small hop straight up and dash forward. Keep going right. Charge up the Speed Burner to go to the right, then dash to left when you make it past the first part of the winding path full of spikes. Slide down the left wall. You'll enter a hidden room with a capsule. The capsule will only show up if you have nine lives, full health, all enhancements, all of the Zero Parts, all the Heart Tanks and all four sub-tanks filled up. Inside is Ken's Dragon Punch (aka the Shoryuken) from Street Fighter II. It's even used the same way: Forward, Down, Down-Forward, and Y. It can take down a lot of enemies and even make short work of bosses, but it can only be performed if your health is full.
From there, you can drop down and finish the rest of the stage. Use the Crystal Hunter to freeze the bugs in place and use them as platforms to get across the spikes.
Agile will be in a machine of his own when you fight him. He can send out missiles that fly across the room (and into the foreground!) and he also sends out spiked platforms that can hit you when they fall down. When he glows red, he canot be damaged until he stops glowing.
Stay under him when he makes the spiked platforms, and you won't get hit. Thankfully, the spiked platforms are not instant death. As for the missiles, stay out of the air.
The best weapon to use is the Magnet Mine. Charge it up with the X-Buster upgrade, then get up to his level and let loose. The slow-moving energy orb will make quick work of him, and you can take him out in quite a few shots.
X-Hunter Fortress - Stage 4
Climb up the walls and you'll find a teleporter. Step inside and you'll be in a room with eight more. Unlike the last game, the bosses are all in separate rooms much like the classic Mega Man saga.
From upper-left to upper right, the order of the teleporters are: Morph Moth, Wire Sponge, Bubble Crab, Flame Stag, Magma Centipede, Crystal Snail, Overdrive Ostrich, and Wheel Gator. The same strategies apply.
Flame Stag strangely has an alternate color scheme (and blue flames!) when you face him here. Wire Sponge's room is smaller this time around. Magna Centipede's room has a higher ceiling. The area where you fight Overdrive Ostrich in the X-Hunter Fortress is much different compared to where you do it in the actual stage. You have far less room to manuever (and far less area to look at, too).
Oh, and if you still want to refill your energy, the four center platforms at the top have health pick-ups...but they're the small ones. I guess Capcom expected you to come prepared here.
When you beat all of the Mavericks a second time around, Sigma finally shows himself. Well, he speaks to you, anyway. Time to head out of this chamber before it explodes!
We've beaten all the Robot Masters. It's time for the X-Hunter Fortress...
X-Hunter Fortress - Stage 1
This stage is just dead simple. Surem the wall-crusher parts may be a bit non-linear and require you to use the air dash to get to the other side when necessary, but even then you can get through them without much trouble if you know what to do.
You could take the upper path and do all those all jumps as soon as you see it, but not yet. If you need it, go down for a 1-Up and two large energy pick-ups.
The claws will try to force you to use the lower path. The upper path is more effortless, believe it or not.
You'll fight Violen again at the end. There will be two blocks that act as platforms which Violen can change the position of (which is completely random) when he raises his arms. He has the same attack pattern as last time, but thanks to the blocks the mace can be easier to avoid at times. Hit him with Bubble Splash, now that you have all the weapons. It does the most damage.
X-Hunter Fortress - Stage 2
The first half of this stage takes place underwater and uses elements from Bubble Crab's stage.
You'll need to use the wall jump techniques on the floating columns to get past some of the spike pits.
For the spike pit with the two bats, hit the bats with Crystal Hunter so you can dash to the other side. The brown blocks can be removed with the Spin Wheel. You can charge up the Speed Burner to get the 1-Up, but it takes some practice to time that just right and you'll more than likely lose more than one life trying to get it, making going for the extra life rather pointless.
The boss is Serges in a machine. Jump on the platforms, and destroy the laser cannons with Silk Shot or Magnet Mine. Stay on the platforms, as he'll destroy them until two are left as you destroy the laser cannons. From there, get off the platforms and stand on the front of Serge's machine, charge up Sonic Slicer and unleash it on Serges. It'll hit him every time. The fireballs he shoots in his second form split into form, and the four fireballs from the split alternate between cardinal (horizontal and vertical directions) and intermediate (diagonal) directions. Since you're standing on the one safe spot of the machine, he won't be able to even reach you, and the fireballs will barely be able to hit you. Fire away.
Head back to where the Heart Tank is. It's that spiked wall to the left of the top of a ladder shortly after the beginning. Jump to the platform to the right, then charge up your newly-acquired Speed Burner and leap to the left before releasing Y. If you do it right, you'll rocket all the way to the Heart and get over the spikes to acquire the Heart Tank.
The purple robots that fly back and forth are as quick as they are irritating. Hit them with a fully charged X-Buster shot, then shoot them in the center while they're stunned with their shields down.
Avoid the searchlights, too. They cause the grey blocks to come down from the ceiling and shoot at you. If you offscreen them, they'll return back to their normal positions.
There's a passageway leading up shortly after the beginning. You'll need the X-Buster upgrade for this. Charge up the Speed Burner so that you can launch yourself to the grey block to the left of this passage. From there, you can wall jump to the Heart Tank.
You'll also want to do this for the Sub-Tank in this level as well. You're supposed to use the blocks before the passage going upwards just before the mini-boss room, but if you can time it right, it's definitely doable.
Wait for the large grey blocks to stop moving before you continuing. If any of these big blocks are a pale pink, shoot at them to break them. Some of them may also contain power-ups.
The mini-boss is a hologram of a sword. You'll want to hit the handle as it swings back and forth and flies toward you. The blade is completely invulnerable.
After taking out the boss, you'll go down another vertical shaft full of flying robots and searchlights. Then, you'll be dealing with falling rocks that transform into floor segments. If the target reaches X, it will read his data, but it won't shoot at him or anything.
If you can make it to the end in time, you can enter the X-Hunter segment (if you need to). Otherwise, you'll have to take the top path to succeed.
The robot here will jump back and forth and shoot at X. It falls after 11 hits from the Speed Burner. If the target read your data, the robot becomes faster and harder to fight, but it still takes 11 Speed Burner shots to kill it.
From there, you'll have to deal with the blocks that shoot you, falling bridges and the big grey blocks trying to push you into open pits.
Hit Magna Centipede with the Silk Shot so he loses his tail. This will make fighting him much easier, as fighting him the hard way can be somewhat difficult.
Magna Centipede will teleport around the room, leaping around and firing at you. If you hit him with the Silk Shot, he'll lose his tail, which kills his offense a bit. From there, he'll just teleport and jump around. Sometimes he'll teleport and then teleport again, but he'll stay in place for a moment after the second time in such a case.
The Silk Shot fires in an X pattern, so if you know how it fires, you can even hit him while he's on the ceiling.
Beating Magna Centipede will give you the Magnet Mines, which can stick to walls and work...well...like mines. Charging it turns into a powerful orb that slowly moves forward.
The cave cycles through the color spectrum here, which shows just how much of the 16-bit technology Capcom played around with at the time.
Grab the Robot Ride armor, then go to the left and drop down the pit. Do a double jump on the Robot Ride armor, then ditch it at the top of your jump and keep going left. You're supposed to use the Strike Chain to grab onto the wall, but if you can get enough height on the double jump, you won't need it. From there, you can take a platform back.
Grab the Robot Ride again, and keep going right. Watch the icy slopes, as they speed you up dramatically even if you're not dashing. You'll land in a pit of spikes. Punch the blocks to the right, then move to the right as jump out of the Robot Ride. Jump over the pit, then hide in the hole in the ground as the huge icy wall comes apart and slides downward to the left. This will break a third block the Robot Ride can't reach. If you want, you can now get the Robot Ride out of that spike pit and take it with you through the level again.
Above this is the path to the X-Hunter room. You'll need the Robot Ride in order to break the blocks. The columns from the Bubble Crab stage are here, and since they are, I can finally mention what they do. Guess what? They're just platforms that float up and down. Use them to get to the X-Hunter area and fight...whomever, depending on how your game is going, in case you have yet to fight them.
The cave cycles through the color spectrum here, which shows just how much of the 16-bit technology Capcom played around with at the time.
Grab the Robot Ride armor, then go to the left and drop down the pit. Do a double jump on the Robot Ride armor, then ditch it at the top of your jump and keep going left. You're supposed to use the Strike Chain to grab onto the wall, but if you can get enough height on the double jump, you won't need it. From there, you can take a platform back.
Grab the Robot Ride again, and keep going right. Watch the icy slopes, as they speed you up dramatically even if you're not dashing. You'll land in a pit of spikes. Punch the blocks to the right, then move to the right as jump out of the Robot Ride. Jump over the pit, then hide in the hole in the ground as the huge icy wall comes apart and slides downward to the left. This will break a third block the Robot Ride can't reach. If you want, you can now get the Robot Ride out of that spike pit and take it with you through the level again.
If you still have the Robot Ride armor when you take the normal route, you can get some power-ups as well as a 1-Up.
The crystallized robots that stick to the walls shoot lasers that bounce off the walls.
You'll come across a robot encased in a crystal. Shoot at the robot inside and avoid the other robot that flies around that shoots lasers directly at you. The robot will also send out another robot just like the one that fires at you, but if you charge up all your X-Buster shots while fighting this thing and focus solely on the robot in the crystal (the two that fly around are indestructible), you should be okay.
Run down the slope to avoid that huge crystal wall that comes at you from behind, but don't forget to slide down the wall after that to get the helmet upgrade. This lets you find secret object and hidden rooms easily.
You may notice a ladder leading to an empty room near the end. Climb up to it and charge up the Silk Shot. You'll cause several large weapon pick-ups to appear. There are a few empty rooms in the game that allow you to do something like this.
You'll have to go back to avoid the crystal walls that slide at you past that point.
When Crystal Snail stops spinning around and stands in place, he's vulnerable. Hit him with a Magnet Mine, then put another mine on the wall while he's stunned. Jump over him when he rushes at you, and avoid him as he returns to his shell. This will let you cause some major damage.
Crystal Snail's main attack is the ability to slow down time. That's not lag you're seeing. X is actually slowed down, which makes avoiding Crystal Snail difficult at times. Just keep hitting him every chance you get, and he won't be able to use it often.
Beating Crystal Snail gives you the Crystal Hunter. It encases enemies in crystal, and you can then use the enemies like platforms. Charging it up lets you slow down everything around you, much like Crystal Snail did.
When you beat all of the Mavericks, you'll know the location of the X-Hunters base thanks to Dr. Cain. We won't be going there just yet, though. We still have a few more things to find.
Use the Crystal Hunter on the first shield robot in the level. Use him as a platform to leap to the wall to the right. You'll get a 1-Up and a Heart Tank for you efforts.
The green robots that fly around here drop bombs that turn into path-blocking cacti you have to shoot out of existence when they hit the ground and also try to fly into you. Some of them also shoot out blue bombs that turn into dragonflies that fly at you.
Wire Sponge will try to jump and swing around the room, but if you have the Sonic Slicer, you can put an end to any of his attacks immediately. The best thing about the Sonic Slicer is that it can bounce off walls, so if you miss, it can keep going up to the ceiling as it bounces off the walls. You can tag Wire Sponge from behind with it!
Wire Sponge can shoot seeds that turn into plants that can block your path. He can also launch himself into the wall at you with his Strike Chains, and he can power up and shoot bolts of lightning around him. Keep away from him and keep hitting him in the head with the Sonic Slicer as necessary and you should be fine.
If you finish off Wire Sponge with the Sonic Slicer, he gets sliced in half as he explodes.
Beating Wire Sponge gives you the Strike Chain. It lets you grab onto walls much like Wire Sponge's version can.
Copying and pasting here, since I do explain some stuff again here as I've gotten the collectibles here.
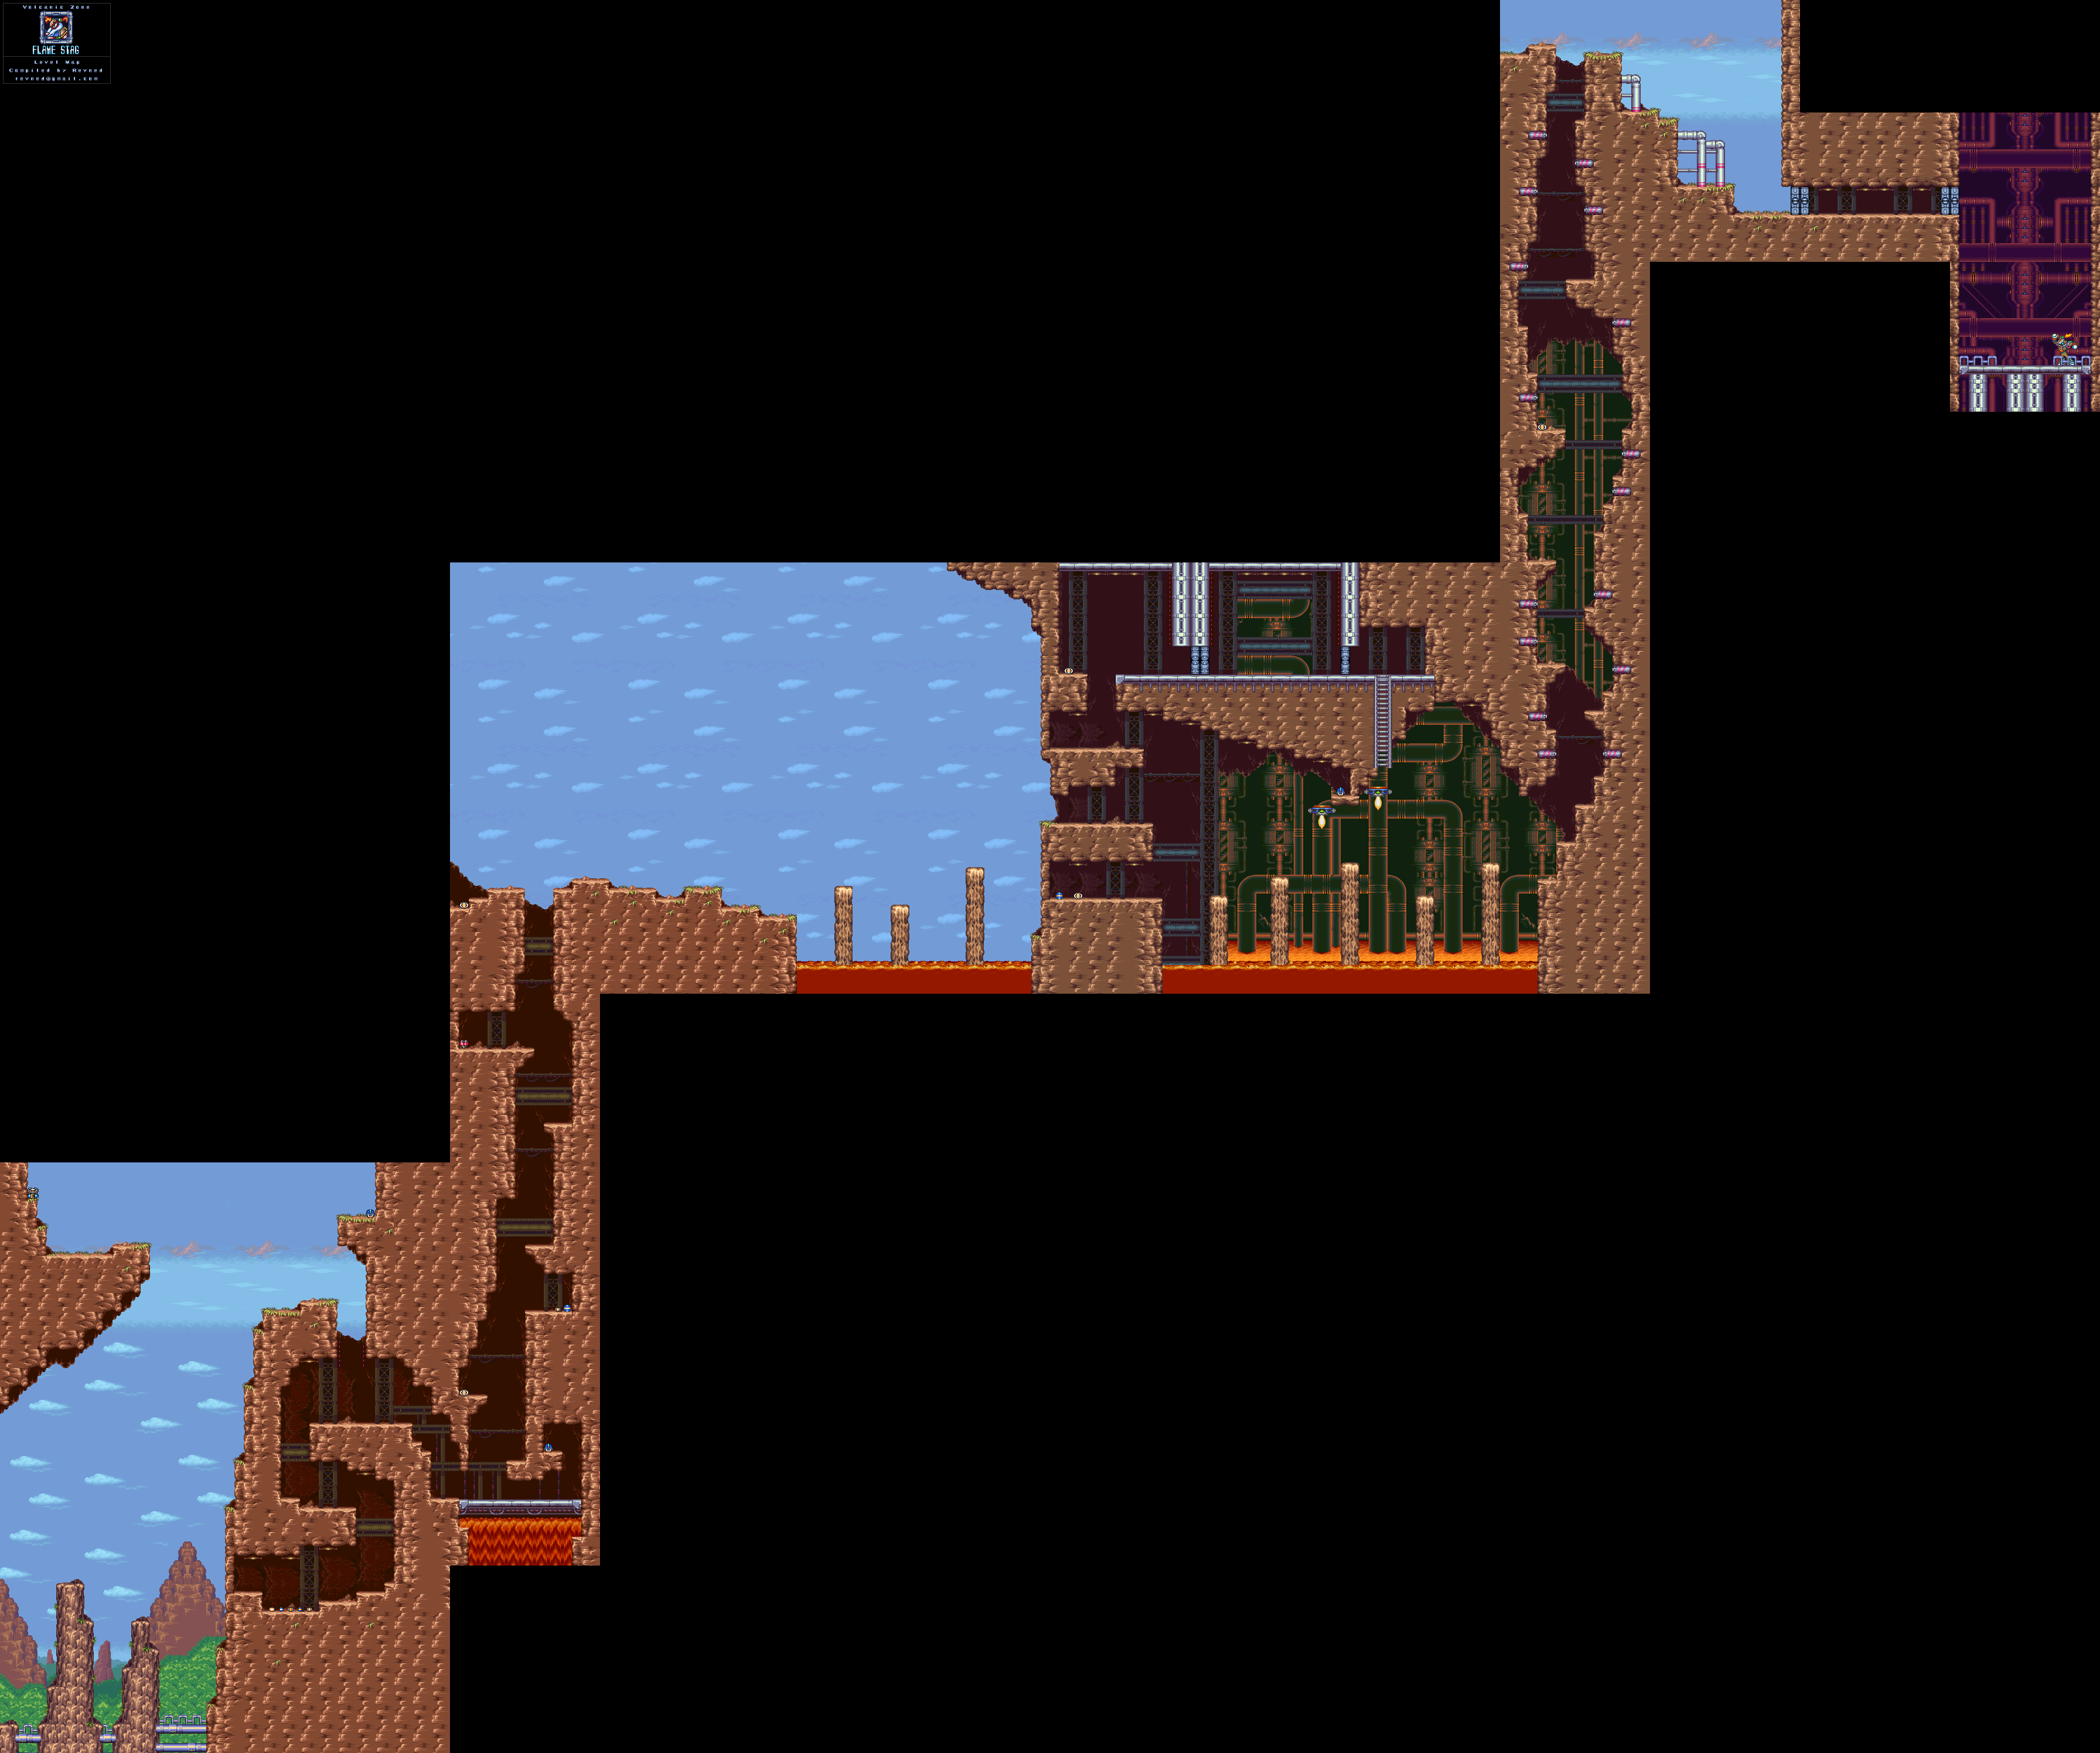
To take care of that stag beetle robot, just have it plow into the wall where you're supposed to go. This wall will block the path to the rest of the level. If you can lure it upwards, though, you'll be able to access a 1-Up as well as a Sub-Tank. To do that, lure the stag beetle robot to the right, then stand on the flat part of its head. It will take you up to some platforms that you couldn't normally access. There you go. If you go low, however, the stag beetle robot will break the wall when lined up to it, then explode.
You'll then be in a race against the lava in an upward climb. If you're quick, you can get rid of the wall robot that blocks your path and get the Heart Tank behind it.
Once you make it away from that volcanic eruption waiting to happen, you'll be able to continue to the right. If you even do so much as do a wall kick on the column-like platforms, you'll cause them to sink into the lava with a mighty quake.
The vertical shaft with the pipes with the pink stripes in the walls may seem harmless at first, but the lizards that walk down the walls and glide their way down turn the fumes into the flames if they're not trying to hit you with three-way shots.
If you're wondering why the area where you fight Flame Stag is huge, well, that's because Flame Stag will wall jump to you until he hits you. You're going to be moving around quite a bit as you fight him.
Do you have the Bubble Splash? If you do, just shoot him with it and jump over the fireball he throws before shooting him again. It won't take long at all to get him in a loop like this and get rid of him very, very easily.
Beating Flame Stag will give you the Speed Burner - a much larger version of Flame Stag's fireball that quickly travels across the screen. Powering it up lets you rocket forward, much like on Flame Stag's regular attacks.
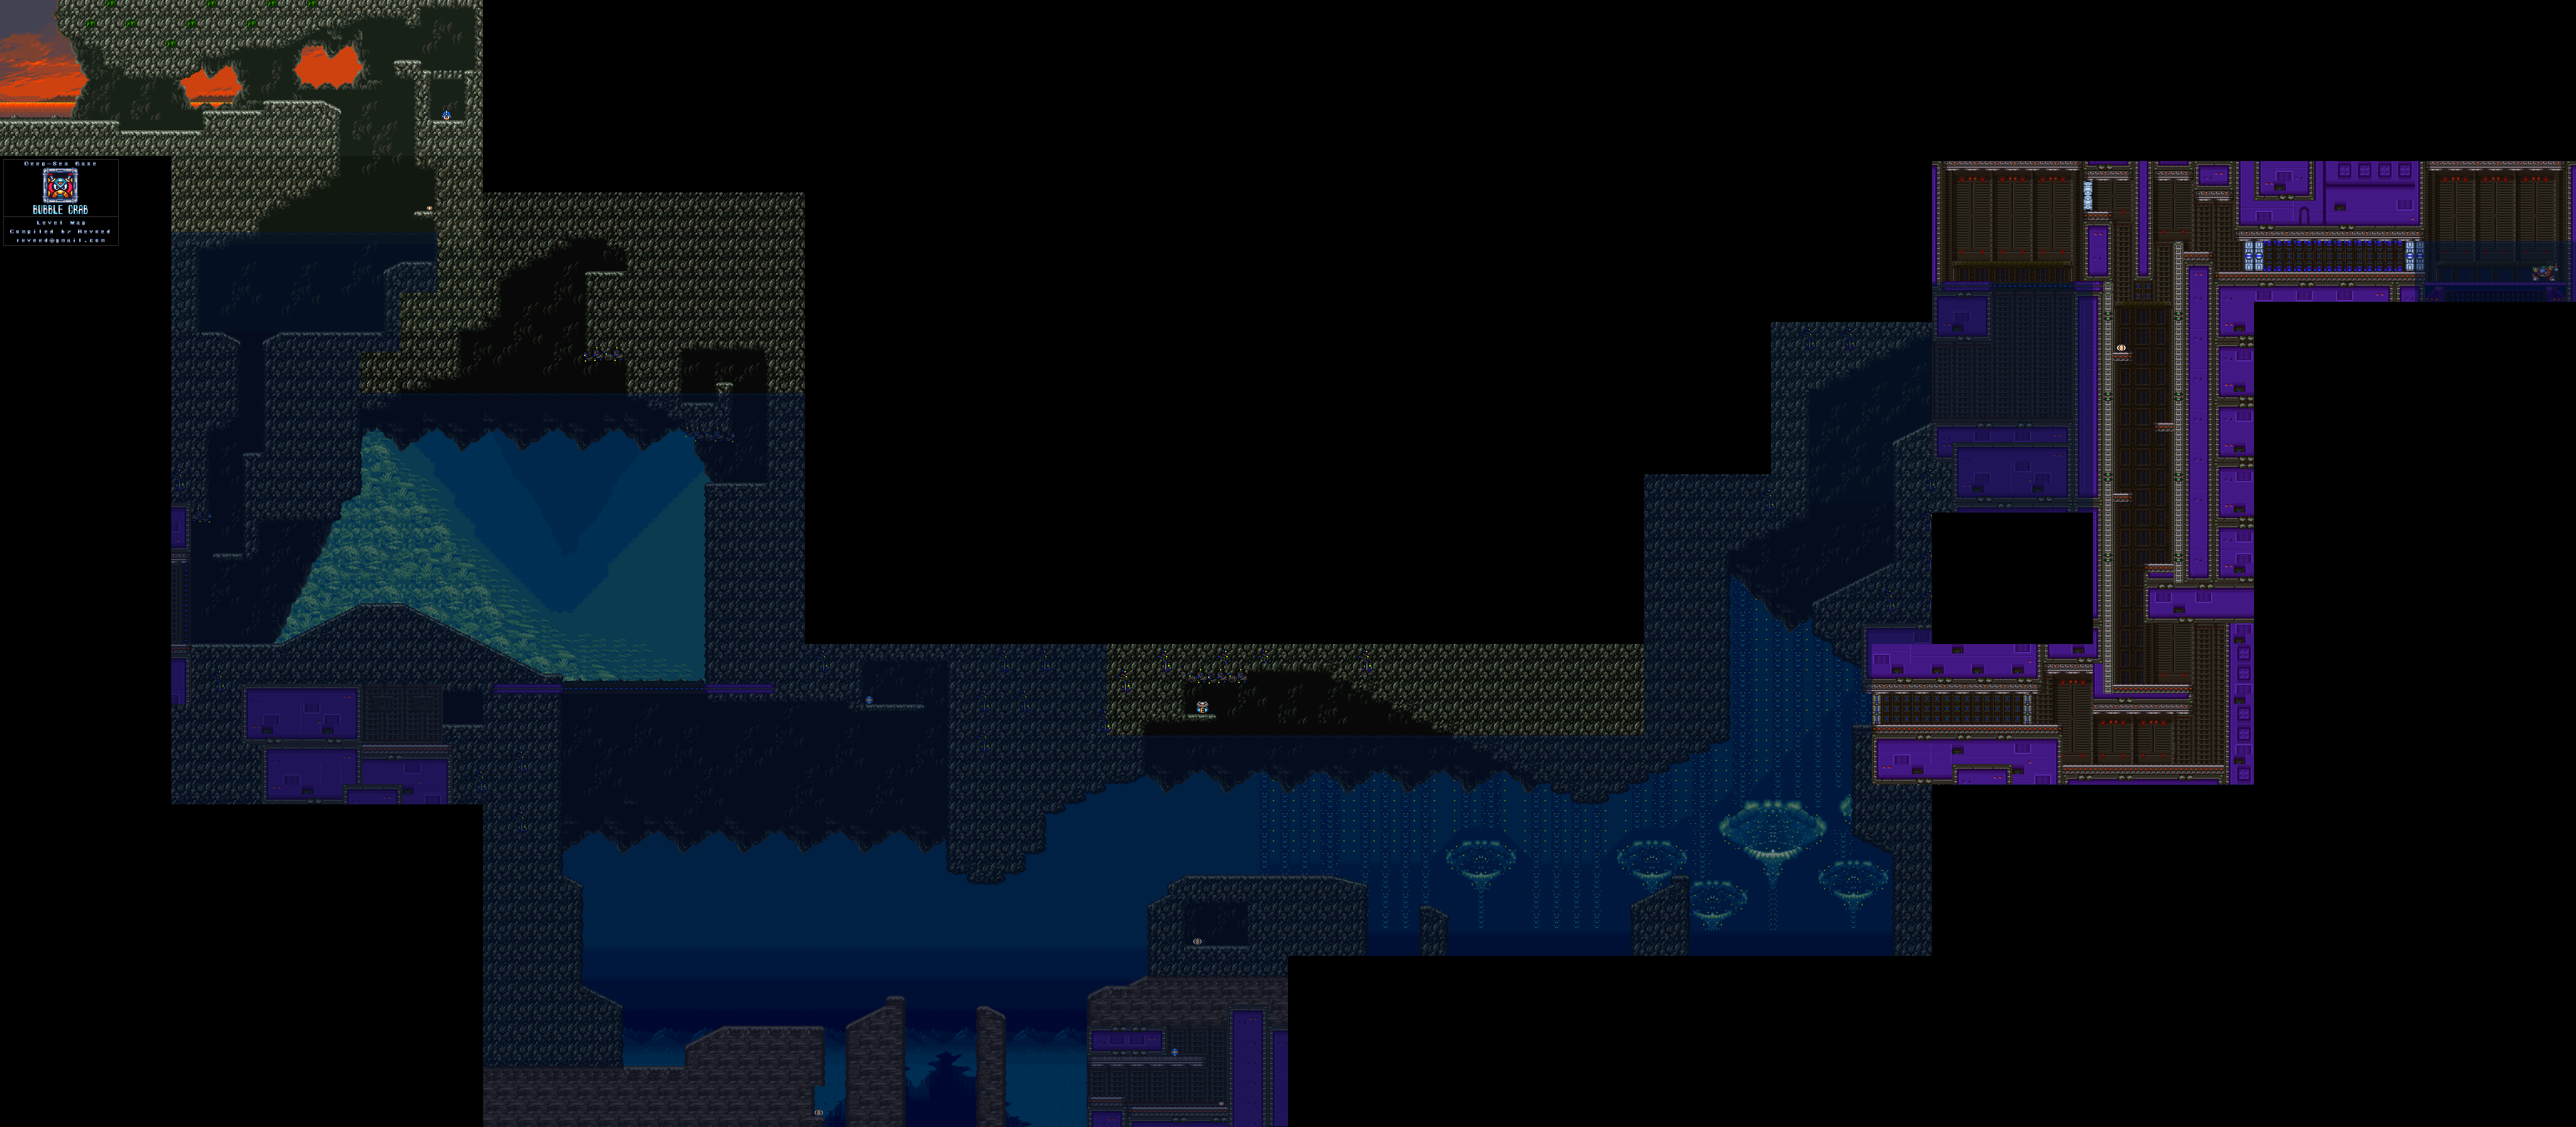
Make your way through the stage until you start seeing the columns that make up the undersea colonies in the background. When you do that, charge up Bubble Splash and release the Y button. Bubbles will rotate around you, allowing you to jump even higher in the water. From there, you'll want to get to the surface and keep jumping, so you can double jump on the water. Once you get the hang of it, you'll be able to get the Sub-Tank from this level.
For the Heart Tank, you'll want to head back to the open area where the fish submarine sinks back into door in the ground. Head to the right and charge up Bubble Splash, then use the bubbles to dash to the left and leap to some columns that will act as platforms. From there, it's an easy route to the Heart Tank.
The floating robots will fire at you if you shoot them down, leaving their heads intact. They can also come down and fight you on the ground if you let them.
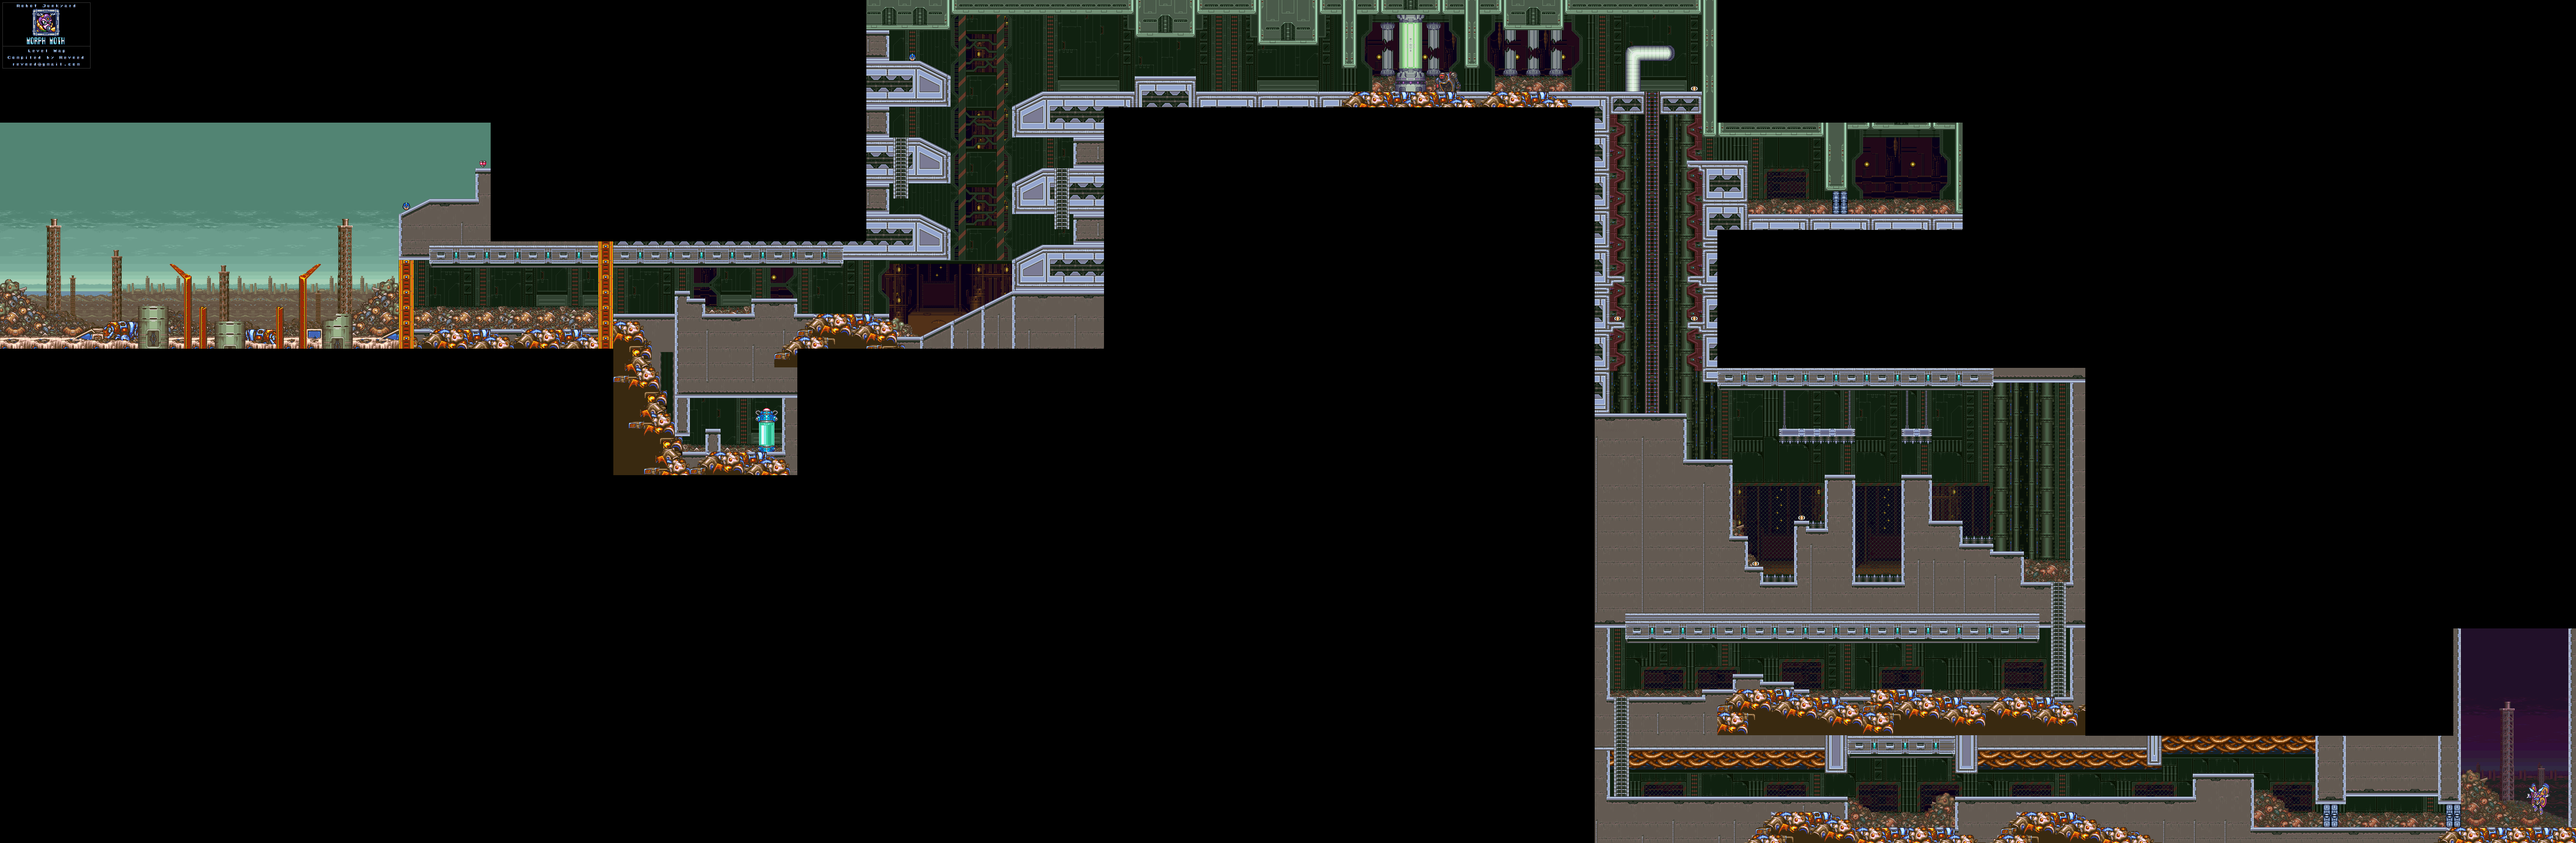
There will be junk being sucked towards the ceiling that will get in your way shortly after the beginning, but you can shoot it down with the X-Buster. It also allows you to make some low gravity jumps.
Right after this, you'll want to use the Spin Wheel and fire it at the ground. You'll open up a hidden passage in the floor that leaves to the Body Armor capsule. Just like last game, this lets you cut the amount of damage you take from attacks considerably. It also has a new feature: the Giga Crush. Damage you take is changed into an explosive weapon energy that can be used only once but can destroy everything on the screen when the energy for Giga Crush is full.
The wheels with heads are pretty slow. They're easy pickings.
You'll then meet some sort of insect robot that will leap out of a capsule and take control of a nearby junked robot. Shoot at the torso while avoiding the robot's jumping attacks, then take out the insect that jumps out when you finish the robot off. Yet another easy enemy. It shows up in green as a regular enemy, but if you don't finish off this pink version in time, it will reinsert itself into the robot and you'll have to deal with fighting the robots again.
You'll soon climb down a ladder dealing with more of those shield robots, and you'll also be able to get two large health pick-ups. You'll then deal with more junk and (if you take the top route) dragonflies that will charge at you in mid-air. Keep your X-Buster charged up and you should be able to take care of the dragonflies without incident. If they touch you, they latch on to you and make X move and do things on his own until they let go. To make them let go, just move your thumb all over the Control Pad.
If you go to the right past the first shield robot on the climb down, you'll be able to enter an X-Hunter room. In my case, I fight Serges here. Serges rides back and forth on a platform. Sometimes he'll somersault and shoot all over the room. You can dash under him while jumping over the platform when he's in the air if you need to. The platform will also drop mines. If there are too many on the ground, take them out with fully-charged X Buster shots or the Spin Wheel (if you have the latter). Take him out with fully-charged X-Buster shots whenever the shield at the top of the platform is down. This causes him to fall on his back and respond with the somersault energy blasts, but if you have at least one Sub-Tank, this shouldn't be a tough battle at all.
Beating Serges will give you Zero Part No. 01.
After another low-gravity area (with spikes that don't instantly kill you) and another junked robot (and its bug), you'll take on Morph Moth.
Morph Moth is initially in a cocoon. Shoot at the cocoon with fully charged X-Buster shots, and avoid the junk that he spews out. If the cocoon falls to the ground, stay high and keep air dashing to avoid the junk that shoots up as the cocoon moves back and forth before hanging onto the ceiling again. After you bring him down to a certain amount, the ceiling explodes and you'll actually meet Morph Moth. He'll fly around sprinkling some sort of powder around as he flies all over the room. If you have the Speed Burner from Flame Stag's stage, hit him with it. Otherwise, just use the X-Buster from the other side of the room to keep him from suddenly smacking into you while you're in mid-air. If he stops in the center of the room, stay away so you don't get hit by the beam of light he shoots toward the floor. If he's low enough to the ground, he'll shoot it directly at you instead of shooting it directly downwards, so keep that in mind.
Beating Morph Moth gives you the Silk Shot. This lets you shoot debris at enemies, and if you charge it up in certain spots, you can pull out energy instead of the usual junk.
If you have all three Zero Parts, Dr. Cain will tell you he can bring Zero back, but he will need more time to install the control chip. Even though you can't get Zero back right away, you'll get the good ending nevertheless.
Shortly after the beginning, you'll need the air dash and be just high enough to dash from the right-hand wall to the left and wall jump from there to get the X-Buster upgrade. By getting this upgrade, you can charge up the X-Buster a little longer to shoot two even more powerful shots. You can also charge up your special weapons and fire them to get move powerful versions of your special weapons.
There was one section after the sandstorm generator where you can use the bike to launch yourself into a spike-laden area. When you make it into the next building, take the top path, and keep holding Right and A. You'll get the Heart Tank, but you'll immediately crash into the spiked wall and die from touching the spikes. At least you got the Heart Tank. If you have the Speed Burner, the Air Dash and the X-Buster Upgrade, you can get the Heart Tank without the bike. Again, you'll still die, but you'll still get credit for the Heart Tank.
Wheel Gator
Just going here to show you that if you have the X-Buster upgrade, the very beginning of the stage is the best place to farm for things. Just keep moving in and out where the first bird robot generator is and keep destroying, and you should be able to get everything you need to suit up and continue with the game in minutes.
We take down two Mavericks and two X-Hunters, and we almost beat a third Maverick in the meantime. Due to never having played this game as a kid, this is perhaps the hardest part of the game for me.
Knock the columns in your path over with the X-Buster.
The one-wheeled robots with the spikes move back and forth, while the scorpion robots sit there and shoot at you.
Instead of going down that ladder, use the Spin Wheel on the dirt wall to the right. You'll find a hidden passage that takes you to a battle with Violen, one of the X-Hunters. It looks like he's the powerhouse of the group.
The doors to the X-Hunters look different to the ones that lead you to the Mavericks, so keep that in mind. If you need to find an X-Hunter area in other stages, feel free to hit up the maps. They're there for a reason.
Violen jumps around and shoots downward in mid-air, and sometimes he'll shoot forward to. Both of those shooting attacks have multiple shots that go in their respective directions at an angle, making avoid the shots a little more difficult.
His nastiest attack, however, is the mace attack. The mace comes out rather fast, and Violen will quickly swing it all around the room as he stands there.
Beating Violen will give you Zero Part No. 02.
Now you'll be able to go back and take that ladder down. Go down further and you'll be able to take a jetbike.
Jump on the jetbike. You won't be able to take damage while you're on, so keep shooting the entire time so you can push the barriers down and not crash into a wall. Left and Right let you change direction and manage your speed, Y lets you shoot and A lets you dash to go faster. You'll run into a sandstorm that makes it harder to see, but it's not really all that bad. When you make it into the next building, take the top path. You'll get the Heart Tank, but you'll immediately crash into the spiked wall and die from touching the spikes. At least you got the Heart Tank.
Crash your bike and then head up the wall to the blocks underneath where the Heart Tank was. Destroy the blocks with Spin Wheel and you'll reveal a path to the Air Dash ability, which lets you dash in-mid air and allows you to climb ladders faster. Take it. It'll come in handy later.
After this, you can head out of here and continue normally. When you reach the rocket, X will automatically destroy it. You'll be back in the desert, and you'll take on Overdrive Ostrich.
Overdrive Ostrich will leap around. You'll want to be under him when he jumps, and that's easier to do when he's going downhill. If he's going up hill, stay away from him until you reach a downward slope and quickly position yourself so that he'll jump right over you, as it is easier for him to hit you while going up a slope. All the while, he mixes it up with two attacks: one where he fires a Sonic Slicer wave out out of his mouth and another where he fires one upwards that turns into four bigger Sonic Slicers that come down around where he fired it.
Sometimes Overdrive Ostrich will run away and run through the background. When he stops, he's going to leap back to where you are. Avoid him and carry on with the battle.
He's also easy to beat with the X-Buster (preferably if you have the upgrade for it), but the Crystal Hunter from Crystal Snail's stage does the most damage.
Beating Overdrive Ostrich gives you the Sonic Slicer. It works much like the boss's regular mouth shot. Powering it up works much like Overdrive Ostrich's other attack - four Sonic Slices come down from above.
You won't believe where the Heart Tank is. As a matter of fact, it's probably the easiest thing in the game to miss. Wall jump up the left wall at the beginning and you'll find it. That's all. Really.
You can change the weather here with the weather control orbs if you hit them with specific weapons. If everything has a yellowish hue, that means it's humid. If that happens, the frog enemies that just leap forward and shoot at you will immediately fry from the heat and die when on-screen. If it gets dark, it will start raining. Remember the rain from the Toad Man stage in [i]Mega Man 4[/i]? If it rains here, prepare to be blown back while in the air...again. If you have the Crystal Hunter, you can create foggy weather.
At the second orb, go up and take the top path. Go right to find some cool stuff, such as an extra life and one of the four Sub-Tanks! Now you have a portable energy tank! At last! To fill it up, fill your health all the way up, then collect health-pickups. They'll instantly go into your Sub-Tank.
Slide down the wall when you get to where the lifts are, and you'll find the X-Hunters area to the right. (This and the Overdrive Ostrich X-Hunter rooms require something to be accessed, the rest can be found by just exploring and don't require anything. Again, consult the maps.)
From some reason, I face Agile here. Stay on the upper part of the wall to kite him into attacking you. Dash to get under the huge crescent projectiles he shoots out if you're on the ground, and stay away from him as he tries to do a Shoryuken with his sword. If he rushes at you, be ready to wall jump and dash over him. This is easier if you stay on the wall.
To take care of that stag beetle robot, just have it plow into the wall where you're supposed to go. This wall will block the path to the rest of the level. If you can lure it upwards, though, you'll be able to access a 1-Up as well as a Sub-Tank. To do that, lure the stag beetle robot to the right, then stand on the flat part of its head. It will take you up to some platforms that you couldn't normally access. There you go. If you go low, however, the stag beetle robot will break the wall when lined up to it, then explode.
You'll then be in a race against the lava in an upward climb. If you're quick, you can get rid of the wall robot that blocks your path and get the Heart Tank behind it.
Once you make it away from that volcanic eruption waiting to happen, you'll be able to continue to the right. If you even do so much as do a wall kick on the column-like platforms, you'll cause them to sink into the lava with a mighty quake.
The vertical shaft with the pipes with the pink stripes in the walls may seem harmless at first, but the lizards that walk down the walls and glide their way down turn the fumes into the flames if they're not trying to hit you with three-way shots.
If you're wondering why the area where you fight Flame Stag is huge, well, that's because Flame Stag will wall jump to you until he hits you. You're going to be moving around quite a bit as you fight him.
Do you have the Bubble Splash? If you do, just shoot him with it and jump over the fireball he throws before shooting him again. It won't take long at all to get him in a loop like this and get rid of him very, very easily.
Beating Flame Stag will give you the Speed Burner - a much larger version of Flame Stag's fireball that quickly travels across the screen. Powering it up lets you rocket forward, much like on Flame Stag's regular attacks.
X is back! This time around, Sigma has come back with more followers...and he has a few new tricks up his sleeve! Are you ready?
Intro Stage
The first thing you'll be doing as soon as you start playing is shooting at a robot that just stands there as soon as you're shot off of your bike. Usually there's nothing near you, so it's an interesting change of pace to be thrown into the heat of battle (albeit with one enemy) as soon as the game starts. Just jump over the small metal balls he shoots at you as you take him out.
The screwdriver robots just jump around.
The wall robots will block your path. Unless you dash past them, you'll have to shoot them down after they lower. You can dash by either double-tapping forwards on the D-Pad or pressing A. Unlike the first game, you can now do this at the start of the game instead of having to earn it this time around, which also holds true in future games in the series.
Be sure to avoid the enemies inside the "doors" of the assembly line. You'll be able to destroy them after they're fully assembled.
Use the claw to get over the electrified junk pit. To do that, just let it latch on to you, and jump when you reach the other end. Thankfully, the electrified junk pit does not instantly kill you.
The purple flying robot with the extendable arms will try to crush you with the walls. Thankfully, it's pretty easy to get past it. It flies away when the walls below it crush into each other.
You'll soon face a giant purple robot with its own health meter. Yep, we got a boss. Avoid the spiked balls it has for fists and shoot at its head with fully-charged X-Buster shots. It'll go down in no time!
After beating this robot, three men named Violen, Serges and Agile watch Mega Man X from the shadows in an undisclosed location. The Mavericks will hopefully keep X busy for them to prepare to take down X themselves...
You'll then see the password screen. Unlike last time, you have four rows of numbers instead of three, which would also occur in the third game. I guess there's much more to see, do and keep track of in this game.
Well, you have eight Mavericks to choose from again. Compared to the first game, the stage select screen in this one is a lot more streamlined, and the third game would do something like this. This one looks better, though, because of the static effect on the Maverick's pictures.
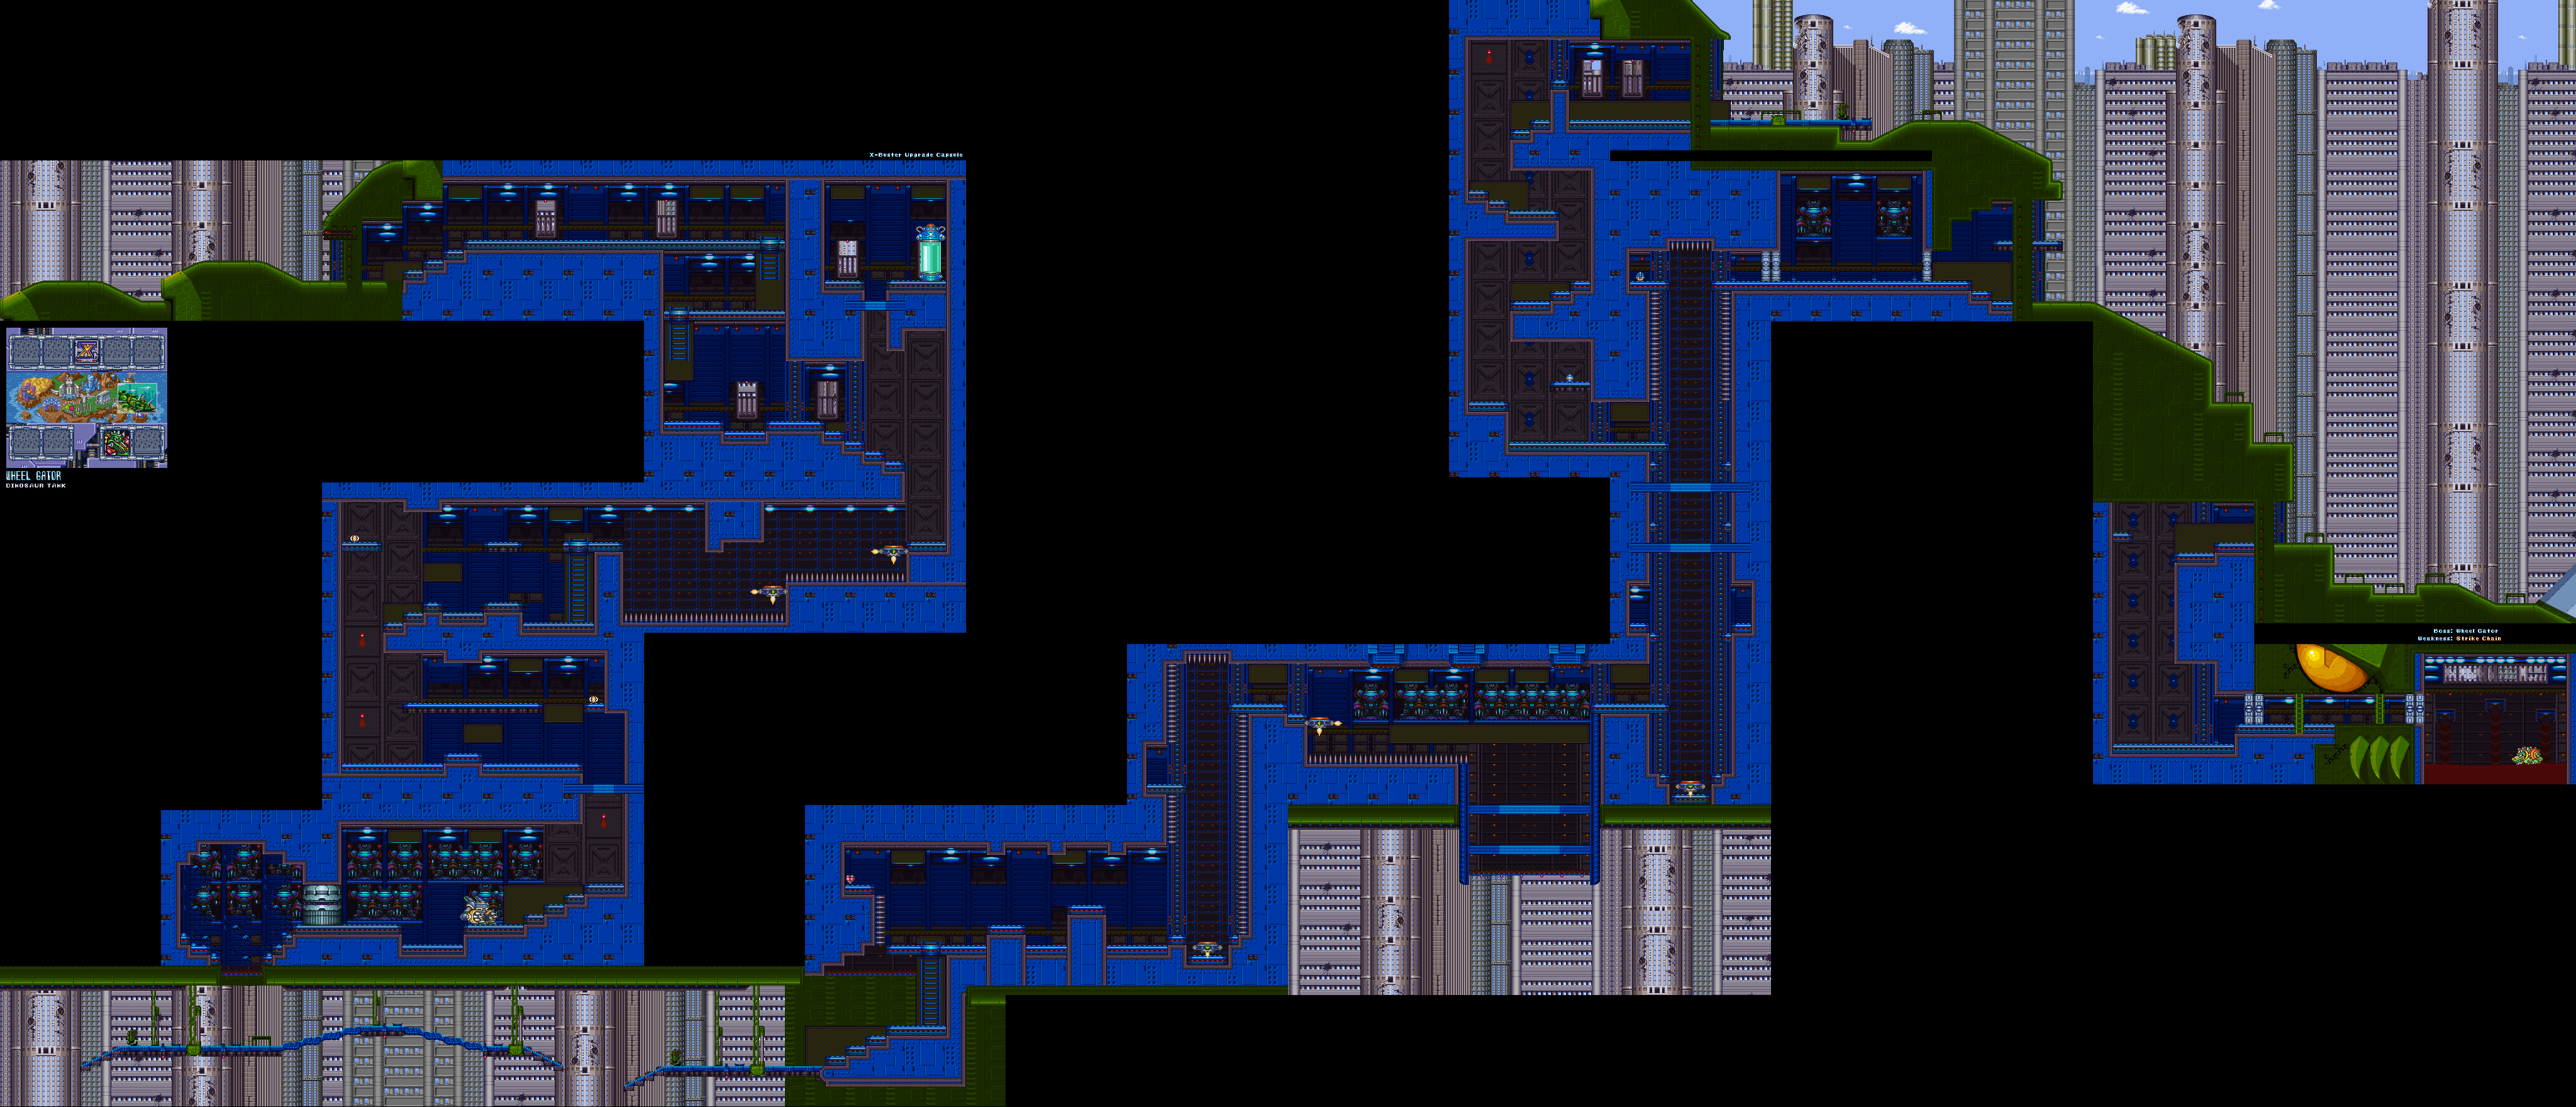
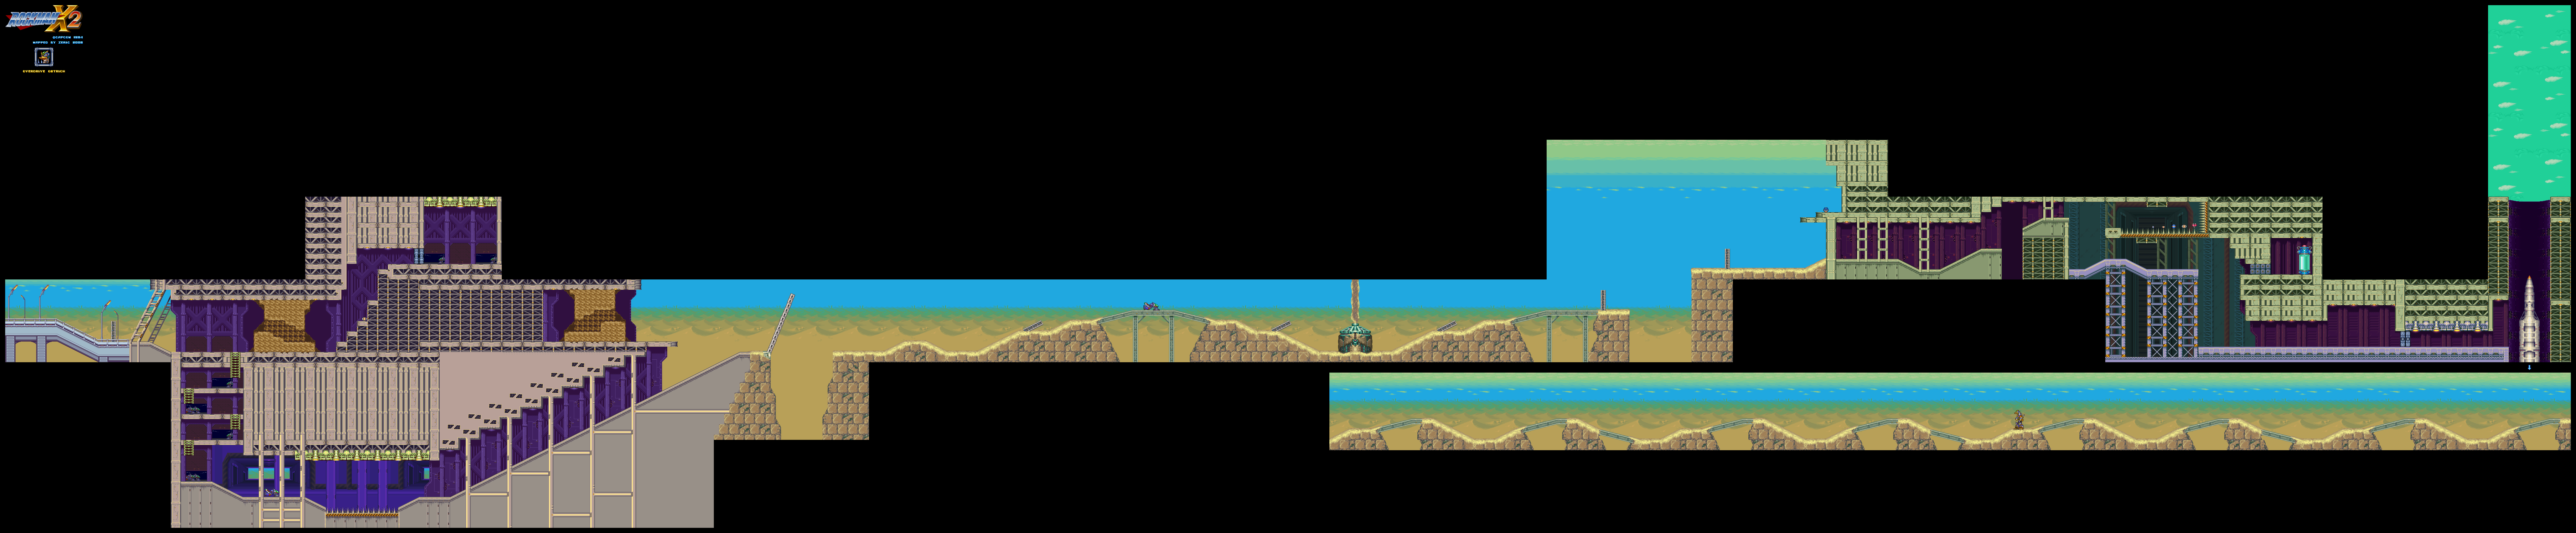
Wheel Gator's stage not only has interesting music (it was later made into a YouTube Poop meme by YaminamoAlex), but it also has one of the more interesting locales of the game: a moving dinosaur tank that travels throughout the city. This time, Super Nintendo does what Nintendon't.
The first thing you'll notice as soon as you go right is a door at your feet that keeps spawning bird robots. Shoot at the door with fully charged X-Buster shots, and let the birds fly above you. They'll just keep going forward, and you'll be able to stop them from spawning.
The yellow triceratops robots are easy to kill off.
The platforms you see soon after this have little green arrows in the center that show which direction it's going.
To take out the robots with the shields, hit them will a fully charged X-Buster shot to knock the shields into the air for a second or two, then fire away from there while they're still vulnerable. If the shield comes back to them, charge up again and continue the assault. Just watch out for the spiky boomerangs that they throw at you.
The Robot Ride armor is back. Not only does it have spikes for fists, but it can also hover in the air for a brief time if you press and hold the B button in the middle of your jump. Like last time, you can also dash by double-tapping forward on the Control Pad. If you hold the Y button, you can do a charge punch after letting it go after a sec.
You'll see a Heart Tank after you have to get off the Robot Ride armor and climb up, but you won't be able to get it quite yet. The Heart Tanks increase your maximum health by a few notches. Collect all eight for maximum health.
You'll then come across a few elevators that go up. As you go up this giant dinosaur tank, you'll have to contend with the shield guys again.
If you keep riding the second one up past the spiked walls, you'll be able to get an extra life. There is a door to the right, and you can skip part of the level with it.
When you make it back outside on the dinosaur tank, keep an eye on the ground. You'll have to go left - back into the dinosaur tank - in order to make your way to Wheel Gator. If you go right, you can find some hidden health where the big gray spike is. Just jump on the "stairs" that make up the gray spikes to find it all.
Wheel Gator is in a room full of some weird, maroon-colored liquid. Avoid standing in this while Gator is swimming around in it, as he can get you and put you in some sort of vice grip from the deep in order to slowly drain your health. That attack doesn't happen until the wheel makes a second pass around the room, and if you're at the top of the room, he'll jump straight up out of the water, but won't be able to reach you.
You'll want to avoid the buzzsaw that is Wheel Gator's Spike Wheel as it travels across the walls and ceilings of the room. Just say near the ceiling and use your dash jump, and get back up the wall with your wall jump after you dodge it. To dash jump off the wall, press A and B at the same time while also pressing the Control Pad away from the wall.
Wheel Gator will eventually pop out. If you have the Strike Chain from the Wire Sponge stage, use it on him. Otherwise, shoot at him with the X-Buster. Sometimes he'll shoot some more spiked wheels out of his shoulder blades, which you can easily avoid if you watch where they bounce, but he'll usually go back underwater. If he does the former, this is your chance to get some free hits in with charged-up X-Buster shots as you dodge the wheels. He may also spit projectiles out of his mouth; these can be easily avoided.
He also has another attack that he can do. If Wheel Gator leaps up into the air and he looks like he's lying flat on his stomach when he does so, he's about to spin into the wall. Back off when he jumps up and go up the wall to avoid this attack.
It'll take a little bit of work, but Wheel Gator is still the easiest to defeat with the X-Buster. Beating Wheel Gator awards you with the Spin Wheel, which works much like Wheel Gator's own version of the wheel attack but is much smaller and doesn't stay on screen as long. When charged up, it goes in eight directions.
You can use the Spin Wheel to the right of the start to get a free 1-Up.
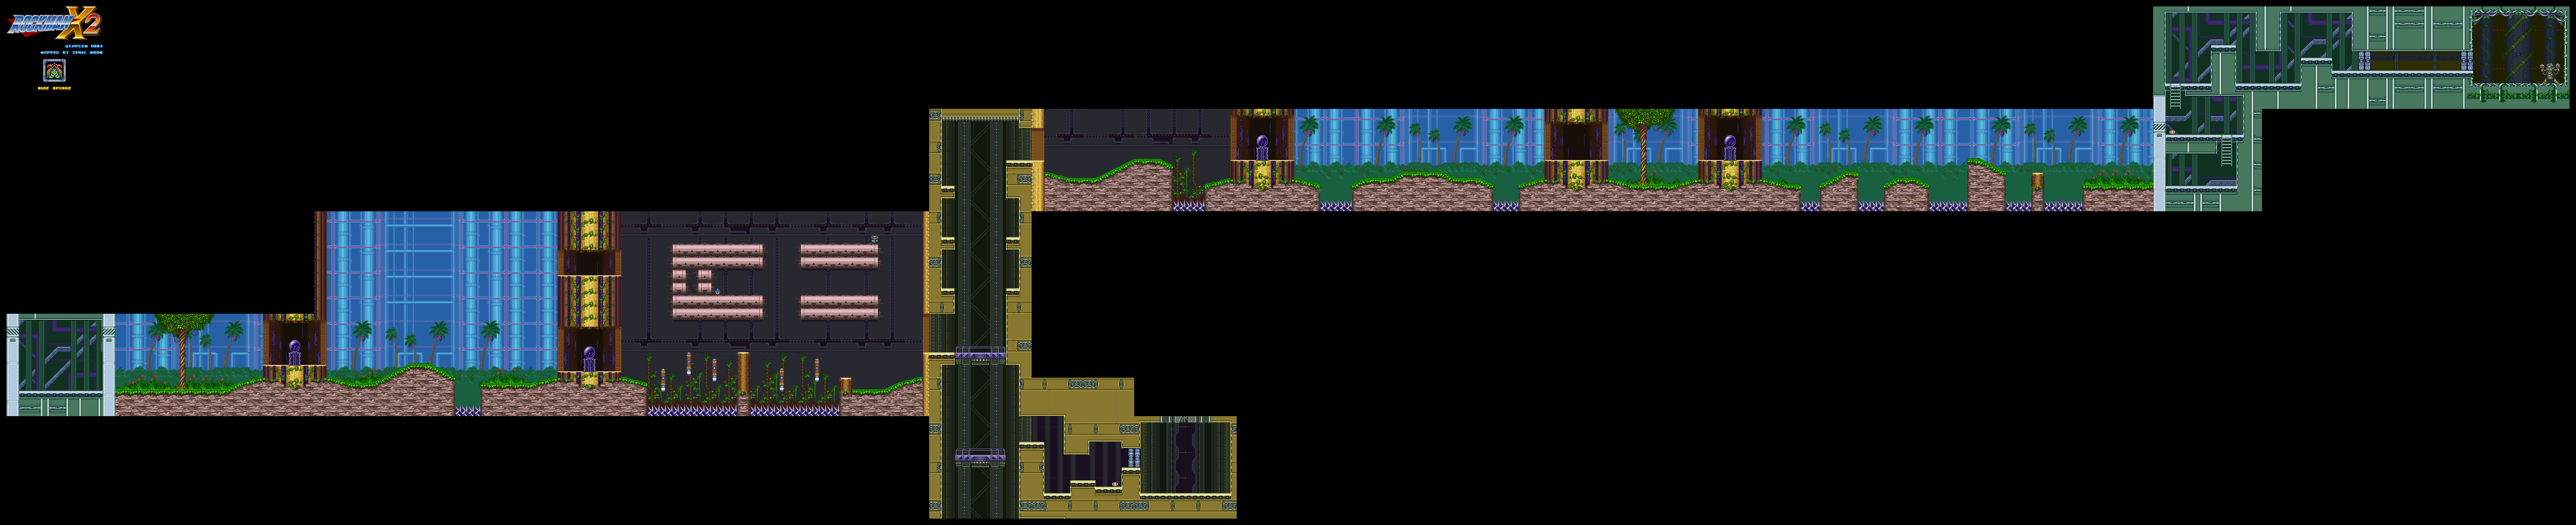
The bats from Armored Armadillo's stage in the first game are back, and they just fly at you like before. The fish you see as soon as you go underwater just swim back and forth and are just as easy to destroy.
Take out the fish tank with the Sonic Slicer, and destroy the radar light at the bottom first so that you don't get hit by a laser. Take the rest of the tank out afterward as you follow it around. Along the way you'll also meet up with jellyfish robots and columns that look like missiles.
There are some hidden passages near the bottomless pits that take you to hidden power-ups.
The jellyfish have a close range shock attack.
The column platforms can be used like a wall for some wall jumps, but you can also stand on the top of them to get to where you need to go, too.
You'll eventually go through a passage deep in the water, and the water will eventually drain from the area. Watch out for the wall robots with the three-way shots.
You'll soon meet Bubble Crab. Bubble Crab will cause the water level in the room to rise and lower every so often, making it harder to jump over him at times. Use the Spin Wheel to break through the bubble he encases himself in (and uses his main Bubble Splash weapon) and cause some major damage. Bubble Crab jumps around a lot for his attacks, but it's easy to anticipate where he'll land. Always use a dashing jump to jump over Bubble Crab.
Sometimes Bubble Crab will shoot two crabs inside of bubbles to the surface. If they're left alone long enough, they'll suddenly pop out of the bubbles and fly right at you. It takes a while for that to happen, though, so keep an eye on them if you can't shoot them down.
Beating Bubble Crab will give you the Bubble Splash. It lets you shoot bubbles that go upwards, and the colors on them are rather excellent. Powering it up lets you jump higher in water.
When you beat two Robot Masters, Agile, Serges and Violen start taking Mega Man X a little more seriously. Meanwhile, a mysterious group known as the X-Hunters have contacted the Maverick Hunters...and they are none other than Serges, Violen and Agile. They have Zero's body, albeit in three separated pieces. To get Zero's parts back, X must defeat them.
Pay attention to the map screen, as you'll see where the X-Hunters will teleport to. Then choose where one of them landed to fight them. The X-Hunters show up in random locations, so I'll cover them when we see them in the LP. If you kill off too many of the Mavericks, however, the remaning X-Hunters will flee. If that happens, you won't be able to rebuild Zero.
Thankfully, you can tell where they've landed by the Sigma symbols that show up at where the X-Hunters have moved to. Just position the red dot above them and you can track them down.
Here it is: the stunning conclusion to Mega Man X2.
If you didn't put Zero back together again prior to this, you'll have to fight the real Zero. He'll dash around, shoot multiple shots and punch the ground to cause parts of the ground to fly upwards in an attempt to hit you out of the air if you try to dash over him. The X-Buster upgrade is really good here, as you can store two shots and keep one of them if you get hit. Your projectiles from the upgrade's full charge will go through the ones Zero shoots, so take advantage of that.
Also, Zero can destroy the computer in the background with relative ease during his Maverick-induced rage with his ground pound attack, which is actually pretty impressive.
Regardless of what happens, go down the hole Zero makes to meet Sigma again. Claws will come out of knuckles, making it look like Sigma is going through some sort of Wolverine phase. Or something. I dunno.
The Sonic Slicer is his weakness...and you'll want to use it as wisely as possible as you stay on the move. You cannot afford to stay in one spot during this fight as you will get hit.
Anyway, Sigma will leap off the walls before disappearing after the second one. He'll re-converge and drop down where you're at. You'll want to stay away from him at all times as you hit him with the Sonic Slicer. This is especially during his reappearance, because his standing claw swipe will kock you into the wall and then into the ceiling, which can be more aggravating than not.
The five projectiles that Sigma will send at you will track your current positions. They're tough to dodge. Hope you have four full Sub-Tanks.
If Sigma glows yellow once while he stands still, wall jump out of the way immediately, as Sigma is about to shoot out some Hadouken-like projectile of his hands.
When you beat Sigma, he explodes just like the rest of the Mavericks...only for some disembodied, see-through, wire-frame Sigma head to come out of nowhere and immediately aim for X as it twitches around.
Sigma's floating head flies from left to right while frying the ground with eye lasers when it's not flying at you trying to go for a direct hit. It can also spawn blue cubes that can transform into either the birds from the bird-spawning pads, the fish from the Bubble Crab stage or the screwdriver robots. The small enemies may drop power-ups, which makes this a tad easier...but not by much!
The only weapons that will do any damage are the Strike Chain and the fully-charged shots from the X-Buster upgrade. That is it.
Despite having no visible health bar, you can still damage Sigma's disembodied noggin. As a matter of fact, you're supposed to. The head changes from green to blue to purple to orange to red. When he turns red, he starts teleporting around the room. If he gets on top of you, he'll slowly drain your life. When that happens, hit him repeatedly with the Strike Chain.
When you beat Sigma's head, you'll destroy the computer that it came from along with it. Sigma will tell you that Zero is the last of "the doctor's" creations. (This also gets fleshed out somewhat as the series progresses.)
X and Zero (if you saved him) watch the sun rise and X questions his destiny yet again, then X rides away on a jetbike as the enemy roll call runs. Then, Zero shows up on the "Thank you for playing!" screen and does his triple shot before standing there. If you saved Zero, the real Zero shows up. If you didn't, it's the gray Zero. (Why it works that way, I'll never know.)
This is it! We're closer to the final confrontation!
X-Hunter Fortress - Stage 4
The area where you fight Overdrive Ostrich in the X-Hunter Fortress is much different compared to where you do it in the actual stage. You have far less room to maneuver (and far less area to look at, too).
Also, Flame Stag has an alternate color palette when you fight him the second time around.
When you beat all of the Mavericks a second time around, Sigma finally shows himself. Well, he speaks to you, anyway. Time to head out of this chamber before it explodes!
X-Hunter Fortress - Stage 5
Okay, this is really bizarre.
The stage is exactly the same as Magna Centipede's, right down to the spotlights and the traps. The only difference is that the music is from the intro stage.
When you make your way to the mini-boss room where you fought the sword, you meet Sigma...and Zero? Why is Zero here standing next to Sigma? More importantly, why is he gray? (A precursor to Black Zero from Mega Man X4?)
Sigma is about to send this gray Zero at you, but before that can happen, a few powered-up buster shots ring out from behind X and destroy him before anything can even happen. It's the real Zero, and he's back and better than ever! Sigma then mentions that Zero was born to follow him. (This is barely hinted at in this game, but is fleshed out a lot more in subsequent games.) Zero then goes after the main computer and asks you to go after Sigma.
It's time to continue our adventure through the X-Hunter Fortress...and this time we have the teleporter room proper for the boss rush.
X-Hunter Fortress - Stage 3 (continued)
When you make it to the top of that shaft that requires the flying platform, you'll see two ladders - one leading up and one leading down. Lure the two bats towards you and hit one of them with the Crystal Hunter. Use the crystallized bat as a platform to the ladder leading up. You'll find two large health pick-ups and an extra life, but that's not all!
Keep going right, and charge through the spike pit with the charged-up Speed Burner. Take the wheel enemies out, make a small hop straight up and dash forward. Keep going right. Charge up the Speed Burner to go to the right, then dash to left when you make it past the first part of the winding path full of spikes. Slide down the left wall. You'll enter a hidden room with a capsule. Inside is Ken's Dragon Punch (aka the Shoryuken) from Street Fighter II. It's even used the same way: Forward, Down, Down-Forward, and Y. It can take down a lot of enemies and even make short work of bosses, but it can only be performed if your health is full.
From there, you can drop down and finish the rest of the stage. Use the Crystal Hunter to freeze the bugs in place and use them as platforms to get across the spikes.
Agile will be in a machine of his own when you fight him. He can send out missiles that fly across the room (and into the foreground!) and he also sends out spiked platforms that can hit you when they fall down.
Stay under him when he makes the spiked platforms, and you won't get hit. Thankfully, the spikes platforms are not instant death. As for the missiles, stay out of the air.
The best weapon to use is the Magnet Mine. Charge it up with the X-Buster upgrade, then let loose. The slow-moving energy orb will make quick work of him, and you can take him out in quite a few shots.
X-Hunter Fortress - Stage 4
Climb up the walls and you'll find a teleporter. Step inside and you'll be in a room with eight more. Unlike the last game, the bosses are all in separate rooms much like the classic Mega Man saga.
From upper-left to upper right, the order of the teleporters are: Morph Moth, Wire Sponge, Bubble Crab, Flame Stag, Magma Centipede, Crystal Snail, Overdrive Ostrich, and Wheel Gator. The same strategies apply.
Oh, and if you still want to refill your energy, the four center platforms at the top have health pick-ups...but they're the small ones. I guess Capcom expected you to come prepared here.
We tear through the X-Hunter fortress in our attempts to get rid of Sigma's followers once and for all!
X-Hunter Fortress - Stage 1
This stage is just dead simple. Sure the wall-crusher parts may be a bit non-linear and require you to use the air dash to get to the other side when necessary, but even then you can get through them without much trouble.
The claws will try to force you to use the lower path. The upper path is more effortless, believe it or not.
You'll fight Violen again at the end. There will be two blocks that act as platforms which Violen can change the position of (which is completely random) when he raises his arms. He has the same attack pattern as last time, but thanks to the blocks the mace can be easier to avoid at times. Hit him with Bubble Splash, now that you have all the weapons. It does the most damage.
X-Hunter Fortress - Stage 2
You'll need to use the wall jump techniques on the floating columns to get past some of the spike pits.
For the spike pit with the two bats, hit the bats with Crystal Hunter so you can dash to the other side.
The brown blocks can be removed with the Spin Wheel. You can charge up the Speed Burner to get the 1-Up, but it takes some practice to time that just right and you'll more than likely lose more than one life trying to get it, making going for the extra life rather pointless.
The boss is Serges in a machine. Jump on the platforms, and destroy the laser cannons with Silk Shot. Stay on the platforms, as he'll destroy them until two are left as you destroy the laser cannons. From there, get off the platforms and stand on the front of Serge's machine, charge up Sonic Slicer and unleash it on Serges. It'll hit him everytime. The fireballs he shoots in his second form split into form, and the four fireballs from the split alternate between cardinal (horizontal and vertical directions) and intermediate (diagonal) directions. Since you're standing on the one safe spot of the machine, he won't be able to even reach you, and the fireballs will barely be able to hit you. Fire away.
X-Hunter Fortress - Stage 3
Oh, no. Oh, boy.
Everything's all good and everything...then you reach the platform. We've seen the platform here before, but in order to get where you need to go, you need to jump and quickly orientate the platform so that the green triangle in the center is pointing where you want it to go. The directions go right, down, left and up. It goes clockwise as you keep jumping on it, so you'll have to time your jumps and do them quickly if you want to get anywhere in one piece.
Hit Magna Centipede with the Silk Shot so he loses his tail. This will make fighting him much easier, as fighting him the hard way can be somewhat difficult.
Magna Centipede will teleport around the room, leaping around and firing at you. If you hit him with the Silk Shot, he'll lose his tail, which kills his offense a bit. From there, he'll just teleport and jump around. Sometimes he'll teleport and then teleport again, but he'll stay in place for a moment after the second time in such a case.
The Silk Shot fires in an X pattern, so if you know how it fires, you can even hit him while he's on the ceiling.
Beating Magna Centipede will give you the Magnet Mines, which can stick to walls and work...well...like mines. Charging it turns into a powerful orb that slowly moves forward.
The cave cycles through the color spectrum here, which shows just how much of the 16-bit technology Capcom played around with at the time.
Grab the Robot Ride armor, then go to the left and drop down the pit. Do a double jump on the Robot Ride armor, then ditch it at the top of your jump and keep going left. You're supposed to use the Strike Chain to grab onto the wall, but if you can get enough height on the double jump, you won't need it. From there, you can take a platform back.
Grab the Robot Ride again, and keep going right. Watch the icy slopes, as they speed you up dramatically even if you're not dashing. You'll land in a pit of spikes. Punch the blocks to the right, then move to the right as jump out of the Robot Ride. Jump over the pit, then hide in the hole in the ground as the huge icy wall comes apart and slides downward to the left. This will break a third block the Robot Ride can't reach. If you want, you can now get the Robot Ride out of that spike pit and take it with you through the level again.
If you still have the Robot Ride armor when you take the normal route, you can get some power-ups as well as a 1-Up.
The crystallized robots that stick to the walls shoot lasers that bounce off the walls.
You'll come across a robot encased in a crystal. Shoot at the robot inside and avoid the other robot that flies around that shoots lasers directly at you. The robot will also send out another robot just like the one that fires at you, but if you charge up all your X-Buster shots while fighting this thing and focus solely on the robot in the crystal (the two that fly around are indestructible), you should be okay.
Run down the slope to avoid that huge crystal wall that comes at you from behind, but don't forget to slide down the wall after that to get the helmet upgrade. This lets you find secret object and hidden rooms easily.
You may notice a ladder leading to an empty room near the end. Climb up to it and charge up the Silk Shot. You'll cause several large weapon pick-ups to appear. There are a few empty rooms in the game that allow you to do something like this.
You'll have to go back to avoid the crystal walls that slide at you past that point.
When Crystal Snail stops spinning around and stands in place, he's vulnerable. Hit him with a Magnet Mine, then put another mine on the wall while he's stunned. Jump over him when he rushes at you, and avoid him as he returns to his shell. This will let you cause some major damage.
Crystal Snail's main attack is the ability to slow down time. That's not lag you're seeing. X is actually slowed down, which makes avoiding Crystal Snail difficult at times. Just keep hitting him every chance you get, and he won't be able to use it often.
Beating Crystal Snail gives you the Crystal Hunter. It encases enemies in crystal, and you can then use the enemies like platforms. Charging it up lets you slow down everything around you, much like Crystal Snail did.
When you beat all of the Mavericks, you'll know the location of the X-Hunters base thanks to Dr. Cain. We won't be going there just yet, though. We still have a few more things to find.
Use the Crystal Hunter on the first shield robot in the level. Use him as a platform to leap to the wall to the right. You'll get a 1-Up and a Heart Tank for your efforts.
Once you make it away from that volcanic eruption waiting to happen, you'll be able to continue to the right. If you even do so much as do a wall kick on the column-like platforms, you'll cause them to sink into the lava with a mighty quake.
The vertical shaft with the pipes with the pink stripes in the walls may seem harmless at first, but the lizards that walk down the walls and glide their way down turn the fumes into the flames if they're not trying to hit you with three-way shots.
If you're wondering why the area where you fight Flame Stag is huge, well, that's because Flame Stag will wall jump to you until he hits you. You're going to be moving around quite a bit as you fight him.
Do you have the Bubble Splash? If you do, just shoot him with it and jump over the fireball he throws before shooting him again. It won't take long at all to get him in a loop like this and get rid of him very, very easily.
Beating Flame Stag will give you the Speed Burner - a much larger version of Flame Stag's fireball that quickly travels across the screen. Powering it up lets you rocket forward, much like on Flame Stag's regular attacks.
Head back to where the Heart Tank is. It's that spiked wall to the left of the top of a ladder shortly after the beginning. Jump to the platform to the right, then charge up your newly-acquired Speed Burner and leap to the left before releasing Y. If you do it right, you'll rocket all the way to the Heart and get over the spikes to acquire the Heart Tank.
Make your way through the stage until you start seeing the columns that make up the undersea colonies in the background. When you do that, charge up Bubble Splash and release the Y button. Bubbles will rotate around you, allowing you to jump even higher in the water. From there, you'll want to get to the surface and keep jumping, so you can double jump on the water. Once you get the hang of it, you'll be able to get the Sub-Tank from this level.
For the Heart Tank, you'l want to head back to the open area where the fish submarine sinks back into door in the ground. Head to the right and charge up Bubble Splash, then use the bubbles to dash to the left and leap to some columns that will act as platforms. From there, it's an easy route to the Heart Tank.
The purple robots that fly back and forth are as quick as they are irritating. Hit them with a fully charged X-Buster shot, then shoot them while they're stunned with their shields down.
Avoid the searchlights, too. They cause the grey blocks to come down from the ceiling and shoot at you. If you off-screen them, they'll return back to their normal positions.
There's a passageway leading up shortly after the beginning. You'll need the X-Buster upgrade for this. Charge up the Speed Burner so that you can launch yourself to the grey block to the left of this passage. From there, you can wall jump to the Heart Tank.
You'll also want to do this for the Sub-Tank in this level as well. You're supposed to use the blocks before the passage going upwards just before the mini-boss room, but if you can time it right, it's definitely doable.
Wait for the large grey blocks to stop moving before you continuing. If any of these big blocks are a pale pink, shoot at them to break them. Some of them may also contain power-ups.
The mini-boss is a hologram of a sword. You'll want to hit the handle as it swings back and forth and flies toward you. The blade is completely invulnerable.
After taking out the boss, you'll go down another vertical shaft full of flying robots and searchlights. Then, you'll be dealing with falling rocks that transform into floor segments. If the target reaches X, it will read his data, but it won't shoot at him or anything.
If you can make it to the end in time, you can enter the X-Hunter segment (if you need to). Otherwise, you'll have to take the top path to succeed.
The robot here will jump back and forth and shoot at X. It falls after 11 hits from the Speed Burner. If the target read your data, the robot becomes faster and harder to fight, but it still takes 11 Speed Burner shots to kill it.
From there, you'll have to deal with the blocks that shoot you, falling bridges and the big grey blocks trying to push you into open pits.
The cave cycles through the color spectrum here, which shows just how much of the 16-bit technology Capcom played around with at the time.
Grab the Robot Ride armor, then go to the left and drop down the pit. Do a double jump on the Robot Ride armor, then ditch it at the top of your jump and keep going left. You're supposed to use the Strike Chain to grab onto the wall, but if you can get enough height on the double jump, you won't need it. From there, you can take a platform back.
Grab the Robot Ride again, and keep going right. Watch the icy slopes, as they speed you up dramatically even if you're not dashing. You'll land in a pit of spikes. Punch the blocks to the right, then move to the right as jump out of the Robot Ride. Jump over the pit, then hide in the hole in the ground as the huge icy wall comes apart and slides downward to the left. This will break a third block the Robot Ride can't reach. If you want, you can now get the Robot Ride out of that spike pit and take it with you through the level again.
Above this is the path to the X-Hunter room. You'll need the Robot Ride in order to break the blocks. The columns from the Bubble Crab stage are here, and since they are, I can finally mention what they do. Guess what? They're just platforms that float up and down. Use them to get to the X-Hunter area and fight...whomever, depending on how your game is going. In our case, it'll be Serges.
Serges rides back and forth on a platform. Sometimes he'll somersault and shoot all over the room. You can dash under him while jumping over the platform when he's in the air if you need to. The platform will also drop mines. If there are too many on the ground, take them out with the Spin Wheel if you have it. Take him out with fully-charged X-Buster shots whenever the shield at the top of the platform is down. This causes him to fall on his back and respond with the somersault energy blasts, but if you have at least one Sub-Tank, this shouldn't be a tough battle at all.
Well, NCS was on his last life, so it's Wire Sponge's stage this time. (Serges teleported there, anyway.)
You won't believe where the Heart Tank is. As a matter of fact, it's probably the easiest thing in the game to miss. Wall jump up the left wall at the beginning and you'll find it. That's all. Really.
You can change the weather here with the weather control orbs if you hit them with specific weapons.
Remember the rain from the Toad Man stage in Mega Man 4? If it rains here, prepare to be blown back while in the air...again.
At the second orb, go up and take the top path. Go right to find some cool stuff, such as an extra life and one of the four Sub-Tanks! Now you have a portable energy tank! At last! To fill it up, fill your health all the way up, then collect health-pickups. They'll instantly go into your Sub-Tank.
Slide down the wall when you get to where the lifts are, and you'll find the X-Hunters area to the right. (This and the Overdrive Ostrich X-Hunter rooms require something to be accessed, the rest can be found by just exploring and don't require anything. Again, consult the maps.)
We're done with Serges here, so let's go ahead and continue by getting back on the lifts and continuing with the level as normal.
The frog enemies just leap forward slowly and shoot at you. The green robots that fly around here drop bombs that turn into path-blockig cacti you have to shoot out of existence when they hit the ground and also try to fly into you.
Wire Sponge will try to jump and swing around the room, but if you have the Sonic Slicer, you can put an end to any of his attacks immediately. The best thing about the Sonic Slicer is that it can bounce off walls, so if you miss, it can keep going up to the ceiling as it bounces off the walls. You can tag Wire Sponge from behind with it!
Wire Sponge can shoot seeds that turn into plants that can block your path. He can also launch himself into the wall at you with his Strike Chains, and he can power up and shoot bolts of lightning around him. Keep away from him and keep hitting him with the Sonic Slicer as necessary and you should be fine.
If you finish off Wire Sponge with the Sonic Slicer, he gets sliced in half as he explodes.
Beating Wire Sponge gives you the Strike Chain. It lets you grab onto walls much like Wire Sponge's version can.
Since we now have all of the Zero Parts, Dr. Cain will still need time to rebuild Zero, so you won't get him immediately. Still, you have all the parts, so saving Zero's body is now out of the way.
To take care of that stag beetle robot, just have it plow into the wall where you're supposed to go. This wall will block the path to the rest of the level. If you can lure it upwards, though, you'll be able to access a 1-Up as well as a Sub-Tank. To do that, lure the stag beetle robot to the right, then stand on the flat part of its head. It will take you up to some platforms that you couldn't normally access. There you go.
The robots that stand on the walls shoot a three-way shot. They're easy to take out.
You'll then be in a race against the lava in an upward climb. If you're quick, you can get rid of the wall robot that blocks your path and get the Heart Tank behind it.