Enjoy!
Showing posts with label Mega Man X5. Show all posts
Showing posts with label Mega Man X5. Show all posts
Friday, January 26, 2018

ClementJ64 plays Mega Man X5 - Part 15 of 15
Believe it or not, there is a training stage you can play before going into the main game.
Training Stage

Training stage map by X GOD & rmexesaito for the RockMan Memorial Hall.
The training mode just shows off what you can do in the game as well as how to do it. All the enemies here are from the last game. You'll start with the Fourth Armor (the X4 armor) if you play as X, and you'll get the respective character's theme for the intro level based on who you choose.
When you reach the end, you'll face Magma Dragoon! He fights just like he does in the fourth game, but he has a much smaller health bar and you can duck under his high Hadokens now.

Thursday, January 25, 2018
Wednesday, January 24, 2018
ClementJ64 plays Mega Man X5 - Part 12 of 15
It's time to finish off Sigma yet again...
Sigma's not done yet. This time around, you'll fight a much bigger Sigma. He'll tell you he has recruited a new partner, who has created a new body for you that he's using right now. That new partner is never mentioned, but is hinted at when you play as Zero, whom Sigma tells is the same guy he's met in his dreams.
Sigma's weak spot will be the gem in his forehead. If this reminds you of the battle with Gamma at the end of Mega Man 3, give yourself a pat on the back. Avoid the fists that fly at you and use them as platforms when necessary to shoot at that gem with Spike Ball if you're playing as X. Use Twin Dream and Crescent Slash if you're Zero, and make sure you're far enough away from Sigma's weak point so your hologram hits the Jewel.
When Sigma is in wire frame mode, you can't damage him. He has to be in his full-color corporeal mode in order to take damage.
The energy balls that he fires onto the ground will then home in on you. They will all home in on you, and they can be difficult to dodge at times. The hand will track you from above and try to fire lightning bolts at you, and these lightning bolts cover a good section of the room as they move.
Every once in a while, Sigma will attack you with purple block that combine to form one big one. The first one is impossible to dodge, but the rest can be dodged rather easily. He doesn't pull it out that often. As a matter of fact, he may not pull it out at all.
When you beat Sigma, depending on who you play as, and assuming he'll try to take the other character down with him as he explodes. There is nothing you can do as Sigma dies (assumingly for the last time).
There are two endings for X and one for Zero.
In X's ending,(automatically assuming Zero did not turn Maverick, as you wouldn't have him if he did), you'll see a nearly-destroyed Zero lying on the ground, with X looking over him. X tries to pick him up when he hears a voice from a skull-like face with a "W" symbol on its forehead behind him. The skull face shoots a laser that goes through both X and Zero, and as they fall back to the ground, Zero blasts the skull face. Zero then mutters that X's optimism led to his own demise, and that X should live. Zero then remembers things from the past, such as Iris from X4 and the "old man" that has been mentioned through the game. He now realizes that he was the one created to destroy Reploids. Zero realizes he needs to die for there to be peace.
You'll then see a beaten up X. A hologram Dr. Light shows up, tells him not to die just yet, and instructs him to relax. After that, the game cuts to three years later. What happens next depends on whether or Zero went Maverick. If Zero did turn Maverick, the game cuts to a week later. You'll find out X's memories of Zero are somehow erased by a mysterious figure who rescued him (most possibly the Dr. Light hologram), and that he was returned to the Hunters already fully repaired. X also says he wants to create "Elysium," a paradise where humans and Reploids can peacefully coexist. If Zero did not turn Maverick, Zero sacrifices himself. He still remembers him, and carries Zero's Z-saber wherever he goes so he always feels close to him.
In Zero's ending, Zero reflects on his life before dying. He remembers things from the past, such as Iris from X4 and "that old man" before he realizes he must die in order for there to be peace and kicks the bucket. You never find out what happens to X in that ending, which is a bit disappointing.
ClementJ64 plays Mega Man X5 - Part 11 of 15
The endgame is now.
All Virus maps by X GOD, No. 11 & rmexesaito for the RockMan Memorial Hall.
Virus Stage 4
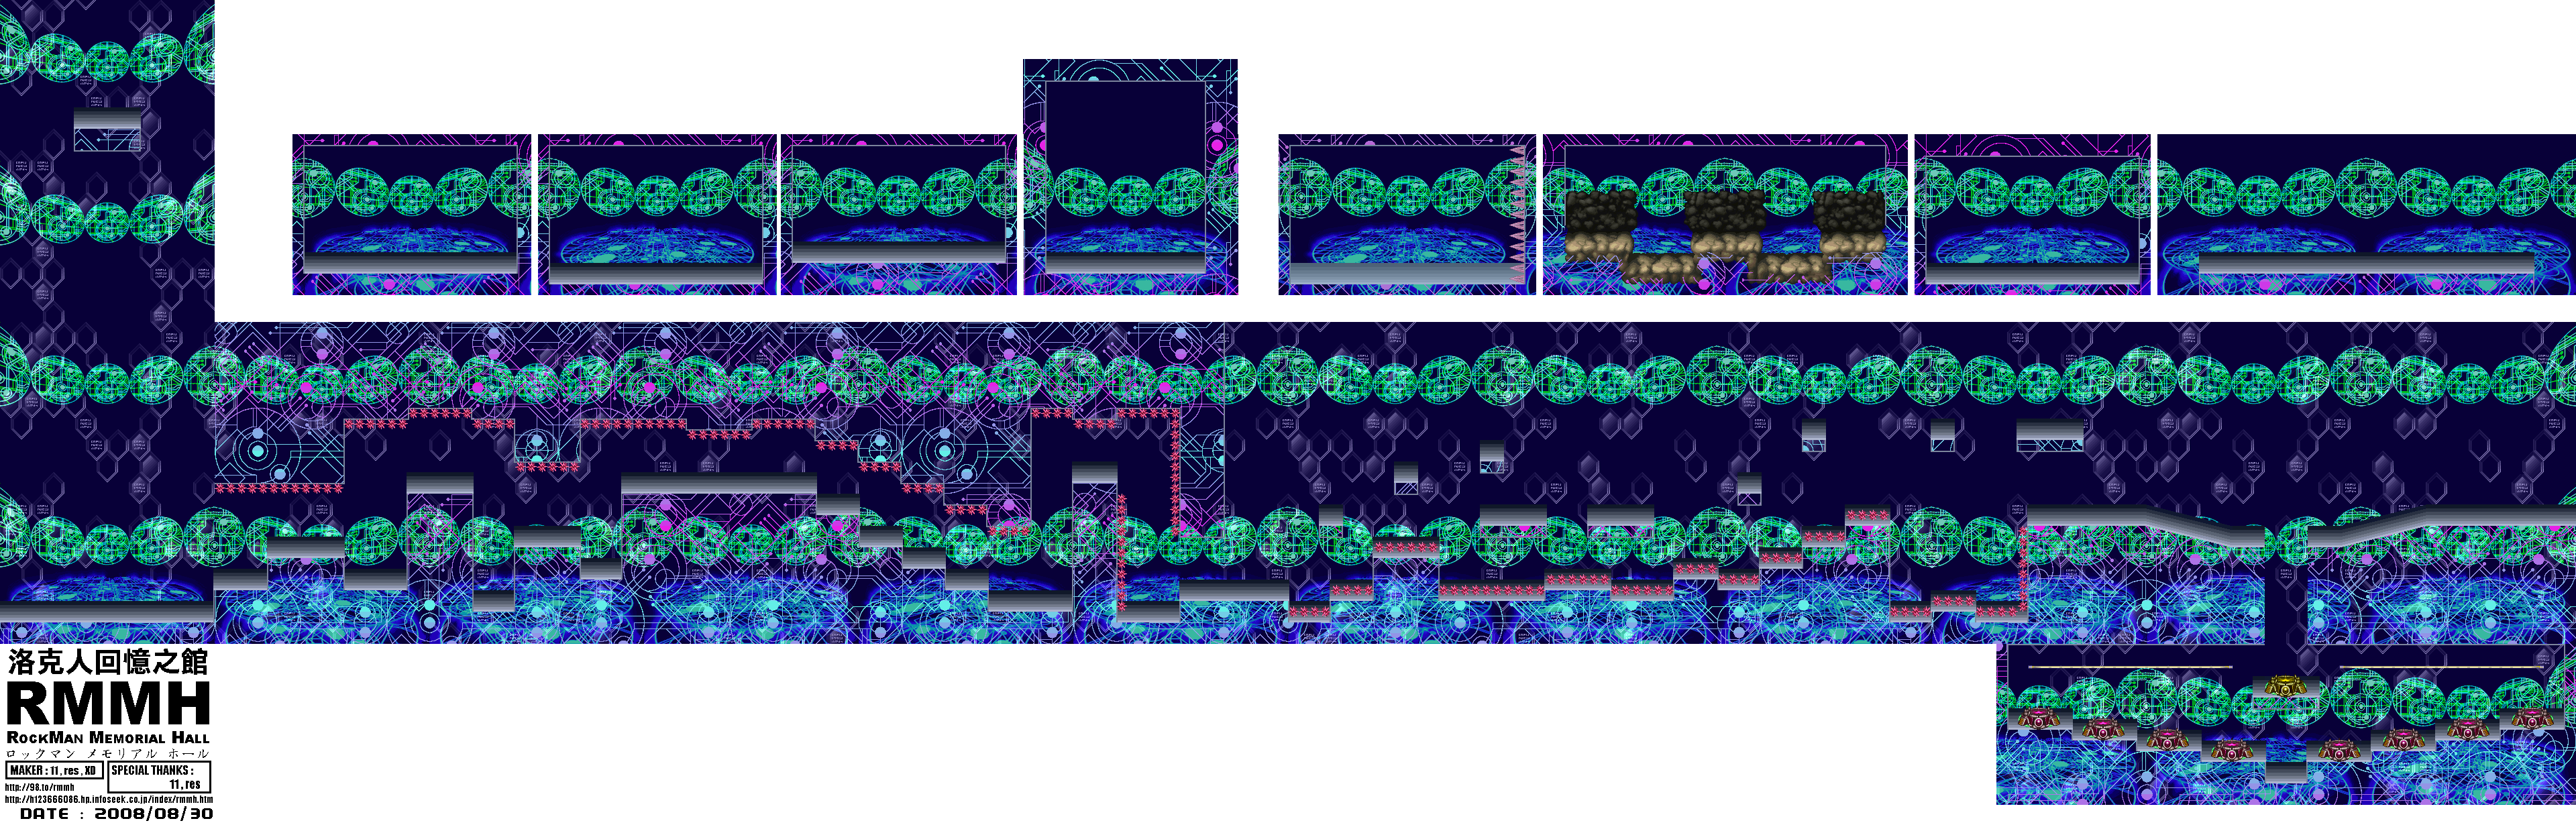

Regardless of who you play as, Sigma shows up and Zero tries to save a downed X. Sigma is foiled and retreats...for now.
The beginning of the stage is like a water-free version of the spike-heavy part of Bubble Man's stage from Mega Man 2. Once you get halfway through, though, the spikes are on the floor. At least there are platforms above them.
If you dash jump over the pit that leads to the Boss Rush, you'll find a large health pick-up and an Extra Life. They're easy to get, so why not take them?
The teleporters, from left to right, are: Mattrex, Dark Dizzy, Izzy Glow, Squid Adler, Duff McWhalen, Grizzy Slash, Axle the Red and The Skiver. Same strategies apply...almost. The enemies have much bigger health bars this time around. You're gonna be in for longer fights if you're playing on Normal or Extreme. You're better off coming here as Ultimate Armor X and abusing that air dash attack to high heaven. It's your best bet here. Except for Duff McWhalen. Use the same strategies there as last time.
When you beat all eight Mavericks, you'll find a gold teleporter in the center. This takes you to the second area, where the triangles home in on you and the balls slowly move towards you. Take them all out as you make your way to the final area, which has the outlines of X and Zero recessed into the background. Guess what? The reappearing blocks show up right before you can get there. It's like the game is just trolling you now. We didn't have to deal with them the rest of the game, so why now?
You'll finally meet Sigma. You'll find out that all that's transpired has happened because Sigma wants to purify Zero, and awaken Zero from his "false self." He also confesses that most of the Hunters have become Mavericks. If you're playing as Zero, Sigma will tell you he met an old man that knew a lot about Zero.
Sigma's first form will perform wall jumps and throw electric balls, some of which in a double helix pattern. Wall jump with him and hit him from a distance, then drop down and avoid him as necessary. For the double helix balls, dash under them when they converge in the middle of their trajectory, and duck under the single balls. It's always fired in a single-single-double pattern. Use X's Tri-Thunder and Zero's Electric Blade. If you're playing as Zero, be sure to use Grizzly Slash during the wall jump part as necessary. When Sigma flashes blue, stay at the opposite end of the room and dodge the waves when necessary. You'll either have to duck, wall jump or stick to the middle of the wall, as the last of the three patterns use two of those energy waves instead of one.
Tuesday, January 23, 2018
Mega Man X5 - The OST
This blog series isn't finished yet, but here's every song from Mega Man X5, regardless.
ClementJ64 plays Mega Man X5 - Part 10 of 15
Remember in X3's ending, where the ending text says that X has to fight Zero? Well, it finally happens.
All Virus maps by X GOD, No. 11 & rmexesaito for the RockMan Memorial Hall.
Virus Stage 2

The final room here has the Sigma logo in the background.
The boss here is the Wall Boss from Mega Man X re-imagined. This time, there are no spikes, the eyes have different attacks. There's a laser that goes to the top and bottom of the room (the red eye), a bunch of projectiles that shoot at your current position (the green eye), and just ramming straight into you (the blue eye).
When you do enough damage, the walls will close in just like in the battle with the first game and you'll have to destroy the sun symbol at the bottom as soon as possible, which tries to home into you just like last time. Here, you'll want to stay on the walls and avoid touching the spikes that pop up on the bottom. You'll have to use Crescent Shot (with X) and Crescent Slash (with Zero) to destroy it as fast as possible or else spikes will pop out of the walls...and those are instant death, too.
When you destroy all three eyes and the sun symbol, the battle's over.
Virus Stage 3

Finally, an original part of the final stage.
You'll want to come in here as either Zero or just plain X. Not X4 (Fourth) Armor X, not Falcon Armor X, not Gaea Armor X. Just plain X.
Watch out with some of the platforms that don't have a green arrow on them, as those will break down and collapse after you stand on them for a second.
When you reach the end of the platform and spike gauntlet after the rope section, drop down the pit and hug the right wall. You'll find a ninth capsule. Enter it and you'll get the Ultimate Armor. This armor is like the X4 (or Fourth) Armor, but allows X to use the Giga Crush infinite times. You must either complete the level or lose all your lives and continue in order to get credit for finding it.
Believe it or not, you can access this capsule with Zero. Instead of getting the Ultimate Armor, however, you will get the Black Zero armor. This increases Zero's defense and enhances his Saber. Also, Zero's hair will be platinum blond.
The boss room has the Wily "W" symbol in the background. The boss is different depending on who you bring to the end. If you're Zero, you'll fight X. If you're X, you'll fight Zero. Either way, the opponent will use attacks that aren't even possible when they're playable. Either way, Zero is here trying to find clues about his origins and X has to bring him back to base to figure out why the Sigma Virus isn't affecting him...or the Zero Virus, for that matter.
Zero will shoot two charged arm cannon shots followed by a projectile from the Z-Saber that travels to your current position at the time the sword is swung. He'll also try to dash into you and also repeatedly perform a room-wide attack that involves hitting the floor and causing numerous fireballs to travel up the screen. When he does this, get near him, hover over his head and return to your previous position, and hit him with your X-Buster. (Special weapons will not work in this battle if you're playing as X.) When you beat Zero, you'll find out that Zero used Soul Body (an X4 weapon!) on X, and that X is losing consciousness.
When Zero is Maverick, the fight will be the same as if he wasn't. The only difference is that he his charged arm cannon shots turn into saw blade-like projectiles that can home in on you after they hit the wall. After the battle, Zero will sacrifice himself to save X from Sigma.
If you face X, you'll see him and two Lifesavers. X is still concerned that Zero might be a Maverick. After the conversation, X switches to his Ultimate Armor. X's attacks are even stranger, as he not only jumps around and just shoots charged shots with the X-Buster, but he shoots out charged versions of the weapons from the fourth game! (Why couldn't we have those?) There's Split Mushroom's Soul Body, which sends out multiple X clones flying towards Zero and homes in on him as he moves, and also a charged version of Frost Walrus's attack, which sends out huge icicles down from the top of the room, just to name a few. X spends most of his time charging his attacks, however, making this battle easier than it should be and allows you to defeat him rather easily. The battle ends the same way after you beat X: Zero falls into unconsciousness from X using Soul Body on him.
Monday, January 22, 2018
ClementJ64 plays Mega Man X5 - Part 9 of 15
The Virus Stages copy level layouts from past Mega Man games. Yes, you read this right. It would actually have meant something if CAPCOM LISTENED TO KEIJI INAFUNE AND NOT MADE X6
This new entity with the same reading as Zero is christened the Zero Virus, and it has appeared at a specific location. The Maverick Hunters must destroy it once and for all.
But first...
Izzy Glow


Izzy Glow map by X GOD, No. 11 & TK31 for the RockMan Memorial Hall.
Come here as X with the Gaea Armor equipped. After the wall you have to knock down at the beginning, go down instead of straight ahead. You'll find a spike pit, a hostage and a Heart Tank.
You may have noticed a wooden roof in the castle. Destroy it with a charged-up Ground Fire, then climb up there to find a hostage and an EX-Tank. The EX-Tank allows you to start the game with four lives instead of three whenever you load up your save file or continue after a game over.
Axle The Red

Axle the Red map by X GOD, No. 11 & TK31 for the RockMan Memorial Hall.
You may have noticed at the beginning of the part with all the rope that one of the walls has two black blocks with a gold "V" on them. Dash into them with X's Gaea Armor. You can also destroy them with a fully-charged X-Buster shot if necessary. You'll have to push one towards the edge of a cliff in order to dash jump to a Heart Tank, and reaching that can be a bit of a stretch unless you can dash jump right off the edge of the block and onto the platform. Use the Gaea Armor to reach it so in case you somehow reach the left side of the platform where the Heart Tank is at, you won't accidentally slide off.
Grizzly Slash

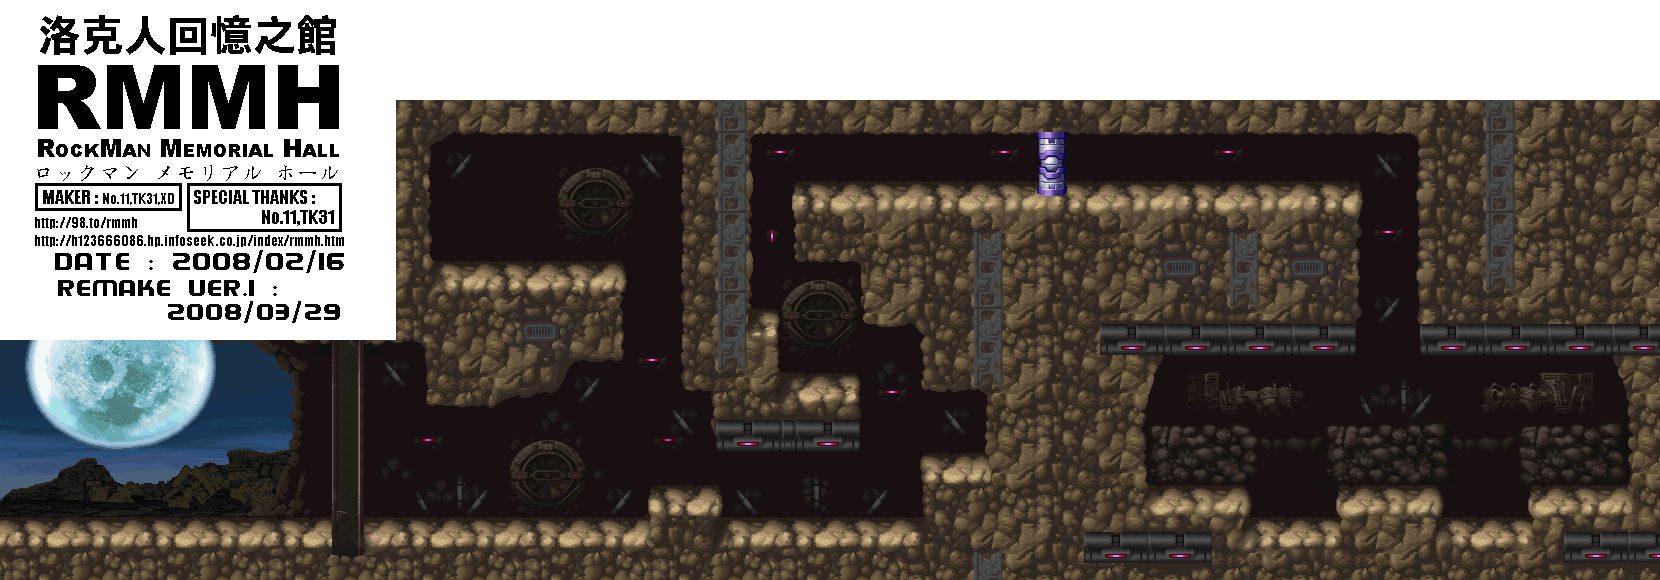
Grizzly Slash maps by X GOD, No. 11 & TK31 for the RockMan Memorial Hall.
Remember the maze near the end? Equip X's Gaea Armor and climb up that rather tall wall. There are spikes at the top, so you wouldn't have been able to really do anything here until now. Head to the right and you'll find another Heart Tank.
Squid Adler (continued)

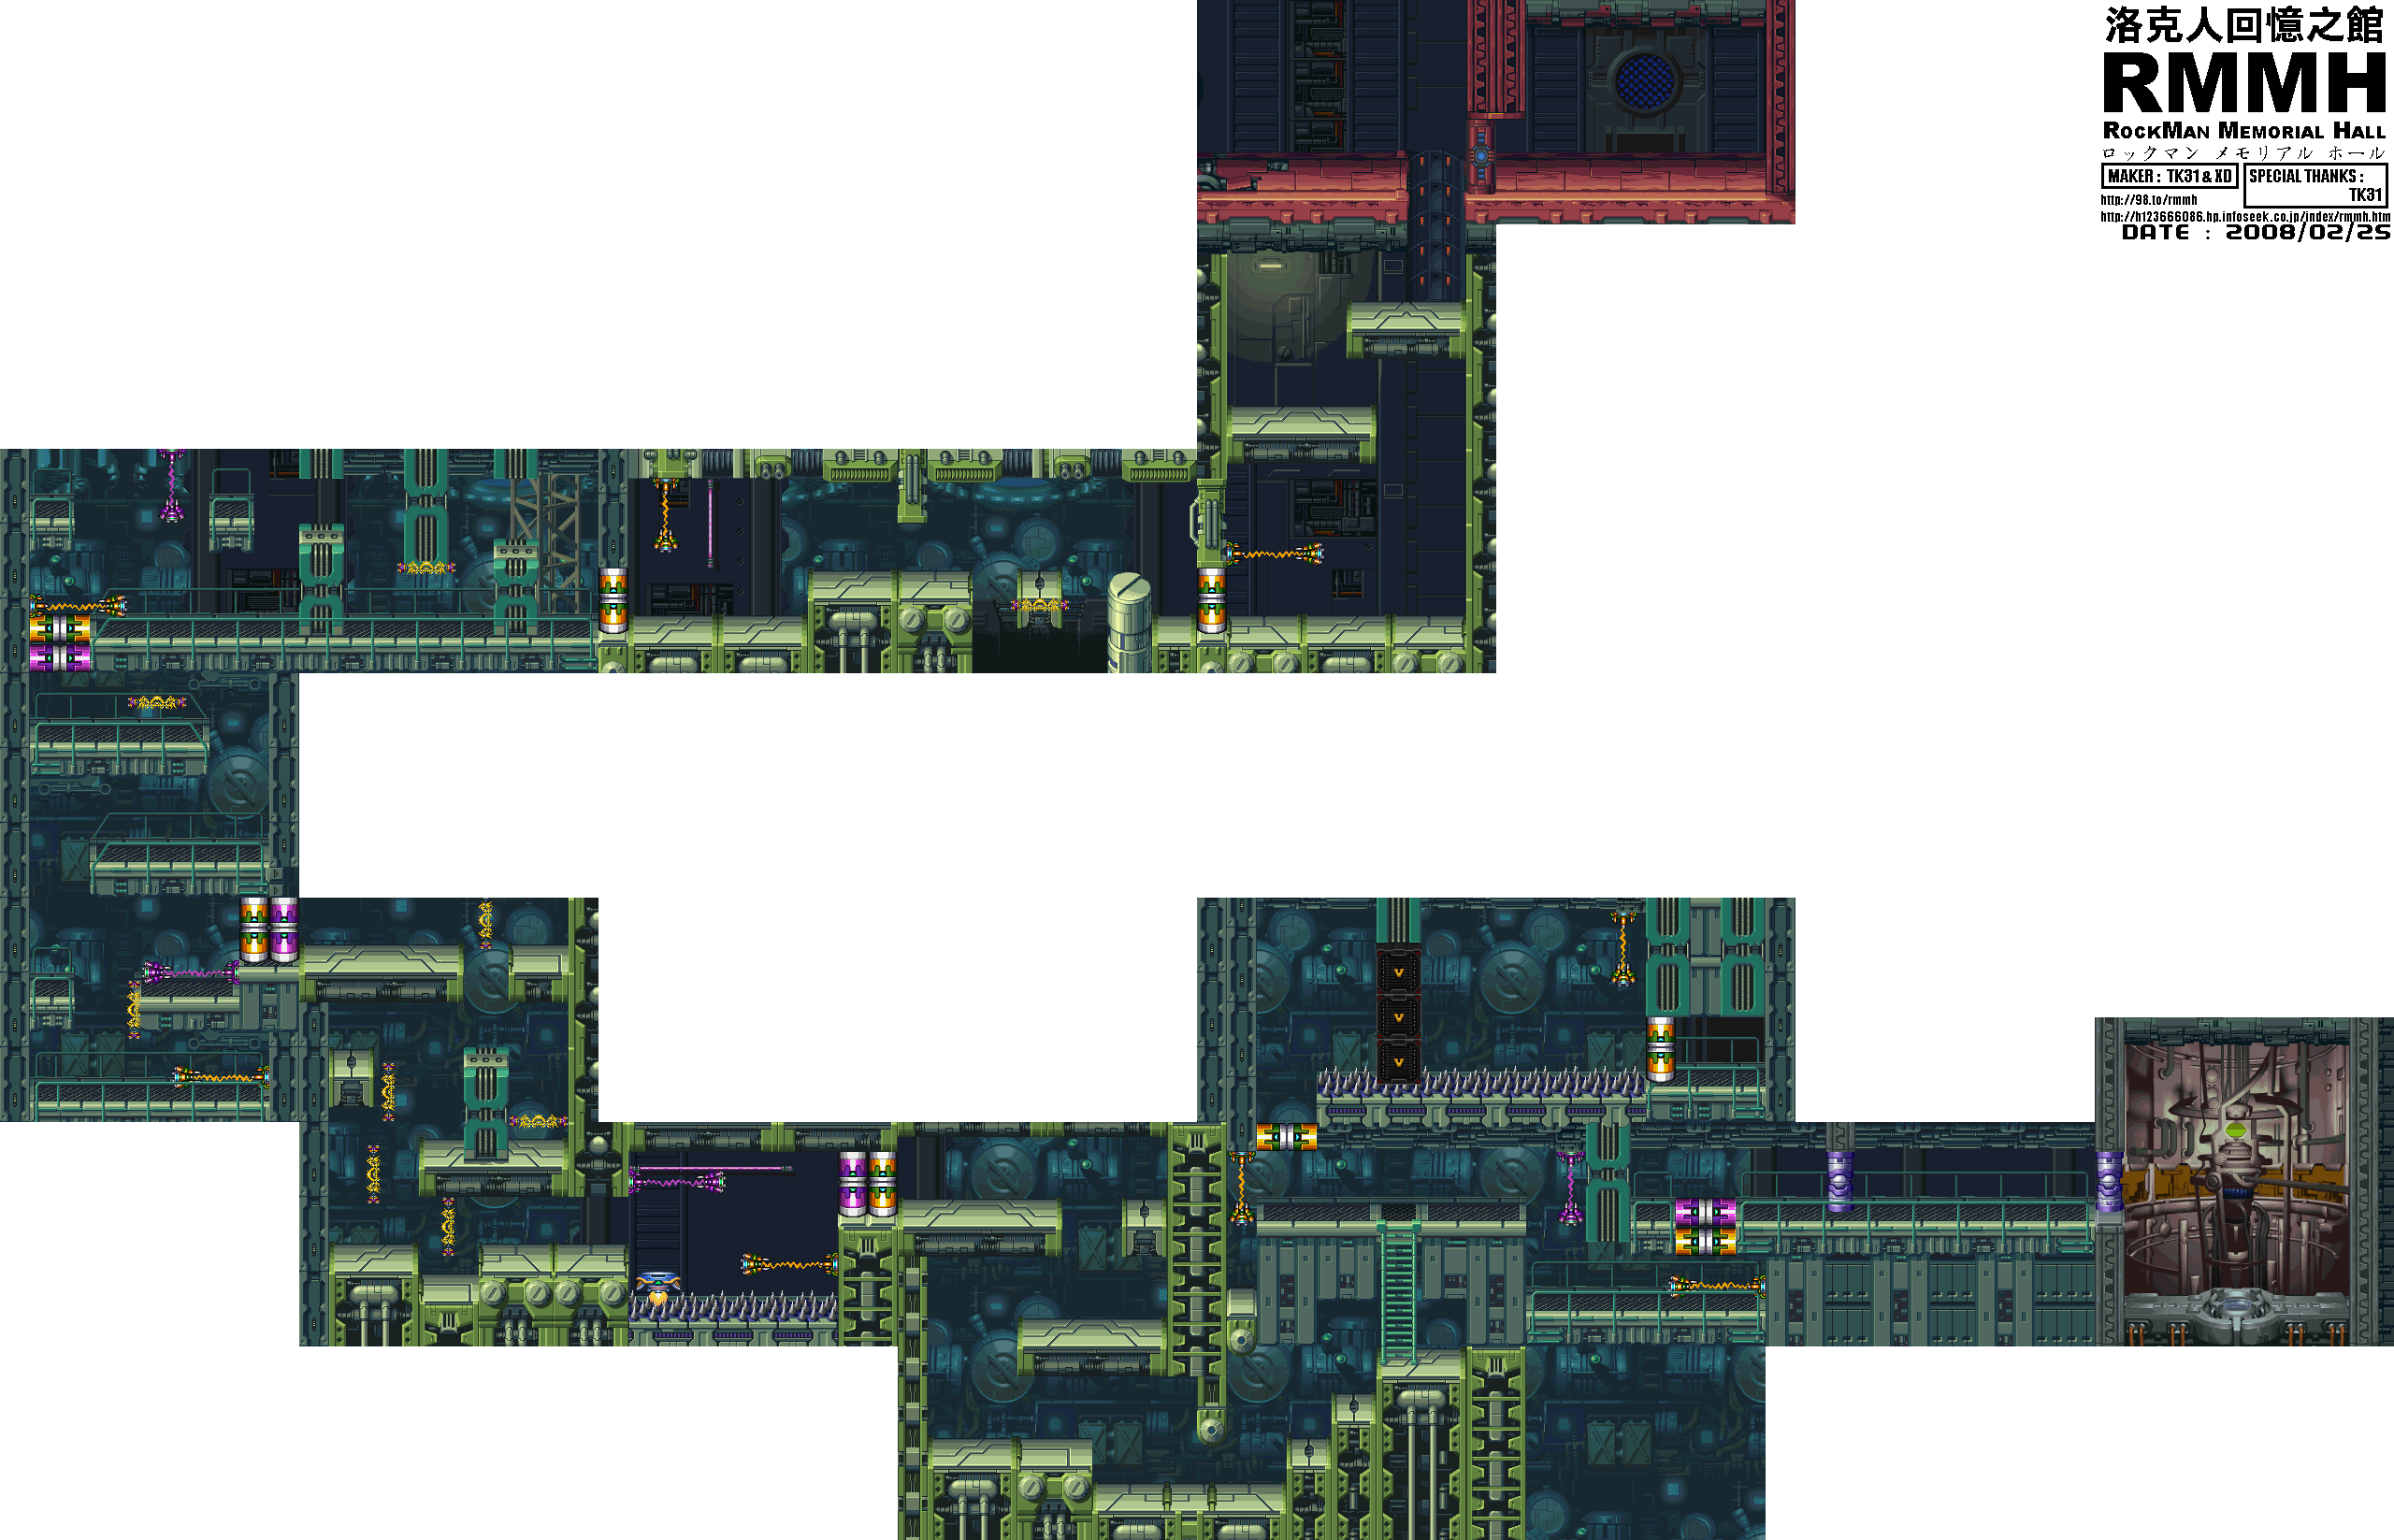
Squid Adler maps by X GOD & TK31 for the RockMan Memorial Hall.
You'll need X's Gaea Armor yet again. Climb up the ladder near the end, but go left instead of right. Open up the yellow gate and go up. Push the blocks, open the gate, and you'll get yet another Heart Tank.
Virus Stage 1
All Virus maps by X GOD, No. 11 & rmexesaito for the RockMan Memorial Hall.

As soon as you go in, some of you big-time Mega Man 2 fans will notice that this looks awfully familiar.
It's Quick Man's stage. No, seriously, it's Quick Man. Right down to the level design. There are two flying Robot Ride armors, a bunch of Sigma viruses at the midway point that look like X (I think) and extra vertical lasers near the end. Only thing is, you don't have any breaks in the action while you're dropping down and avoiding the lasers. Yes, the lasers still kill you. Yes, Dark Hold acts like Flash Stopper, and if you charge it up you'll freeze time longer than if you don't.
Then you enter the Boss Room. It's the Yellow Devil from the first and third games in the original saga. Even the music here is a remix of the Wily Boss music from Mega Man 3. Only difference is that the Yellow Devil is now black, you can duck under the lower center row of blobs when the boss teleports in the usual Yellow Devil fashion (this time from front column to back instead of utterly randomly), and the boss can sometimes change into a replica of a Wily machine.
Shoot at the eye with Tri-Thunder if you're playing as X, or use your regular attack if you're playing as Zero.
Sometimes the teleportation will stop halfway, and the boss will attempt to crush you two blobs at a time. Stay still in the center of the room and duck and jump accordingly.
The boss also leaves a green outline when it teleports. This outline will hurt you if you touch it.
When the Black Devil is near death, it'll change into the Wily machine form from Mega Man 6 with the spikes on the bottom that tries to jump around and crush you. You may not have that tomahawk weapon, but you can still shoot the eye with Tri-Thunder when it appears.
Virus Stage 2
It's Sigma Stage 1 from the first X game. Using Zero for this part makes it easier, as you can double jump to the platform area (which doesn't have those annoying flying enemies, by the way).
There are walking cannons will follow you around and jump in addition to shooting at you, and you also have crushers on the ceiling, too.
ClementJ64 plays Mega Man X5 - Part 8 of 15
Here we are. Our last Mavericks.
Mattrex


Mattrex maps by X GOD, No. 11 & TK31 for the RockMan Memorial Hall.
To beat Mattrex, equip Wing Spiral with with X and use Wing Shredder if you're playing as Zero. Mattrex is pretty sudden with his moments, whether he's shooting at the floor, trying to stomp on you or diving at you. Nevertheless, you'll want to use the weapons you got from the Skiver and have both Sub-Tanks filled up before you come here.
Beating Mattrex will give you Ground Fire for X and Quake Blazer for Zero. Ground Fire shoots a fireball towards the ground. When it lands, fireballs will shoot out of it in random directions. Quake Blazer is a downward stab that creates an explosion which destroys any nearby enemies when Zero lands. You'll also get the Booster engine for the space shuttle.
Axle The Red
Axle the Red map by X GOD, No. 11 & TK31 for the RockMan Memorial Hall.
X's Falcon Armor will come in handy here, since you can fly through here with it. Watch out for wall spikes, the purple roses that shoot out bugs (and sometimes thorns out of the side) and robot thorns that pop out of floors and ceilings. You'll need it to find the leg program for the Gaea Armor. For this capsule, Dr. Light explains the Gaea Armor, so I'm guessing the developers intended you to go here first if you took on the second set of Mavericks.
The purple roses can only be damaged and destroyed when they open up.
Wait for the thorns on the thorn robots to disappear before shooting.
The spiked robots on the ropes spin around when you get near them. Wait for them to be on the top part of the rope so you can dash under them.
It won't be long before you meet Axle the Red. Equip Ground Fire if you're playing as X, and use Quake Blazer if you're playing as Zero. Hit him with those attacks as he hops around and makes the occasional clone. Keep an eye on him so you ensure that you hit the real one, as hitting the clone does nothing.
Beating Axle the Red gives you Spike Ball for X and Twin Dream for Zero. Spike Ball acts as a spiked ball that shoots forward. The ball will bounce around the room if it's fully charged. Twin Dream is a hologram of Zero that is positioned in from of him and mirrors his every move, dealing damage to whatever it attacks when Zero uses his sword (simply having enemies touch the hologram does nothing). You'll also get the Orbiter engine.
After beating all eight Mavericks, the Space Shuttle will be complete. Zero will pilot the space shuttle. Even though X wants to do it, Zero tells him to stay in order to protect the Earth.
What happens next is random. You'll either destroy the colony or you won't. The chances of success is based mostly on how many times you continue. Using no continues guarantees success, but it's still a bit random. You can even reload your save file to get the desired result that you want.
If Zero crashes the shuttle into the colony successfully, Alia gets a strange reading that is similar to Zero's...
If both the Enigma and the shuttle fail to destroy the Eurasia colony, Zero turns Maverick instead. You won't be able to use him anymore after this. You can also get this scenario if the timer for the shuttle crash goes all the way down to zero.
Sunday, January 21, 2018
ClementJ64 plays Mega Man X5 - Part 7 of 15
Not only does The Great Clement fight off The Skiver and Dynamo (again), he also shows off Mattrex's volcano.
The Skiver
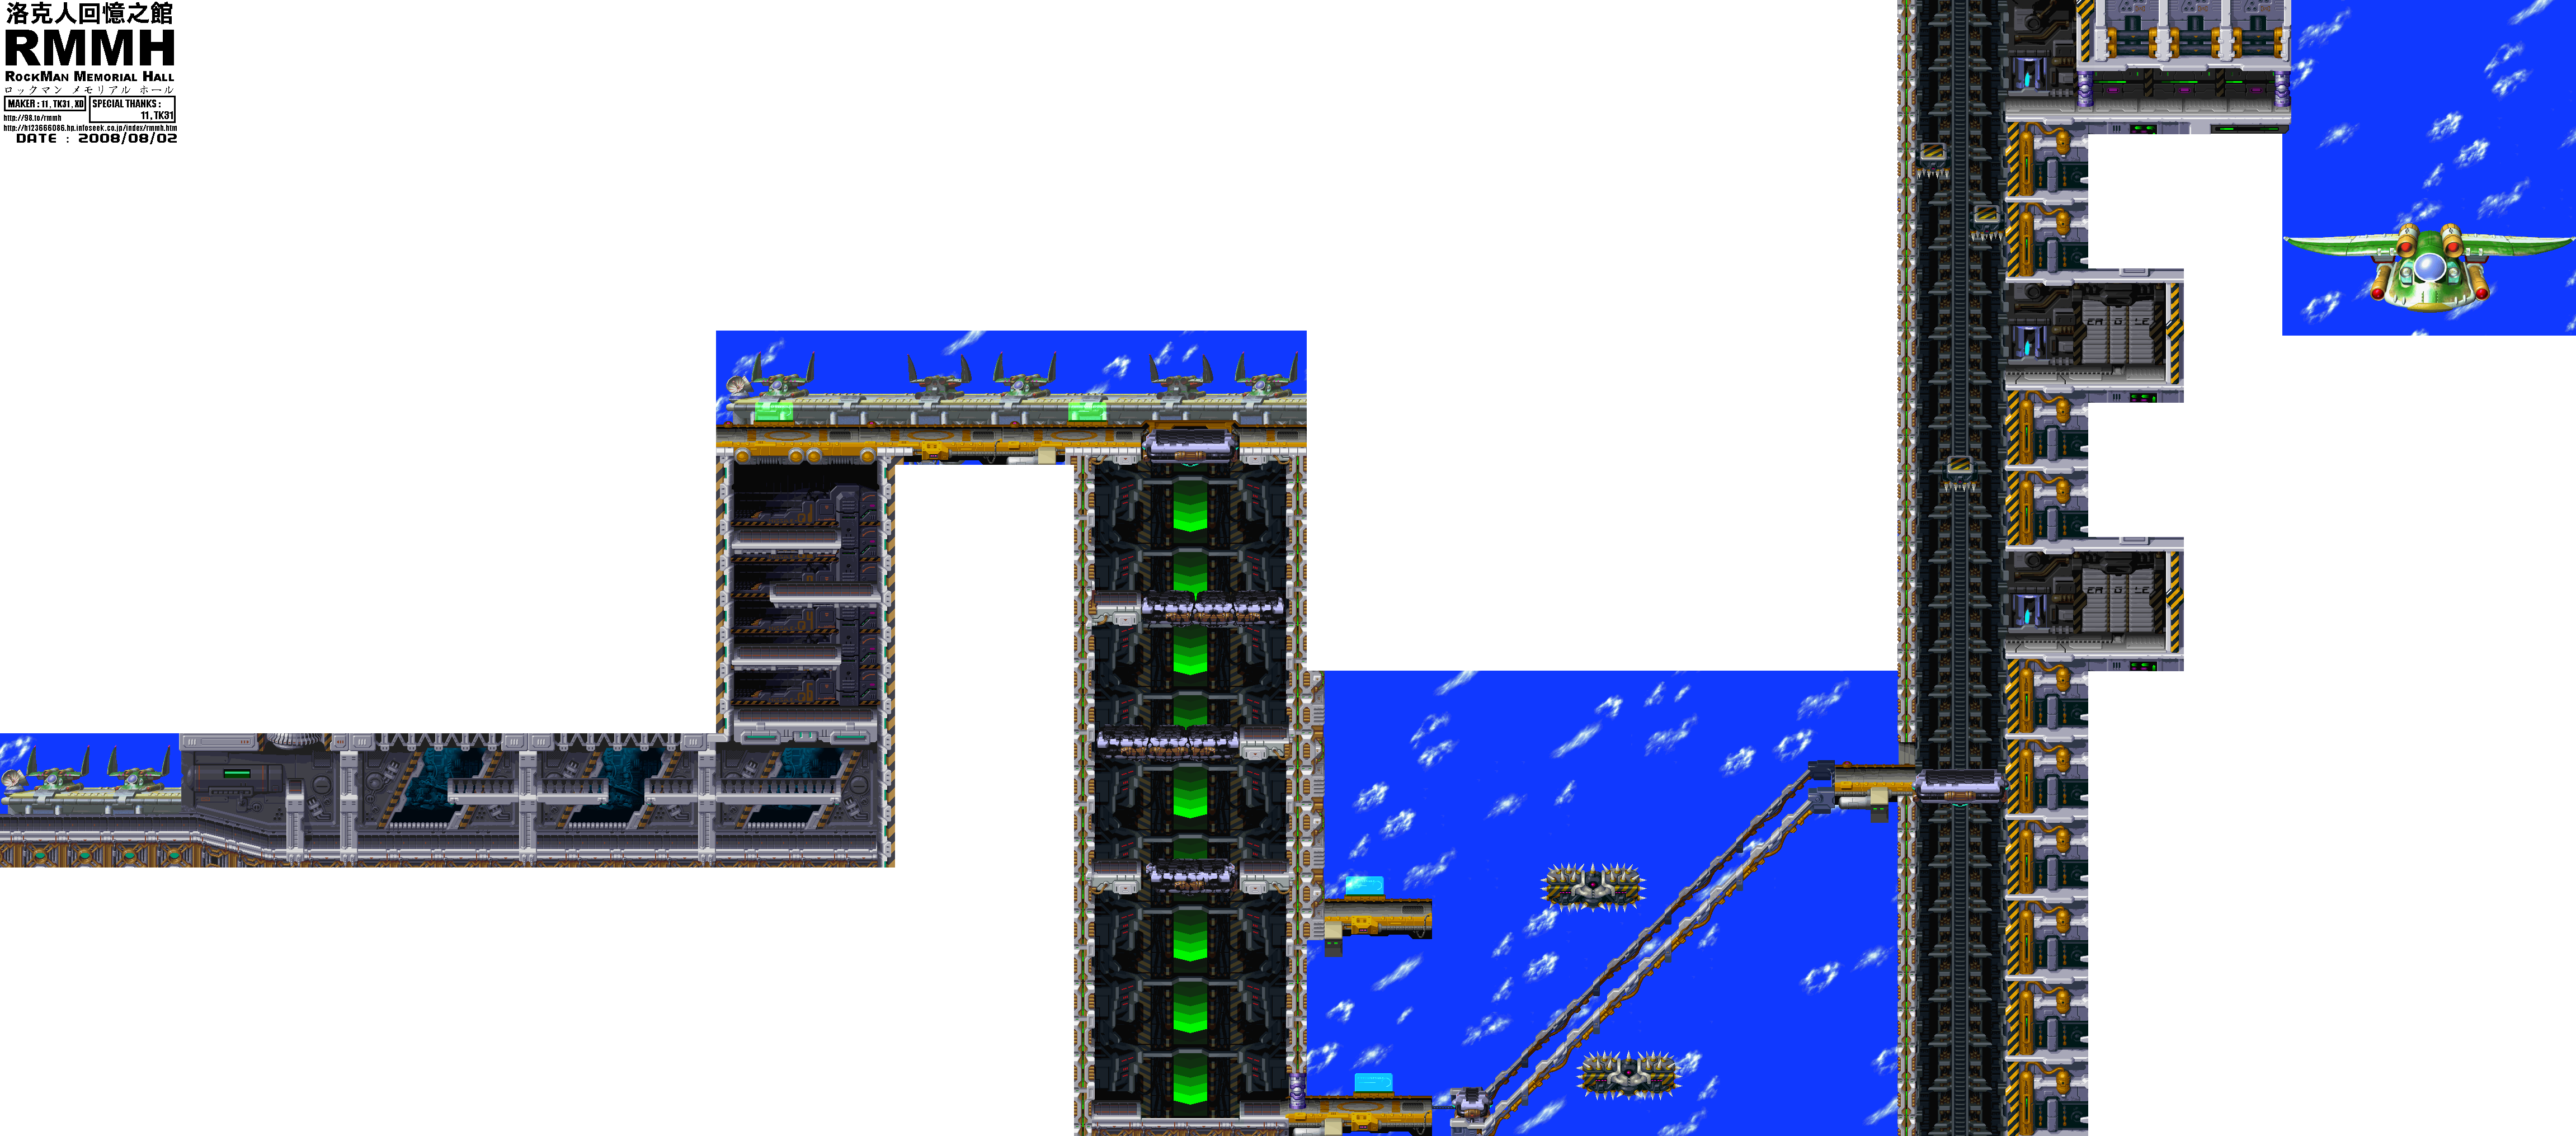
The Skiver map by X GOD, No. 11 & TK31 for the RockMan Memorial Hall.
To beat The Skiver, equip Dark Hold. Shoot your most powerful X-Buster shots or keep smacking him with the Z-Saber. When that runs out, stay in the middle so he doesn't knock you off the edge when he runs into you. Dash and jump to avoid the divebomb attacks (which come in all directions), and dash jump over the tornadoes he makes. If you have a W-Tank, use that to refill the Dark Hold so you can use it on him again.
Beating The Skiver gives you the Wing Spiral for X and the Wing Shredder for Zero. Wing Spiral produces a tornado that grows larger as it moves. Wing Shredder gives Zero the ability to produce a holographic clone that shoots at enemies while he is dashing. You'll get
Dynamo
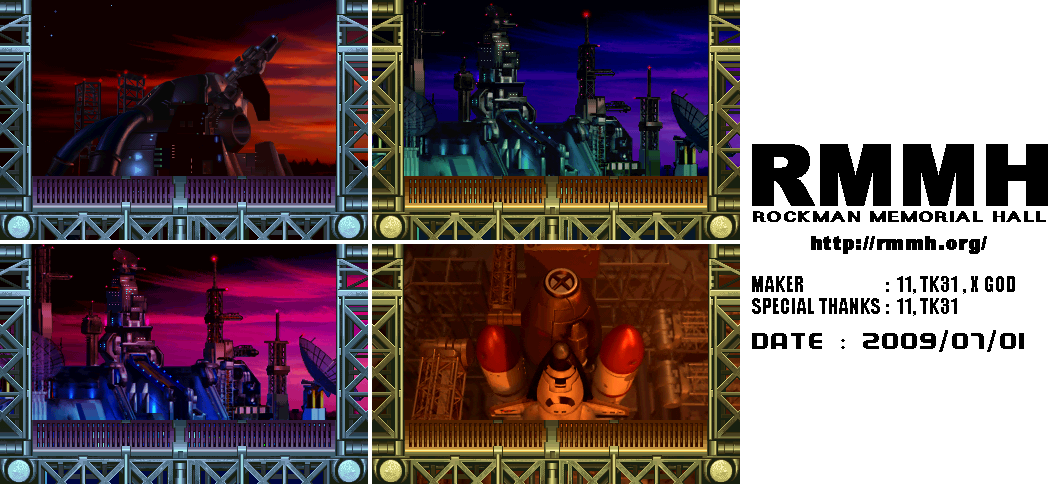
Dynamo maps by X GOD, No. 11 & TK31 for the RockMan Memorial Hall.
Yes, you'll fight Dynamo again after taking on six Mavericks. He has a new attack: a bunch of lasers out of nowhere coming down. Keep using the Crescent Laser or a fully-charged X-Buster and use a Sub-Tank if you need to. Once you beat him this time, you'll never have to face him again.
Mattrex
Mattrex maps by X GOD, No. 11 & TK31 for the RockMan Memorial Hall.
Be careful as you drop down, as the dragon heads can shoot fire and take off quite a bit of health. Don't touch the lava, or else you'll be vaporized. When you drop down where the lava first appears, go to the left to get a Heart Tank.
If you hide in the areas in the background are black, the lava that rushes out every so often will not be able to hurt you. This involves wall-jumping repeatedly in a corner to get walls decimated by the lava. If you see a low area, you'll have to duck to avoid an instant kill.
There are two different paths in the second area. The first uses the Robot Ride to take you through the lava below, and these Robot Ride armor have the same overhead swipe and dashing stab and exact same controls as the fourth game. Taking this path takes you the arm program for the Gaea Armor, which gives X the short-ranged but powerful Gaea Shot and the ability to break certain bricks while dashing.
The upper path has a robot pterodactyl chasing after you but never quite reaching you. It never catches up to you, so take your time while you avoid the projectiles and destroy the walls to continue on. Attack the pterodactyl's head when it's time to fight this thing.
ClementJ64 plays Mega Man X5 - Part 6 of 15
We take down to more Mavericks, and Zero's origins finally begin to unravel...
Dark Dizzy


Dark Dizzy maps by X GOD, No. 11 & TK31 for the RockMan Memorial Hall.
The platform here moves in a fixed pattern, and you'll want to avoid the spikes along the path while fighting all the bats.
You'll have to use the Falcon Armor at the end of the first Area to get the Sub-Tank here.
In the second area, you'll be dealing with some new stuff. Besides the dragonfly robots that fly from the floor to the ceiling, you'll get teleporters that turn the room upside down whenever you enter them. This will cause blocks to fall down and spiked areas to become easier. You'll have to re-enter the teleporter you came out of once to get the Heart Tank here.
Near the end, you can jump down the pit near the exit to the Dark Dizzy battle and find a capsule. You'll have to use the Firefly chaser to break the wall here from the other side. This is easier said than done, as you have to navigate it through the narrow corridor leading to the capsule, and if you hit a wall while trying to navigate the projectile, you'll have to start all over. This may take several tries, but once you pull it off, you'll get the head program for the Gaea Armor, a heavier, bulkier armor. Sadly, the Gaea Armor does not allow you to use the special weapons, but it is very strong and allows you to reach certain areas that X has not been able to reach otherwise. It can even stick to walls (as opposed to sliding off) and handle walking on spikes! This program works the same way as the head program for the Falcon Armor.
To beat Dark Dizzy, equip the Firefly Chaser on X, or use the C-Flasher if you're playing as Zero. These weapons not only do the most damage, but they temporarily blind him as well. Firefly Chaser is a slow weapon, but it keeps him from attacking. Destroy the bats, avoid touching him, dash jump straight up and over him when he divebombs and stay from the sonar shots that he fires. Dark Dizzy can also stop time, which allows him to freeze you until he hits you. If you run out of either weapon, use your X-Buster or Z-Saber.
Beating Dark Dizzy gives you the Dark Hold for both characters, which stops time as long as you have weapon energy for it. You'll also get the Energy Cart.
When you beat your fifth Maverick, you'll get some plot in which the Sigma virus and mentioned as well as Zero wondering why it doesn't harm him. A medical Reploid named Lifesaver asks Signas to keep Zero contained due to his positive reaction to the Sigma virus, but Signas thinks it over first.
The Skiver
The Skiver map by X GOD, No. 11 & TK31 for the RockMan Memorial Hall.
The bombs explode faster when you continue to shoot at them. If you're near them when that happens, you'll take about one-fourth of a full health meter.
The guys with the guns will just shoot at whatever location you're at. The "squid" robots can be killed with ducking attacks, which let you avoid the missiles it shoots. Yes, these enemies are from the fourth game.
At the elevator that leads downward, you'll want to drop down until you reach a cracked platform. There is the W-Tank, which works like the Sub-Tanks but allows for replenishment of weapon energy, provided you can pick up some weapons power-ups while your special weapons are full. You'll want o get this before the platform is crushed by the elevator.
After the elevator, fly up with the Falcon Armor to get the body program for the Gaea Armor. This reduces the amount of damage you take while using the Gaea Armor.
You'll have to wall jump off the right side of the lift elevator to avoid the spikes after this.
On the second elevator, check out the sides for hostages and a Heart Tank. Don't worry, the elevator will wait for you. Watch out for the platforms with the spikes on the undersides.
Saturday, January 20, 2018
ClementJ64 plays Mega Man X5 - Part 5 of 15
For the sake of this Let's Play, let's make it so that the Enigma fails so that we can go kick some more Maverick butt again.
Izzy Glow
Izzy Glow map by X GOD, No. 11 & TK31 for the RockMan Memorial Hall.
Watch out for this Sigma Virus heads as you go up the stairs. You'll take on small blue robots that will produce laser-like force fields that travel towards the ground, which will damage you if you run into them. Destroy the blue robots to get rid of them.
Watch out for the bouncing spiked balls as well.
You'll soon take on laser cannons on ropes. Focus on destroying only the black cannons and avoid the fire from the purple ones, which are indestructible. X can fight them from a distance, but Zero will have to get in close.
The green cannons that shot the orange energy balls can be destroyed with either the Crescent Shot or the Crescent Sword. You'll have to wall jump up a wall and destroy one to get the arm program for the Falcon Armor, which allows for an even more powerful charged shot for the X-Buster, but not for the charging up of special weapons.
To take down Izzy Glow, equip the Tri-Thunder if you're playing as X, or use Electric Blade if you're playing as Zero. Stay just to the side below Izzy and keep using those weapons. If you're fast enough, he won't be able to get any attacks in. If he moves around, the weapon will be able to travel the ceiling and walls.
Duck under Izzy's laser when he fires it, and watch out for his sudden teleporting.
Beating Izzy Glow will give you the Firefly Laser for X and the C-Flasher for Zero. The Firefly Laser allows X to shoot out a firefly projectile that can be controlled with the D-Pad. Sadly, X is immobile while using this. (Charging it gives you the Izzy Glow laser.) C-Flasher is Zero's Giga Attack for this game. Equip it like you would a weapon and use it to destroy all
onscreen enemies.
Once you've beaten the first four Mavericks, you'll be able to fire the now-reinforced Enigma. Your chances of success will be random: you'll either completely destroy the Eurasia space colony and go on to the final stage, or you're destroy only part of it, delay the collision and take on more Mavericks. The plot changes depending on what happens, and getting the result you want can be as simple as reloading your save file until you get the desired result.
If you fail, you'll have to send a space shuttle straight into the space colony, and you'll need to get more devices in order to get that to work.
Here are the four Mavericks you'll have to defeat in order to get those parts:
Axle The Red (Axle Rosered)...who is he? He carries a concealed Orbiter Engine, but that's all that is known. (Named after lead singer Axl Rose.)
Mattrex (Burn Dinorex) is a weapons storage guard. He owns a Booster for rockets. (Named after Matt Sorum.)
The Skiver (Spiral Pegacion) is part of the Reploid Air Force. On his forehead is the Repliforce "R" symbol. He has an Orbiter Wing. (Named after Michael "High in the Sky" Monroe, who is not a member but nevertheless played on a few tracks on Use Your Illusion I and The Spaghetti Incident.)
Dark Dizzy (Dark Necrobat) is a mysterious Maverick with a Fuel Tank. (Named after Dizzy Reed.)
Dark Dizzy
Dark Dizzy map by X GOD, No. 11 & TK31 for the RockMan Memorial Hall.
Enemies will come out of the constellations if you're under them, so watch out. The bats usually show up in packs and will fire projectiles and bombs downwards.
Friday, January 19, 2018
ClementJ64 plays Mega Man X5 - Part 4 of 15
We get some more of the collectibles this part of the Mega Man universe is known for and take on Duff McWhalen...
Duff McWhalen (continued)
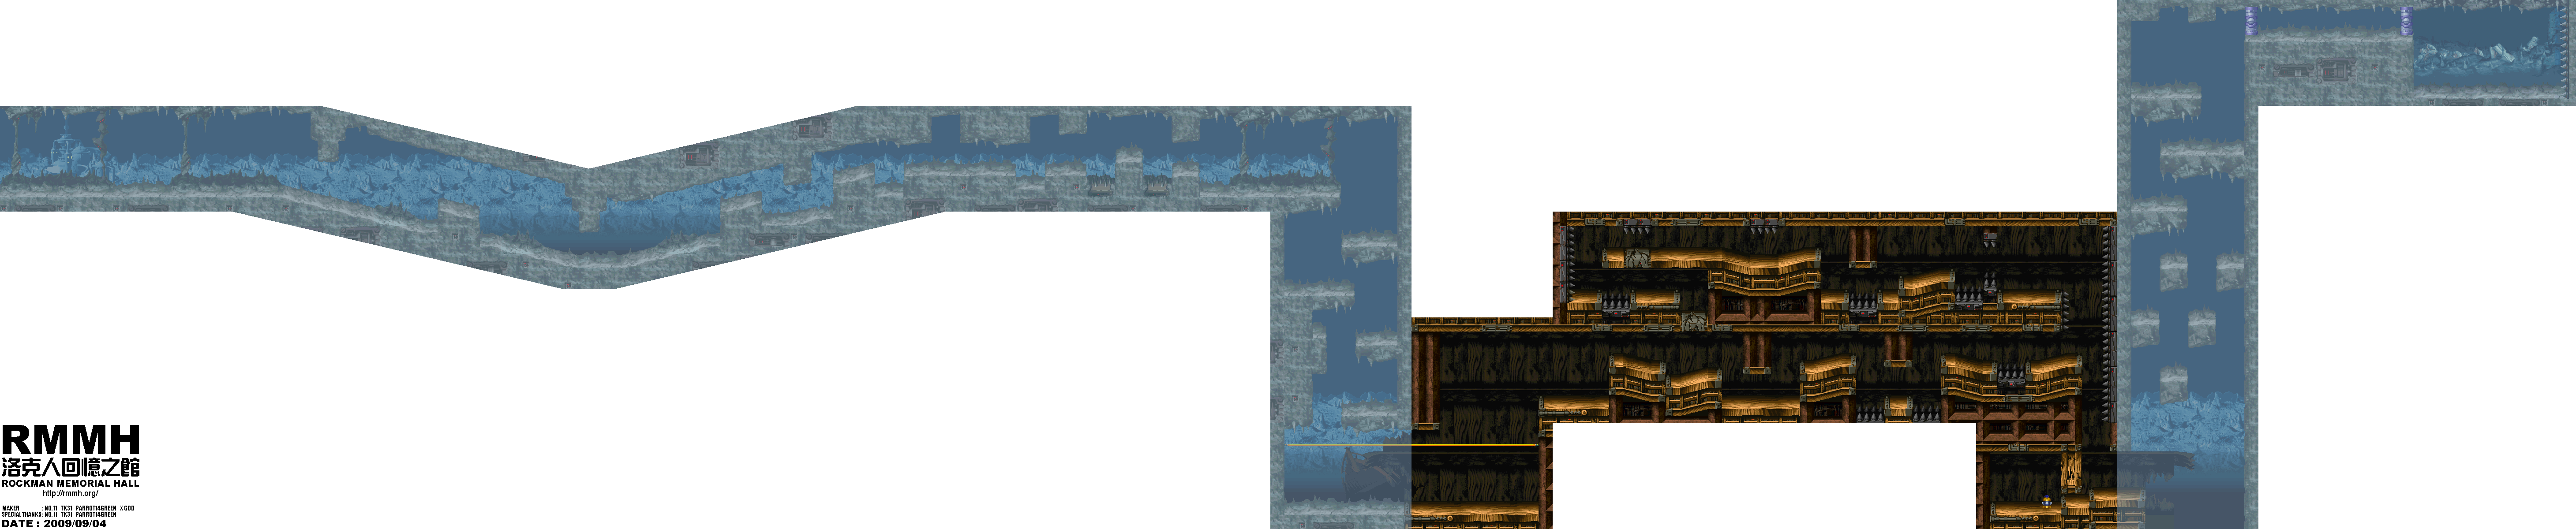
Duff McWhalen map by X GOD, No. 11, parrot14green & TK31 for the RockMan Memorial Hall.
You'll eventually have to fight the submarine itself. Just stay low, avoid the laser, destroy the fish it spits out and just keep shooting at it.
Unfortunately, you're still not down with it. The stage will scroll downwards, and you have to deal with the back of the sub. You can destroy the cannons at the back of the sub, but they'll continually re-spawn. Once you reach the bottom, you'll fight that part of the submarine off. You can then continue into a sunken ship, and the water will sink below the bottom of the screen.
The fish robots here will follow the path in a stop-and-go motion, and will shoot at you. Thankfully, they aren't too difficult to deal with. There is a cracked ceiling that only Zero can break with the Electric Blade. This leads to a higher path that only Zero can access, and along the way there is a Heart Tank. Be careful with the Heart Tanks, as the health increase only goes to the character you pick it up with. The other character gets nothing.
You're better off getting all the Heart Tanks with X whenever possible, as you'll eventually find out that Zero won't be able to access most of them.
You'll eventually find a capsule for the armor program for X's Falcon Armor, but you won't be able to get it with Zero at all. You'll have to come back here later as X. When you do, use Goo Shaver to shoot through the narrow opening near the floor and destroy the explosive barrel, allowing you to destroy the wall blocking the capsule.
Continuing on, you'll face the top of the submarine. You'll have to destroy the re-spawning missile pods and the yellow part at the top covering the laser cannon while avoiding the projectiles and being crushed by the platforms above. When you reach the top, you'll finally be able to destroy the top of the submarine. Destroy the laser cannon at the top and watch out for the projectiles from the missile pods, like before. You'll also have to deal with the Launch Octopus fish as well.
You'll then reach the end and take on Duff McWhalen. With X, equip Crescent Shot. Use the Crescent Sword if you're playing as Zero. Leap on the ice blocks when he creates them. When he swims to the other side, stay as far left as possible so you don't get sent into the spikes. Whenever you use the C-Shot or C-Sword, Duff McWhalen will be stunned and will briefly stop producing the ice blocks that get in your way.
Beating Duff McWhalen gives X the Goo Shaver and Zero the Frost Splasher. Goo Shaver fires a small ice shared along the ground, while Frost Splasher gives Zero an air dash that produces a shield of ice that damages enemies and allows Zero to pass through most obstacles without harm.
You'll also get the Hydrogen.
Izzy Glow
Izzy Glow map by X GOD, No. 11 & TK31 for the RockMan Memorial Hall.
To get the bridge to come down, simply shoot at it.
The Mettaurs are back! Shoot them down with your X-Buster.
Watch out for the platforms on chains with the spikes at the bottom. They can't insta-kill you, but they do a lot of damage.
The purple disembodied Sigma head finally makes an appearance here. Remember, they'll hurt X, but for some reason they heal Zero.
When you reach the door at the end, shoot it down to continue.
ClementJ64 plays Mega Man X5 - Part 3 of 15
Interesting backstory: Squid Adler retired as a Maverick Hunter after he was fed up with the work, and he was acquainted with Launch Octopus, who was killed at X's hands in the first game. Whaddya know?
Squid Adler (continued)
Squid Adler maps by X GOD & TK31 for the RockMan Memorial Hall.
Now that you're done with the jetbike section (and have all the little balls of light collected), you can access the door to the right. Here, you can get the Falcon Armor head program for X, which allows use of special weapons with less weapons energy consumption.
After you get the part, drop down and kill the purple robot. This guy takes a lot of abuse before he finally falls, but he is destructible. Behind him is a yellow Reploid that looks a lot like X. Turns out there are some hostages in this game that you have to rescue. Thankfully, this guy is pretty easy to rescue, but some aren't as simple to get. Nevertheless, you can get health boosts and even extra lives from rescuing these guys, so you should definitely make it a priority.
To open the big yellow and purple doors, you'll have to attack the color-coordinated levers above them.
To climb on the rope, simply jump into them. It's like Donkey Kong Country 2.
The flying robots with the shields will raise the shields up when they shoot, making them extremely vulnerable to attack when that happens.
You'll eventually face Squid Adler. If you're X, equip the Goo Shaver from Tidal Whale. If you're Zero, use the Frost Splasher from Tidal Whale's stage and slash him with the Crescent Slash. Watch out for the three-way shot that turn into balls that travel the walls and floor, and wall jump to avoid the electrical laser he lays along the floor.
Beating Squid Adler gives you the Tri-Thunder for X and the Electric Blade for Zero. With Tri-Thunder, X can create spheres electrical energy that travel along floors and walls. Electric Blade allows Zero to slash upwards with a lightning sword. You'll get the Energy Cart as well.
When you beat a Maverick, you can get a DNA select prompt. Weapons & Life will increase your max health, while Weapons & Energy will increase your maximum weapons energy. You'll also get different equips depending on which choice you make, which you can see a list of here and a list of which choices give you what at the end of the list here.
After beating two Mavericks, you'll find out Dynamo is attacking the Hunter base.
Dynamo
Dynamo maps by X GOD, No. 11 & TK31 for the RockMan Memorial Hall.
You'll face Dynamo in one of four possible areas, but the fight is always the same. Dynamo has just two attacks: spinning around a red whip that acts like a shield (which he also throws) and jumping up to shoot an energy ball that vertically tracks where you are and splits into two when it reaches your level.
Either way, the fight is a piece of cake.
Duff McWhalen
Duff McWhalen map by X GOD, No. 11, parrot14green & TK31 for the RockMan Memorial Hall.
The music here is a remix of Bubble Crab's theme from the second game.
Here, you'll be chased after by a submarine in an auto-scrolling segment. Destroy the cannons on the top and bottom and take out any of the fish robots it shoots out.
Remember those big fish from Launch Octopus' stage in the first game that sucked you in and tried to damage you, and forced you to attack them from the inside if they devoured you? Well, they're back, and they haven't changed a bit. They just have more graphical detail now.
The starfish that move up and down are indestructible.
If you attack the submarine, you'll be able to push it back a bit. It'll move back to its original location after some time, but you can continue to push it back. Just watch out for that orange laser.
Thursday, January 18, 2018
ClementJ64 plays Mega Man X5 - Part 2 of 15
New game, new Mavericks.
As soon as you enter the stage select screen, Signas will tell you that you must upgrade the Enigma in 16 hours or else you won't be able to save the Earth from the Eurasia colony collapse. These hours pass in several minutes of game, so you definitely have to be quick. Four of the Mavericks will have parts that can enhance it.
Grizzly Slash (Crescent Grizzly) is a weapons broker. He has a Crystal Ball. (Named after Slash.)
Duff McWhalen (Tidal Makkoeen) lives in the ocean. If the ocean can be secured, you'll get Hydrogen. (Named after Duff McKagan.)
Squid Adler (Volt Kraken) is an ex-Maverick Hunter. He has an Energy Cart. (Named after Steven Adler.)
Izzy Glow (Shining Hotarunius) is a Doctor of Engineering. He has a Laser Device. (Named after Izzy Stradlin.)
The first set of parentheticals are the Japanese names for the Mavericks; the second set of parentheticals dictate which members of American hard rock band Guns 'N Roses the Mavericks are named after in the English translation. You're welcome.
For now, you'll have access only to these four stages.
If you press R1 on the stage select screen and go to the Device Set-Up screen, you'll see which items you have for the Enigma. To equip armor, press L1 on the stage select screen. (Yep, you'll be equipping super-laser weapons and switching between X, armored versions of X and Zero. Nice.) You can even shoot the laser right now if you wanted to, even though your chances of success are pretty low. If you equip stuff, you'll change stats around and even change the accuracy.
For now, let's focus on taking on some Mavericks.
Grizzly Slash
Grizzly Slash maps by X GOD, No. 11 & TK31 for the RockMan Memorial Hall.
Grizzly Slash is the easiest to defeat with the X-Buster and Zero's Z-Saber, so let's play his stage first. Also, playing as Zero makes the boss battle easier.
The bouncing spiked balls and the wall lasers on the trains can be easily destroyed with your normal weapon.
When you reach the end of a train car and find a big blue light on it, destroy that light and quickly move on to the next car. Watch out for the missiles.
The flying red robots with the cannon on it fires weak shots in two directions.
The robots with the big wheels will also jump, but they can easily be taken care of.
You may notice the blue circle with the green dot in it as well as the word "Normal" next to it. This is your reading for the Sigma Virus. Some enemies will carry the virus and show up as a disembodied purple Sigma head, and this indicator will change color and go from "Caution" (yellow) to "Danger" (red) to "Maverick" (purple) if they keep running into you. If you go Maverick, the game isn't over. If you're playing as X, it will damage you. If you're playing as Zero, it heals you. This will be explained later.
You'll eventually destroy the rest of the train cars and you'll have to dash to the finish. At the front of one of the cars in this part of the first area, you'll find a Sub-Tank, which can be filled with energy capsules if your health is full and used as an energy refill in the pause menu if you're low on health. Just like in X4, there are two of these in the game.
When you make it to the last train car, you'll make your way to the second area. Thankfully, this is very seamless and doesn't have the loading times that signify entering a new area that the last game had.
If you go up at the beginning of the second area, you'll find a leg capsule. If you approach it as Zero, Dr. Light's hologram will identify you as Zero and wonder who you really are before thanking you for supporting X. (Do these holograms have AI or something? Sheesh. The fact that Dr. Light's hologram just knows things out of the blue is never explained, so this is pretty mind-boggling once you think about it.) The best part is, you don't have to be X to step into them. You can still be Zero and get the enhancements for X, which is really, really convenient.
The leg program is one of four segment of a much larger program, in this case the Falcon Armor. Once you get the four pieces of the program, you'll be able to complete the Armor. Once you get all four pieces, the armor will be complete. Nothing happens unless you have all four. Alia (who Dr. Light apparently knows from beyond the grave as well) will be able to analyze the program data and make it available for upload.
With the leg program, X can fly through the air and even become invincible while flying, allowing any enemy he comes in contact with during that time to be destroyed.
Dr. Light's hologram doesn't know Zero's body structure, so therefore Zero can't get any Dr. Light enhancements. Zero shrugs it off, but asks him about the figure of an old professor that pops up in his mind from time to time. Dr. Light tells him to forget about it, thinking it's an error of some sort.
You'll eventually take on Grizzly Slash. If you're playing as Zero, slashing at him does a ton of damage. Don't get too close, or you'll be hit with his slash attack. Don't let him jump into you, and when he burrows into the two recessions in the ground, stay away from them so he doesn't hit you. If you're playing as X, you can fight him with the X-Buster, but you're going to have to shoot him quite a bit to do some heavy damage.
Grizzly Slash will also stab at you with his drill arm, but you can whack it with the Z-Sabre.
By beating Mavericks, you get weapons for both X and Zero, which is really nice. X gets the C-Shot, which fires a crescent forward at a random angle. Zero gets the C-Sword, which gives you a double jump and a somersault slash when you press Square in mid-air, meaning that you can do a few things from the last game again. You'll also obtain the Crystal Ball, which increases the striking capability of the Enigma.
After beating one Maverick, you'll get a message from one of the characters in the intro cutscene. He plans to attack the Maverick Hunter base, calls out X and Zero, and introduces himself as Dynamo.
Squid Adler
Squid Adler map by X GOD & TK31 for the RockMan Memorial Hall.
Remember the jetbike segment from Jet Stingray's stage in the last game? Well, you're doing it in the beginning. You'll have to jump a pit before the word "Ready" is off the screen, and you'll have to collect all the balls of light as you make your way to the front door to the rest of the area, dashing into and shooting down all the walls that are in your way as you go. If you collect them all, you'll be able to get another Dr. Light capsule.
ClementJ64 plays Mega Man X5 - Part 1 of 15
...and now for the finale of the X series...if Keiji Inafune had his way.
Not only is there a difficulty switch (Easy, Normal, Xtreme) but there is also a game speed switch (Slow, Normal). Beware the Xtreme difficulty, as it can get pretty insane.
You can choose between X and Zero, and there are no major plot differences between the two characters. Unlike the last game, you're not forced to stick with the character you've chosen, as you can switch between the two at any time. This selection is just for the intro stage only, after that, you can choose between the two of them.
There is a plot to destroy the colony of Eurasia, and it involves scattering a Virus all over Earth. Not surprisingly, Sigma's involved (and you can definitely tell it's him through the first of the now non-animated cutscenes). Sigma plans to show Zero his true origins.
Intro Stage

Intro stage map from X GOD and rmexesaito for the RockMan Memorial Hall.
As soon as the game starts, you'll get communication from Alia. Sigma has appeared towards the statue under construction but has had no readings from him since, and Alia has also lost a reading on Zero.
Alia is the navigator, spotter and communicator of the Maverick Hunters, and she debuts in this game and stays on board for the rest of the series. She's the closest that the X series gets to having a character like Roll from the original saga. AND SHE TALKS A LOT.
Believe it or not, you can duck by holding Down on the Control Pad.
Also, you start the game with all the armor upgrades from X4, even though you have no special weapons. Well, this is interesting. The only downside is that you can only do this if you start the game with X instead of Zero, but it's a small price to pay.
If an energy pick-up is laying on its side, it's a small pick-up. If it's upright, it's a large one. The glass things with the yellow dot inside is a health pick-up, while a blue ball is a weapons pick-up.
Fight off the purple tanks from a distance so you don't get cut.
The small purple robots that stay low to the ground and shoot at you can be picked off better with a charged shot.
The flying green robots can be destroyed with a charged shot.
Jump on the green palette swaps of the purple tanks to get over them.
When you enter the dilapidated building, watch out for crumbling ceilings. Thankfully, they can also destroy enemies.
Hold the Control Pad, jump toward the wall and keep pressing X to wall jump your way over the walls that try to crush you near the statue.
When you make it to the statue, you'll meet Zero. He's wounded, but okay. Since Sigma is a virus, he can't be tracked, and his presence has to be "felt." Before Zero can leave, Sigma's giant floating head explodes right out of the statue. Shoot at Sigma with fully-charged X-Buster shots and leap up the wall to avoid the green homing fireballs. Duck to avoid the purple laser and the barrage of blue fireballs. Just stay at the left side of the room and you'll be fine.
After the battle, you'll find out the Sigma Virus has spread all over the Earth and has completely covered it due to Sigma's floating head exploding. To make matters worse, the space colony Eurasia is on a crash course for Earth and must be destroyed within 16 hours, or else the entire planet will be annihilated. The only options are A) fire at the colony with a superlaser known as the Enigma that is very old and has to be powered up, or B) ram a space shuttle affected by the Sigma Virus into the colony as part of a kamikaze flight into the blasted thing.
When you beat a level, Alia will tell you how well you did (time taken, Mavericks defeated and damage received) and you'll see how much time you have left before Eurasia crashes into Earth.
By the way, Douglas and Signas are also new characters. Douglas is a mechanic for the Maverick Hunters, while Signas is the Maverick Hunters' newest leader and commander.
Subscribe to:
Posts (Atom)