We've got the Diamond Eyes, but we find out too late what the Diamond Eyes are really for...
All maps by Grizzly.
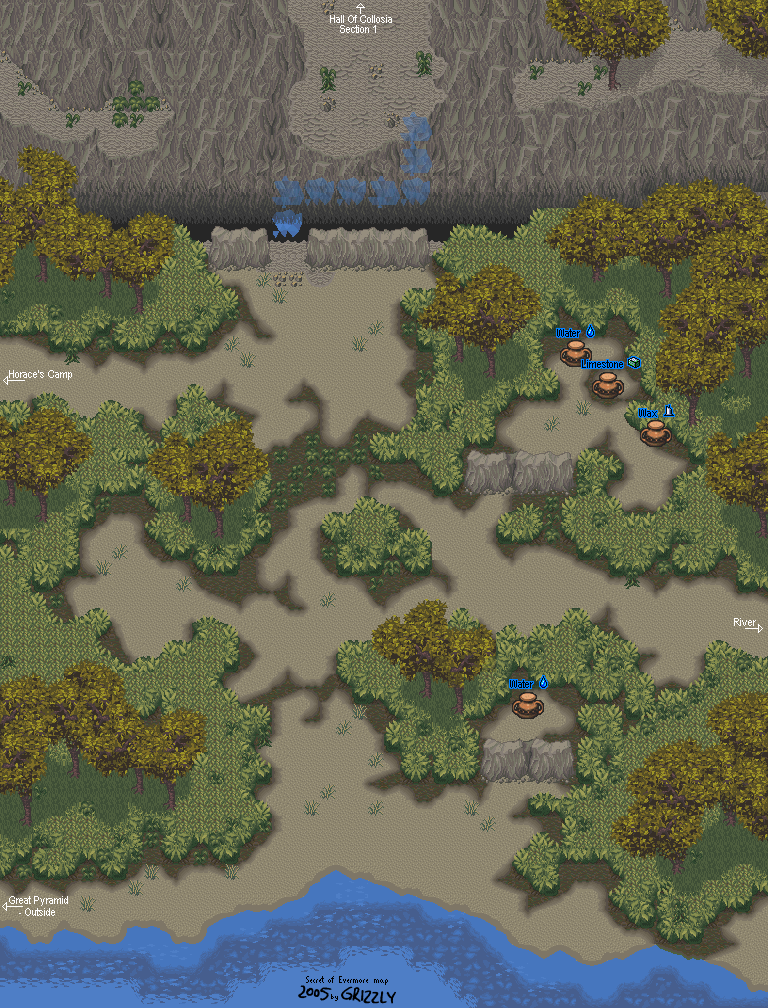
Right Bank Forest
Now that you have the Bronze Axe, you can break the rocks that are blocking the jars in this area.
Before you head back to the Right Bank, you'll meet Horace...except he's wearing green. He'll ask for the Diamond Eyes and pay you back with an evil laugh. He'll send two Rogues after you, but they're nothing.
When you beat them, you'll earn 100 Jewels. Yes, you beat up two Rogues out of a million that we've already fought before. We can tell you're proud.
Right Bank
That Bronze Axe will also work on the rock wall blocking the cave on the east side of the Right Bank area. Break the wall with the Bronze Axe, then go inside and you'll meet an Alchemist. He'll give you the Drain formula, which works like the HP Absorb spell in Secret of Mana - it drains the enemy's HP and transfers it to you.
Drain
1 Ethanol, 2 Roots
From here, head back to Nobilia. If you need alchemy ingredients, talk to both the alchemist that gives you Drain as well as Blimp again. You have yet another boss battle coming up. Hope you can get lots of Ethanol and Roots...levelling up Drain for this battle can be helpful.
Nobilia
When you return to Nobilia, you'll find out that the marketplace is empty. Head down to the Town Square and you'll instantly walk up to the Sacred Dog. The fake Horace will place the Diamond Eyes in the Sacred Dog, and you'll have to fight the monster underneath it that's been waiting to be revived after all this time...Aegis.
Boss: Aegis
Aegis sends out three creatures - Bad Dawgs (evil clones of your dog from Prehistoria), Will-o-the-Wisps, and Skullclaws. The Will-o-the-Wisps are exactly like the ones from the Salabog battle from earlier in the game, and the Bad Dawgs move as slowly as your dog and just have the Dog Attack. The Skullclaws are the worst enemy of the three, since they are basically more powerful versions of the Bone Buzzards.
Whenever Aegis has a medallon on its head, it will create the three monsters. The skull and moon medallion produces the Bad Dawgs, the dog medallion produces Skullclaws and the sun medallion produces the Will-o-the-Wisps.
Surprisingly, Aegis is pretty easy. Aegis can cast spells, but that doesn't seem to happen very often.
If you try to leave the area around Aegis, the bridges will explode and knock you back.
When you take him down, you'll get 1200 Jewels.
Town Square
When you defeat Aegis, he'll leave some sort of power core behind. The real Horace Highwater shows up and summons Tiny to throw it somewhere...which he does with relative ease. It will explode north of the camp, emptying the river that flows near the Pyramid and exposing a hidden tunnel. Horace asks you to explore this tunnel as it may be your only hope of returning to Podunk.
If you have five or more Call Beads in your inventory, Horace will also give you the Staff of Life. It increases your ability to defend against enemy attacks.
At this point, Madronius will not be at the camp, as he shows up to mention the tunnel near the Pyramid before leaving.
Now that you can trade in the marketplace again, it is possible to get a Chocobo Egg randomly from buying pots instead of getting just 10 Jewels. Chances are pretty low, though, but if you keep trying, you can eventually do it.
There is a palace north of the new crater where the Sacred Dog statue used to be. The gate will not be open, but you can find ingredients there. The middle stone cobra on the left gives you water, meteorites, dry ice and more water, but you have to talk to it many, many times before it gives you everything, and that takes a while.
No comments:
Post a Comment