We explore the rest of the Hall of Collosia before obtaining the first Diamond Eye in this entry.
All maps by Grizzly.
Hall of Collosia - Maze 2
Remember that first maze we did before we fought the Mini-Taur? Go to the nook south of that. It leads to another maze.
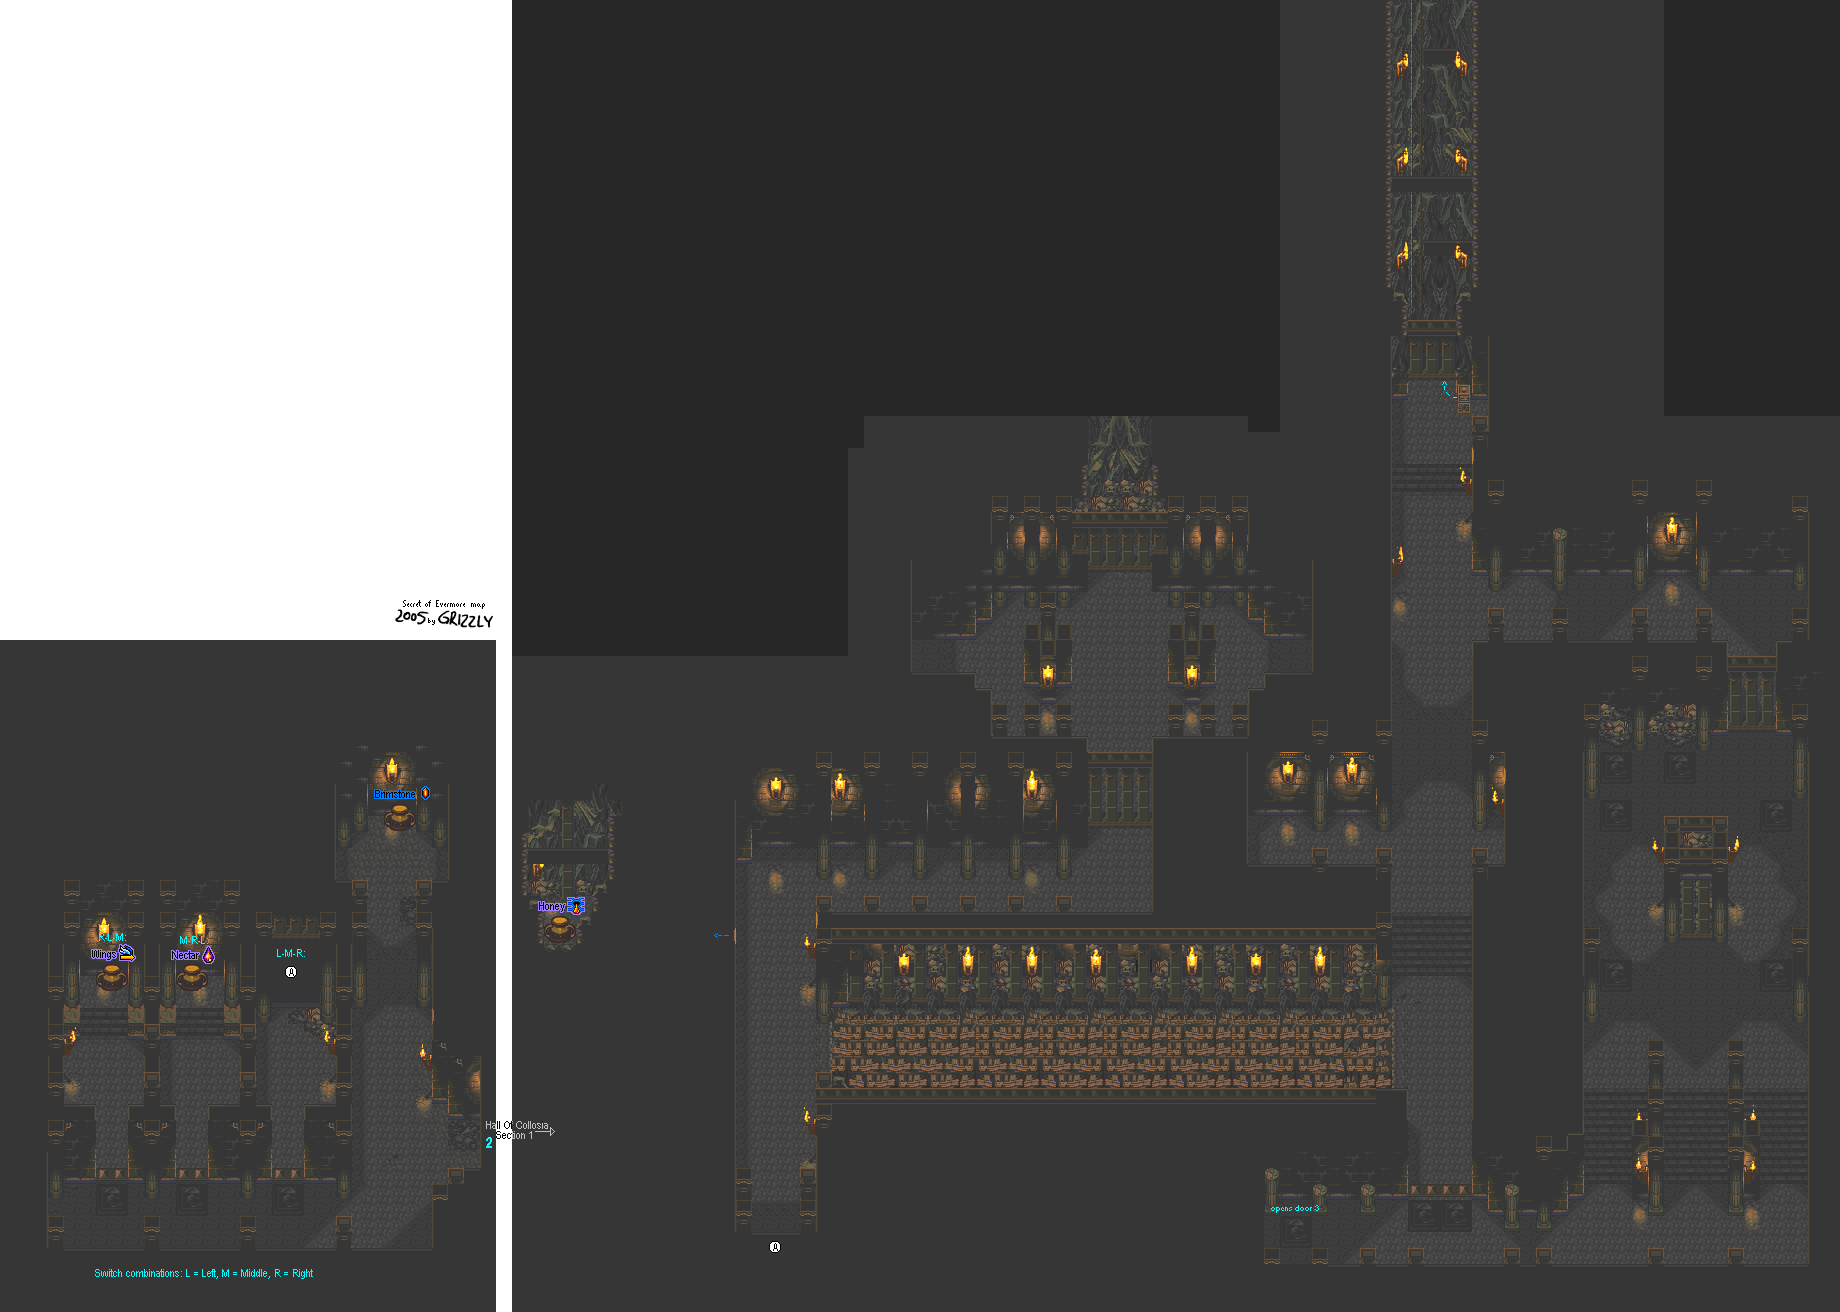
There are three possible doors to go through here. To pick the one you want, press the faceplates in front of them in a specific order to get the wanted path.
Pressing the left one and then the middle one (or right-left-middle) will automatically give you access to the left passage. Pressing the right one after the left one (or left-middle-right) will give you access to the right passage. Any other pattern gives you the middle passage. The left and middle passages lead to jars with stuff you might want in them, while the right passage takes you to another part of the Hall of Collosia.
Hall of Collosia - Collapsing Bridge Room
In this room is a bridge to the east. If you keep going north, you'll hit a gate you won't be able to get past.
In the wall east of the start is a pot containing three parts Honey. Honey heals more than nectar does - 200 on its own, 240 with the Moxa Stick. Keep these for when you really need them; you won't find Honey a whole lot until a bit later in the game.
When you get on this bridge, your attack had better be at 100% - because you're gonna be running full blast from the ground that's coming down behind you! If you fall here, you'll end up further north of that gate I mentioned before. Go south, find the two Lime Slimes and defeat them. They should be on the sides of the room. There, you just opened that gate and got yourself out of there.
If you hug the wall west of where you start, you'll find a hidden passage to a jar that contains three pieces of Honey. Hold on to these, since they recover your entire HP and will really come in handy much later in the game!
Apparently, the trick here is to hold the run button, then keep tapping it when your attack meter runs out. Or you could just charge your weapon and then run forever. That works, too.
From here, go south then go left to hit another face plate. Go east until you no longer can, then go north and hit all six faceplates. From there, go north, then west, then hit the switch. Go through the gate. You're done here.
Hall of Collosia
Go into the nook north of the one that led to the Mini-Taur room. It's open now.
Hall of Collosia - Maze 3
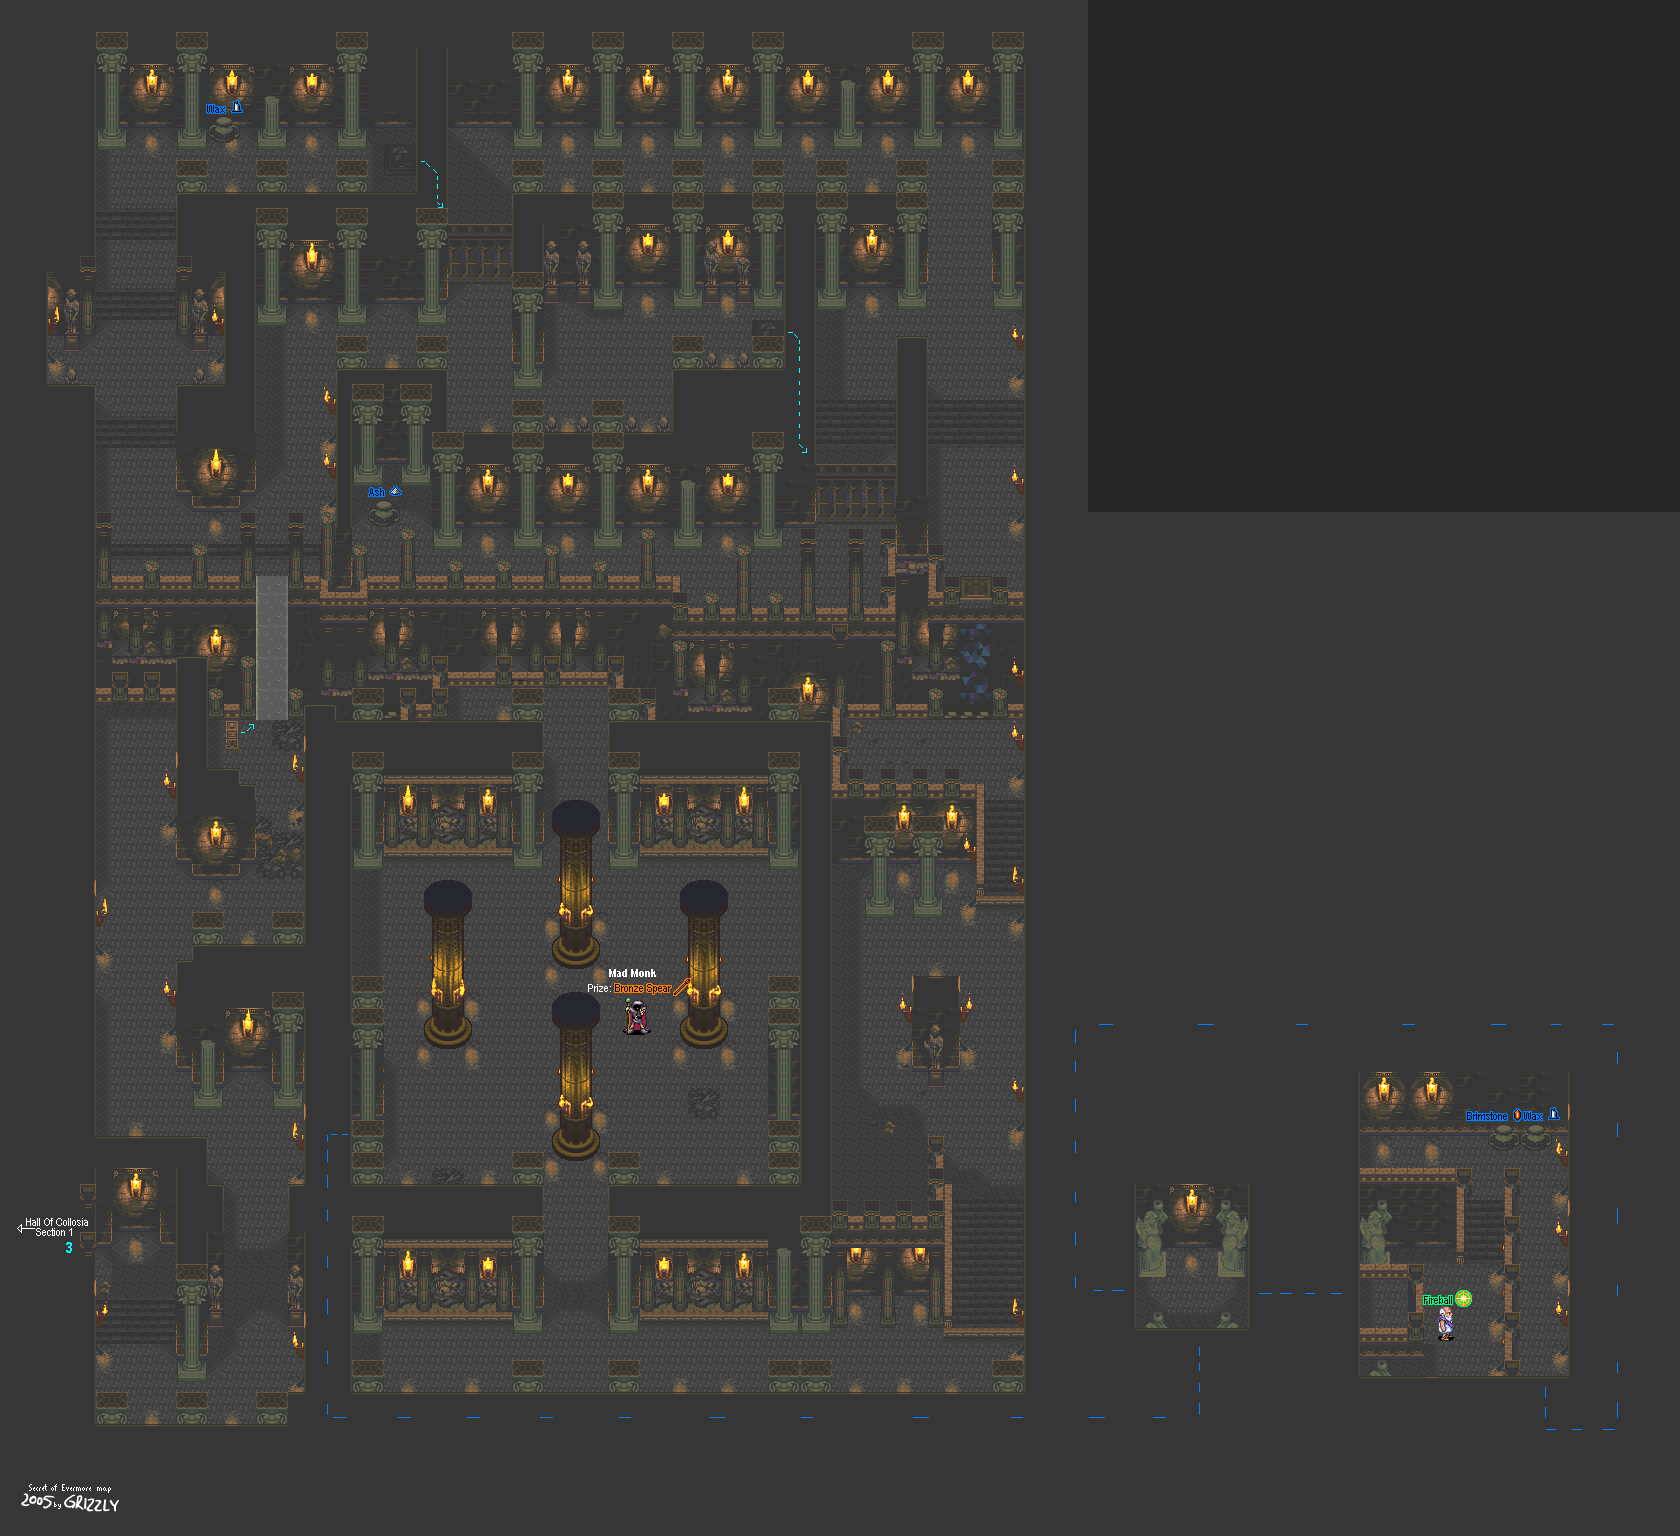
Follow the path and hit the switch. Take the bridge. From here, go all the way north on the left hallway and go east until you step on a faceplate. By this point, you'll reach a dead end and you'll have opened the gate on the other side of the wall, so go back to where you were before and take the right hallway. Take the hall with the gate you just opened and keep on going.
You'll reach another fork in the road eventually, so take the right path on your way south. You'll find a Revealer plate here, so use Revealer to go further south.
From here, follow the path until you reach a huge room. You'll find only a Mad Monk in here. Destroy him. You'll get a new weapon - the Bronze Spear. Your next mission: level this sucker up to Level 2 so you can finally throw this bad boy.
Yeah, we're raising our new weapon in victory because we took out a Mad Monk. Yeah, we're so proud of ourselves. Let's get out of here.
Also, don't worry if you aren't at Level 2 with the Bronze Spear if you come across a switch you can't reach. The Boy will toss it automatically and get the drawbridge to show up.
From the Mad Monk room where you found the Bronze Spear and search the lower left walls. From there, feel your way around and you'll eventually find your way to Madronius' brother. He'll commend you for finding him and he'll give you the Fireball spell.
Fireball
1 Brimstone, 2 Ash
Be sure to check the jars there as well. You'll find 4 Brimstone and 5 Wax. Also, he'll let you save your game. Go ahead and do it, now that you have a new spell.
Hall of Collosia
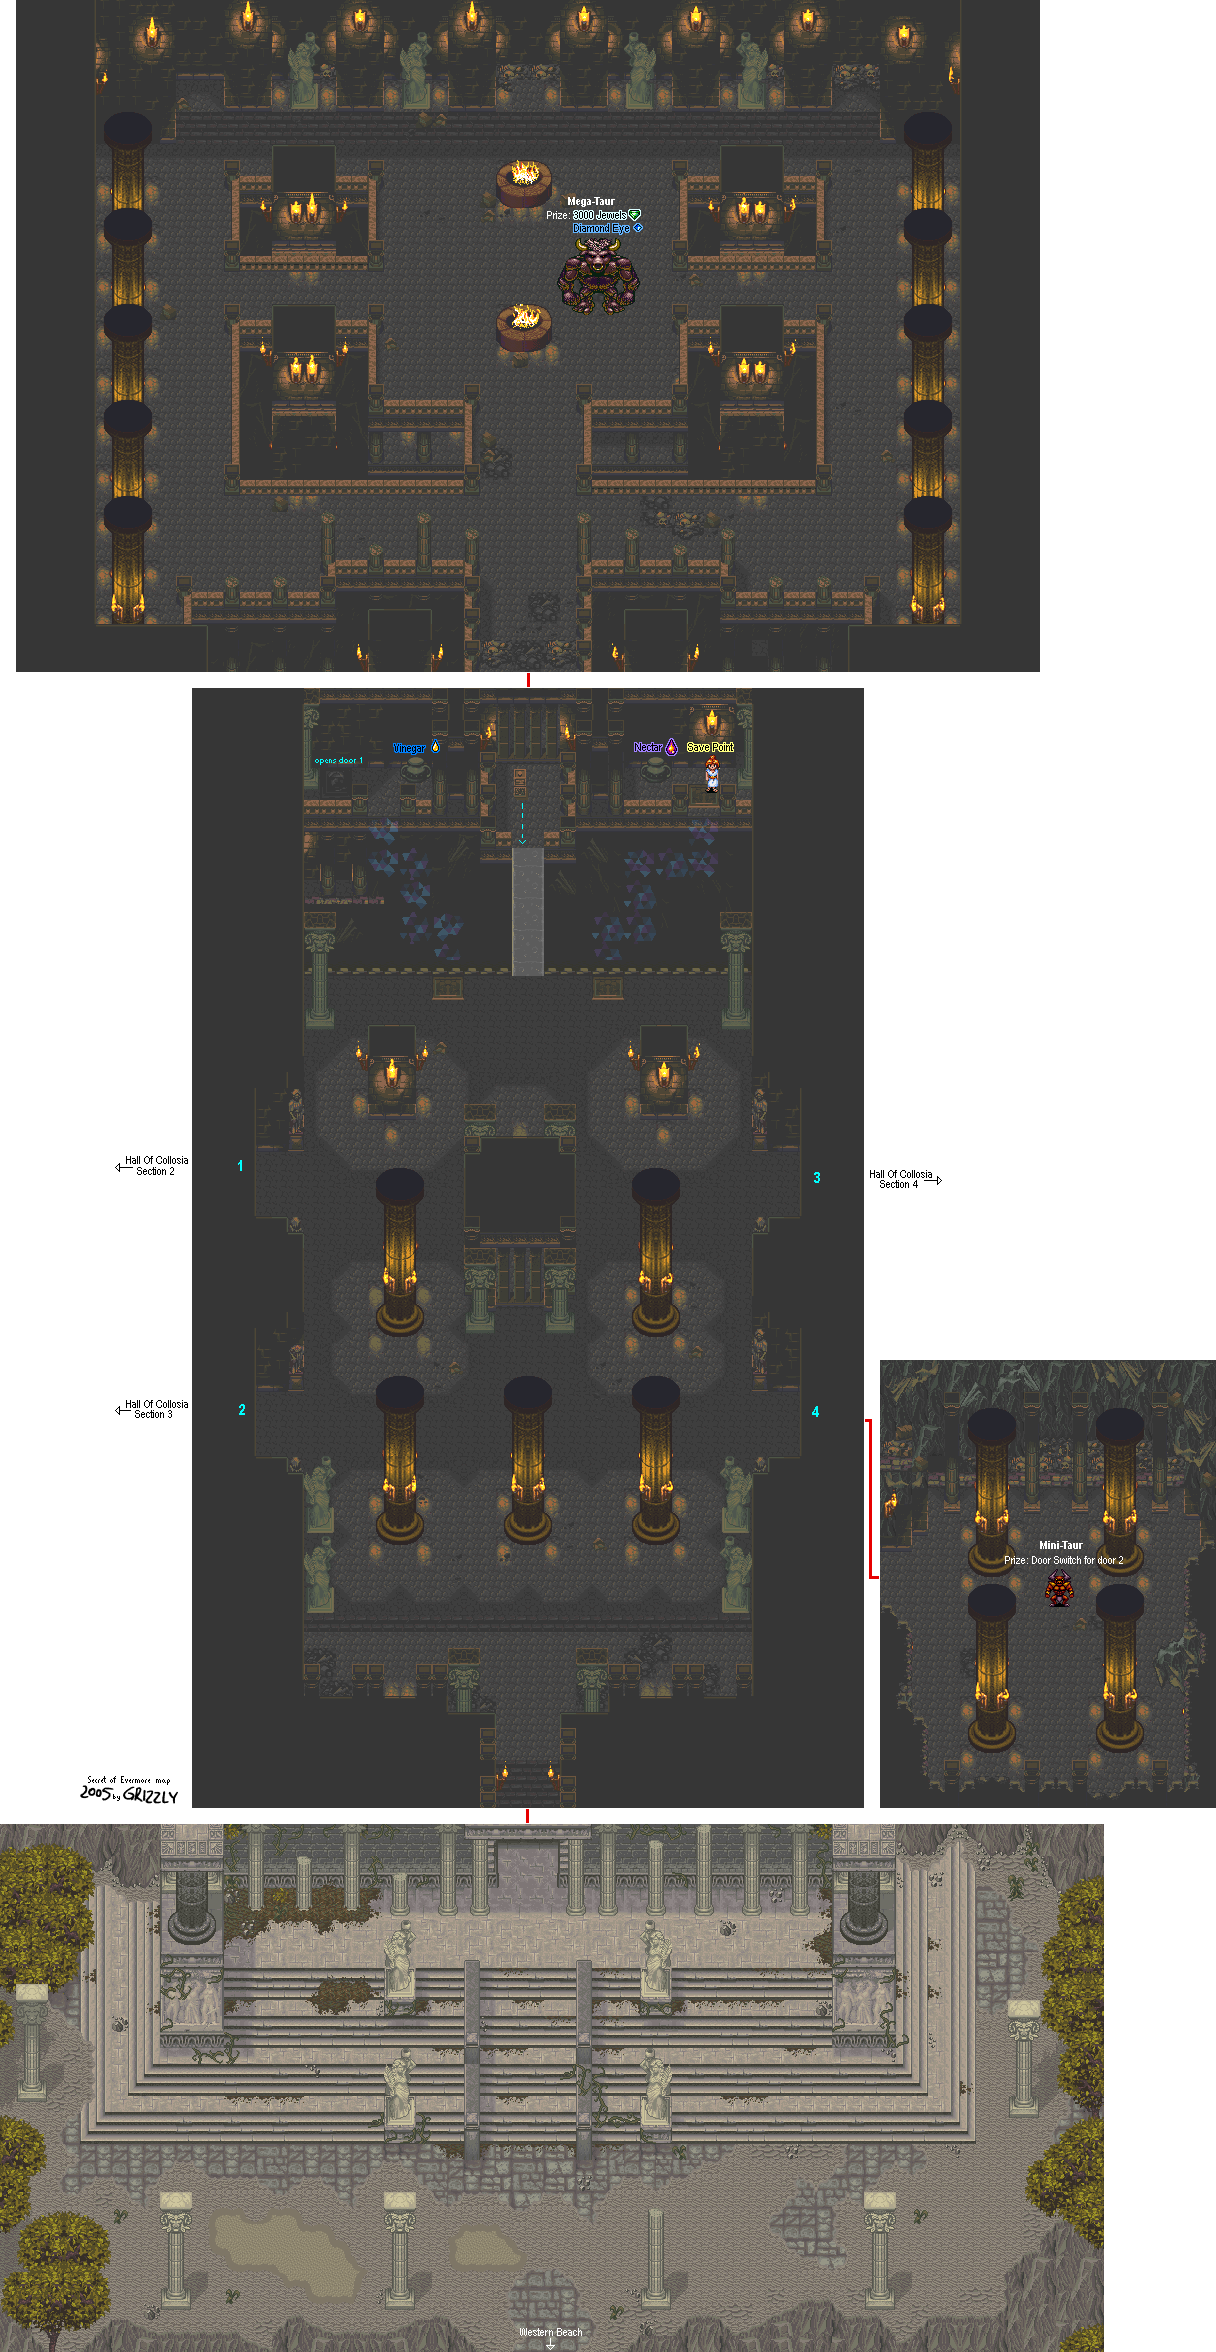
Now for that switch in the center of the north end of the room. Leveling the Bronze Spear to Level 2 is well-advised. Also, carry plenty of alchemy charges for Crush, since you've more than likely leveled it up enough to take the next boss down.
Boss: Megataur
Oh, look. A re-made Magmar.
This guy will cast Confound and Drain in an attempt to make your life miserable. His Drain spell is kinda weak, though, but be prepared and keep your HP as high as possible nonetheless.
He'll also roll into a ball and hide in one of the fire pits before he pops back out of another one. It also acts as an attack, so pay attention to where he is. He also stomps the ground for an earthquake attack, which takes a small bit of your HP down but is dreadfully annoying.
Taking this guy down with Crush and a powered-up Bronze Spear attack definitely works well here.
A really cheap way to destroy him is to bring Crush up to Level 6 (that'll take you a while, unless you've been leveling up and somehow got really crazy with that spell) and use it on the Megataur multiple times. He'll go down really fast then.
When you beat him, you'll get 3000 Jewels and one of the Diamond Eyes before the game whisks you outside the Hall. Head back to Horace's camp.
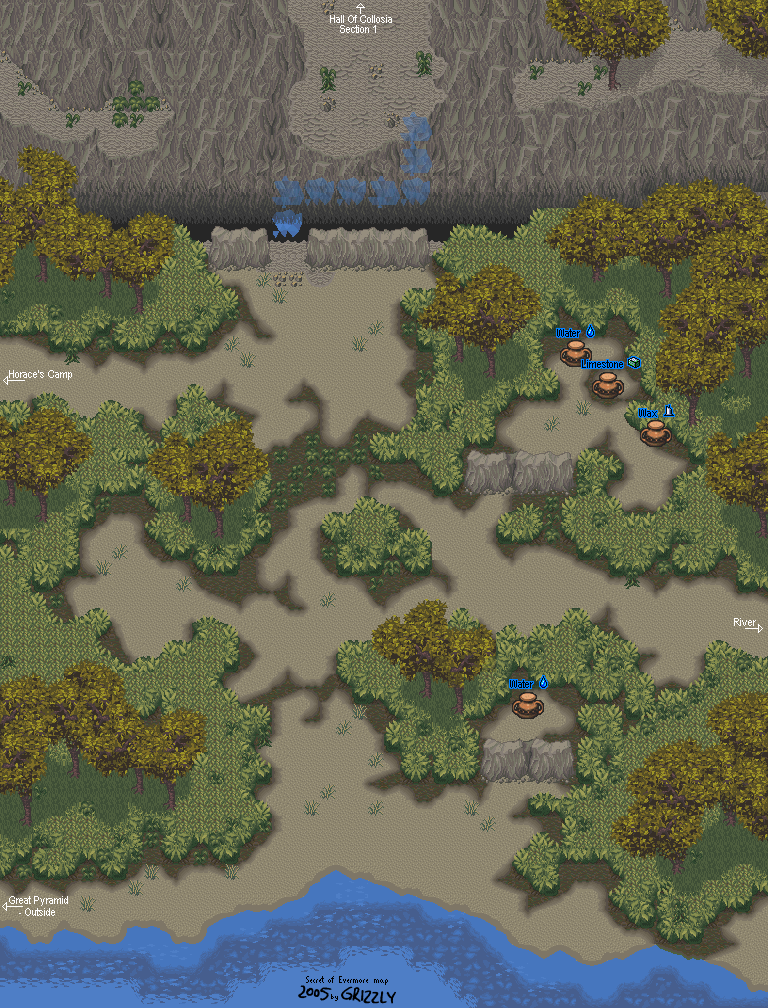
Horace's Camp
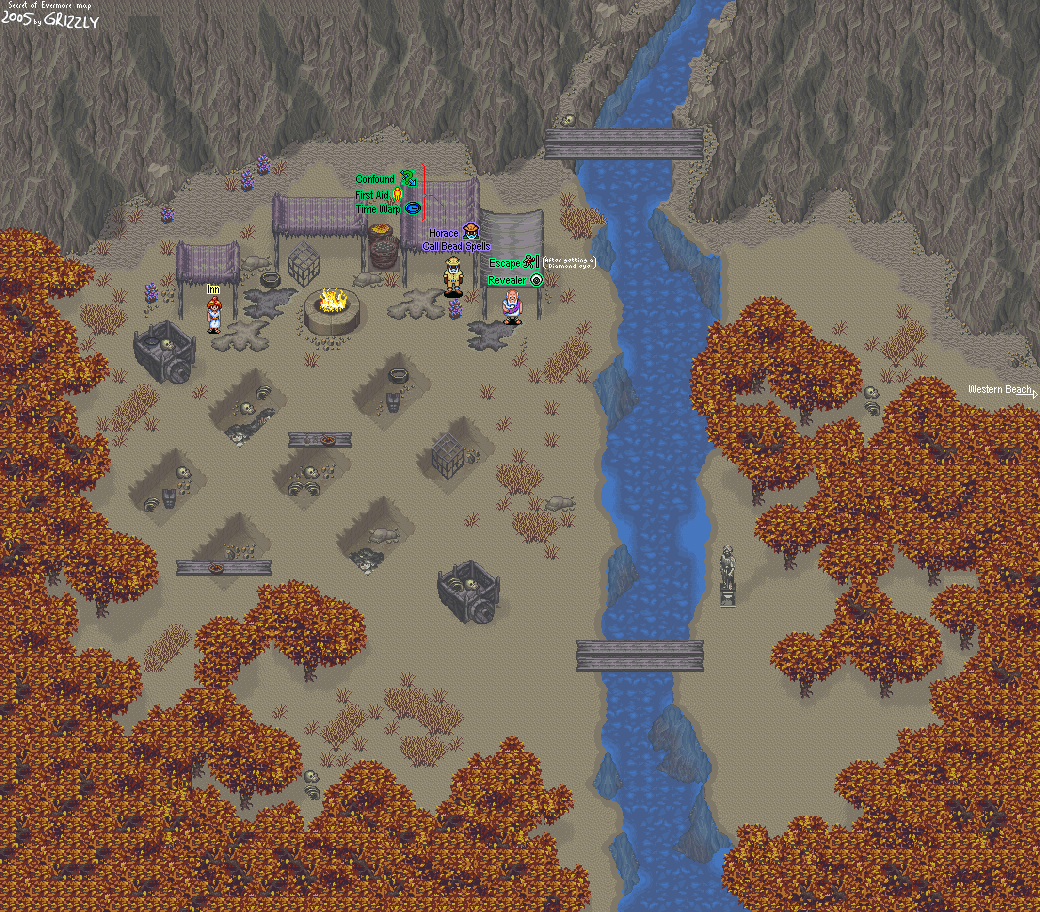
Horace will commend you for finding one of the Diamond Eyes. Now it's on to the Pyramid, where you'll find the other Diamond Eye as well as some more awesome stuff.
Now that you have one of the Diamond Eyes, talk to Madronius again and he'll give you the Escape forumla. This is basically an alchemy version of the Wings.
Escape
1 Wax, 1 Vinegar
No comments:
Post a Comment