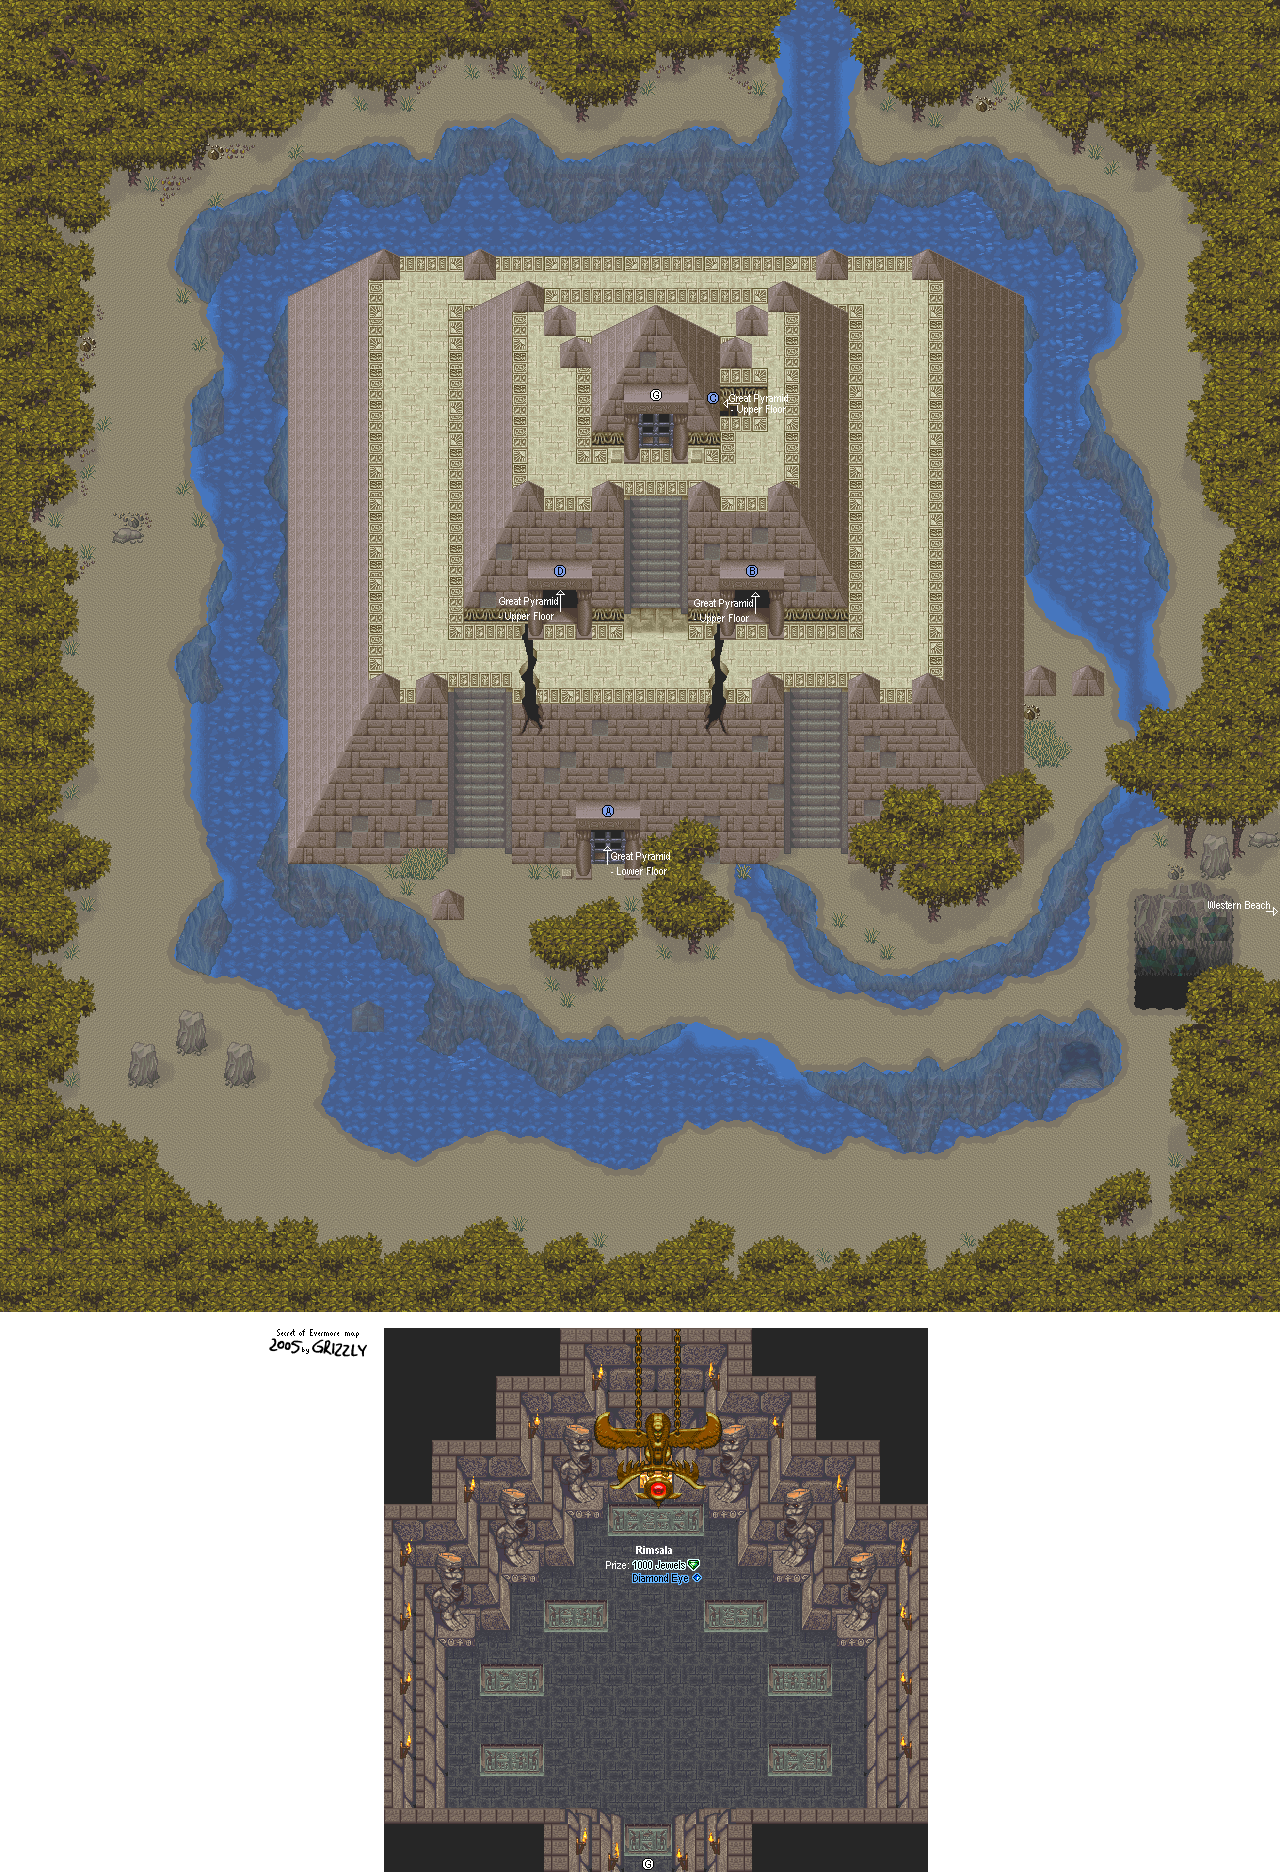
The Pyramid is the most treacherous area of the game to date, with Stone Cobras that pack a punch and plenty of traps.
All maps by Grizzly.
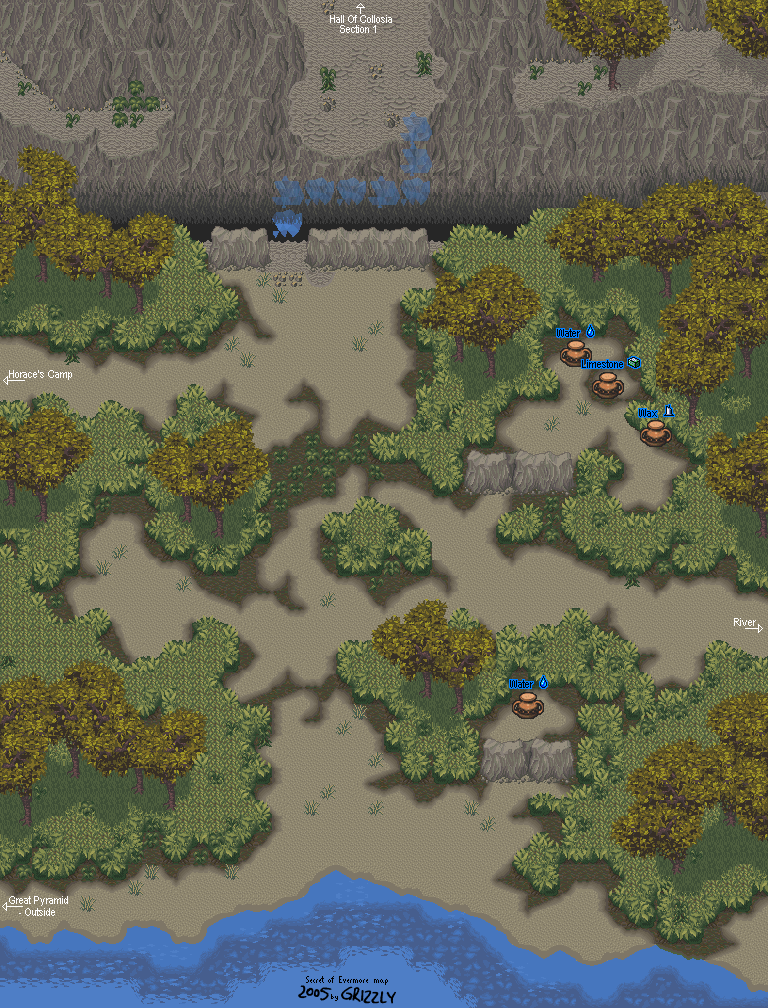
Right Bank Forest
Go all the way south, then go west. Use the Revealer formula to get across the pit.
Pyramid - Outside
Just like the Mad Monks, the asp-faced Sons of Set have staves that can still do some massive damage and status ailment problems, particularly Plague. On the other hand, they're slow and can't attack from a distance, so you should be able to use them as target practice for offensive spells.
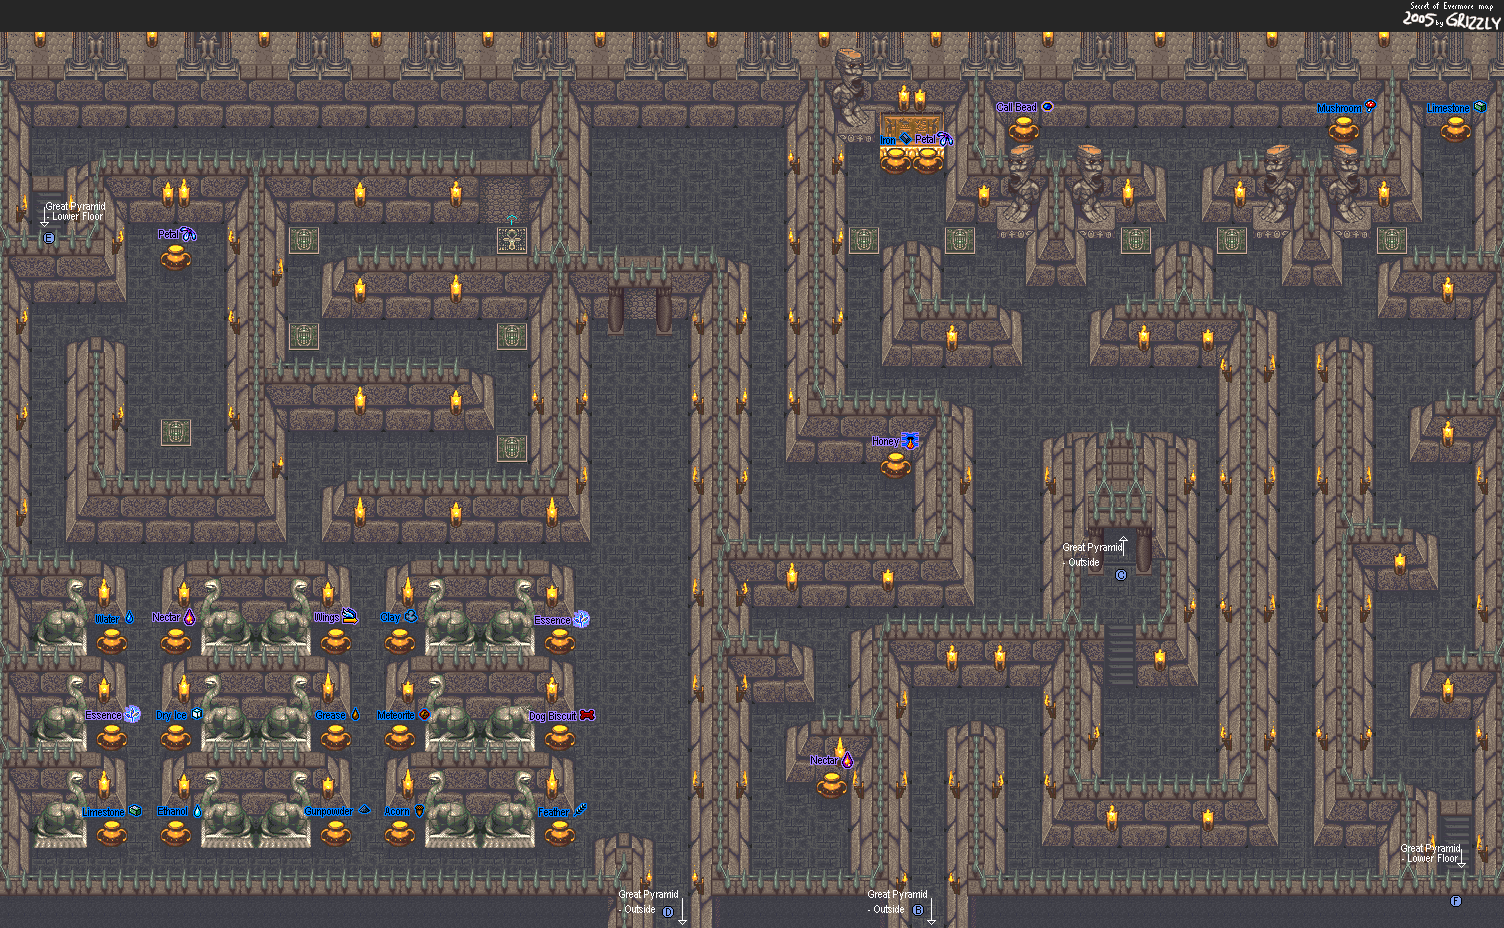
The door at the bottom can only be accessed by The Dog. Keep The Boy on the switch, then switch to The Dog and have him go in. From there, have him leap across the water with the run button. The Dog is now in the switch room. The four floor switches will activate four specific doors that The Boy cannot open himself. Press Select and you'll be able to switch back to The Boy. As the Boy, climb up the stairs and move your way around. You'll find an entrance on the roof.
Pyramid
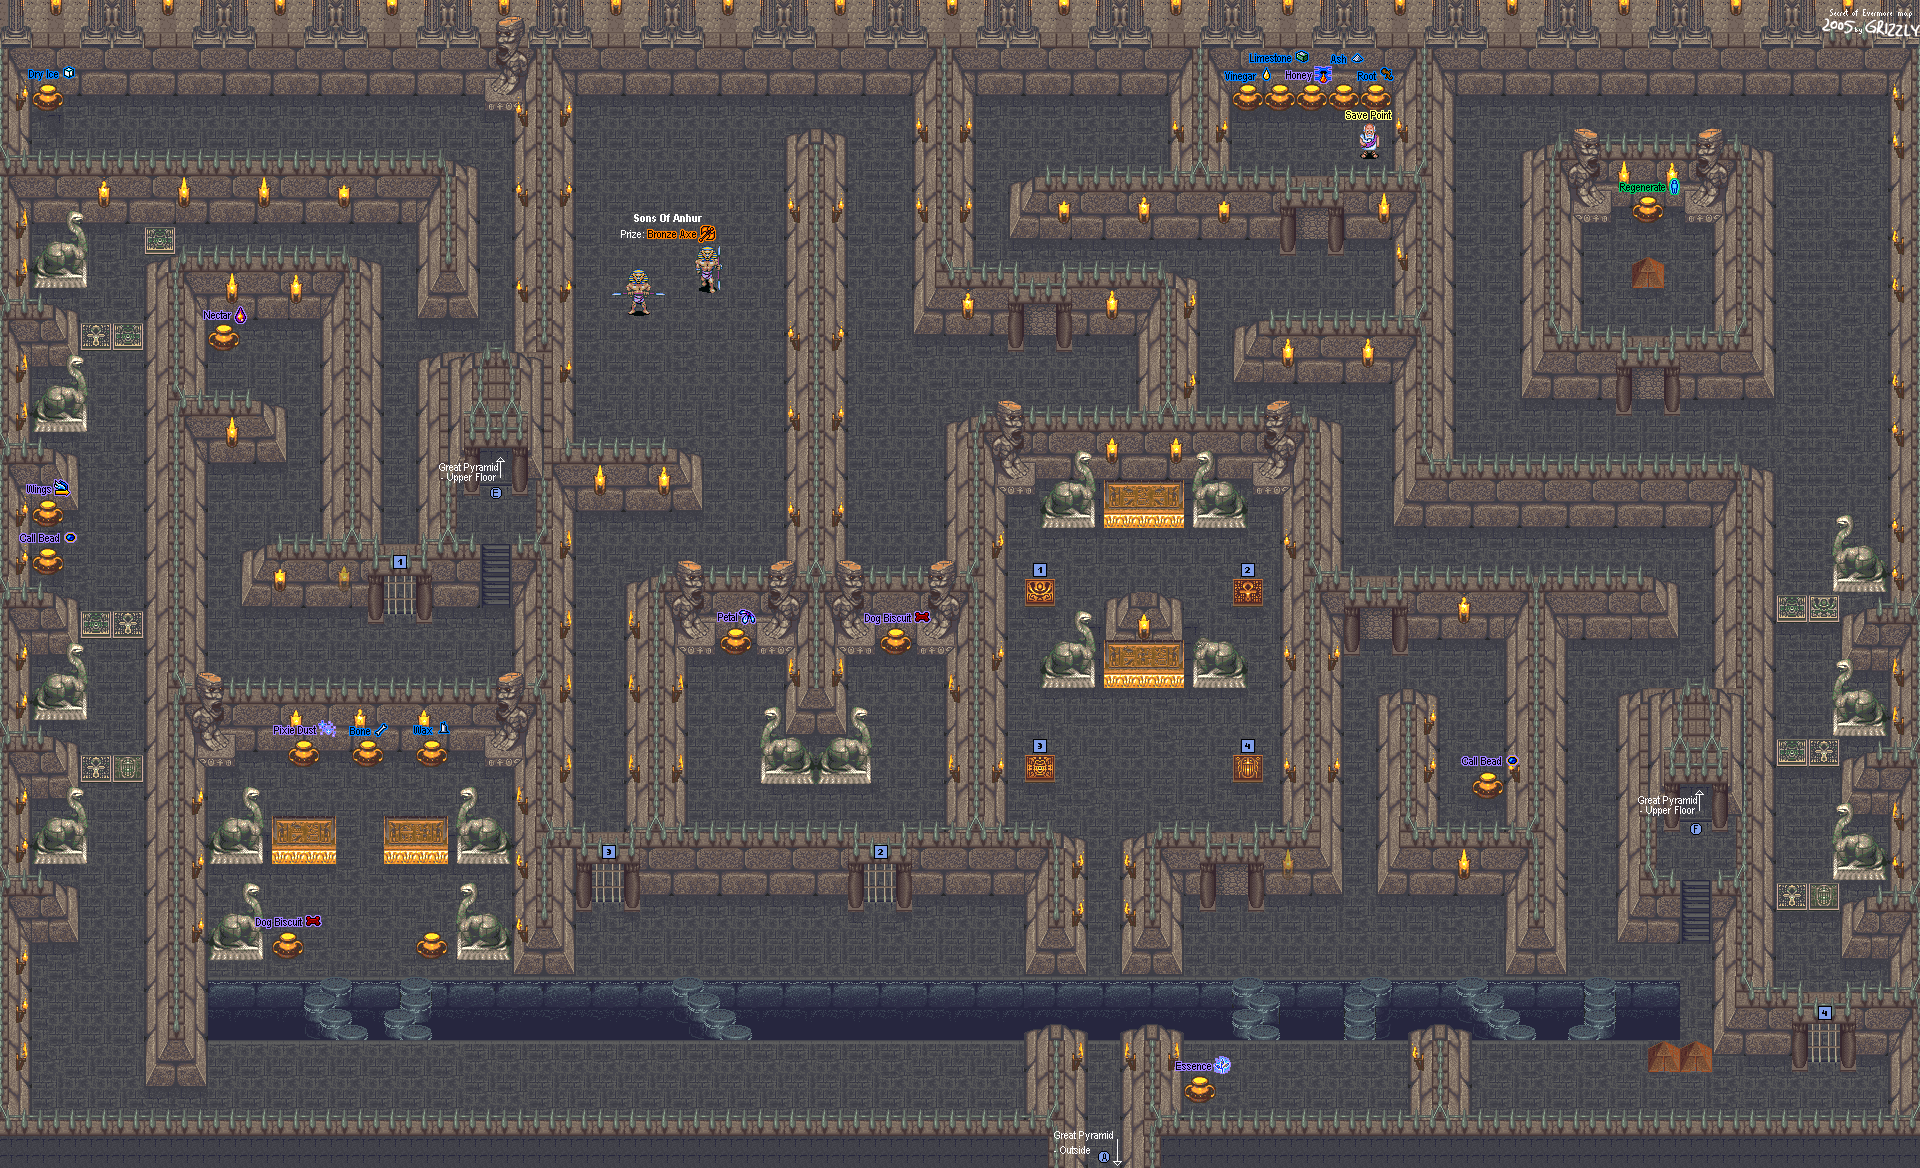
Make your way around, and watch out for those Bone Buzzards. If you've leveled up the Bronze Spear to at least Level 2, you'll stand a better chance against them and you'll be able to get them out of your hair much more easily.
From the fork in the road, go south. The other forks lead to Mummified Cats and items.
Once you go down the stairs, you'll find yourself with some more choices to make. You'll be near the switch room, but you won't be able to free The Dog yet. Instead, take down all the enemies, then switch to The Dog. The lower right switch on the floor should open the door to the Stone Cobras hallway. Be sure to stand on the Ankh symbols for the first two, and the right symbol for the last one. Otherwise, the Stone Cobras will come to life...and they hurt like hell, with the ability to take down a good fraction of your HP in addition to Poisoning you.
Well, you can get a Call Bead in a jar here, but since you can't break those stone walls down, you won't be able to do anything around here.
Go back upstairs to that Bone Buzzard maze, then take the left path that goes south. It'll be directly south of all those jars in that fork in the road. Take the stairs and go through the door, and you'll be on the upper level of the outside of the pyramid. Go down the stairs, and open all the jars. You'll find some interesting stuff. Aside from the Mushroom and the Iron that you'll find in the fork in the road near the pyramid exit you just walked through, you'll also find Meteorites, Feathers, an Acorn, Gunpowder, Grease, Ethanol, and Dry Ice.
If you go north, you'll find an Ankh floor plate. If you step on it, you'll cause the stone wall near it to crumble. Follow the path and take the stairs.
Switch to The Dog and have it trigger the upper-left floor plate. This will open the door that's immediately near you. Go through it, and take the path to the left. There's some more Stone Cobras here, so remember to step on the Ankh plates to keep from springing them to life. The jars after the first two have Wings and a Call Bead. When you make it to the lower-left corner and go north towards the jars, be sure to open all the jars.
As you continue on, you'll find another set of gates that The Boy can't open. Switch to The Dog and hit the lower-left floor plate. You'll open the one on the left.
When you go in and follow the path, you'll come across an open area where you'll fight two Sons of Anhur. Even though these guys have lion heads and can attack like the Sons of Set, they can also cast Lightning Storm, which can cause a more than adequate amount of damage. When you beat them down, you'll get the Bronze Axe, which you can use to break down the stone walls and re-unite with your dog...but don't do that just yet!
Run around and destroy these walls with the Bronze Axe. You should be able to find a lone jar that you can open if you've gotten Horace's Call Bead spells. Go north of the stone cobras in the lower floor and you'll find a lone room that you can access with the Bronze Axe. In here you'll be able to find a lone jar that you can open if you've got Horace's Call Bead spells. It contains the Regenerate spell, which allows you to regain health slowly for a short time if you select a Call Bead, choose Horace and go through his list of spells. There's another hidden spell that he has, but we won't have to worry about it just yet. Don't worry, it's not in Antiqua.
No comments:
Post a Comment