WELCOME TO THE WORLD OF TOMORROW
All maps by Grizzly.
All right, let's get back to Gothica. Head back to the fire pit near Ebon Keep. That's Tinker's Workshop.
Tinker's Workshop
When you head back in, you'll automatically walk to Tinker, have a discussion with him, and give him all the parts. Then he'll send you back outside where the rocket is. You'll go in and in a minute or two, you'll be back in Omnitopia.
Junkyard
When you land in Omnitopia (aka Metroplex), a cleaning droid will drop you down into a chute to the junkyard. You'll both come out of the rocket, and you'll find out that The Dog has changed form yet again, this time into a toaster dog. Instead of a bite attack, the toaster dog (as some of us want to call it), shoots lasers. The Level 2 and 3 attacks are slightly larger lasers that pack a punch. Finally, the dog is a little more useful.
There is a Guardbot here, but he won't hurt you. Instead, he asks you to find his replacement so that he can get off of sentry duty. It won't take you long to find him, but remember the location of this first Guardbot for later.
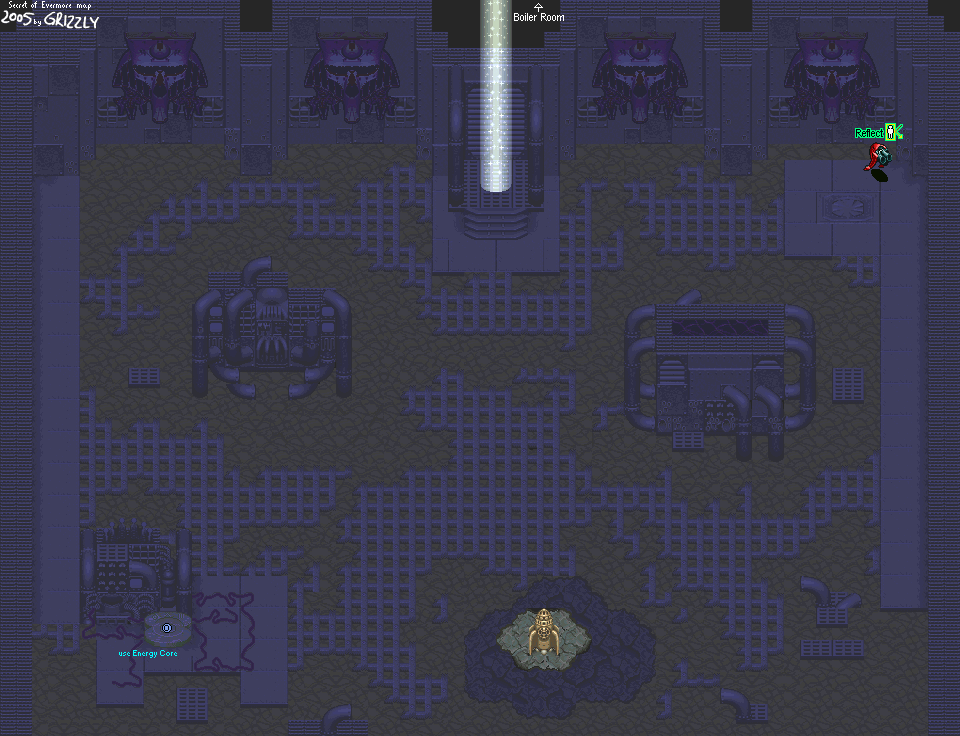
Anyway, follow the path and be careful near the tentacles that come out of the ooze that makes up Omnitopia's trash. The transporter beam will take you to the Boiler Room, where some creatures are held in holding cells...as well as the replacement sentry!
Boiler Room
The beginning of this room contains the green Neo Greebles. These guys actually walk around and try to run into you. They're not much of a problem, though.
You'll then see four holding cells, one of which has four switches and two small monitors on the wall. Hit the third one to release the Guardbot. If you want to fight the monsters inside, open the others...but be careful against the Raptor, because he packs a punch!
When you talk to the Guardbot here, you'll get your final sword...the Neutron Blade. Now go back to the junkyard and talk to the Guardbot you met there. He'll give you a formula called Reflect. This formula reflects magic, like Wall in Final Fantasy and Secret of Mana.
Reflect
2 Grease, 1 Iron
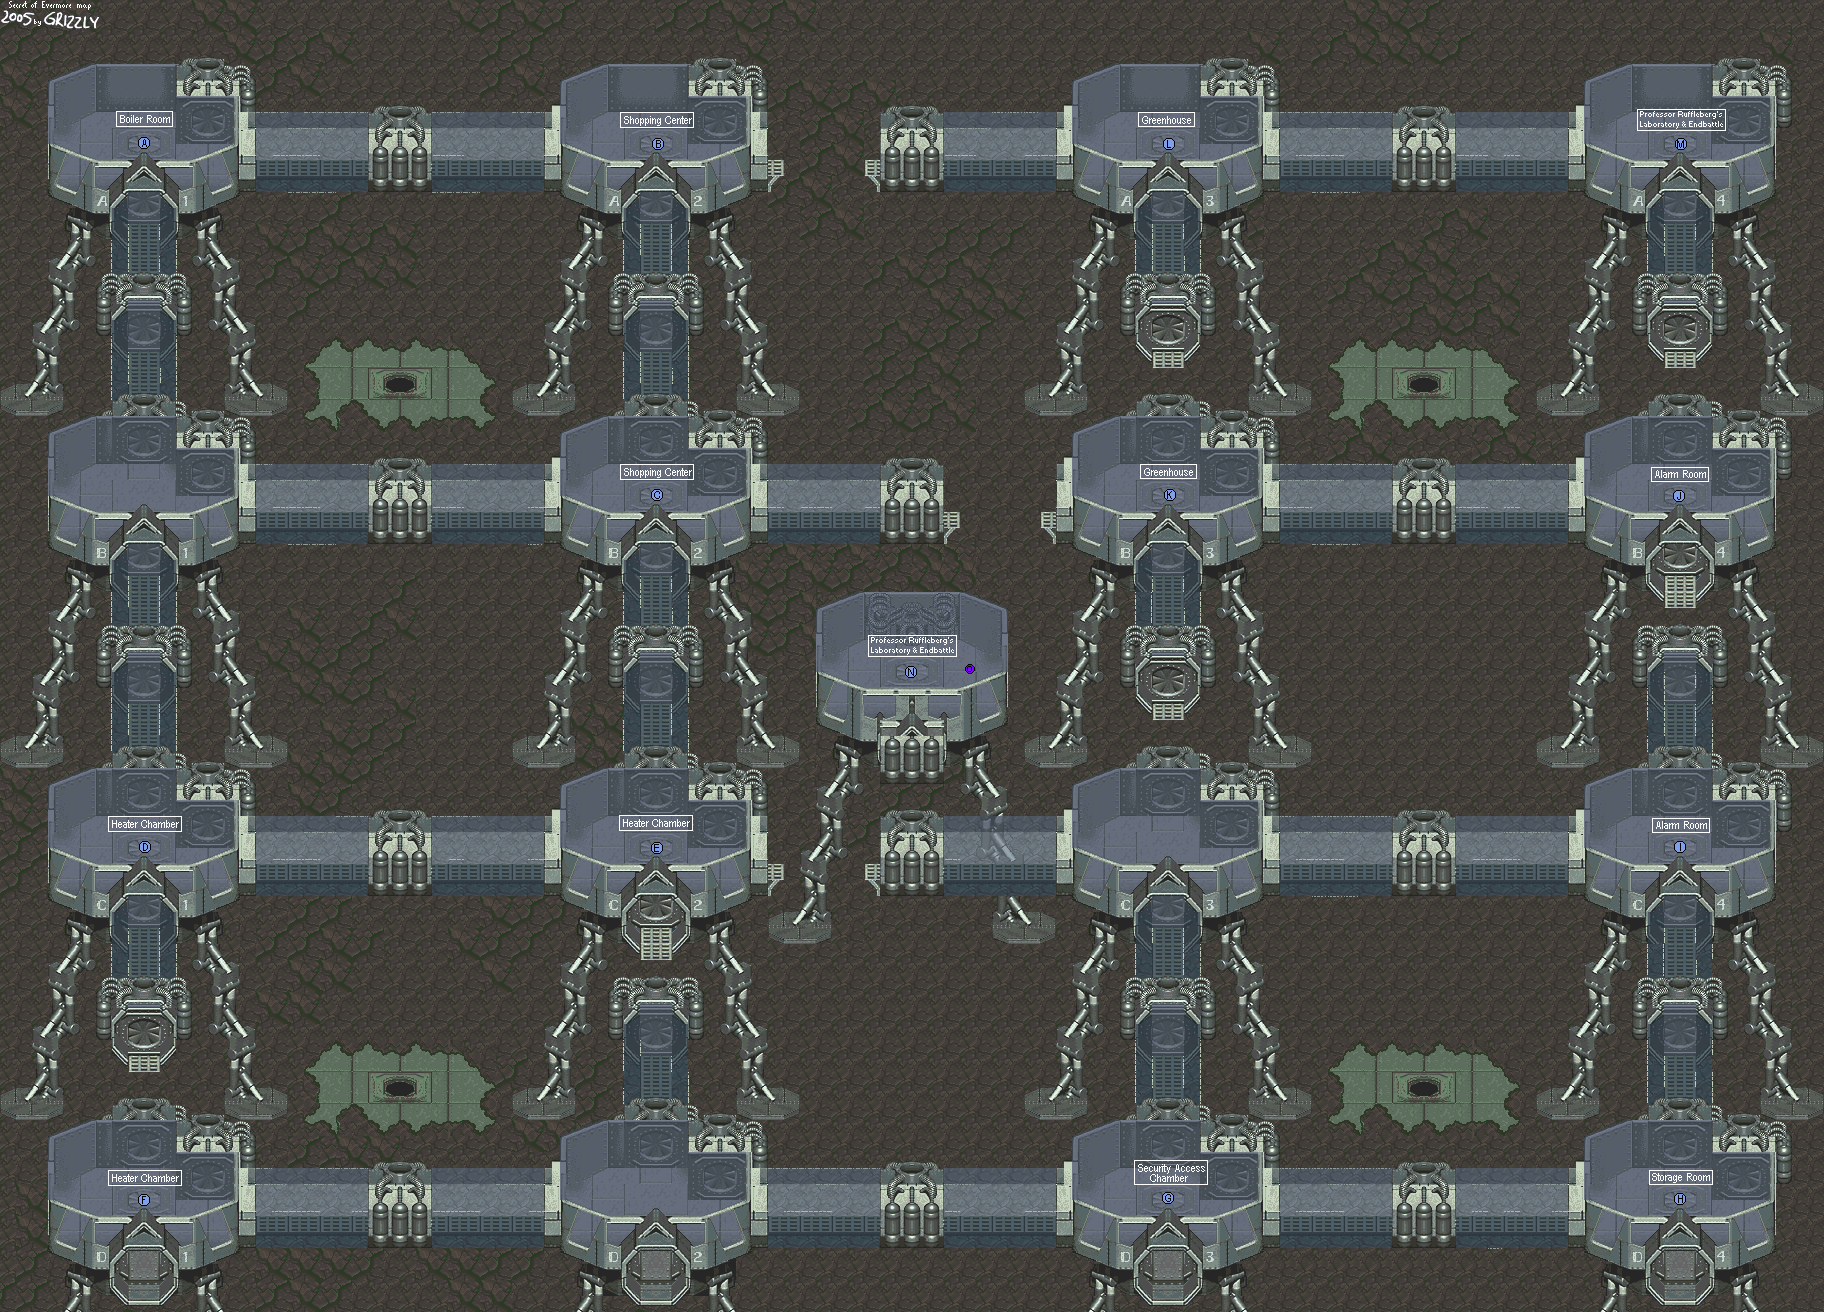
Head back to the Boiler Room, then enter the transporter beam on the right side of this area. This will take you to the Main District, which is the meat and potatoes of the Omnitopia area.
The portals to the outside world can only be accessed fully by The Dog. From there, The Dog can go anywhere he wants and blast the orb-shaped robots shooting lasers to smithereens, opening up doors to other rooms. These things will track The Dog quite well, so power up the Dog Attack to Level 3 before you even think about attacking these things. If there's a port hole in the ground, it can be accessed to enter different areas of Omnitopia. You'll have to go through some of these to complete your first order of business, which is to find Professor Ruffleberg.
There are also blue Eyes of Rimsala moving back and forth in some of the horizontal walkways. Killing one not only makes getting around a lot easier, you'll be able to get 1000 credits. There isn't much to Omnitopia, but there are a few stores littered around the Main District, as well as an inn. This will make getting some Credits at the beginning of Omnitopia a bit easier.
The porthole in A-2 sends you to the Shopping Center. Here, you can buy some armor for both The Boy and The Dog and even use the Inn. One of the cleaning droids gives you a color combination that will come into use later.
B-2 leads to the other transporter beam on the other end.
Be sure to buy Particle Shot and Cryoblast for the Bazooka. Unlike Thunder Ball, they both give you infinite ammo because of a glitch in the game that fails to count down your ammo for both of these weapons by one when you fire it. Whoo-hoo.
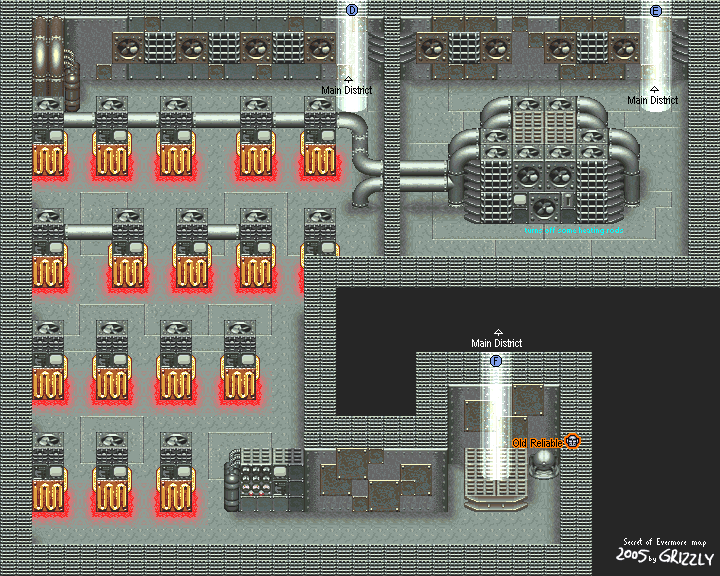
Heater Chamber
C-1 leads to a bunch of heaters. If you touch them, however, you will take damage. In order to get to the other side of these things, you'll have to turn the switch off that controls some of these. To do this, you'll have to go to C-2, flick the switch, then return to C-1. When you do, some of them will be turned off and you'll be able to get to the other side without a problem.
Be sure to open the little bubble next to the teleporter when you reach the other side, too. It contains Old Reliable, which is stronger than what you can get in the Shopping Center.
Security Access Chamber
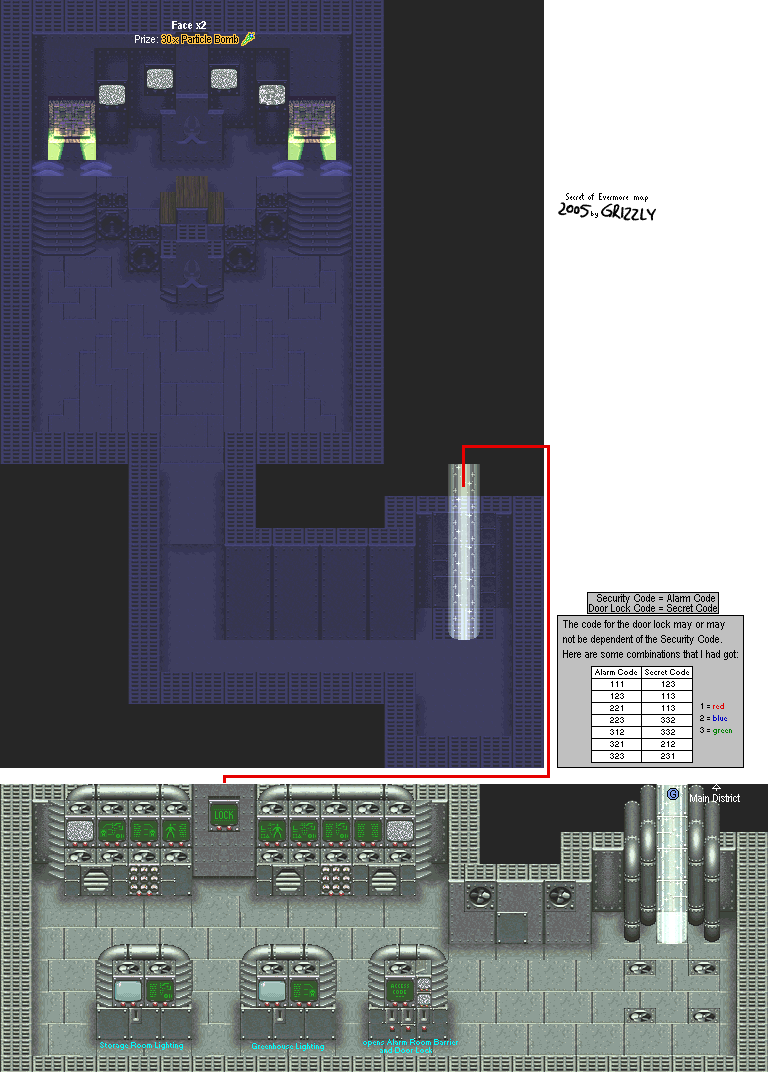
D-3 leads to the Security Access Chamber. When you come down the transporter beam, take down all the fans that come out of the floor. They may look like they're powerful, but they're not. Now you can do stuff around here without being very slightly hassled.
The console in the middle is the greenhouse lighting switch. Flick it.
If you don't flick the storage room lighting, you'll have to fight some monsters if you go into it.
The console on the right controls the alarm. If you used this before you went into the alarm room and used the code for it, you won't have to fight the eight Guardbots (which aren't very hard, anyway) in the Alarm Room.
There is a green monochrome screen that says lock. Play around with all the possible combinations after turning on the greenhouse and storage room lighting and you'll eventually open a passage that leads to a hidden boss through trial and error.
No comments:
Post a Comment