We're reunited with our dog, but it's under less than favorable circumstances in this entry.
All maps by Grizzly.
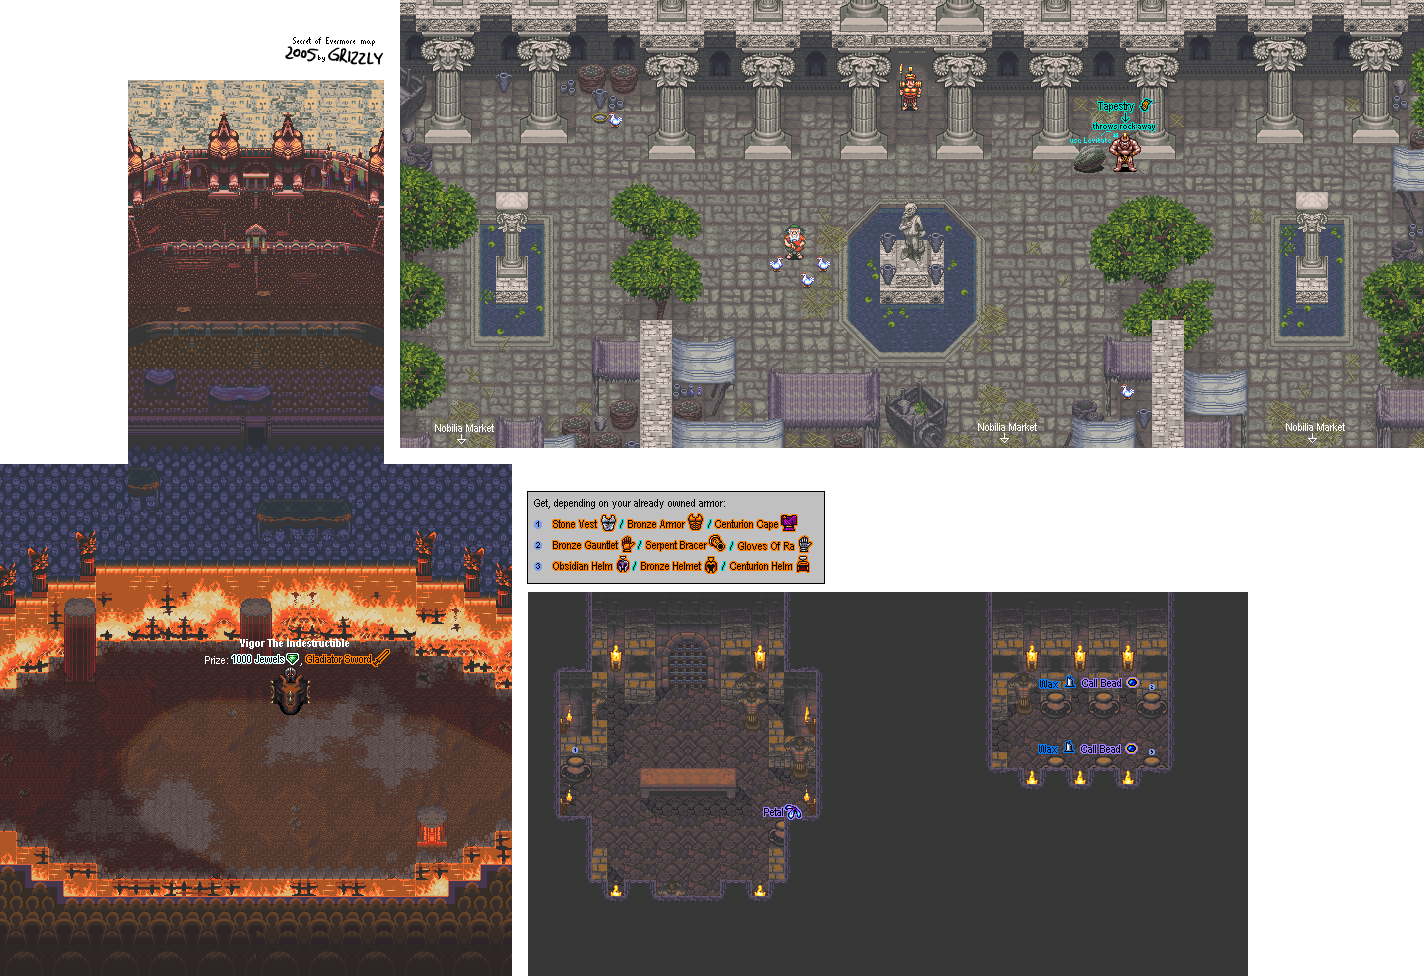
Believe it or not, there is a secret warp in the Desert of Doom. Go to the rock-skull cluster, then go to the large rock just north of it. Go a little north and a little east to find another rock formation. Walk between the two rocks here and you'll warp straight to Nobilia in seconds.
If you keep pressing A on the chickens, you'll eventually get told not to taunt the chickens by a mysterious voice and your HP will be reduced to one. If you keep doing this, you'll get a message saying you were warned, and your HP will be back to one again. If you keep doing it, you'll eventually get killed by the game, but if you talk to the woman selling the chickens after the second message, she'll call you a low-down chicken taunter if you try to buy chickens from her. Yes, the game actually does this.
Coliseum
Boss: Vigor
Gotta love the Final Fantasy VI characters making a cameo in the audience.
Anyway, you and Vigor (some big Roman guy in a spiked war chariot) will be introduced, then the fight begins.
Besides keeping yourself healed, your main order of business against this guy is to have the Horn Spear equipped and attack him in the back with a Level 3 attack charge.
His javelin and boomerang attacks can cause quite a bit of damage if you're in the vicinity of the weapons when he throws them, especially the javelin. When Vigor flexes, that's your cue to start running in order to avoid the rotten vegetables that the crowd throws at you. His ram attack also does some dangerous amounts of damage as well.
When you finally beat him down, you'll get 1000 Jewels for your efforts. Pompolonius will finally acknowledge that this is your dog, and he'll give you information about the Diamond Eyes. He'll also give you the Gladiator Sword, which will prove to be your best weapon so far.
The scene will then shift to the mystery man Pompolonius was talking to talking to a face that protrudes out of a brick wall. Could this be a trap...?
Also, in the Desert of Doom, you can warp back to the desert entrance near the coast. From the entrace, go straight south past the rock formation and the skull-rock cluster. Pass by the pebbles, then go to the large rock next to the small one that you used to warp to Nobilia. Walk into the top of the smaller rock, then move a little bit to the left and then run down and to the right between the two rocks. If you can somehow do it right, you can warp all the way to the southern desert entrance.
Now that you're done at the coliseum (and you have your dog again, yay), use the sniff feature around this area which is north of the market. You'll be able to find some alchemy ingredients, especially near the fountain and near some stuff positioned against the coliseum wall.
Desert
Almost forgot about those skulls with the wings.
If you go far enough left or right from the center, you'll meet skulls on wings that fly around and try to ram into you. The spear does quite a bit of damage on those, even more than the sword you have right now will.
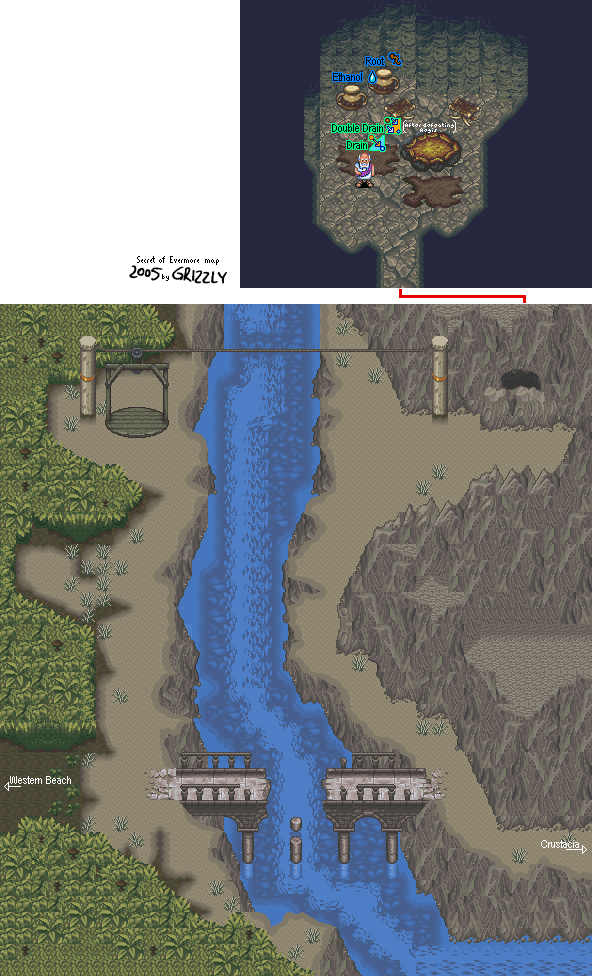
Right Bank
Now that you have The Dog again, go back to the Right Bank, which is west of the pirate ship. From there, switch to The Dog and use the Run button at the end of the bridge to jump to the other side. From there, take the lift to the right side. Now you can take The Boy and The Dog further west of Crustacea.
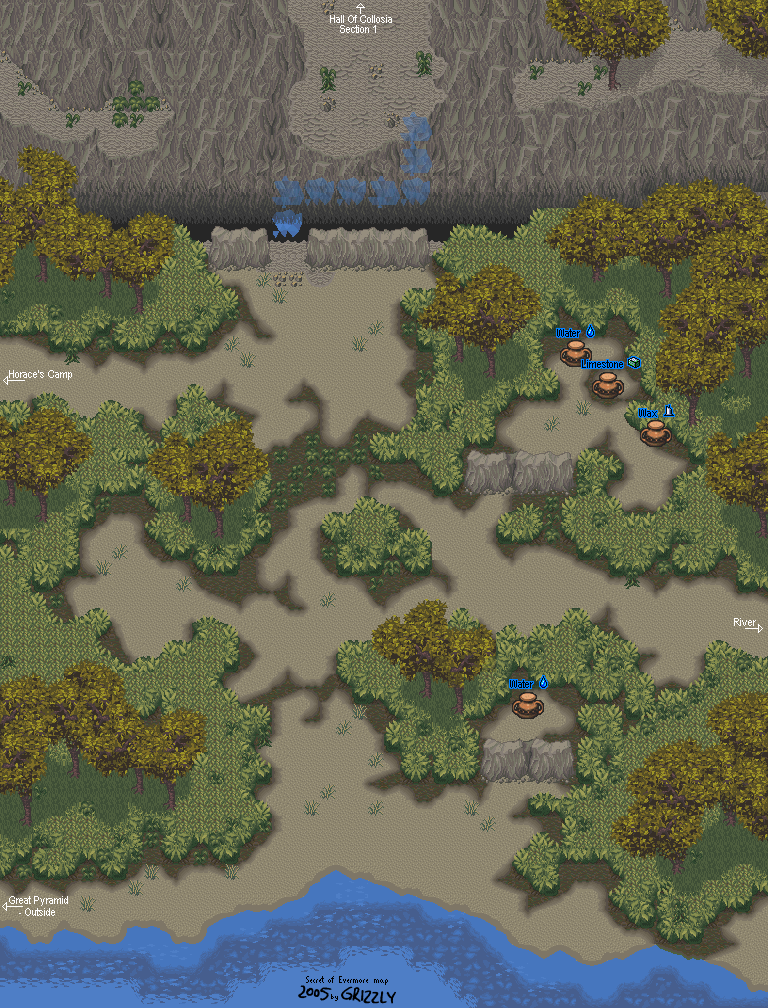
Right Bank Forest
Now that you're on the other side of the bridge, cut the plant overgrowth at the other side and go west. You'll be in a forest, where you'll find more of those spiders and also take on a new enemy, the Dancin' Pans. You'll be seeing these guys kinda often.
Go north so that you'll come across the plant undergrowth you'll need to cut down, then go west from there. You'll be in a new area.
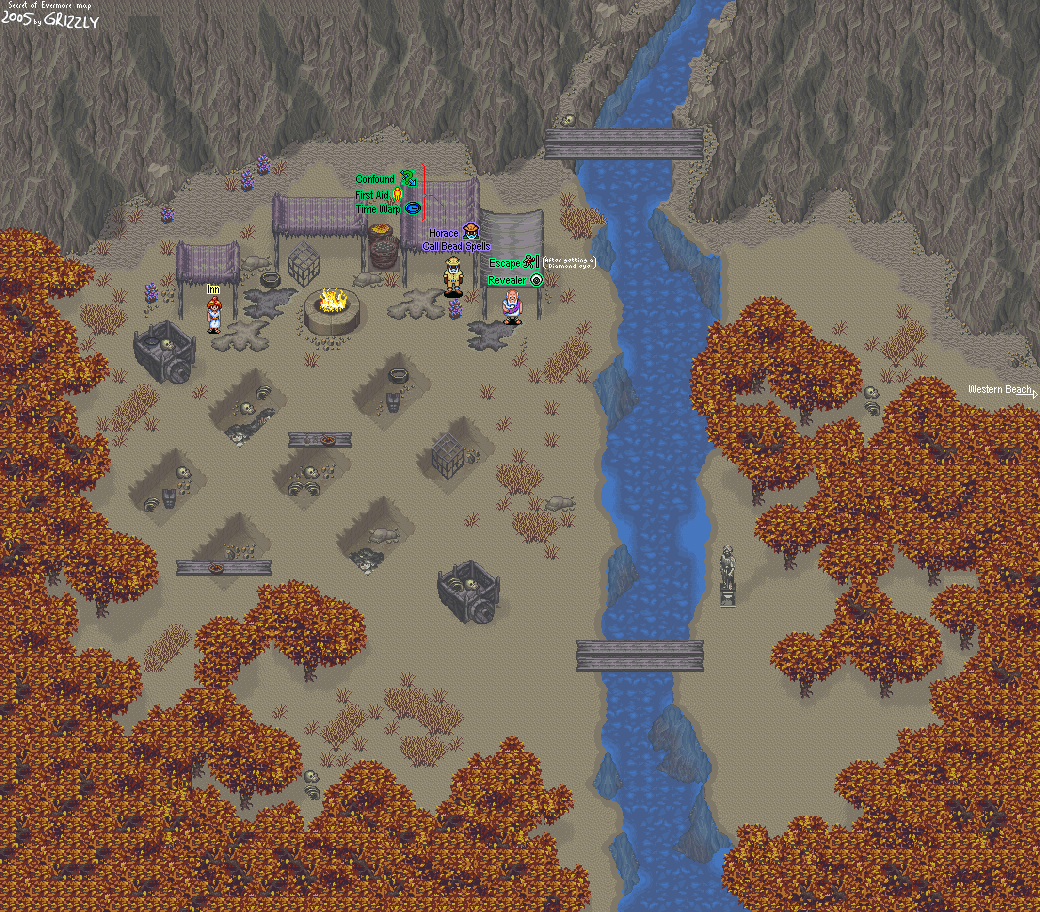
Horace Highwater's Camp
Go west and you'll meet Horace Highwater, who created the world of Antiqua. He'll tell you about the Diamond Eyes and that he also has a bad feeling about the leader of Nobilia. You'll not only meet his assistant Madronius, who not only sells you alchemy supplies but also gives you the Revealer formula, which lets you see the secret passages across pits if you equip and use it.
Revealer
2 Ash, 1 Wax
It should be noted that Madronius not only sells Roots, he also sells Vinegar and Brimstone. You'll definitely be needing those later, so keep a mental note about that.
Madronius also mentions his brother, who has a hiding place in the Hall of Collosia. He tells you to check the walls and that he'll help you out. This is where you'll find one of the two Diamond Eyes, so keep this tidbit of information in mind.
Be sure to talk to Horace again. He'll give you two Call Beads as well as some of his spells. He has two other spells that you'll find elsewhere in the game. One of them is in the Pyramid, so check every square inch of that place when you're there.
There is also a woman at the camp that lets you sleep at the camp for 20 jewels. Take advantage of it whenever necessary during your quest for the Diamond Eyes, it's pretty useful and doesn't cost very much.
Be sure to sniff around the camp with The Dog. You'll find some useful alchemy ingredients, including some Bone and Brimstone.
Blimp's Cave
Now that you've got your dog back, go back through the desert then go to Blimp's Cave. Talk to him and he'll give you Revive, which revives the dog without the use of a dog biscuit. However, it takes a bit of leveling with the spell to make it somewhat powerful.
Revive
3 Root, 1 Bone
No comments:
Post a Comment