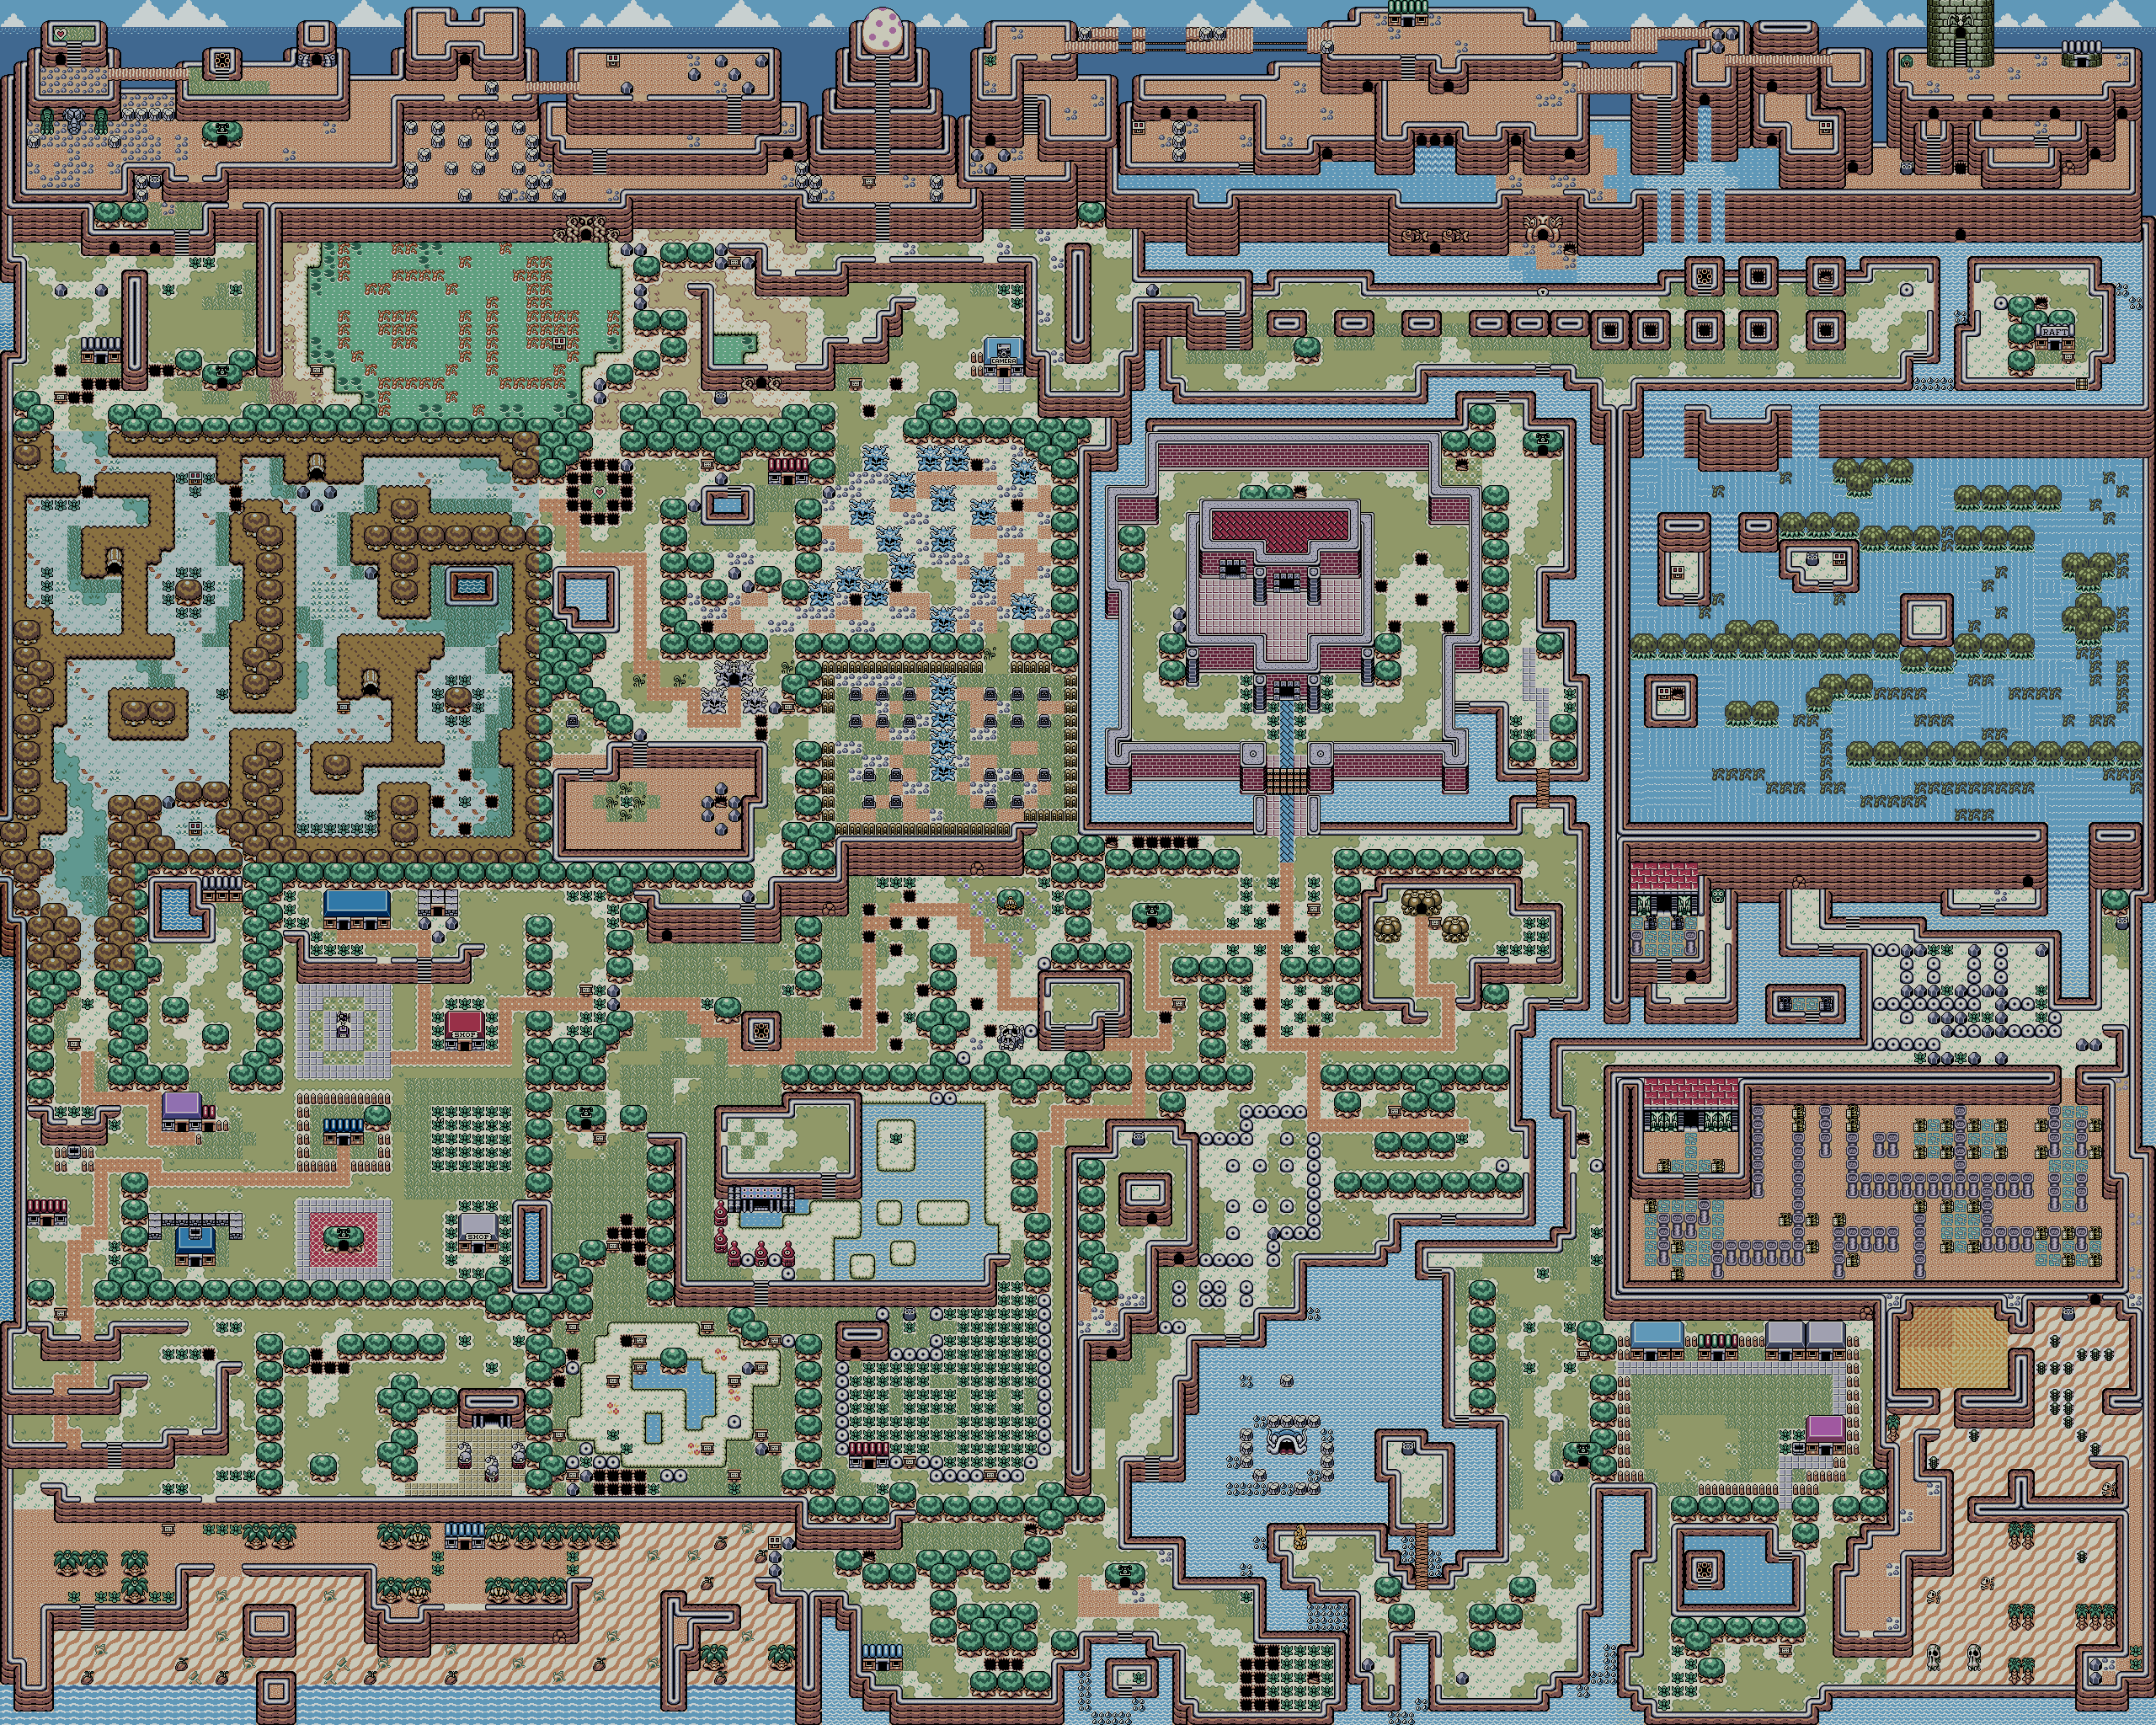
After taking Bow Wow down to the swamp, we get to enter the second dungeon.
Overworld maps by Osverad. Dungeon maps by Revned.
.png)
As you take Bow Wow for a walk, you'll notice that Bow Wow eats all the enemies for you...including Moblins. Why didn't he eat all the Moh yeah he was chained to a rock.
The northern exit out of the Mysterious Forest takes you to Mr. Write's house. He likes writing letters, but he never gets a response...
The monsters that look like Jell-O molds are just vanilla enemies.
The cave north of Mr. Write's house gives you 20 Rupees in one of the chests. You won't be able to open the other chest, though, due to the skull blocking your path. You're going to have to remember this chest for later.
You'll also find another phone booth near the swamp.
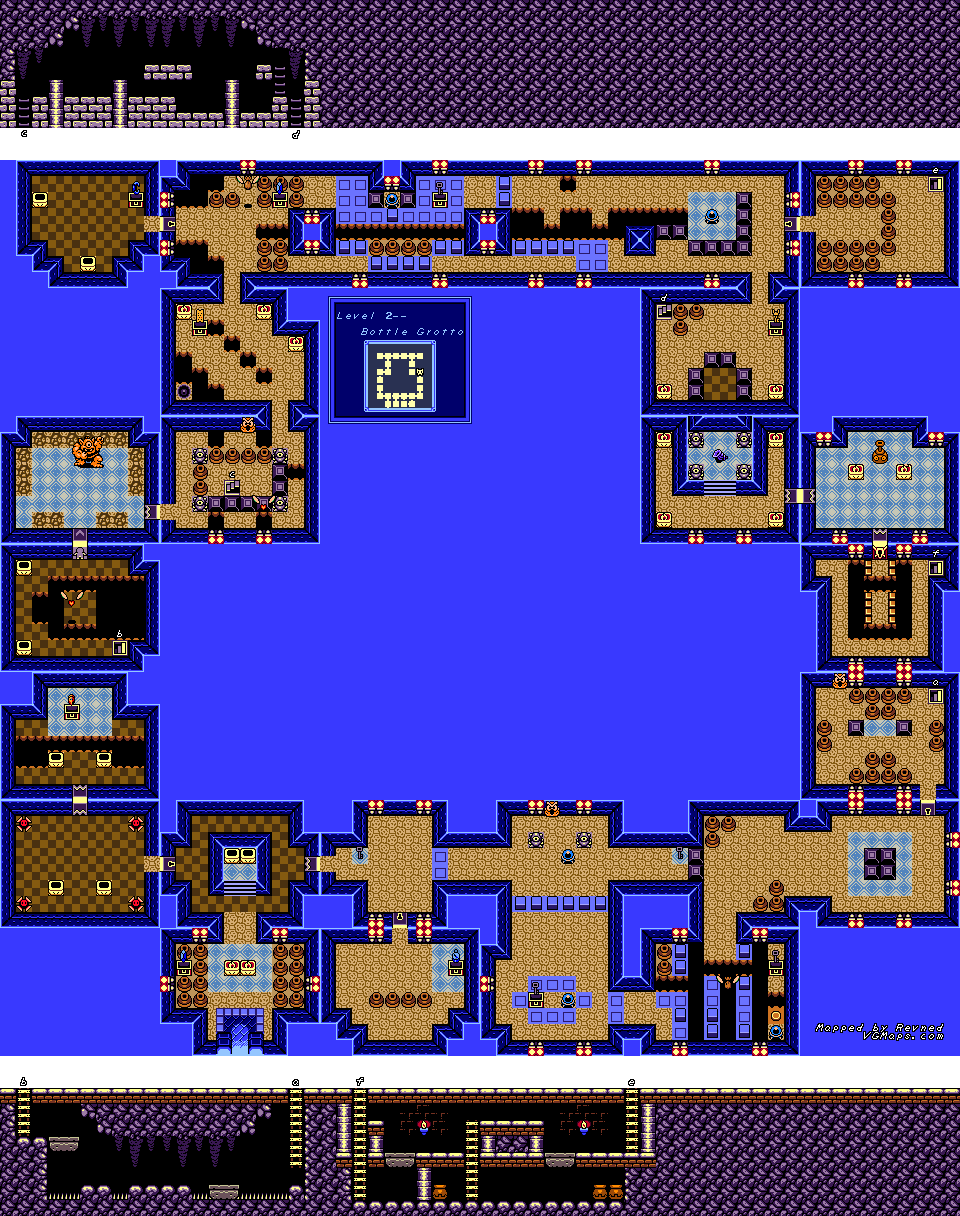
Anyway, head to the upper-right corner of the swamp and you'll find the entrance to the Bottle Grotto. Unless you have bombs, the only way to get rid of the flowers blocking your path is with Bow Wow.
Bottle Grotto
This dungeon brings us a new kind of puzzle: light up all the lanterns with the Magic Powder to open the door to the next room. You'll see this one a few times here and also throughout the game.
The room in the upper-left corner of the map contains the Power Bracelet. This lets you not only pick up bottles with the button you equipped it on, but you'll be able to move those rocks stuck in the ground, too.
Some of the Stalfos Knights are a little faster, and when you swing at them, they'll try to pounce on you. Be careful!
Remember the crystals in A Link to the Past that turned from blue to orange when you hit them? Well, they're back in this game (except they're all in one color). Hit the crystal with your sword, and some blocks in the ground will be raised up like a big protective wall that blocks your path while others lower.
To the right of the first crystal you see are a pair of Shy Guys. They go in the same direction you do. To beat them, hit them from behind with the Whirlwind Slash. It'll take some clever navigation, but it can easily be done.
The hooded Stalfos with the sword and shield can be easily taken care of with a Whirlwind Slash, much like the Moblins with the sword and shield. They basically act the same way, too, so there's nothing new here.
The mini-boss here is one of those one-eyed guys from the Dark World in [i]A Link to the Past[/i] that throws bombs at you. Yep, he's been elevated to mini-boss status. Avoid those bombs and whack him with your sword.
After the mini-boss, you'll meet a vortex-like hole in one of the corners of the room. This guy will try to suck you into the pit. He also sucks the enemies towards him, which can be both a gift and a curse.
To take out the Boo Buddies, light up one of the lanterns. This will cause them to freak out and turn black. From there, you can hit them with your sword.
There is a room with a Pols Voice, a bat and a hooded Stalfos. Defeat the Pols Voice (the thing that looks like a hopping bunny) first, then the bat, then the Stalfos. You'll get the Nightmare's Key.
Superbly written article, if only all bloggers offered the same content as you, the internet would be a far better place..
ReplyDeletePendant Lights
Thanks.
Delete