Showing posts with label part 51. Show all posts

Saturday, March 7, 2026

PrinceWatercress plays Super Mario Odyssey - Part 51 of 92


We get the last of the collectibles for the main game. Next stop: the final fight with Bowser.


At the end of the kingdom is the Wedding Hall. Before going in to confront Bowser, look behind the Wedding Hall for a frog. From there, you can use the high jump to get to the rooftop and find the last of the Regional Coins and the final Power Moons that you can collect before beating Bowser.

Power Moons


3. The Tip of a White Spire - At the roof of the Wedding Hall, there are lights around the top of a spire. Throw your hat at it and hold the throw button down to get this Power Moon.

11. Around the Barrier Wall - From the tower that shoots the smaller Bullet Bills, you can capture a smaller Bullet Bill and go back. From here, you can possess a huge Bullet Bill again, then go further back for this Power Moon. This one takes a bit of exploration to find and can be easily missed.

12. On Top of the Cannon - Take control of the Giant Bullet Bill. The tower firing the smaller Bullet Bills near the end will have a Power Moon hidden at the top. Get on the tower, then ground pound the center of it for a Power Moon.

13. Fly to the Treasure Chest and Back - When you capture and possess the giant Bullet Bill in the underground cavern, turn right and head towards the huge, tower-like structure. There will be a chest containing a Power Moon.

14. Up in the Rafters - At the Wedding Hall rooftop, there is a hole underneath the bell. Drop down the hole to land in the rafters. Here, you can find a Power Moon.

Regional Coins


Thursday, March 20, 2025

PrinceWatercress plays Wario Land II - Part 51 of 51


...and Wario Land 2 comes to an end.


When you beat the game, you'll also unlock a mini-game. The mini-game in question is called "Flagman D.D.," and plays just like the Game & Watch Game "Flag." Since the Game & Watch Gallery games were in vogue at the time, Nintendo decided to put this in the game if you've reached 100%. It costs 100 coins from your total coins to play it, and it can be quite fun.

A series of flags will be raised, and you'll need to raise those same flag in the same order. If you mess up, you'll take a hit. There's also a timer on the left side of the screen, and if it runs out before you can complete the pattern, you'll also take a hit. Three hits, and the game is over. Up, Right, Down and Left are 1, 2, 3 and 4, respectively. The B Button is 5, and the A Button is 6. You'll start out with just the first four flags, then the fifth one will be added in at ten points, and the the sixth will be added at fifteen.

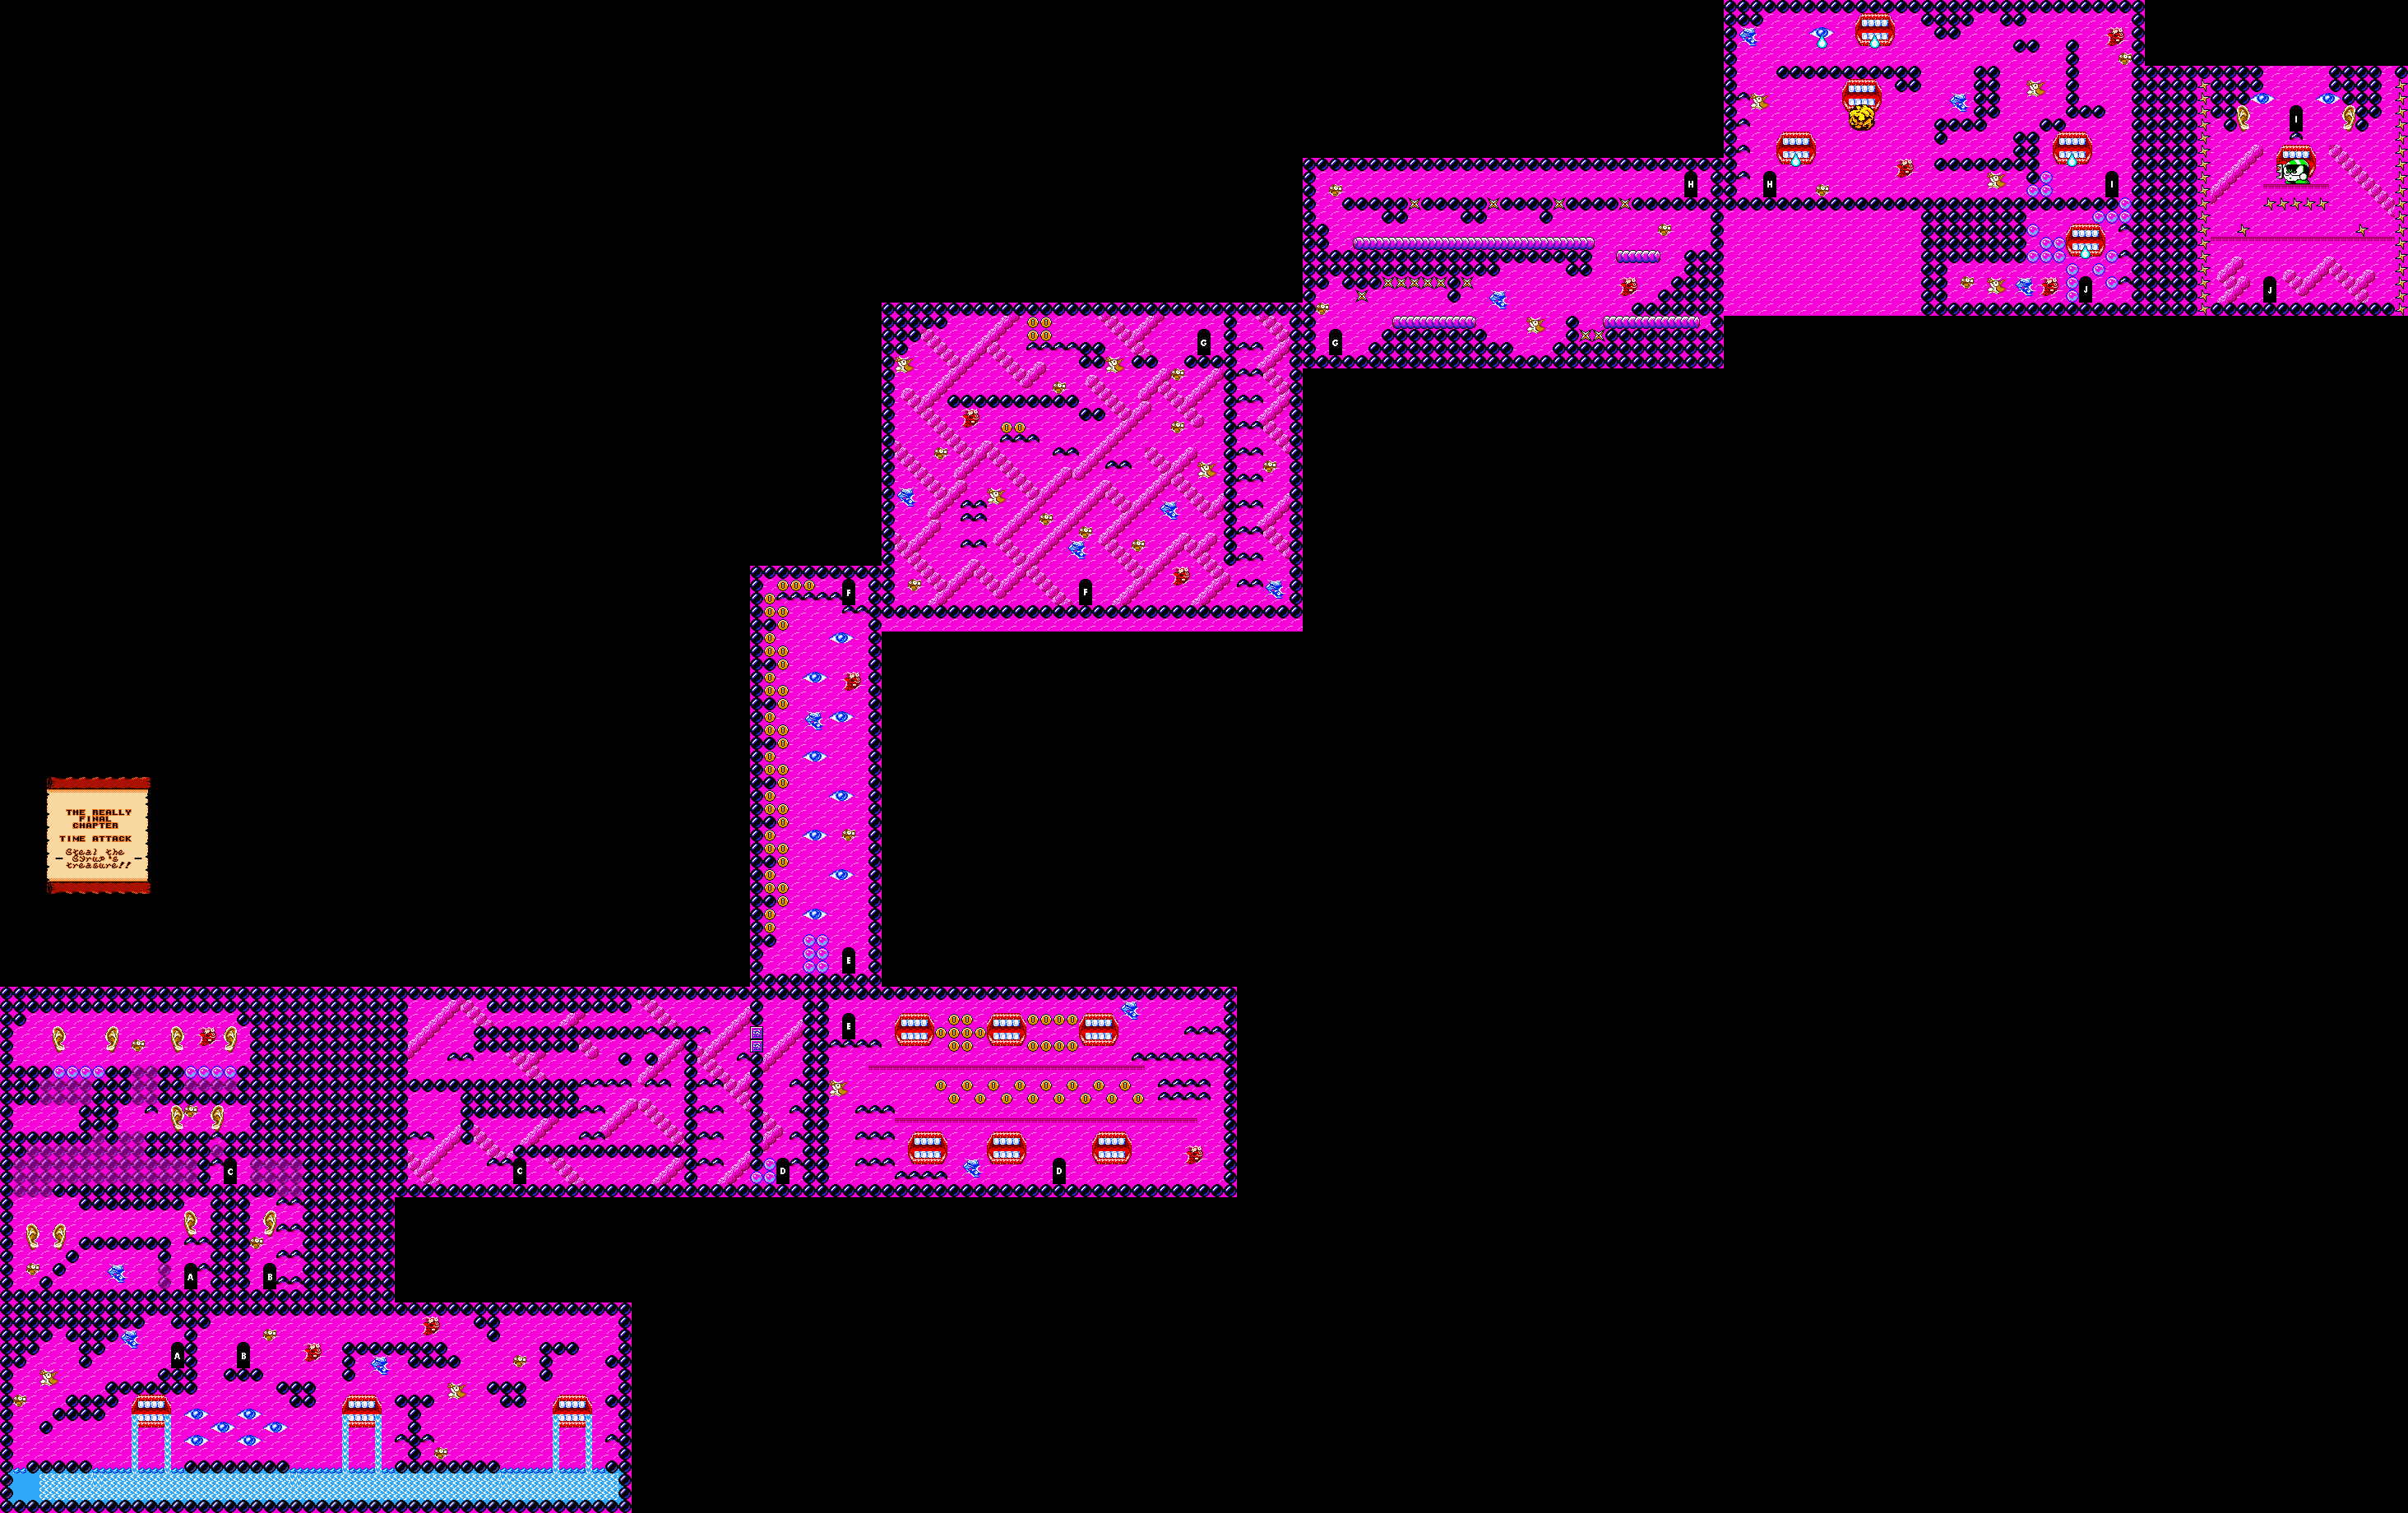
The Really Final Chapter

Time Attack: Steal the Syrup's treasure!


Unlike the other levels, you'll be entering a hidden cave near Syrup Castle and going from the beginning to the end. There are no coins to collect or treasures to find; instead, you have a timer at the lower-right corner to show how long you've been playing. The game will throw a series of challenges at you, such as trying to break your way through walls, floors and ceilings to find paths, or jumping from dresser to dresser across the water, or move an enemy around the room to get past certain blocks and move on to the next area.

The half-circles are platforms that you can jump on and through. 

In order to tackle the wrap-around jumps that the level throws at you, you'll need to position yourself so that it looks like Wario in mid-air, and do that, you have to stand on the edge of the platform before jumping up and around to the platform above.

Other challenges include jumping off birds diving to the side to reach platforms, throwing enemies onto platforms that only enemies can walk on and jumping across, getting to a door as Flat Wario while avoiding water droplets, and dealing with spikes and conveyor belts.

To defeat the Giant Spear Man without falling to the bottom of the screen, you'll need to alternate between the left and right sides of the Giant Spear Man as you keep butt bouncing on him. If you do that, he will go down, and you'll finish the level.

When you finish this level, you'll find the treasure, which is a big bag of money. After this, you'll get the credits one more time. Wario runs back to his castle with the treasure while a Giant Spear Man chases after him.

With that, that completes Wario Land 2!

Saturday, October 19, 2024

PrinceWatercress plays Chrono Trigger (Super NES) - Part 51 of 70


The first run through the Black Omen is the best. If you know what you're doing, you can get a whole bunch of items to better your party with.


The Tubster is a gold Heckran palette swap, but you can easily hit it with physical attacks. If you attack it or use a technique on it (like Charm), it will counter-attack, and that attack can pack a punch. You can Charm it to get a Power Tab, and there is also a chance you can get an Elixir from it that way as well. If you want, you can leave, come back, keep fighting the Tubster and get a ton of Power Tabs.

The Blobs and the Aliens are one-time-only battles. The Blobs can be Charmed for a Magic Ring and the Aliens can be Charmed for Magic Tabs. Beating them can also net you some Shields and Barriers. Beware, as they both have counter-attacks and they can be nasty. The Blobs can counter with MP Buster, while the Aliens counter-attack with an instant death attack. If you're going to hit them, hit them super-hard so they die before they can counter-attack.

Saturday, July 13, 2024

PrinceWatercress plays Ratchet and Clank: Going Commando - Part 51 of 54


In this entry, we take on all of the ship challenges that are left.

First | Previous | Next | End

1:13 - In Challenge 2 of Hrugis Cloud, you'll need to shoot down the ships that are flying around. Stay near the power receptors so you can make it easier to find the ships you need to shoot down, then give chase and fire away when they show up.

4:37 - In Challenge 3 of Hrugis Cloud, you'll have to destroy the virus-infected repair drones. This challenge goes much like the other dogfights in the game - the enemies get in front of you, you move around to avoid getting shot, then blast away once they get in front.

7:01 - In Challenge 4 of Hrugis Cloud, you'll be racing another spaceship and going through the rings. Once again, if you make it to the end without missing a ring, you'll get a Platinum Bolt.

If you start missing rings at the beginning of the race without even going through the first ring, crash your ship. That will stop the game glitching out.

Of the three races to get the Platinum Bolt in, this is the hardest one.

9:05 - In Challenge 2 of Gorn, you'll need to shoot down all of the ships in the area without getting destroyed yourself. Some of the ships drop Raritanium in addition to bolts, and I'll be using this battle later to get more of both.

11:48 - Before starting Challenge 3 on Gorn, we get a bunch of weapons and upgrades for the ship.

13:23 - In Challenge 3 of Gorn, you'll need to destroy the various parts of the big ship that is flying around. If you star running out of shiled and weapons, take out some of the smaller ships. Be sure to use your missiles to find out what parts of the large ship you have yet to shoot down. 

16:10 - In Challenge 4 of Gorn, you're racing Ace Bunyon again. Once again, you have to get to the finish line without missing a single ring for another Platinum. Thankfully, this is the last time you have to do this.

Controls:


As Ratchet:

Control Pad/Left Analog Stick: move
Right analog stick: move camera

X:
  • Jump and double jump (hold button after double jump to use Heli-Pack or Thruster Pack)
  • Wall jump (near certain walls)
Square: strike with wrench
Circle: pull out/shoot currently equipped gun
Triangle: 
  • quick select (hold and use in conjunction with Control Pad or left stick to switch guns; menu can be customized in Quick Select on the pause menu
  • double tap to switch between two most recently equipped weapons/items
  • interrupt on-screen messages

Select: open map
Start: Pause menu
  • Control Pad: select option
  • X: confirm option choice

L1:
  • center camera behind Ratchet (tap button to center)
  • first-person view (hold button and use left stick or D-Pad to look around; let go of L1 to move camera back behind Ratchet)
  • Square: wrench boomerang
  • Circle: fire gun
  • R1/R2: zoom in and out (Pulse Rifle only)
L2/R2: strafe (hold while moving)
L3: see health and Bolt totals
R1/R2: crouch (hold down)
  • Square: wrench boomerang
  • X: high jump
    • long jump (hold crouch button and jump while running to perform)
R3: open map

In water:
  • Square: dive and descend
  • X: surface and ascend
  • R1: accelerate with Hydro-Pack

As Clank:

Control Pad/Left Analog Stick: move
Right analog stick: move camera

When hanging off platforms:
  • Control Pad/Left Analog Stick: move
  • Forward+X: vault up
  • Back+X: drop down

Square: punch
X: Jump (press and hold in the middle of a jump to glide with Heli-Pack)
Triangle: command menu (hold and use in conjunction with Control Pad or left analog stick to choose commands)

Tuesday, June 4, 2024

DeceasedCrab plays Earthbound - Part 51 of 53


This entry and the next two are the ending. Everything after you return Paula home is completely optional, but it is nice to check out.


After the battle, the four souls of the party leave their robotic bodies in the past and return to the present, where they re-inhabit their bodies in Saturn Valley. Poo spins in place and teleports, then drops a few presents down after he teleports back to Dalaam. Jeff also leaves the party to see what he can learn from his father Dr. Andonuts. Paula will then ask Ness to escort her home. Say yes. When you approach the Polestar Preschool, Paula will leave the party to return home.

There are three things in the presents. The Letter From Kids is a letter from the kids at the Polestar Preschool, the Letter From Mom is a letter from Ness' mom congratulating you on beating Giygas and asking you to hurry home, and the Letter From Tony is a letter from Tony in Winters hoping to see Jeff again.

From here, you can travel the world and talk to people before you take Paula back to Polestar Preschool in Twoson and head back to Ness' house in Onett. There are no more random encounters, as all of the monsters will be gone due to Giygas no longer being around to exert control over them.

Escargot Express, Mach Pizza and Stoic Club will no longer work, due to Tracy quitting, the chefs quitting and the Stoic Club becoming "The Lazy Cowpoke Stop 'n Go," respectively.

If you talk to the talkative rock in the Lost Underground, he goes back to being a simple lock.

If you talk to the Tenda Chief, you can return the "Overcoming Shyness" book back to the library.

The Chaos Theater in Twoson will be closed if you go to it.

Saturday, November 11, 2023

Jerry Martin plays Strong Bad's Cool Game For Attractive People - Part 51 of 53


In this entry, we finally face Trogdor.


If you click on the third option (Rather Dashing), Strong Bad will ask Rather Dashing to join him on slaying Trogdor, but Rather Dashing will mention that he is no longer in the dragon slaying business due to getting burninated over and over again and has shifted to princess saving, yet he has been unable to find a single damsel in distress. Click on Strong Sad, which is the now-unearthed fourth option. Strong Bad will tell Rather Dashing that the Munchox is attacking the princess, and upon knowing who the princess really is, he reluctantly joins your party.

Head back to the Inn and use Rather Dashing on Strong Sad. When Strong Sad says he is really an evil wizard, Rather Dashing sees no reason to save him, but upon the Munchox roaring again, Strong Sad syas that he is both a wizard and a princess due to his pink hat. Rather Dashing tells Strong Sad to get rid of the Scorpion Bait, which he does. Strong Sad offers to join his party and give Rather Dashing Bard powers.

From here, head towards the mountain that Strong Sad was guarding. The peasants, needing protection from Trogdor, leap onto Strong Sad and join his party automatically. Limozeen will show up in their space party machine and will not be far behind.

You'll then be in the castle. Trogdor will be underneath the castle, and you'll have to find him. Homestar will pop up and mention the obvious, then turn this part of the game into a first-person-shooter. WASD controls as well as the arrow keys will move you through the hallways. The right mouse button will attack, and the left mouse button lets you look at or use objects from the inventory.

You'll soon fight a Space Circus Catastrophe Clown. Use the Performing Bear on the clown to get rid of it and to open a secret passage. When you see Nebulon, use Limozeen's Bus to get rid of him and find another secret passage. When you see the polynomial equation, use the Algebros on it to solve it and open another secret passage.

From here, you'll have to use the doors you see the rest of the way, as there are no more fights. You'll soon meet The King of Town with two chainguns in an obvious reference to Wolfenstein 3D. Shoot at him with the light gun. Three shots will do him in.

After defeating The King, you'll find Trogdor. Use the Trog-Sword on Trogdor to fight him. Trogdor will be defeated after being unable to handle Strong Bad's style, then the walls will come down to reveal a dungeon behind it. You'll find out that not only is Homestar being held hostage here (for some reason), and that you're also in a 3D adventure! Trogdor will suddenly pop up from behind Strong Mad, and some pedestals will pop up.

Use the Peasants on Ultimate Trogdor to set them on fire. Afterwards, use Gel-Arshie on Ultimate Trogdor to reveal his weak spots. Click on the weak point on the stomach to hit Trogdor and do damage. Strong Bad will mention that he will have to turn Trogdor around to reach the rest of the weak points. Use the Peasants on the top-left pedestal to distract Trogdor and hit the weak point that you see on his left bicep by using the Trog-Sword on it. From here, use the Peasants on the bottom-left pedestal to reveal the other weak point on the other bicep, then hit the other weak point.

GOOD GRAPHICKETEERS CARDS:
- Carpal Tunnel Connie: Examine Strong Sad's bookcase.
- Trick Card 1: Use Gel-Arshie on Strong Bad's mailbox.
- Trick Card 2: Take a picture of the ghost to the left of the photo booth.
- Anti-Social Angus: Underneath the box in Peasantry Inn.

PARTY MEMBERS:
- The Algebros: Talk to The Algebros on the brick wall.
- Snake Boxer: Talk to the Snake Boxer in the Crates area and talk to him.
- Performing Bear: Click on the Space Circus Catastrophe game in the Mainframe.
- Gel-Arshie: Get the killscreen in Gel-Arshie's Fruitboarder.
- Innkeeper: Talk to the Innkeeper about repairing Limozeen's Spaceship.
- Mista Fixit: Use ??? on the bucket in the Crates area.
- Limozeen: Use the Innkeeper on Limozeen's Spaceship.
- Strong Mad: Grab the trophy and use it on Strong Mad.
NEW! Rather Dashing: Use Scorpion Bait on Strong Sad and talk to Rather Dashing.
NEW! Peasants: Obtained when heading towards Trogdor's Cave.

OUTFITS:
- EGA Hat: Smash the crate near Bubs with Snake Boxer.
- Stinkoman Boots: Take a picture of the ghost in the Strong House bathroom.
- Stinkoman Gloves: Use Gel-Arshie on Bubs' Concession Stand.
- Trogdor Shirt: Line up Trogdor with Cottage on the code wheel and use Gel-Arshie on it. (You need to do this before going to Peasant's Quest.)
- Elf Boots: Underneath the box in Peasantry Forest.
- Mista Fixit: Use Mista Fixit on the Cool Car.
- Stinkoman Hair: Use Mista Fixit on the leftmost broken ladder in Stinkoman 20X6.

GAME BOXES:
- Halfathon Box: After obtaining the Light Musket, return and destroy the crate again.
- Lady Crate Ape Box: Underneath then box in Strong Bad's front yard.
- Fruitboarder Box: Use Gel-Arshie on the Brick Wall.
- Spirits of '76: Take a picture of the ghost to the left of the scorpion cave in Peasantry.

GHOSTS TO FREE:
- John Hancock: Give the feather quill to him in Strong Mad's Room.
- Samuel Adams: Give the tea bag to him near the stairs leading to the basement.
- Paul Revere: Give the lantern to him in the TV Room.
- Benjamin Franklin: Give the key to him in the computer room.
- ???: In the picture in the right side of the TV room.
- ???: In the picture in the bathroom near the tub.
- ???: In the picture near the left side of the photo booth.
- ???: In the picture in Peasantry Forest, left of the cave.

CHEAT COMMANDOS FIGURINES:
- Swampslash: Take a picture of the ghost in the TV Room.
- Dryghost: Use the Quest Item on the Munchox before using the Scorpion Food.
- Subtlefuge: Use Gel-Arshie on the lava pool in Halfathlon.

PEASANTS BURNED:
- Use the Innkeeper on Limozeen's Spaceship.
NEW! Use the Peasants on Ultimate Trogdor.
NEW! Use the Peasants on the top-left pedestal.
NEW! Use the Peasants on the bottom-left pedestal.

Wednesday, November 10, 2021

HCBailly plays Final Fantasy II AGAIN - Part 51 of 65


In this entry, we reach the top floor of Mysidia Tower and get Ultima...at a cost. We then end up never using the spell because it's bugged. Go figure.


It is possible to run into Ice Lizards. They are rare, but they can attack in groups and attack your party with Snowstorm 16. They don't have a lot of HP, but they can be pretty powerful.

The Evil Cane casts Aero 16, but on a random person. It can be a party member or an enemy. Don't even bother using it as an item; instead, use it as a weapon in battle if you have somebody who's good with a Cane, as it's more powerful than the Power Cane.

Enter the second door near the Black Robe.

When you reach the top floor, you'll see Minwu. He'll focus all of his power on the door to open it, but he'll knock himself for a loop and die as a result. The next room contains five crystal orbs. The outer orbs increase Spirit, Strength, Intellect and Agility for a random member of your party, while the center light is Ultima...which is bugged. Unlike future versions of Final Fantasy II, Ultima is useless here as it involves leveling up a zillion spells that you'll never use just to power Ultima up.

It is possible to go beyond 99 on a stat with armor that increase said stat; if that happens, the first number will be an A. If you gain a point of that stat, the game will reset that stat to the normal maximum of 99, but you can remove and re-equip something so that the game will recalculate your stats to get it back to what you want.

If you go to Mysidia after leaving the Mysidia Tower, you'll be told to go to Fynn. If you ask around, you'll also be told that the Emperor's magic power is extraordinary, that you'll need to return to Castle Fynn to summon the Wyvern from the Mirror Chamber and that the Jade Passage appears with the coming of the demons.

Also, once you leave the Mysidia Tower, different enemies will show up in locations where they weren't before, due to enemy domain tables changing once you get the Ultima tome.

The PitFiend is a Rank 6 enemy and can Blind you with its physical attacks. It has no elemental weakness, can cast Fire 16 on your entire party, and is strong against Ice and Fire. The Salamander is also a Rank 6 enemy and cast Blaze 16 on your entire party.

The Mantis King (MntisKing) is a Rank 6 enemy and are weak to Ice. Other than that, there is nothing else worth mentioning about them.

Wednesday, May 22, 2019

HCBailly plays Final Fantasy IV (Super Famicom) - Part 51 of 70


Our adventure now takes us to the Sealed Cave...


There's not much else you can do, so head northeast of Tomera to the Sealed Cave.

Sealed Cave


When you approach the door at the beginning, use the LukaKey on it to enter.

The Miss Vampire (Miss Vamp.) and Evil Heads can be easily destroyed with Fire 3.

The ropes act as paths to different platforms. Thankfully, the ropes are not one-way.

Some of the doors are monsters known as Assault Doors. Their Dimension 9 attack will outright kill one of your allies, but you can have one character revive that person while Cecil attacks with the Avenger to cut it to ribbons. If you deal too much damage to it in one round (over 4000+), another enemy will come out of the door. Usually it is a Chimera-type enemy, but it can also be a Yellow Dragon.

The Kotatsu seems useful, but it's less powerful than the Full Moon boomerang.

Save the Light Curtain for later. It acts a free Reflect for whoever uses it in battle.

The Light Sword is for Cecil, but you're better off with whatever you have equipped on him at this point.

The Hell Wind Shuriken is a very good weapon; save it for later.

The Dark Hood gives Edge a little more defense, but it also boosts his strength, vitality and agility all by three.

The Marid and the NagaRusher are basically vanilla enemies.

The Silence Bell casts Silence on an enemy when used.

Monday, June 11, 2018

HCBailly plays Terranigma - Part 51 of 75


In this entry, we head to Australia for the first time.

World map by Tropicon. Suncoast map by Amir Azadur.


There is a port on the southwestern tip of Australia. In the middle of the nearby forest, there is a spot that leads to a hidden area where you can find 892 Gems.

From there, follow the southern mountains and enter the forest. The empty space will lead you to 228 Gems and a Life Potion. Be sure to take the vine on the right or you'll just be wasting time.

On the northern part of Australia is Airsrock, which is a reference to Ayers Rock. We won't be going there yet.

On the northeast coast is a town. This is the town of Suncoast.

Suncoast


Take a picture of this place before you do anything.

The building to the left of the entrance houses someone who says that they will move if the town becomes a tourist resort. I'm afraid I've got some bad news.

To the right of the entrance is the inn. The left room contains two sailors from Litz who have taken a liking to the town.

To the north are some more houses. The house in the top-left corner has a guy who will tell you about Airsrock, where a scientist has went to study the end of the earth.

Nearby is an opening to the north, which is a grazing field for some cows. You'll even see koalas here. You'll meet Keinz here, who says that the town desires progress, but has a bad location. Attracting people and promoting the town's name is essential for town growth here. Inside the nearby house is a man who wants to know how he can tell the world about his beef. When he asks if you can advertise for him, say yes. He'll give you a sample of his Tasty Meat and ask you to give to someone who will appreciate it.

To the right of the entrance to the grazing field is the town square. The people here are wondering how to expand and promote the town and get people to come here. You'll see a Magirock on top of the china cabinet nearby, but you won't be able to get it quite yet. The room to the north doesn't contain anything of importance.

To the right of the Square is the Sea House, where you can eat seafood for 15 Gems. It's all you can eat.

South of the Sea House is the tourism office. Be sure to inform about all the towns, and if you haven't taken photos of the expanded towns, do it.

In the center of the town, you can try some coconut juice for 10 Gems.

You're done in Suncoast. Head northwest of Australia. There is an island with a pier, and if you comb the forest, you'll find another hidden area where you can get 1403 Gems and a Luck Potion.

Just north of that is a smaller island where you can find. Go through the right crawlspace to get the Speed Shoes and 378 Gems. You'll need the Speed Shoes for later.

Next up is Africa, so head there. There are still some place we can go to. On the west coast is a pier, and you can find an oasis to the north. This leads to a caravan where you can meet some desert merchants. You can buy some items from one of the guys, but another guy will have Crystals. You'll need one to expand a town later.

Friday, March 9, 2018

skorch82 plays Brave Fencer Musashi - Part 51 of 70


It's time to take on another boss! Hope you've brought plenty of Cheese before heading into the Frozen Palace!

Equip the Fire Scroll, then jump up and light the torches with it.

You'll enter a room with a fresco on the ceiling. Go up to the statue and strike the crystal there with Lumina. You'll drop down a trap door. Use the Fire Scroll to melt the spikes and continue. You'll eventually meet the next boss: Frost Dragon.

Crest Guardian

Frost Dragon


Whatever you do, do not let this guy touch you unless you are currently using the Fire Shield. He'll freeze you if you're not.

After some time, you'll be able to head further down the path. Use the Fire Scroll to melt the ice spikes, and double jump over them when they're low enough. You'll have to be quick so the dragon doesn't destroy the path while you're crossing it.

When the dragon comes out of the ground, avoid his face slam attack. Move around to avoid the ice breath projectiles, then run to the other side of the room to avoid the ice beam. After firing it, he'll be tired out. Use the Fire Scroll to weaken him as he lays down, and eventually he'll rise up and drop back down again with his core exposed. Whack the core with Lumina.

After two hits, he'll sweep the floor with his body and then fly up before going back down into the hole. After three, he's destroyed and the Fire Crest will be liberated. You'll teleport back to the lobby of the fortress. There's nothing more to do here, so head out of here.

Friday, February 24, 2017

Chilean Retrogamer plays Wario Land 2 - Part 51 of 57


It's another owl level! Yay!

Final Chapter: Uncanny Mansion

Story 2: Hold on to the owl


0:07 - After going right, up and to the left, you'll find a door.

0:29 - Go up and hit the switch, then head back.

0:46 - All of the blocks here will be out of your way, and you'll be able to fly around with the owl. Just above the owl is the treasure room, where you can win an old book.

3:08 - From here, head to the upper right corner with the owl.

3:52 - Head up to the next doorway.

4:22 - Just avoid the spikes and go to the right. There are two coins above the raging currents of the pool of water below if you need them.

4:48 - From here, it's a maze to reach the exit in the upper-right corner. The first door you see as you go through the maze takes you...

5:18 - Break the enemy blocks here and hit the switch, and you'll be able to go back to the maze and ride to the exit with the owl. Go back to that room, hit the switch again, and you'll be able to make your way to the exit.

7:07 - Three more to go...

Monday, December 9, 2013

brickroadbrickroad and SovanJedi play Secret of Evermore - Part 51 of 88


Not much here. Just stocking up on supplies.

Crustacea


It should be noted that the dog can't go up the ladders...but you can bring the dog to the upper regions with the lift. :D

Tuesday, June 25, 2013

Eexecute plays Turok 2: Seeds of Evil - Part 51 of 51

Finally! The last battle!

0:38 - Meet the Primagen.

Anyway, avoid the bombs and destroy the planes he sends out. once you do, he opens the glass window in front of him. It's go time!

Shoot the Primagen in the head. Take down as much of the Primagen's energy as you can, and stay away from it as its arms have some range. After you damage it enough, he'll start shaking and you'll hear some sort of metal whirring sound. Take him down when he's doing this, otherwise he'll regenerate some of his health. During this first form, keep an eye on him at all costs as he goes in and out of the air constantly. He can land on you and cause damage, so stay on the move.

The second form starts the same way as the first one. Avoid the bombs and take out the planes, then the Primagen comes out again. He has a supersonic attack that comes out of his hands, and it's pretty tough to dodge due to its speed. Planes will still show up when the Prigamen comes out to play, and will assist him in getting rid of you. Other than that, same strategies apply.

The third form starts with two salvos of planes. Take both of them out and you'll fight the Primagen one last time. Since he has only one arm this time around, he'll try to push you back with his wings and fly around throwing fireballs. Keep shooting him in the head and keep the fight going. When you get him down to half health, you get a cutscene if you saved all the totems. The five energy totems power up and fry him, taking the Primagen out for good! Hell yeah!

10:27 - The good ending and credits. To be continued...