Showing posts with label Flight of the Amazon Queen. Show all posts

Sunday, June 27, 2021

PrinceWatercress plays Flight of the Amazon Queen - Part 19 of 19


It's time to fly out to the Valley of the Mists and face Dr. Ironstein once and for all...


Get the heck out of Floda Inc., then go to Trader Bob's shop. Buy the alcohol. Since you have the dead Floda guard's ID, you can now get the alcohol. If you haven't combined the Commander Rocket coupon with the blueprint yet, do so now. Use the alcohol on the rocket pack, then leave the village. You'll then see Joe on the pinnacle in a static scene. Use the rocket pack and you'll crash land in the Valley of the Mists. After you talk to Faye Russell, head east.

You'll notice that a Brontosaurus is blocking your path. Go north, and you'll find out that the Brontosaurus is eating the trees nearby. If you go all the way north, you'll find some branches. Use the knife on the branches to get some, then go south and use the branches on the Brontosaurus' head. You'll feed it, then the Brontosaurus will get out of your way. Go all the way back south, and you can now go west.

You'll soon see some smaller dinosaurs munching on a dinosaur skeleton, then they will run away from a Deinonychus. Use the Tyranno Horn to scare it off, then go east. You'll encounter Dr. Ironstein, and Faye will mentions that he has a dino ray gun that can turn people into dinosaurs. Ironstein threatens to turn Princess Azura into a dinosaur, then commands Joe King to put the crystal skull in the nearby robot. The robot activates, and after it is revealed that the robot is the protector of the Valley of the Mists, Ironstein announces that it will turn everyone into dinosaurs and help him rule the world. Unfortunately for Ironstein, the robot mentions that the only person it takes orders from is whoever activated it...which is Joe King, not Dr. Ironstein. Ironstein tries to turn Joe King into a dinosaur, but the robot catches the beam, amplifies it and turns Dr. Ironstein into a giant dinosaur. The robot, knowing that Dr. Ironstein now has powers equal to his, grows in size and fights him.

Pick up the dino ray gun. If you use the ray gun on Dr. Ironstein, Faye will turn into a dinosaur and Joe will automatically change her back. Talk to Faye and ask her to turn her mirror around so that you can deflect the beam back on Dr. Ironstein, then use the dino ray gun on Dr. Ironstein again. This time, you'll turn Sparky into a triceratops, and Joe automatically changes him back. Give the death mask to Sparky, then use the dino ray gun on Dr. Ironstein again. The laser will bounce off Faye's mirror, then the death mask, then the robot and finally hit Dr. Ironstein, getting rid of him for good. Joe, Sparky, Faye, Anderson and Princess Azura get on the Zeppelin, the shield to the valley is restored, Joe gets a kiss from Azura, and the game ends.

PrinceWatercress plays Flight of the Amazon Queen - Part 18 of 19


In this episode, we finally get the Crystal Skull, but by the time we find out what we really did all that work for, it's too late...or is it? Thankfully, we get help from Faye Russell and a rather familiar face...


You'll need to use the two stone statues in conjunction with each other, and in order to do that, you'll need to get the tree sap one more time. Go back to the drop off point at the Prince's crypt, get the tree sap, put the tree sap on one stone statue piece, then combine that piece with the other. Return to the statue and use the statue you just repaired on it.

The statue asks as a key, and the floor of the altar moves to reveal a staircase. Go down the stairs and follow the path, and you'll come across a maze. Give the Cheez Bits on the dino rat, and follow the dino rat into the exact doorway it goes into to find your way out.

You'll end up at a strange room. If you look at the wall markings, Joe will automatically translate them with the Pgymy to English dictionary. Joe will find out that this is an escape hatch he is looking at, and that pressing the panels in the right order will activate it. Go up the steps and look at the left wall panel. Joe will notice it is loose and adjust it, triggering it. Trigger the other one, and you'll get the escape hatch set up.

Go through the door on the right in the foreground. Use the vacuum cleaner on the floor to reveal all the symbols. After a brief cutscene involving Sparky, the floor will be clean.

From here, you'll notice that some of the symbols on the wall do not match any that are on the floor. Move the bottom symbol on the second column (I go from left to right on numbering the columns, so the left-most column is the "first" one). The symbols will change. Touch the third symbol on the third column (I go from top to bottom numbering the symbols on the columns, so the top-most one is the "first one). You'll open a door to the right. Go through it. You'll meet the guardian again, and you'll have to prove your lineage. Give the crown to the guardian, and you will be able to take the crystal skull. Pick it up. 

Go back to the "throne room" and use the chair, which acts as the escape hatch. You'll be greeted by Henry at the jetty, and Henry will point a pistol at you and throw you into prison at Floda Inc. Dr. Ironstein mentions that the shield surrounding the Valley of the Mists is shut off, and he can now turn people into dinosaurs. Regardless of what options you pick in the dialogue options, Dr. Ironstein will go ahead with his plans.

When you regain control of Joe, move around and you'll notice a mug was behind where Joe was standing. Pick up the mug and use it on the prison bars. Faye Russell will show up with Anderson, and after Anderson's first name is revealed to be Hans, Faye finds a laser pistol in a nearby cupboard and disintegrates the cell door before telling Joe to find a way into the Valley of the Mists before it is too late before heading back to the hangar with Anderson.

Saturday, June 26, 2021

PrinceWatercress plays Flight of the Amazon Queen - Part 17 of 19


Now he's gone and done it. Ian did something stupid and got himself killed, making it impossible to get out the easy way. However, this does allow us to do some more things in the temple. Unfortunately, we get stuck again.


Now that you've rescued Ian, we've been told not to follow him. Let's follow him anyway! Go back to the room with the lasers and use the death mask on one of the mirrored surfaces to destroy the laser trap. You can then go through the door behind it. You'll be on the lower path where the one dead body was. Go right, and you'll be on the other side of the room with the crypt. To get the green jewel, you'll need to create something that will allow you to get it.

Head back to the room where you dropped down from and go through the door on the right. Head back to the room where the Prince's crypt was and go down the hole. Pick up the tree sap again, and use it on the baseball bat. Go back to the green jewel and use the sticky bat on the jewel to grab it.

Go back to the statue with the eye holes and the two waterfalls. You'll hear Ian scream. Put the green jewel in the left eye hole and the blue one in the right. The waterfalls will disappear, and the statue will point to the right, telling you to go that way. If you go left, you'll see the trap that Ian accidentally triggered, killing him. If you go to Ian's lifeless body, you won't find the Crystal Skull at all. Instead, you'll find another stone statue much like the one you picked up earlier.

Go back to the double waterfall and take the right doorway. You'll be at the statue.

PrinceWatercress plays Flight of the Amazon Queen - Part 16 of 19


We finally helped Ian, but it doesn't exactly end well for us. However, we do get to open up more of the temple.


Enter the upper doorway where you played around with the pulley. Use the pickaxe on the stalactite in the room and grab the flint that drops to the floor. Use the flint on the lighter so you can use it. Then, use the pick-axe on the hole in the west side of the room to make it bigger. You'll end up in a new room, but you won't be able to do anything here yet.

Go back to the room with the giant snake. Use the mummy wrappings on the arm bone, then light the mummy wrappings with the lighter. You'll create a makeshift torch. Use the torch on the snake to get it to go away.

Go down the stairs and enter the doorway to the right. You'll end up in a previous room. Search the dead body for an ID card and a strange stone, which Joe will automatically take. Continuing west will take you to a large room with a statue, so go back and enter the room in the center. Go down the stairs and enter the doorway to the right. The stairs leading up leads back to the statue that you would have went to if you went west from the dead body, and you won't be able to go through the lasers blocking your path, so go west.

You'll trigger a cutscene where Dr. Ironstein meets with Anderson concerning the status of the zeppelin so he can fly into the valley and start his reign of terror. He also tells Anderson that Joe King will never bother him again, then leaves. Anderson starts to have second thoughts about his partnership with Dr. Ironstein...

You'll end up where you first met Ian. Go west and you'll see two waterfalls. There are eye indentations in the statue, and there is a big stick in a stone. Pick it up, and somehow, Joe will pull it out and put it in the inventory. Go back to the crypt from earlier and use the big stick on the crypt to open it. You'll lose the stick, but you'll open the crypt. Look inside, and you'll find a death mask, which Joe will automatically take. It is dirty, but you'll still have a little bit of the mummy wrappings left from when you made the torch. Use these wrappings on the mask to clean the dirt off of it.

Go back past where the snake was and return to the dead body. Go west, and then go east in the statue room. You'll be back at those stairs. To the right will be Ian. Pull the lever. Nothing will happen, but you will need to do this. Talk to Ian, and mention that you have a plan. Since you've hit the lever, you'll get the option of telling him to untie the rope tethering the cage. Ian will untie the rope at his feet. Hit the lever again, and Ian will be free. Unfortunately, Ian will draw a gun and tell Joe not to follow him. He will then walk away.

Friday, June 25, 2021

PrinceWatercress plays Flight of the Amazon Queen - Part 15 of 19


In this entry, we do even more problem solving within the ruins of Sloth Island. This is gonna be a long one.


Talk to the leader of the zombie women, who is in green. You'll find out that they are Prince Almaxaquottl's personal concubines, and that they are waiting for the prince to rest before they go to the afterlife. By talking to then, you can find out that the temple - built by the guidance of the gods, who left a guardian behind - is a resting place for the prince, as death is looked upon as a form of rest until going on to the afterlife. You'll also find out that they have been waiting for about three hundred years after being blessed by a high priest, allowing them to stay in a physical form until the Prince wakes up and goes to the afterlife.

Tell them that they have been had as far as the wait goes, then ask where the Prince is. Ask them how they know the Prince is still in the sarcophagus. and when the leader says that they trust him, tell her to prove it. She will tell you to go away, so ask her if she is afraid he is not inside, and she will get angry and open the sarcophagus. You'll see a mummy, and one of the wrappings will roll out. Pick up the wrappings, and Joe will pull them out and take them with him. From there, ask the leader to open the sarcophagus again, then tell her that you pulled a pile of rags out of the sarcophagus. When the sarcophagus opens, the Prince will be gone and the women will be shocked and angry.

From here, open the sarcophagus. Joe King will take the crown. From there, use the knife on the vines popping out of the back of the sarcophagus, and you'll find a hole in the back. Close the sarcophagus, then move it. You'll find a hidden opening. Go in.

Joe will drop down a level. There will be some tree sap on the tree in the background, and you can use the knife on the tree sap to be able take some and put it in your inventory. Take the tree sap. To the left is a loose fountain head. If you use the tree sap on the fountain head, you'll be able to get the water on the floor out of your way and reveal a blue jewel. Take the blue jewel, then go further left through the door.

You'll see the Floda soldier from earlier. The man's name is Ian, and he will tell you that he has accidentally set off a trap and is caught in a cage. He will tell you that he also has the Crystal Skull, and that if you help him out of the cage, they can return with the skull. From here, you can ask Ian questions. To get over to where he is, you'll have to get past the giant snake first.

To the left is a statue pumping out steam. There is a mug, but you won't be able to take it, as it is fused to the statue. There is also a stone disc that looks loose, but if you try to pick it up, you'll burn your hand. If you use the hand puppet on the stone disc, you'll be able to get the stone disc.

From here, go back to the room you dropped down to and use the lever. You'll get whisked back up to the room where you met the guardian. Go through the center door and you'll end up on the upper level of the room to the right. Use the stone disc on the spindle, then place the vines on the stone disc. It will be loose at the bottom, however, so go back and enter the door on the right to use the loose vines on the pulley. As for how to get the pulley, you'll need to use the bat that has been in your inventory the whole time on the notch to turn it and move the stone slab out of the way. On the other side is a pick. Pick it up, then go back and use the bat on the notch to pull the stone slab back down.

PrinceWatercress plays Flight of the Amazon Queen - Part 14 of 19


I could have caught that bug a lot easier. Oh, well. Anyway, time to head to Sloth Island, which is going to be the hardest part of this whole game.


Give the beetle you caught with the net to Charon to give him some bait. Charon will finally catch a fish, then he will give you a ride to Sloth Island as soon as you give him the word. You can ask him if he knows stuff about Floda and Sloth Island, and you can find out that he has been ferrying people from Floda over to the island for the last month and that nobody has returned. You'll also find out that Sloth Island is the tip of a submerged mountain and that the temple is deep into the mountain.

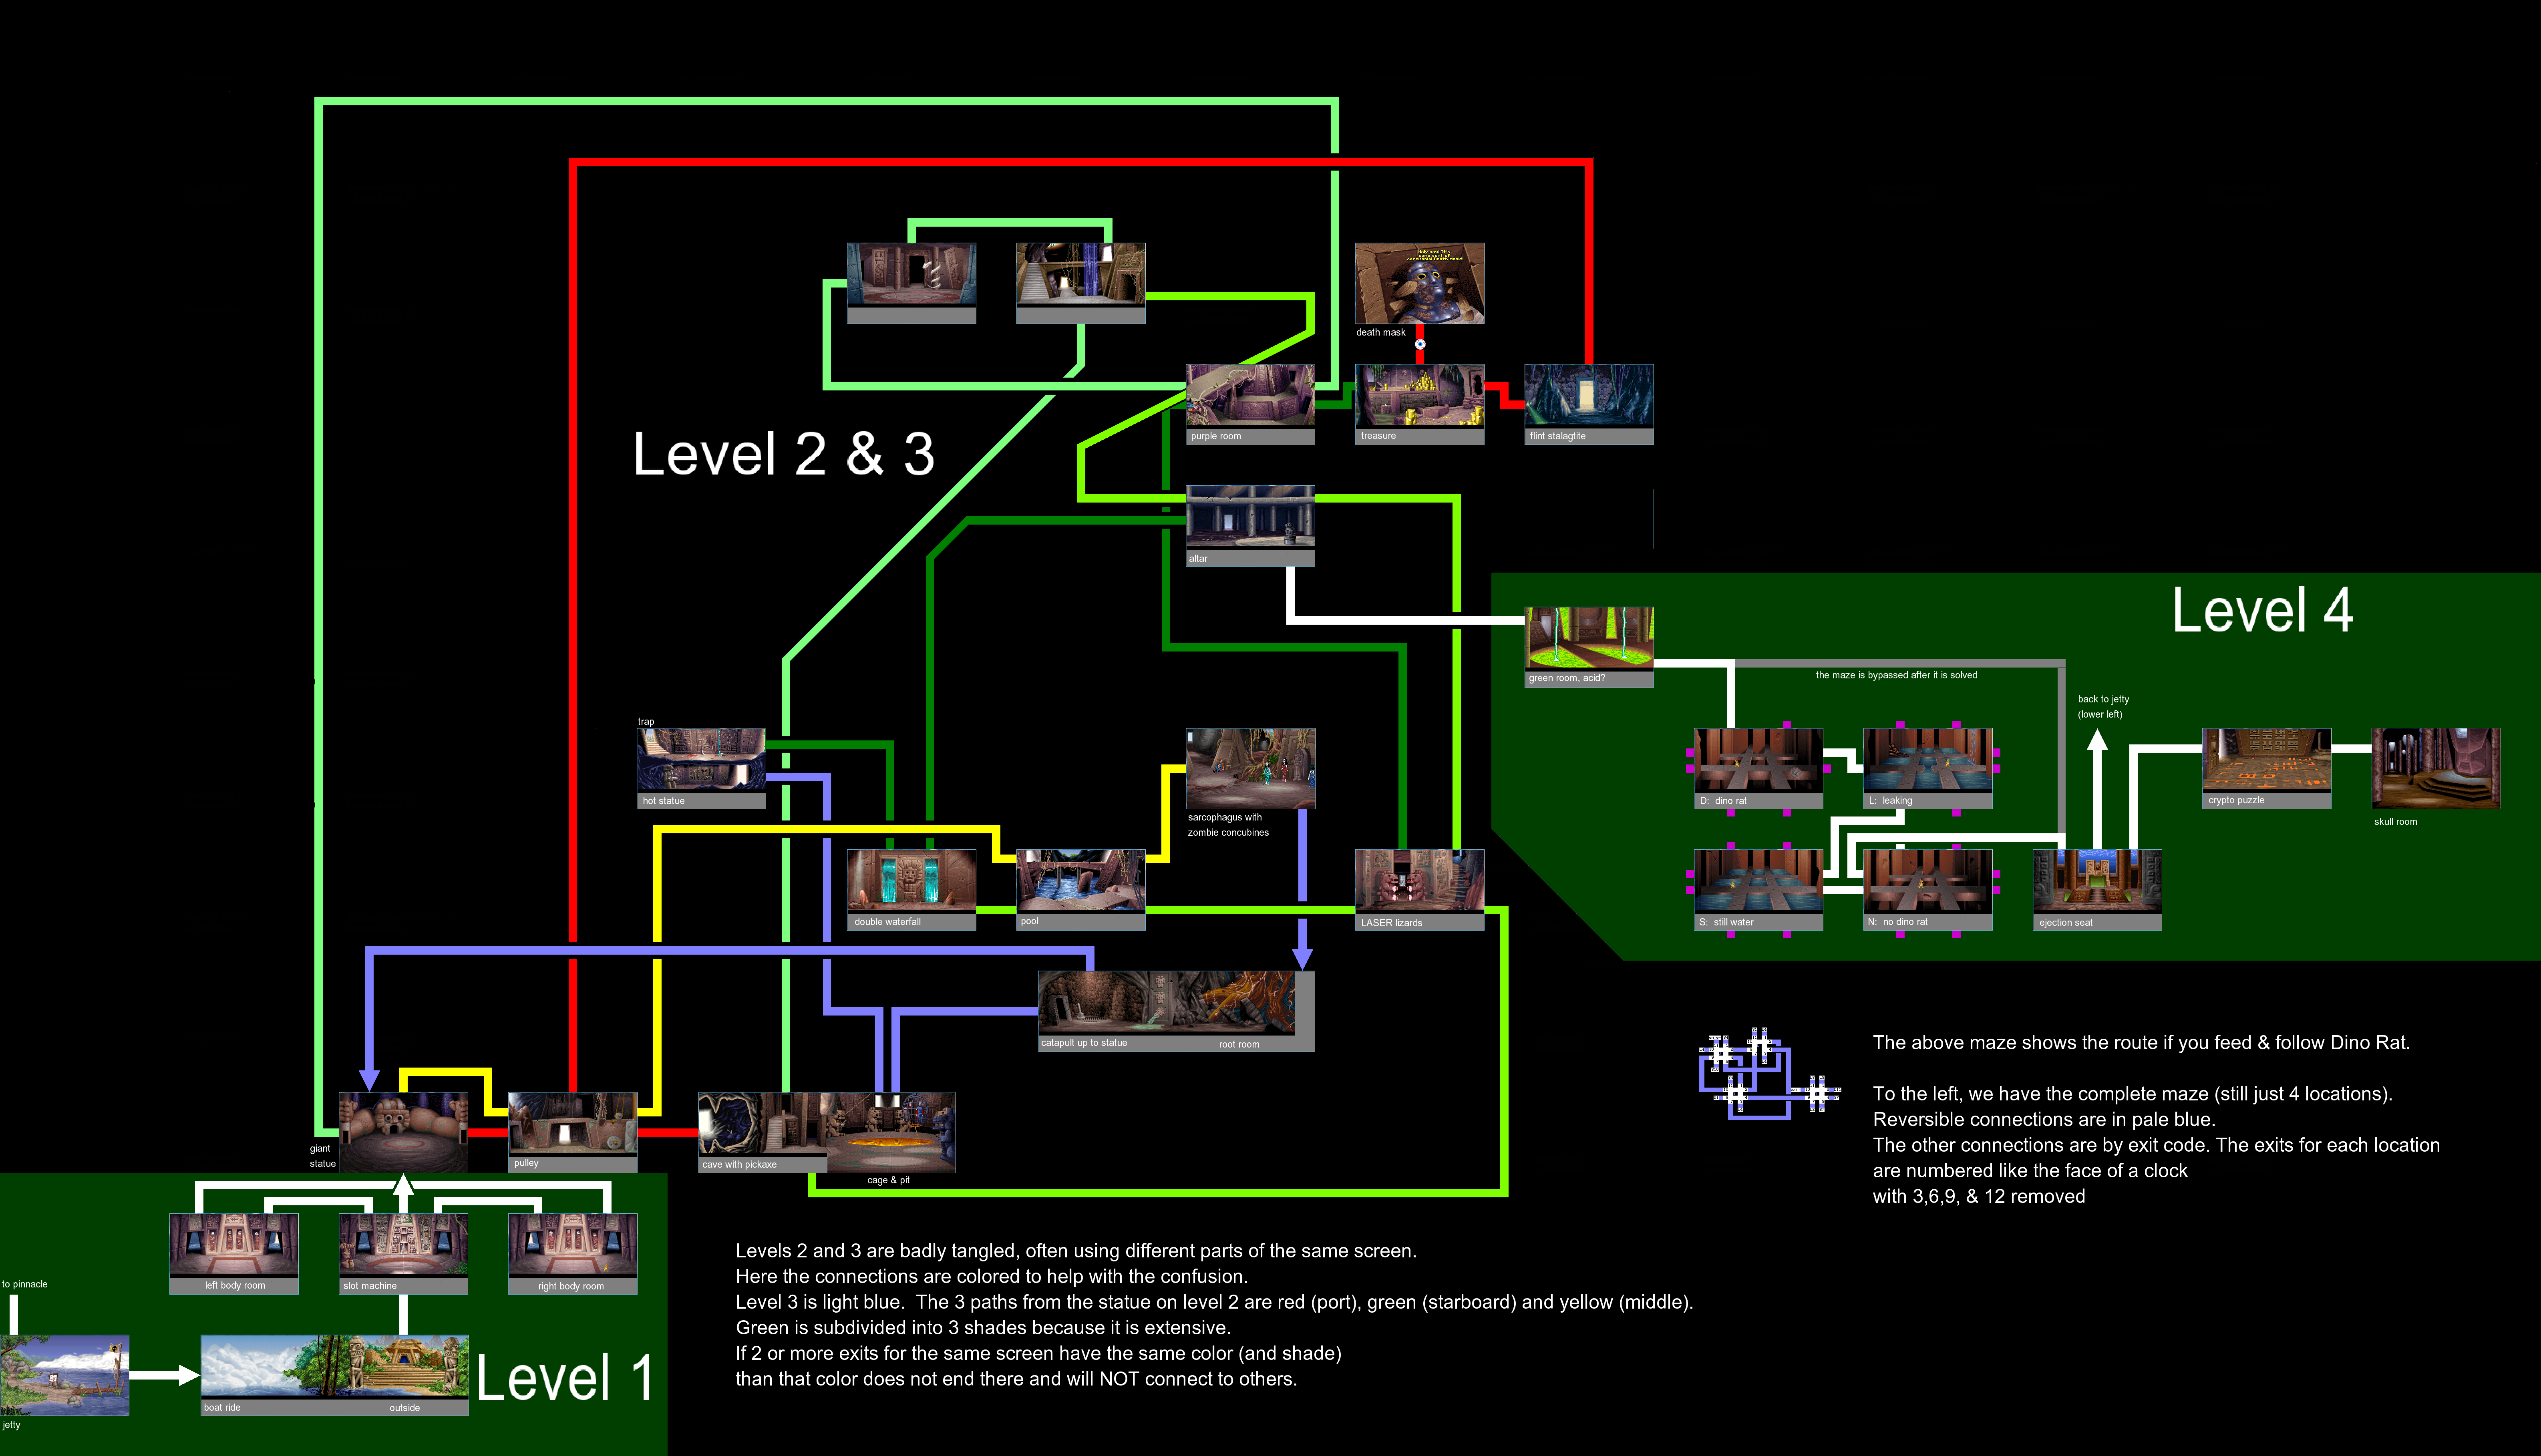
Go ahead and go to Sloth Island. Once you make it there, Charon will leave you there. Go into the entrance. You'll be in a room with two doors, and the statue on the left will have a slot and three lights - red, yellow and green. If you go through the doors, you'll go in a circle around the temple and find a couple of mummies that looks like they are about to break apart. If you pick up the mummies, they will crumble, and some of them will leave bones that you can pick up. You'll also find the dino rat, which has somehow made its way to the temple. There are four that you can get: a leg bone, an arm bone, a rib and a skull. If you give the dino rat a Cheez Bit, it will eat the Cheez Bit and run away. Go back to the room where you came in from and place the four bones where they should be on a skeleton in the holes in the center of the room. Of course, when you try to place the arm bone where it should be, the game will not let you. Instead, put it in the socket of the statue, then use the arm bone. Use one of your coins on the slot in the statue, then use the arm again. The lights will flash and you'll hit the jackpot, then you'll open a door where the skeleton was. Joe will then take the arm bone back.

Go through the door. You'll drop further into the temple and you will encounter a spirit which asks "What walks at four legs at dawn, two legs at noon and three legs at dusk?" Obviously, the anser is man, but you don't have that answer as an option. Ask the spirit who it is, and you'll find out she is the temple guardian. You'll eventually have to answer the question, and once you do, you'll get another shot. This time, you can select "It's man in the three stages of life." From here, you can go through the last of the dialogue options and access more of the temple before the guardian teleports out. Three doors will open up here.

The left door will take you to a large white snake blocking a door. If you try to go through the door, the snake will hiss at you and block your path. You'll have to come back later.

Go back to where you dropped down, and this time, take the right door. Without knowing how to deal with the pulley, you can only go through the door and end up on a bridge, where you'll find another Floda soldier. Joe King will try to get his attention, but he will walk away. Go east on the bridge you are on and you will find a dead body of a Floda soldier and three zombies.

Thursday, June 24, 2021

PrinceWatercress plays Flight of the Amazon Queen - Part 13 of 19


In this episode, we take care of business in Floda Inc., but things soon go from bad to worse.


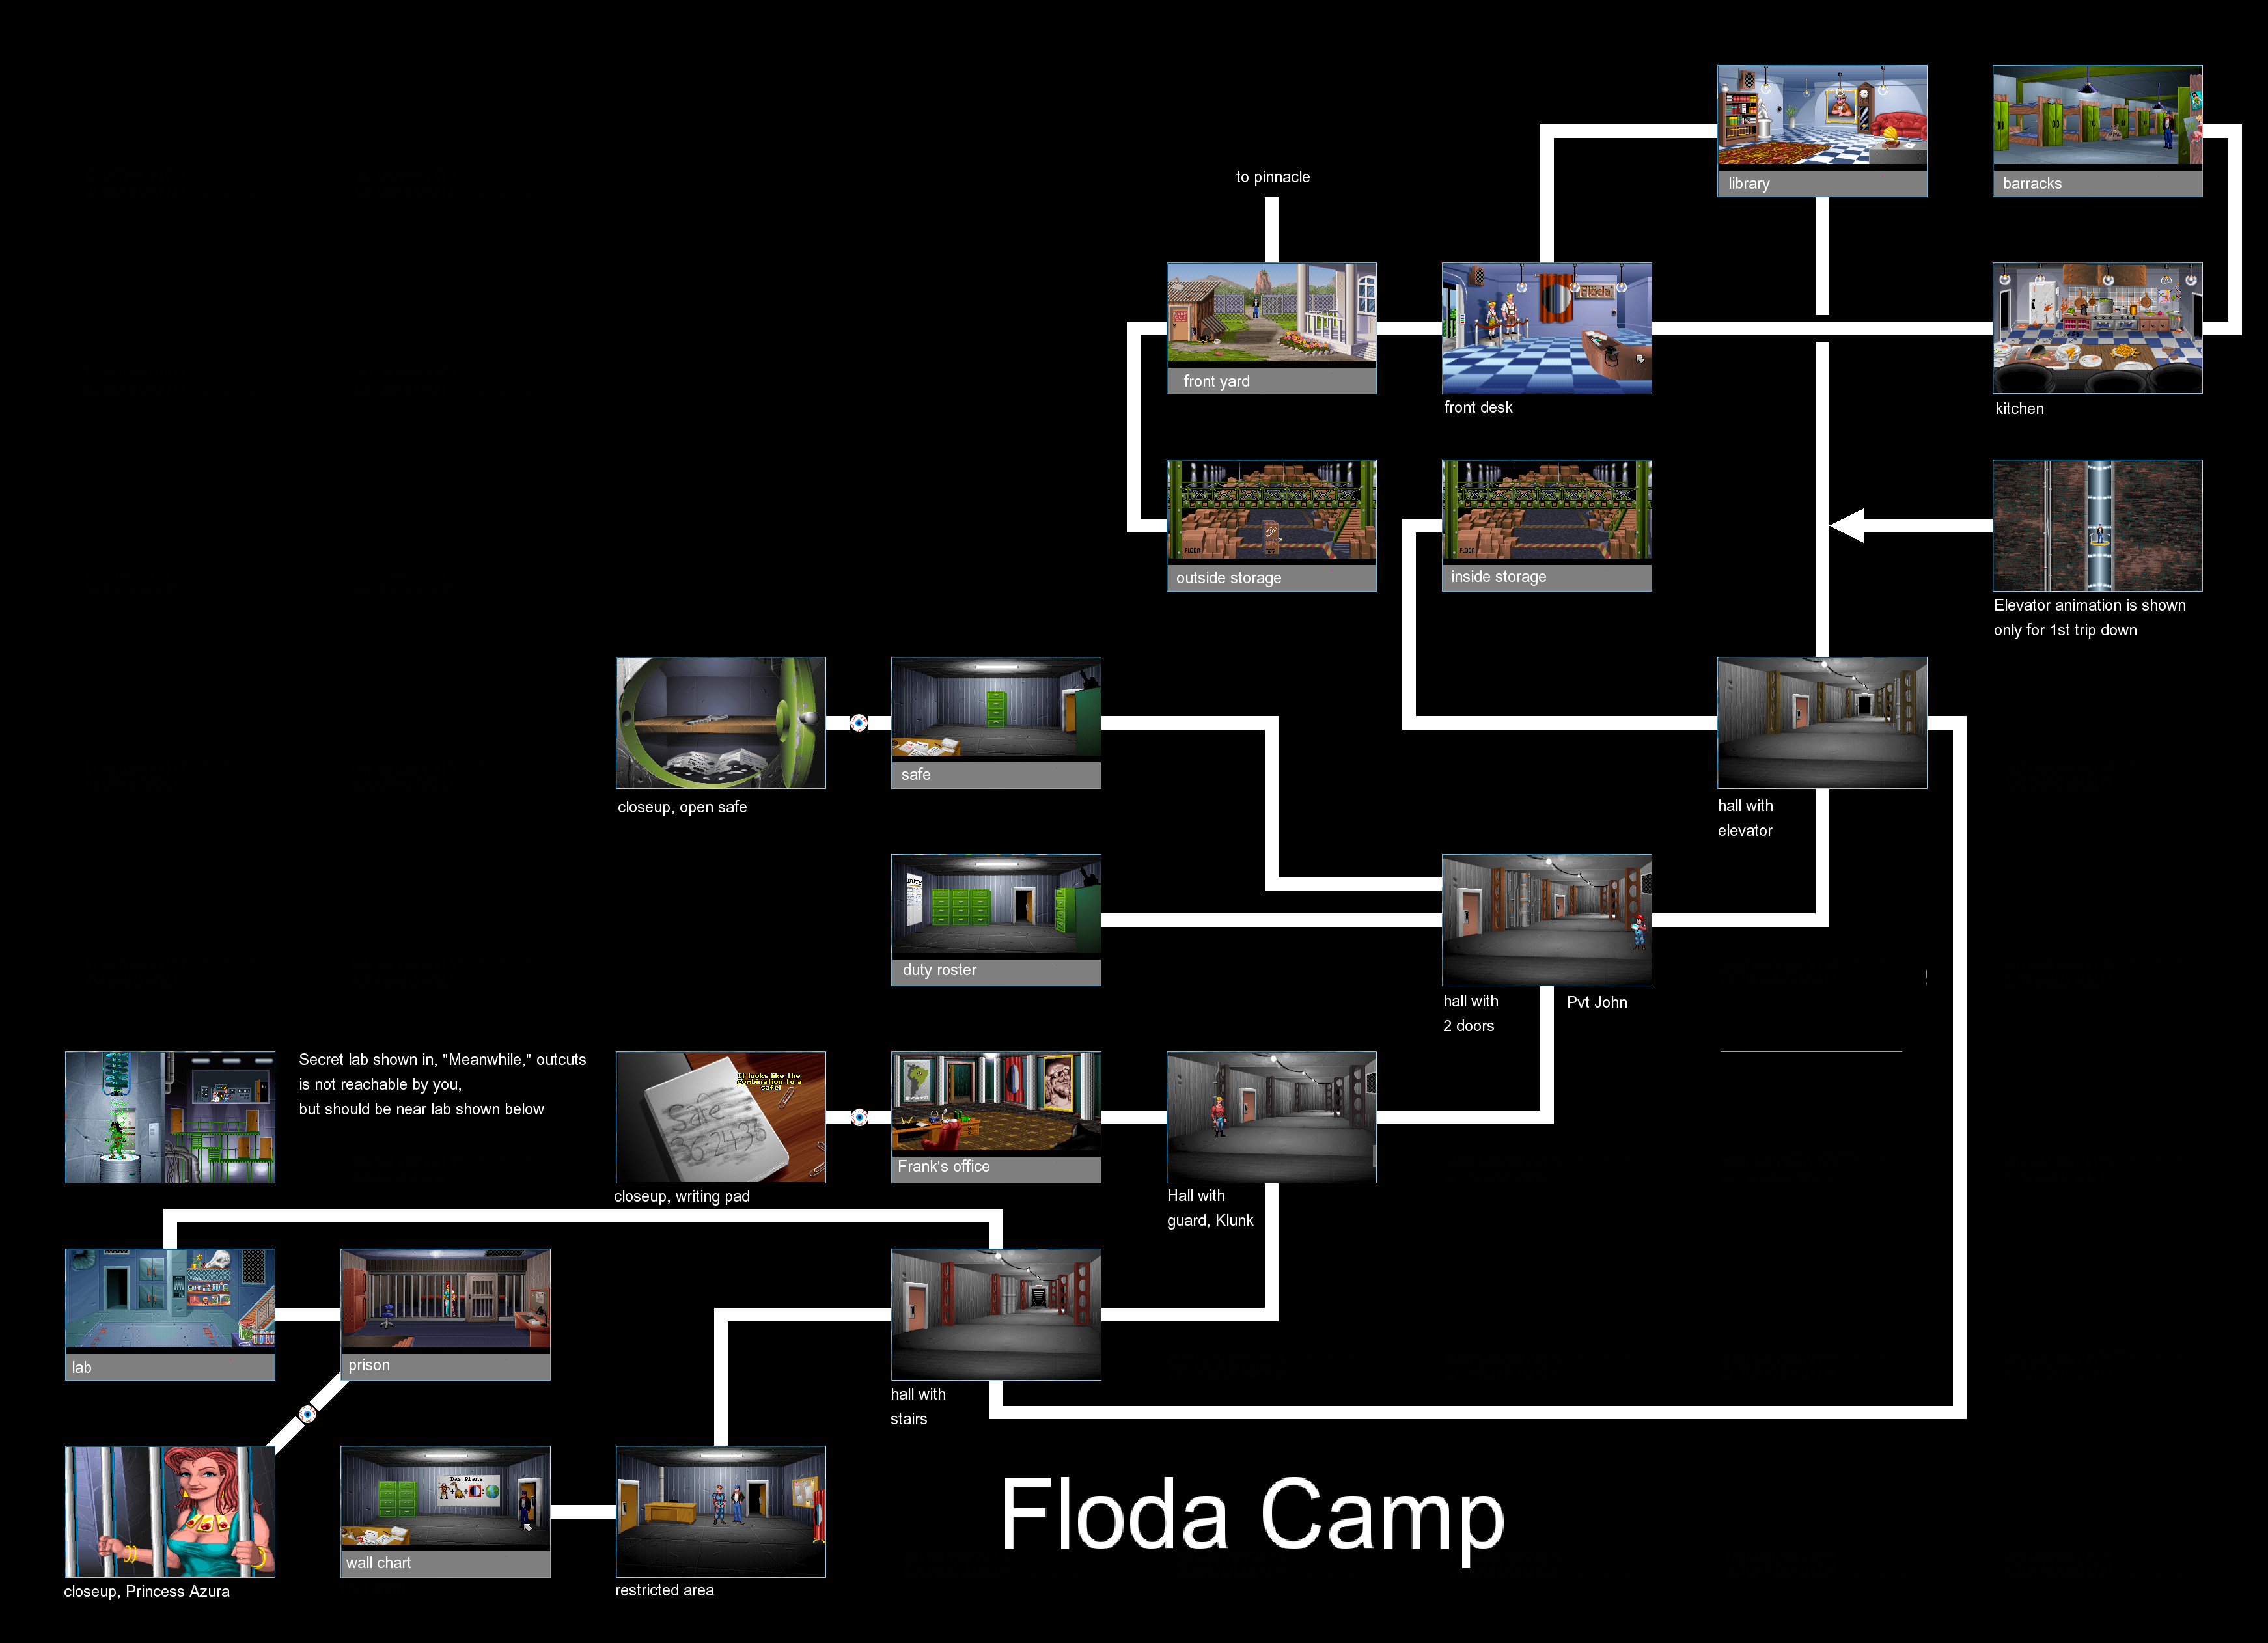
After giving Klunk the Chef's Surprise, call him a major league weenie again. This time, you'll knock Klunk out and you can enter the nearby door. Do it.

You'll be in Dr. Ironstein's office. Look at the notepad on the desk and use the pencil you found in the lobby on it, you'll find the combination for a safe. Joe will tear the page out and put it in the inventory.

If you want, you can go back to the room with the lone green file cabinet and the notes on the desk in the corner. There are four different notes you can read. Also, move the cabinet. You'll find the safe. Use the safe combination on the safe to open it up, then open the safe and look inside. You'll find a padlock key and plans for some sort of rocket pack.

Go back up and go back outside to where the entrance is. Use the squeaky toy on the guard dog to keep the dog occupied, then open the door. You'll be in a storage shed with a locked crate at the bottom. Use the padlock key on the padlock, then open the box. Look inside, and you'll find the rocket pack and put it in the inventory. It's out of gas at the moment, however.


Leave the storage shed and go to the pinnacle. You're done at Floda Inc. Head to the Amazon village and go to the throne room. Joe will automatically talk to Princess Azura, who will reward you with a Tyranno Horn, which makes the sound of a Tyrannosaurus Rex when blown into. Suddenly, Dr. Ironstein shows up, having followed Joe King out of the camp, and shows up with two guards. Dr. Ironstein mentions a crystal skull hidden deep with in an ancient temple on Sloth Island, and demands that Joe King get it for him or else he turn the entire village into dinosaur people. Dr. Ironstein promises to release the villagers if Joe gets the skull.

From here, you'll need to return to the pinnacle and head for the jetty. On the way there, use the net on the beetle at the waterfall to catch it.


This time, you'll see a man in a black cloak fishing. If you talk to him, you'll find out that his name is Charon. Yes, the ferryman of the dead. When it comes time to ask him if he is fishing, do it. Charon will tell you that he has had trouble catching fish. Ask him what bait he is using, and Charon will realize he is not using bait. Joe King will work out a deal where if he gives Charon bait, he can get a ride to Sloth Island. 

PrinceWatercress plays Flight of the Amazon Queen - Part 12 of 19


We finally find and free Princess Azura, but we're not done in Floda Inc. just yet.


Enter the fire exit. You'll be in the maze room where Dr. Ironstein and Anderson met. You can look at things here, but there is one thing in particular worth mentioning: the Super Weenie Serum. Looking at it will reveal it is the antidote for the Super Soldier Serum. Take it.

Go up the stairs and you'll meet Princess Azura. By talking to her, you'll find out that Floda guards ambushed her while she had none of her personal guard around. She will also tell Joe King about Dr. Ironstein's plan to turn Amazon women into dinosaur people and enslave the world. She'll also hint that the guard who took the key is a real bookworm (it's Henry). You'll also find out Wedgewood the parrot is an excellent mimic.

Take the key you found on the prison door to free Princess Azura. You'll then see a cutscene back at the crash site where Sparky worries about Joe, then you'll be in the lobby with the alarm set off. Use the mannequins, and Joe will turn off the lights and hide behind the mannequins. One of the guards will show up and use the buttons on the security panel. To use the panel, talk to Azura and ask her if she saw the guard enter the door code, and she will tell you what it is. Use the panel again, and Joe will automatically enter the code, allowing you to get out. Princess Azura will head back to the Amazon village while Joe stays behind.

Go back to the lobby and get the pencil, then go back to the underground corridors. If you haven't done so yet, use the can opener on the dog food, then use the Super Weenie Serum on the dog food. You'll have the Chef's Surprise. Give it to Klunk.

Wednesday, June 23, 2021

PrinceWatercress plays Flight of the Amazon Queen - Part 11 of 19


Hey, we got unstuck! What results is a set of underground corridors. No wonder the secretary didn't want us back here. Of course, it would have worked better if she didn't mention it.


Turns out, you're supposed to move the book before placing the record on the phonogram. By doing so, you'll reveal a secret elevator. Walk onto the elevator to use it.

From here, you'll be in a secret underground corridor. The door to the west leads to a storage room. There is a box that you can look at, and by doing so, you'll find a left-handed can opener. There is nothing else you can do, so go back to the hallway. From here, go south. You'll find Private John. By talking to him, you'll find out that there is secret stuff in the hallway, that Doctor Ironstein wants people without the proper security clearance kept out, and that Princess Azura is being held in the basement. Give him the letter that you found earlier, and he will find out that his girlfriend Chrissy has broken up with him for another octor at the hospital.

From here, you can go through the two doors to the left. The upper door contains a file cabinet and a desk with some notes. You can't take the notes, but you can look at them. The lower door contains a bunch of file cabinets and the duty roster. Read the duty roster; you'll need the information for it for later.

From this area, go south. You'll see a rather muscular guard with a chicken leg in his hand whose name is Klunk. After going through the dialogue options, ask him if he thinks he is a tough guy. You'll find out he has underwent the Super Soldier Treatment, which involves a serum that makes someone much stronger at the cost of reduced intelligence. He will also tell you that he was the first and last soldier to get the treatment due to Doctor Ironstein finding a way to turn Amazon women into mindless lizard slaves. From there, call Klunk a weenie. Joe will punch Klunk to no effect, and Klunk will answer with a mean right hook. At least that doesn't kill you.

Go south from here. You'll find a fire exit and a door to the west. Enter the door to the west, and you'll meet another soldier named Henry. If you've read the duty roster, you'll know that he is needed for kitchen duty with Colonel Jackson. You can use the other dialogue options, but to advance the game, you'll need to tell him that he is needed for kitchen duty. To make sure this isn't a joke, he will ask who the commanding authority in charge of kitchen duties is. That would be Colonel Jackson, so answer with that. From there, he will leave, and you can go to the west side of the room. Enter the door on the west side of the room to trigger a cutscene.

In the cutscene, Dr. Ironstein will be met by Anderson, who has suddenly sided with Doctor Ironstein. You'll also see a Dino Rat travel through a maze before Anderson arrives, and escape from the room afterwards. Dr. Ironstein then reveals that he will make the Science Academy sorry for ever laughing at him for his Dino Ray invention.

You'll then be in the room that you entered. The wall chart will mention Dr. Ironstein's plan to take over the world with Amazon lizard women. There is also a book, and if you look at it, you'll notice the pages are stuck together. Take the book, then use the knife of the book to find a key. Joe will automatically take it. 

Tuesday, June 22, 2021

PrinceWatercress plays Flight of the Amazon Queen - Part 10 of 19


It's time to head to where Princess Azura was last seen: Floda, Inc. But once we're there, we get a tad stuck.


When you head back to the log leading to the Amazon village, Bud and Skip will be there, but they will not provide you with any useful information.

From here, head to the Floda Inc. camp and talk to the secretary. This time, you'll have the vacuum cleaner with you. The secretary will tell you to do all the rooms except for the library, as they do not want you finding secret passages. Unfortunately for her (and fortunately for us), the library is one of only two places we can go.

East is the kitchen. You won't be able to go far without attracting the chef's attention. Talk to him a second time, and this time, ask him what he is doing. He will tell you that he is cooking something for Doctor Ironstein, but the Doctor's sensitive teeth make him fussy about what he eats. Ask him if he has had any luck, and he will say no. Give the chef the banana, and he will take it to the Doctor while telling you to keep an eye on the kitchen. From here, you can now do things in the kitchen.

You can pick up a can of dog food from the cabinet full of dog food, and you can pick up the Cheeze Bitz from the plate on the foreground table. To the east is the barracks. There is a mail bag and a foot locker. Open the mail bag, and you can look at it afterwards to find a letter for Private John with a woman's handwriting on it. You can also open the foot locker and take the squeaky toy.

From here, head back to the lobby and go north to the library. You can move the painting, but it is fruitless to do so. If you look at the couch, you'll find a lot of money underneath the seats. If you look at the phonogram, you'll find an empty record slip that says "German Elevator Muzak." You'll obviously need to put the record you bought at Trader Bob's here, but we'll do that next time. 

PrinceWatercress plays Flight of the Amazon Queen - Part 9 of 19


In this entry, we head to the Amazon Village. Unfortunately, the Amazons were waiting for us, and it takes a certain someone to show up and rescue us. From here, we have no choice but to save Princess Azura.


Head to Trader Bob's store and pick up the record now that you have a ton of money. You'll need it later. If you look at it, you'll find out it is called "Great German Composers - Elevator Muzak Collection."

From here, it's time to head to the Amazon fortress, and since you got there the hard way, you can skip to it at the pinnacle. Use the buttons on the stone panel, and you'll trip a snare trap and be placed in a dungeon by one of the Amazons.

Here, there are a few guys that you can talk to. The tired prisoner is Ernest Wilkins, who is not in any hurry to escape after looking for the Amazons for years. He'll also tell you about Bert, the guy with the puppets. From here, you can talk to Bertrand Smith, the bedraggled prisoner. By talking to him, you'll find out that you are in the Amazon's dungeon and that the Amazons need outside males to maintain their population. If you ask him about the puppets and complement the one with a stick, it will start an argument between what the puppet is holding - a stick or a baseball bat - before Bertrand tries to give the puppet to Joe King, who doesn't want it. Joe King takes it to satisfy Bertrand, leading Ernest and Bertrand to stop speaking to each other when Ernest doesn't get the puppet like he wants. (What have I, what have I, what have I done to deserve this.)

Suddenly, Faye Russell shows up and gets Joe's attention. As it turns out, she has gotten help from the Amazon women, who have fed and sheltered her. From here, you can go through some dialogue options, where you'll find out that this is a real Amazon village, and that you'll have to apologize to Faye Russell for the trouble you've concerned (pick the last option for both). You'll then find out that the leader of the Amazons wants to see you, and Faye will take you to her. Just go up the stairs when she lets you out.

From here, you'll meet the head of the Royal Amazon Guard, who tells you that their princess is in grave danger that she may be held at the Floda, Inc. camp. Joe King, having already starting getting to work on it, heads out. From here, you'll be at the Amazon village. You can try to talk to the people here, but they do not provide much in terms of information, and not even the woman bathing (who is the Royal Engineer) gives any useful information.

Monday, June 21, 2021

PrinceWatercress plays Flight of the Amazon Queen - Part 8 of 19


In this episode, we put the Pygmy-to-English dictionary to good use and do the last of the item gathering. From here on out, we're continuing with the game's story.


Now that you have the Pygmy-to-English dictionary, you can talk to them in English just by clicking on them. Joe King will pull the dictionary out, and the game will take care of the rest.

By talking to the village chief, you'll find out how the tribe was discovered, find out that the tribe is called the Hekarwii tribe, and get a National Enquirer.

You can also talk to the witch doctor now that you have the dictionary. You'll be able to ask the witch doctor about her work, and even make a rash cure. She will tell you that in order to make a rash cure, she will need the hair of a slow moving climber, milk from a sacred site, and something else to give it a little buzz. Guess what? We can get all three right now. The first thing is sloth hair, the second thing is coconut milk from the coconut you got from the monkey in the mission, and the third thing is the wasps that you swept up with the vacuum cleaner.

For the coconut milk, use the knife on the coconut to cut it open, then give the coconut halves to the witch doctor. For the sloth, you could use the scissors on the sloth right now, but you won't be able to reach it. If you give the flower to the sloth, the sloth will slowly move towards it. You'll get a cutscene at the crash site where Sparky wonders what Joe is up to, then the sloth will be at the flower. You can now use the scissors on the sloth to get the sloth hair. If you haven't gotten the wasps yet, go back in the jungle and look for them, and sweep them up with the vacuum cleaner.

Also, if you don't have a banana in your inventory, go back to where the bridge was and go get it. You'll need one for later.

Once you have the three ingredients, give them to the witch doctor and you'll get the rash cure. Go back to Bob and Skip in the jungle and give the rash cure - which the game calls a lotion - to Bob. Bob will give you a lot of money as he promised, and from here, you can go back to the village and spend it.

PrinceWatercress plays Flight of the Amazon Queen - Part 7 of 19


In this entry, we do even more exploring and get even more items!


You can actually use the English-to-Pygmy dictionary to talk to people in the village, but I don't have it quite figured out yet.

By giving the beef jerky on the beef jerky stand to Trader Bob at the convenience store, he will give you some money in exchange. From here, you can pick up the vacuum cleaner, and this time, you'll be able to buy it.

Go back to the mission. If you give the banana to the money with the coconut in the center of the area, you can trade the banana for the coconut.

As for the gorilla in the dinosaur costume, ask about the disappearing trick, then ask the gorilla if he will disappear again if we say he doesn't exist. After that, tell him he doesn't exist, and he will disappear again.

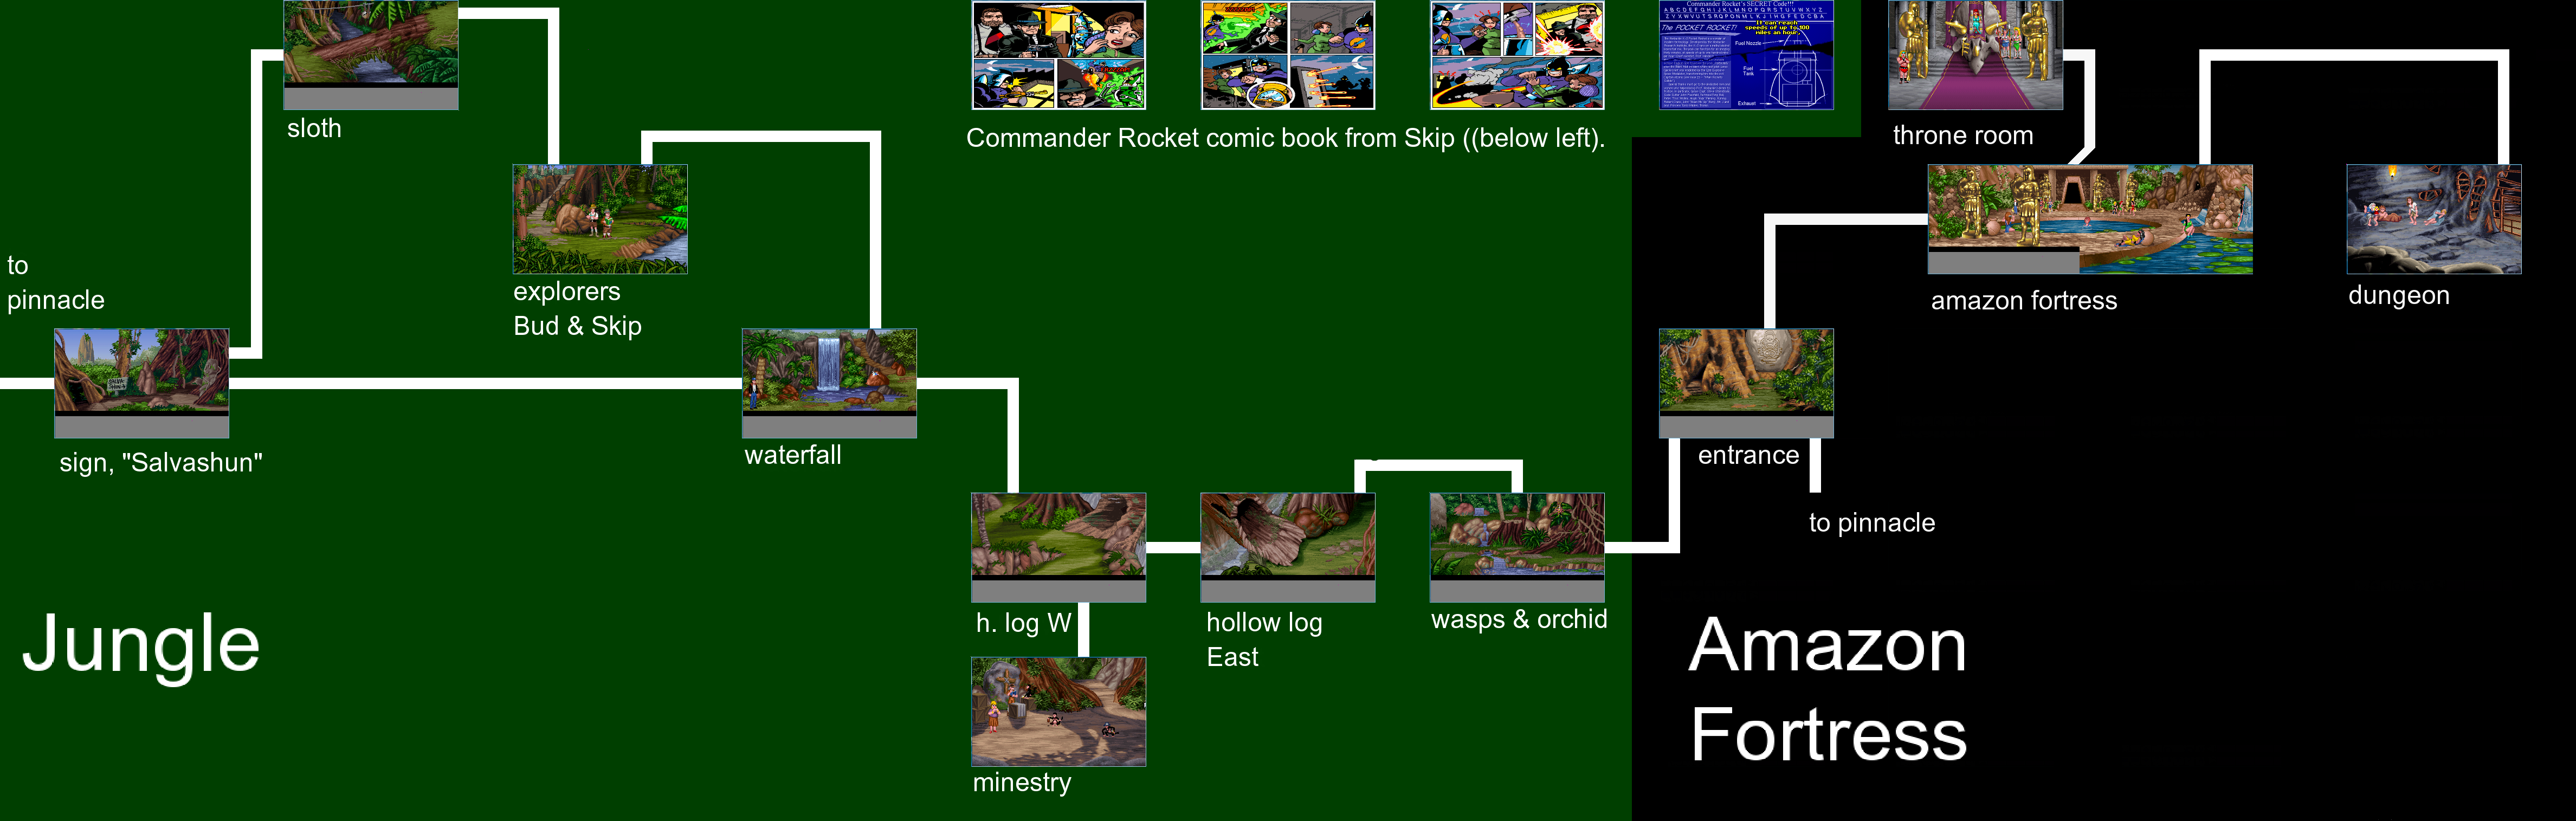
You can now go through the hollow log, and if you keep going east, you'll reach an orchid with wasps swarming around it. If you use the vacuum cleaner on the wasps, you'll get them away from the orchid, and you can now pick the orchid up.

East of the orchid is the Amazon fortress. If you look at the stone carving, Joe will hide, then you will see an Amazon woman press the panels on the carving before being given clearance by the guard on the other end. We could go there right now, but that will advance the plot and I want to do some more exploration.

Go back to Trader Bob's and give Trader Bob the orchid to give to Naomi. In exchange, you'll be able to take one of the fishing nets. Take it, then head back to the crash site and use the fishing net on the perfume. You'll be able to take the perfume and give it to Naomi in exchange for the hair clippers.

Sunday, June 20, 2021

PrinceWatercress plays Flight of the Amazon Queen - Part 6 of 19


In this entry, we explore more of the jungle while also meeting a bunch of missionaries and reading a comic book. Not gonna lie, I got a kick out of the comic book reading.


If you read the comic book, you'll find out that Commander Rocket's jetpack is powered by alcohol. Keep that in mind for later. Also, a page will fall out of the comic book. Combine it with the coupon you got earlier with the Use command, and you'll complete the blueprint on the back of the page...and yes, you can look at it.

South of the ape is the mission. Here, you'll see a couple of monkeys as well as Jimmy and Mary Lou Cook, who run the mission. By talking with Jimmy, you'll find out that Jimmy is a zoologist in his spare time, that the monkeys have names and love playing with their food, and that Jimmy knows plenty about sloths, such as their love for sweet nectar. By talking to Mary Lou, you'll find out that pygmies ran away from the mission due to her singing voice, and says Trader Bob is always taking her and Jimmy's potential converts. You'll also find out that they spoke to the pygmies with a English-to-Pygmy dictionary...which they won't give to you easily due to it being the only one they have. If you ask to swap something for the dictionary, you won't get far, but Mary Lou mentions that her nail file is almost blunt. Keep that in mind for...right now!.

Go back to Sparky and give him the comic book. As promised, he will give you a file, but not before giving you a hard time about how the comic book is not in mint condition. Go back to the mission and give the file to Mary Lou. Joe will swap the file for the Pygmy-to-English Dictionary, and with that, we can now talk to the pygmies near Trader Bob's.

PrinceWatercress plays Flight of the Amazon Queen - Part 5 of 19


In this episode, we go exploring and pick up whatever isn't nailed down.


Time to explore. The first place I go to is the Floda, Inc. camp, since I'm going from left to right as far as pinnacle locations go.


You can take one of the flowers near the building and put it in your inventory. You can talk to the guard dog, but it won't do you much good. You also won't be able to enter the door near the dog, either.

You can go in, but you won't be able past the secretary unless you have the vacuum cleaner from Trader Bob's store, even if you tell the secretary that you're the fumigator. You also won't be able to take the pencil on the desk, either.

Next up is the jetty. 


You won't be able to do much here, either, as the ferryman has stepped out for a bit to go fishing somewhere. You won't be able to do anything here until much later in the game. 


On the path north of the entrance, there is a sloth, but you won't be able to interact with it yet. Go east and you'll meet two explorers, Bud and Skip. Bud is to the left and Skip to the right. By talking to Bud, you'll be able to find out that they are indeed explorers and that they are here to find the Amazon women that are in the jungle again after being captured by them so they can birth some kids. Bud will also mention that he has a rash from the jungle heat, and that the Amazons kicked them out of their village for it. He also says he will pay a lot of money to cure it. Keep that in mind for later.

By talking to Skip (who sounds a lot like Sparky), you'll be able to get the comic book of Commander Rocket battling the Chicago mob from him. All you have to do is talk about the comic book, bring up Sparky, mention his comic book dilemma, and he will give it to you. The rest of the dialogue options are of no use.

On the other side of Bud and Skip - and east of the jungle entrance - is the waterfall. Keep the beetle that is flying around for later.

East of the waterfall is the ape wearing a pink polka-dotted dinosaur suit. By talking to him, you'll make it obvious that he can't fool you. 

Saturday, June 19, 2021

PrinceWatercress plays Flight of the Amazon Queen - Part 4 of 19


In this entry, we check out Trader Bob's Convenience Store, get our first hints at what the story of this game is about, and get our first look at the game's main antagonist.


Inside Trader Bob's Convenience Store, you'll meet the parrot again, as well as Trader Bob. Trader Bob will will tell you that Princess Azura is a good friend of his, and he suspects she has been kidnapped. Tell Bob that you are interested in helping him, and he will tell you that Azura is being held captive at Floda Inc's camp on the other side of the pinnacle. From here, you can ask a bunch of questions. You'll find out that other people have disappeared near there, that the place has electric fences and guard dogs, and that the lederhosen - leather shorts, which one would not usually wear in a hot place like the Amazon - they make are a cover for their real activities.

By looking around, you can find some stuff of the shelves. You'll also find out that the beef jerky jar is empty and that a shipment should be coming . If you try to buy the alcohol, you'll need an ID card. Some of the things are not for sale, while the rest are very expensive. If it's "more than you can afford," you'll be able to buy it...eventually. If it's "not for sale," you can't.

The vacuum cleaner to the right of Trader Bob is also for sale, but it's expensive. You'll need it eventually.

The parrot's name is Wedgewood, and you can talk to the parrot. There is no real reason to talk to Wedgewood, but it's worth it for a bit of a chest.

You can also talk to Naomi, who is cleaning the shelves and has just been introduced. By talking to her, you can ask about the comic books only to find out that the store does not sell them. As , you'll find out that the barber chair is part of the village hair salon, and that hair styling is a bit of a family tradition. Unfortunately, everyone only wants a bowl cut. After talking with Naomi enough, you'll find out that Naomi has a date with Trader Bob, and she is nervous because Trader Bob gave her some perfume and Wedgewood drank the entire bottle. Now she is wondering what to do. It looks like that perfume that Faye Russell threw into the lake will be of use, but how are we gonna get it? Nevertheless, Joe King offers to trade perfume in exchange for something else, and Naomi proposes giving you her hair dressing scissors if you're able to do it. 

You can also ask Naomi where she learned to speak English, as she is the only one other than Trader Bob who can speak it fluently. She will tell you that the missionaries in the jungle taught her to speak English fluently. With more talk, you'll find out that they are still in the jungle and that they won't teach you Pygmy for nothing.

When you leave Trader Bob's convenience store, you'll get another cutscene involving Dr. Ironstein. Dr. Ironstein is trying to find a crystal skull, and that he needs it to enter the Valley of the Mists to get more dinosaur DNA samples. 

PrinceWatercress plays Flight of the Amazon Queen - Part 3 of 19


I'm surprised this video was rendered at 480p and 30fps. Don't know how I managed to have that happened. We'll be back at 720p60 next video.

Anyway, we're now stuck in the Amazon. Joe King heads out to get help, but little does he know that he's about to stumble into a grand adventure...


If you want, talk to Faye. Faye has nothing to say to you, but if you talk to Sparky, he will tell you that the comic book he is looking for is the one where Commander Rocket battles the Chicago mob. (I didn't do this in the video, even though I thought I did. I didn't. This is how you find out about the comic book.)

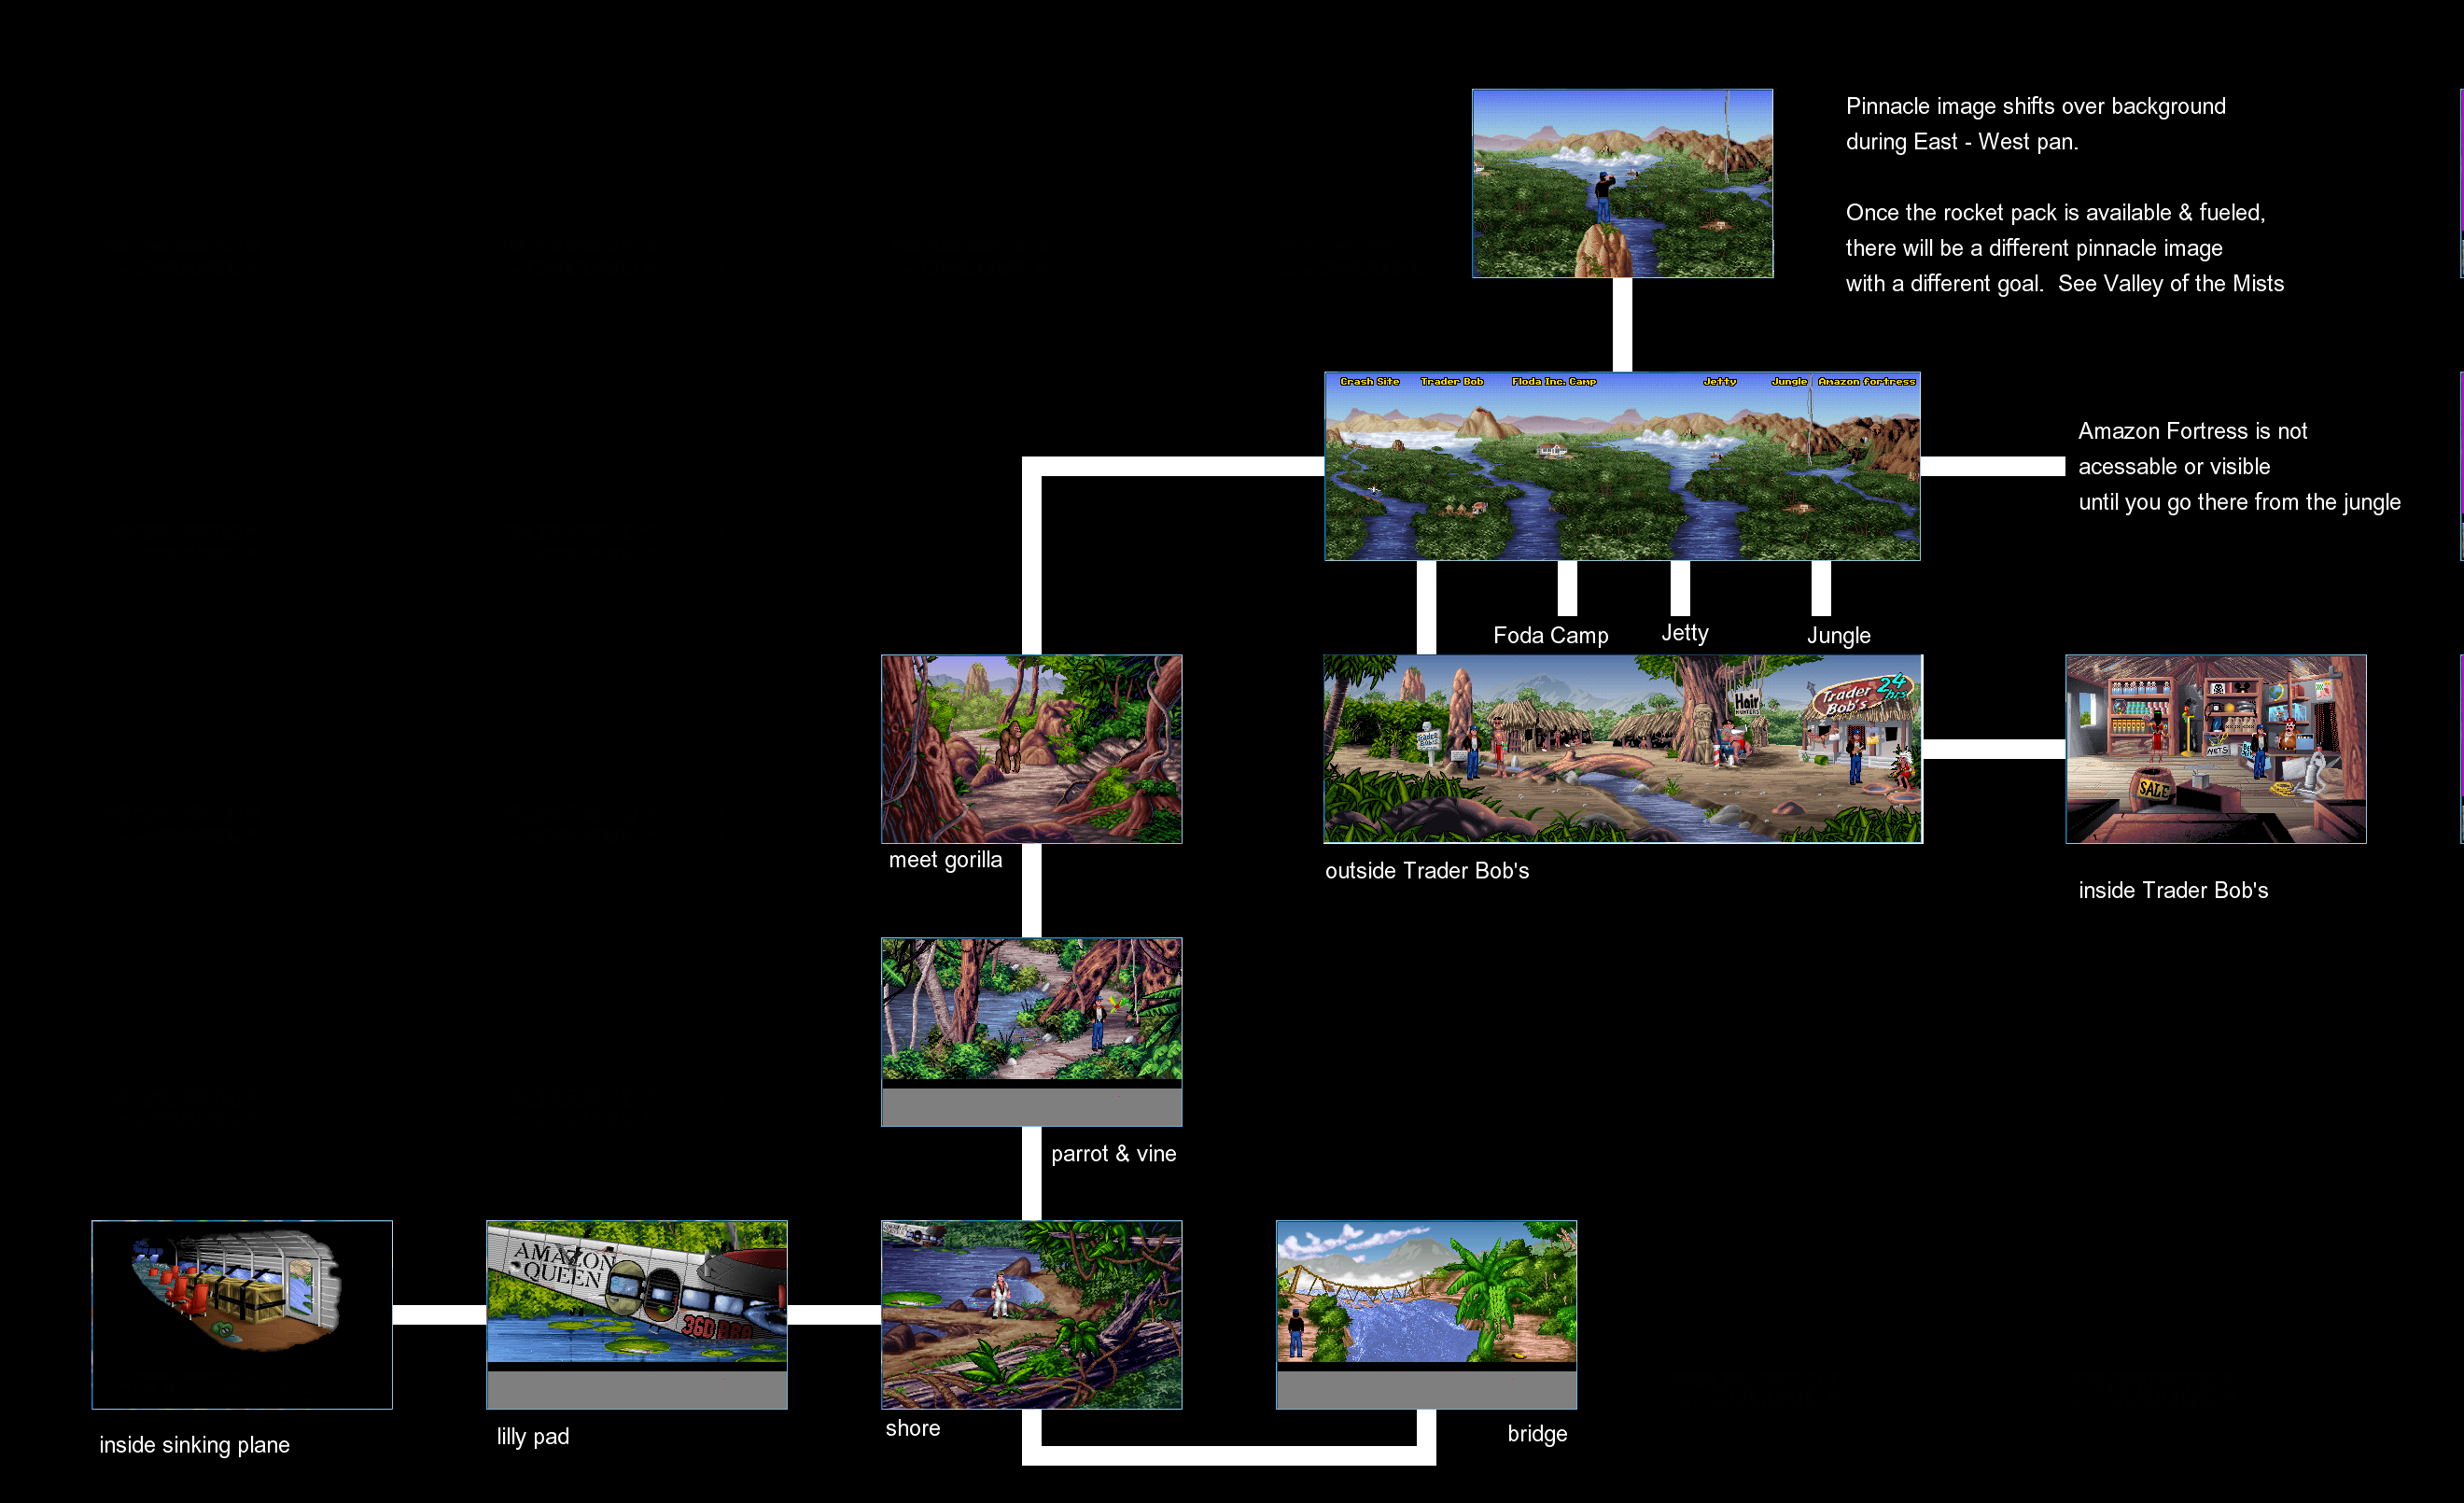
Taking the north path takes you to a parrot, who tells you that Princess Azura is being held captive and that Trader Bob is her only hope before flying away. If you look at the vine, Joe will note that it is strong enough to hold his weight. Use the knife on it, and the vine is yours.

Further to the north is a gorilla. The pinnacle is in the distance, but we will have to get past the gorilla to get to it...and he ain't budgin'. If you talk to the gorilla, you'll be able to start a conversation. Tell him you do not speak ape, then ask if he is a gorilla. Then, tell him that you thought gorillas came from Africa. The gorilla will suddenly start speaking perfect English and tell you that you are right. Tell him he is in South America, and he will suddenly deflate and disappear, allowing free passage to the pinnacle.

However, there is a path to the south of Faye and Sparky. You'll come across a partially submerged bridge that you won't be able to cross. Use the vine on the support rope of the bridge to pull the bridge up and replace the support rope, and you'll be able to cross. There is a banana on the other side; pick it up, then go to the pinnacle. (If you used the banana on the gorilla, the gorilla eats it, and you'll have to go back to the bridge and pick up another banana. You'll need the banana for later.)

You'll get a cutscene where Faye throws her perfume at Sparky and into the lake before going for help on the northern path. You'll then be at the pinnacle.

There are a few areas you can go to. From left to right, there is the crash site, Trader Bob's, the Floda Inc. camp, the jetty and the jungle. Before you go anywhere, go back to the crash site and talk to Sparky. You'll be able to get some more dialogue options with Sparky concerning Faye and the engine block that he is currently tending to. If you ask about the engine block, you can ask for a file, but you'll have to trade for that comic book to get it. Sadly, you won't be able to get the perfume...yet.

Now back to the pinnacle. We'll go to Trader Bob's first. You'll be in a South American pygmy village, and if you talk to anybody, you won't get anything out of it at all. Also, Trader Bob's 24-hour convenience store is here, and we'll head there next time.

Friday, June 18, 2021

PrinceWatercress plays Flight of the Amazon Queen - Part 2 of 19


Now that we've done the thing I never figured out how to do as a kid, it's time to get out of the hotel and get on the plane with Faye Russel. Unfortunately, things go from bad to worse...


To save your game, click on the journal. Aside from volume levels and the ability to see which version of the game you're playing, you can also save and load games. A-J gives you ten tabs for save files. Click on a slot to turn it white and highlight it. "Read Entry" lets you load, and "Save Entry" lets you save games complete with the ability to name the file. You can also close the journal with "Close."

Since you're now in complete disguise, go to the truck. It won't be until the truck leaves that Eddy and Rico will find out that you are in disguise and go after you. If you lost your clothes, Joe will thank Sparky for picking his clothes out of the trash. You'll then see Rico and Eddy, with Rico driving and Eddy shooting at you. Unfortunately, Eddy is the worst shot in the world, and you'll have all the time in the world to do what you need to do next.

If you want, you can switch back to your clothes now. (If you don't, you'll switch back to your clothes after you deal with Rico and Eddy.) Pick up the chicken for later, then pick up the hay. You'll find some oil inside. Pick up the oil, then use it on Rico and Eddy by clicking on their car. The oil will get all over Rico and Eddy, then Joe and Sparky go to the airport just in time to see Anderson with Faye Russell. After some dialogue (it doesn't matter what you pick), Joe will punch Anderson in the face. Sparky shows up, then everyone flies to the Amazon as a big storm is about to brew. Unfortunately, we fly right into it, and the Amazon Queen is struck by lightning. The plane will soon fall into the river.


You'll then be inside the plane, which is now taking on water. If you open the duffle bag and look at it, you'll find a knife and a lighter. Both will automatically enter your inventory. If you look at the waterlogged seats, you'll find a coupon for a Commander Rocket Pocket Rocket decoder ring. If you look at it, you'll find part of a blueprint on the back. Sparky will lament the damage of his comic book, and says that he'll have to find a new copy of the comic book later.

From here, you can talk to Sparky. By talking to him, you'll find out that the Amazon Queen will need a miracle worker more than a mechanic, that we will need to get off the plane, and that everything is water damaged except for some beef jerky. Tell him you're starved, and he'll give you the beef jerky. You can also talk to Faye, but she will eventually become angry with you after all of the dialogue options are exhausted.

From here, open the hatch. Click onto the giant lily pad to walk onto it. There will be some piranhas to the left and a propeller to the right. You can also look at the lily pad underneath the lily pad to notice that it is keeping the lily pad in place. You'll need to get the propeller, but not without those piranhas in the water. Use the beef jerky on the piranhas to give them something to munch on and also get them away from you, then pick up the propeller. You'll still have a bit of beef jerky left. From here, you'll need to cut the lily stem. Take the knife from the inventory and use it to cut the lily stem, then use the propeller on the lily pad. Joe will tell Sparky and Faye to get out of the plane, and he will row everyone to safety. Joe then tells everyone to stay put so that he can get call "Al's Air Rescue" for help. Faye tells Joe to call a lawyer, and Sparky tells him to find a new copy of his Commander Rocket comic book.

PrinceWatercress plays Flight of the Amazon Queen - Part 1 of 19


Fun fact: the game's designers, John Passfield and Steve Stamatiadis, would later form Krome Studios and bring us...wait for it...Ty the Tasmanian Tiger. Who knew?


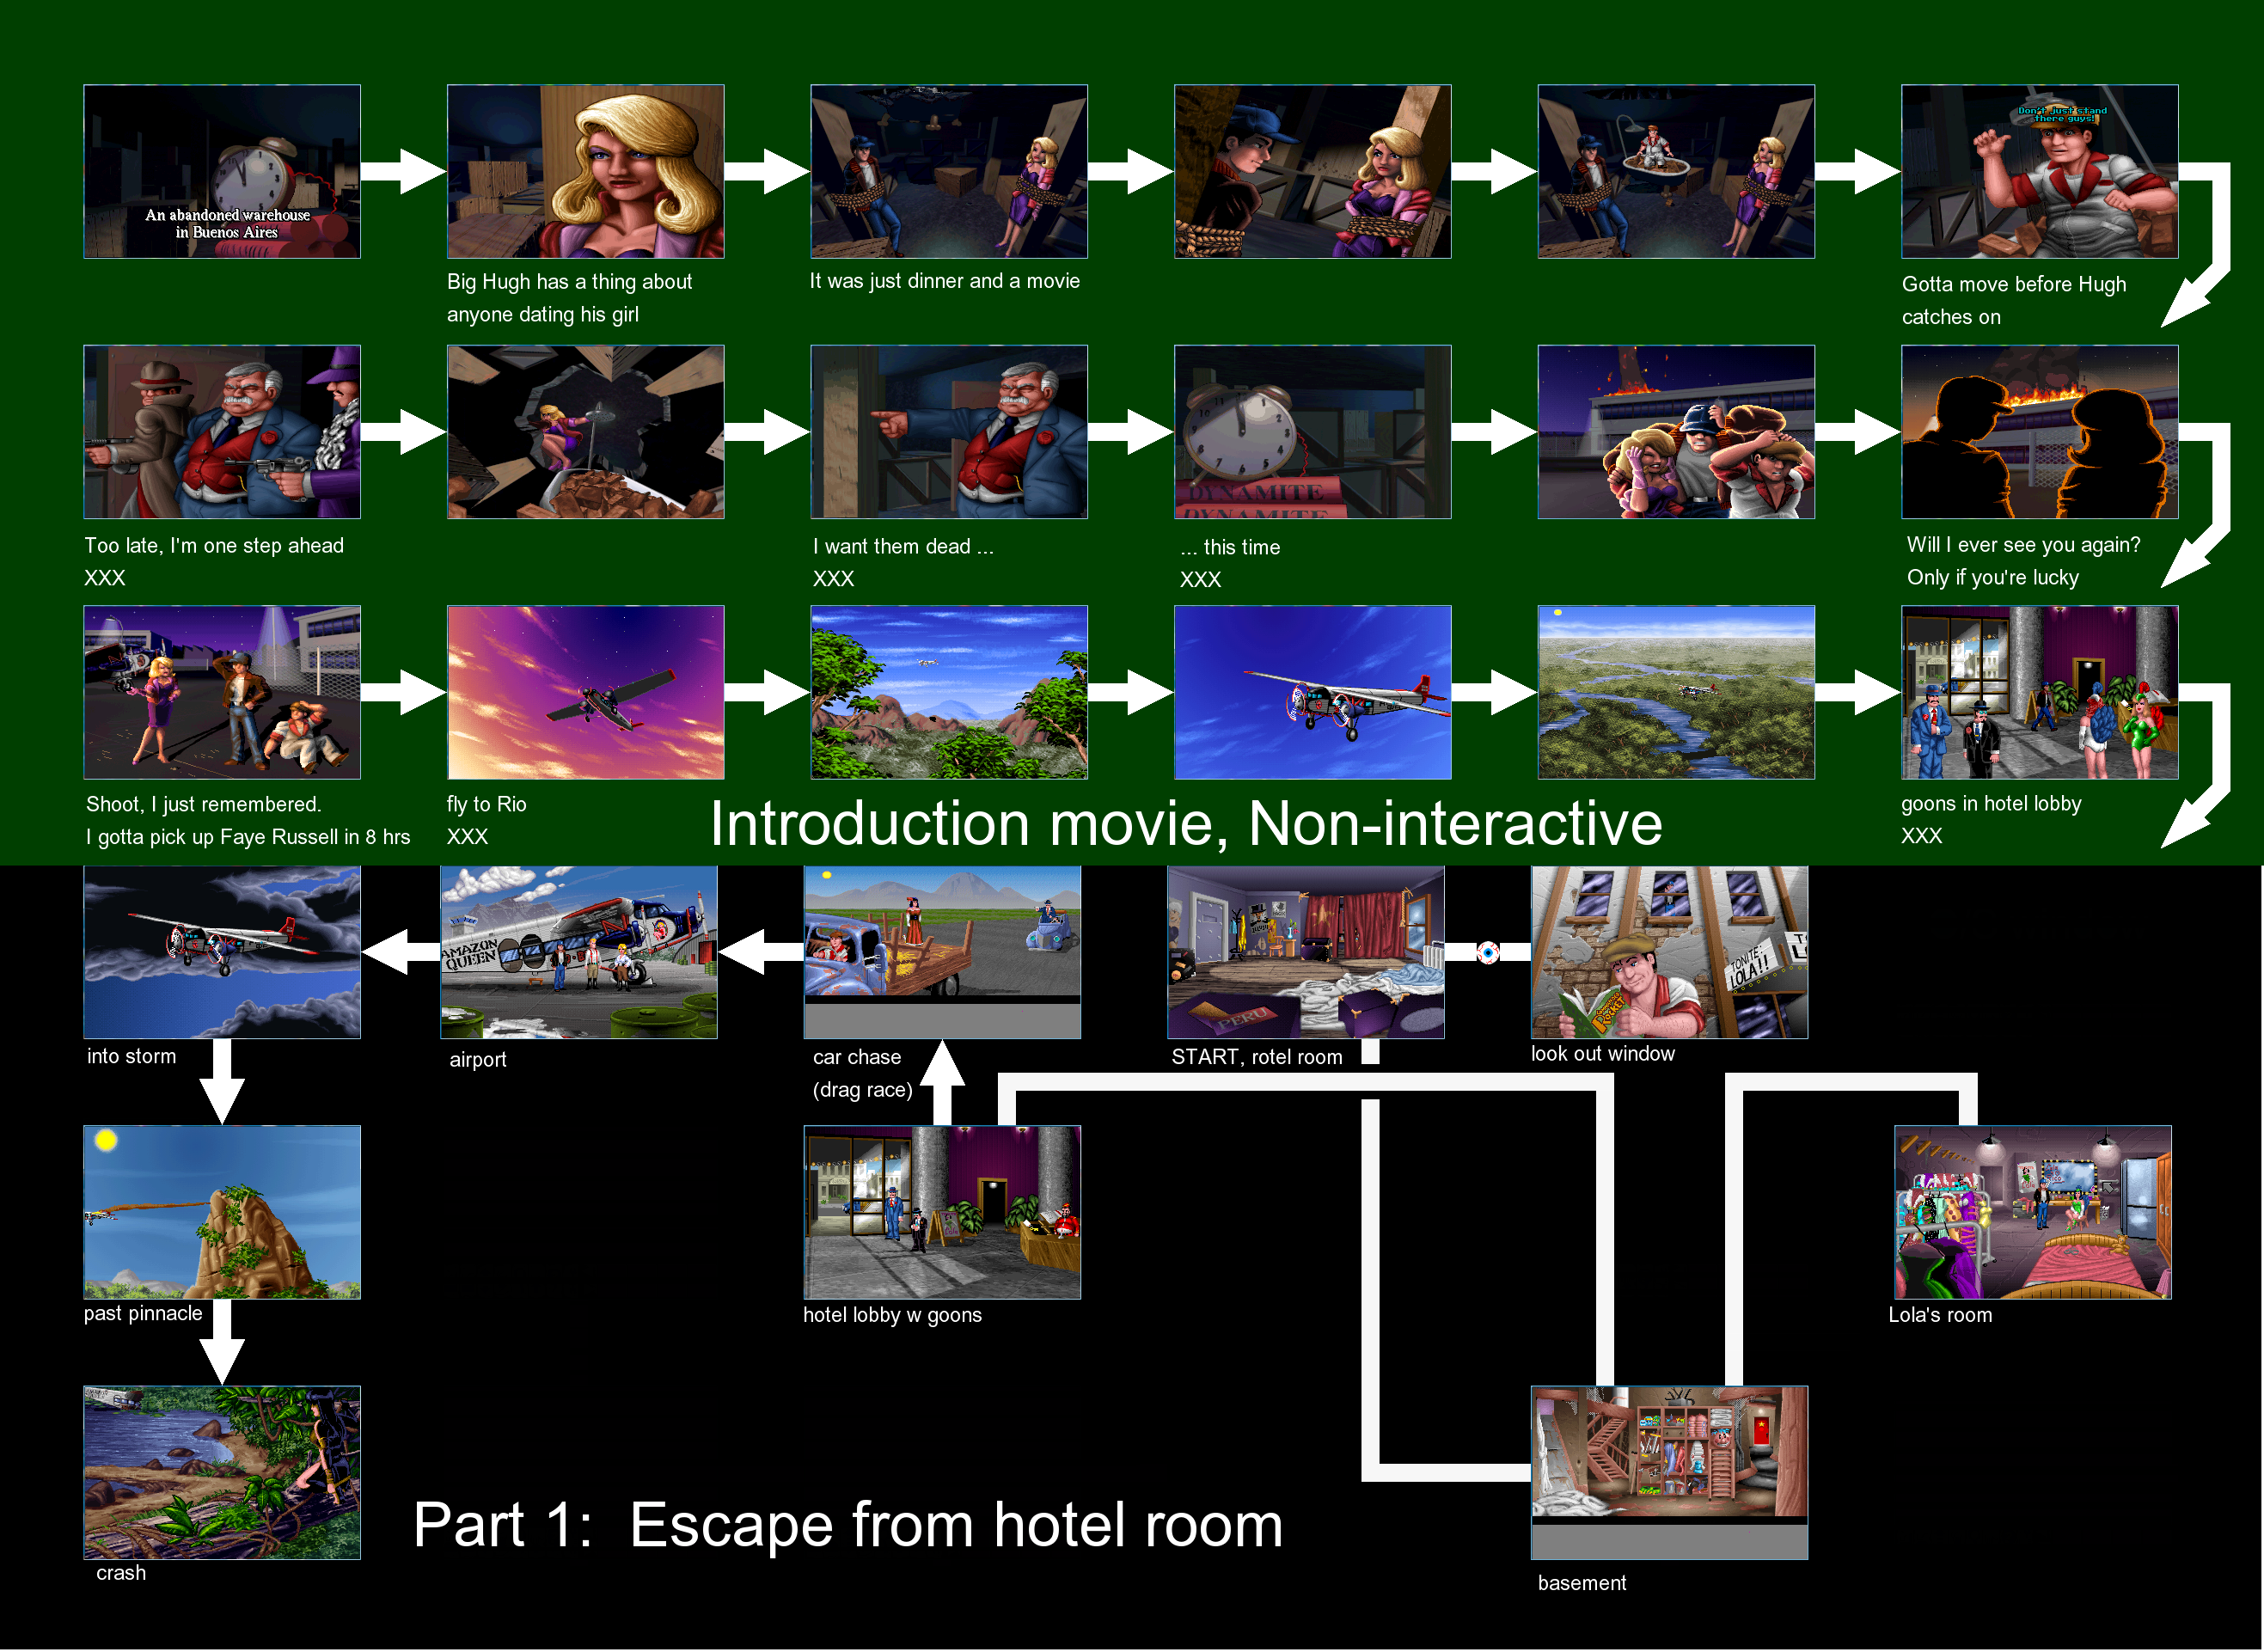
The game begins in an abandoned warehouse in Buenos Aires in 1949. Our hero, Joe King, is all tied up with a woman dressed in purple named Rita, thanks to one Big Hugh having a thing against guys dating his girl. All of a sudden, Sparky breaks into the room from above, riding a bathtub, but Big Hugh has two guys with machine guns with him. Sparky, Joe and Rita escape, but Big Hugh and his men get caught in an explosion caused by dynamite rigged to an alarm clock. Afterwards, Joe King remembers that he has to pick up famous movie star Faye Russell in a few hours.

Joe and Sparky then fly to a hotel in Rio de Janiero, Brazil and head to a hotel. In the hotel, Joe King runs into his arch-rival Anderson, who traps Joe King into a room to fly Faye Russell to the Amazon Jungle before Joe King can do it first and do it before a storm hits. From here, you have control over Joe King.


You have plenty of controls. From left to right, you can open and close things, you can move things, you can give things to other people, you can look at things, you can pick things up, you can speak to people and you can use items. Just select the command you need in the bottom of the screen, then click on the item you want to interact with with the left mouse button. The right mouse button lets you look at items you can interact with. To the right of that is your inventory. The left and right button let you cycle your inventory, and the four slots show what items you have. The journal lets you save you game in one of one hundred save slots, and the baseball bat is an item that you'll be able to use later on.

The chest in the middle of the room has Joe King joke that it is full of linen if you right-click on it.

The linen in the southeast corner can be picked up. You can pick up two sheets, and by doing so, you can find a laundry chute. However, it is too dangerous to just drop down it. There is a radiator bolted to the wall, but its appearance is weird as Rio de Janeiro, Brazil is usually a humid place. If you use one sheet on the other sheet, you can tie them together. From there, use your newly-made sheet rope on the radiator to tie it to the radiator so you have a way to rappel down to the room below.

If you click on the window, Joe King will try to yell out the window to Sparky, but Sparky will not be able to hear him.

The curtain cord near the window can be used, and by using it, you can pull it. Here, you can pick up the wig near the dressing room mirror.

Below, you'll find plenty of places to go and plenty of things to look at. You can move the ladder from one part of the shelves to another, and by doing so, you can pick up a couple of things: the comedy breasts(TM) and a crowbar from the box of crowbars at the top of the shelves. There is a door on the east side of the room, but you won't be able to open it quite yet, so you're better off going up the stairs to the door.

You'll be in the lobby. If you pass by Rico and Eddy, you'll be thrown back into your hotel room in your underwear. (You aren't required to do this, but it's pretty funny.) Go back to the lobby and talk to the bellboy. By talking to the bellboy, whose name is Mike Laris, you'll be able to get some information on the hotel. For instance; the front entrance guarded by Rico and Eddy is the only way out, and that the hotel is co-owned by Anderson and the bellboy's uncle, and that Anderson uses some of the money to fund his air service. You'll also find out that Faye Russell was recently here, and that a woman Lola will be doing her showgirl routine soon.

You can also ask about the key on the desk. You'll need it to move on with the game, but unless you're a friend of Lola's, you won't be able to get it unless you ask about the key again and just say you're Lola's friend. Mike will just let you take you the key, just like that. If you look at the key, you'll notice the name tag tied to it says "Lola." Go back downstairs and use the key you just got on the red door with the star on it that you couldn't do anything with previously. Go in, and you'll meet Lola, who is getting ready for her showgirl routine.

By going through the dialogue options with Lola, you'll find out that Joe King and Lola used to be in a relationship until Joe walked out of her life. (If Rico and Eddy have taken your clothes, you can also jokingly ask Lola if she likes your boxer shorts. If you do, you'll get some hilarious, albeit useless, dialogue.) Ask Lola for help, and tell her that either you need help getting out or that Anderson's goons have your trapped. (The first option gets you some extra dialogue.) Lola is reluctant to help you after your leaving her, then gets in the shower and tells you to get her a towel.

There's nothing left to do here, so go back up the rope to the hotel room and go back to the chest in the middle of the room. Use the crowbar on that chest. To Joe's lack of surprise, it's full of linen. Take one of the towels, go back to Lola and give Lola the towel. Lola will ultimately decided to help you out and gives you a red dress to use as a disguise. You'll then leave the room.

If you have the dress, the wig and the comedy breasts in your inventory, you can just use the dress on Joe and Joe will be able to dress up as a woman. (If Rico and Eddy did not take your clothes, you can switch between your regular clothes and your disguise.) Go back to the lobby.

You'll then get a cutscene underground in a top secret laboratory. An old man in a lab coat tests out his "Dino Ray," which turns people into dinosaurs. He then tests the ray out on an Amazon woman, and it turns her into an anthropomorphic lizard woman. When he tests the Aggression Enhancer, however, it turns her into a lizard showgirl. The old man says he will have it fixed, but he will need more Amazon women for his dinosaur army.

You'll then be back in the lobby.