Part nostalgia-bomb, part note-taking and part FAQ, what started in GameTrailers as a video game blog is now on Blogger. This blog is a look back at video games, both popular and obscure, from the video game industry's infancy all the way to the previous console generation.
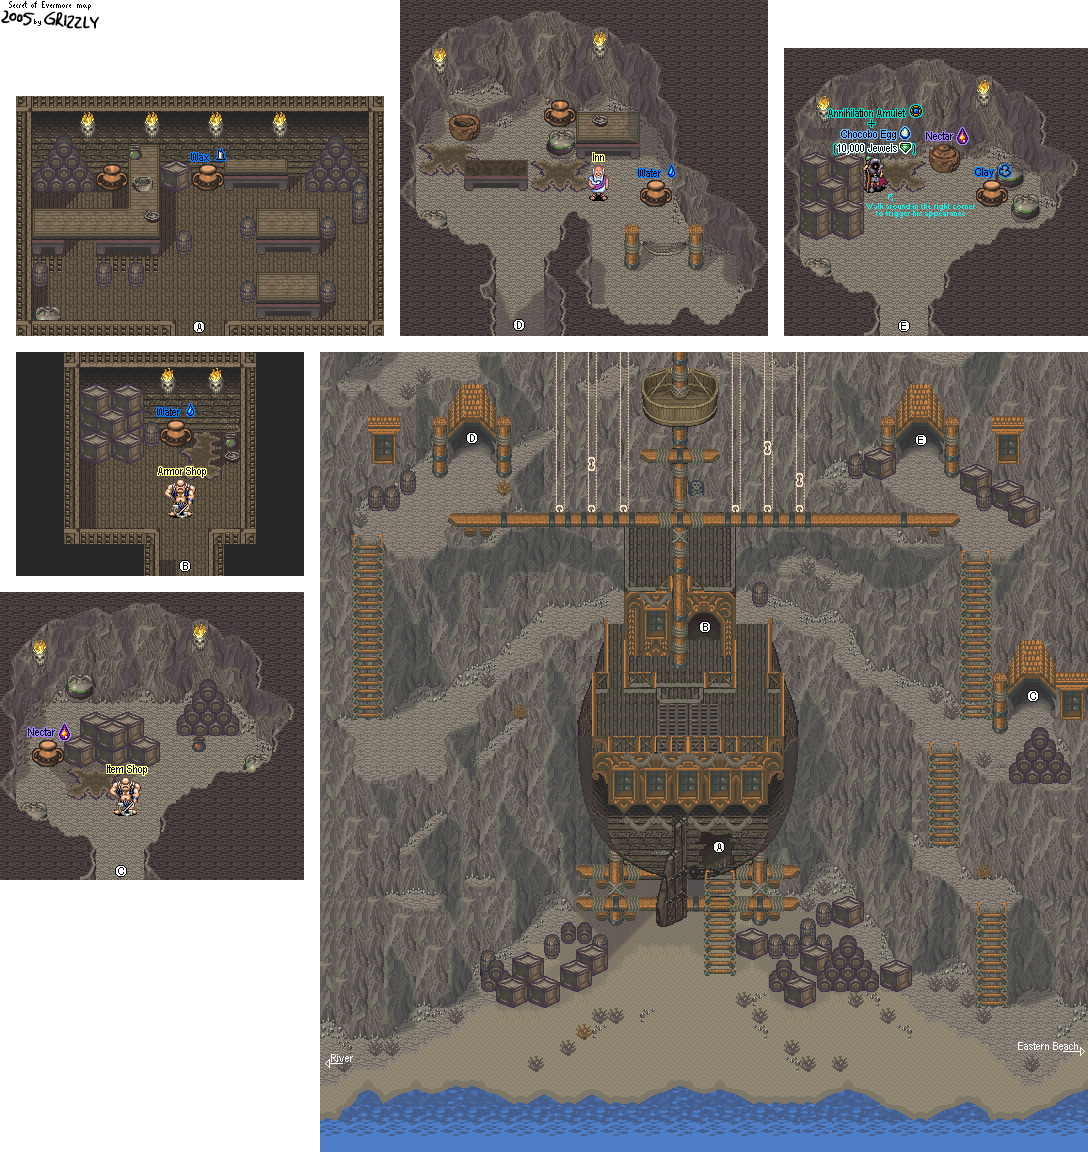
If you get the Amulet of Annihilation from the Mad Monk in Crustacia, you'll get the Chocobo Egg absolutely free. The Chocobo Egg will boost your maximum HP by 25%.
Just like the Mad Monks, the asp-faced Sons of Set have staves that can still do some massive damage and status ailment problems, particularly Plague. On the other hand, they're slow and can't attack from a distance, so you should be able to use them as target practice for offensive spells.
The door at the bottom can only be accessed by The Dog. Keep The Boy on the switch, then switch to The Dog and have him go in. From there, have him leap across the water with the run button. The Dog is now in the switch room. The four floor switches will activate four specific doors that The Boy cannot open himself. Press Select and you'll be able to switch back to The Boy. As the Boy, climb up the stairs and move your way around. You'll find an entrance on the roof.
Also, there are a ton of alchemy ingredients in the trees, and you'll have to weave through them to find them all.
Make your way around, and watch out for those Bone Buzzards. If you've leveled up the Bronze Spear to at least Level 2, you'll stand a better chance against them and you'll be able to get them out of your hair much more easily.
From the fork in the road, go south. The other forks lead to Mummified Cats and items.
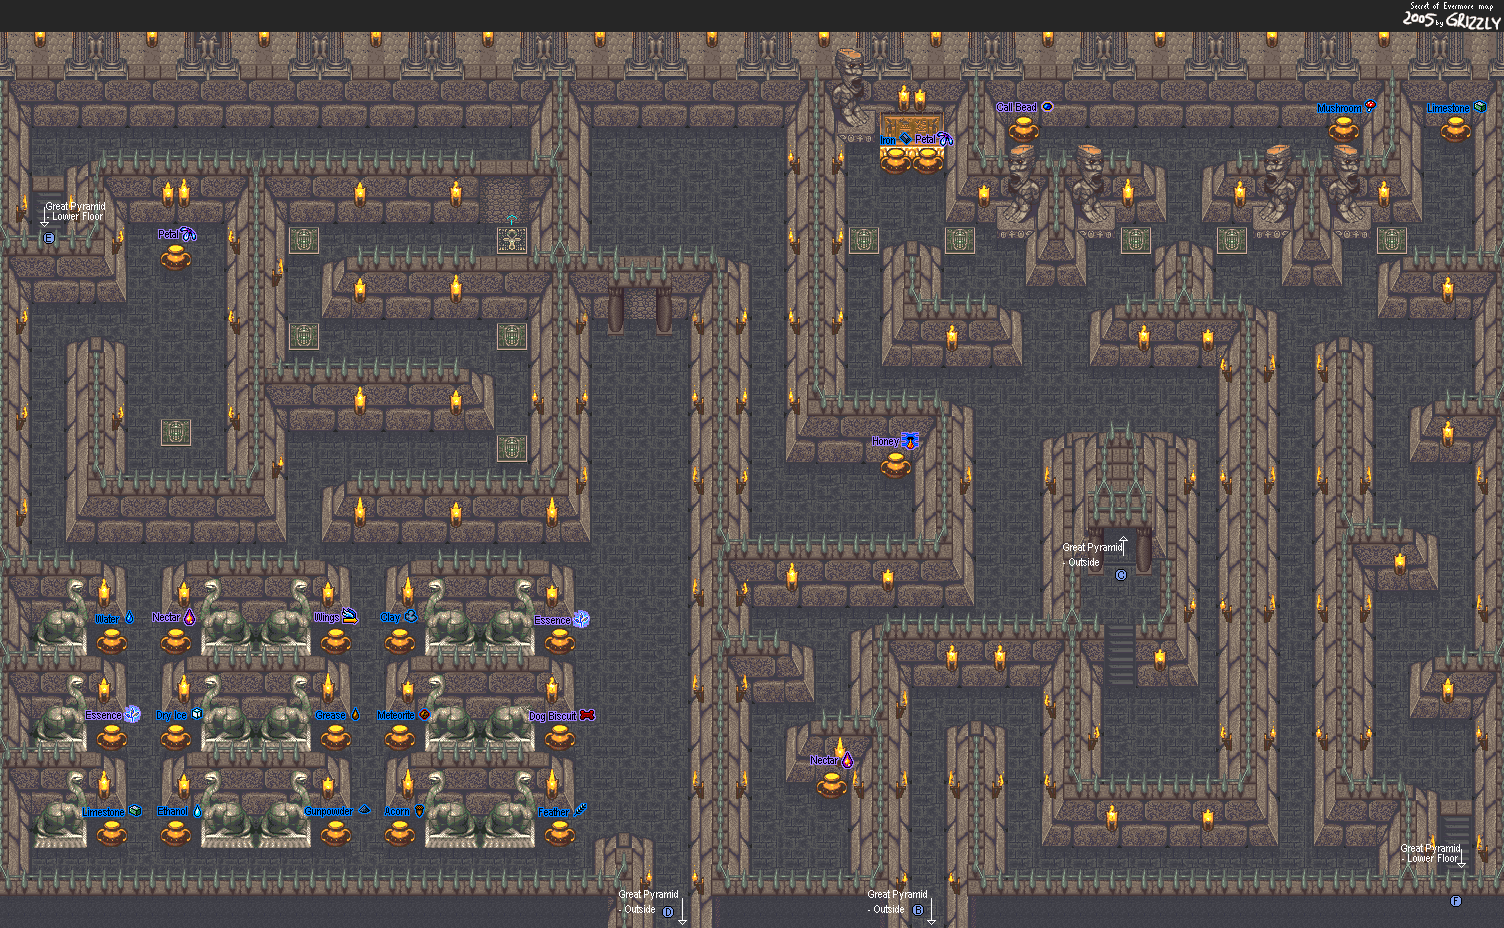
By going upstairs to the rooftop area, you can find a ton of jars with alchemy ingredients, including meteorites, gunpowder and dry ice. Meteorites and Dry Ice are used only for one spell that you won't get at the very end of the game, and there are only so many parts of them in the game...and once they're gone, that's it.
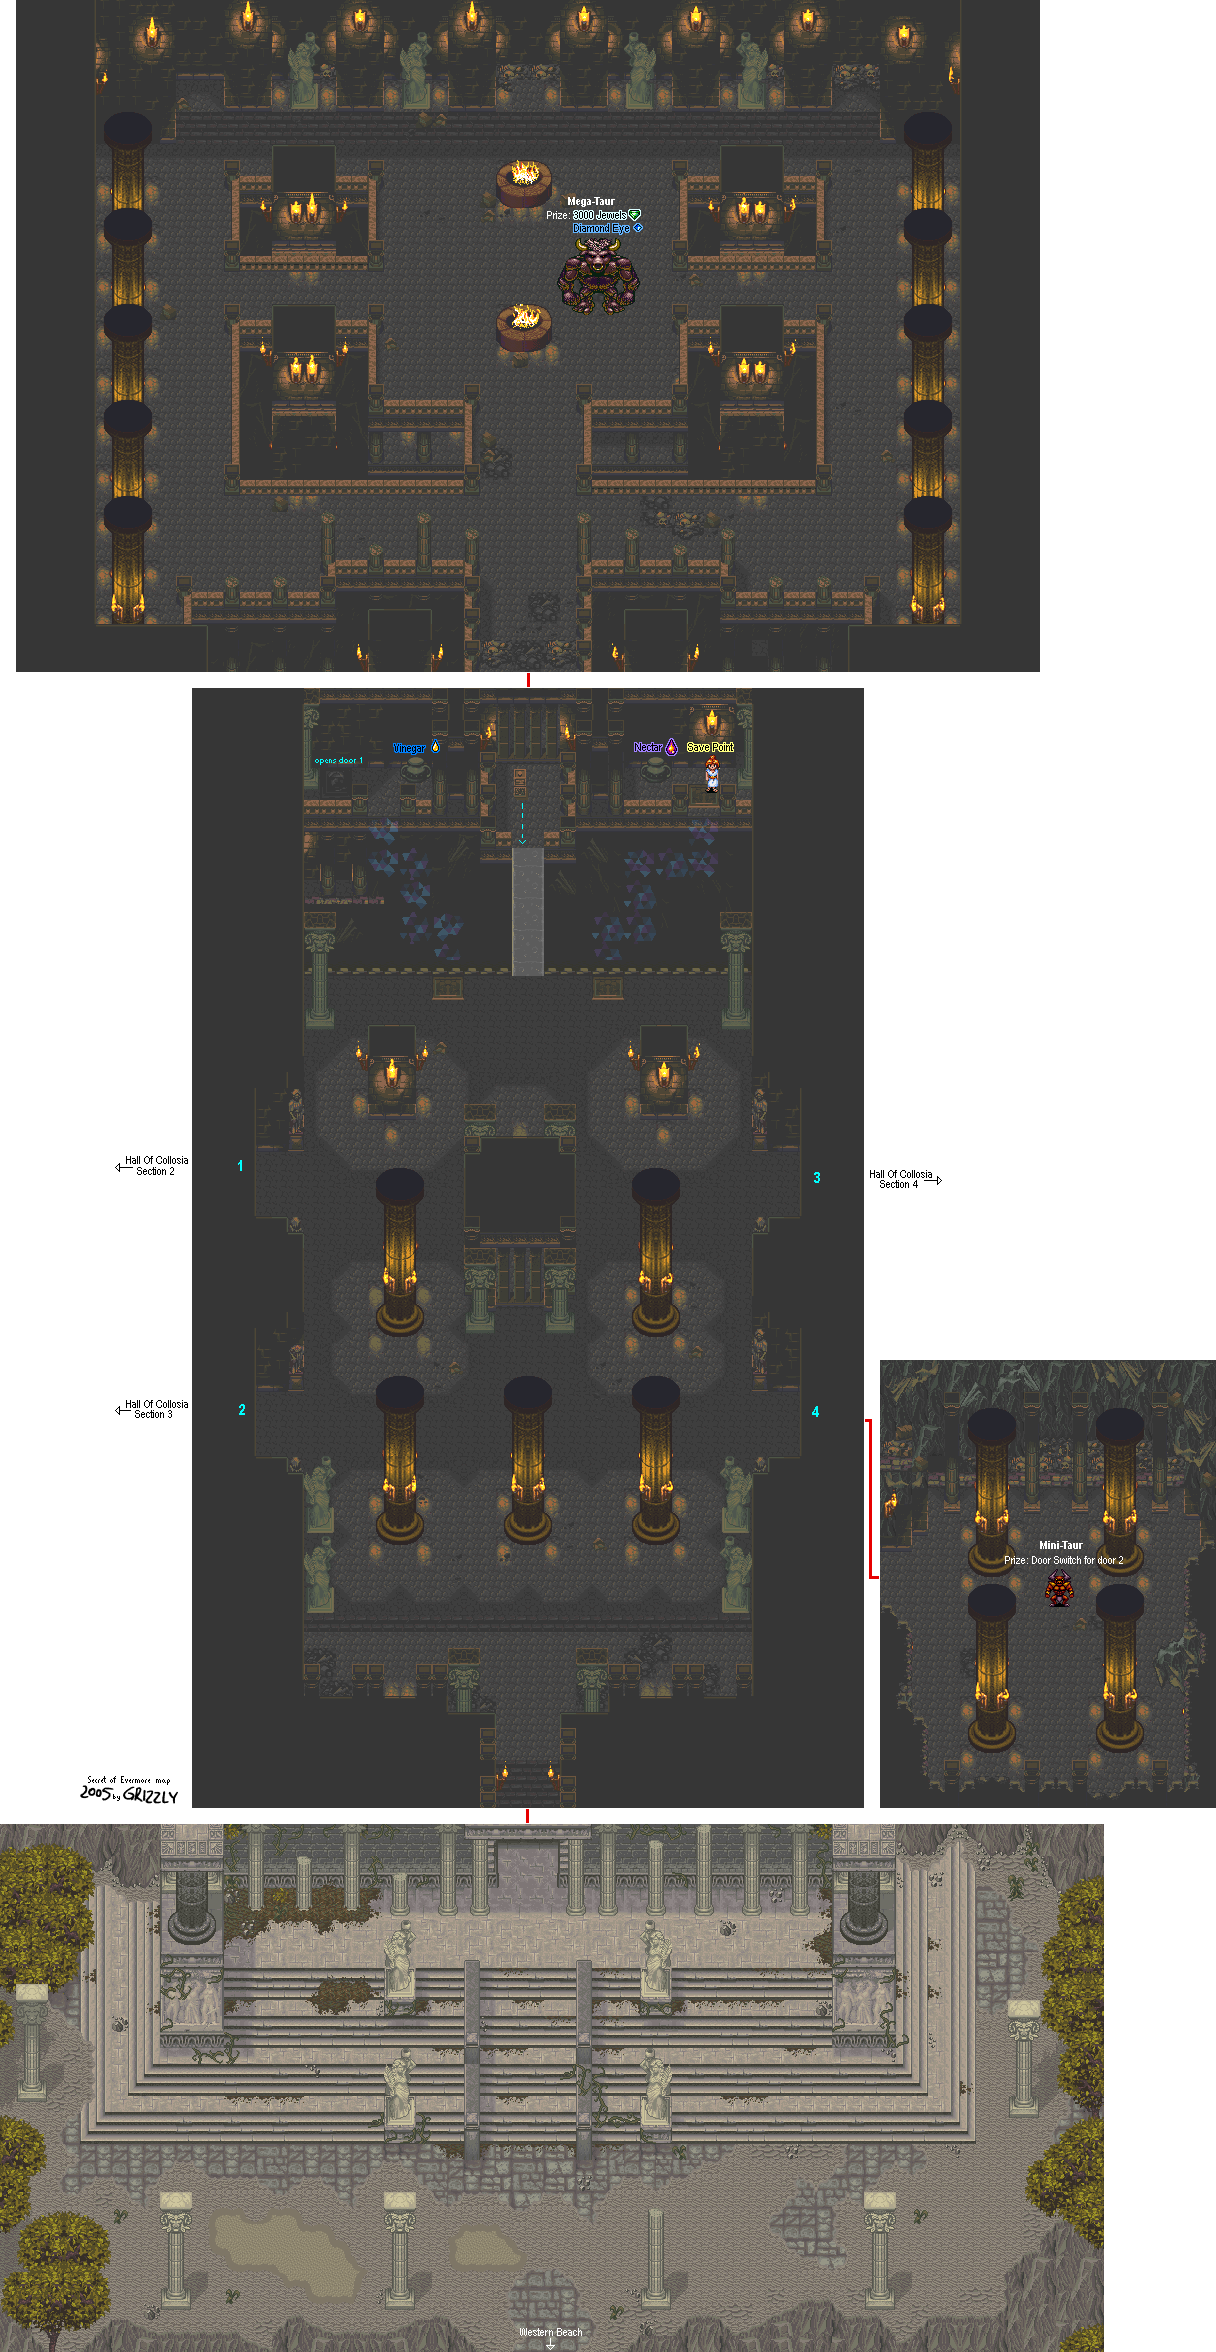
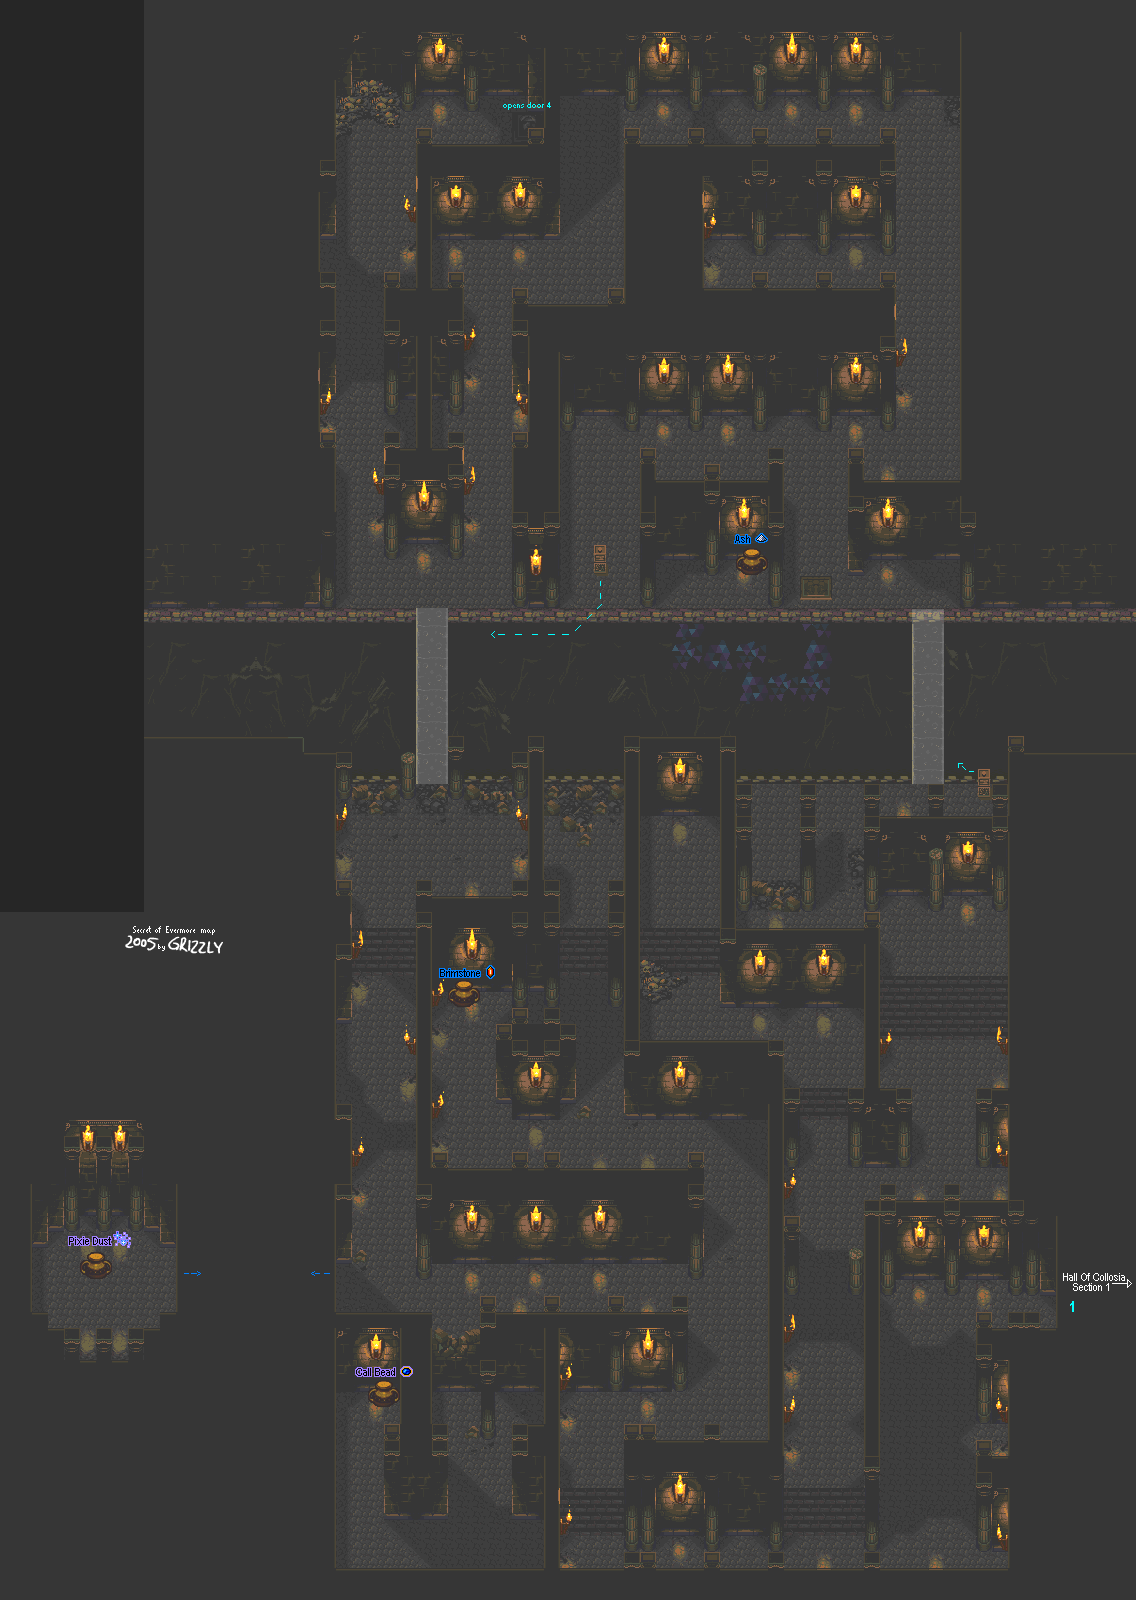
Remember that first maze we did before we fought the Mini-Taur? Go to the nook south of that. It leads to another maze.
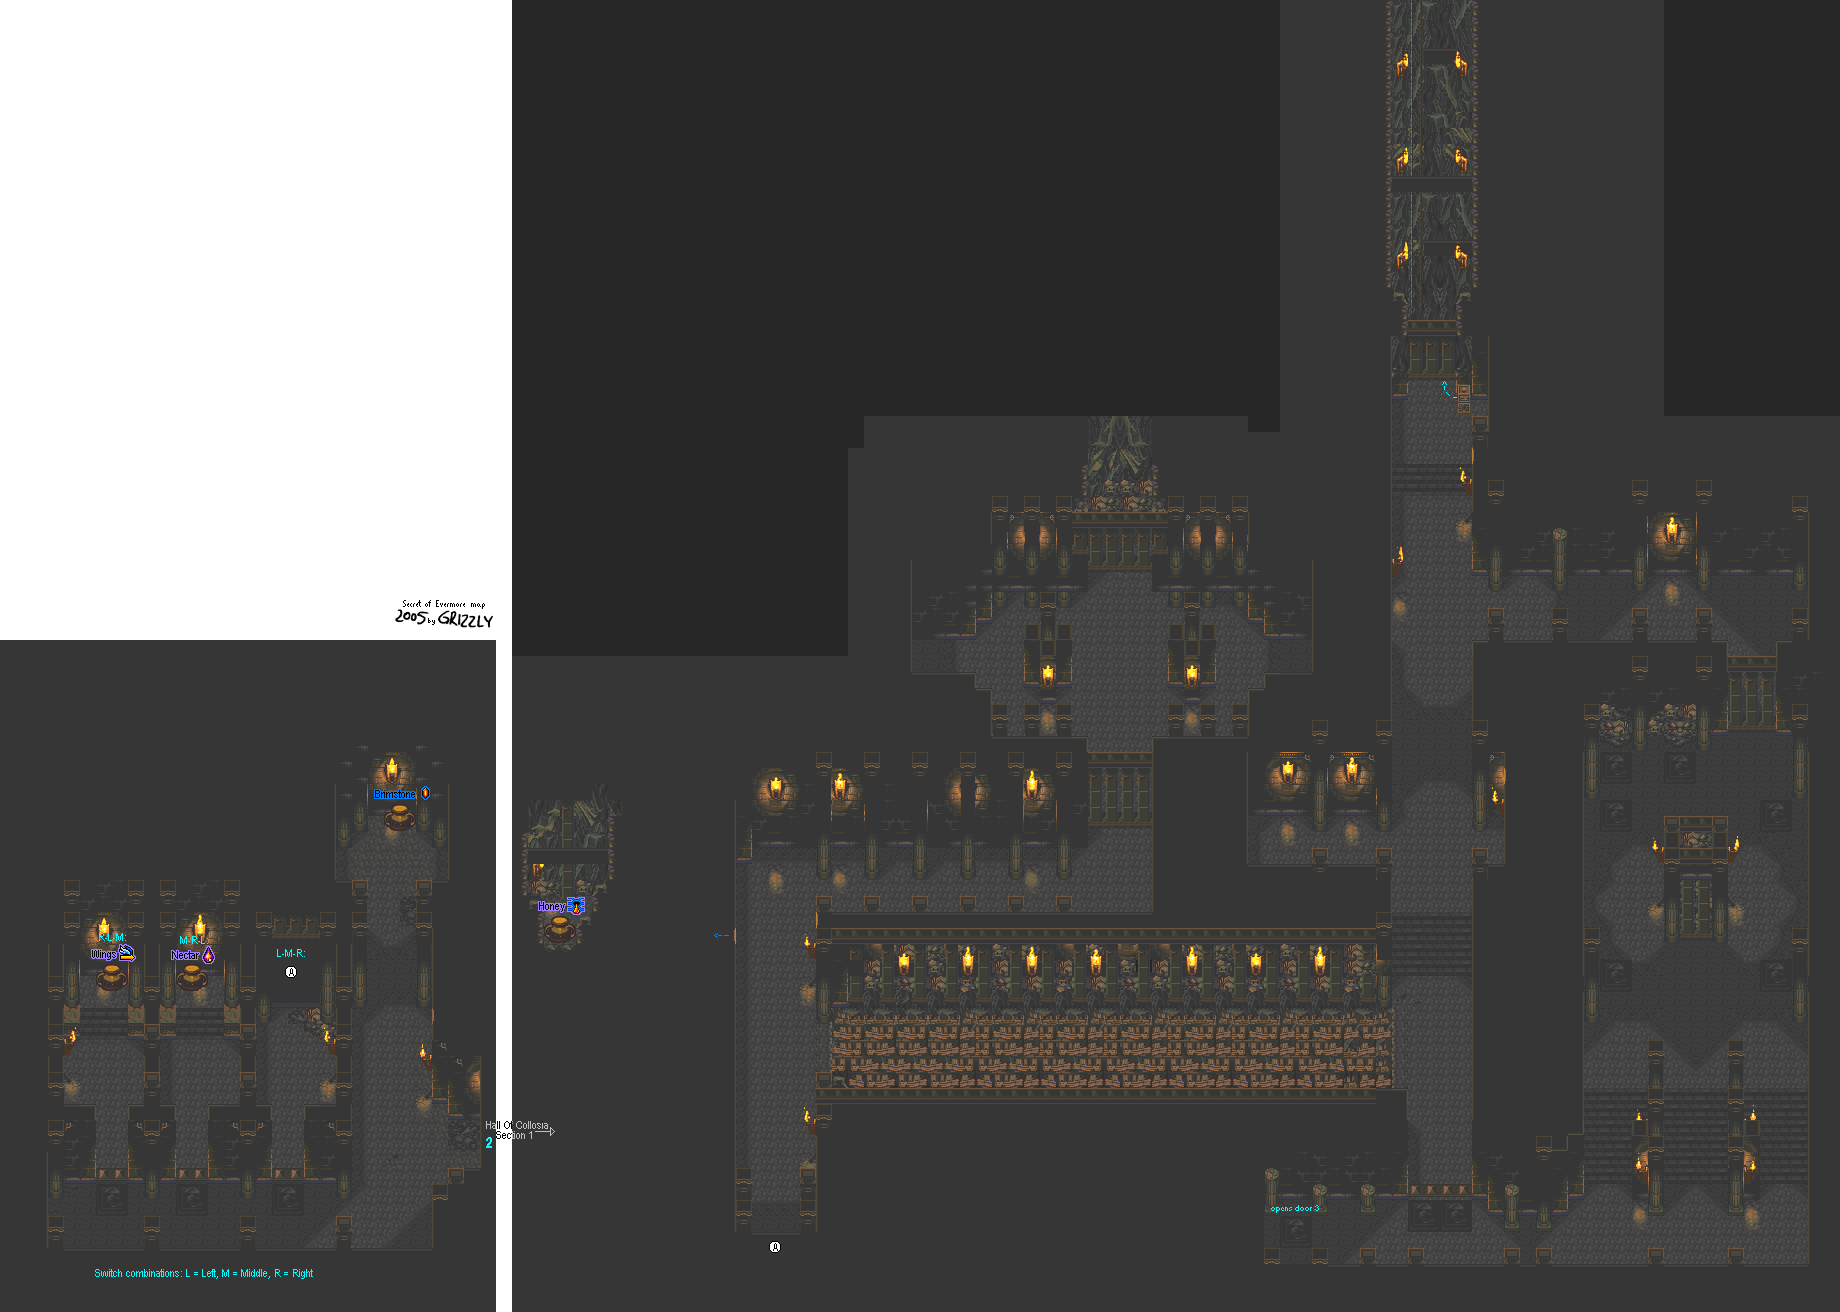
There are three possible doors to go through here. To pick the one you want, press the faceplates in front of them in a specific order to get the wanted path.
Pressing the left one and then the middle one (or right-left-middle) will automatically give you access to the left passage. Pressing the right one after the left one (or left-middle-right) will give you access to the right passage. Any other pattern gives you the middle passage. The left and middle passages lead to jars with stuff you might want in them, while the right passage takes you to another part of the Hall of Collosia.
In this room is a bridge to the east. If you keep going north, you'll hit a gate you won't be able to get past.
In the wall east of the start is a pot containing three parts Honey. Honey heals more than nectar does - 200 on its own, 240 with the Moxa Stick. Keep these for when you really need them; you won't find Honey a whole lot until a bit later in the game.
When you get on this bridge, your attack had better be at 100% - because you're gonna be running full blast from the ground that's coming down behind you! If you fall here, you'll end up further north of that gate I mentioned before. Go south, find the two Lime Slimes and defeat them. They should be on the sides of the room. There, you just opened that gate and got yourself out of there.
If you hug the wall west of where you start, you'll find a hidden passage to a jar that contains three pieces of Honey. Hold on to these, since they recover your entire HP and will really come in handy much later in the game!
Apparently, the trick here is to hold the run button, then keep tapping it when your attack meter runs out. Or you could just charge your weapon and then run forever. That works, too.
From here, go south then go left to hit another face plate. Go east until you no longer can, then go north and hit all six faceplates. From there, go north, then west, then hit the switch. Go through the gate. You're done here.
Hall of Collosia
Go into the nook north of the one that led to the Mini-Taur room. It's open now.
Follow the path and hit the switch. Take the bridge. From here, go all the way north on the left hallway and go east until you step on a faceplate. By this point, you'll reach a dead end and you'll have opened the gate on the other side of the wall, so go back to where you were before and take the right hallway. Take the hall with the gate you just opened and keep on going.
You'll reach another fork in the road eventually, so take the right path on your way south. You'll find a Revealer plate here, so use Revealer to go further south.
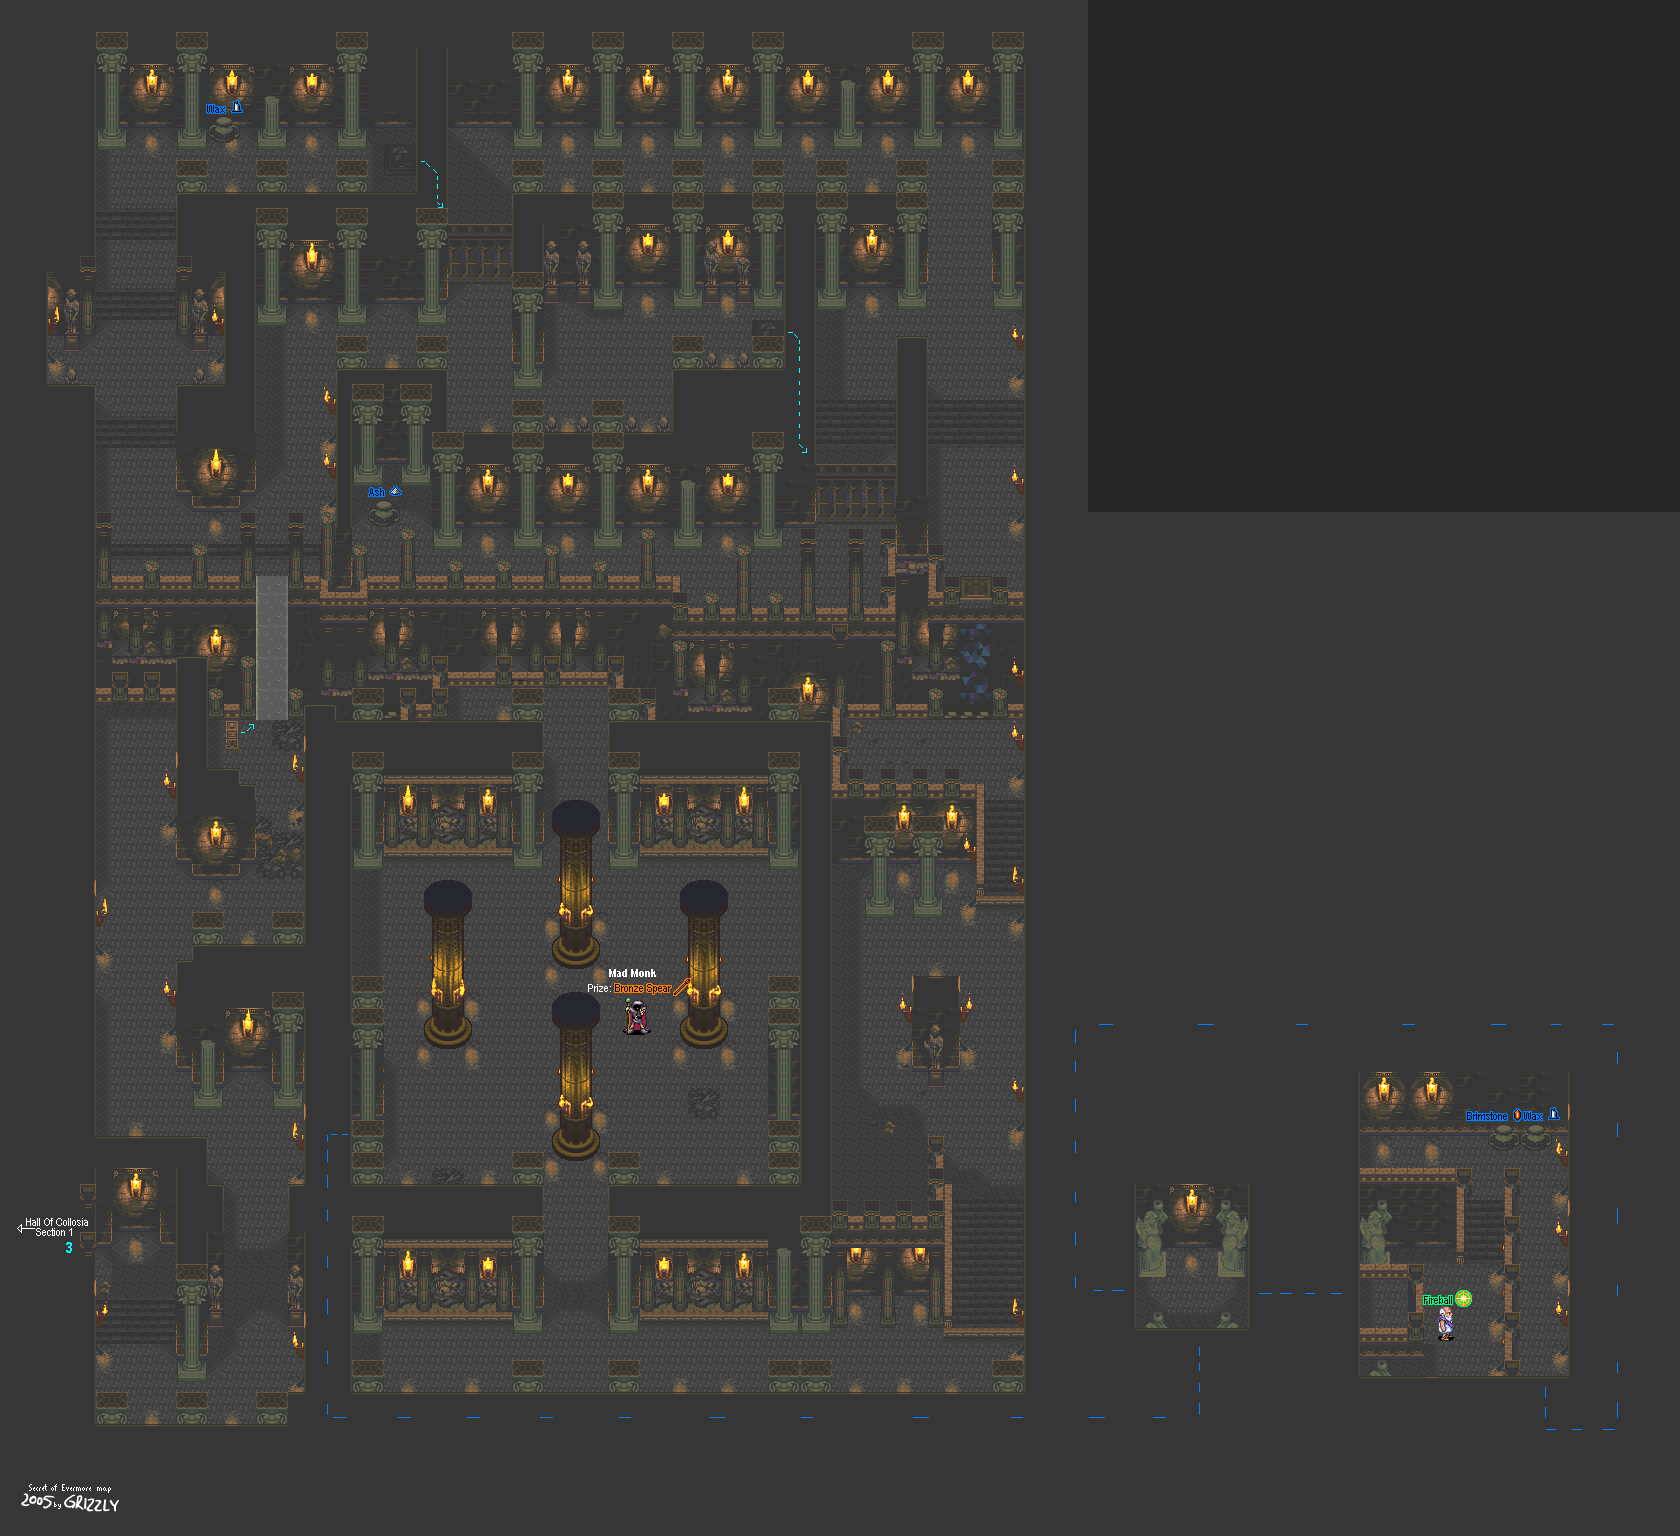
From here, follow the path until you reach a huge room. You'll find only a Mad Monk in here. Destroy him. You'll get a new weapon - the Bronze Spear. Your next mission: level this sucker up to Level 2 so you can finally throw this bad boy.
Yeah, we're raising our new weapon in victory because we took out a Mad Monk. Yeah, we're so proud of ourselves. Let's get out of here.
Also, don't worry if you aren't at Level 2 with the Bronze Spear if you come across a switch you can't reach. The Boy will toss it automatically and get the drawbridge to show up.
From the Mad Monk room where you found the Bronze Spear and search the lower left walls. From there, feel your way around and you'll eventually find your way to Madronius' brother. He'll commend you for finding him and he'll give you the Fireball spell.
Fireball
1 Brimstone, 2 Ash
Be sure to check the jars there as well. You'll find 4 Brimstone and 5 Wax. Also, he'll let you save your game. Go ahead and do it, now that you have a new spell.
Hall of Collosia
Now for that switch in the center of the north end of the room. Leveling the Bronze Spear to Level 2 is well-advised. Also, carry plenty of alchemy charges for Crush, since you've more than likely leveled it up enough to take the next boss down.
Boss: Megataur
Oh, look. A re-made Magmar.
This guy will cast Confound and Drain in an attempt to make your life miserable. His Drain spell is kinda weak, though, but be prepared and keep your HP as high as possible nonetheless.
He'll also roll into a ball and hide in one of the fire pits before he pops back out of another one. It also acts as an attack, so pay attention to where he is. He also stomps the ground for an earthquake attack, which takes a small bit of your HP down but is dreadfully annoying.
Taking this guy down with Crush and a powered-up Bronze Spear attack definitely works well here.
A really cheap way to destroy him is to bring Crush up to Level 6 (that'll take you a while, unless you've been leveling up and somehow got really crazy with that spell) and use it on the Megataur multiple times. He'll go down really fast then.
When you beat him, you'll get 3000 Jewels and one of the Diamond Eyes before the game whisks you outside the Hall. Head back to Horace's camp.
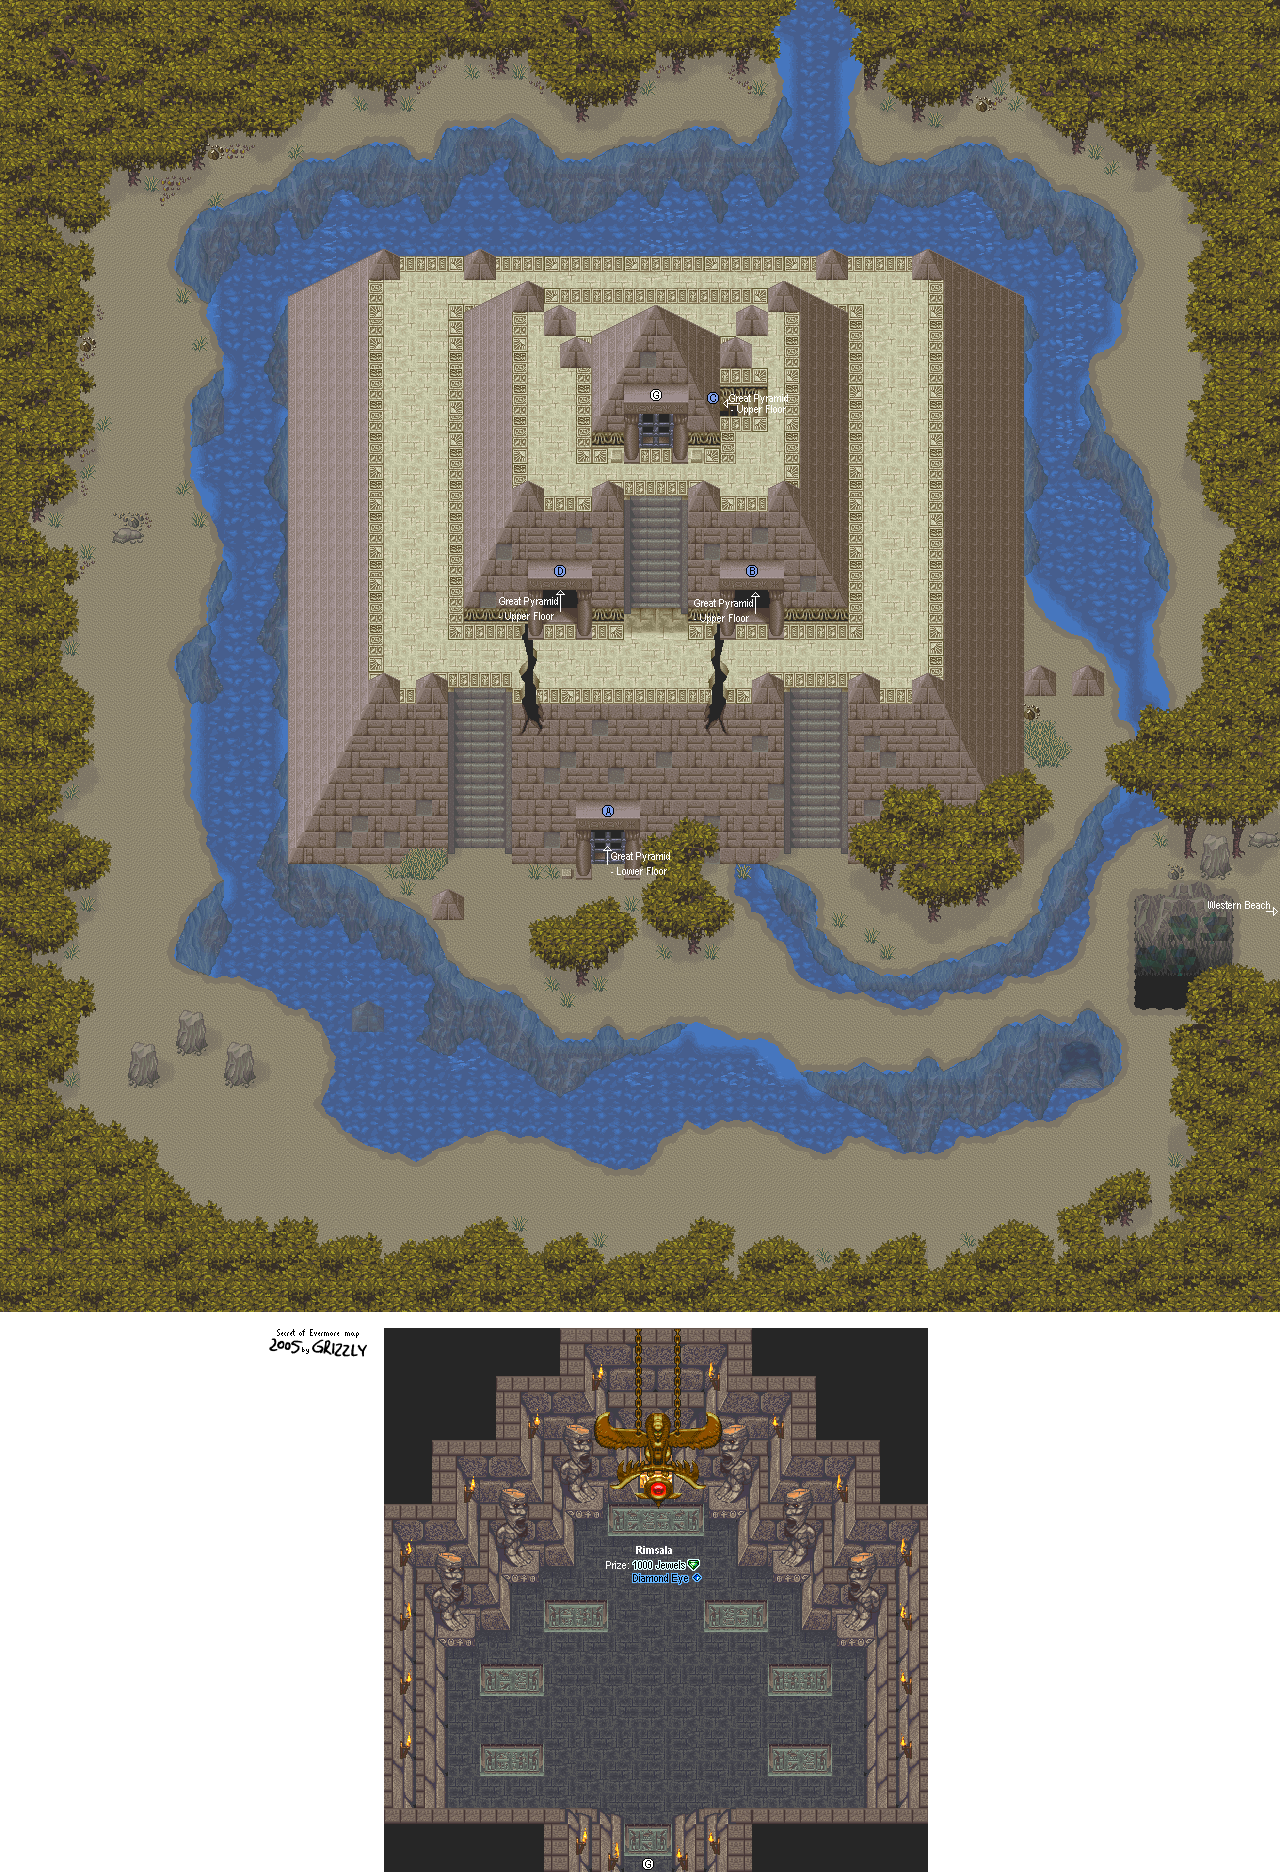
Horace will commend you for finding one of the Diamond Eyes. Now it's on to the Pyramid, where you'll find the other Diamond Eye as well as some more awesome stuff.
Now that you have one of the Diamond Eyes, talk to Madronius again and he'll give you the Escape forumla. This is basically an alchemy version of the Wings.
You could just go right in the Hall, but feel free to take down the monsters here and level up both your characters and your weapon. That sword is the most powerful thing in your hand aside from any spells you have, so you might want to get it to at least Level 2 if you haven't done so already.
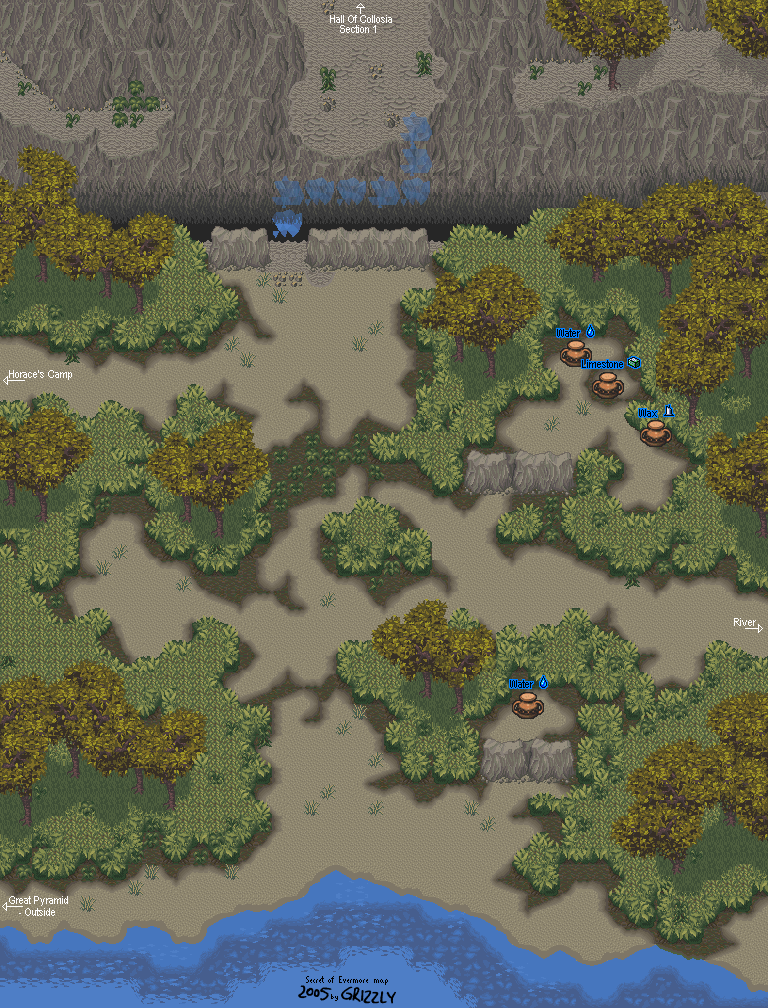
Hall of Collosia
There's a lot of rats in here, but they can't do anything to hurt you. You can defeat them for experience (characters and Gladiator Sword) and jewels, even though it isn't much. Every little bit helps.
There are also Lime Slimes hopping around. They give more experience and jewels than the rats and are thankfully easy to attack than some of the monsters that you've seen in Antiqua so far.
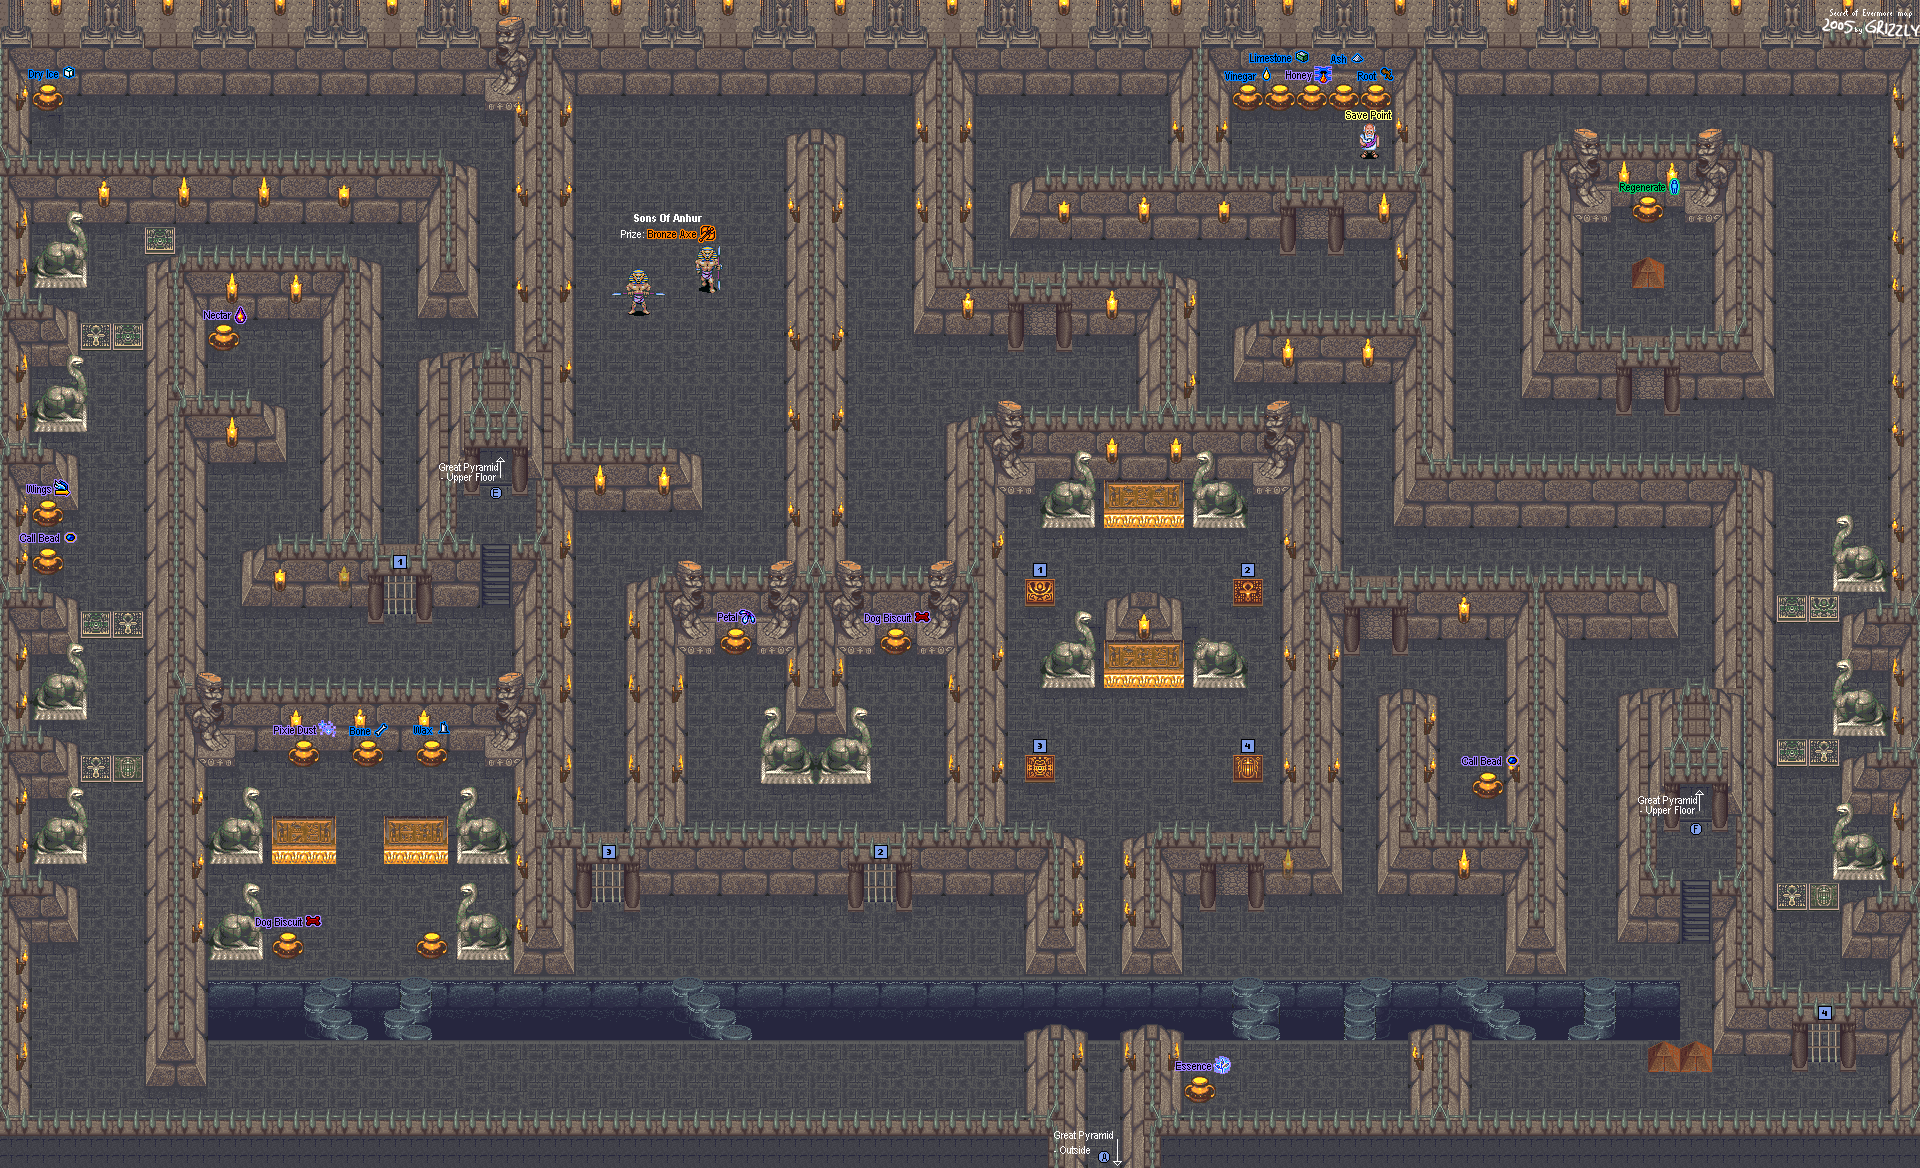
There are some plates that you can step on on the north end of the entrance room. The ones on the left and right are places where you can use the Revealer spell to find bridges that lead you to treasures and faceplates (as well as a woman that will save your game), but the one in the middle requires...something else. You'll find out what it is.
The bridge on the left takes you to a faceplate on the floor. When you step on it, it'll open a door in one of the walls to the left. Be sure to step on this before you go any further.
When you check the left wall, you'll see a feint light near one of the walls. Go in here and look around. As you go north, you'll find another pit. You'll have to reach the right-hand edge and hit a switch in order to cross to the other side. This opens up a bridge that comes to you. From here, you can use Revealer to find another invisible bridge that leads to a pot, as well as another switch that opens up a bridge at the other end of this part of this maze. You'll have to hurry to this bridge, as it doesn't stay opened up forever.
There is a hidden passage that leads to a jar of Pixie Dust if you can find it.
Before you do that, though, there's a faceplate at the northernmost wall of this room that you'll have to stand on before you trigger the bridge. Find it, then hit the switch and make a mad dash for the bridge.
Now that you've hit that faceplate, let's go to the right of the main chamber and go through the lower-most nook in the wall. You'll take on the Mini-Taur.
Your best bet here is to equip the Horn Spear and let loose with both this and your spells. The Mini-Taur isn't too hard. When you kill him, a faceplate will show up in the middle of the room. Step on it.
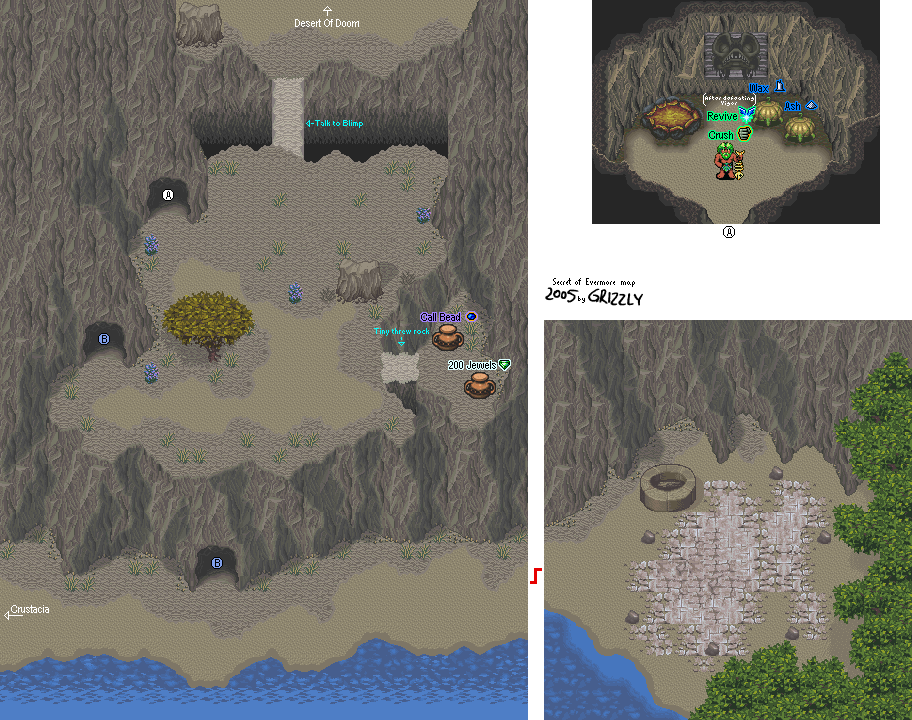
Now that you've got your dog back, go to Blimp's Cave. Talk to him and he'll give you Revive, which revives the dog without the use of a dog biscuit. However, it takes a bit of leveling with the spell to make it somewhat powerful.
Revive
3 Root, 1 Bone
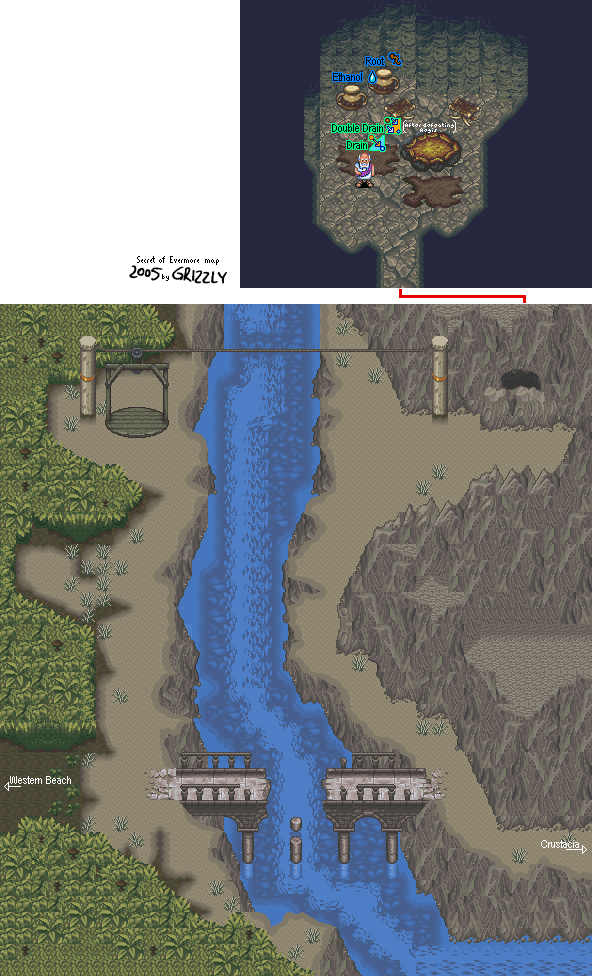
Now you can go to the Right Bank, which is west of the pirate ship.
From here, switch to The Dog and use the Run button at the end of the bridge to jump to the other side. From there, take the lift to the right side. Now you can take The Boy and The Dog further west of Crustacea.
Now that you're on the other side of the bridge, cut the plant overgrowth at the other side and go west. You'll be in a forest, where you'll find more of those spiders and also take on a new enemy, the Dancin' Pans. You'll be seeing these guys kinda often.
Go north so that you'll come across the plant undergrowth you'll need to cut down, then go west from there. You'll be in a new area.
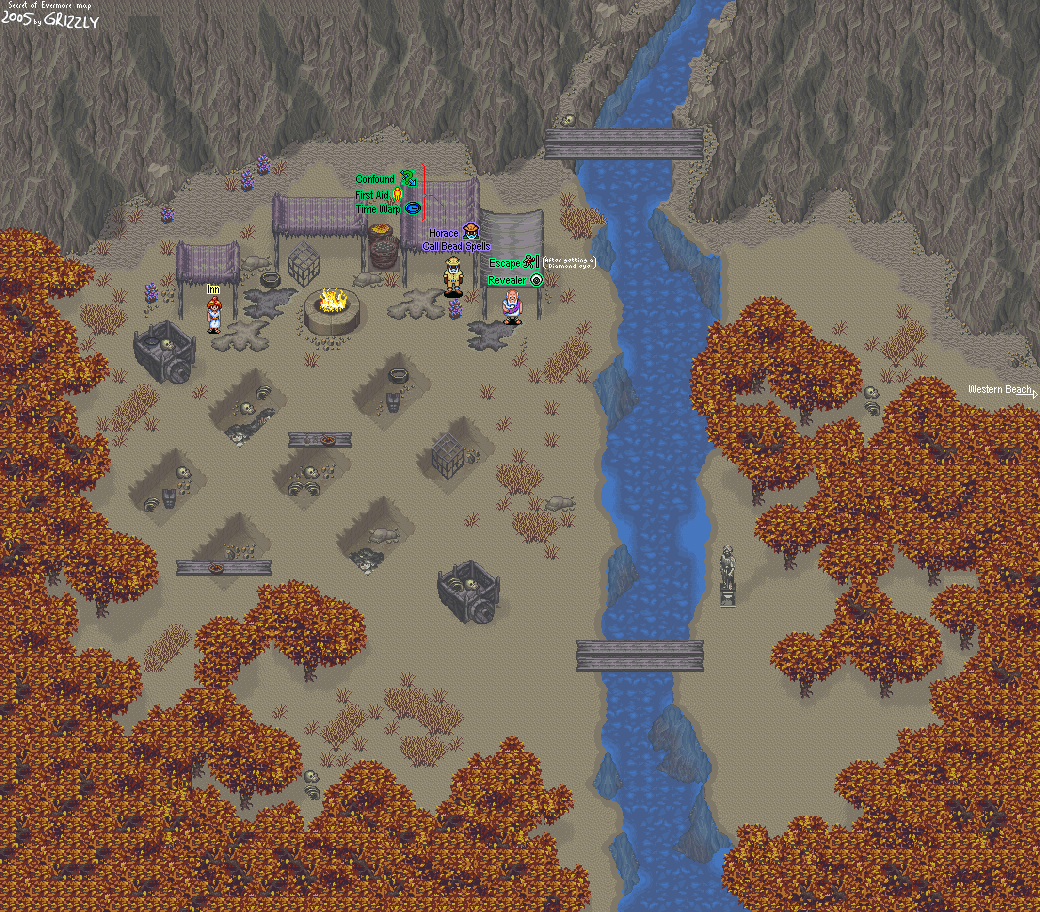
Go west and you'll meet Horace Highwater, who created the world of Antiqua. He'll tell you about the Diamond Eyes and that he also has a bad feeling about the leader of Nobilia. You'll not only meet his assistant Madronius, who not only sells you alchemy supplies but also gives you the Revealer formula, which lets you see the secret passages across pits if you equip and use it.
Revealer
2 Ash, 1 Wax
It should be noted that Madronius not only sells Roots, he also sells Vinegar and Brimstone. You'll definitely be needing those later, so keep a mental note about that.
Madronius also mentions his brother, who has a hiding place in the Hall of Collosia. He tells you to check the walls and that he'll help you out. This is where you'll find one of the two Diamond Eyes, so keep this tidbit of information in mind.
Be sure to talk to Horace again. He'll give you two Call Beads as well as some of his spells. He has two other spells that you'll find elsewhere in the game. One of them is in the Pyramid, so check every square inch of that place when you're there.
Time Warp: Scales back and undoes damage that you have just taken.
First Aid: A very powerful healing spell, even more so than Life Spark.
Confound: Confuses enemies.
There is also a woman at the camp that lets you sleep at the camp for 20 jewels. Take advantage of it whenever necessary during your quest for the Diamond Eyes, it's pretty useful and doesn't cost very much.
Be sure to sniff around the camp with The Dog. You'll find some useful alchemy ingredients, including some Bone and Brimstone.
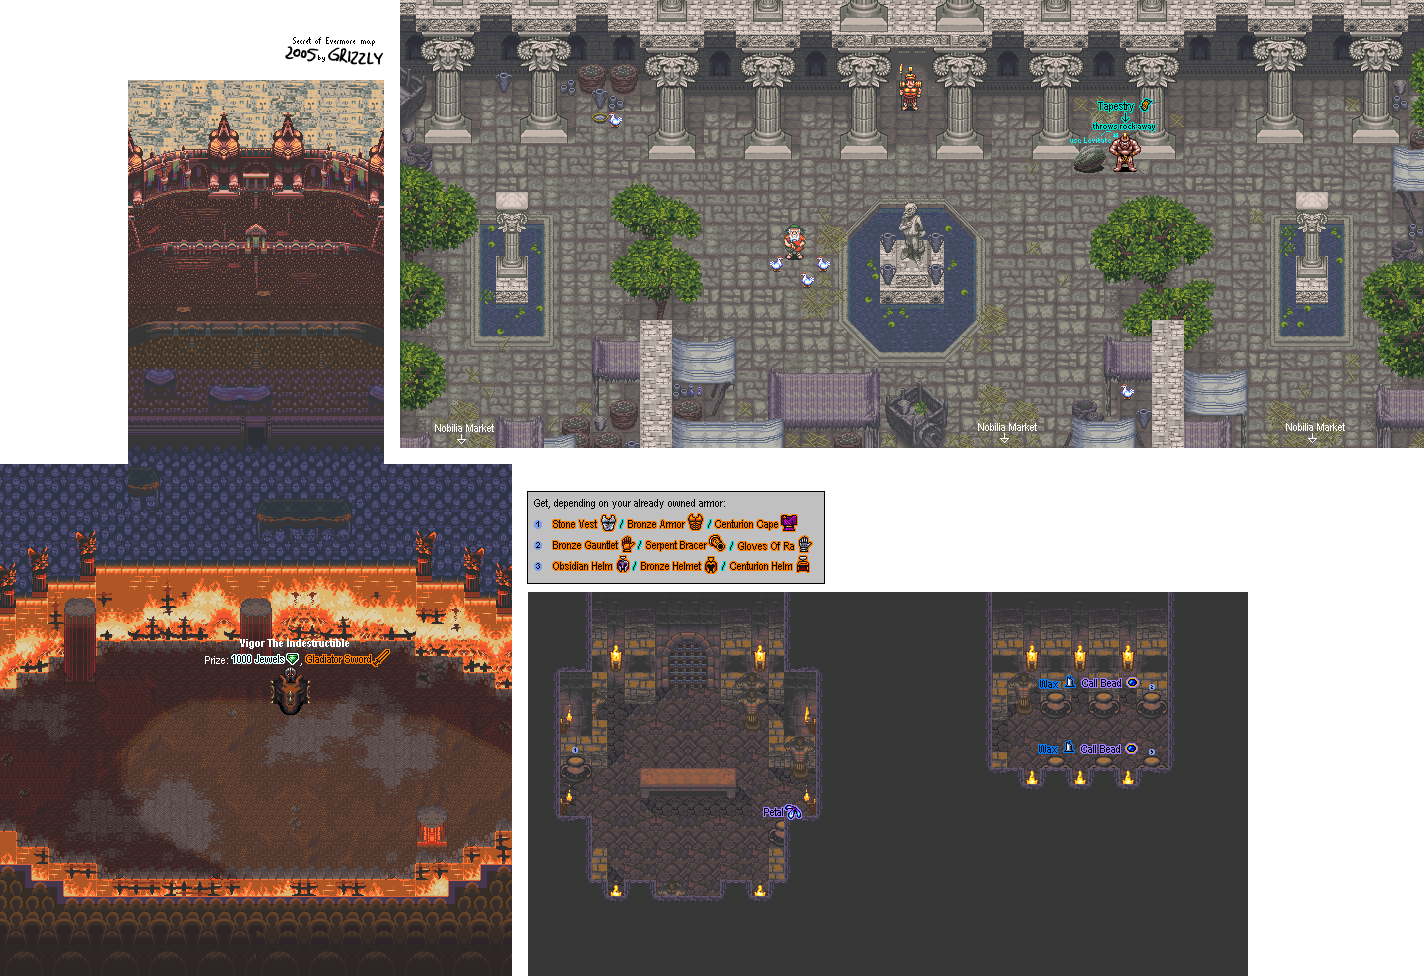
Once you're done in the marketplace, go to the right to enter the town square. Not only will you be reunited with The Dog, you'll also be sent to the gladiator arena because the Sacred Dog (read: your dog) chose you to fight the champion. Fun.
After Tiny escorts you to the coliseum, you'll be in the locker room. Pompolonius will introduce himself to you, then he leaves and the door closes behind him.
The really crappy part about this section of the video is that they don't even show you the hidden wall. It should be on the right side of the room. Walk through it, and you'll find even more armor and useful items.
Remember when I said to get the Stone Vest, Bronze Gauntlet and Obsidian Helm before you came in here? Well, guess what? If you did, there won't be a Stone Vest in the pot to the left as well as the Bronze Gauntlet and Obsidian Helm in the secret room. Instead, they'll be replaced with the better armor - the Centurion Cape, Gauntlets of Ra and Centurion Helmet respectively - without having to go through the market again to upgrade your armor once more! Score!
If you've gotten all the armor including the Centurion Cape up to this point, the jar to the left that usually contains the body armor contains the Thug's Cloak instead. The Thug's Cloak is a charm that increases your evade percentage.
Boss: Vigor
Gotta love the Final Fantasy VI characters making a cameo in the audience.
Anyway, you and Vigor (some big Roman guy in a spiked war chariot) will be introduced, then the fight begins.
Besides keeping yourself healed, your main order of business against this guy is to have the Horn Spear equipped and attack him in the back with a Level 3 attack charge.
His javelin and boomerang attacks can cause quite a bit of damage if you're in the vicinity of the weapons when he throws them, especially the javelin. When Vigor flexes, that's your cue to start running in order to avoid the rotten vegetables that the crowd throws at you. His ram attack also does some dangerous amounts of damage as well.
When you finally beat him down, you'll get 1000 Jewels for your efforts. Pompolonius will finally acknowledge that this is your dog, and he'll give you information about the Diamond Eyes. He'll also give you the Gladiator Sword, which will prove to be your best weapon so far.
The scene will then shift to the mystery man Pompolonius was talking to talking to a face that protrudes out of a brick wall. Could this be a trap...?
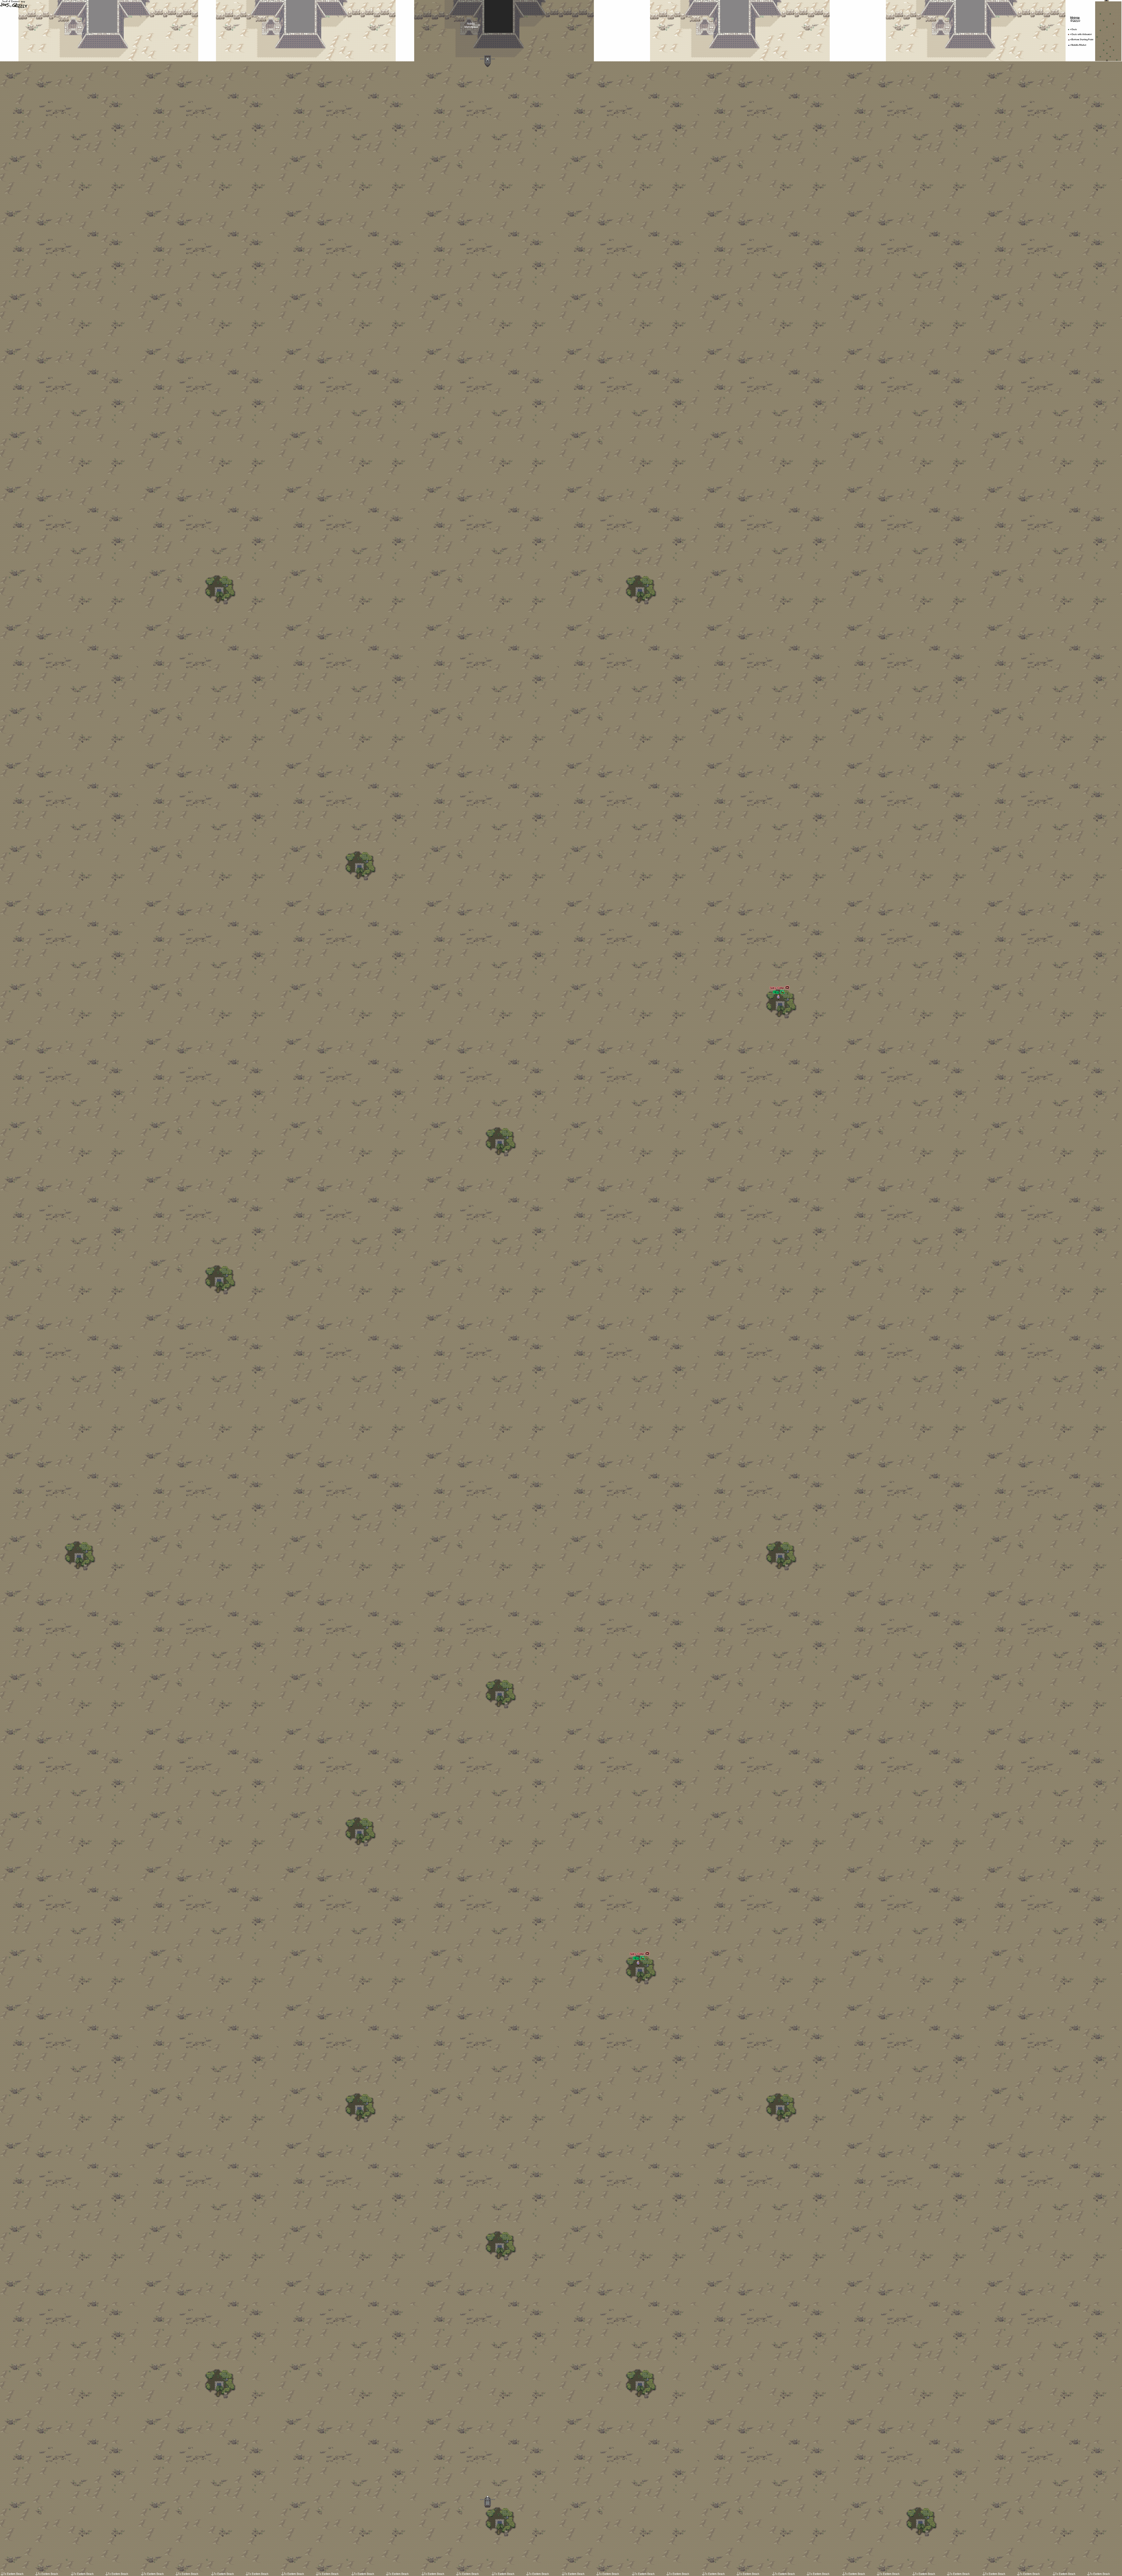
Also, in the Desert of Doom, you can warp back to the desert entrance near the coast. From the entrace, go straight south past the rock formation and the skull-rock cluster. Pass by the pebbles, then go to the large rock next to the small one that you used to warp to Nobilia. Walk into the top of the smaller rock, then move a little bit to the left and then run down and to the right between the two rocks. If you can somehow do it right, you can warp all the way to the southern desert entrance.
Now that you're done at the coliseum (and you have your dog again, yay), use the sniff feature around this area which is north of the market. You'll be able to find some alchemy ingredients, especially near the fountain and near some stuff positioned against the coliseum wall.
If you hunt down the alchemist who gave you Sting and talk to him with The Dog, you'll get a free Spike Collar that has more defense than the Leather Collar.
If you want to take the dog to the inn, you'll have to leave him behind when you go up the steps, then take the lift to the ground and ride it back up with the dog to the inn.
In order to get some answers as to how to get back home as well as find out where we are, we have to trek across the desert and enter the town on the other side.
Just to the left of the entrance to Nobilia is a spot where, if you stand in it, your character will spin around and lose a lot of health. Be sure to heal yourself when your HP runs low. After a while, the boy will say he's getting dizzy. You'll then get "Spin...spin...spin...wheeeeeeeee..." after a couple of minutes if you keep standing there, followed by "Gonna...gonna...hurl!" Keep standing there, and you'll eventually get sucked in the sand, receive 99 Rice and Spice, and then shoot out of the ground. You'll need these for trading in Nobilia.
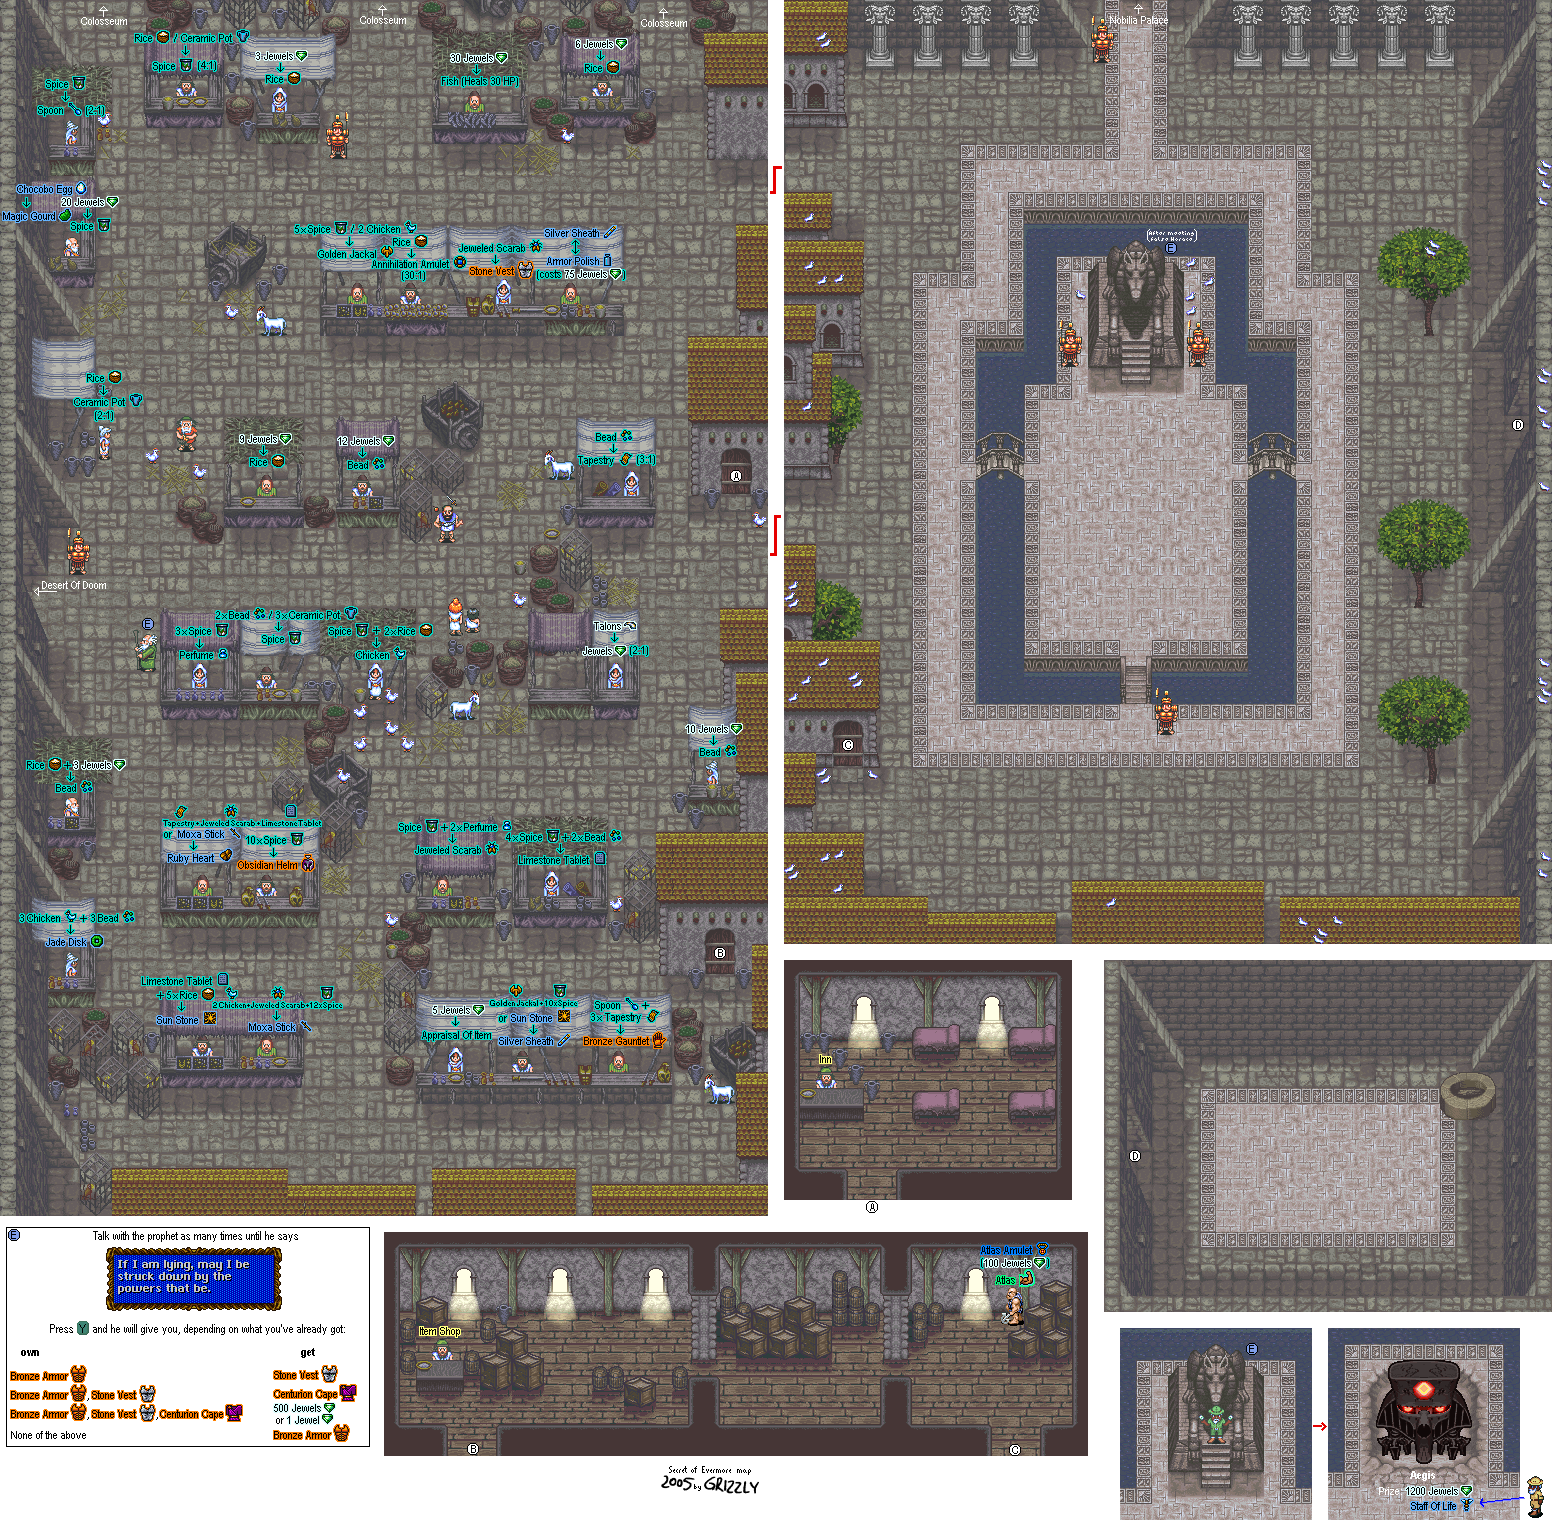
Receive Atlas alchemy from alchemist at the item shop
Exchange 1 Spice & 2 Perfumes each for 3 Jeweled Scarabs
Exchange 4 Spices & 2 Beads each for 2 Limestone Tablets
Exchange 5 Spices each for 1 Golden Jackal
Exchange 2 Spices each for 1 Spoon
Lift the northern rock with Levitate
Exchange 1 Tapestry to get Tiny to throw the rock
Exchange a Jeweled Scarab for a Stone Vest
Receive the Centurion Cape from the prophet
Exchange 3 Chickens & 3 Beads for the Jade Disk
Exchange a Tapestry, Jeweled Scarab, Limestone Tablet for the Ruby Heart
Exchange 10 Spices for the Obsidian Helmet
Exchange 2 Chicken, Jeweled Scarab, & 12 Spice for the Moxa Stick
Exchange a Limestone Tablet & 5 Rice for the Sun Stone
Exchange a Golden Jackal & 10 Spice for the Silver Sheath
Exchange a Spoon & 2 Tapestries for the Bronze Gauntlet
Exchange the Silver Sheath & 75 Jewels for the Armor Polish
The Silver Sheath will increase the attack power of all sword weapons. The Armor Polish will increase the defense of all body armor. The Moxa Stick will increase the power of all healing items and spells by 25%. The Jade Disk will increase your hit percentage by 3%. The Ruby Heart decreases enemy accuracy when you have low HP. The Sun Stone increases the attack power of both of your party members.
You have only fifteen in-game minutes before the crowd disappears to see the Sacred Dog statue. Your job here is purchase stuff with your Jewels and try to trade for as much stuff as possible. Also, being in the rings or any status/options screen with the stone background stops the clock until you leave them, which un-pauses the game. That's why I'm able to get everything that I'm able to get
If you talk to the fortune teller enough times, he'll ask the gods to strike him down if they exist. You'll have a choice of three things for the gods to turn him into: a chicken, a goat, and a basket. Press the B button when you reach this part, and he'll thank you for saving him from the wrath of the powers that be and reward you with a Stone Vest. If you've already bought the Bronze Vest and you've gotten the Stone Vest from whoever is selling it before you do this, you'll get the Centurion Cape instead.
If you buy a bunch of pots, you'll find jewels in them at times. Also, sometimes when you buy a tablet, you'll find a rather strange inscription on them that The Boy will read. Weird...
Do not press B near the chickens over and over again. The game will warn you, and if you keep doing it again...well, you'll find out. You can also "talk" to the goats if you want.
The best way to stock up on trading goods is to buy some rice, spice and beads. Then, you work your way around from there.
If you have a lot of rice, you can get some Amulets of Annihilation from one of the booths. It costs 30 Rice for one Amulet. You can go down to 15 Rice, but if you go any further down in price, he won't sell to you again. If for some reason, you keep turning down his prices, you can get 3 Amulets for 1 Rice at the risk of not being able to get any more if you accept the deal.
If you go to the right at the market, you'll see the city square where the Sacred Dog statue is. If you go south, you'll see a door. Go in.
The first thing you'll see is a spider walking into a pile of boxes to the right. If you walk where the spider goes, you'll see another Rogue. He'll give you the Atlas formula, which gives The Boy super strength.
Atlas
1 Ash, 1 Atlas Medallion
The only place you can get Atlas Medallions from is from this Rogue. He'll sell you one for 100 jewels, but the prices gets higher and you can only carry a few medallions at any given time. It does help at times, though.
If you go to the left in this building, you'll get the store where you can buy Nectar and whatnot. Going south through the door across from him takes you to two store fronts you wouldn't be able to access otherwise, one that gives you Limestone Tablets and another that gives you Jeweled Scarabs.
There is a woman who appraises items at the southern end of the market. If you talk to her, you can sell your trading goods for jewels. You can technically get all the Jewels you need without having to fight enemies just by going to the market.
When you hear nothing but birds chirping in the background, go to the right of the fish seller's booth and press B at the basket. You'll find 500 Jewels.
Coliseum Entrance
To the north of the marketplace is the coliseum entrance. If you get a tapestry from the market and hand it to him, he'll throw it really, really long. Go back to Blimp's Cave and you'll finally see the rock land in that gap between the cliff and the area where those two pots are. The stuff inside those pots is finally yours.
Town Square
If you go east from here, you'll find the fire pit that you won't be able to use until later in the game. You might find some Ash around the fire pit, but that's about it.
If you go north from here, you'll find the entrance to the palace, which is locked to you. One of the statues here talks, by the way. Just get up to it and speak to it like you would a person.