Here it is: every song from Illusion of Gaia!
Showing posts with label Illusion of Gaia. Show all posts
Showing posts with label Illusion of Gaia. Show all posts
Friday, November 2, 2018

PrinceWatercress plays Illusion of Gaia - Part 21 of 21
We get our reward for finding all of the Red Jewels, then attempt to change destiny by fighting a world-altering comet!
Dao

Now that you have collected all 50 Red Jewels, go ahead and meet with Gem in Dao. If you haven't handed all the Red Jewels you have left, do it. You will learn Gem's secret, and you will be teleported into a strange mansion.
Gem's Mansion
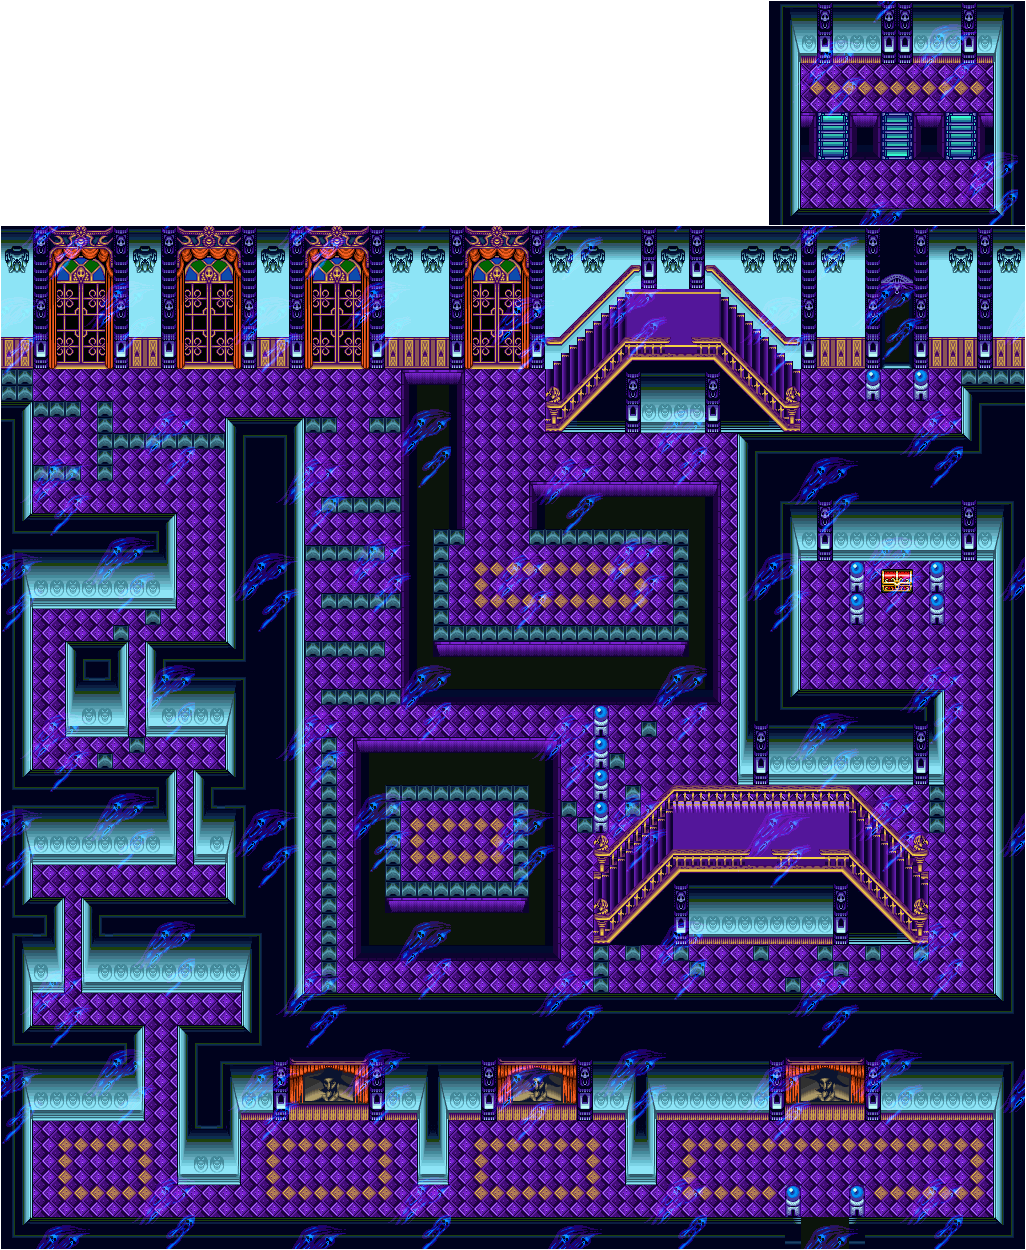
The enemies here are re-colors of those in the Diamond Mine. They are stronger and have more hit points, but they can be beaten. Unlike other areas, beating all the enemies here will not get you any stat boosts. So much for that.
There are two stairwells in this dungeon, and the left side of one of them is completely black. Use the Psycho Slide to get to the other side and continue with the dungeon.
At the end, you will meet Solid Arm, the first boss from Soul Blazer, another classic game by Enix and Quintet. He will tell you that Gem was a temporary form and that this is his real form, then talks about how Blazer - the hero of Soul Blazer - defeated him. He tells you that the Red Jewels you found contained his power, and that he also created the labor trade. He then decides to destroy you.
Get on the middle conveyor belt and block to keep from being hit by a fireball, then strike from as far back as you can before immediately blocking again. Strike again, block again, strike, block, strike, block, rinse, lather, repeat. If you go over to his side, you will be torn to pieces with a completely unblockable attack, so don't do that.
When you beat Solid Arm, Solid Arm will compliment you on your strength before telling you to hurry to the Tower of Babel. You will then teleport back to the final doorway. Heal up at the Dark Portal, then going into the final doorway.
Tower of Babel
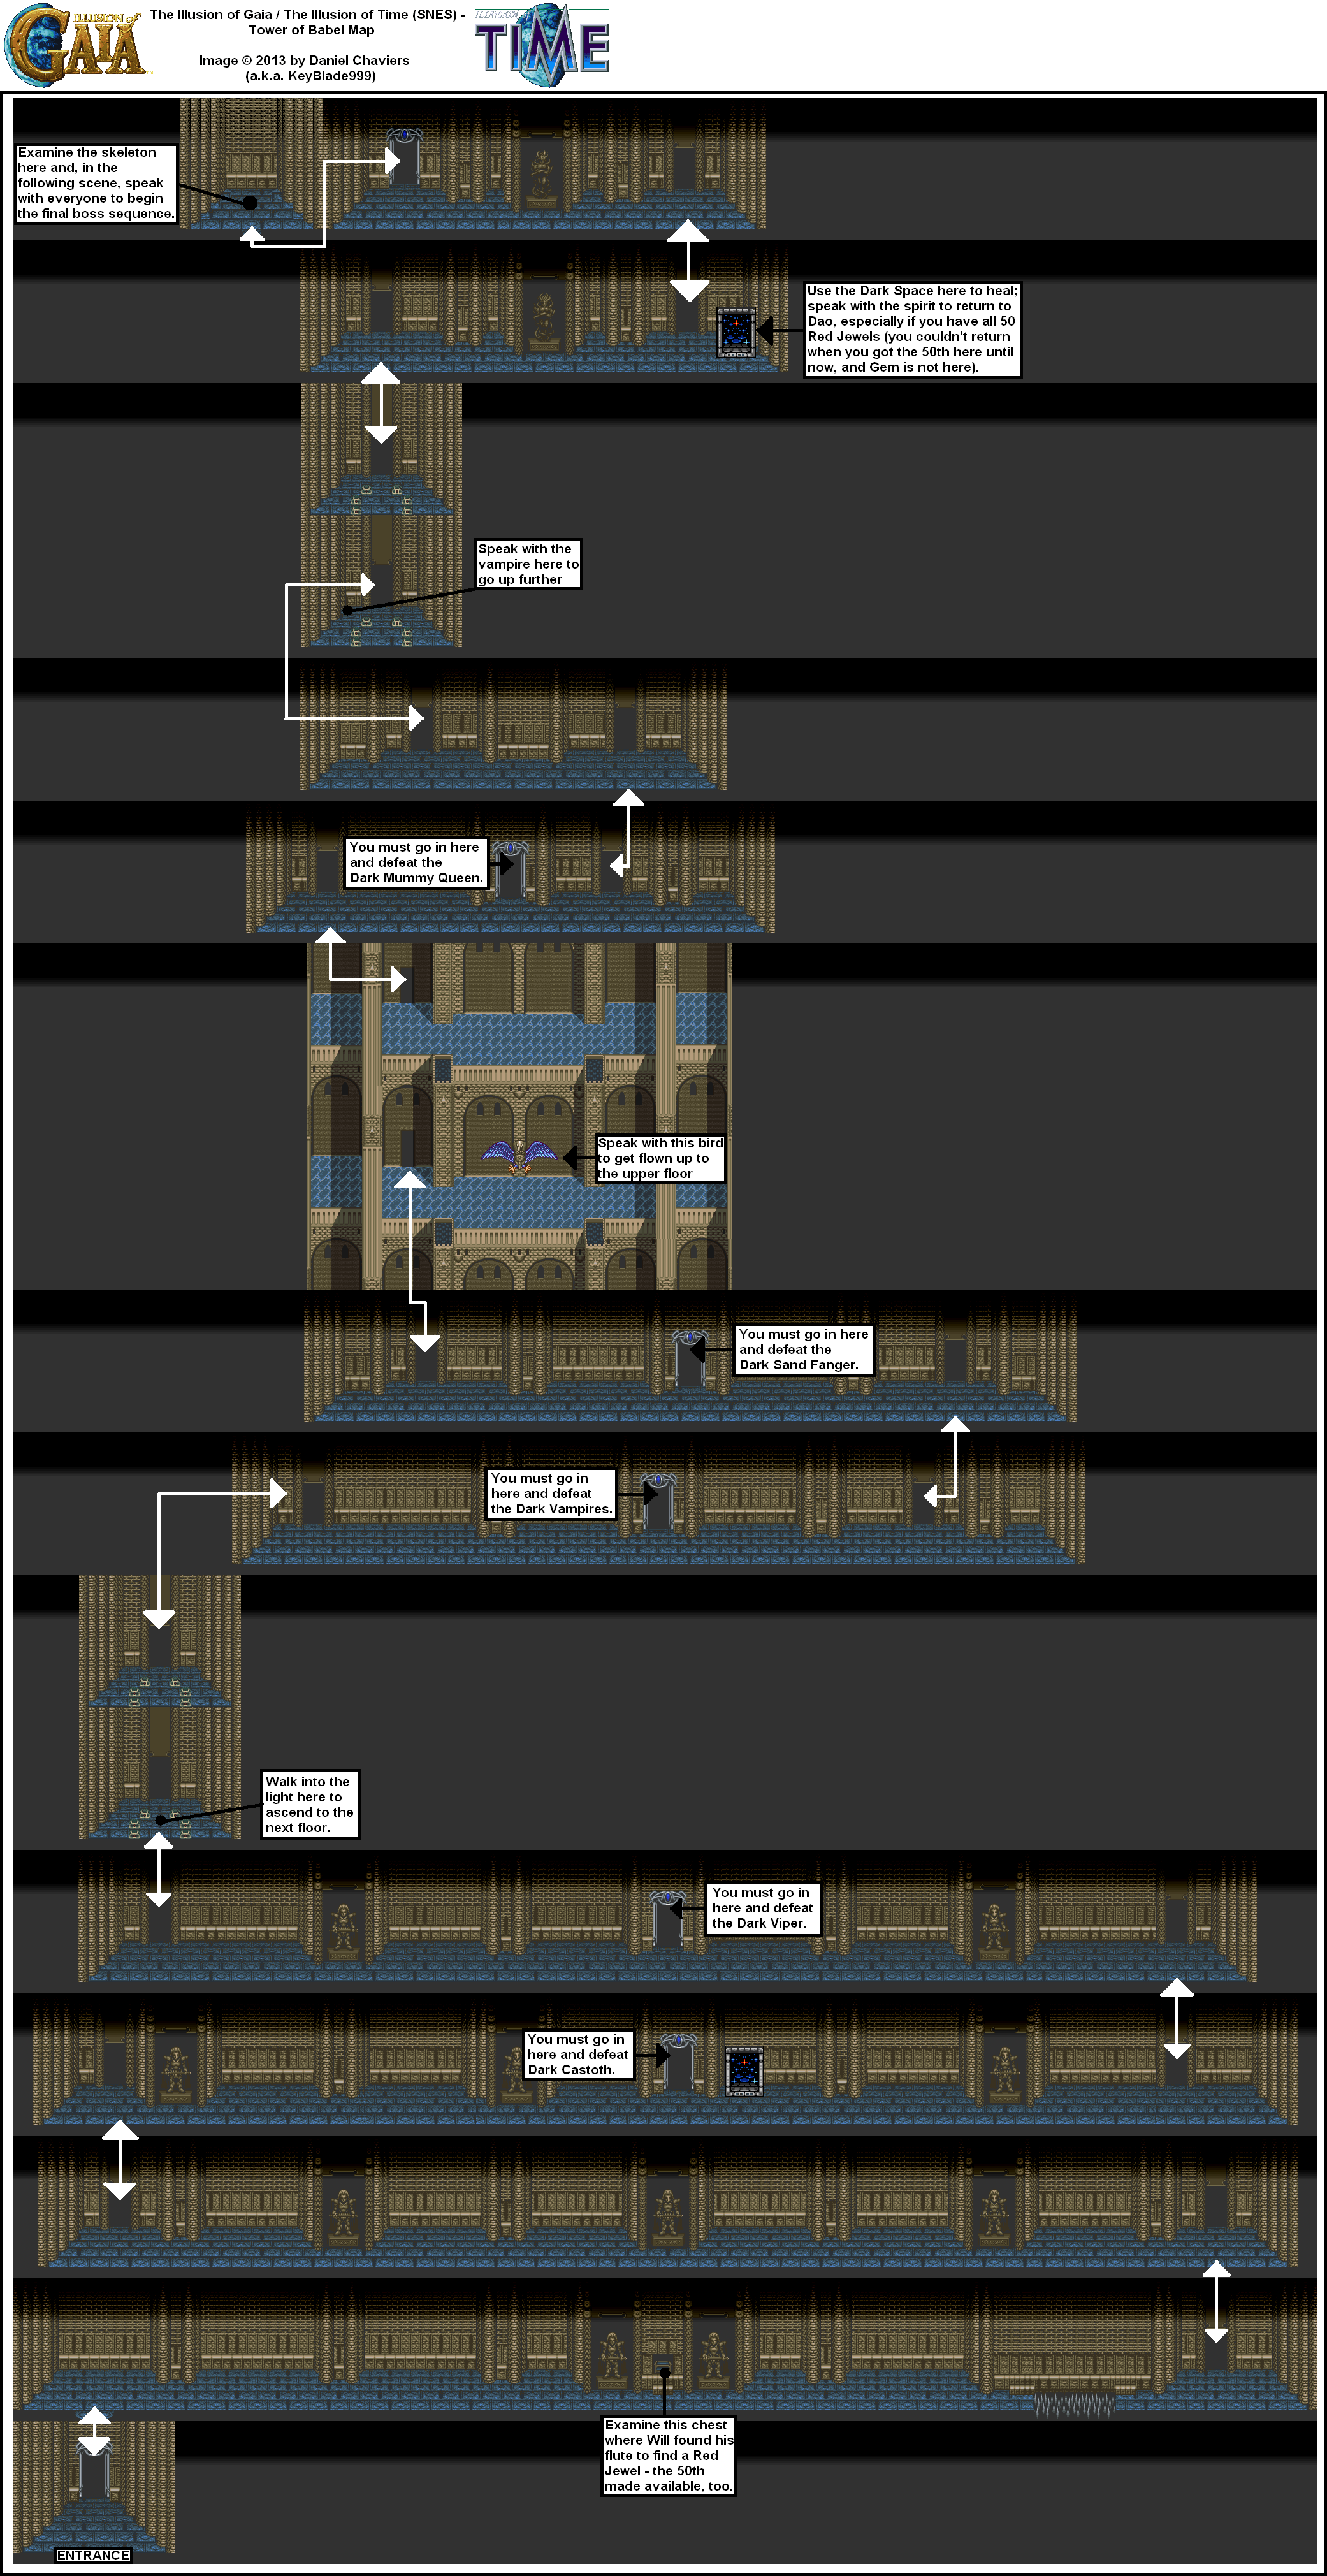
From there, equip the Crystal Ring, then interact with the skeleton at the end. This is Olman's body. You will then see Olman's spirit, who will tell you that there is a room filled with the comet's light where time passes so fast that people evolve quickly. You will then learn that you and Kara are both evolved humans, and that long ago, there was biological technology using the light of the comet that people freely used to make people and animals. Unfortunately, people also used that power to make weapons, demons were created, and the Knights of Darkness and Light were created to judge the fate of humanity. These Knights are your and Kara's ancestors. You will learn that the Mystic Statues were made by the Knights, and you will receive the sixth and final Mystic Statue.
You will then learn that the comet is closing in and that you and Kara should be at the roof of the Tower of Babel. You will be teleported there, then you will learn that the comet's power will bring ruin to the world. You will then see five spirits show up. Two of them are Neil's parents, one is Hamlet, one is Seth (who is now inexplicably dead), and one is a random person who died of a terminal disease. Talk to all of them, then talk to Will's father. The spirits will join you. Talk to Kara. You will learn the Firebird ability, then the Mystic Statues will spin around and you and Kara will turn into Shadow. The final battle for the fate of humanity is about to begin.
The final boss is Dark Gaia. Move to the side at the start of the battle and attack at the mouth on the ground with the Firebird projectiles. Avoid the fireballs it spits out that rain down.
When you beat the floor form, stand in the center and face north, and keep attacking. Press R to avoid the green fireballs, use the Firebird projectiles to take out the blue balls, and use the Aura to avoid the mouth laser. When Dark Gaia's head rears back, it is about to shoot that laser out. Make sure you get some damage before the laser comes out, as that is the only time Dark Gaia is vulnerable.
It will take some practice, but you will eventually beat Dark Gaia and see the ending.
The comet's power will disappear, and the comet will fly to the other side of the universe. You will meet both of Will's parents, then the planet will evolve 500 years forward. The continents will change shape, become the continents of the world that anyone can recognize, and evolve to the point that it should be at. Will and Kara will then return to Earth as ordinary children, and will have no memory of this journey, each other, or their lives leading up to the moment of their return. They converge into Shadow one last time and head back to Earth.
After that, the credits roll. We get to see a brief rundown of the places we have been and the people that we have met.
After this, the scene then changes to a modern (for 1993 or 1994) Japanese schoolroom. School has ended for the day, just like in the beginning of the game. Will heads home with Erik, Lance, Seth and Kara, with all of them wearing modern clothing. The game then ends. You've beaten the game!

Thursday, November 1, 2018
PrinceWatercress plays Illusion of Gaia - Part 20 of 21
Destiny has come calling as we head to the Tower of Babel to face the comet head-on!
Great Pyramid
When you enter the portal near the hieroglyph room, you will face the Mummy Queen.
First of all, you want to play this battle as Shadow. Make your way up to the upper level with the teleporter and hit the Mummy Queen, avoiding the bricks that fall down as you go. From there, drop down to the lower level from the center, and avoid the spirits. Use the teleporter pads and the center area in the upper level to move around and avoid the Queen as she splits into eight spirits that home in on you before eventually re-converging into the Mummy Queen. When she is back in her queen form, hit her again.
After you do enough damage, she will turn from human to some sort of green zombified queen. You will want to avoid the energy blasts that she shoots at you and the falling bricks, and to keep avoiding the spirits and hitting her when she is back in corporeal form.
After she takes enough damage, the queen will turn into a spinning wheel of eight spirits. Seven of them will flicker, but one of them will be solid. Hit the solid one to get the queen to transform back so you can do some damage. It will not be long before you win this battle and get the fifth Mystic Statue.
You'll be back in the hieroglyph room with Kara. Olman's voice will tell you that he is at the Tower of Babel, and to meet him there with the statues quickly.
Kara will tell you that Neil has built another airplane. You'll then be back in Dao. Talk to Neil to advance the plot. He will take you to the Tower of Babel, then take Kara and Erik to South Cape.
Tower of Babel
After a conversation with Neil, Erik and Kara, Will drops down to the Tower of Babel.
As you make your way through the tower, you will see Shadow and Freedan statues. Search the altar where Will says he found his flute, which is the first one you find, and you will find the 50th and last Red Jewels.
You cannot drop into the spike pit no matter how hard you try. Just shimmy over to the other side.
Run into the force field, and something will drop from the flute. Press A on the shining thing that comes out, and you will find the Crystal Ring that King Edward was wanting at the beginning of the game. It turns out the Crystal Ring was on the flute the entire time.
From there, equip the ring and go through the force field again. This time, you will pass through. After you go a little bit to the west, Kara will rejoin you from out of nowhere. It is revealed that the ring on the mummified queen's finger is similar to the ring that you have, and that Kara had it and had been wearing it all along, which explains why she is on the second floor with you. From here on out, Kara will follow you while you are in the tower.
You'll soon meet a spirit. Talk to the spirit, and the spirit will tell you about the effect the comet's light has on living things as well as what the comet will do to the planet. Other spirits will talk about evolution in general.
You will meet other spirits as you press on, and you will eventually come across a doorway that looks like the Crystal Ring. Nearby is a Dark Space portal. When you go into the doorway, you will face Astoth, this time as Astoth. Stay across from Astoth while avoiding everything, and when he opens his eyes, just stand in front of him and keep smacking him. He's done.
The Tower of Babel is a boss rush, and you will face palette swaps of the bosses in rooms that are similar to the Dark Portal room. The same strategies apply to a good extent, but you will have a lot more range, a lot more health and a lot more power. This makes battles with Astoth
Though it seems like you can skip the doors to the bosses, you will have to fight them.
Also, when you fight Viper and take the teleporter to the next floor, you will have to use any Herbs that you have to heal. In the original Japanese version, one herb recovered all your hit points, but in the Western versions, they only recover eight of them. Ouch.
When you face the Vampires from Mu the second time around, it will not be under a time limit as nobody will be tied up near a huge bomb.
After you beat the Sand Fanger, Kara will have disappeared. Continue on, and you will meet Viper. Talk to him to go up to a higher part of the tower and continue.
The hardest boss battle to do the second time around will be the Mummy Queen, even though we've done it earlier in the video, since you won't be any more powerful the second time around than you were the first.
You'll eventually reach another platform, and Jack the vampite will take you to the top of the tower. You'll meet Kara again, and she will tell you that Sylvana is immortal because of the comet and that she will only rest in peace when the comet is gone.
By going further, you'll find the final Dark Space portal of the game as well as the doorway to the final battle. The spirit between the portal and the doorway will take you back to Dao if you want. Head back there, as there is one more loose end besides the comet that is left...
PrinceWatercress plays Illusion of Gaia - Part 19 of 21
Now that we've taken care of one half of the Great Pyramid, it's time to handle the other half.
Great Pyramid
If you go all the way to the exit to the right and use the Aura Ball near the exit, you'll enter a seemingly empty hall. If you go up to the northwest pillar, face it and press A, you will find a Red Jewel that is very easy to miss.
The mummies move pretty fast, and when you destroy them, their spirits will come out of their bandaged husks and fly after you. The bodies will leave Dark Points; the spirits should be destroy anyway so that they don't gang up on you.
In the second part of the fourth chamber, you will be dealing with crushing ceilings with spikes. Thankfully, these spiked ceilings are not instant death, but when you're having to deal with four orbs shooting unblockable lasers at you, they can be a pain. If you are using the Spin Dash, the crushing ceilings will not hurt you at all while you are in mid-move.
There are more spiked crushing ceilings in the third part of the fourth chamber, but thankfully that whole area is a lot easier to get through.
Some of the areas in the walls where the mummies come in the sixth chamber out of hide stairways leading to hidden doors. Watch where the feet are and look for where the dark blue stairs at the feet are to find them.
When you come back to the hieroglyph room with the last hieroglyph, you will be told to move to the left without a sound. Head to the left side of the room, and The Jackal will show up with Kara. He will know about your mission, and that King Edward tricked you into this mission in order to achieve the same power of transformation in order to get anything he wants. When The Jackal tells you to come with him to Edward's Castle, you will change back to Will (assuming you aren't Will). Equip Lola's Melody and play it to spring the trap that will burn The Jackal to a crisp and kill him. Place the last hieroglyph, and if you have all the hieroglyphs in the proper place, a floor portal will show up in front of the door to the hieroglyphs. By taking it, you will face the fifth boss...
Wednesday, October 31, 2018
PrinceWatercress plays Illusion of Gaia - Part 18 of 21
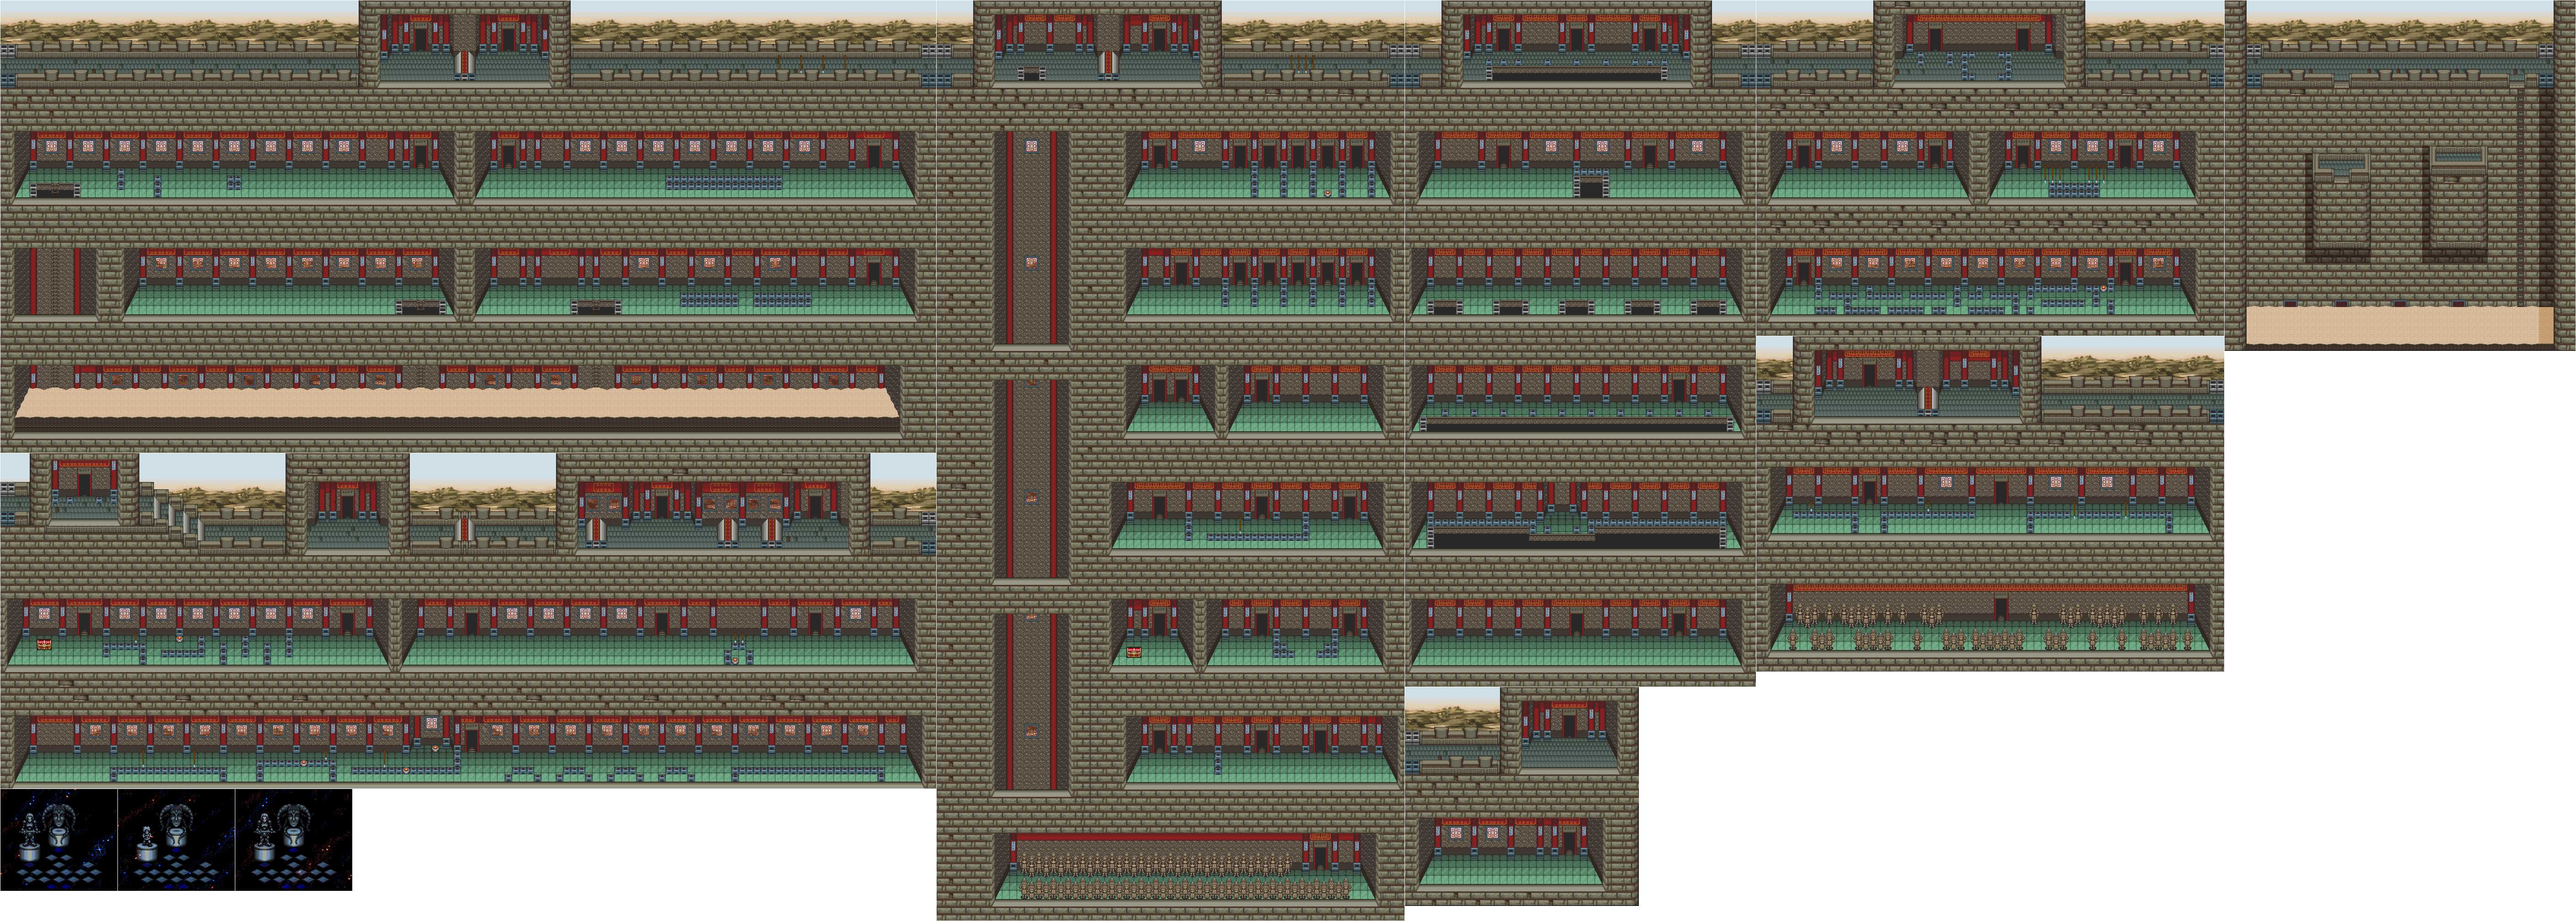
It's time to enter the Great Pyramid...and this one has six different chambers. You'll have to get through them all to get through this one.
.png)
Dao
The exit out of the village is to the west.
Great Pyramid
The orbs at the beginning shoot unblockable lasers, and if you destroy them, you will open up a path to a Dark Space portal. If you go north up the stairs, you will see a wall with some panels as well as a man in blue who will tell you that there is a trap in the room that responds to sound. You'll be coming back to this room again.
When you enter the Dark Space portal, you will have access to another statue to the right. Talk to Gaia first, and she will tell you about the ultimate warrior, Shadow. She will also give you the Aura Ball, which is used when you transform into Shadow.
Gaia will also tell you that most of the pyramid is below the surface, and that you will have to go down into the pyramid as Shadow. Go up to Shadow's statue, and you will turn into Shadow, a warrior made from the light of the comet. Since his body has no shape, he will be able to use the Aura Ball to slip into the cracks in the pyramid to go down.
Shadow punches things when you press A, and he has a lot of range.
If you see a lot of bricks underneath the floor, you can equip the Aura Ball and press B to turn Shadow's body into water in order to enter the rest of the pyramid. You will see another Dark Portal that will allow you to change into Will and Freedan when necessary. The dark blue portal will take you back to the upper level if you press A while standing on it.
The rest of the time, if you press B with the Aura Ball, you will sink into the floor.
The bird men will carry shields and spears, and they can run at you as well as lunge at you. If they step back with their spears out, they are about to do the lunge.
When you enter the first chamber, teleport to Will in order to use your Spin Dash to get around. You will be switching between Will, Freedan and Shadow often in order to get through all six areas of the pyramid.
When you reach the end of a section, you will find a Heiroglyph Stone. You will have to enter the room across from the stairs in the upper part of the pyramid entrance and consult Olman's journal in order to figure out where to place the tone. Thankfully, there will be a portal leading back to the pyramid entrance and the puzzle room near where you find the stone. You must place the symbols in the same order where they appear in Olman's journal.
If you see fireballs come out of what looks like nothing, strike at where the fireballs are coming from. There are invisible bird heads that will shoot at you, When you attack it once, it will stop being invisible but it will keep firing out fireballs that you can block.
There are switches and tiles that allow you to raise and lower certain pars of the pyramid in order to get around. Take advantage of them to get through the later parts of the pyramid.
PrinceWatercress plays Illusion of Gaia - Part 17 of 21
We trek to the desert town of Dao, where we meet some familiar friends...as well as a familiar foe...
Angkor Wat
(Mapthrough).png)
(Mapthrough).png)
.png)
One of the enemies near the exit out of the bush maze can only be hit with Dark Friar.
Once you go north of the bush maze, you'll learn a third attack for Freedan: the Earthquaker. Press A when falling off a ledge and Freedan will stick his sword in the ground, causing an earthquake that will stun any enemies on the screen.
Underneath a bush in an outside area will be the Black Crystal Glasses. In a later room in Angkor Wat, there will be crystals flying everywhere and a blinding white light as soon as you go in. You can still move around, but you will not be able to see anything due to the whole screen being white. Using the Black Crystal Glasses as an item will allow you to get rid of the white light surrounding the room. You'll need to be able to see so you can figure out which pit will lead to the floor below and to another Dark Space portal that will let you change back to Will.
By changing back to Will, you'll be able to slide under a hole in the wall with the Psycho Slider and explore more of the dungeon.
When you make it to the fifth floor, talk to the ball of light. Will will be shown an image of the world in the future and be told that he will usher in the modern age. You will be given the Gorgon flower, which will turn the people in the village who were turned to stone back to normal. Also, if your inventory is full and you have Red Jewels (which you probably will have), one of the Jewels will be taken to Gem and the Gorgon Flower will take its place in the inventory. With that out of the way, you can now leave Angkor Wat.
Natives' Village

Go to the hut on the right and use the Gorgon Flower to turn the girls who were turned to stone back to normal. If you talk to the girl in the middle after restoring her, she will give you a Red Jewel. Once you restore all three girls, Erik and Kara will show up, and Kara will tell you that the animals have returned to the forest, and that the animals (and the people, in the Japanese version) no longer prey on each other.
If you talk to Kara, she will tell you that a nearby village has taken advantage of the situation in the village to turn villagers into laborers. From here, you can head to Dao whenever you're ready.
Dao
When you leave the house, you can talk to a man nearby. He will tell you a letter and some luggage have arrived from Bill and Lola, and he will give you two things: the letter and Olman's journal.
If you read the letter, you will learn that Bill and Lola are aware of your incredible journey and that they will be seeing you in Dao. You'll also find out that they have sent the journal your way. After that, go ahead and discard the letter; you won't be needing it anymore.
The house next door to where you start is Neil's house. Neil will tell you he is here in Dao to replace the slave labor trade with pepper imports, and he will also tell you about the nearby pyramid.
To the east of Neil's house is Gem.
Near the pool of water in the northeast corner of town, if you face north towards one of the walls and press A, you can find a Red Jewel.
The house to the east of Jewel is a snake-whacking mini-game. Whack as many snakes that come out of the pots as you can in one minute. Stand near the center pot, and face left or right when attacking. If there is a snake in the center pot, you will be able to whack it as well. There are two Red Jewels to be had from this mini-game, and if you do what I've just mentioned, you can very easily get both of them and hit far more than enough snakes. Don't worry about the Red Jewels being in your inventory; they will be sent to Gem.
You'll get a clue that the living cannot enter the nearby pyramid, and that one has to transcend the body in order to enter. Hmmmm....
Behind the snake mini-game house is a woman. If you talk to her, she will hand you a sheet of paper with a picture of a jackal on it, signifying that The Jackal is here.
Tuesday, October 30, 2018
PrinceWatercress plays Illusion of Gaia - Part 16 of 21
Our adventure takes us into Angkor Wat...and it's pretty expansive.
Natives' Village
If you examine the skeletons in the area, you will find out they have only recently died.
If you talk to Kara, you will advance the plot. She, Hamlet and Erik will enter the hut on the left. Follow them inside, then talk to Kara to advance the plot again. Everyone will rest, and as they do, native will show up and attack everybody.
Everyone will be tied up, and the villagers are about to have the party for dinner. Suddenly, Hamlet will look at Kara before running right into the fire, sacrificing himself so that you can go free. Suddenly, a spirit pops out of Hamlet's body, and that spirit is Will's mother. She will explain that it was Hamlet's wish to sacrifice himself so that the villagers could eat, and that everyone must combine their strengths to find the Mystic Statues, head to the Tower of Babel and combat the darkness that is soon approaching the planet. Erik, Kara and Will will soon be untied, and you can move again.
By talking to the natives, you will learn that they had bugs to eat, but not much else. They also become friendlier (even though they are cannibals in the Japanese version). One of the boys will point to the northeast, and will draw a picture of Angkor Wat on the map as if to ask you to go there. Another one will want you to go to a nearby skeleton, as if to tell you that he knew that person.
From there, all you can do is head to Angkor Wat.
Angkor Wat
Use the Psycho Dash to attack the blue men with the extending heads to destroy the head, then keep striking when the eye on their chests open and they start running at a high speed.
The green flies will fly around in random directions. If you can get to them when they have come to a complete stop for a little bit, you can easily destroy them. The Psycho Slider will allow you to keep up with them and maybe even get some big hits in on them if they are mobile.
Some of the bushes will sprout legs and spring towards you if you get too close. You can tell the bush monsters from the real bushes if you look hard enough, and you can also take them out with the Psycho Slider.
Be sure to look around the entrance to Angkor Wat before you go inside to get a health bonus that can be easy to miss.
When you go inside, you'll meet even more enemies.
It should be mentioned that the beginning of the music for this dungeon was used earlier in the game for the Memory Melody.
The brown skulls will move around in a figure eight pattern, and if you do not take it out fast enough, it will split in two, chase after you and become invulnerable until they combine again. The Psycho Dash can do a lot of damage to them.
The Golems have a lot of health, and if you get to close to them, they will roate their torsos to do quite a bit of damage with their arms. The Psycho Dash and Psycho Slider both work best on them.
The ramps just northeast of the entrance lead to the first Red Jewel of Angkor Wat.
The purple skulls will follow the walls. Hitting them from the south with the Psycho Dash will take them out quickly, which is useful, as they go faster the more damage you do.
The large brown bugs on the walls will shoot blue fireballs that you can block, and they can also drop small green worms that you can thankfully destroy.
At one point, you will drop down and fall into a trap door. You will be walking on...something...when you get down there, but all that happens when you do so is that you hear a funny noise as you walk.
Some of the Golems will drop down from higher areas. When that happens, debris will drop from the ceiling. Look for shadows to see where not to stand so as not to get hit by it. Be sure not to be near the ledges or else they won't drop down to where you can hit them.
There is a chest with an herb at one point. Use the stairs on the other side to the get to the herb; the ramp will allow you to continue with the area and will force you to backtrack for the herb if you did not take the stairs.
In the maze of bushes, you will have to go clockwise in order to make it to the exit. You'll also find a skeleton carrying a journal that signifies that he was part of Friezer's expedition party, as well as a Dark Portal.
PrinceWatercress plays Illusion of Gaia - Part 15 of 21
In this episode, we enter the strange maze that is the Mountain Temple to find the Teapot.
Euro
The exit out of Euro is at the southeast corner of town.
Mt. Temple
.png)
Also known as Mt. Kress and/or Mountain Temple.
The vines act as bridges.
The grey skulls move around in sine wave patterns (much like the Medusa heads in Castlevania) and can easily be destroyed in multiple hits. They do move back and forth, but they can cover a lot of ground.
The spiders will jump from one bridge to another using their webbing, and they can also spit acid at you that can linger on the floor for a little while. The Psycho Slider can make quick work of them.
The gold skulls move back and forth and will shoot lasers out of their eyes. You can block the lasers, but it is just as easy to move out of the way when possible.
If there are any folds in the vine bridges, they are ramps. Use the Spin Dash to take them to a previously inaccessible location.
The sprites with the flutes fly around and summon fireballs that can encircle them before going in four different directions. They usually spawn in the areas made of mushrooms, and you will want to fight them with Freedan and his more powerful Dark Friar, which creates four smaller fireballs that spiral around the screen and cause massive damage when either A is pressed a second time or the fireball runs into an enemy. When possible, fight these guys as Freedan, since you will need the range.
There is only one Red Jewel in Mt. Kress/Mountain Temple, and it is west of the series of ramps to the left of one of the Dark Space portals. Just travel south and the west and follow the long path in order to get to it.
The Mushroom Drops can be used to fix some broken bridges to reach some areas that you could not get to before. You'll be finding them in three chests in the area in order to get to the end.
There is a Dark Space portal that allows you to learn the Aura Barrier for Freedan. The Aura Barrier acts as a shield, and to use it, hold A and quickly alternate between the L and R shoulder buttons. Mirror panels will move around you for a short time, but they make you invulnerable to enemies and destroy anything that gets in close.
When you get the Teapot, that's your cue to get out of the area. Hope you remember how to get out of here.
Euro
Meet with Neil again and use the Teapot near him. Neil's parents will turn into members of the Moon Tribe. You'll learn that both of Neil's parents are dead and that they used their bodies. Talk to Neil, and he will realize how important his parents are and that he wants to be alone.
You'll be back in the guest room. Neil will leave you to become president of Rolek and stop the slave labor trade, and tells Kara that an old friend is wanting to see her. That old friend is Hamlet, who has come all the way to Euro (by way of Rolek's delivery service in Watermia, thanks to Lilly). Talk to everyone, and talk to Kara to advance the plot and head towards Angkor Wat.
Natives' Village
Before going to Angkor Wat, everyone will stop over in a village. There are two huts, and if you enter the one on the right and look in the jar near the door, you can find a Red Jewel.
Monday, October 29, 2018
VGMusic Explorers covers the Itory Village theme
Here's another one I found just by typing in "Illusion of Gaia" in the search bar on YouTube and looking for whatever.
Nice.
PrinceWatercress plays Illusion of Gaia - Part 14 of 21
This one's a long one. That's why I've made sure I never went over 20 minutes on RPGs from this point on.
Great Wall of China
Now that you can perform the Spin Dash, head back to the ramps that you jumped over before. From there, power the Spin Dash up and use it to get over the ramps. Be ready to hold the opposite direction in case you don't want to go over more ramps than you want. Now that you're able to go over the ramps again, you'll be able to enter a previously inaccessible area. Some of the fireball enemies will shoot fireballs into the air that will drop in random spots.
You'll soon find another Dark Space portal which will allow you to transform into Freedan. You can use him to hit the switch controlling the two spears (hit the switch twice) and go even further into the Great Wall. Use the Dark Friar to take out the archer you could not reach as will so you can explore even more of the dungeon.
In the maze with the clay statues, you will have to use your telekinesis as well as your attack to move the statues around, as the statues do not transform into enemies right away until you hit the switch at the end.
You will have to transform back into Will at some point to reach the final parts of the dungeon. Until then, use Freedan to take out the enemies so you can get those stat boosts. Then, you can access the final Dark Space portal so you can transform back.
Once you Spin Dash across the final ramp, you'll take on the Sand Fanger. Unlike other bosses, you are forced to face the Sand Fanger as Will. Drop off the wall and land onto the sand below to star the fight.
The Sand Fanger has three attacks: the diving attacks from one side of the other, the eggs and the jump straight into the air followed by the dive back into the sand.
If you can follow the Sand Fanger while he is in the sand spitting out eggs, you'll be able to do some damage and take out the bugs that come out of the eggs. Some of the eggs will sprout an eye and legs and walk across the screen at an angle until they disappear. Just let those run around without them running into you. Be sure to keep the Sand Fanger nearby
Once you beat the Sand Fanger, a ladder will materialize leading to the other side of the room. Go down the stairs and you will finally meet Lance. Lilly will reunite with Lance, who finally has some medicine to cure his father with (whether it comes from the Sand Fanger is never mentioned). Talk to Lance, and you will hand the necklace back to him. Lance will then ask you to give him some alone time with Lilly. Walk to the right - with the camera not following you - and the next cutscene will play. This time around, Lilly will reciprocate the same feelings for Lance, then you'll go back to Watermia.
Watermia
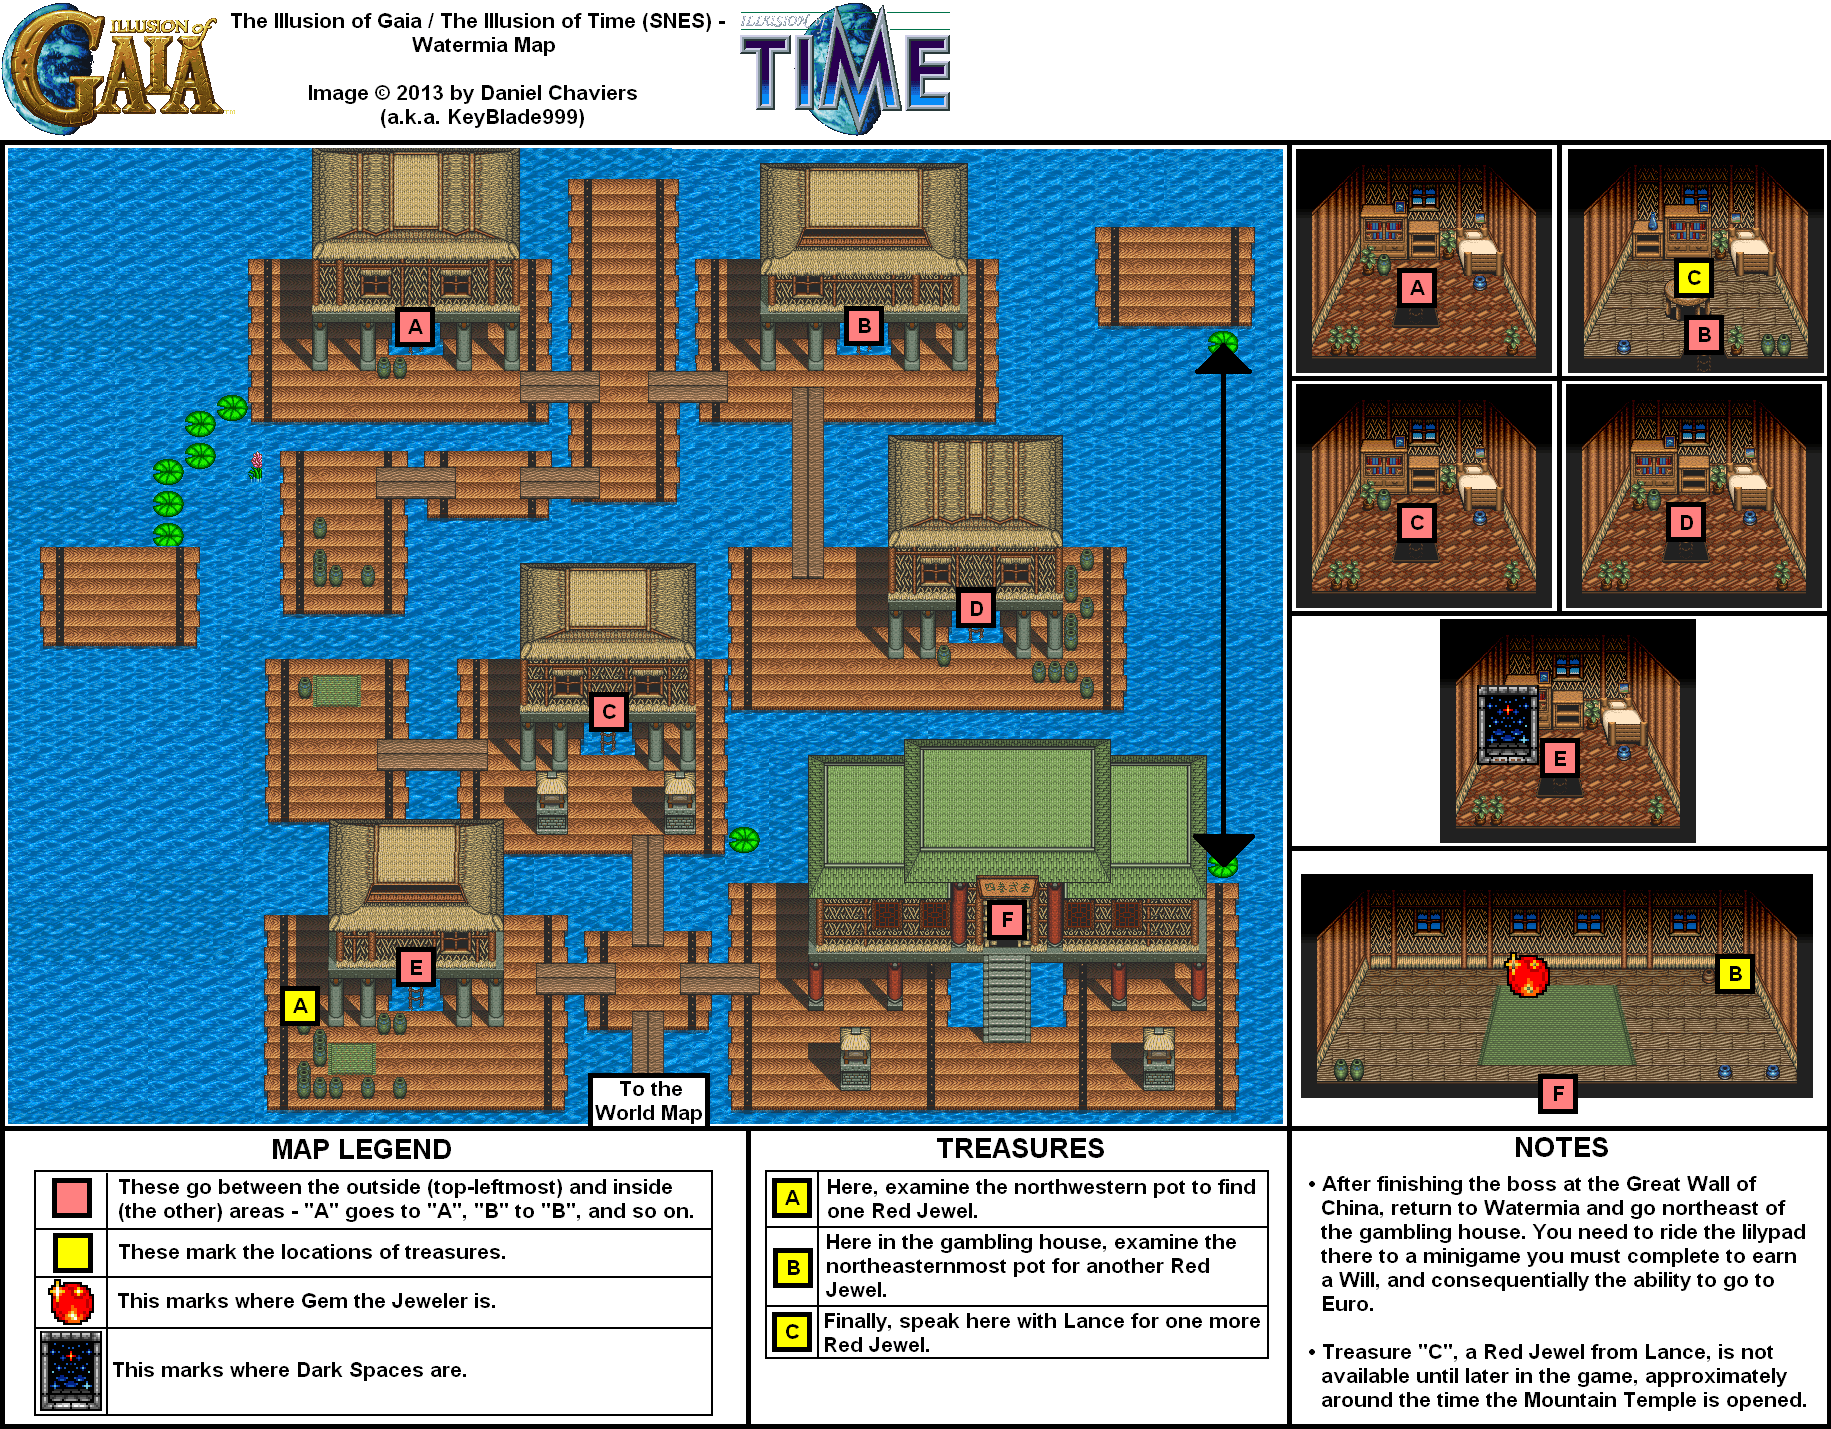
From here, talk to everyone. It will be nighttime. You will have to get some Kruks in order to trek across the desert to the west.
Head to the gambling house and take the lotus leaf to the isolated raft on the other side when it shows up. Talk to the man blocking your path and say yes on both questions when he asks you if you want to play Russian Glass. Talk to the man in the straw hat, and he will tell you the rules, which are pretty simple: don't drink the glass that kills you, and whoever is left with the last glass is the loser.
The game makes it pretty simple: always drink from a glass on the left-hand side. If you do not, the game gives you a prompt before drinking, and if you still take the drink, you will die and spend an entire Dark Point. If you don't get the prompt before drinking, you're doing it right.
When it comes down to one drink, your opponent, his pride gone and his luck run out, drinks the last glass in order to not to tarnish his reputation. He will die, then you will end up back at the house where he lived. She will give you his will as well as four Kruks, even though you have six people in your party. Go to the inventory, equip the will and read it with B. You will learn that he learned that he was dying within six months and that he wanted to get as much money for his wife and child, and that he has left part of his fortune to you as well as four Kruks. He also apologizes for the unhappiness that he has caused others.
Go back to Luke's house and talk to everyone. You will find out that Lance and Lilly are staying in Watermia with Lance's father, and Lance wishes you luck when you speak to him. You'll learn that everyone is heading to the town of Euro, where Neil's parents not only live, but also run a successful business known as Rolek. Talk to Neil to advance the plot.
Once you make it to Euro, feel free to discard the Will from your inventory. You won't need it after you ride the Kruks across the desert.
Euro
You will end up in the guest room of Neil's parent's home. Erik and Kara will be amazed by the size of the house.
If you go upstairs through the door to the left of the guest room entrance, you'll see Neil with his parents.
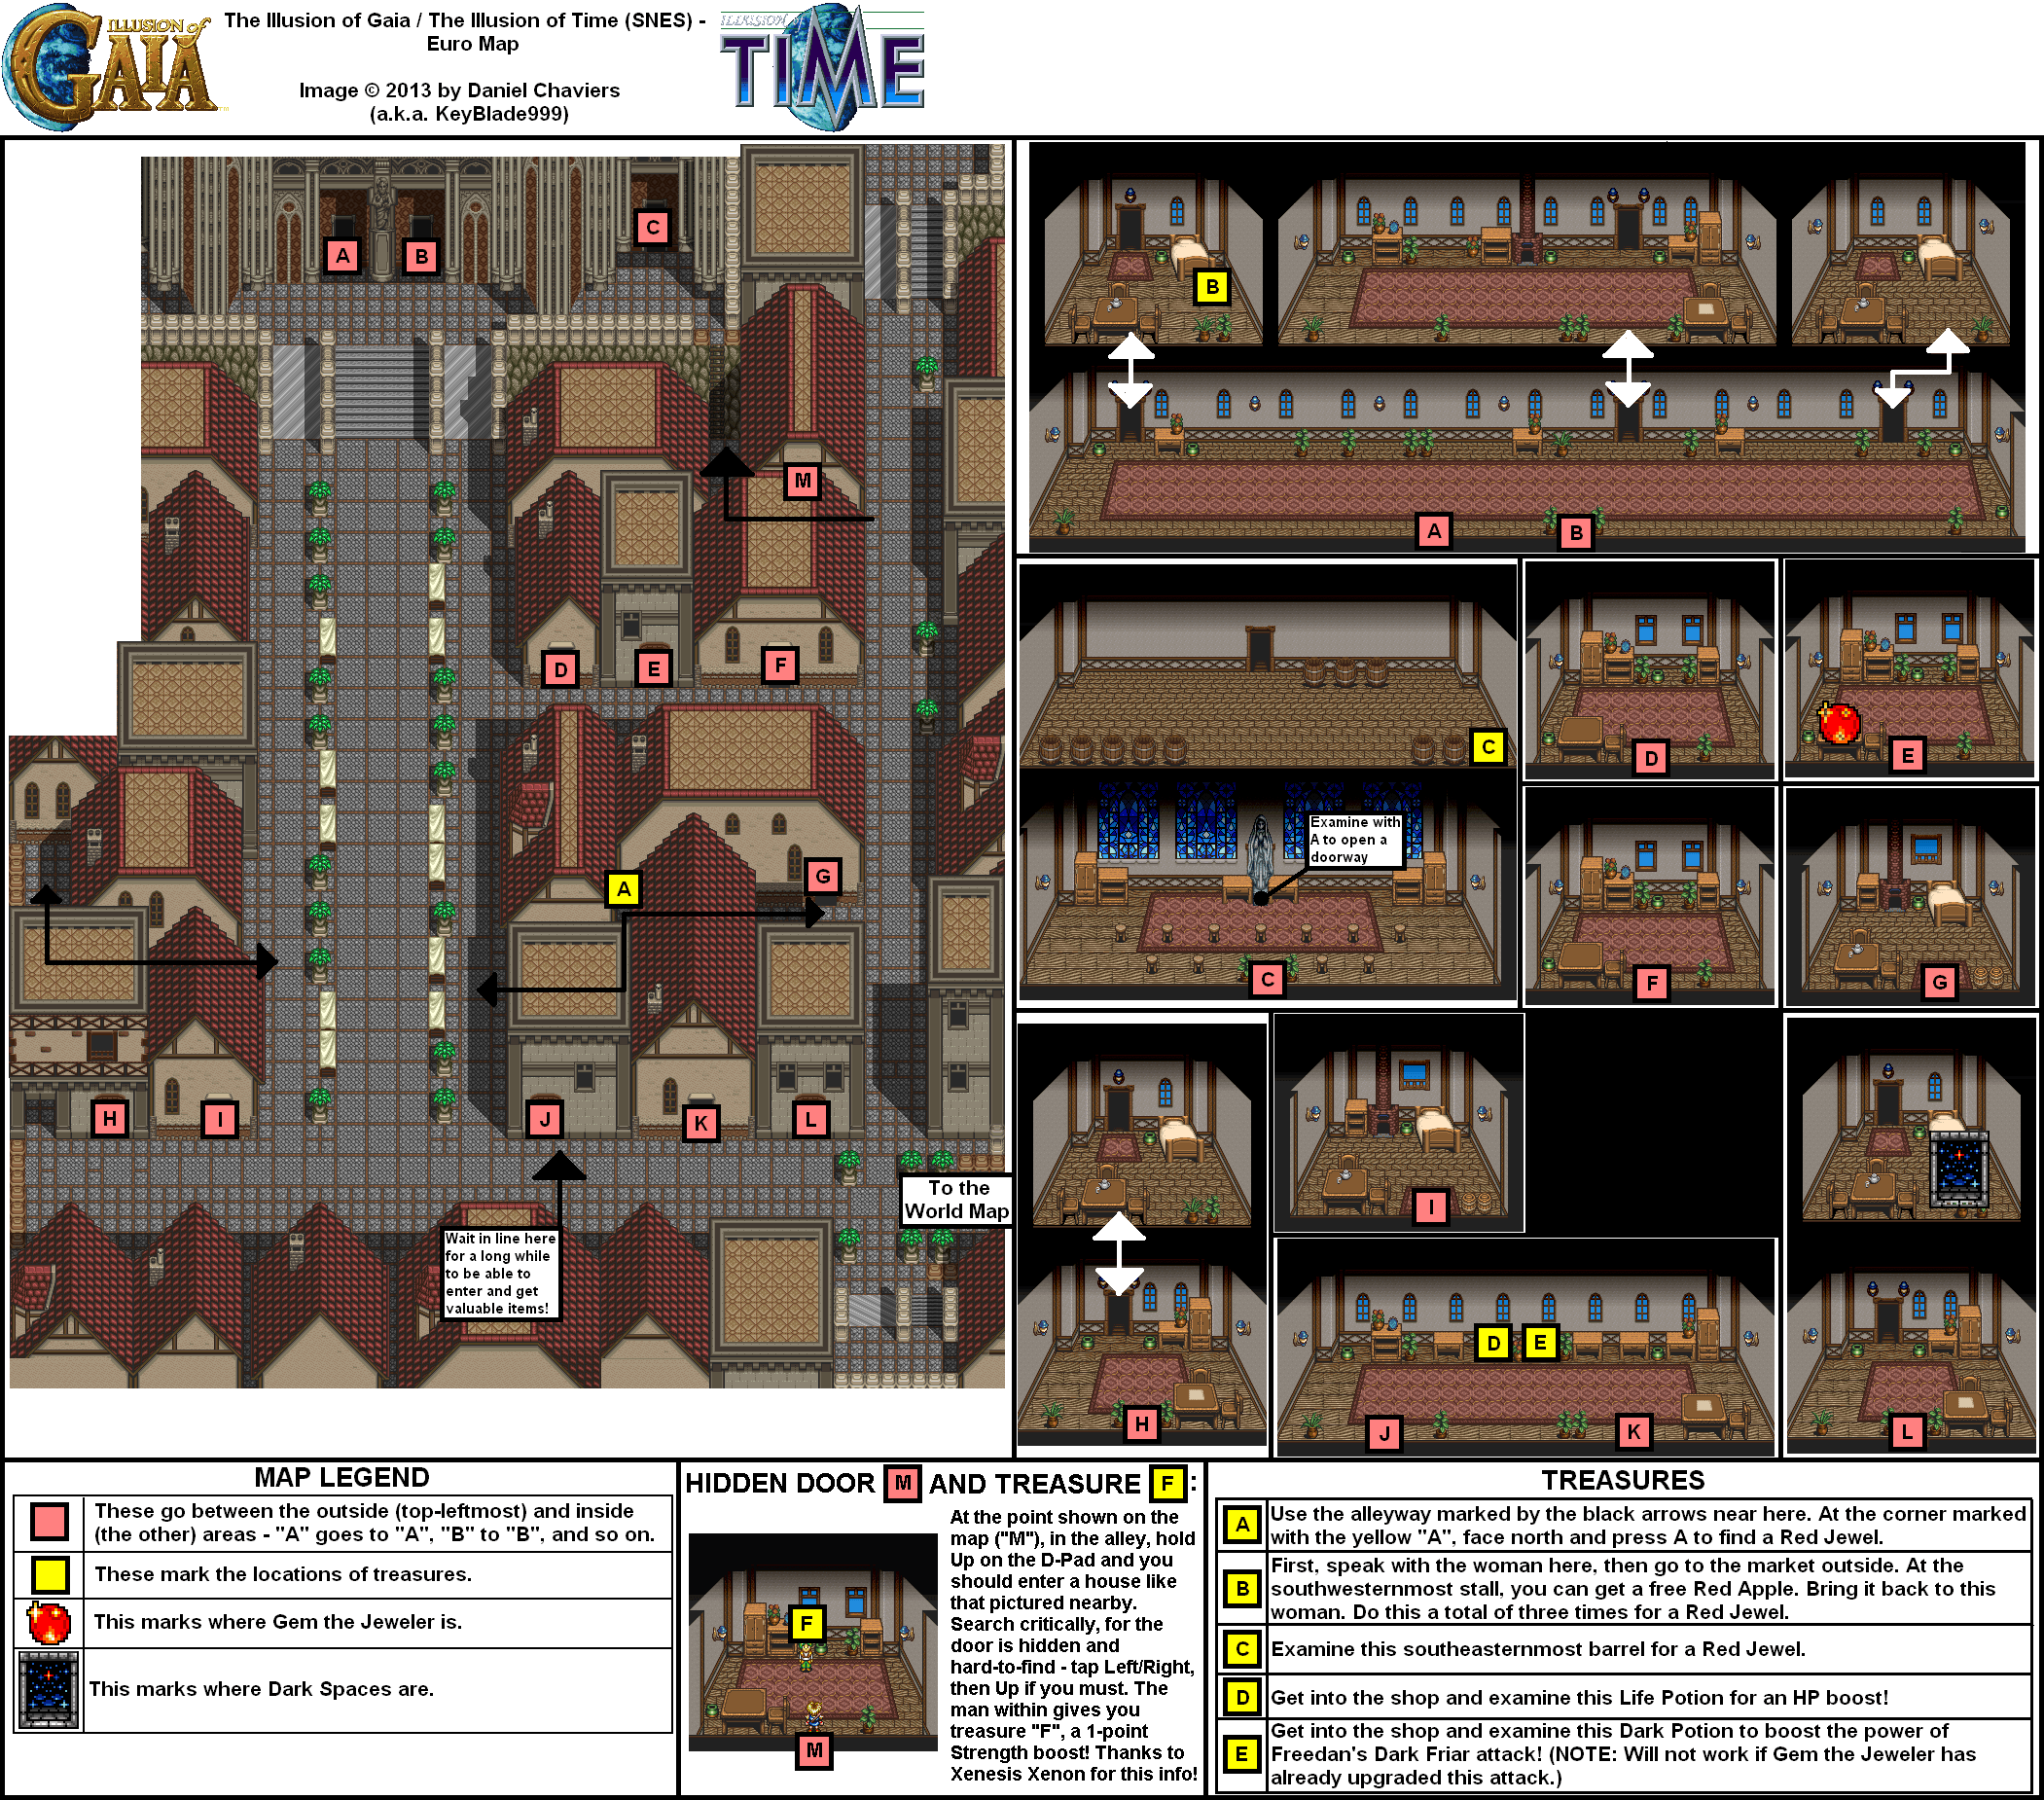
In one bedroom, there will be a girl in blue named Ann who will tell you that The Jackal has shown up. When she asks if she should tell Kara, say no. She then asks you to get an apple from the marketplace.
When you leave the mansion, you will learn that there are plenty of back alleys through town and that The Jackal was indeed here. You will also learn that there are people trapped within the Rolek building, and that sometimes you can hear human groans from inside luggage.
One of the marketplace stalls to the south of the mansion will sell apples. It will be the southwest-most stall. Talk to the woman there to get an apple, then bring it back to Ann. You will have to do this three times in order to get the first of four Red Jewels in this area from her.
If you talk to the marketplace sellers from their side of the stalls, they will either tell you to get out of their side or give you alternate dialogue.
Another part of town to the left of the marketplace has a hidden passage leading to a woman who tells you that you can enter a place where some people can increase your strength. That place will not be too far, as they will be queuing in a line near a door. If you take the door to the right of the line, you will be forced out of the building and told to get in line. Wait in the line, and people will eventually go forward.
Inside the building, a woman will follow you around. Drink the two bottles. The first one is Life Medicine gives you an HP boost, while the Dark Medicine will give you a power-up for the Dark Friar that makes it far more useful in case you did not get the reward for 30 Red Jewels from Gem.
The house to the right of where the queue for the medicines are contains a Dark Space portal.
World-famous musicians Rofsky and Erasquez will be arguing over music in one building. Rofsky will tell you to head to Mt. Kress at the right time and take a look at the Teapot. You'll also be able to head to Mt. Kress on the world map. Erasquez will tell you that the Teapot contains enshrined tears from a spirit that have been rumored to have saved people in the past.
To the left of where Rofsky and Erasquez is a dead-end. If you face the west wall, you will get the second Red Jewel.
You will learn that Mt. Kress is a forest maze of sorts if you keep talking to people.
You'll also come across an expedition with three NPC's that look like they come from South Cape: Frezier, Max and Rudy. They are lead by a man named Frezier and that they too are planning to head to the Tower of Babel in order to make history.
There is another opening near the northeast corner of the town. If you find it, go west and you will find a ladder leading to the shrine that Neil's parents come to often. If you stand in front of the statue, wind will blow Will's hair and clothes around. Face the statue, press A and select "yes" when asked to look. You will find a hidden door. Go into the door and you will find laborers. Check out the barrel in the southeast corner for the third Red Jewels.
The fourth Red Jewel is in Watermia. Head back to Luke's house and talk to Lance. He will give you the final Red Jewel.
Gem will be sticking his head out of a window in one of the houses on the east side of town. Walk up to the table and press A to talk to Gem and give him some Red Jewels if you need to. You should have 34 Red Jewels at this point.
Sunday, October 28, 2018
PrinceWatercress plays Illusion of Gaia - Part 13 of 21
In this entry, we take a break from our journey in Watermia, but almost as soon as we get there, someone from Will's - and one of our friends' - comes up...
.png)
(Paths).png)
(Unmarked).png)
Watermia
If you talk to your friends, Lilly will tell you that Lance saw someone he knows in town, and that Erik has found something behind the house. If you go down the ladder, walk around the house, get behind where the ladder is and press A, you'll find Kara's secret diary and read an entry.
To the left of Luke's house is where you will find Lance. The person near him is his father, who seems to have lost his memory after the expedition with Olman. Talk to Lance, then his father, then Lance again. When you leave, Lance will head out.
South of that house is Sabas and Nana, whose names were on the letter held by one of the skeletons in the Larai Cliff dungeon. They have no idea that their father is dead, unfortunately, and aside form talking to them, there is nothing else that you can do regarding them.
As you talk to people, you will learn that Lance's father came to Watermia two years ago with no memory of his past. You'll also learn about the Great Wall of China and the Sand Fanger (whose bodily fluids are a miracle cure of some sort), and that the brown saddled creatures here are called Kruks. These were mentioned in Sabas and Nana's letter. You'll also learn that if you get bitten by a snake, you can mash directions on the Control Pad to shake them off.
One of the kids will tell you to wait on the right side behind the gambling house, as a lotus leaf will come.
One of the pots in the southwest corner of town contains a Red Jewel. The nearby house contains a Dark Space portal.
East of that house is the gambling house. Here, people are playing a game of chance called Russian Glass where if one drinks the wrong glass, they will die. If you go in and check the right pot in the northeast corner, you can find another Red Jewel. You'll also find Gem in the crowd, so if you want to give your Red Jewels to him, you can.
If you take the kid's advice involving the lotus leaf next to the gambling house, you'll get on a raft where the man on it will tell you about Russian Glass.
After all this, head back to Luke's house. Everyone will have Lilly's fifteenth birthday party, then Lilly and Lance will have a private conversation outside of the house. Lance will give her a bouquet of roses, then he will admit his love to Lilly to her. Lilly turns into a dandelion and runs away, unbeknownst to everyone else in the party.
Afterwards, you will learn that Lance has disappeared as well. If you look in your inventory, you will find the letter from Lance. Equip it and press B, and you will learn that Lance has went to the Great Wall of China to look for a cure for his father's memory loss and that Lilly has left him.
Going all the way south will take you to the overworld map. From here, you can go to the Great Wall of China.
Great Wall of China
The archers can only shoot horizontally, though they can move around vertically and horizontally. The Psycho Slider will make quick work of enemies here.
The fireballs will swoop down and shoot columns of fire at you. Stop when you get close and face north to attack. Some of them will also move around on the ground as well.
The snakes will lunge at you if you get close enough. If they bite and grab hold, mash directions on the Control Pad to break free.
You'll eventually find small glimmers on the floor. You'll find out that they are stones that are part of a necklace that Lance made for Lilly. Collecting one will give you the Necklace Stones as an item. As you find more shimmers, you will be able to get more stones for the necklace. The shimmers will also tell you where to go in case you get stuck. One of them takes you to a switch that will open up another area.
There are spears popping out of the walls at the top level. Watch for them so they don't damage you.
You will not be able to cross the small ramps until later.
When in an area with clay statues, pay attention to any statues that look slightly different compared to the others. These will turn into regular archers and attack.
There is only one Red Jewel in the Great Wall, and it is located in a chest in a lower level in the second section.
When you make it to the end of the second section, Lilly will show up in dandelion form and join you.
You will skip some doors as you leave the third section. Do not worry about them for now; you will get a skill that will allow you to cross over the nearby ramps and access them. In the fourth section, there is a Dark Space portal, and if you can drop down to it, you will be able to learn the Spin Dash for Will. To execute this move, hold A, then quickly press L and R alternately. When you start spinning, hold the direction on the Control Pad that you wish to go. This will allow you to get over the ramps.
PrinceWatercress plays Illusion of Gaia - Part 12 of 21
Here we are...Angel Village! I could never get past this part as a kid due to that one thing involving pressing A on a wall. I could never figure it out.
Angel Village
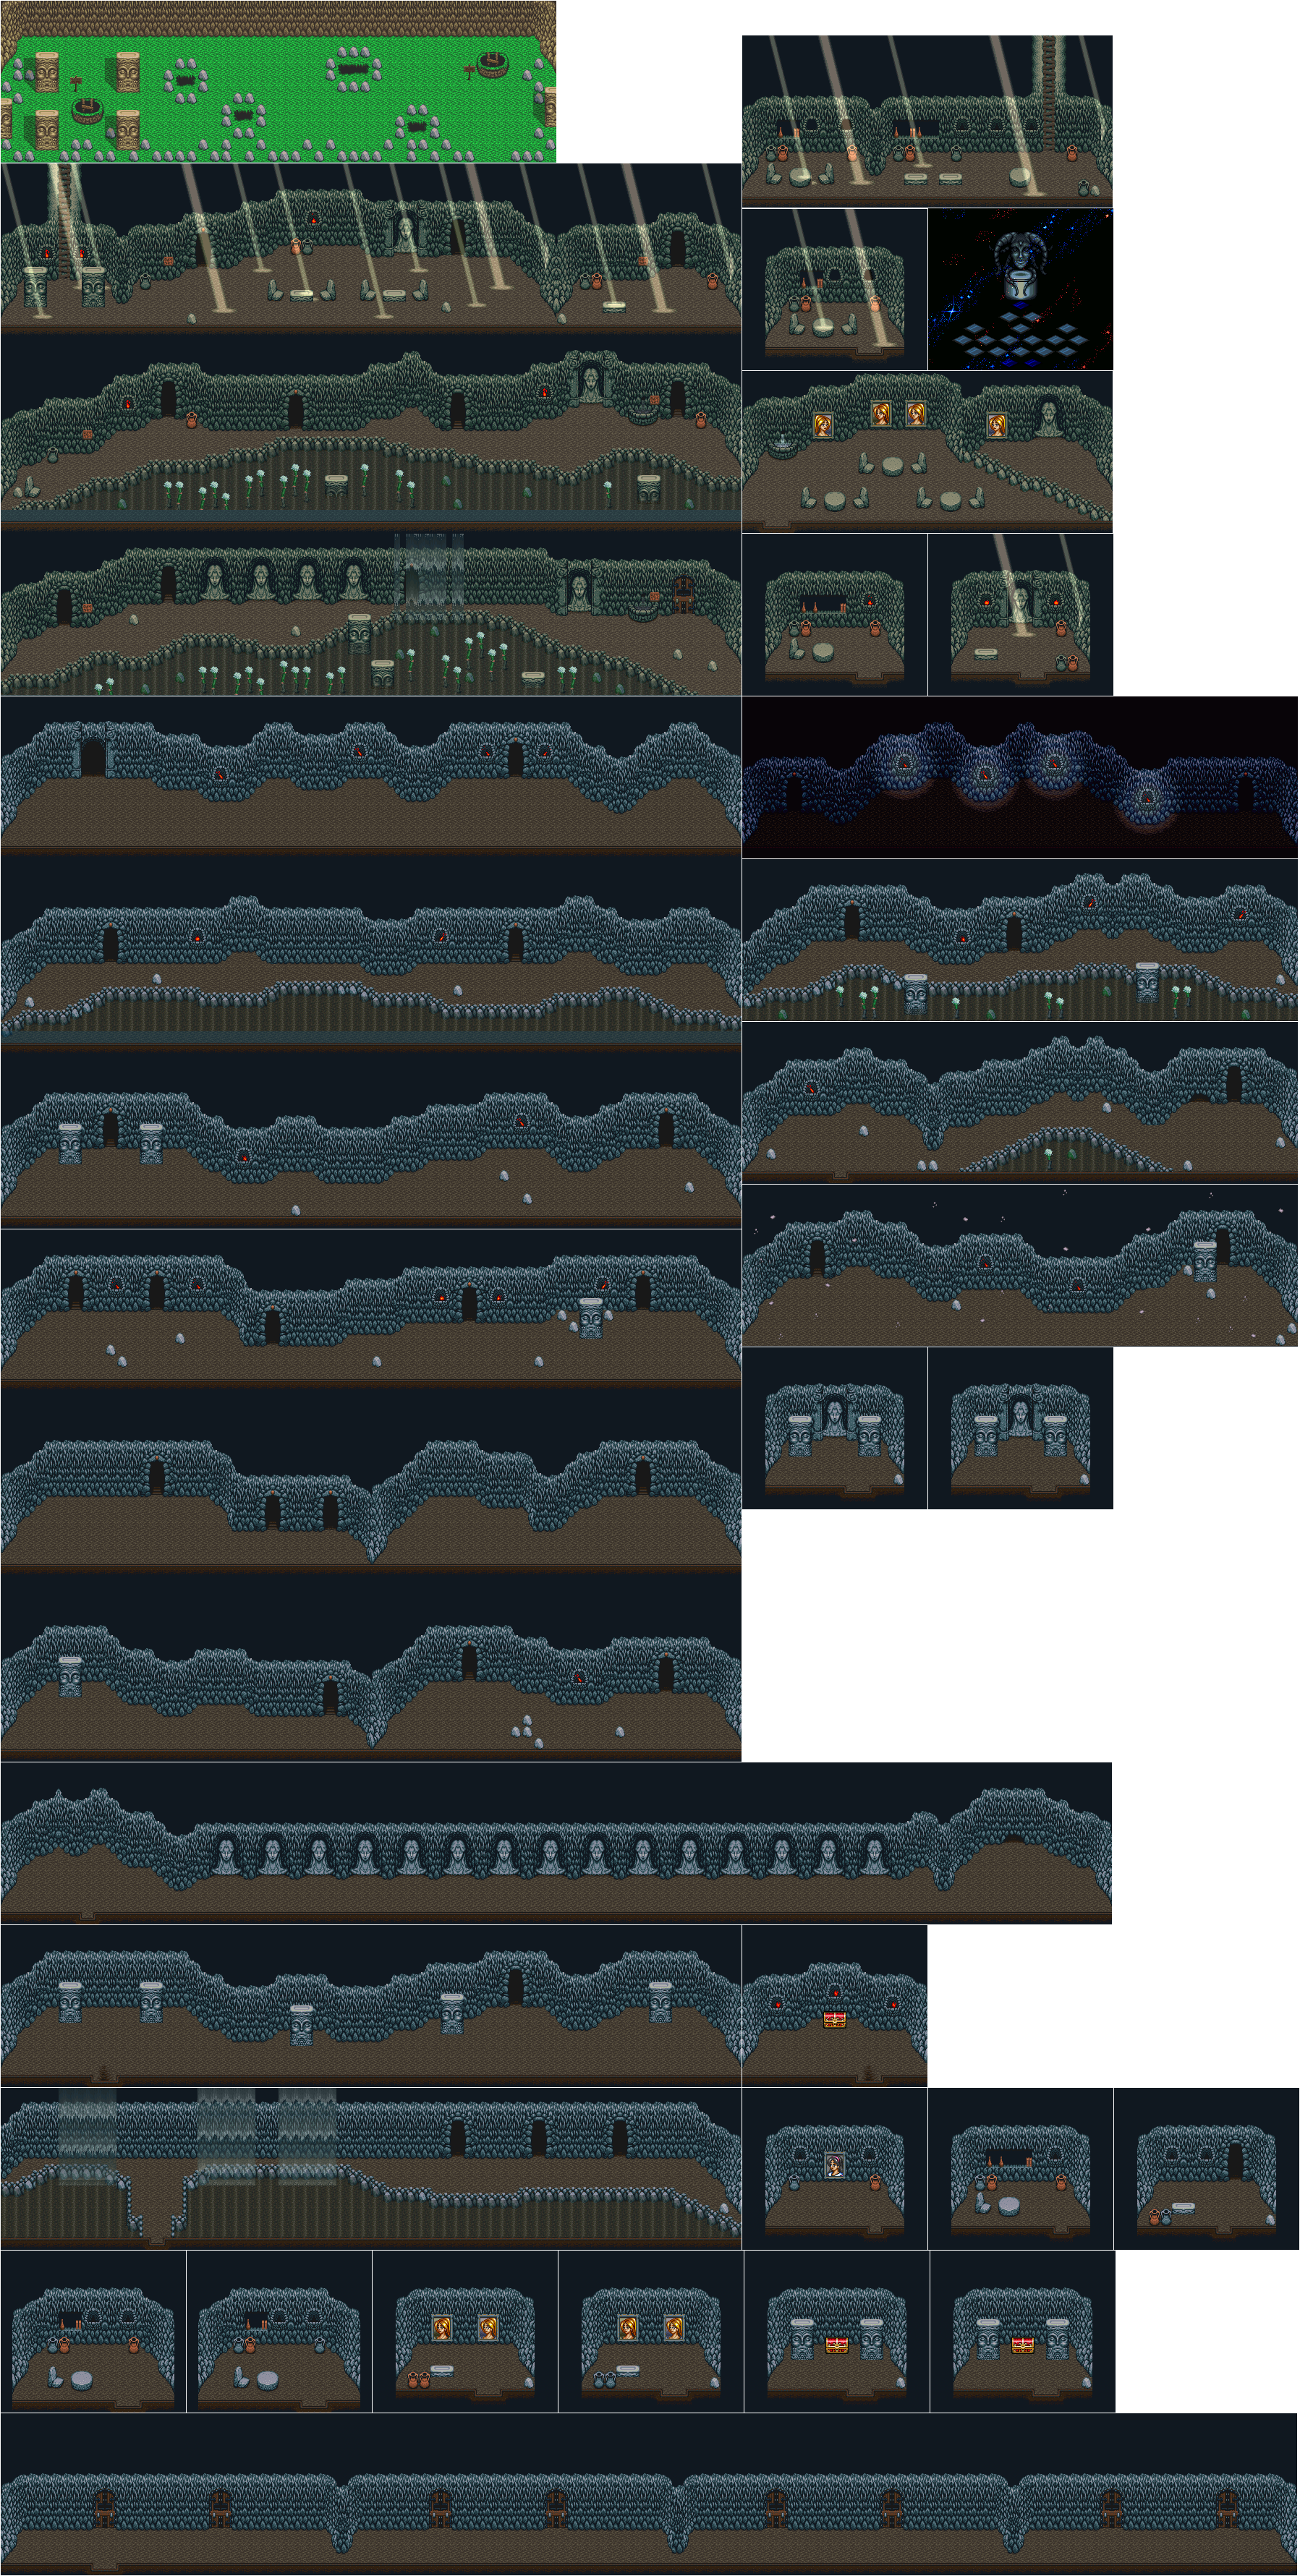
From here, go down the ladder across from the entrance and talk to everyone. If you talk to Lance, he will admit to you that he has fallen in love with Lilly and asks for advice on what to give her as a gift for her fifteenth birthday. The plot will advance the same regardless of how you answer his questions.
To the west of the entrance is the village proper. As you talk to the people, you will find a Red Jewel in the area where people are dancing. You'll also meet Gem, who will give you a more powerful Psycho Dash attack when you talk to them with 20 Red Jewels collected. You should have 24 at this point if you found the Red Jewel in the dance hall.
You'll also meet a person working on a statue who will tell you about a stone that is out of place. Remember that for later. You'll also be told to follow the wind, the torches and the sound where the waterfall is loudest to find the studio of the painter Ishtar, and that Kara has asked Ishtar to paint her.
The room to the fat left of the lowest floor before the dungeon contains a Dark Space portal where you can save your game. At the door, talk to the woman there, and say "yes" when asked if you know the painter Ishtar. From there, go up to the door and press A so you can go in.
There are brown bats that will swoop down, speedy skeletons with boomerang ribs that return to them, and lizard with extending mouths that also prove to be their weak points. Be sure to use your map when you pause so you can see if you need to defeat any more enemies for power-ups before leaving a section.
In the section after the darkened hallway, there is a wall where you have to press A in front of it to open up another door. It's not very intuitive, and not even the handbook hints at it very well. Once you go in, you will meet a new enemy: a horned skull turret that fires horizontally. If you go to the east and beat up the two mouthy lizards, you can slide down the narrow corridor with the Psycho Slider to get another Red Jewel.
In the room next to it, run to the right to fight the wind and use the Psycho Slider to beat up the two skull turrets. After a few more enemies, Psycho Slide throw the narrow opening.
You will then hear the waterfall. As you head to the right, the waterfall will get louder. Head to the wall where it is loudest, then go up to it and press A to open another hidden doorway. Head to the right and enter the first doorway you see to find the portrait of Kara. In the next room, you will want to look in the pots with the A button to find the third of four Red Jewels in Angel Village.
In the third room is Ishtar's studio. Talk to Ishtar, who will tell you to go into the next room and that he will give Kara back if you can solve all his riddles.
In the first room, memorize what is in the room. Be sure to press A to enter all the doors. In the next room, you will have to show what is different from the previous room. In this case, it is the jar to the far right; it is gray here, not orange. Move the cursor to the pot with the Control Pad and press A to confirm.
The difference between the third and fourth rooms is that the pots are gray; they were orange in the previous room.
The difference between the fifth and sixth rooms is the contents of the chest. In the fifth room, open the chest to get an herb; in the sixth room, it will be the fourth and final Red Jewel of Angel Village.
The difference between the seventh and eighth rooms is wind in Will's hair. It is not present in the seventh, but it blows his hair around in the eighth.
Head back to Ishtar's studio, and you will find out that Ishtar has made himself into a painting. Talk to the painting and you will get magical powder, which will be in the nearby chest. He will tell you to put the Magic Dust on Kara's painting and give it a kiss, and if Will cares about Kara enough, she will return.
When Will does as Ishtar asks, Kara appears from the door behind Will and regrets what she has done. You will then return to the party, and Neil will then propose heading to Watermia. If you need to, head back to Gem and give them the Red Jewels. You should have 27 by this point. After that, head back, talk to everyone, then talk to Neil and say "yes." You'll all head to Watermia.
Watermia
When you make it to Watermia, the townspeople will put you up in the house of a young fisherman named Luke who is going on a voyage...
Saturday, October 27, 2018
PrinceWatercress plays Illusion of Gaia - Part 11 of 21
We're almost at the end of Mu...but now we have to save Erik if we want to continue with our journey!
Mu
.png)
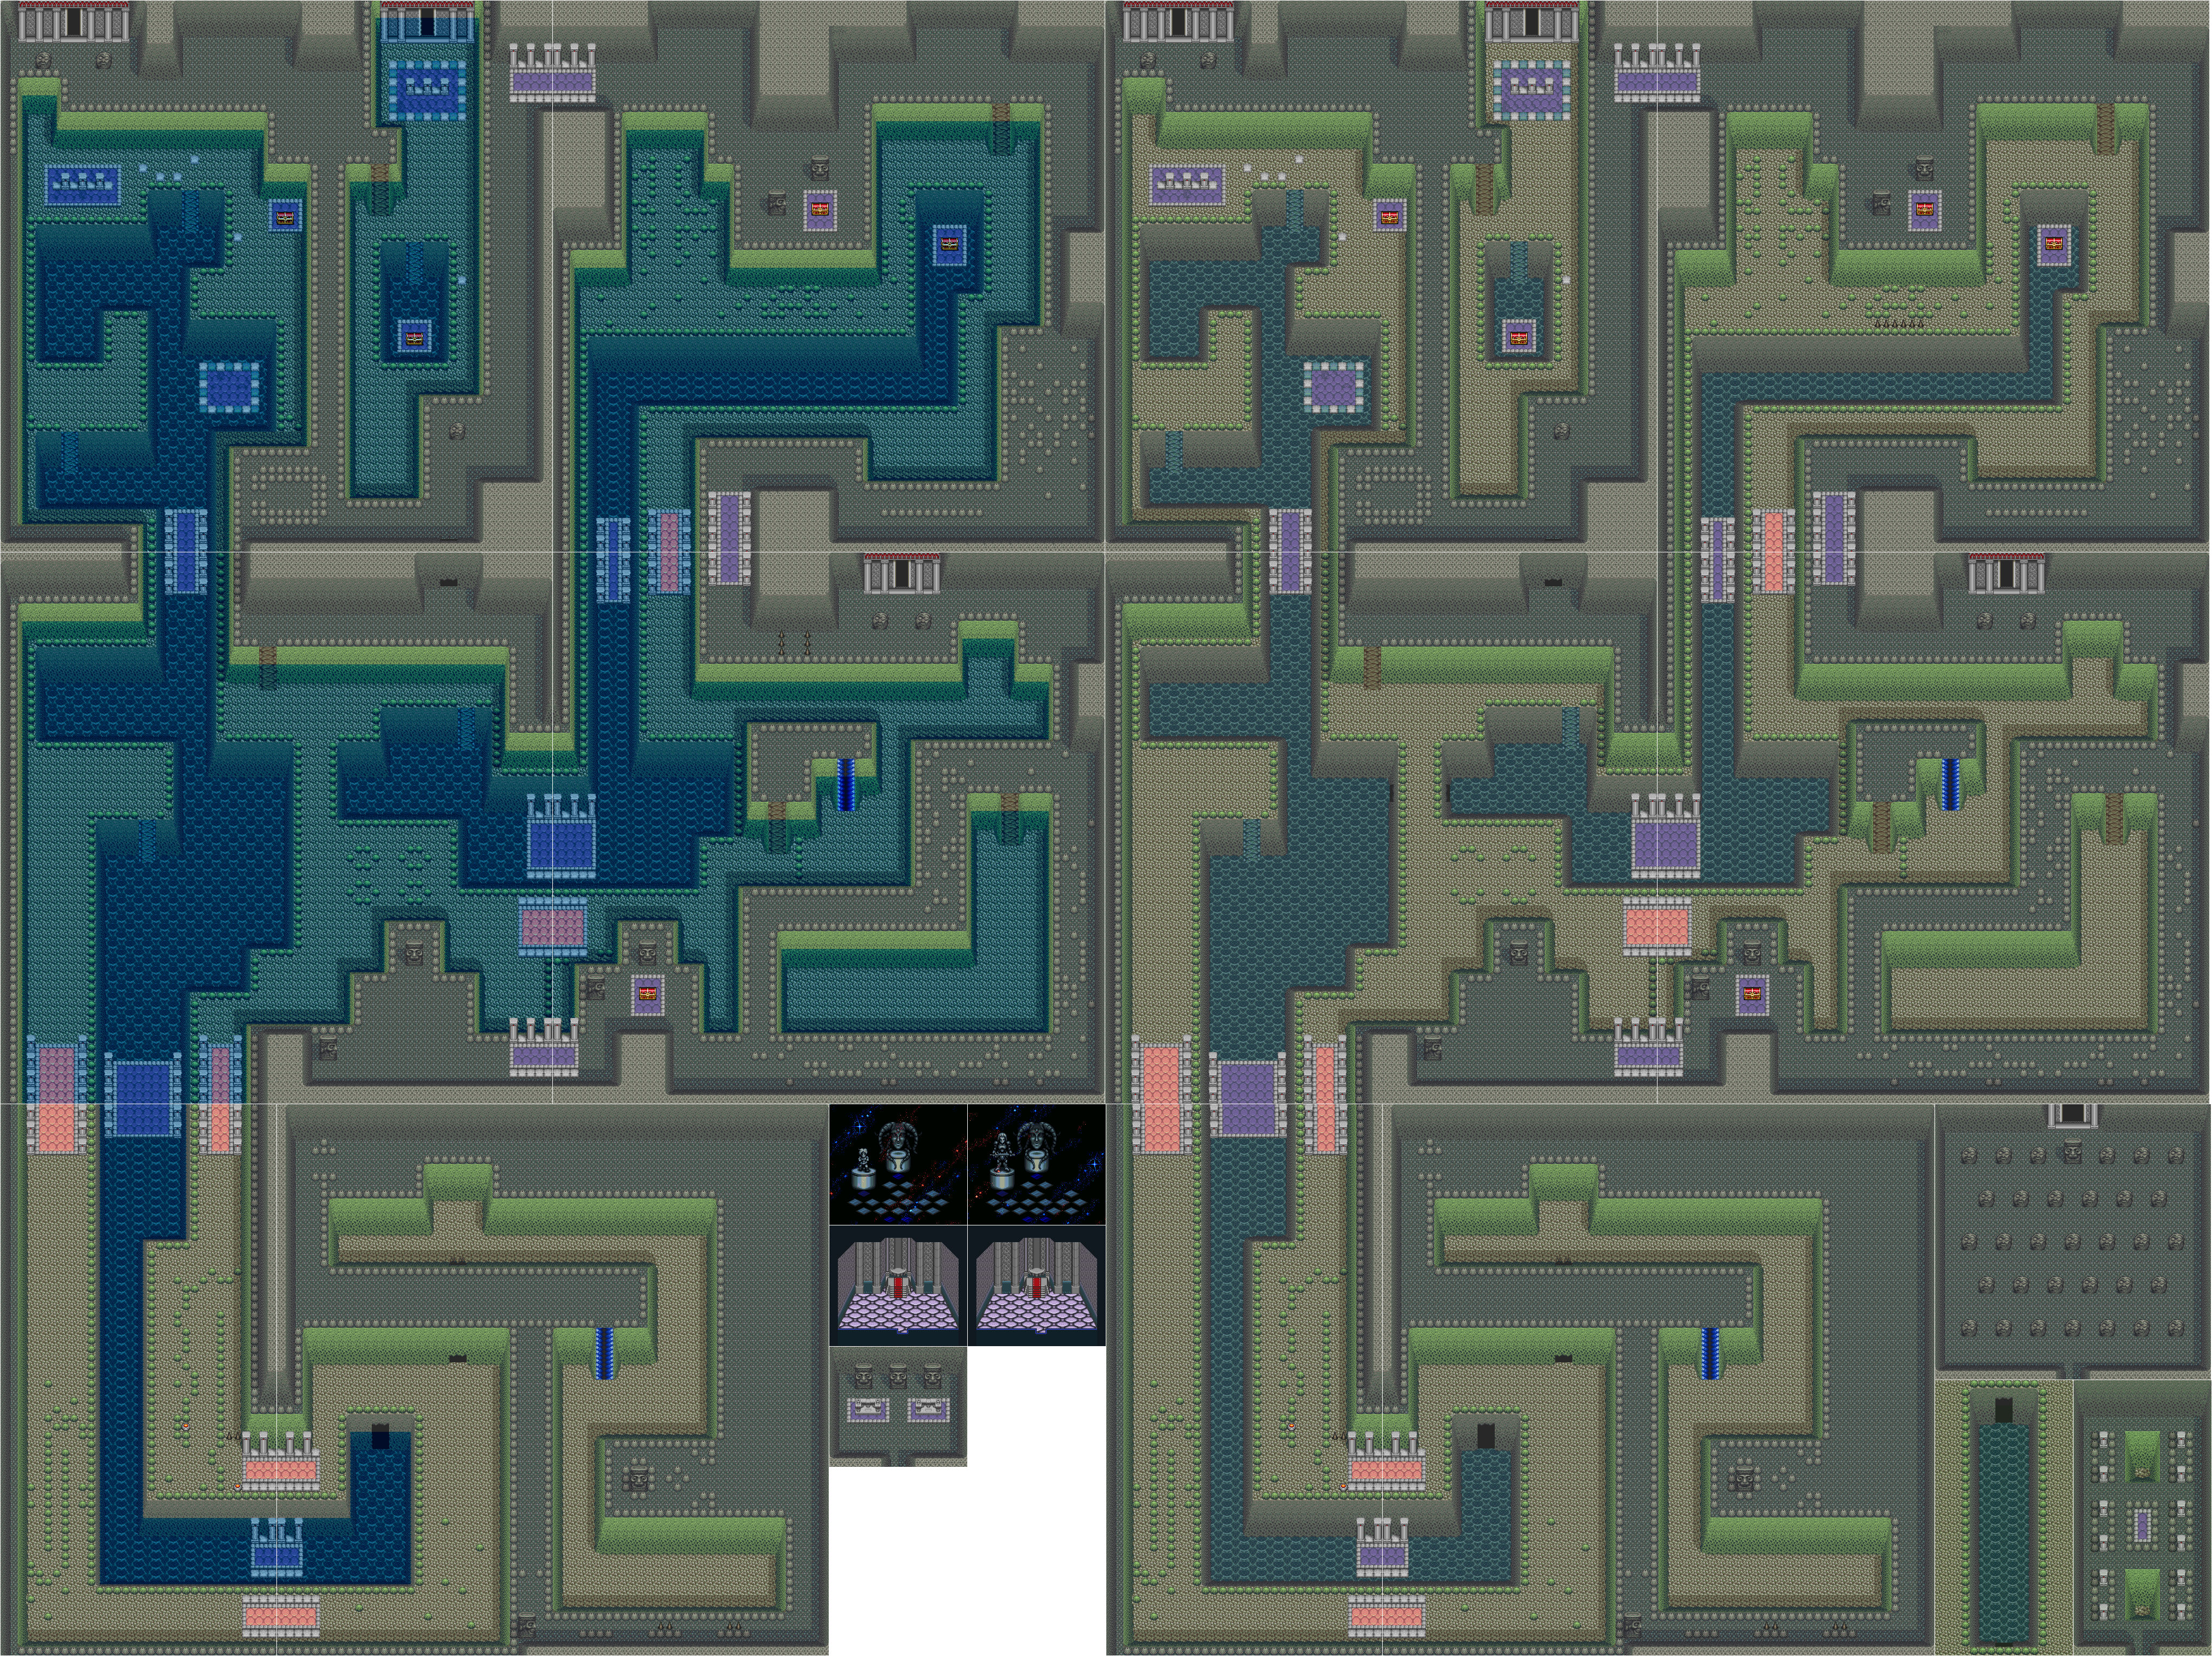
When you make it to the big opening in the lowest level, you will meet Rama, King of Mu. Just place the Rama Statues on the altars, then go forward tot he big statue to talk to Rama. From there, talk to all of the spirits that pop up from northern-most to southern-most so you can hear their story in the proper order. From there, talk to Rama again. You will receive the third Mystic Statue and reveal an opening leading to the man-made tunnel out of Mu.
From here, charge up Dark Friar (you should be in here as Freedan at this point) and go to the right before going north. Let go of the button when Erik is talking to you, and you can get a free hit on the male vampire who shows up. (You can go to the left and get a free hit on the female vampire, but the male one is more of a threat.) They will converse, and you can go through their conversation with the A button.
Turns out, not only have they kidnapped Erik and tied him to a bomb (which will explode in 150 seconds, resulting in an instant death), but they want the third Mystic Statue! You will have to beat them both in a very quick amount of time and defuse the bomb that Erik is tied to!
It's time to face the vampires, Jack and Silvana. Jack has a fire wave attack that travels in four directions, while Silvana has a fireball that goes only in one. When they both go to the bottom of the screen, they will be invulnerable as they create a massive fireball that will bounce off walls as they go to the north. You will want to run to the north to avoid it.
Jack may have some energy balls rotating around him. As a matter of fact, so will Silvana. If that happens, stay away and hit him with Dark Friar. As a matter of fact, you will want to hit the vampires with Dark Friar often. If you can get in close to them and hit them with your sword multiple times, that's great.
Once you beat both vampires, talk to Erik. From there, go to the bomb and cut either wire to defuse the bomb; it does not matter which one you choose. It should also be mentioned that if you wait for the timer to reach zero after you beat the vampires and talk to Erik, the bomb will suddenly decide to be a dud and not work. Video game logic! /slimkirby
Lilly will then express fear about not being able to do anything in a time of crisis and apologize. Afterwards, go south to the entrance to the room. Lilly will come out of your pocket, then everyone will come up with the idea of taking the man-made tunnel to the mainland.
Inside the tunnel, everyone will set-up a campfire. Once you are able to look around, talk to everybody. When you talk to Kara, head right and press A at the mushroom near the wall. Walk up to Kara, and then everyone will eat.
You'll then get another cutscene where Will and Lilly talk. Will will talk to Lilly about his powers, then Lilly will tell you that there is a reason for joining the adventure that she cannot reveal just yet.
You'll get another cutscene where Kara talks about hearing weird knocking sounds in the walls. You will find out that the knocking sounds are in Morse Code. You will hear from Seth, who was swallowed by Riverson on the Incan gold ship and has since turned into a fishman much like Riverson. He now lives in the ocean, and he has no idea if he is human. He will tell you that evolution is being affected by the light of a comet, and that he wanted to continue with you on your journey, but not as a fishman, and he tells you to figure out the riddle of the comet and the ruins.
After this cutscene, you will finally be in Angel Village. From here on out, if you missed another from Mu or before then, you won't be able to get it.
PrinceWatercress plays Illusion of Gaia - Part 10 of 21
We've just been to the Sky Palace, and now we've found the tunnel to Mu...and this is going to be even more complex than the Sky Garden was!
Mu
Once you go through the tunnel in the Seaside Palace, you'll be in the third main dungeon of the same soon after the second. Despite having six sections to it, you will be
You'll meet some old enemies new enemies here, the first of which are golems that will throw rocks at you, either one at a time straight forward or five at a time at angles. They can also launch an eight-way attack when they get mad. Be ready to block when they turn red, and remember that you won't be able to attack them until they wake up when you get close..
The hooded spectres will teleport around the room and fire a fireball at you. If you cannot get to this enemy in time, be ready to face the enemy at block so their fireball doesn't hit you when it homes in.
The spikes in the holes pop in and out in regular intervals.
The chest near the two statues looking at a certain point is a clue. The chest is empty, but you will want to keep the placement of the statues in mind for later. If you see something like this, go to the place where the vision of the statues meet and press A to find something. You will find the two Statues of Hope in this way.
The bubbles will powerfully knock you into the opposite direction when you run into them. You'll need these to go up some ramps that are colored blue and black, which only take you one direction - straight down - unless you use the bubbles to gain immense speed.
There are three levels to the dungeon, and when you first come into Mu, only the first one will be available. You will have to head to a Room of Hope, equip a Statue of Hope and place the statue onto the altar to lower the water level so you can explore the next level down and find some things. You should also beware of new hooded specter enemies that will pop up in places where they were not at before.
When you open up the second level, you will want to watch out for the worms that flash brown and blue. They cannot be destroyed, and they will hurt you if they extend outwards and touch you.
There is only one Red Jewel in all of Mu, and it is located in the chest in the third level near the second Room of Hope. Don't miss it.
There are two Dark Space portals on the second level. One of them will allow you to transform into Freedan.
At one point in the second level, there is a point where you will have to hit a switch, run through a corner and make it past a pair of holes while the spikes are still down. Thankfully, you have just enough time to make it to the other side.
The small openings in some of the walls let you go between areas. However, you will need a new skill for Will in order to use them: the Psycho Slider, which is in one of the Dark Space portals on the second level. To use it, double-tap and hold any direction on the Control Pad to run, then press A while running. The Psycho Slider can also be used to defeat enemies, and it can do quite a bit of damage.
The big opening in the wall in the third level will take you to Rama, King of Mu. This is where you want to go.
Friday, October 26, 2018
PrinceWatercress plays Illusion of Gaia - Part 9 of 21
We've almost got the second Mystic Statue in our grasp, but in order to get it, we must first face a worthy foe...
Sky Garden

.png)
.png)
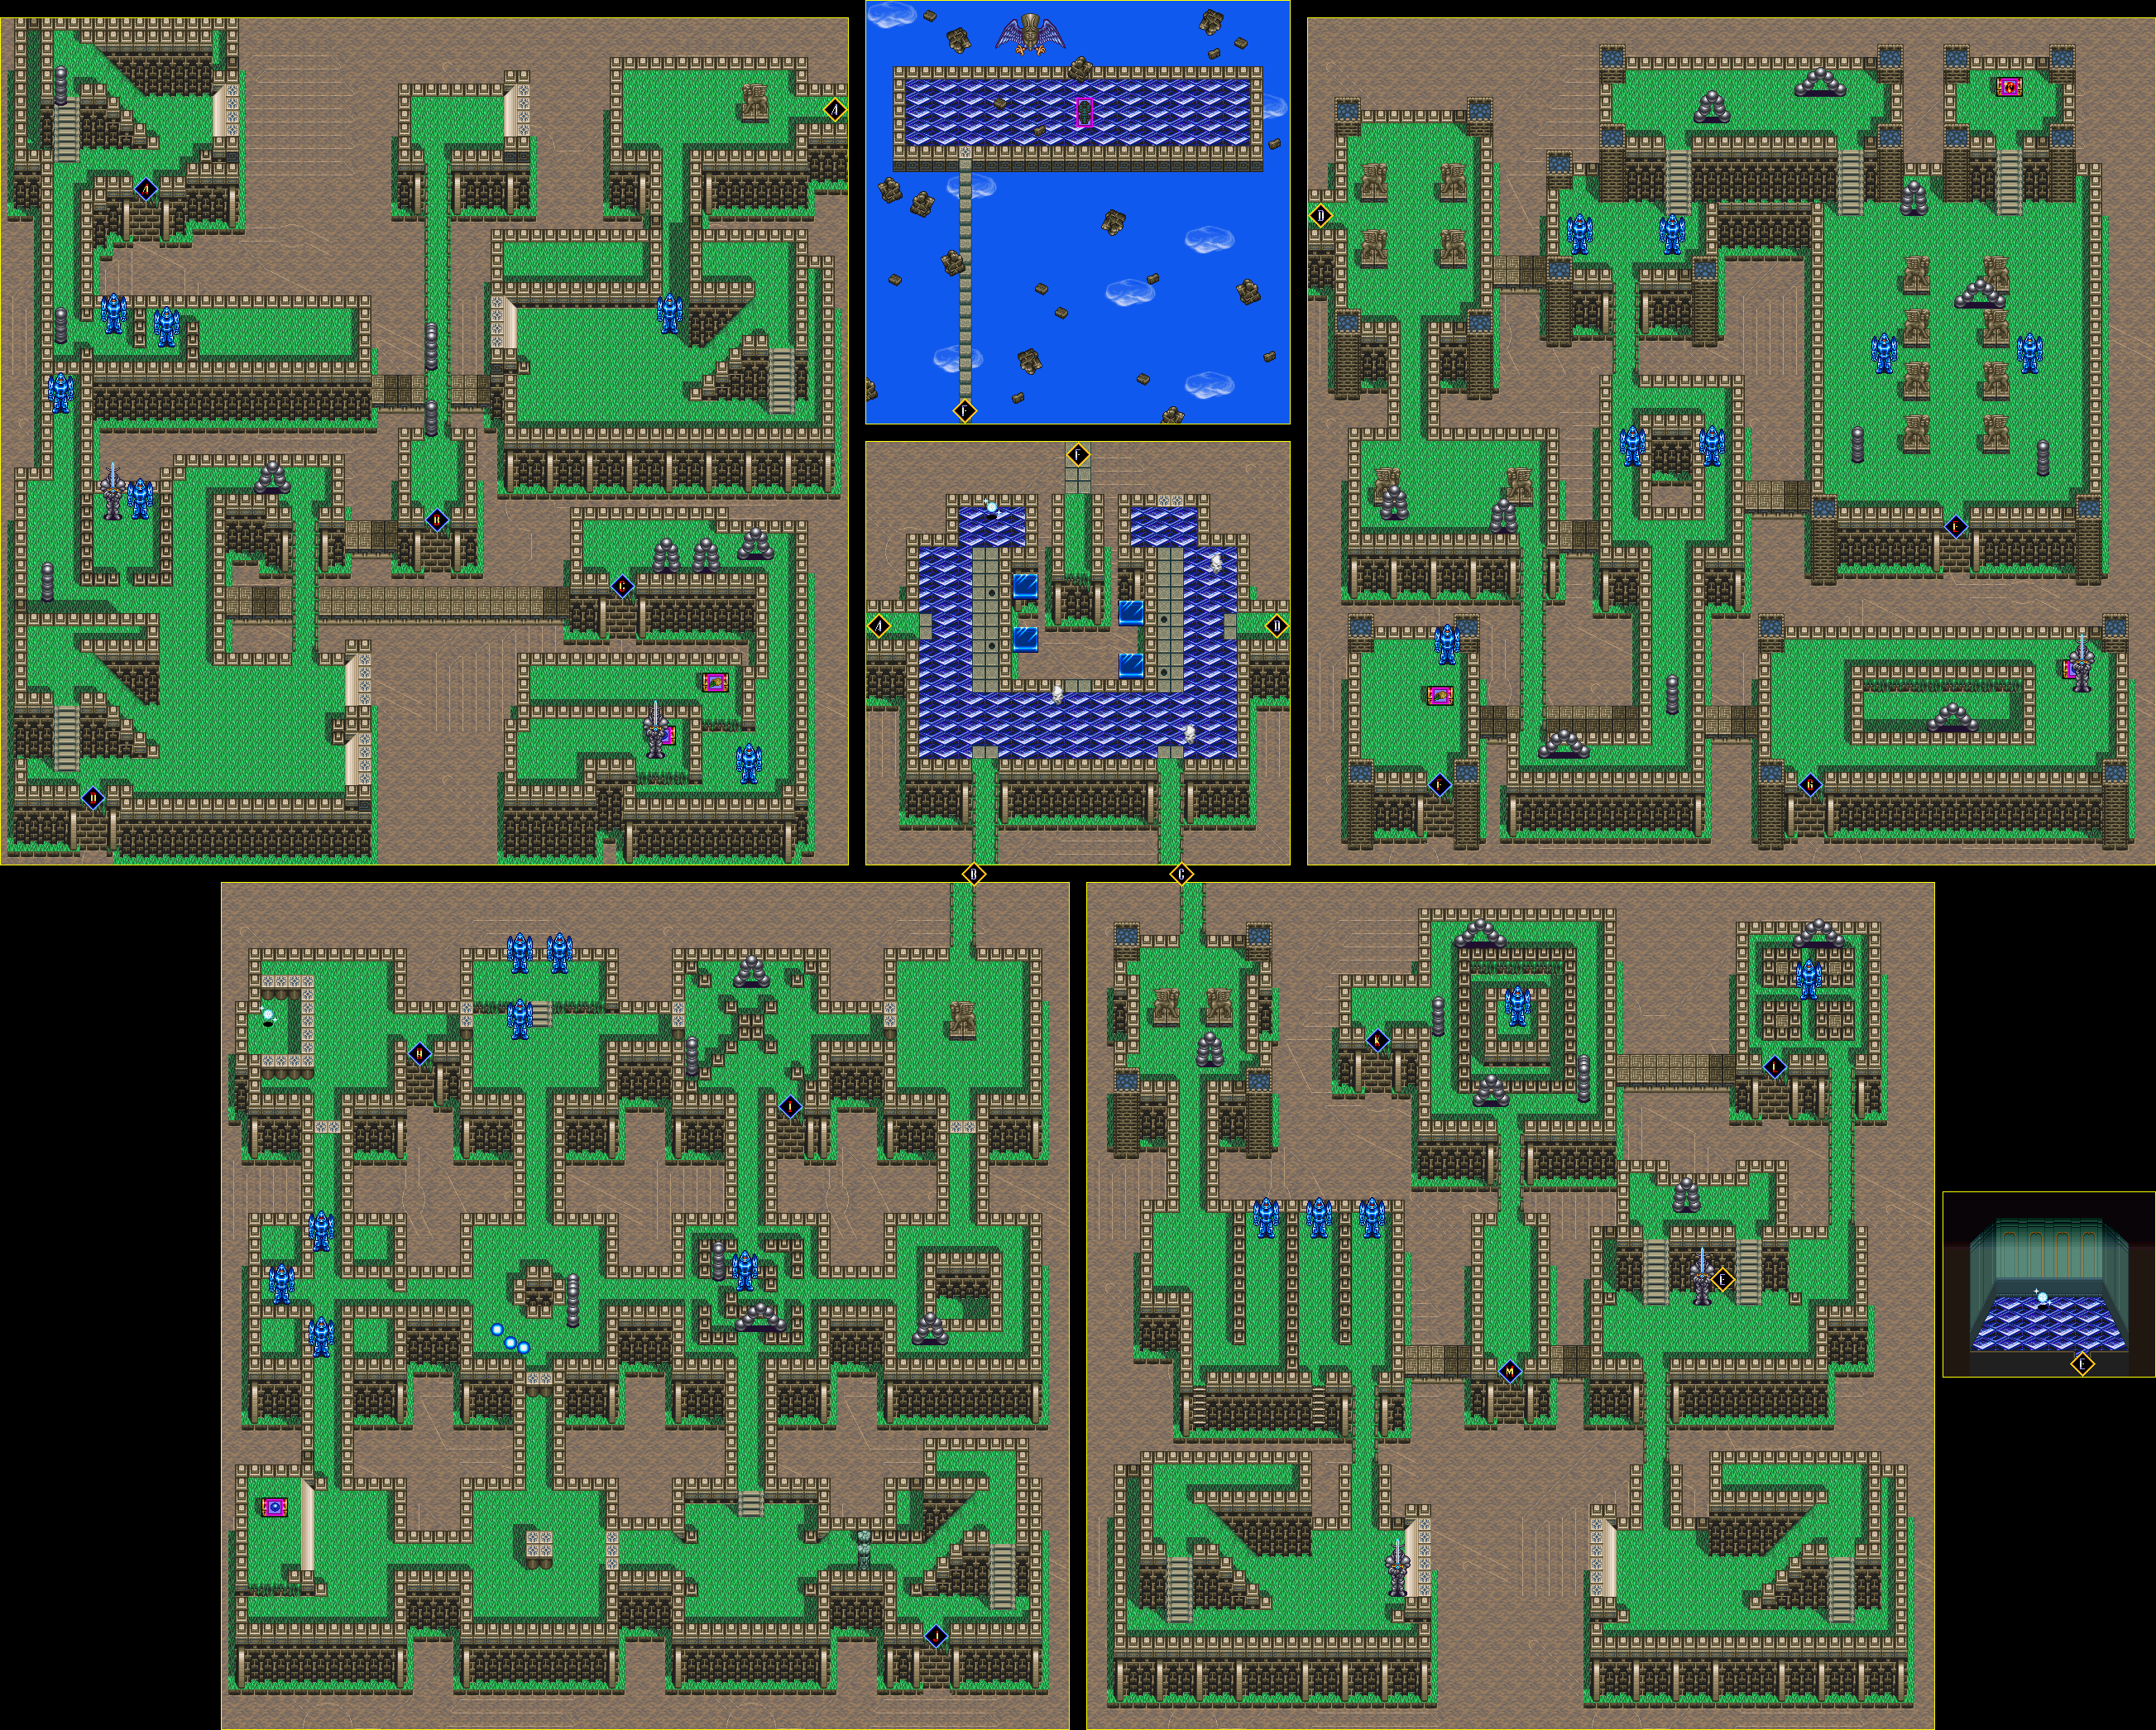
When you cross the bridge you have just made to the boss, you will have to ross another bridge that will break down behind you. The next boss is Viper, a eagle with an Incan mask. He has four attacks: a cluster bomb that splits into a four, a divebomb, a close-range freeze breath and another cluster bomb that shoots out six feathers that home in on your current position. For this battle, you will want to be Freedan and you will want to keep your distance and hit Viper with Dark Friar, then run away when he does the divebomb attack. It should not take you long to get through this battle if you know what you are doing.
When you beat Viper, you will get the second Mystic Statue, then transform back into Will if you are playing as Freedan (which you should have been doing, anyway). You will hear Neil's voice teylling for you to drop down and grab the airplane. Head back to where the bridge was and drop down from there Neil will miss the first time around, but Neil's airplane will catch Will on the way back.
At this point, it will be smooth flying until it is realized that Mu is somewhere in the ocean and the plane suddenly goes down. At this point, you will crash...
Seaside Palace
.png)
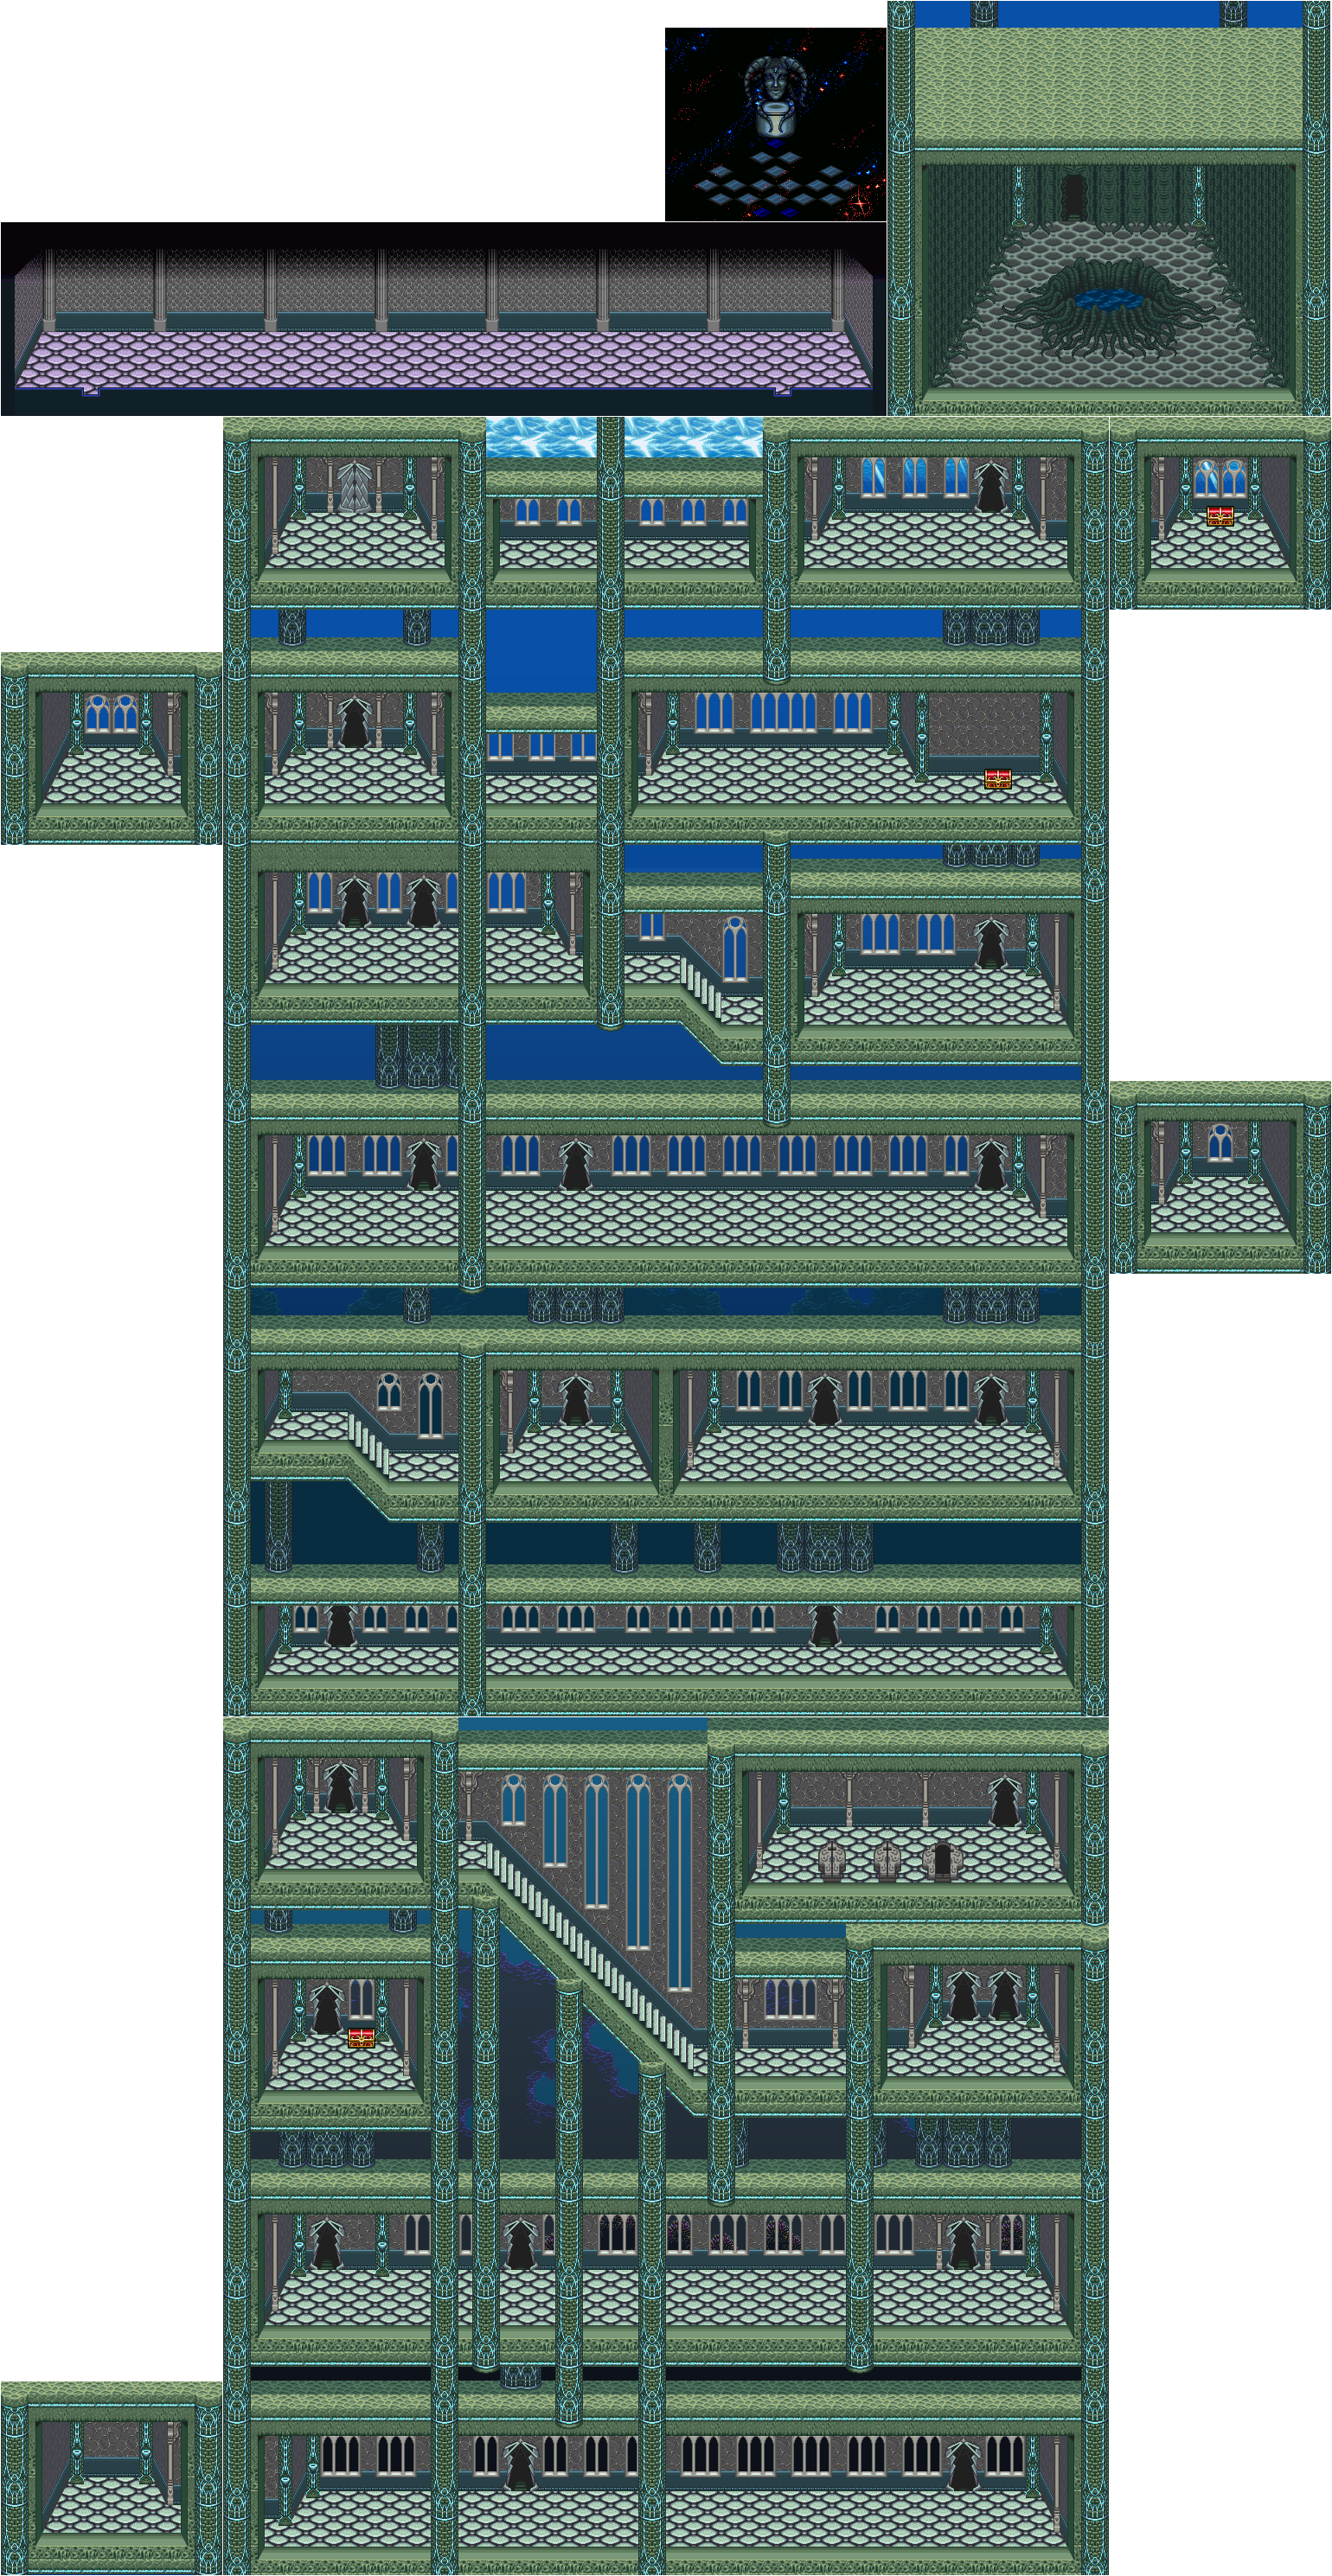
Before you know it, you will be in a huge palace, separated from everyone else. There is a door near you, but it will not happen. To the east is a skeleton that will not even hurt you, a Dark Space portal to save at and a room with a chest in it where Kara is walking around, transparent. The chest near Kara contains one of the three Red Jewels in this area.
When you go down the nearby stairwell, a voice will tell you that this is the palace of vampires and that the fountain in the palace continuously spawns demons. As you explore, you will find your companions, but they are just as transparent and out of it as Kara, as if they are unconscious in some way and unaware of where they are.
Keep going down and not only will get it darker outside (you are underwater, after all), but the voice will tell you to keep going down to the fountain. Lower still, the voice will tell you that the Purification Stone is nearby.
You'll eventually run into Lilly, who is completely intact compared to everyone else. She will tell you that everyone else is unconscious, then turn into a dandelion and hop into your pocket for a while.
When you reach the lowest floor, go to the left and enter the stairwell. There will be enemy slimes that show up, and you can kill them for the Dark Points, even if you don't get any power-ups from destroying them all. The blue ones can charge at you if left alone, but the bouncy silver ones that bounce diagonally are a new enemy. As you explore this second area, you will find another stairwell leading to a few coffins. One of them will contain nothing, but the other one will contain the Purification Stone. You'll also find a stairwell leading to the third final Red Jewel of this area.
You'll eventually find the fountain. Throw the Purification Stone into the fountain, and the water will become blue and clear. With this act, the enemies will all disappear, all the skeleton demons turn into people from Freejia, and all your friends will be gone (yet safe). Talk to the people and you will find out this palace leads to Mu, the site of the third Mystic Statue in the game,
Also, if you go into the first area and enter what used to be a dead end, you will see a man. Talk to the man to get the Seaside Palace Key, which will open the door where you started. The doors open up to reveal a tunnel to Mu...
PrinceWatercress plays Illusion of Gaia - Part 8 of 21
We've been teleported to the second dungeon...and we'll have to go through a lot to get out of it!
Sky Garden
Talk to the Moon Tribe members. You'll learn that you will have to explore all four areas in clockwise order, and that you will have to go to the other side of the Sky Garden in order to get out of here. There is also a Dark Space portal at the start in case you need to save.
Do as the Moon Tribe says: go from the east-most area to the west-most area and get the Crystal Balls for each. When you find a Crystal Ball, equip it and place it into a tile with the hole in it in order to build a bridge leading to the boss.
The worms break up and explode when you kill them. The segments go in a V pattern in the front side, but on the back side, all the segments rise up before dropping in random spots in a rather tight area around where you killed the worm, and if those segments hit you, they will do damage.
The blue robots will try to fire lasers at you as well as hit you with their fists. You cannot block the lasers, but you can block the fists with the shoulder buttons. On the front side, they are blue and their arms go all the way to the end of the screen; on the back side, they are red, their arms have shorter range and their arms do come back.
If you drop off an edge, you will go to the other side of the Sky Garden. Here, the world looks a little different, as will the enemies. There is a front side and a back "mirrored" side, and you will have to explore both sides well in order to get through the Sky Garden.
The fireball worms are indestructible and should be avoided. They are blue on the front side and red on the back, but they don't act differently between sides.
The statues that carry swords will attack you telekinetically with their swords, and you will have to destroy the swords in order to neutralize the statues. The statues can then be moved with your telekinesis, and you will have to move the statues onto tiles in order to solve some puzzles. The swords are blue on the front side and red on the back, and they will re-spawn if you ever leave the area by either heading back to the central hub or entering a Dark Space portal as they are not counted as enemies by the game.
If you are on a narrow pathway that has your back against the wall, you can simply hold Left and Right on the Control Pad to move across it.
There is also a Dark Space portal in a room guarded by a statue in the southeast portion of the Sky Garden. Enter the portal, and you will be able to transform into Freedan.
There are two Red Jewels in the Sky Garden. One of them is at the beginning of the east-most section, while the other is on the back side of the southwest section. You should have 19 Red Jewels collected so far in the game by the time you are done with the Sky Garden.
In the southwest section, you will have to hit switches on the back side in order to move some pillars on both the front and back sides. This will definitely have to be done to get the Crystal Ball. You will have to hit a switch on the back side with Freedan's Dark Friar, transform to Will when you get back to the front, then run down the nearby ramps and break the statues with the Psycho Dash to get to another part of the back side. From there, you will have to destroy a statue's sword and then move the statue to a nearby title with your telekinesis. This will allow you to run up and down all the ramps to reach the third Crystal Ball.
In the west-most section, when you make it to the ramp, run down and jump at the first ramp, then immediately hold Left after you cross so you don't run across the second. By doing this, you can explore more of the section. You'll want to do this in case you need to go to the back end switch to Freedan.
When you find all four Crystal Balls and place them in the tiles with the holes in them, you will be able to build a bridge to the boss...
Thursday, October 25, 2018
The Ukes of Hazzard re-arrange the South Cape theme for ukelele
If anything probably ever needed a ukelele remix, it's this. Just ran across this; this is wonderful.
PrinceWatercress plays Illusion of Gaia - Part 7 of 21
We free the rest of the people imprisoned in the Diamond Mine, then head to Nazca in the hunt for the second Mystic Statue.
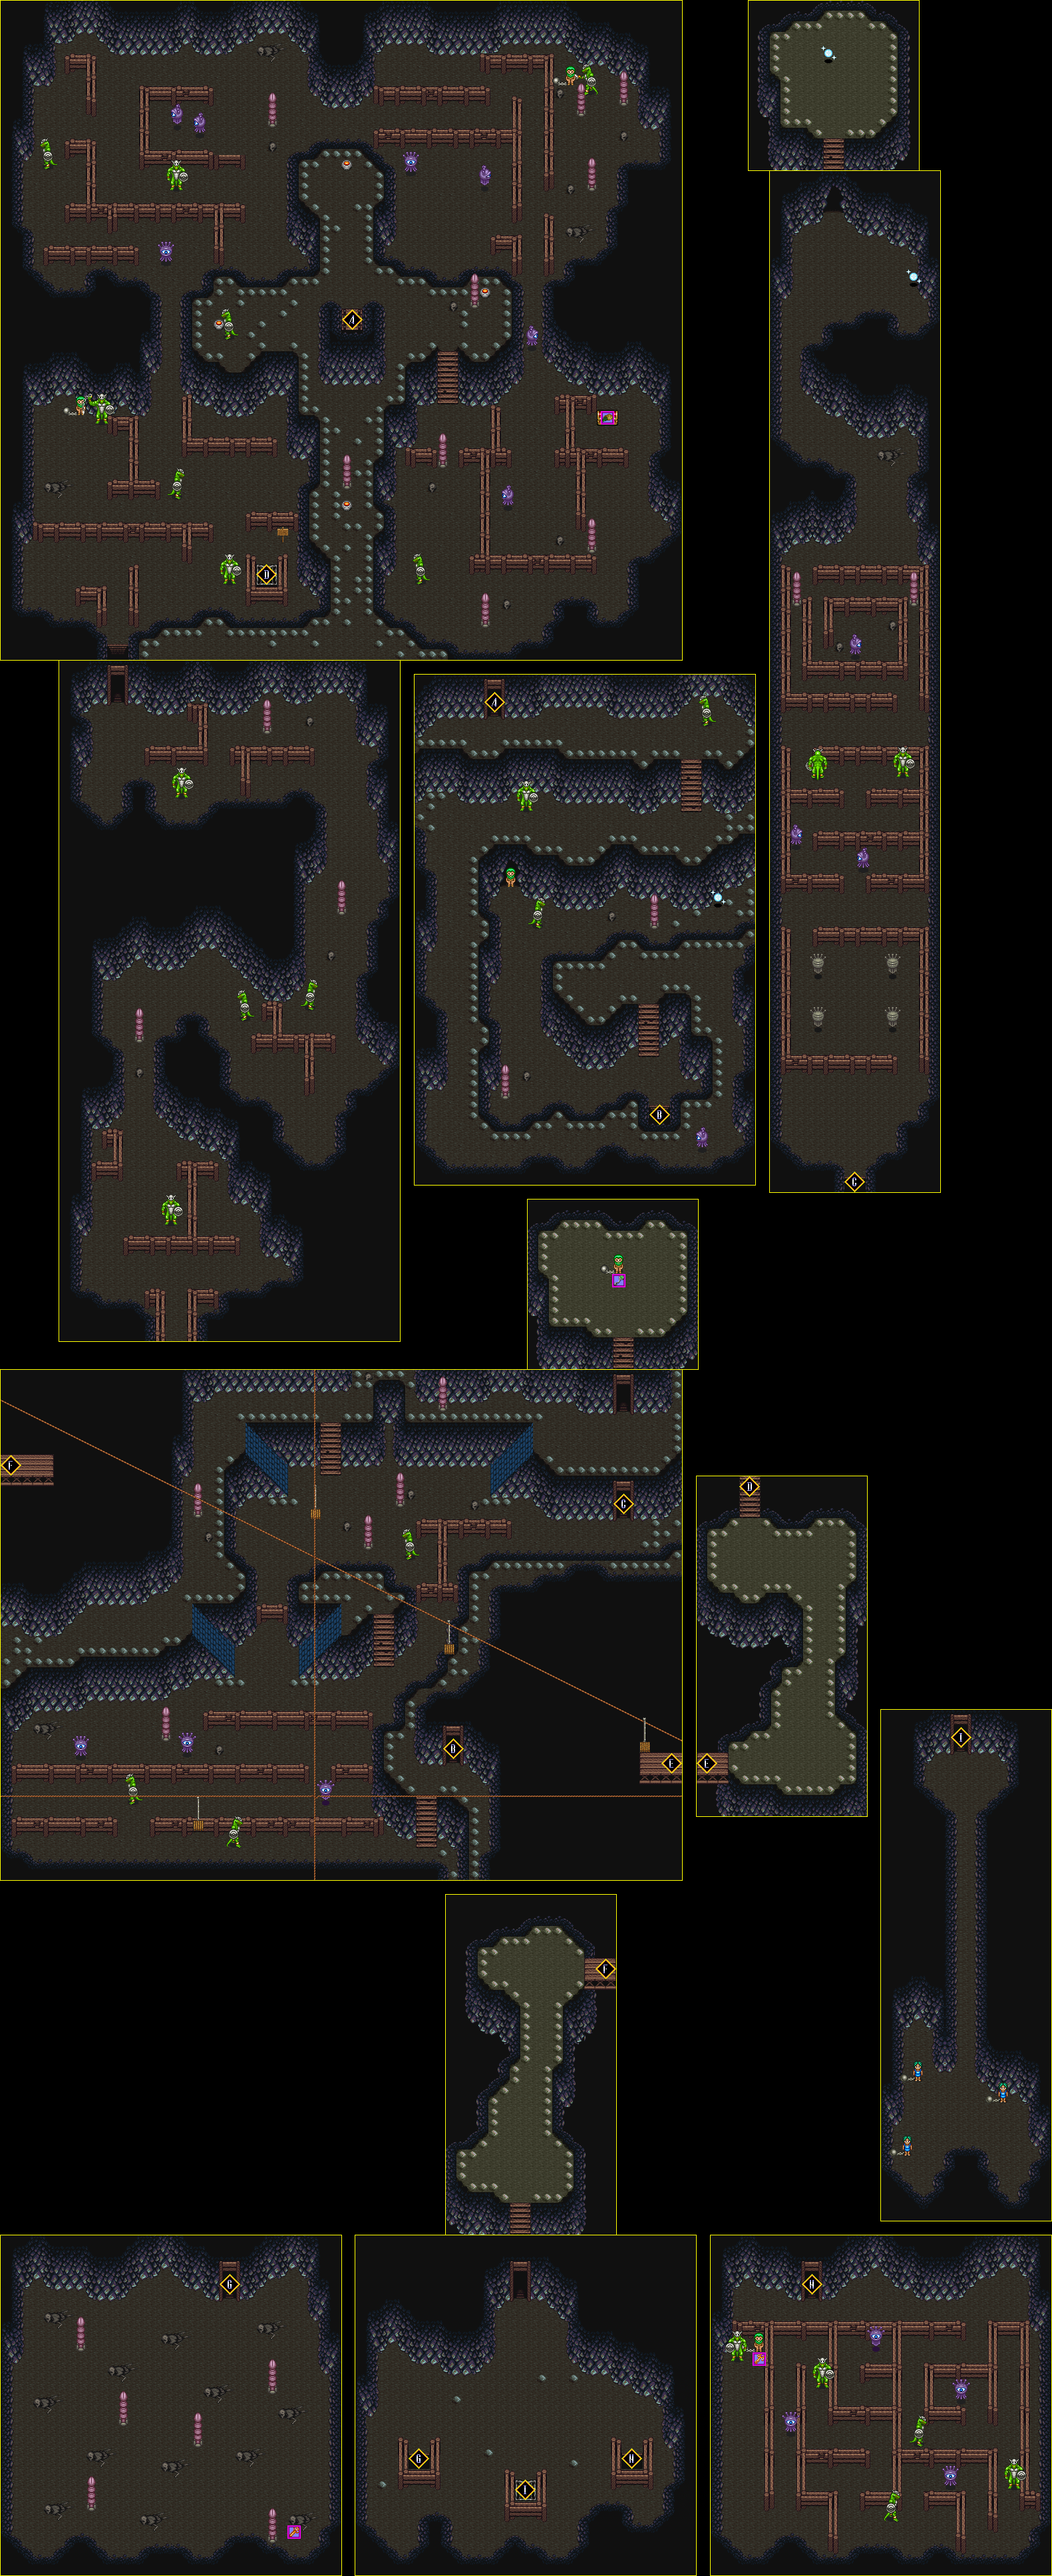
Diamond Mine
.png)
Now that the unreachable enemy has finally been defeated, we can use the ramps to reach a new area and free another laborer. The laborer will tell you that there are deeper levels in the mine, and he will give you a key to save them
The elevator is back at the beginning. Head to the door at the right, then equip the Elevator Key and use it at the door to open it.
The corridor takes you a lift. Get on the left, and it will take you to the other side, where there are two areas to the sides and another door - this one with two keyholes - in the center.
The west area is the morgue. Charge up Dark Friar, and if you see any worms pop out of the ground, hit them with Dark Friar. If you go to the corpse in the southeast corner, you'll see something flashing. Walk up to where the flash was and press A to get Mine Key A.
The east area is a maze full of monsters. The laborer at the end will give you Mine Key B when you cut the chain and talk to him.
When you have both Mine Keys, head to the door and use both keys. You'll meet Sam, Remus and Imus. Cut the chains and talk to them. They will tell you to help their countrymen regain strength, as well as the strange occurrences that are plaguing the villagers. Sam will also teach you a melody that you can play as Will to restore Lance's memory. In exchange, you will give Sam the Edward's Castle Prison Key and the Incan melody to order to remove them from the inventory, as you cannot get rid of them otherwise.
Also, don't worry about having to morph back into Will on the way out. You will automatically be transformed back into Will after you leave.
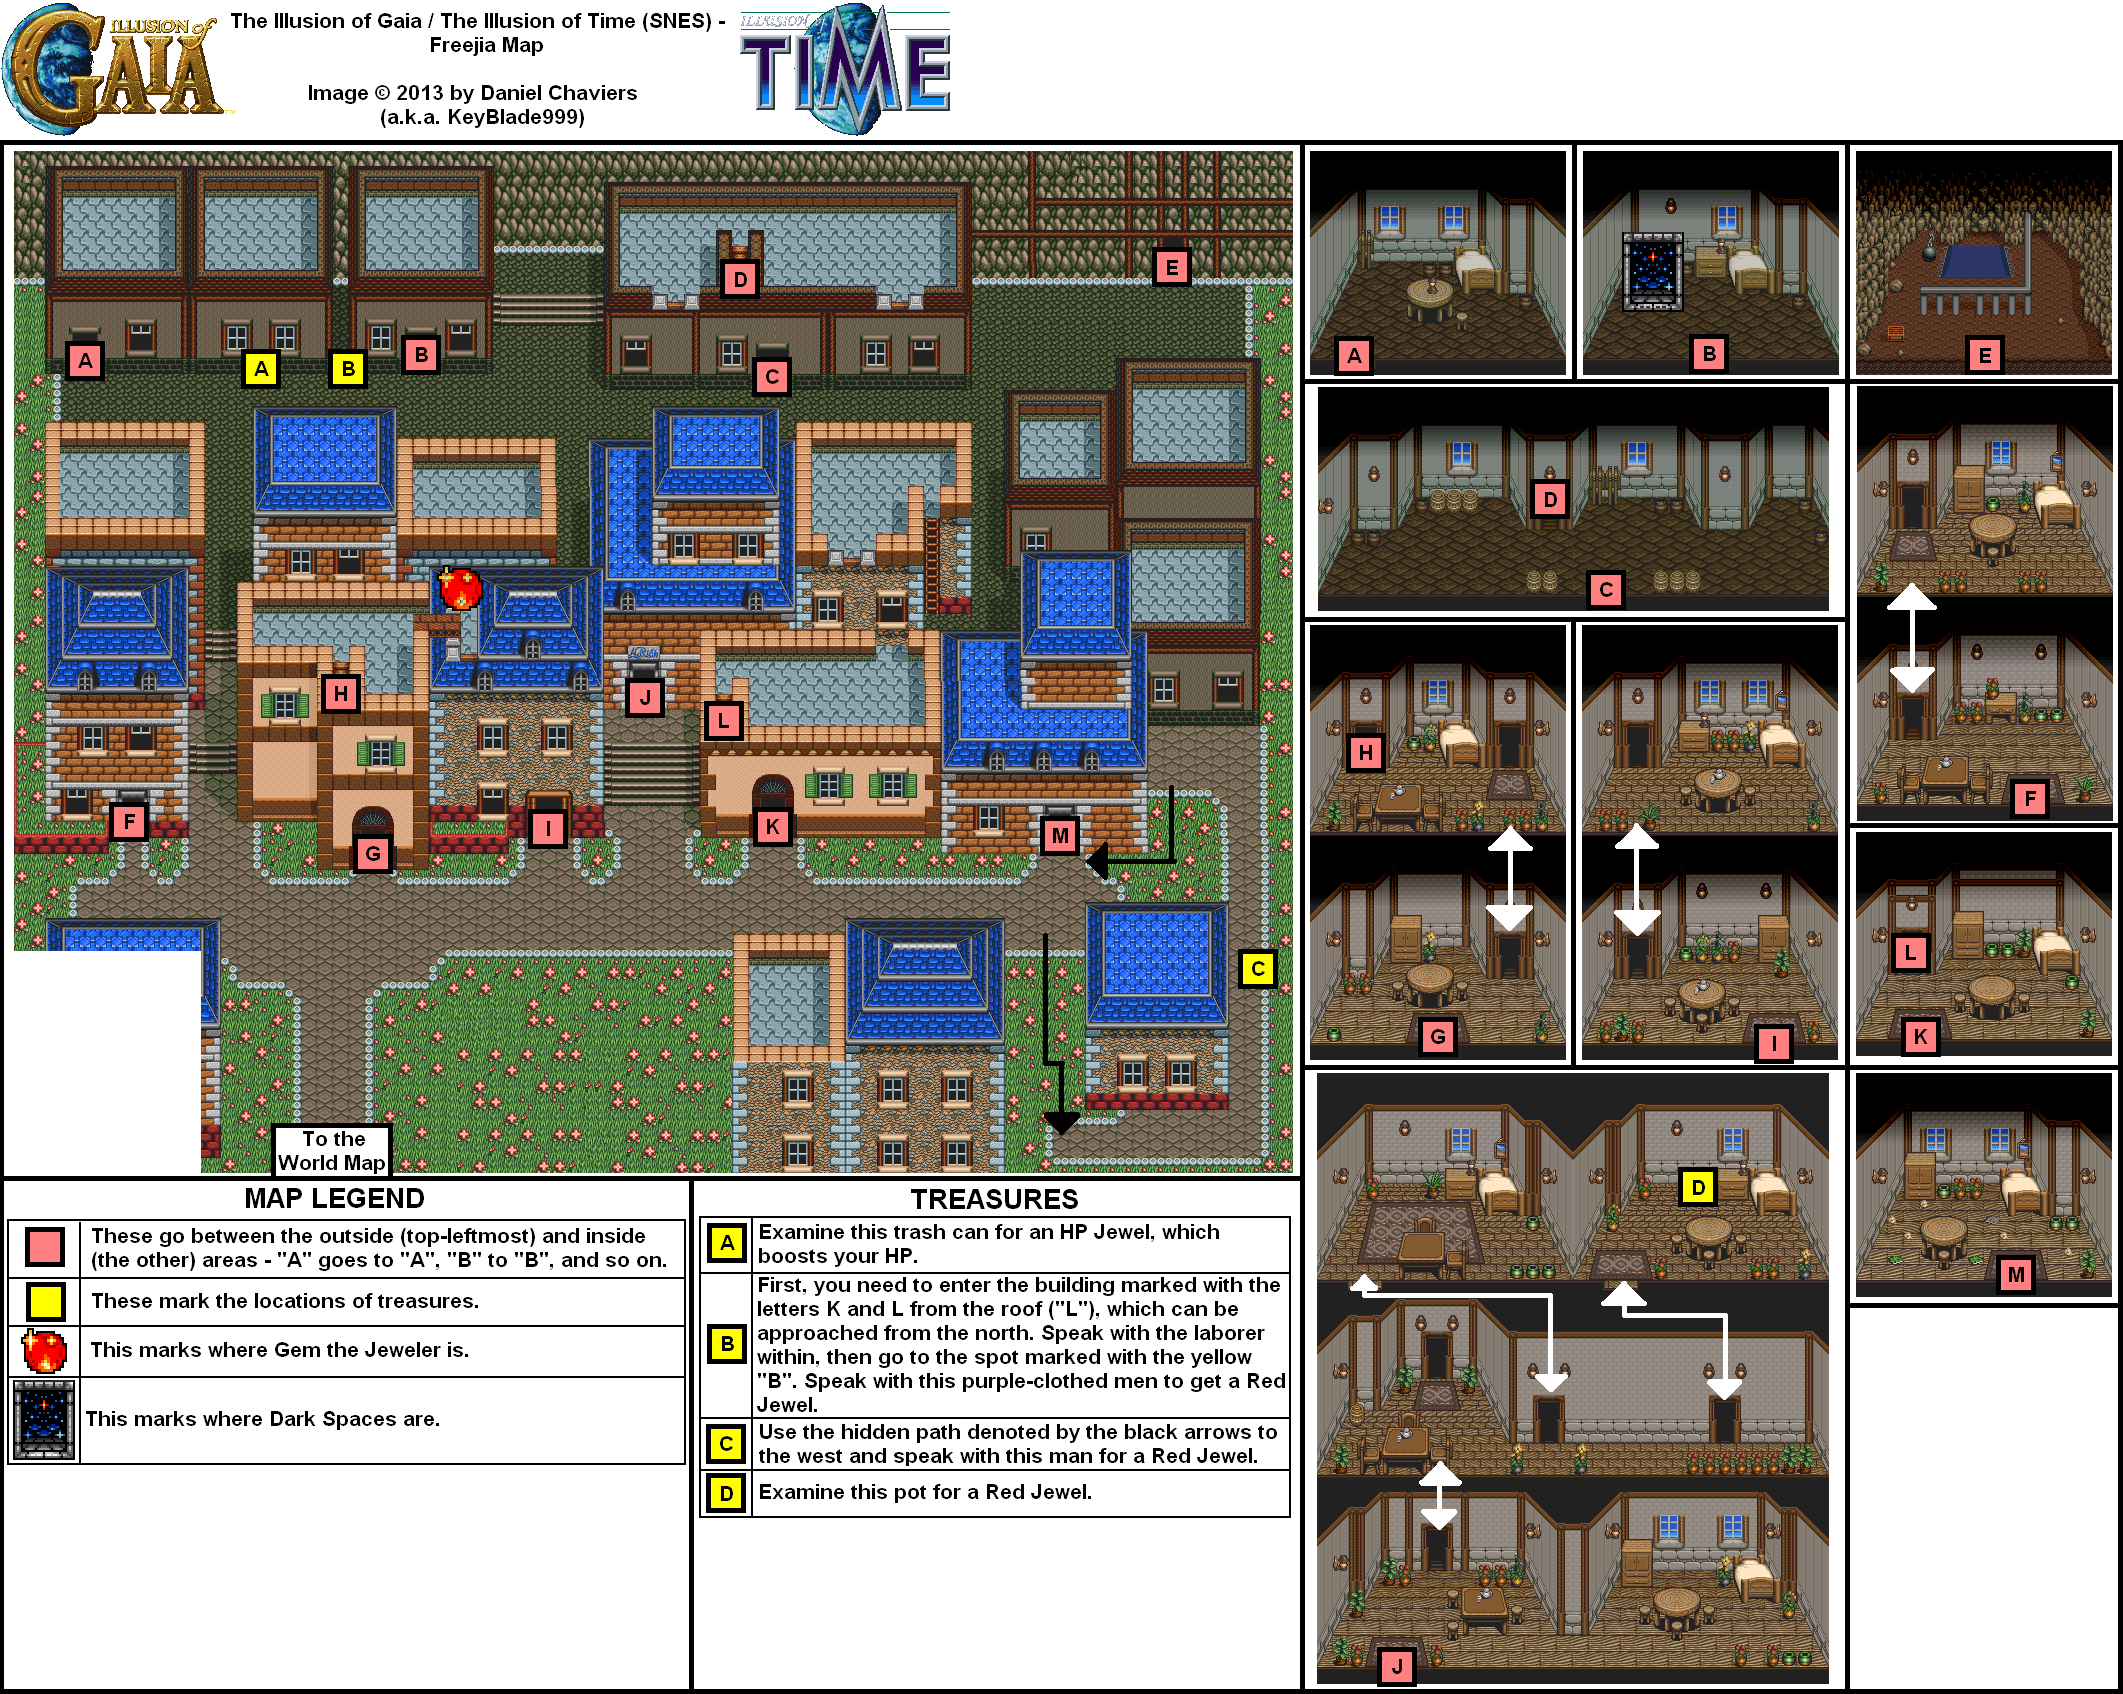
Freejia
.png)
Head back to the hotel and use the Memory Melody near Lance. Once you use it, it will disappear from your inventory. You'll restore Lance's memory, but you will also get some rather deep dialogue.
After Lance's memory is restored, talk to Erik. You'll head to the inventor Neil's cottage. Neil invented the airplane, and he also happens to be your lost cousin.
Neil's Cottage
At Neil's Cottage, Will and his friends will meet Neil. Talk to Neil, and he will ask you to check out his inventions. Press A at the camera, the telescope, the airplane wing and the oxygen tank. From there, talk to Neil again. The red star in the constellation of Cygnus as well as the disappearance of Will's father are all brought up, and you'll get the choice as to whether or not to go to Nazca. Say yes.
Nazca
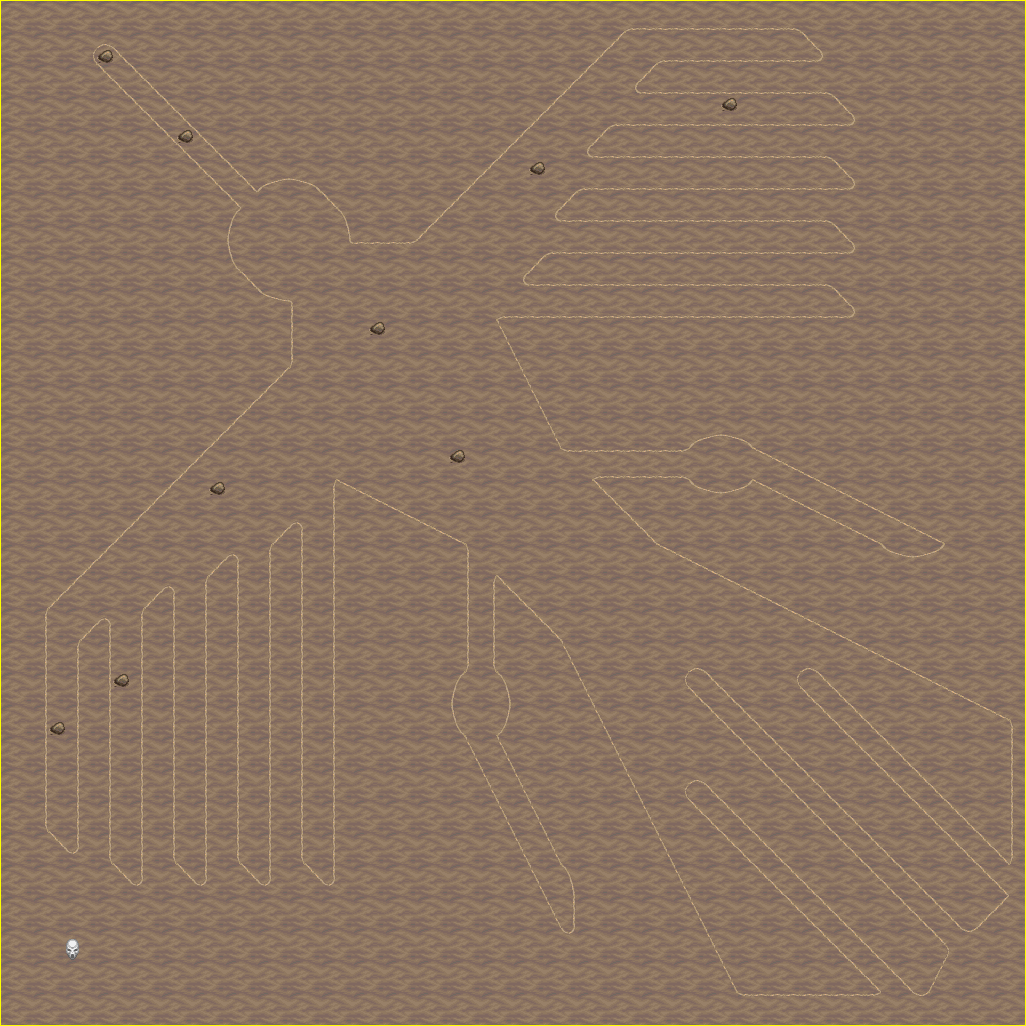
At Nazca, Neil will tell you about the drawing of the bird on the ground, then everyone will look around. Talk to Kara, and she will walk to the "stomach" of the bird drawing. Then, talk to Lilly and Lance, then go to all the rocks. After that, go to to the southwest corner. A member of the Moon Tribe will show up. Approach him, and he will teleport. After you approach him a couple of times, talk to everybody, then talk to Neil.
Erik will notice that the drawing of the Condor looks like Cygnus, and that the rocks are positioned like the stars in the constellation of Cygnus. When asked where the red star is, pick "Condor's Left Foot." Everyone will head to the left foot, press A in the center of the foot joint where everyone is. You'll find a tile, and when Will's flute touches it, the sky goes dark and Will will suddenly vanish. You will then be in the Sky Garden, the second dungeon in the game...
Subscribe to:
Posts (Atom)