Showing posts with label part 52. Show all posts

Sunday, March 8, 2026

PrinceWatercress plays Super Mario Odyssey - Part 52 of 92


In this entry, we beat Bowser and end the main game, but we're not done yet...


We're all done here. Head into the Wedding Hall, then smash the door with the hat on it with Cappy. You'll show up just in time for the wedding, but when you approach Bowser and Peach, Bowser activates a trap door sending you to the final battle.

Throw your hat at Bowser's hat when Bowser throws his hat at you. From here, you'll want to run towards Bowser and punch him repeatedly. As you do this, you'll need to jump over the rings of fire that Bowser produces as he jumps around. When he starts throwing rocks, go straight towards Bowser and punch the rocks that come straight at you while avoiding the rocks that get thrown to the side. You'll finally catch up to Bowser. Keep punching him, and when Bowser turns around and shows his flaming tail, be ready to jump over it before hitting the knockout blow.

From here, you'll want to get away from him. When Bowser jumps to the center, run back and forth away from the fire blast and use the sideways jump to jump over the fire when it catches up to you. He will then throw multiple hats. The purple ones are fake; go for the white one and throw your hat at it. From here, the pattern repeats, but this time, he throws flaming spiked balls that cannot be punched out; you'll need to avoid them entirely. Bowser will also swing his tail twice once you start punching him. You'll want to jump over it both times.

You'll get the fire blast you'll need to jump over again, then Bowser will throw even more hats. You know what to do here. Avoid or take out the purple hats, capture the white hat, catch up to Bowser, avoid the spiked balls, punch him repeatedly. He will swing his tail three times in succession, and before you can hit the knockout blow, he swings it one more time. Jump over it for the final time and punch him for the final hit.

Once you beat Bowser, walk up to him and peach. Moon rocks will start falling, and everyone will fall into a pit. You'll end up in an underground cavern. Catch up to Bowser and Peach, and watch out for the falling pieces of floor. Throw your hat at Bowser to take control of him, and enjoy the references to earlier games once Mario is inside of Bowser.

Y attacks, B jumps and shaking the controller breathes fire. You'll need to punch through the walls at the beginning, then run across the moon rocks while avoiding the rocks that are falling from above. When you see the column, repeatedly press Y to claw through it and knock it down.

You'll then enter an 8-bit area. While you're inside, you'll want to hurry to the top as fragments of the tower start falling down. Destroy the blocks by jumping into them from below or using your Y button attack, which will be a fireball just like in Super Mario Bros. Once you get out, you'll need to claw through the cracked walls again. You'll soon come across a wall made of moon rock. Repeatedly claw at it to turn it gold and break it...but you're not done yet.

You'll need to slash at the four columns in the next room with the Y button, but as you do this, the fragments of the floor will turn gold and fall when you walk on them! You'll also have to deal with debris falling from above again, and these pieces of debris will split into smaller rocks that move in the cardinal directions. For best results, keep jumping as you move from column to column, and run around each column in a circle as you claw at them. 

As you break columns, more parts of the floor and turn gold, so watch where you're going. Once you destroy all four columns and reveal the rock in the center, slash at the rock, then slash at the moon rock to reveal a pylon. Jump into the pylon and hold Up on the left stick to get out of here.

Once you end up back on the Moon, Peach and Mario will be safe, and Cappy and Tiara will reunite. Bowser gets back up, and he and Mario fight over Peach, who finally has enough and leaves with Cappy and Tiara back to the Odyssey. As the Odyssey takes off with Peach, Cappy and Tiara on it, Mario and Bowser try to catch up. This ends the game, but we're not done yet! Now that we've beaten the main game, we have unlocked a whole slew of Power Moons throughout all of the kingdoms, and we're going to go back to the beginning and grab them all.

Before that happens though, we get the credits, then we end up in the Mushroom Kingdom near Peach's Castle. We have another set of Power Moons to get and one more set of Regional Coins to grab, and now that we have over 250 Power Moons, we can head over to the Dark Side, which is past the Moon Kingdom. Cappy will stick with you for the post-game, and we'll start the post-game in the next video...


Sunday, October 20, 2024

PrinceWatercress plays Chrono Trigger (Super NES) - Part 52 of 70


We're almost done with the Black Omen...


You'll soon face the Giga Mutant. The Giga Mutant will try to put you sleep and poison you, among other things, and the lower body can also hit you with Life Shaver if given the chance. It also likes to suck HP out of its lower half to keep its upper half alive. Charming the upper half gives you a Wall Ring while the lower half will give you a Hit Ring. Hit both halves with Magic and don't let up.

After this, you'll take an elevator ride, and you'll face even more monsters along the way to the next boss battle. All of these battles are one-time-only, so you'll need to Charm as many MegaElixirs as you can out of the Ruminators and get two Power Tabs out of that double Tubster battle. There will also be a ton of Panels you can fight, so get those Speed Tabs with Ayla's Charm!

You'll then face the Terra Mutant. The upper half will hit you with a bunch of fire attacks, but both halves have attacks that can bring party members' HP to one (Halation for the upper half, which affects the whole party; Life Shaver for the lower half, which affects just one party member). Charming the upper half gives you a Muscle Ring while Charming the lower half will net you a Power Seal.

This battle has a bit of a twist. While this battle is much like the one with the Giga Mutant, you'll want to focus entirely on the upper half and hit it with powerful magic attacks that affect only that half, as the lower half will absorb all magic. When you take out the upper half, the lower half will disappear soon afterwards, so if you wanted, you can just hit the upper half with Luminaire and Dark Matter until the cows come home, and it wouldn't make a bit of difference.

You'll soon face another Lavos Spawn. Same strategies apply: attack the yellow "head" and not the shell, unless you want your party to be wiped out. After that, you'll face five more Panels, which means five last shots at getting Speed Tabs for the party. You'll then have one last save point...

Sunday, July 14, 2024

PrinceWatercress plays Ratchet and Clank: Going Commando - Part 52 of 54


This video took MONTHS to make.

First | Previous | Next | End

So here's everything I did in this video:

  • Getting four million bolts by replaying Challenge 2 in Gorn repeatedly by shooting a nuke and destroying all the enemies with the Nuke as soon as I start the challenge. In case of any stragglers, I go after them while collecting Raritanium. This allows me to buy everything else that I have yet to buy at Slim Cognito's and earn the "Nice Ride" Skill Point from doing so.
  • Buy the remaining weapons not yet in my inventory and evolve all remaining unevolved weapons in the Protopet area in Planet Grelbin, while also getting max health and max experience. I also show off the remote control capabilities of the Hoverbomb Gun.
  • Buy the Carbonox Armor, which cuts all damage by 90%.
  • Got a few Skill Points from the aforementioned things as well as the Skill Point for the grinding section in Boldan, which I forgot all about until this point.

13:59 - The Plasma Coil hits and shocks one enemy, but will also shock nearby enemies when possible.

The Shield Charger zaps enemies who get to close to you.

The Hoverbomb Gun will shoot bombs that you can also control by holding Circle and moving the left stick around. Pressing Circle again will make the bomb explode in its current location.

The Minirocket Tube shoots rockets at enemies.

24:00 - The Tesla Barrier is the evolved version of the Shield Barrier, and it shocks enemies from a little further away.

24:49 - The Plasma Storm is the evolved version of the Plasma Coil, and it shoots out a ball of lightning that zaps nearby enemies as it flies forward.

26:28 - The Megarocket Cannon is the evolved version of the Minirocket Tube, which shoots more powerful rockets.

27:18 - The Tetrabomb Gun is the evolved version of the Hoverbomb Gun, but it shoots five bombs instead of one for more widespread destruction.

For buying and evolving all the weapons, you'll get the "Weapon Envy" Skill Points.

29:26 - You'll get the "Nano to the Max" Skill Point when you reach maximum health and experience. This also unlocks more stuff to buy at Slim Cognito's. It's just more paint jobs, though.

36:55 - The power lines in Boldan. If you can grind through this whole section without getting hit once, you'll get a Skill Point. I end up making two winning runs, since the game doesn't register me getting the Skill Point the first time. That ended up being really frustrating, and it is amazing that it took one more try after that to make it work.

At the end of the grinding section is another button you can press to buy weapon mods. Keep this in mind, since we'll be utilizing it soon.

Skill Points:


Nice Ride: Buy all weapons for the ship at Slim Cognito's.

Weapon Envy: Buy all weapons and upgrades, and evolve all evolvable weapons.

Nano to the Max: Achieve max health and experience.

No Shocking Developments: Complete the grinding section on Boldan without getting hit once.

Controls:


As Ratchet:

Control Pad/Left Analog Stick: move
Right analog stick: move camera

X:
  • Jump and double jump (hold button after double jump to use Heli-Pack or Thruster Pack)
  • Wall jump (near certain walls)
Square: strike with wrench
Circle: pull out/shoot currently equipped gun
Triangle: 
  • quick select (hold and use in conjunction with Control Pad or left stick to switch guns; menu can be customized in Quick Select on the pause menu
  • double tap to switch between two most recently equipped weapons/items
  • interrupt on-screen messages

Select: open map
Start: Pause menu
  • Control Pad: select option
  • X: confirm option choice

L1:
  • center camera behind Ratchet (tap button to center)
  • first-person view (hold button and use left stick or D-Pad to look around; let go of L1 to move camera back behind Ratchet)
  • Square: wrench boomerang
  • Circle: fire gun
  • R1/R2: zoom in and out (Pulse Rifle only)
L2/R2: strafe (hold while moving)
L3: see health and Bolt totals
R1/R2: crouch (hold down)
  • Square: wrench boomerang
  • X: high jump
    • long jump (hold crouch button and jump while running to perform)
R3: open map

In water:
  • Square: dive and descend
  • X: surface and ascend
  • R1: accelerate with Hydro-Pack

As Clank:

Control Pad/Left Analog Stick: move
Right analog stick: move camera

When hanging off platforms:
  • Control Pad/Left Analog Stick: move
  • Forward+X: vault up
  • Back+X: drop down

Square: punch
X: Jump (press and hold in the middle of a jump to glide with Heli-Pack)
Triangle: command menu (hold and use in conjunction with Control Pad or left analog stick to choose commands)

Wednesday, June 5, 2024

DeceasedCrab plays Earthbound - Part 52 of 53


With Ness on his own again, we can ride a bike for the ending.


Now that Ness is on his own, you can finally ride a bicycle from the bicycle shop again.

In this video, we visit Happy Happy Village, Threed, Fourside, Winters, Summers, Scaraba, and Deep Darkness.

If you head to the Cafe in Fourside, you'll find Pokey's dad. He will tell you that Pokey left him and disappeared, and tells you to tell Pokey to treat him better and to not tell his wife he has been here.

At the Monotoli Building, Mr. Geldegarde Monotoli will be working as an elevator man, having returned the building to Mr. Enrich Flavor, who will still be in the room where you first met Mr. Monotoli.

Back at Winters, you'll find out that Jeff is still with Dr. Andonuts and that Tony is still waiting from Jeff to return. You'll also find out that the gum-chewing monkey has been off saving the world.

The Magic Tart woman in Summers will give you a tart if you talk to her.

You will not be able to enter the Stoic Club, now known as "The Lazy Cowpoke Stop 'n Go," due to their not allowing minors. 

Somehow, you can ride the bike in the Deep Darkness.

Saturday, November 11, 2023

Jerry Martin plays Strong Bad's Cool Game For Attractive People - Part 52 of 53


In this entry, we finally finish the fifth episode and enter Extended Play. Unlike other episodes, there's not much to do here.


From here, use the Peasants on the bottom-right pedestal, then use them on the top-right pedestal. This will expose Trogdor's final weak point while also making it easier to earn 100%. Once you hit the final weak point, Trogdor is slain and Homestar is saved. Unfortunately, Trogdor was a load-bearing dragon. Use the key that unlocks the arcade cabinet on the door with the padlock in front of you to get out.

Strong Bad will wake up back at the arcade machine. Unfortunately, Trogdor is also there, and he scares everyone off as the credits roll before ultimately burning the camera, which segues into the cast of characters for the game.

After the credits, you'll be in Extended Play mode, where you'll be able to do a few new things.

Use the Peasants on the Mysterious Bush. Trogdor will show up to burninate the Peasant and you'll get the Fudgeclank Cheat Commandos figure.

If you go up to the arcade machine, you'll be able to play Trogdor's 3D-Ungeon. Use the mouse to aim and fire at the peasants as they pop up on the pedestals. You'll need to burn a minimum number of peasants in order to get to the next level, and if you can get over 10,000 points in the game, you can get closer to 100% completion. The game ends when you miss too many peasants, causing Strong Bad to show up and slay Trogdor.

Once you're in Extended Play, you can put the Halfathlon on the map if you haven't already.

Head to the Cool Car and use the Light Musket near the right end of the car. You'll be able to shoot down a Redcoat for 100 points.

GOOD GRAPHICKETEERS CARDS:
- Carpal Tunnel Connie: Examine Strong Sad's bookcase.
- Trick Card 1: Use Gel-Arshie on Strong Bad's mailbox.
- Trick Card 2: Take a picture of the ghost to the left of the photo booth.
- Anti-Social Angus: Underneath the box in Peasantry Inn.

PARTY MEMBERS:
- The Algebros: Talk to The Algebros on the brick wall.
- Snake Boxer: Talk to the Snake Boxer in the Crates area and talk to him.
- Performing Bear: Click on the Space Circus Catastrophe game in the Mainframe.
- Gel-Arshie: Get the killscreen in Gel-Arshie's Fruitboarder.
- Innkeeper: Talk to the Innkeeper about repairing Limozeen's Spaceship.
- Mista Fixit: Use ??? on the bucket in the Crates area.
- Limozeen: Use the Innkeeper on Limozeen's Spaceship.
- Strong Mad: Grab the trophy and use it on Strong Mad.
- Rather Dashing: Use Scorpion Bait on Strong Sad and talk to Rather Dashing.
- Peasants: Obtained when heading towards Trogdor's Cave.

OUTFITS:
- EGA Hat: Smash the crate near Bubs with Snake Boxer.
- Stinkoman Boots: Take a picture of the ghost in the Strong House bathroom.
- Stinkoman Gloves: Use Gel-Arshie on Bubs' Concession Stand.
- Trogdor Shirt: Line up Trogdor with Cottage on the code wheel and use Gel-Arshie on it. (You need to do this before going to Peasant's Quest.)
- Elf Boots: Underneath the box in Peasantry Forest.
- Mista Fixit: Use Mista Fixit on the Cool Car.
- Stinkoman Hair: Use Mista Fixit on the leftmost broken ladder in Stinkoman 20X6.

GAME BOXES:
- Halfathon Box: After obtaining the Light Musket, return and destroy the crate again.
- Lady Crate Ape Box: Underneath then box in Strong Bad's front yard.
- Fruitboarder Box: Use Gel-Arshie on the Brick Wall.
- Spirits of '76: Take a picture of the ghost to the left of the scorpion cave in Peasantry.

GHOSTS TO FREE:
- John Hancock: Give the feather quill to him in Strong Mad's Room.
- Samuel Adams: Give the tea bag to him near the stairs leading to the basement.
- Paul Revere: Give the lantern to him in the TV Room.
- Benjamin Franklin: Give the key to him in the computer room.
- ???: In the picture in the right side of the TV room.
- ???: In the picture in the bathroom near the tub.
- ???: In the picture near the left side of the photo booth.
- ???: In the picture in Peasantry Forest, left of the cave.

CHEAT COMMANDOS FIGURINES:
- Swampslash: Take a picture of the ghost in the TV Room.
- Dryghost: Use the Quest Item on the Munchox before using the Scorpion Food.
- Subtlefuge: Use Gel-Arshie on the lava pool in Halfathlon.
NEW! Fudgeclank: Use the Peasants on the Mysterious Bush. (Extended Play)

PEASANTS BURNED:
- Use the Innkeeper on Limozeen's Spaceship.
- Use the Peasants on Ultimate Trogdor.
- Use the Peasants on the top-left pedestal.
- Use the Peasants on the bottom-left pedestal.
NEW! Use the Peasants on the bottom-right pedestal
NEW! Use the Peasants on the top-right pedestal.

NEW! Score over 10,000 points on Trogdor's 3D-Ungeon.

Wednesday, November 10, 2021

HCBailly plays Final Fantasy II AGAIN - Part 52 of 65


HCBailly re-recorded this one after accidentally selling a useful piece of armor, so the information for this entry is from both the original upload and the re-upload. Enjoy!


Castle Fynn


Once you get Ultima, if you head out and go to Altair, you'll find out it's been destroyed, as are other nearby towns.

Head to Castle Fynn (which is alright) and you'll see a tornado outside of the city. (You may notice that Gatrea is also destroyed.) Head to the town and ask around, and you'll find out that the Empire created a Cyclone that you won't be able to do anything about quite yet (and you definitely can't enter it, because it'll tear you apart).

Head to the throne room. You'll find out that Layla's alive if you haven't been here recently. Talk to Hilda and you'll be able to Learn the Cyclone term. Ask her about it, and you'll find out the Emperor is behind it...literally. He's literally inside the Cyclone. Ask Hilda about the Wyvern, and you'll learn that Fynn has used the light of the Pendant to summon the Dragoons and the Wyvern.

Ask Gordon about the Cyclone, and you'll find out that the only way to enter it is to fly.

In order to enter the Cyclone, you'll have to get a Wyvern. If you Ask Hilda about the Wyvern, she will tell you to head to the room in the castle with the shiny Mirror and use the Pendant to reflect light from it onto the mirror to summon a Wyvern. The light from the Pendant will be absorbed into the Mirror. Use the Pendant on that mirror, and congratulations, you now have a Wyvern.

Believe it or not, you can equip the Wyvern on Ricard as an item. It can cast Blaze 7 on all the enemies in the battle.

Fynn


Head back into town, and you'll find out that the Whirlwind has attacked Fynn, and all of the townspeople (save for one person) are dead...but Paul is still alive. Ask him about the Cyclone, and he'll tell you to search the bed. Do that and you'll find a fake wall that leads to eight treasure chests. The stuff in these chests is actually pretty useful. One of them is a Blood Sword, and while you can get two in the Famicom version, this is the only one you can get in the remakes.

The Captains are just stronger versions of the Sargeants. While you could meet them earlier, such as patrolling Fynn, on the Dreadnought, at the arena or at Deist Castle (while there were still monsters), you should be able to fight them more easily now compared to the first times you met them.

Any spells that bestows a positive status on your party members such as Haste do not stack; re-casting simply removes the status and re-applies it.

Leave town and enter the Cyclone. The Wyvern will go in, and you'll be inside.

Cyclone


The water does damage you while you walk in it.

If you didn't get the Ripper Knife earlier in the game, you can get it here. It's still pretty powerful, and while the knife is supposed to deal an additional 20 HP of damage per hit to an enemy it strikes regardless of their defense, that effect is bugged in the Famicom version of the game and it does not work.

The VmprLady (Vampire Level) is Rank 6, has 1100 HP and has Temptation 9, Sleep 16, Blizzard 12 and other spells. Get some Mind-elemental protection on (preferably with the appropriate armor or Barrier 3) and take her out as soon as possible. If you can, hit them with Life like you did before.

If you've actually been leveling up on Axes for quite a while, the Poison Axe is probably one of the best weapons in the game for you. Besides being quite powerful, it can actually Poison enemies and works very well on Lightning-based enemies.

Thursday, May 23, 2019

HCBailly plays Final Fantasy IV (Super Famicom) - Part 52 of 70


Secret of Mana isn't the only game with a death wall in it...but that's not even the worst thing that happens in this entry!


At the fourth basement floor, there is a hidden treasure in front of the left-hand rope leading downwards. By fighting off six Dream Evils (turn 'em into Toads!), you'll be able to access a rope that leads nowhere new.

At the fifth basement floor, you'll finally find the Crystal Room. You'll be able to take the Crystal, but as you leave the fifth floor, the wall will try to close in on you.

To beat the Demon Wall, have Edge throw the Hell Wind Shuriken as an item. Have Rydia summon Leviathan, have Kain use Jump and have Rosa Berserk Edge. If you don't beat the Demon Wall in time, all your party members will start dying one by one, but you should be able to beat this one.

Unfortunately, you'll have to leave the fifth basement floor to use Teleport or Warp. You'll only be able to warp back up to the first floor, and when you get back to the entrance, Golbez's presence shows up once again. Kain is brainwashed by Golbez once again and steals the last Crystal, then runs off while Golbez boasts about opening a way to the moon.

Monday, June 11, 2018

HCBailly plays Terranigma - Part 52 of 75


Also known as "The one where HCBailly breaks into song."

World map by Tropicon. Loire and Litz maps by Amiz Azadur. 


There's a secret area next to the mountains north of the oasis in Africa. Just stay near them and move around in the desert area to find it. You'll find a ton of gems in the two chests here.

Our next stop is to the north of Loire and Litz. It's the island of Britain, and in the north end is Rich's house. This is the house of a man named Rich, who is a self-centered super wealthy magnate and known for his generosity. Go in and talk to Rich, and he'll tell you that he wishes to decorate his house. Only thing is, he can't find anything worthwhile to do it with. He'll ask you to help solve his problem, and he'll tell you that money is no object when it comes to solving it. Give him the painting that you got from Matis in Loire. When he asks if he can have it, say yes. He'll thank you with 1,000 Gems, and if you talk to him, he'll ask you to inform Matis that he will amply support his artistic efforts.

North of Scandia is a lone island with a cave. It's a bit dark, and you'll have to scale some narrow ropes to get around in the cave located. At the other side is Magirock #70.

Head back to Loire.

Loire


Be sure to head to the tourism office and show your new photos while you're here to help the other cities expand.

From there, head to Litz.

Litz


Head to the Crafts building and hand the guy there the Crystal. You'll have to check with him later.

The house west of the Crafts building is the guy needing something to pack the sardines in. Give him the Tin Sheet, and he'll have a way of packing sardines. Leave, go back and talk to him again. He'll give you the Tinned Sardines.

Freedom


Head to Stoma's house and give him the Tasty Meat you got from Suncoast. Let him sample it when he asks to have it. Stoma will like it and give it his vote of confidence, and reward you with 100 Gems.

From there, give him the Tinned Sardines. He'll give it a vote of confidence and give you 100 Gems for that as well.

Head back to Litz and talk to the sardines guy again after you give the Tinned Sardines to Stoma. From there, head to the port of Litz and get on the boat. If you don't talk to the sardines guy, the Litz expansion will not trigger.

Saturday, March 10, 2018

skorch82 plays Brave Fencer Musashi - Part 52 of 70


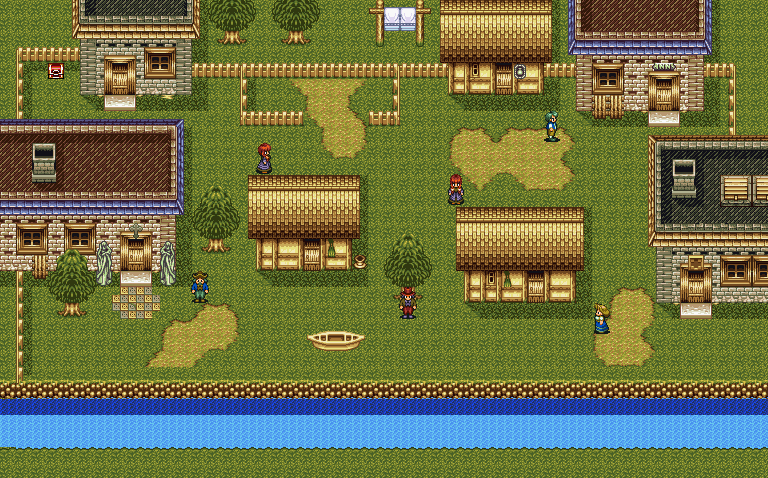
Now that we're done in the Frozen Palace, let's head back to town...

When you leave, you have a choice of going back in or heading back to the village. Go back to the village.

You'll get a cutscene where Colonel Capricciolla talks to Ed and Ben. Gingerelle and Bubbles are now going to deal with Musashi, and depending on how well Topo does, their plans may have to change accordingly. Also, it looks like the Colonel can't stand either of these two guys.

Chapter 5: The One That Nests Underground


When you head back to town, the music is different...again. The Mayor tells you something is up, but to get more info you'll have to head to the shops and talk to people.

Better yet, head to the castle. Steward Ribson will tell you that the Princess has disappeared. He asks that you report back if you learn anything.

Friday, February 24, 2017

Chilean Retrogamer plays Wario Land 2 - Part 52 of 57


If you know what you're doing, you can finish this story off rather quickly.

Final Chapter: Uncanny Mansion

Story 3: The way to the open door


0:15 - Door V is the only door open. When you go through, you'll be at the exit. DON'T FINISH THAT STORY! There's more to it! (Well, you can't anyway. There's no ground below the door.)

0:32 - Go through door IV. Get all the coins you can and leave.

1:29 - Enter door I. Become Zombie Wario so you can get all the coins that you can at the moment.

2:34 - Enter door III. The door to the right leads to the treasure room, where you can win a chalice.

4:02 - Enter door II. The switch here will let you get the coins that you couldn't before.

4:31 - Enter Door IV, then Door V. This takes you back to the exit. Now you can exit.

5:17 - Two more to go...

Monday, December 9, 2013

brickroadbrickroad and SovanJedi play Secret of Evermore - Part 52 of 88


"Gee, I sure hope we're in the right dungeon!"

All maps by Grizzly.

Right Bank

Return to the cave where you got Drain. You'll get the Double Drain formula, which is twice as effective as Drain...especially when leveled up!

Double Drain

2 Ethanol, 2 Vinegar

Also, don't bother going back to Horace's camp to get alchemy ingredients, because Madronius won't be there anymore.

Pyramid


New Map!

When you head back to the pyramid, you'll find out that the river bed nearby has been completely drained of water. Hmmmm...

Go south after you cross the pit and you'll be in what used to be that river. Go east from here and you'll find a cave.

Oglin Cave


You'll meet three guys cloaked in black running around carrying spears. These are the Oglins, and these guys hurt. There's a teleporter here. I wonder where it goes...

Hidden Pyramid Chamber


Well, derp. We're not supposed to be here until near the end of the game. At least there are Oglins and Sons of Anhur here, so we can at least go here to farm on experience and spell levels, so it's not a complete waste of time at this point in the game.

There are three switches when you teleport into here: left, center and middle. The left one leads to some more monsters as well as a Call Bead. You can open the center door, but you won't be able to get anywhere here, as this part isn't available until near the end.

The right switch leads to some areas that you can easily access with the Bronze Axe. Equip that, break down the barriers and find stuff. You'll also find the teleporters that take you to the jars that you wouldn't be able to reach otherwise. You'll only be able to reach one of them right now...you won't be able to destroy the big rock wall held together by that wooden brace until you get the Knight Basher in the next world. Yeah, you won't be back here for a while.