Here's every track from Donkey Kong Country 3.
Showing posts with label Donkey Kong Country 3: Dixie Kong's Double Trouble. Show all posts
Showing posts with label Donkey Kong Country 3: Dixie Kong's Double Trouble. Show all posts
Monday, October 8, 2018
Donkey Kong Country 3: Dixie Kong's Double Trouble - The OST
Here's every track from Donkey Kong Country 3.
Sunday, October 7, 2018
PrinceWatercress plays Donkey Kong Country 3: Dixie Kong's Double Trouble - Part 16 of 16
Well, this final video got nasty...but it was so worth it in the end! We're at 103%!
All maps by Tropicon.
What the heck am I doing back at K3 in the beginning of this video? Turns out, you're supposed to press Left on the Control Pad at Blizzard's Base Camp to access Glacial Grotto. This should allow you to get an easy-to-miss Banana Bird.
All right, back to Krematoa.
Swoopy Salvo
Bonus areas: Three (3)
Remember Swoopy from way back in Kremwood Forest? Well, Swoopy is back with a whole army, because why not? You'll be using Swoopys as platforms in some areas, but you'll also have to avoid some as well. You'll also be playing through the first half of the stage as Squawks, and just because you're able to fly around and spit eggs at enemies doesn't mean this is going to be easy.
The first bonus area is shortly after the K. When you grab it, go down. Here, you'll be Dixie and Kiddy. Bounce off the backs of the Swoops to get to the top and grab the first Bonus Coin.
Just before the "No Squawks" Sign, you will want to go up and to the left. A red Buzz will be flying around in a circle, and if you get in the center of that circle, you'll reach the second Bonus Area. Avoid the lone Swoopy as you grab fifteen bananas for the second Bonus Coin.
Shortly after the "No Squawks" Sign, Koin will be to the left. Grab the steel keg, then get above Koin to stand on Koin's shield and throw the steel keg to the left. You'll get the DK Coin. You can only get here by way of the second bonus area.
Just before the rope ladder that leads to the N, jump up and left and bounce off a Swoopy in the middle of the area where the Swoopys drop downto reach the final bonus area in the game. This one is dead simple for the very last one: tag throw Dixie to get all 20 stars. Congratulations, you now have every bonus area in the game completed.
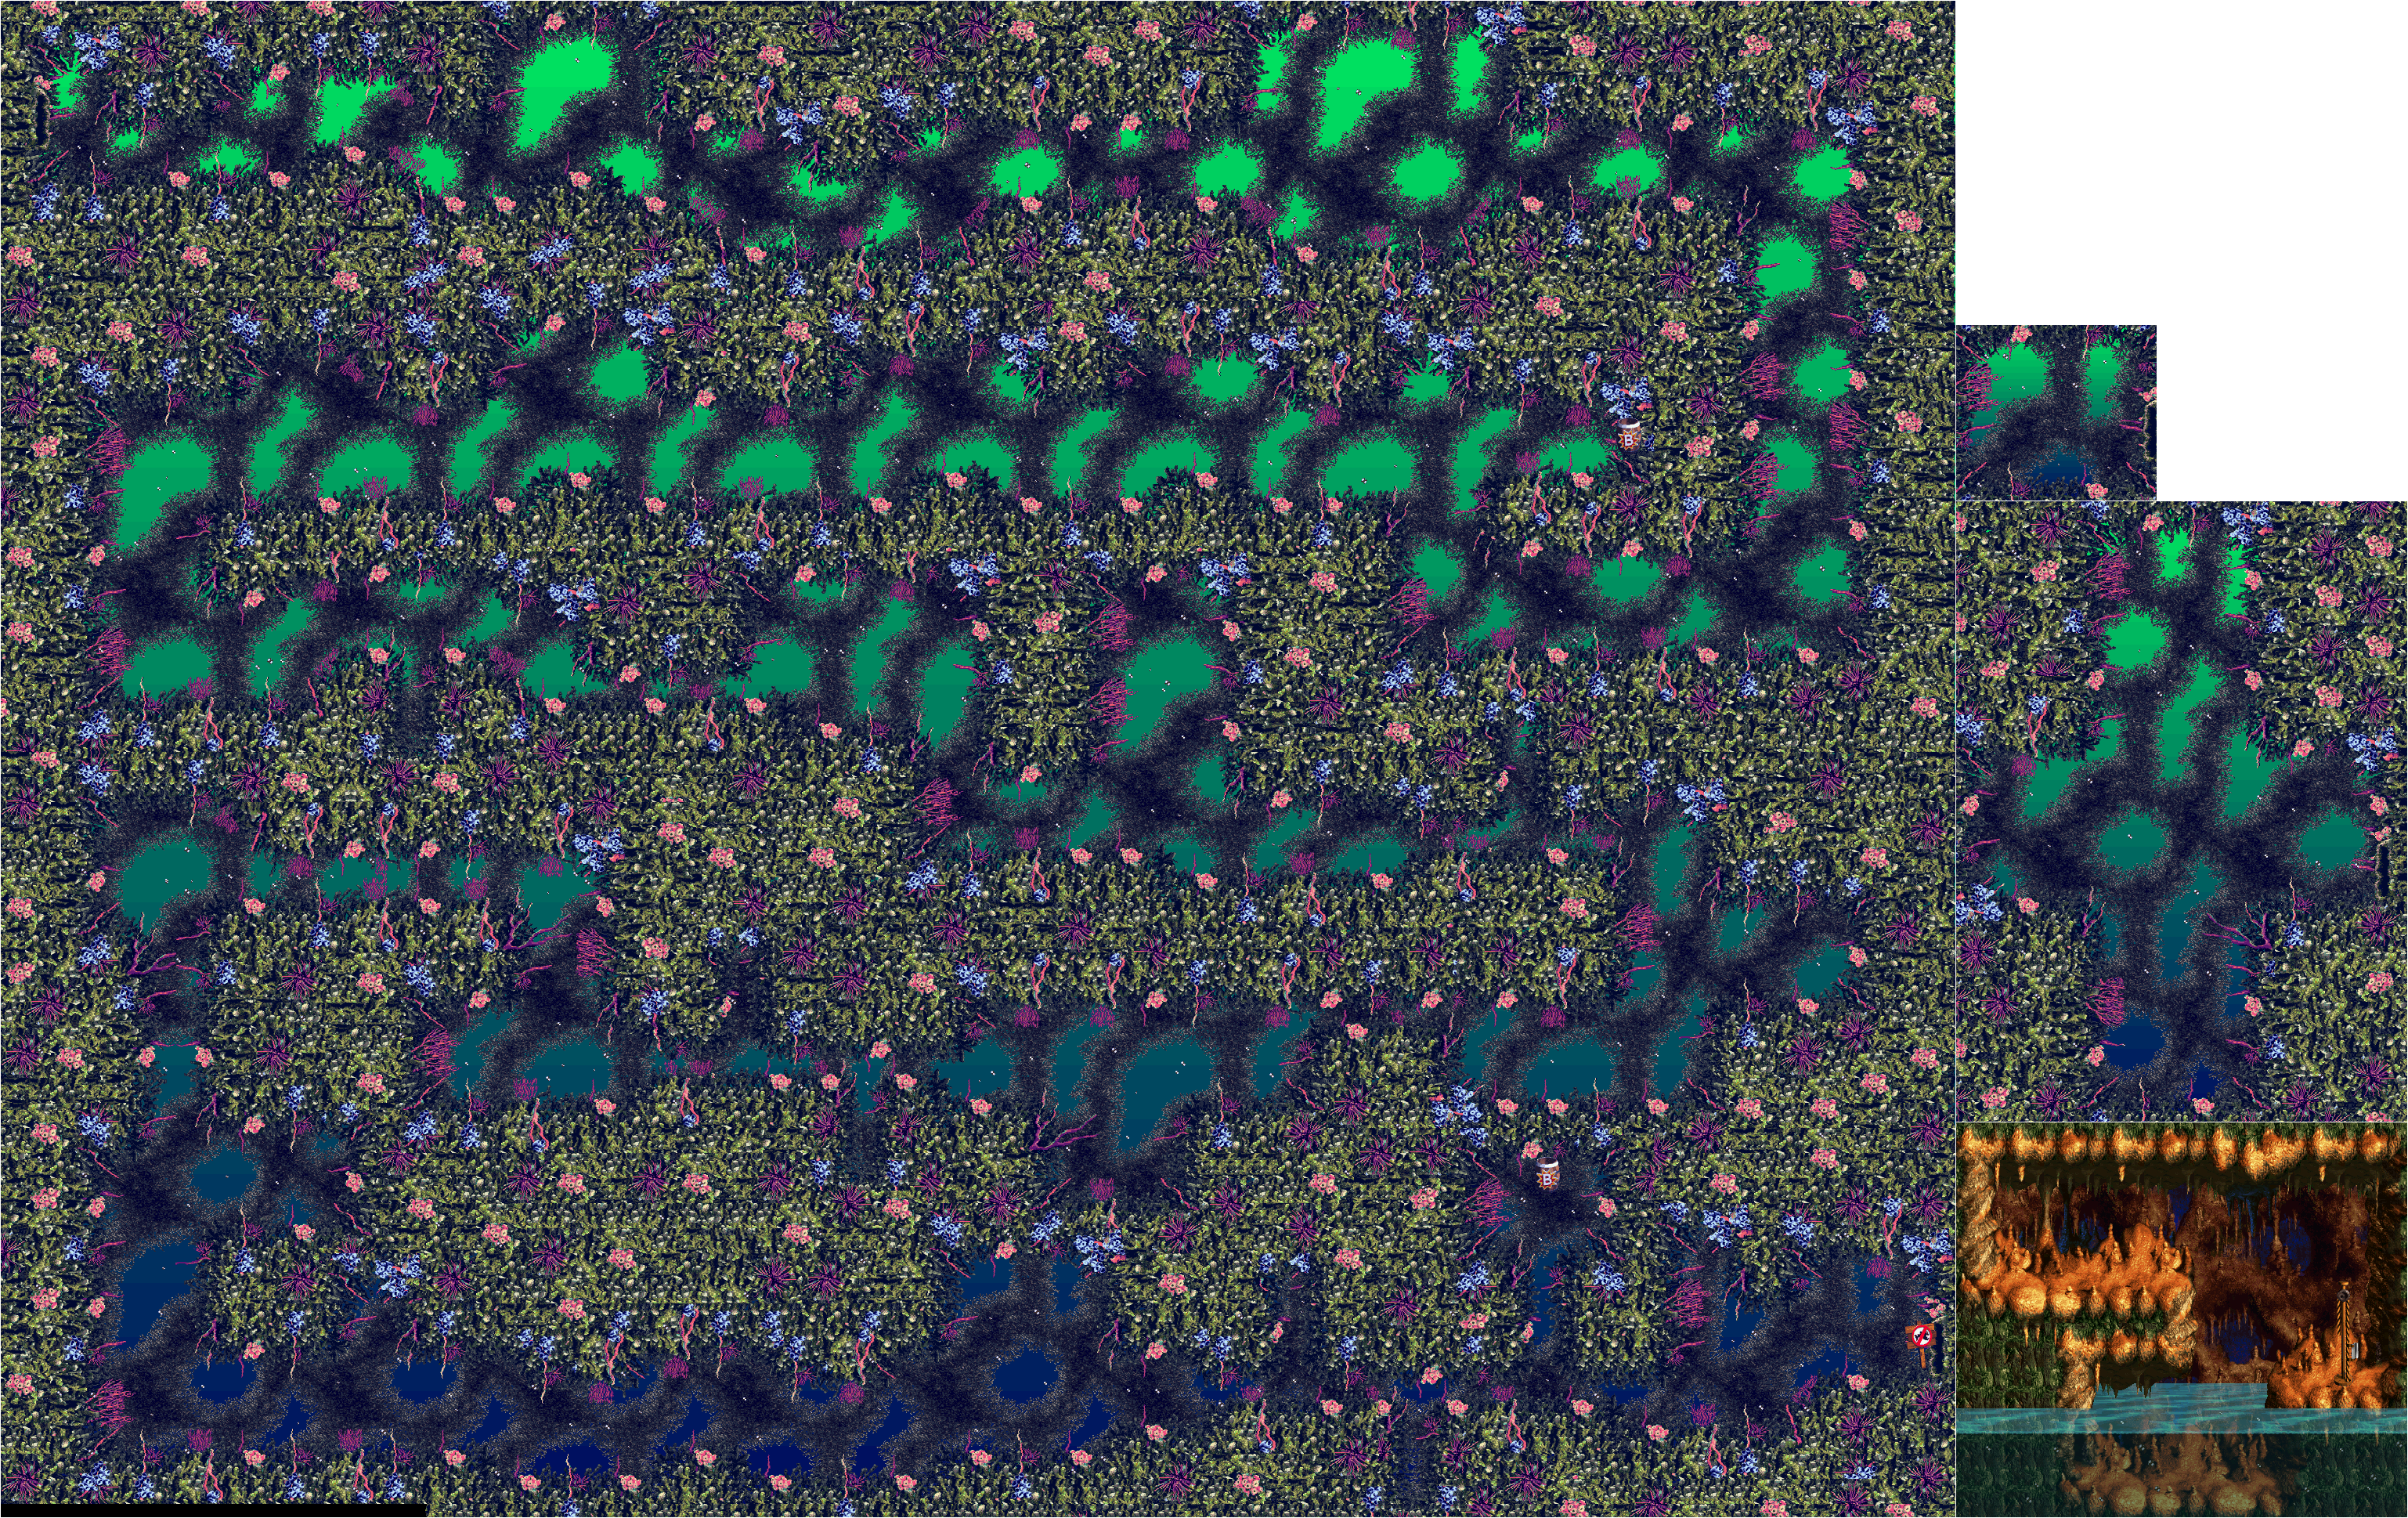
Rocket Rush
Bonus areas: None
Once you have all the Bonus Coins in Krematoa grabbed, head back to Boomer's Bomb Shelter so you can access this level. There are no bonus areas here, amazingly, and you must complete every bonus area in the game if you want to get in here.
The stage starts with you getting into a rocket. From here, you will drop down, and you will gain quite a bit of speed. Use your retro rocket sparingly to slow down keep from using your fuel up, and pick up every fuel can on the way down or else you will not make it on the way back up. You can also use the retro rockets to torch the red Buzzes and turn them ash black on the way down
After you make your way down enough, you'll come across the Star Barrel. Once you hit it, it will be time to make your way up. You can hit the walls to slow yourself down, but if you do that, you will lose fuel. You can do it no more than twice without failing this part, and if you lose all your fuel, you will crash back down into the ground and lose a life regardless of whether you have both Kongs or not. You may have to hit the wall at least once on the final turn so you can get to the end safely.
Once you make it to the end, you'll see the goal, but grab the steel keg first and go left to meet Koin. Grab the steel keg, then stand underneath him, jump up and throw the steel keg over Koin at the top of your jump. You'll get the DK Coin.
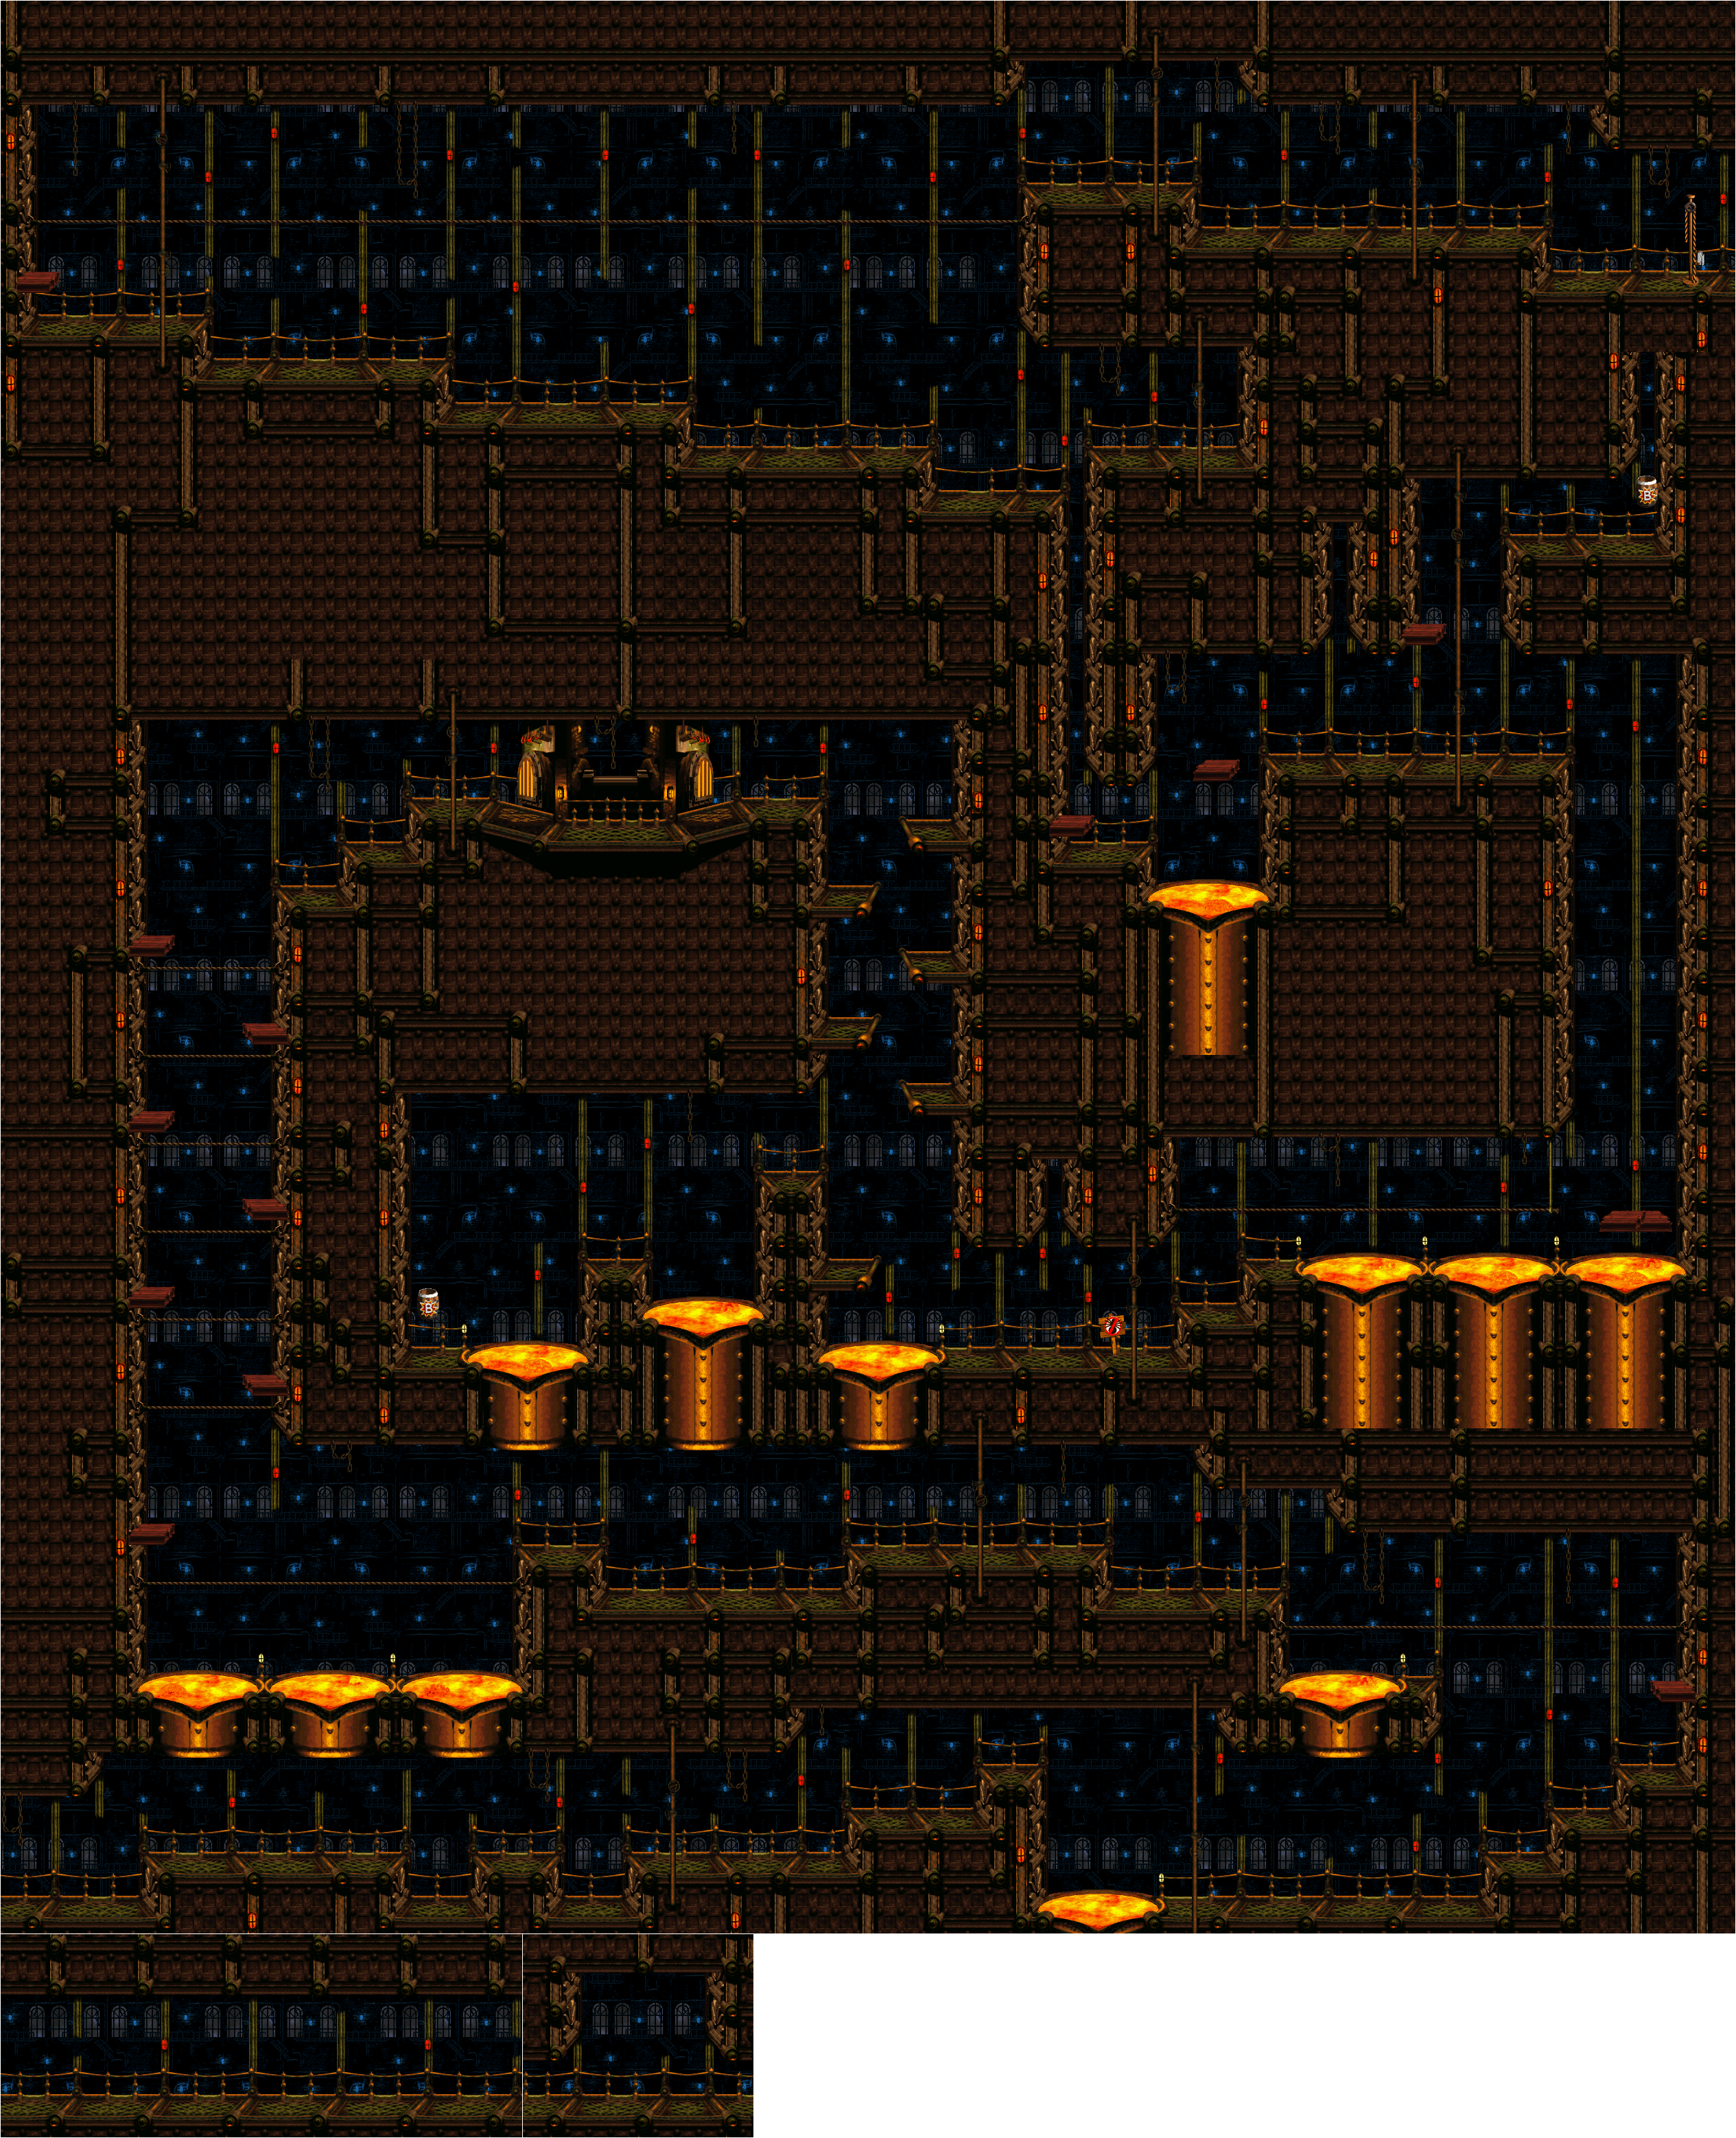
Knautilus
Once you insert the last Gold Gear into the machine at Boomer's Bomb Shelter, you'll finally turn the water into lava and reveal the Knautilus, where you will face Baron K. Roolenstein again.
Avoid jumping into the air while avoiding the fireballs so you don't get zapped, then grab the steel keg into the vacuum in the ceiling. You will have to time it so that the steel keg hits the Baron's backpack copter on the way down. What that happens, run to the sides so he doesn't drop down on you. From there, you'll want to grab the steel keg, stand on the diodes on the side of the room and throw steel kegs into his back until he goes back into the background.
He'll eventually turn the conveyor belt on, and the direction it moves will switch back and forth every few seconds. Eventually, he'll be where you're at. Watch for the shock of electricity so it doesn't touch you and it hits the steel keg before disappearing (don't touch the keg while it is shocked, or you will lose a Kong). If you miss the Baron, just wait for the next shock - and avoid it - and throw steel kegs into that backpack copter a few more times. You'll finally get the last DK coin of the game.
If you go to Wrinkly's Save Cave immediately after this, Wrinkly will tell you that the Banana Birds are immediately getting restless and to go see Funky Kong.
Head back to Funky's Rentals with all 40 DK Coins. You'll get access to the Gyrocopter, which allows you to fly anywhere in the overworld that you want. It controls like the Turbo Ski, except you're in the air.
In the northwestern corner, you'll find Hill Top Hoard. Wait for the area name to appear on the bottom, then press A to go in. Complete the game of Simon to get a Banana Bird.
Just south of Wrinkly's Save Cave is Belcha's Burrow. Land when you see the location name and complete the game of Simon to get a Banana Bird.
K's Cache is the island to the west of Barter's Swap Shop. Land when you see the location name, complete the game of Simon, and get the Banana Bird...after nine button presses!
After this, land at Wrinkly's Save Cave and talk to Wrinkly. The birds will become restless and take you to the clouds on the northwest corner of the map. You'll meet the Banana Bird Queen, and since you've gotten all 13 Banana Birds, you will be able to free her from her prison so she can take care of Baron K. Roolenstein once and for all. And with that, you've done it! You've beaten Donkey Kong Country 3!
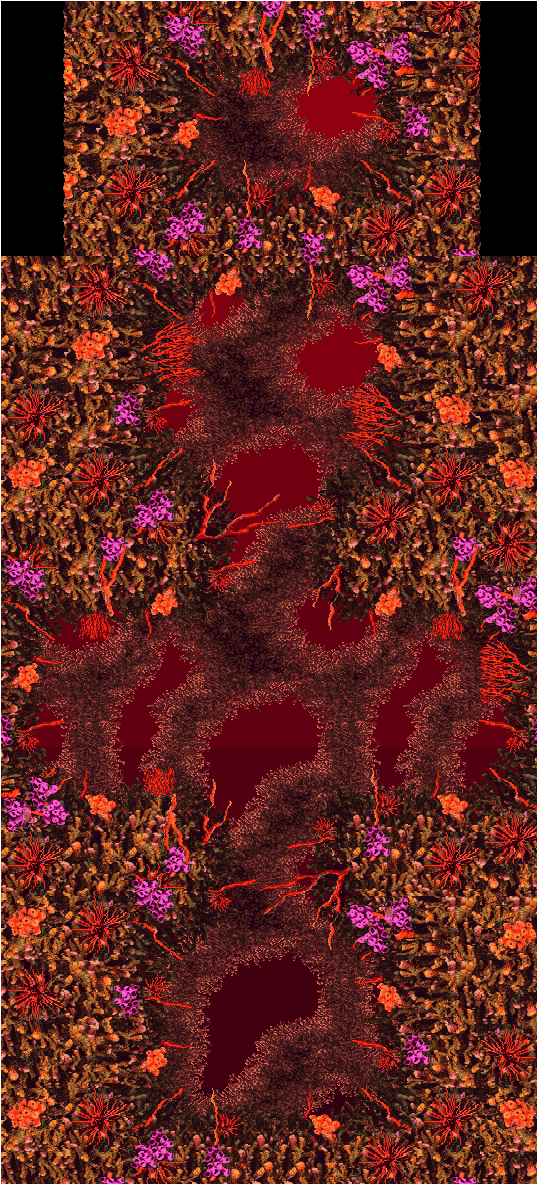
I should also mention that once you cause the Knautilus to rise up from the water in the center of Krematoa, the appearance of all the stages change to have a reddish hue.

.gif)
(Animated).gif)
.png)
.png)
.png)
.png)
.png)
.png)
.png)
PrinceWatercress plays Donkey Kong Country 3: Dixie Kong's Double Trouble - Part 15 of 16
Krematoa begins...and oh, boy, does the first level ever suck.
All maps by Tropicon.
Stampede Sprint
Bonus areas: Three (3)
.png)
Of all the levels in the game, this one is the worst when it comes to not only completing the game, but also getting 103% game completion. Not only does this one contain three bonus levels, but one of them involves Parry the Parallel Bird.
Not only that, but you have to turn into Ellie, get scared by a bunch of Sneeks, and then run to the end of the level, jumping over pits, leaping over enemies and being unable to stop until you reach the "No Ellie" sign at the end. Not only that, but there are Buzzes in the air who will destroy Parry in one hit, making it difficult to get the third and last bonus area at the end.
You'll also meet a new enemy who is exclusive to Krematoa, though you won't be able to get a better glimpse of them until later: Kuff and Klout, two rotund Kremling enforcers who will shoulder tackle around in pairs and play leapfrog in an attempt to make getting around in Krematoa miserable. Right now, they will just do the shoulder tackle thing, but they will play leapfrog in later levels.
The first two bonus areas are next to each other at the very start. There is one with Squawks where you have to fly around Buzzes to get fifteen green bananas as well as another one where you have to do the same with Squitter and his platform webs. Unfortunately, you cannot use them past the bonus areas.
The third one is the one you get when you get Parry all the way to the end in one piece. You'll be collecting fifteen bananas with Parry and keeping him away from the red Buzz the whole time. If Parry gets hit once, you'll have to do the entire stage over again just to try again.
Koin is just past the end. Ellie will turn into a steel keg, and you will have to take the steel keg, move past the goal flag with it and throw it over Koin's head to the right and into the wall to get the DK Coin.
When you complete a stage in Krematoa, you will get a Gold Gear. Take the gear to Boomer's Bomb Shelter and place it in the machine. You'll learn that you need 25 coins to reach the final stage of Krematoa, but to do that, you'll have to get all the Bonus Coins you can find in Krematoa and beat the boss in Krematoa to get 25.
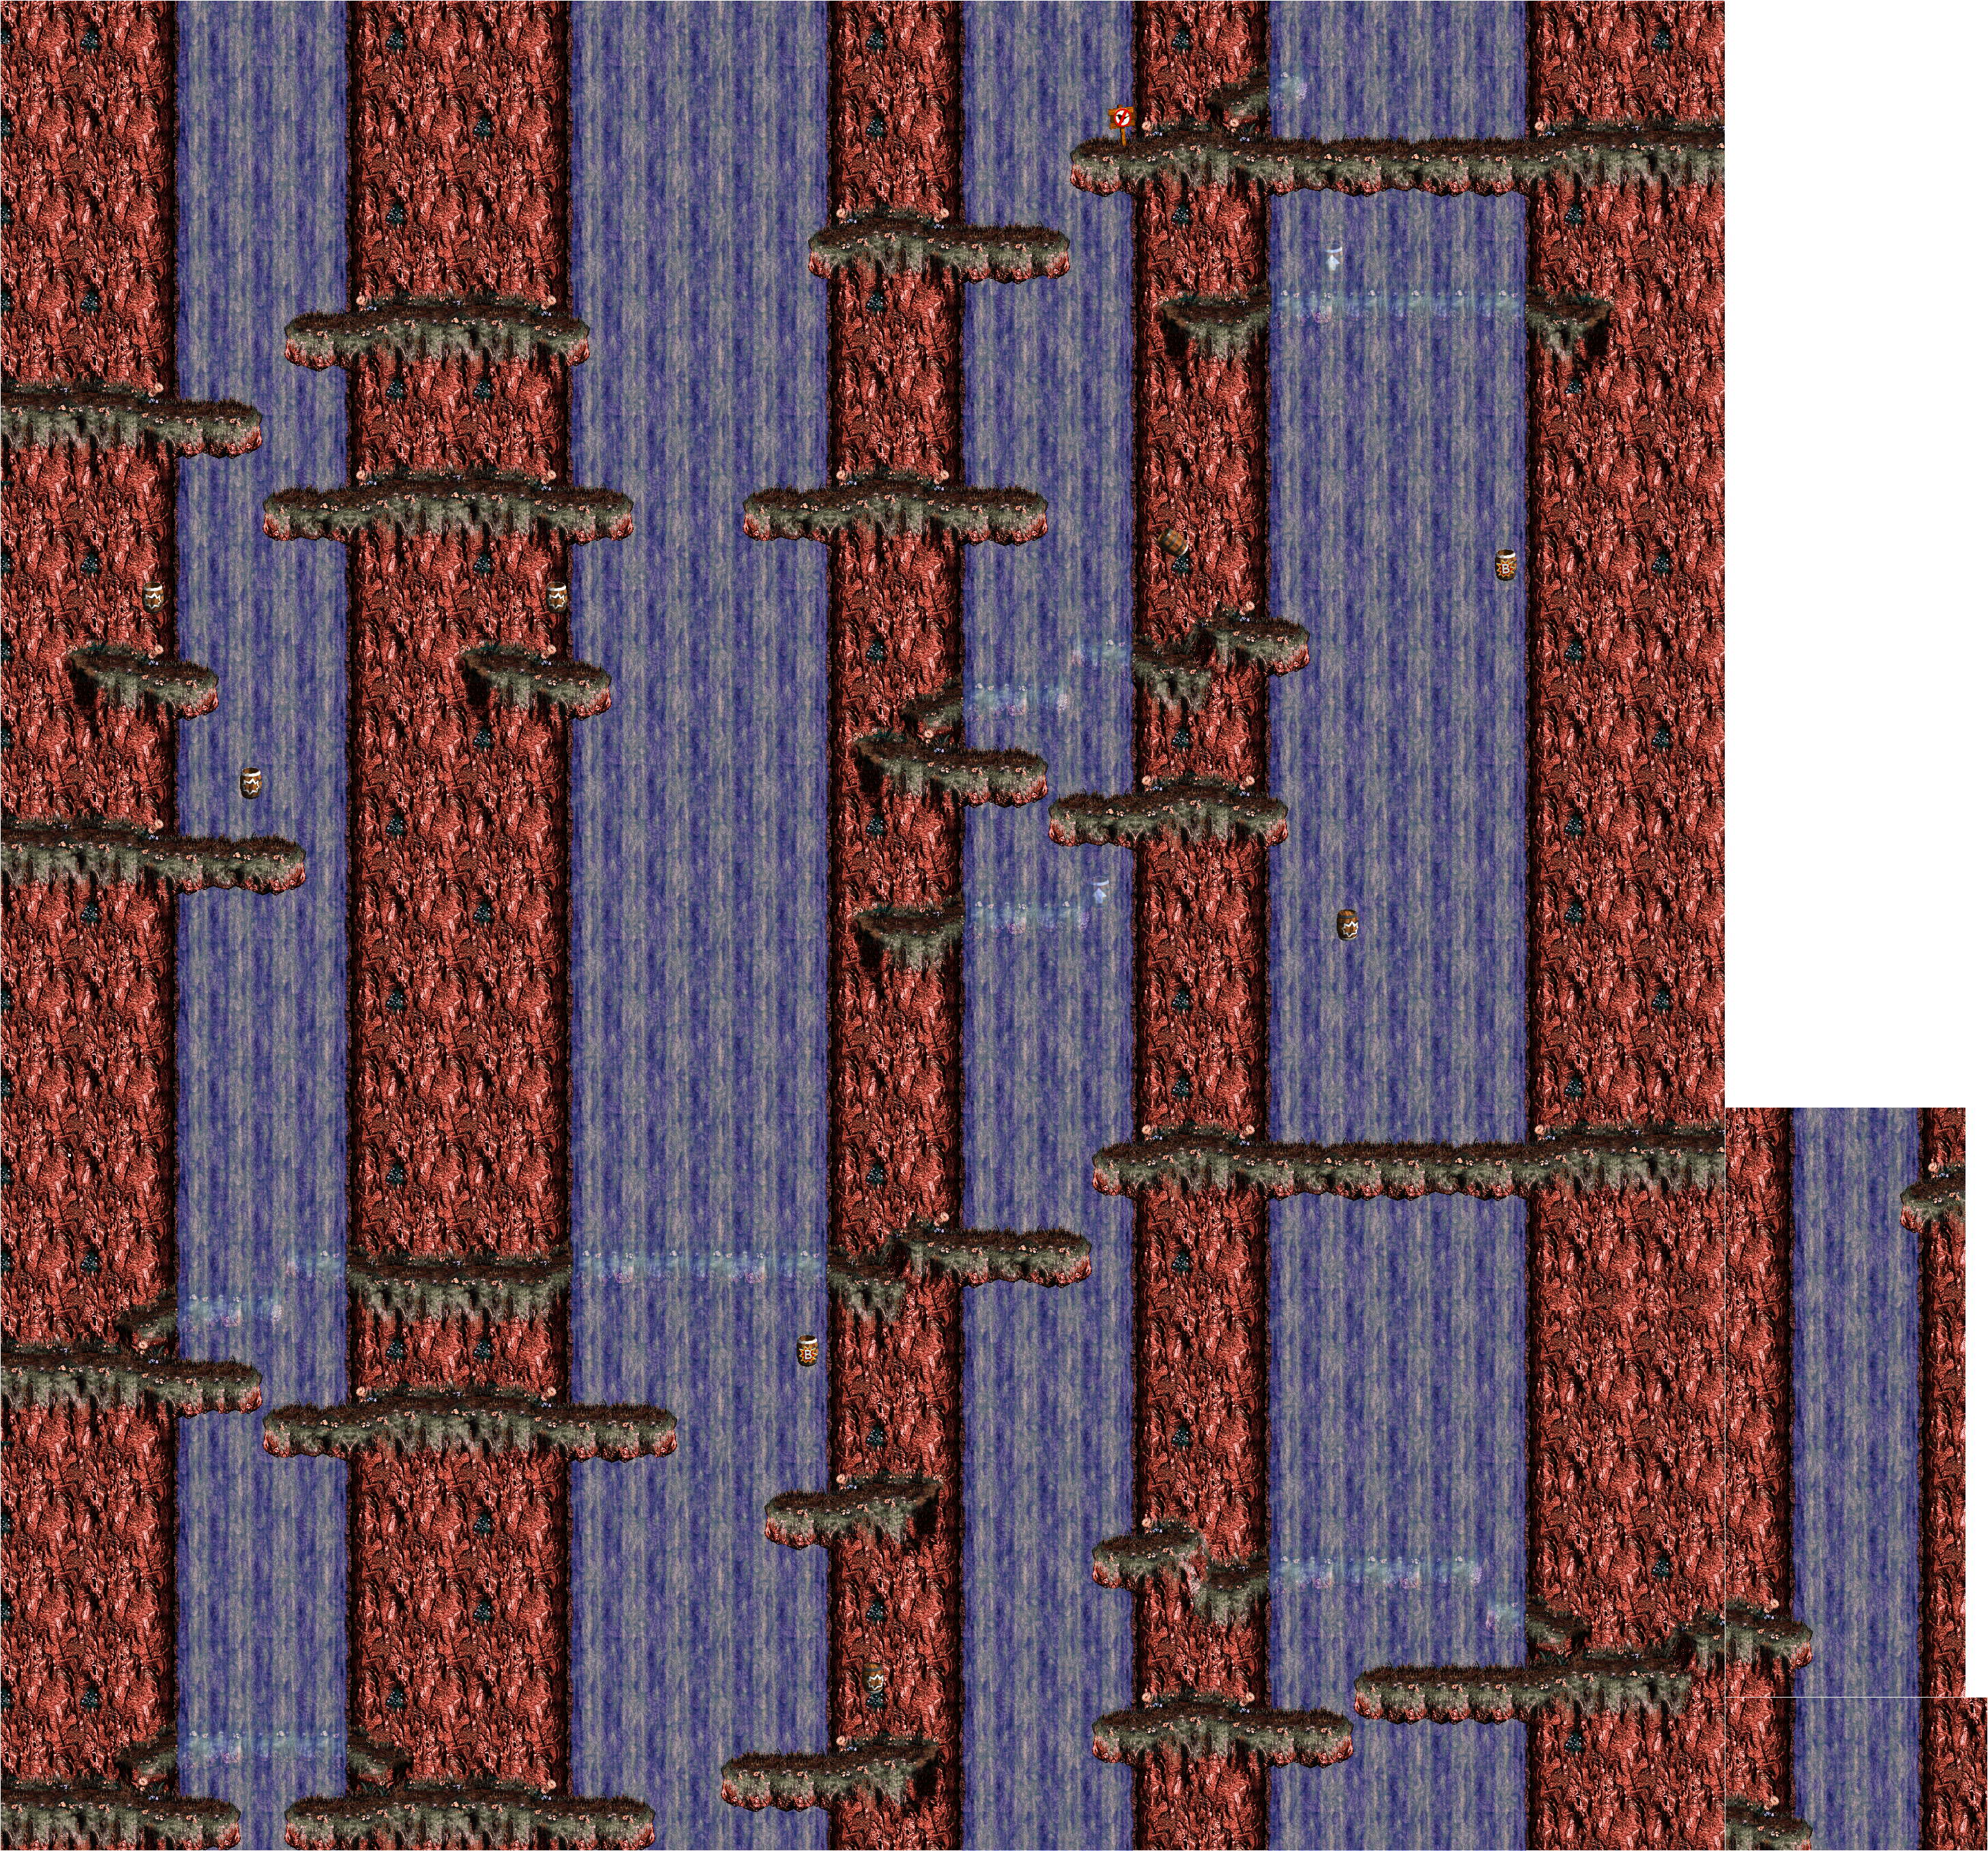
Criss Kross Cliffs
Bonus areas: Two (2)
.png)
It's another vertical mountain segment, but this time, you're using Bazuka's steel kegs to get to the top!
The first bonus area is to the right of the pair of red Buzzes that you see shortly after the start. You'll have to use Dixie's Helicopter Spin to get over them and get into the barrel, but it's worth it. You'll have to collect fifteen bananas while avoiding the TNT barrels that Bazuka shoots out, but if you can do it, you can get the first Bonus Coin. Best advice to give here: use Kiddy, don't Helicopter Spin if you're using Dixie, and stay where you are in case RNG decides to be good to you and give you several bananas without you having to move.
As you go further up the mountain, red Buzzes will block your path. There will always be a Barrel Switch nearby that will allow you to change the steel kegs into TNT barrels so you can get rid of the red Buzzes. Just remember to hit the switch again to turn the TNT barrels back into steel kegs when you're done so you can continue.
At one point, you will have to use barrel cannons to get past the red Buzz and take him out. Go all the way to the left where the barrels are and drop down to switch back to steel kegs. There will be two points where you will have to deal with Klasps. The first encounter will have fast Klasps, while the second near the end will have a leisurely slower one.
Koin is shortly after the N, to the right. When you see him, grab the steel keg and throw it over Koin's head to the right to get the DK Coin.
The second bonus area is shortly after this. There will be a vast expanse of space to the sides. Head to the right, go all the way to the wall, and tag throw Dixie straight up at the height of your jump after jumping into the air. Take out all the Nik-Naks and the second Bonus Coin is yours.
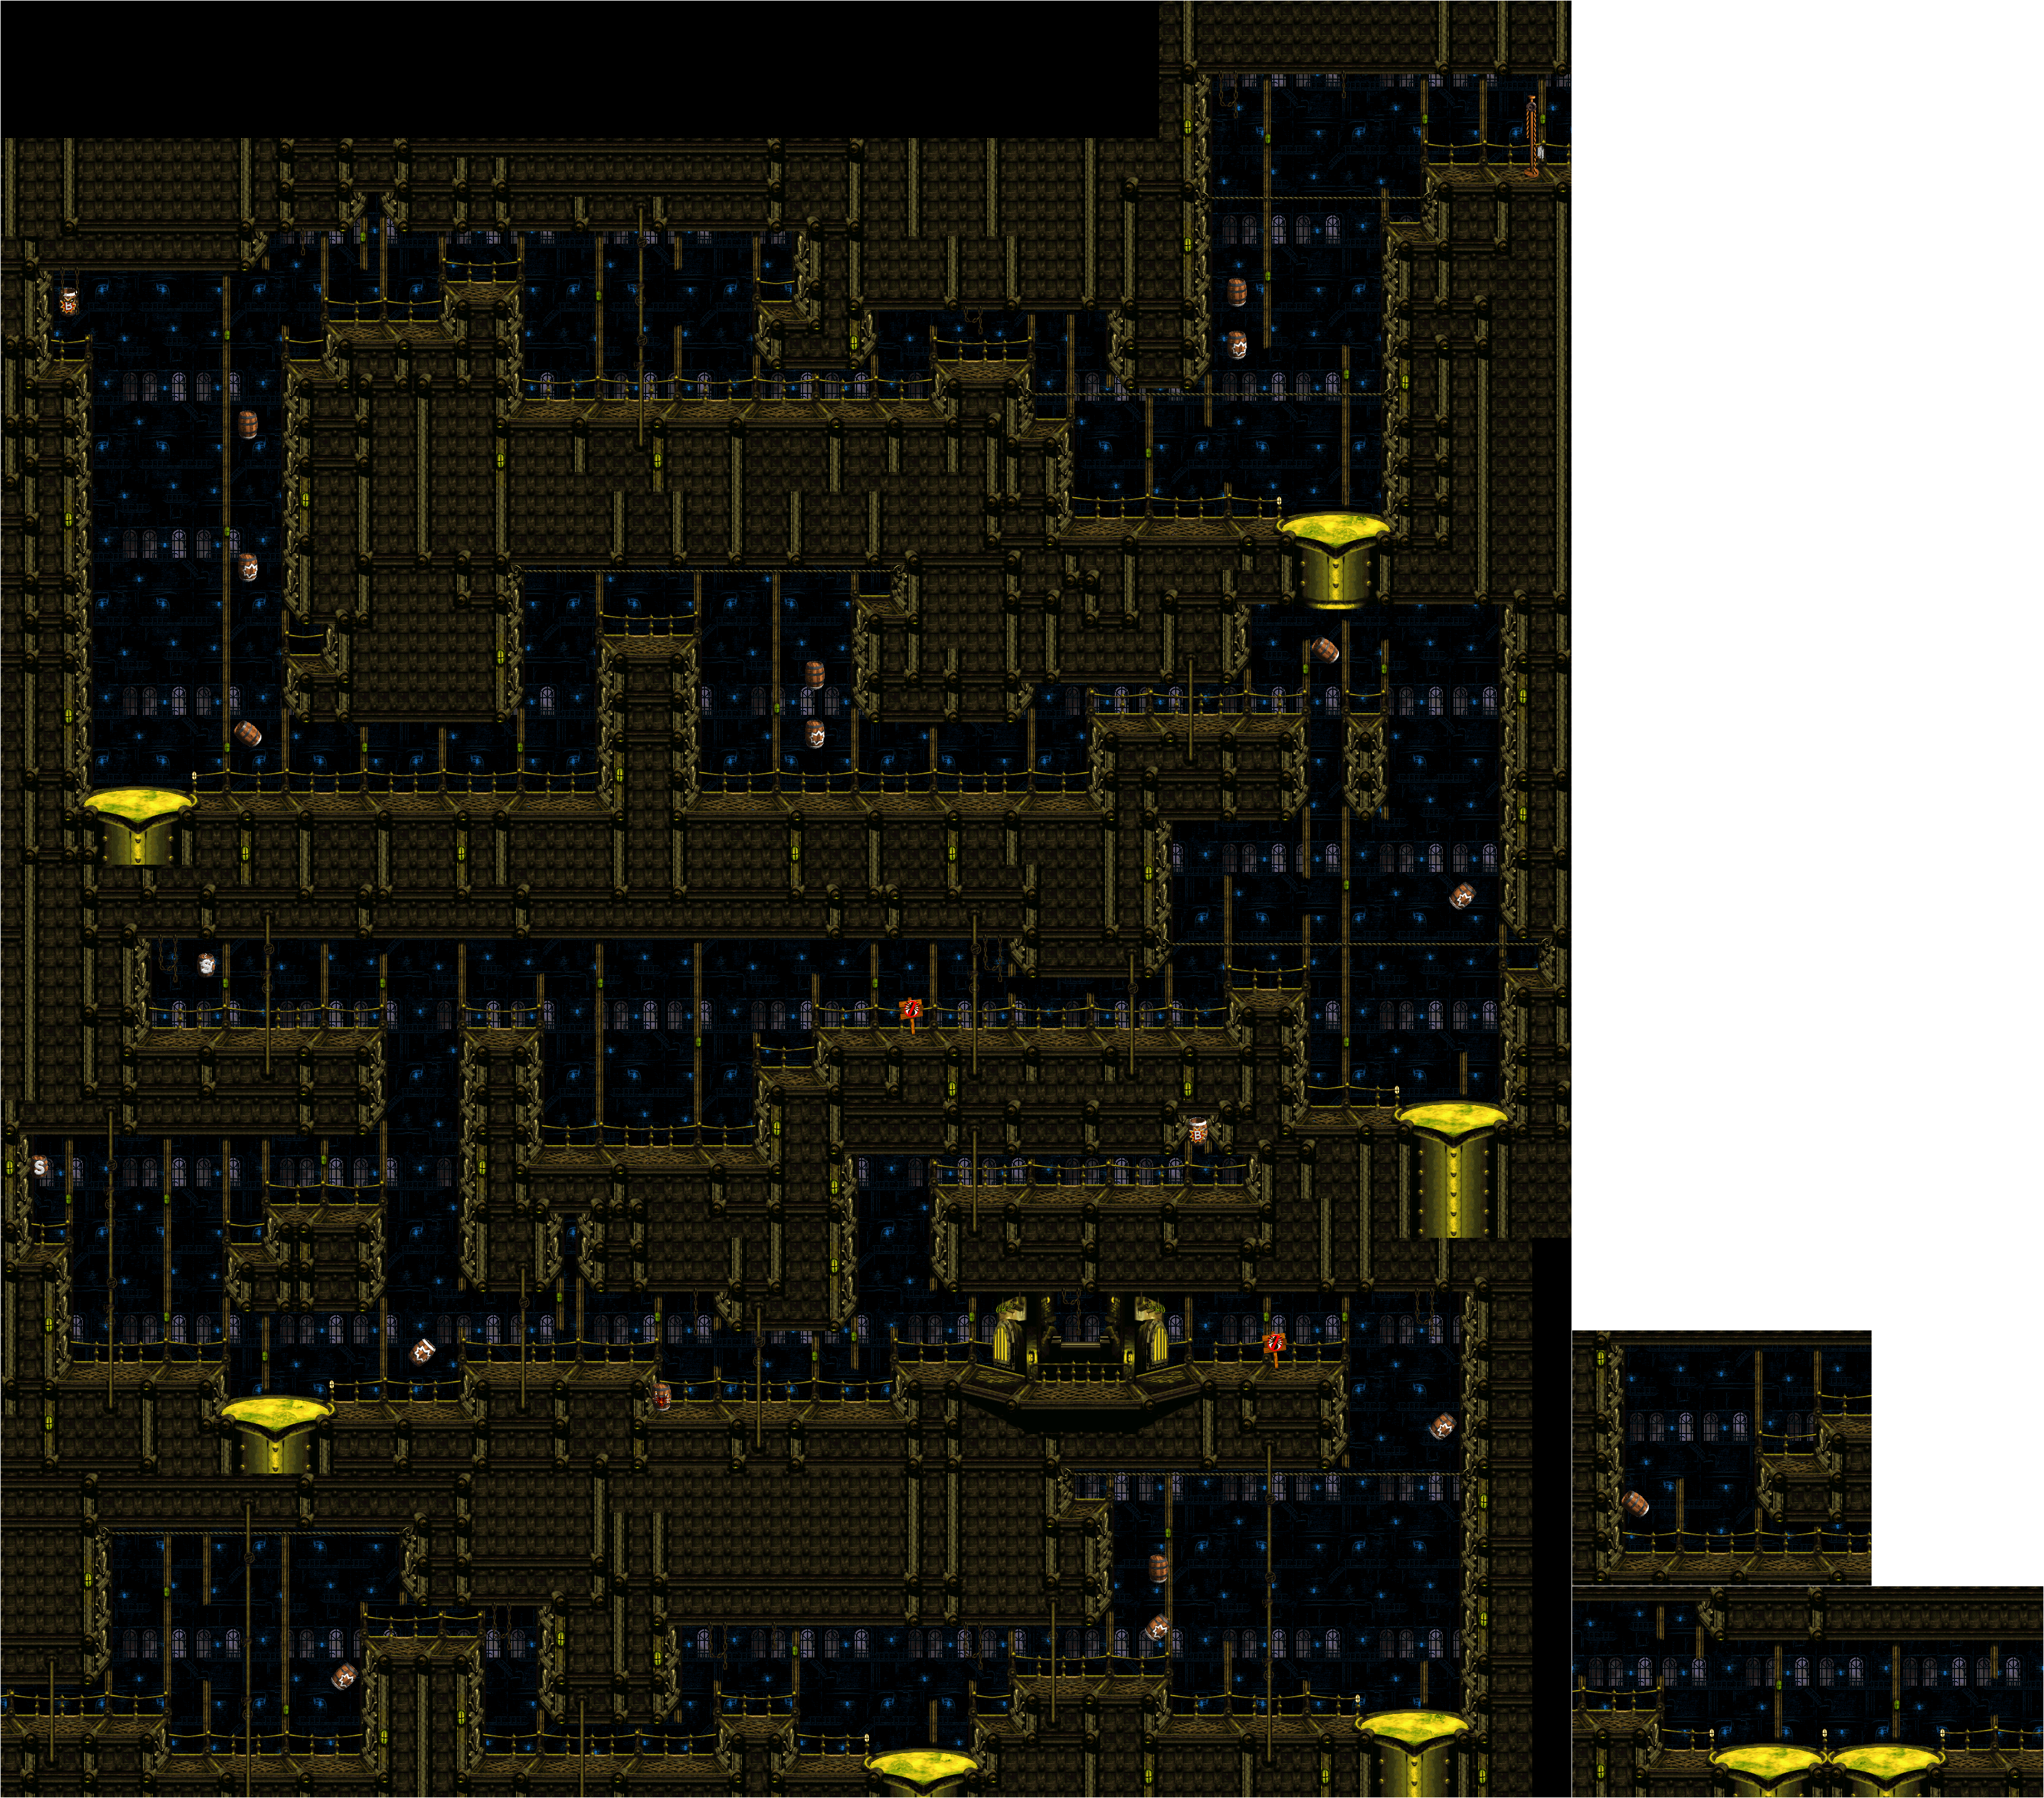
Tyrant Twin Tussle
Bonus areas: Three (3)
.png)
Oh, boy...another stage with three bonus areas. This time, Kuff and Klout are really in full force, as you will be seeing them very often in this stage. If you ever get a TNT barrel, use it on them; otherwise, be ready to stay away. If they are leaping around, use the bananas you see to plan out your movements.
As soon as you are able to go up, do it with the tag team throw. You'll be able to find the Squitter barrel. You'll need to be Squitter to reach the first bonus area, which is just after the O. Go up as soon as you see the "No Squitter" sign with platform webs and you'll be able to reach it. Use your projectile webs to take out Kuff and Klout and use your platform webs to get all the stars.
Whenever you are Squitter, you can use your projectile webs to take out Kuff and Klout making the first half of the stage easier. Be sure to do that!
Koin is just before the first bonus area, and you'll have to use platform webs to reach him. Stand on Koin and shoot platform webs to the left. A nearby Bazuka will be shooting steel kegs to the left, and when they hit the wall, they will roll to the right. The web platforms will help the kegs get to Koin so you can get the DK Coin.
You'll be able to head upwards again soon after you reach the Star Barrel,and . You'll have to tag throw Dixie upwards to reach the barrel cannon that will take you to the second bonus area. Use the TNT barrel to take out Kuff and Klout, then tag throw to the Bonus Barrel. Here, you'll have to avoid Kuff and Kloat, who shows up in two pairs this time around and are very, very fast. If you can get to the end, you will get the second Bonus Coin.
The third bonus area is right at the end. Tag throw Dixie to the upper-right corner to get to the hidden Bonus Barrel. You'll have to dodge Kuff and Klout, who are hopping around the room, to get 15 green bananas in 50 seconds to get the third Bonus Coin. There are three locations where the bananas will pop up: left, center and right. The center location is not a safe spot, so don't stand there.
Saturday, October 6, 2018
PrinceWatercress plays Donkey Kong Country 3: Dixie Kong's Double Trouble - Part 14 of 16
We finally rescue Donkey and Diddy Kong, but it's not over yet...
All maps by Tropicon.
.gif)
Koindozer Klamber
Bonus areas: Two (2)
Here's an interesting new gimmick and enemy: the Koindozer! Unlike the Koins you've been seeing in every stage up until now, these purple guys can move! They will bounce you backwards and follow you around, and they can send you into a pit if you're not careful. You'll also be using their shields as makeshift platforms to get virtually anywhere, so make sure they are holding their shields up before you make it to them.
You'll also meet Bazuka again, and you'll need his barrels to get across a huge pit some time after the O. When you reach him, get on the rope to the right, then jump off the left end to reach the first bonus area. You're collecting stars again. Be ready to check the trees for stars like in Konveyor Rope Klash.
The second bonus area is right after the N. Jump to the left off the top of the Rekoil past the Koindozer immediately after the N and tag throw Dixie up and to the right. You'll reach the second bonus area. You'll have to land on the two Koindozers to get all 15 bananas and get the second Bonus Coin.
Koin, the big kahuna himself, is shortly after the second bonus area. There is another Bazuka after him, and you will have to go over to him, hit the Barrel Switch in the trees off the left edge of the nearby rope to change the wooden barrels into steel kegs, then backtrack to Koin and have Bazuka's ammunition do the work for you.
Poisonous Pipeline
Bonus areas: Two (2)
You'll fall straight into the water as soon as you start this stage. Once you're in the drink, your Left and Right commands on the Control Pad will be reversed. Not surprisingly, there will be Lurchins at floor and ceiling level throughout the pipeline.
There will be parts where you can get out of the water, which immediately return your controls to normal as soon as you jump out. This can make getting onto dry land a little more difficult. Leap out first, then move where you need to.
The first bonus area is shortly after the beginning of the level, just past the two Lurchins that quickly swim up and down and before the Enguarde Level. Before you go down to that barrel, go left and get past the two Lurchins to enter the first bonus area, where you will morph into Enguarde. Use the attack button to attack all the fish as you go, and remember that your controls are still reversed when you're in the bonus areas.
The second bonus area is just before the goal. Before you go up to where the G is, go left. You'll find the second Bonus Barrel below you. You'll be collecting 30 stars, but this one is easy since you can go slow and get them all in one pass easily.
Koin is right where the G is; the steel keg will be to the left and Koin to the right. Grab the steel keg and throw it over Koin's head to the right to get the DK Coin. If you're using Dixie for this, leap up a little bit before throwing.
Kastle Kaos
You'll start out fighting Kaos, whose face is still exposed. Avoid the fire from the thruster as you get to the other side, then toss the wooden barrel you find at his head. You'll get a periscope/rocket launcher head to come out. Stay on the right side of the room to avoid the bomb, then run and roll under Kaos when his thruster isn't shooting out fire. Get to the left while avoiding more bombs, then throw the barrel you find at Kaos' head.
Kaos will fall down, and you'll find out that someone is behind the curtain, Wizard of Oz-style: Baron K. Roolenstein! K. Rool is back, and now you'll have to fight him.
Duck under K. Rool while on the floor (not on the sides, he does fly upwards there), and grab the higher handle of the two that hang down from the ceiling to produce a barrel. Throw the barrel into K. Roolenstein's back, then stay away from him as he bounces up and down across the screen.
After two hits, K. Roolenstein will press a button, and four hooks will be on the ceiling. Also, the dynamos at the far left and far right sides of the screen.
Make your way to the right and get on the wooden platform. Jump to the handle on the far left, then make your way back to the right - all while avoiding K. Roolenstein and throw the barrel into K. Roolenstein's back. This will send K. Roolenstein into the electricity. Do this again.
After two hits here, stay on the wooden platform. It will go to the left. Get on the moving platform and hit the switch hanging from the ceiling on the other end. If K. Rool comes after you on the way there, duck. Get back on the moving wooden platform and duck under K. Rool if you need to, then grab the barrel on the left side, jump up and hit K. Roolenstein in the back. Do this twice.
After the sixth hit, stay on the platform. Grab the higher lever that is hanging off the ceiling, then quickly grab the barrel before the electrity destroys it, get on the wooden platform and throw the barrel into K. Roolenstein's back. From here, you'll have to rush to the other side, get on the wooden platform there, grab the barrel after it hits the floor so the electricity doesn't fry it, then get on the nearby wooden platform and aim for the back again. K. Roolenstein will get shocked again. Go for one more barrel. After the ninth hit, K. Rool is beaten!
Kaos will show back up, and this time, Donkey Kong and Diddy Kong will come out. You will learn that they were hypnotized and forced to control Kaos. Cranky Kong shows up to be rude, then Dixie and Kiddy beat him up. You'll then get a roll call of all the enemies, but you're not done yet. We still have the Lost World, and that will be in the next video.
Back at the overworld map, go to the ring of rocks near Mekanos and circle around them while holding Y on the Turbo Ski. This will cause a mountain to pop up, and if you go in, you'll enter Krematoa, the Lost World of Donkey Kong Country 3.
Krematoa
Here it is: Krematoa, the hardest world in the game...
Boomer's Bomb Shelter
Boomer has been exiled over in the Lost World due to his explosive toys, and for 15 Bonus Coins, you can unlock one level. If you've gotten all the Bonus Coins so far, you can unlock the first four levels.
PrinceWatercress plays Donkey Kong Country 3: Dixie Kong's Double Trouble - Part 13 of 16
Welcome to Kastle Kaos! This is where previous attempts ended because I could never figure out how to beat KAOS. But that ends now!
All maps by Tropicon.
Kaos Kore
Now that K3 and Razor Ridge have been squared away, a path to Kaos Kore further to the north has been opened up.
Konveyor Rope Klash
Bonus areas: Two (2)
In this stage, the ropes are conveyor belts! Some will move you to the left; others will move you to the right. You'll want to be very careful not to run into the Buzzes or get hit by them in this stage.
Watch out at the beginning, the Bristles will be rolling at you and you cannot defeat him. There are also plenty of Knockas that you can send into the Buzzes.
The first bonus area is out in the open past the K. On the second conveyor belt rope past the K, you'll have to drop down and head to the left to find the Bonus Barrel. You'll be collecting stars for the Bonus Coin. Look in the trees to find some hidden stars.
The second bonus area is just after the N, which is hidden behind a Booty Bird. There will be a set of two conveyor belt ropes; use the top rope and Dixie's Helicopter Spin to reach the Bonus Barrel to the right, which is hidden in the trees. Use the conveyor belt ropes to your advantage as you get 15 green bananas for the second Bonus Coin.
There is a hidden 2-Up below one of the Buzzes, but you'll have to be quick to get it.
Koin is just at the end. Throw the steel keg upwards to the left, and keep it on screen as you get on the conveyor belt above Koin to get him to focus on you. You'll be able to get the DK Coin.
Baffle's Code Room
Baffle Bear has a code he is working on, but he cannot break it and says he may need to reflect on it.
Head back to Barter's Swap Shop and get the Mirror back for ten Bear Coins. Pay the ten coins, get the mirror back and take it back to Baffle. Give it to him, and you'll get a riddle: "To open the gate, at the two stones make eight."
After you beat Creepy Caverns, swim in a figure eight pattern around the two rocks. This will open up the drainpipe nearby, leading to Sewer Stockpile. Play Simon one more time and you'll get another Banana Bird.
Creepy Caverns
Bonus areas: Two (2)
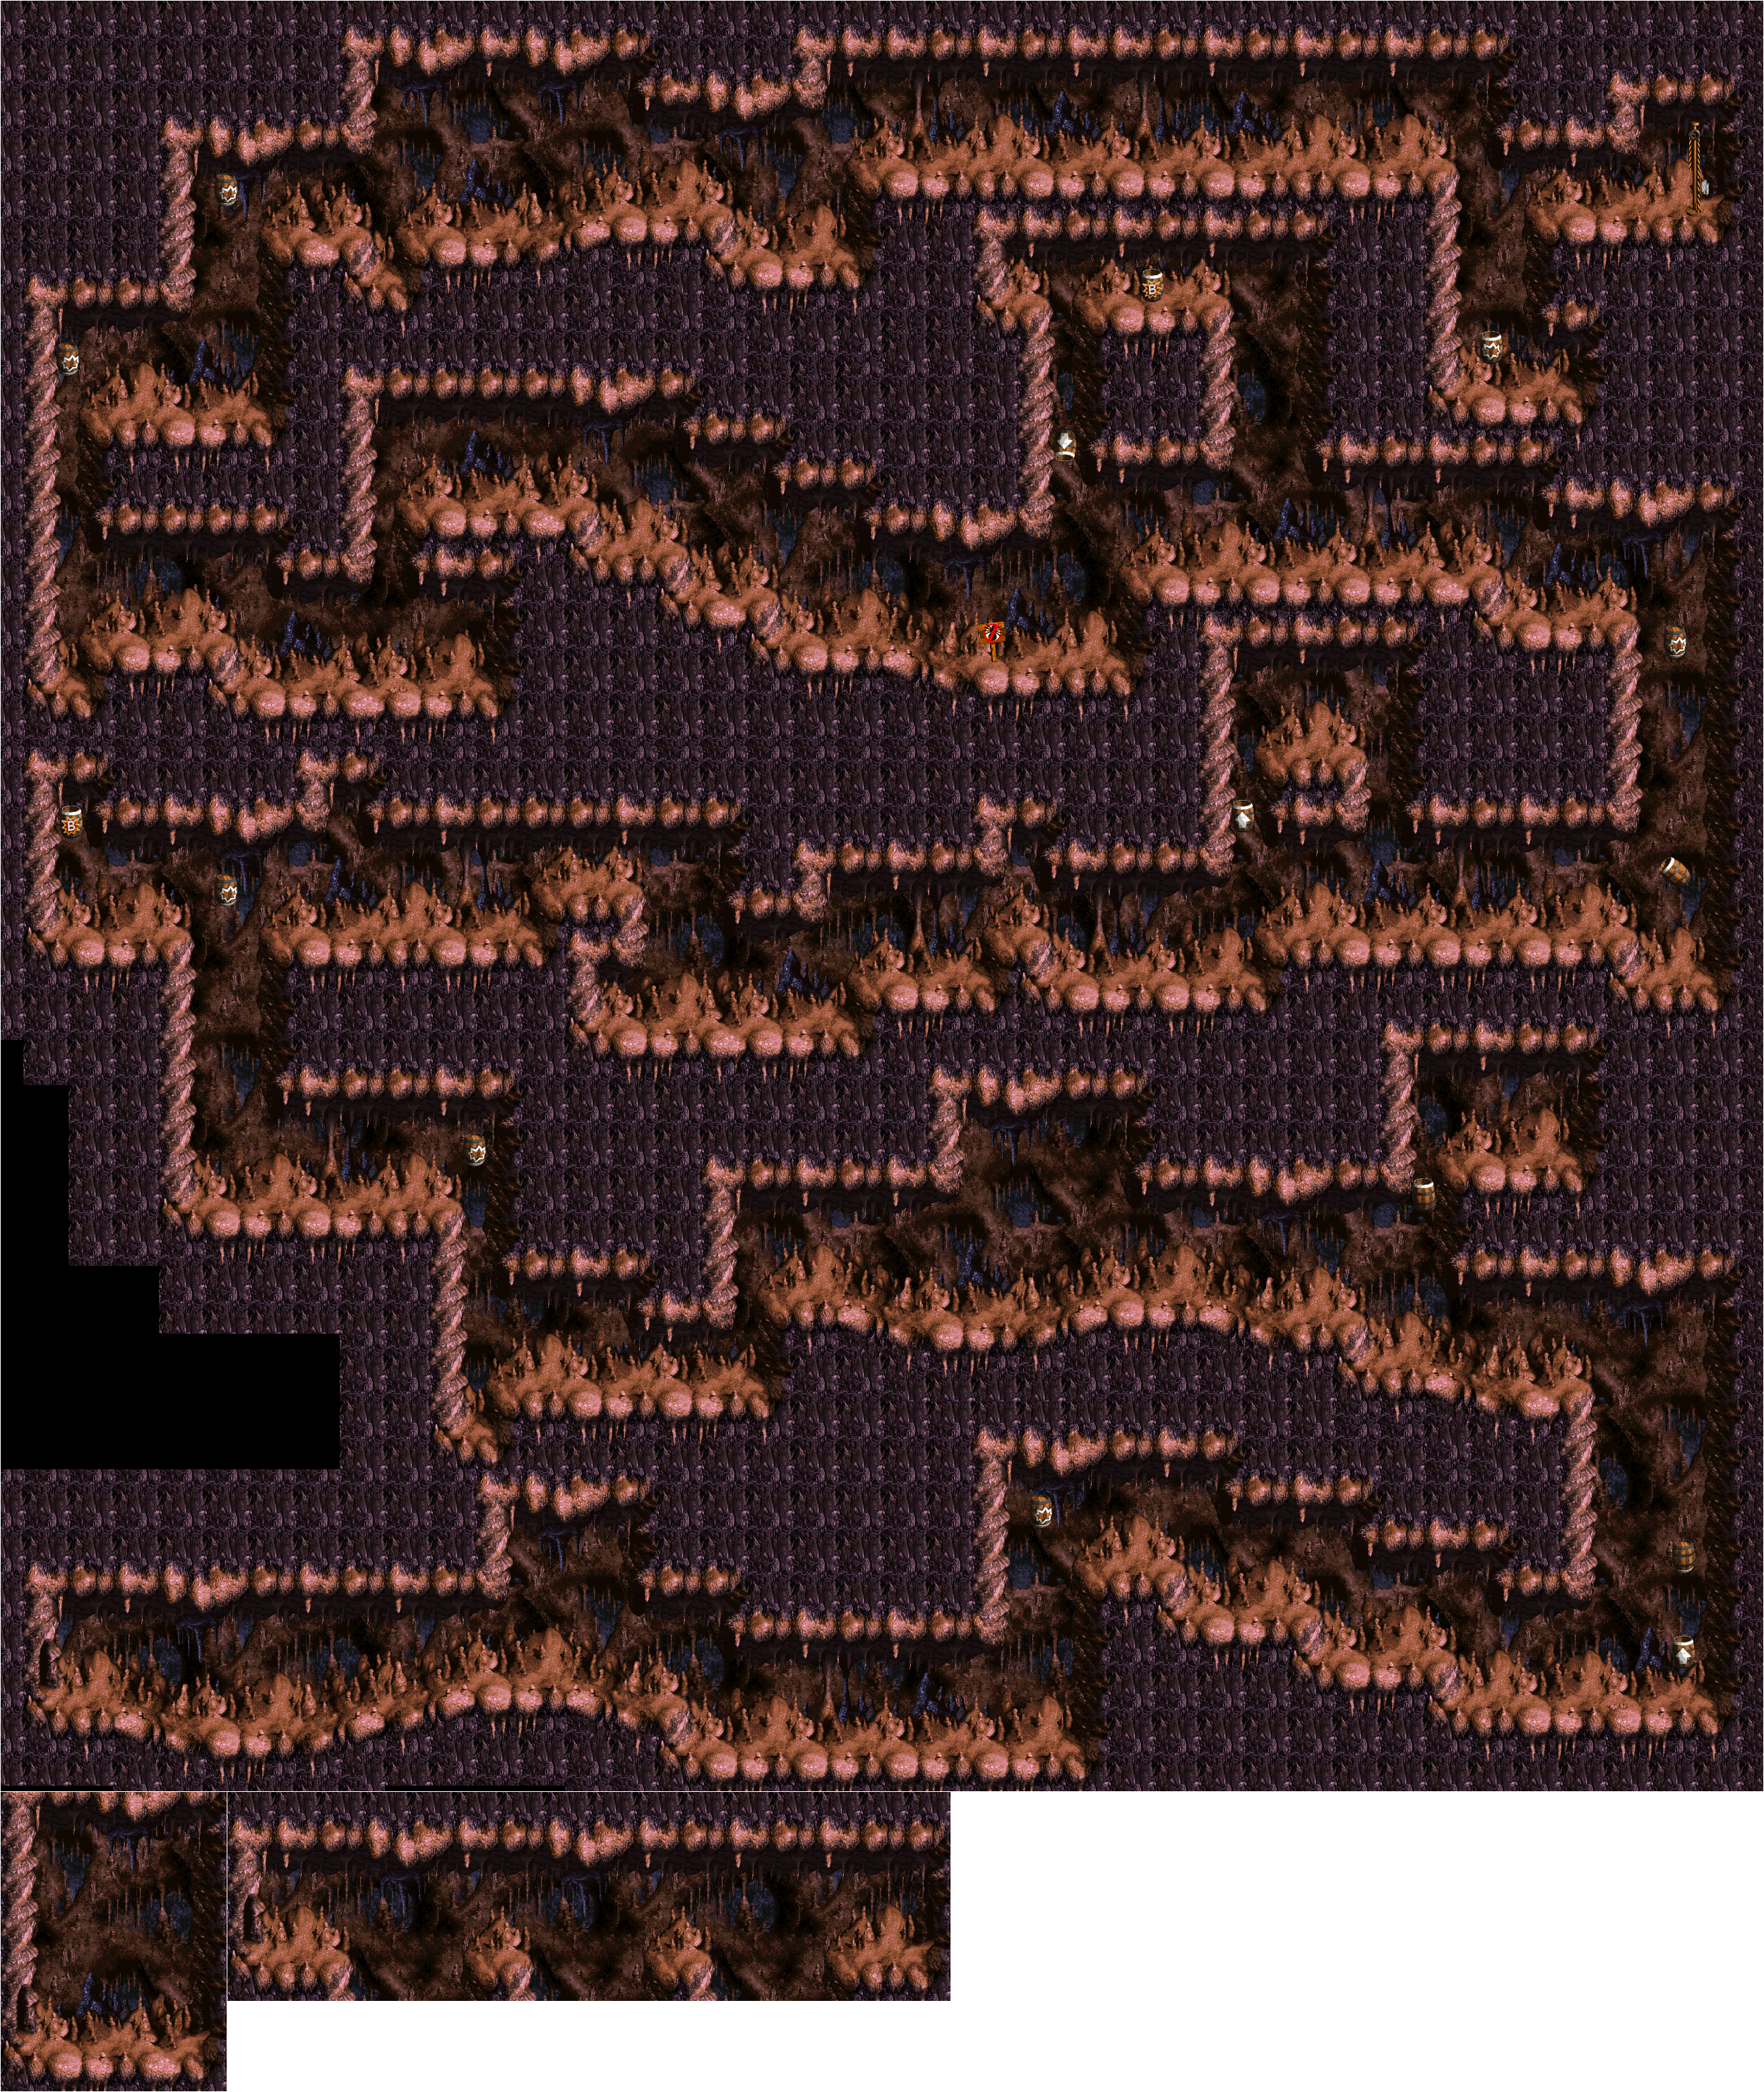
New gimmick here: the Ghost Barrels, which fade in and out and can be a nuisance. Whatever you do, be quick to get past them, and watch where they are aimed if you see them. More often than not, they will appear below Buzzes. Just pay attention to the red band at the opening to see where the Ghost Barrel is aimed.
Just after the O is a part where you will have to go up twice. At the end of that area, go to the left and tag throw Dixie to the Bonus Barrel for the first bonus area. Use the Boo Barrel to get all the stars, and pay attention to where it is aiming before you jump in, as it can point downwards and the directions it points can be random.
The second bonus area is above where the N is. To get to it, you will need Squitter, who is located right after the Star Barrel. Jump on Knocka and send him into the green Buzz that is blocking a Barrel Cannon with an up arrow on it, then get in and head to the right to find Squitter. If you can get him up to where the N and the "No Squitter" sign is, use Squitter's platform webs around the area where all the Boo Barrels are at, and try not to accidentally go into one. You'll find the second bonus area. Place your platform webs carefully so you can get past all the red Buzzes and all the Boo Barrels, and you can get the second Bonus Coin.
Near the end is a steel keg below a Boo Barrel pointed up and right. If you can throw the keg to the right, get in the Boo Barrel, keep the keg on the screen and get to Koin before the keg hits him, you can get the DK Coin.
Lightning Look-Out
Bonus areas: Two (2)
Watch out! In this dark forest, you will be zapped by lightning every few seconds. When you see the flash of light, be on the move, for lightning is about to strike. If it hits your Kongs, you're taking damage. Be sure to watch the top of the screen so you know exactly where the lightning will strike.
Also, don't be in the water for very long. You'll get shocked there, too, just like in real life. Keep that in mind when you're using barrels to make a path over ponds throughout the stage.
The yellow bugs from Belcha's Barn make a return here. Jump on one and pick one up, and hold it over your head to use it as a shield from the lightning. Don't hold one for too long; these guys can revive.
The first bonus area is right below the O. Dive down under it to enter. Take out all the Nik-Naks carefully to get the first Bonus Coin.
Koin is just before the Star Barrel. Let the lightning hit the Booty Birds to get the steel keg, then throw it over Koin's head to the right. Don't forget to dodge the lightning!
The second bonus area is just before the G. There will be a Bonus Barrel above a pond. Make the path, then either use Dixie's Helicopter Spin from the left side of the pond or tag throw Dixie up there to enter. You'll be grabbing bananas...and dodging the lightning. Be careful, stay on the move and watch the sky so you don't get shocked.
Friday, October 5, 2018
PrinceWatercress plays Donkey Kong Country 3: Dixie Kong's Double Trouble - Part 12 of 16
Barbos is the hardest battle so far. Once you clear Razor Ridge, get ready for the home stretch.
All maps by Tropicon.
.gif)
Pot Hole Panic
Bonus areas: Two (2)
It's a submerged cave! This time, you'll be going in and out of the water to get from point A to point B! It's the best and worst of both worlds!
You'll start out riding on Squawks. It won't be long before you meet a new enemy: Kuchucka. Kuchucka is a purple barrel Kremling who can't be destroyed and usually stays in one spot to throw bombs at you. You'll want to watch where the explosions are, since those are the main things that will damage you.
Squawks will drop you off when you reach the water where the O is.
You'll be riding four animal buddies as you go through this stage, in this order: Squawks, Enguarde, Ellie and Squitter. You'll definitely want to be careful as you go through the stage with each and every one of them. It should be noted that this is the only stage where you take a ride on Squawks rather than transform into him.
You won't see the first bonus area until just before the Barrel Cannon that takes you to the Squitter crate. Go to the left to get the N, then jump up below the Bonus Barrel and press X to dismount from Ellie at the top of your jump. This will allow you to enter the first bonus area. You'll be using this same exact technique to get all the stars here and get the first Bonus Coin.
The second bonus area is near the end. There is a wide open space upwards before the "No Squitter" sign. Make some platform webs to get up there, and try not to move towards the sign or get hit by the bomb explosions from the nearby Kuchucka. Here, you'll be dodging the explosions created by Kuchucka's bombs in the center of the room. Use the far left and far right sides of the room as you grab fifteen bananas to get the second Bonus Coin.
Koin is past the "No Squitter" sign. Tag throw Dixie all the way up to get the steel keg, then jump towards Koin so you land on top of him. Jump up and throw the steel keg left to get the DK Coin.
Ropey Rumpus
Bonus areas: Two (2)
The Klasps may be gone, but there are a bunch of Buzzes to contend with. They'll be moving up and down and all around in this stage, and you'll have to avoid them all if you want to survive this stage.
The first bonus area is all the way to the right after the Start. Past the two wooden platforms where the stage starts wanting you to go up, there is a Bonus Barrel to the right. Go all the way up, grab the TNT barrel, then jump to the right and hug the right wall so that the TNT barrel blows up the wall up when you make your way back down. You'll be climbing from point A to point B to get the first Bonus Coin. Be sure to use the bananas to figure out where the safe spots are.
Just past the Star Barrel, there is an area during a horizontal rope where three green Buzzes are close to one another with a pair of bananas between each. If you drop down, you'll find Koin. Just grab the steel keg and throw it at the wall behind Koin to get the DK Coin.
Near the end of the stage, you will find Parry the Parallel Bird. If you can somehow get Parry all the way to the end of the stage, you'll be able to get the Bonus Barrel leading to the second bonus area. You actually have to do this to get there, and this won't be the last time, either. Thankfully, there is a shortcut where a lone banana is, and if you grab that banana, you'll find a hidden Barrel Cannon that will take you to a secret part of the level with a ton of bananas, an extra life and a few collectibles. When you see the banana pointing downwards, Helicopter Spin to the right with Dixie to avoid all the Buzzes. In the second bonus area, you'll be collecting 15 green bananas while two Buzzes fly around in a circle. Whatever you do, stay in the "middle" of the circle to figure out how to best react, and never, ever hold Down on the Control Pad. If you fail, you'll have to get Parry to the end of the stage all over again. If you can pull it off, you'll get the second Bonus Coin.
Barbos's Barrier
When you enter this stage, you'll be able to transform into Enguarde. Do that, and you'll automatically go down and meet Barbos. You wan to attack the Lurchins when they are open so that they bounce off the wall and bounce into the two closed Lurchins protecting Barbos. Once Barbos is exposed, stay to the side of Barbos and superdash into the center of his face so you hit him. Barbos will then sink back down.
You'll be homed on in by mollusk missiles. Stay away from them, and stand near the closed purple Lurchins so that when the mollusk shells turn yellow, they run right into the Lurchin and destroy it. Destroy the two purple Lurchins and get another shot on Barbos.
Barbos will then sink back down, and when you follow him, he will go up. From here, you want to stay at the bottom of the room and avoid the barbs that Barbos shoots downwards. If you know where to stand, you can avoid all the barbs without having to move around. After a few salvos, you can go back up and hit him. Three more hits and you will beat Barbos and open up the way to Kaos Kore.
Before we go over there, head bac to Bramble's Bungalow and go up the path near it. This time, there will be a flower. Go to Bramble and give the flower to Bramble for a Banana Bird.
After you talk to Barter Bear, Funky Kong will confirm that he is making something, but you will need all the DK Coins to get it. If you leave and return to Funky's Rentals after this point, you'll find out how many you have left before you can get it.
PrinceWatercress plays Donkey Kong Country 3: Dixie Kong's Double Trouble - Part 11 of 16
It's time to head to Razor Ridge...and the kid gloves have finally come off!
All maps by Tropicon.
Razor Ridge
Razor Ridge is east of K3. If you haven't had much trouble with the game as of yet, hold on to your buttes.
Buzzer Barrage
Bonus areas: Two (2)
You'll meet a new enemy here: Kopter (who I keep calling Buzzer). These guys will fly around and get in your path, and not even barrels will destroy them! Stay out of their way and move on.
Of course, before you can deal with them, you'll have to turn into Quawks again. You'll be picking up barrels to get rid of Buzzes throughout out the stage, and you will have to be careful as you do it as red Buzzes are also about.
When you can't go to the right anymore after the start of the level, you will find the first bonus area in a chasm guarded by a green Buzz. Take out the green Buzz with the nearby barrel to get in.Defeat the seven Buzzes with barrels as Quawks to get the Bonus Coin.
Koin is just past the Star Barrel. There is an area where you can go, and when you do, you will find a steel keg. Use it to take out the Buzzes first - don't worry, it re-spawns - then drop it above and to the left of Koin to hit him in the gut as he's exposed to get the DK Coin.
The second bonus area is at the end of the stage. There are two shafts going high up near the goal, and the one on the left has a Kopter moving up and down. Use that Kopter to get there. Here, you will want to be Kiddy, especially while jumping on the Kopter repeatedly to go higher, as Kiddy's larger hitbox allows him to pick up more stars in less time. You can do it as Dixie, but it's going to be difficult.
Benny's Chairlifts
You'll be able to use Benny's Chairlifts to get to the next few stages, and thankfully, you can use it for free.
Kong-Fused Cliffs
Bonus areas: Two (2)
In this stage, you will be on ropes that are on fire at the bottom. You'll want to be careful as you are forced upwards, since there are also enemies such as Buzzes and Kopters who will want to take you out before the fire singes your feet. Stay slightly above center, but not too high up; the enemies can get you before you can see them if you're not careful.
The first bonus area is to the right of the O. You're better off using Dixie's helicopter to get this, but to get here, but if you miss, hold Y and keep jumping to the right to get to the Bonus Area. You're better off using the slope before the O, anyway, since the bananas tell you that you can get on it...just keep jumping while holding Y. Avoid the Buzzes while going upwards with the Booster Barrels to get to the first Bonus Coin.
Shortly after the N, you will see a lone banana to the right of the rope. This hides a Barrel Cannon that will take you to the second bonus area. This time, you'll be avoiding Kopters as you make your way to the the top. Make sure your back is not facing them so you don't get hit, and you'll get the second Bonus Coin.
Koin is at the end. At the end of the last rope, jump to the left to get the steel keg, then throw it to the left while you are still above Koin to get the DK Coin.
Bjorn's Chairlifts
Unlike Benny's Chairflifts, Bjorn's are broken. If you can get the wrench back from Barter Bear and bring it here, you can fix the chairlifts and access Clifftop Cache. Complete the Simon pattern here to get another Banana Bird.
Floodlit Fish
Bonus areas: Two (2)
The yellow Bounty Bass are known as Gleamin' Breams. You'll need to hit them with Enguarde's bill to illuminate your way through the level temporarily before you reach another one, or it's going to get hard to see what's on the screen. They can still damage you like any other enemy, so be careful how you hit them.
Of course, you'll have to turn into Enguarde before you can do that. Thankfully, an Enguarde Barrel is just below the start.
You'll want to be able to see as much of the level as you can, since there are plenty of Lurchins that will be blocking your path as well as Kocos that are in the path every so often.
The O is to the left, off the beaten path. Once you hit the Gleamin' Beam after it, you'll want to go right on the third red Koco to enter the first bonus area. Here, you'll be picking up a lot of stars with Enguarde. If you need to, hold A to charge up the Superdash after lining up with some stars and let it loose to get more stars faster.
Just before the wide open area with the Lurchins at the end is the second bonus area. You'll have to take the Lurchins guarding it out, and they can be pretty fast. If you lose your extra hit doing this, just make your way down to the barrel. Here, you'll have to follow a trail of stars in the dark, and if you can pick them all up, the second Bonus Coin is yours.
Since this is an underwater area, Koin is at the end, as usual. Tag throw Dixie to the left to get the steel keg (or use the barrel cannon), then stand on top of Koin and throw the steel keg to the right to get the DK Coin.
Thursday, October 4, 2018
PrinceWatercress plays Donkey Kong Country 3: Dixie Kong's Double Trouble - Part 10 of 16
It's time to finish up K3!
All maps by Tropicon.
Now that I have 50 Bear Coins, I head to Bazaar's General Store and get the mirror. The second option will now let you ask about the secret caves, but the information is pretty useless at this point.
Krack-Shot Kroc
Bonus areas: Two (2)
Not long after you star this level, you'll be playing as Squitter, and you'll be playing as him for the entire stage. Be sure to explore the starting area for two hidden Bear Coins along with the K.
When you see the triangle-shaped sign with the exclamation point on it, you'll meet Krack-Shot, the biggest threat in the stage as well as the stage's gimmick. If the crosshairs meet up with you and flash, you're going to get shot at when it turns red. There are metal barriers that you can hide behind, and if you hide behind those, you won't get hit by the fireballs that Krack-Shot shoots.
You will be making a lot of platform webs to get through this stage. Make sure not to space them out too much so you can get to where you need to a little
Shortly after the third metal barrier is the first bonus area, which will be at the top of a vertical shaft just before the lava and can be reach with platform webs. You have 35 seconds to collect 15 green bananas. Keep a web platform in the middle of the room, so you can jump to the bananas when you need to.
After the first bonus area, you'll have to make some platform webs to get over pools of lava. Take your time, but be mindful of Krack-Shot's cross hairs. The letter O is between two pools of lava, and if you can stand on the area between them, you can get it.
After the N, there is an area where you can go either, left, right or up. Right takes you to the rest of the stage, but going up takes you to the second bonus area. This time around, [b]you[/b] are Krack-Shot! Move the cross hairs with the Control Pad and press B to fire at enemies. Take all the enemies out, then shoot the Bonus Coin to collect it. Aim above the top of the metal barrier to nail the Rekoils, and anticipate where the Buzzes are going to go before shooting the fireball slight before they get to where the cross hairs are. Arcade fun!
The G is behind a metal barrier off the beaten path near the end of the stage. Head left near the end to get it.
When you get Squitter to the "No Squitter" sign, you'll get a steel keg. Koin will be to the left. Just stand to the right coin, jump up and toss the steel keg over Koin's head so it hits the wall on the left. You only have one shot, and if you miss this, it's going to be embarrassing.
Lemguin Lunge
Bonus areas: Two (2)
The first bonus area is right at the start! Just tag throw Dixie up and over the red Buzz to get there. You'll meet the Lemguins here, who are the gimmick for this stage. Jump on all of them to get to the end faster and get the Bonus Coins.
The Lemguins slide towards you in infinite numbers out of a hole in the ground, and they can hit you if you're not careful. Of course, as mentioned earlier, if you jump on them as you make your way to the right, you can beat them all up and get through the stage a little faster. Be sure to land near their back to take them out; if you try to leap onto their heads, you may get hit.
In some part of the stage though, you will be going with the flow of Lemguins instead of against them, which makes getting around a little harder. Keep running in the same direction as them, and be ready to jump on one if you need to.
Koing is after the O. Grab the steel keg, then jump onto Koin so you land on his shield. Face left and throw the keg to the left without accidentally throwing over the wall, and the DK Coin will be yours.
The second bonus area is after the G. Get past the roof, then head to the left without getting hit by a Lemguin. Here, you'll be leaping on Lemguins while collecting all the stars. The coin will be on the right end of the room.
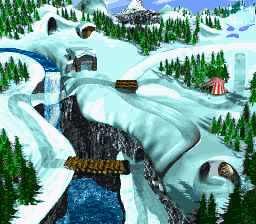
Blizzard's Base Camp
Go up on Lemguin Lunge after completing it to meet Blizzard Bear. He's trying to climb up K3, but he won't be able to get back down in time for Blue's birthday. He will ask you to take a present to him. Say yes, and you'll get the present. Go to Cotton-Top Cove and go to Blue's Beach Hut, and you'll give him the present. Inside is a bowling ball, which he cannot use and immediately gives to you. Head back to Mekanos and see Brigadier Bazooka Bear, and give him the bowling ball. You'll finally be able to fire Big Bessie and head to Sky-High Secret. Play the game of Simon and you'll get another Banana Bird. Once you're done, press Left, then get back to K3 and face the boss.
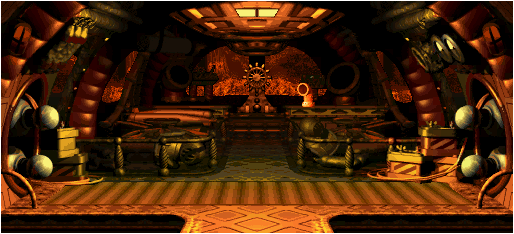
Bleak's House
Apologies in advance; ZSNES did not want to play well with the background wall and therefore it looks glitched up. Also, hope you've practiced at Swanky's Side Show!
Use Up or Down to move the blue ball on the right side of the screen up or down. The blue ball indicates your throwing distance, and you'll need to switch between the two distances when necessary to hit Bleak.
Throw snowballs at the blinking target on Blink's chest while avoiding the ones that he throws. If he makes a "heh-heh-heh" noise and moves around in place, you've hit him.
After two hits, he will shoot snowballs out of his hat, and you will have to avoid them. They will be pretty easy to avoid. When he is done, throw a snowball at the target on his chest. On the third hit, he will be even faster with the hat projectiles, and he will then start shooting multiple balls out of his at a time. Thankfully, you can simply stand between the balls to avoid them. Hit the target again.
After the fourth hit, Bleak throws two snowballs quickly, then moves to a different location. Be sure to switch to the distance you need before throwing. If you can time it right and manage to get the snowball to hit, Bleak will head back to the lower level and shoot snowballs out of his hat again, and this time not only will the sweep shot be faster, but the multi-ball patterns will be a little more complex. They are easy to figure out, though, and if you can get the last shot in just in time, you'll get the Bonus Coin and complete K3.
After competing K3, you'll meet Barter Bear and Barter's Swap Shop to the west of E3. Barter looks like he's had a hard night out on the town, and he has a wrench on his desk. He also mentions a super secret project that Funky Kong is working on.
If you have the mirror, he will ask you to let him borrow it. Say yes, and you'll get the wrench in exchange.
PrinceWatercress plays Donkey Kong Country 3: Dixie Kong's Double Trouble - Part 9 of 16
Now that we have the Turbo Ski, it's time to take on even harder worlds, starting with K3!
All maps by Tropicon.
K3
K3 is to the north of Cotton-Top Cove and Mekanos, and you will have to ride up a waterfall with the Turbo Ski to get there. There are areas to the east and west of it, but you'll have to complete K3 to get to them.
Krevice Kreepers
Bonus areas: Two (2)
Guess who makes a return appearance here? The Klasps! These guys will be even worse than the first time you met them in Cotton-Top Cove, and a lot of them will scurry right at you once you're on their level. Be ready to plan your movements carefully, since some of them are pretty slow and most of them are pretty fast.
After the first set of ropes, you'll see a trail of bananas leading up and to the right. Get on that rope, get to the right to get the Klasp's attention, then go left and jum pinto the nearby Barrel CannonYou'll find the first bonus area at the end. Here, you'll be collecting 30 stars in 25 seconds, and you will have to leap over the Klasp a couple of times to get them all. Pay attention to what you are doing and you should be able to pull through.
Koin is just after the O. Drop down and to the left on the first horizontal rope and you will land on a wooden platform, and the steel keg will be to your left. Throw the steel keg up and to the left, then quickly get to the left and press Y to do a roll or spin so that the steel keg hits Koin in the back. The DK Coin is now yours.
After the Star Barrel, you'll take a Barrel Cannon up to a long horizontal rope. Quickly move to the left, then stay as far right as you can on the next set of ropes and quickly jump up from one rope to another to avoid the Klasps. When you reach the Barrel Cannon at the end here, go right instead. You will find the N as well as the second bonus area. Just tag throw Dixie up and to the right, then get past the Knocka to enter. Here you will have to hurry your way up to the Bonus Coin and avoid the two Klasps as you do it, as those Klasps are fast!
Tearaway Toboggan
Bonus areas: Two (2)
To get to the first bonus area, jump into the Barrel Cannon at the start and launch yourself out when it is pointing down and to the right. You'll go right into the bonus area. You can also Helicopter Spin with Dixie between the ground and the Buzz and then Helicopter Spin to the right to get there. Tag throw Dixie into the three Nik-Naks in 15 seconds (thankfully, there is a DK Barrel in this bonus room) to get the Bonus Coin.
From here on out, you'll be riding in a toboggan. Thankfully, you can jump on enemies while you are in it, but you want to be careful with some of the houses that are in the way, as some of them can't be sped through and will cause you to lose one of your Kongs if you run into the wall. Unless otherwise noted, stay on the roofs of the houses to be safe.
There is a Nik-Nak after the K. Do not jump on it, or else you won't be able to react in time to jump over the nearby bottomless pit unless you rapidly mash the B button.
If you stay on the ground at the house before the O, you can get a Bear Coin. The first house after the O also has a hidden Bear Coin above the right end of the roof.
Past the first house after the O, you can either jump on the Nik-Nak for 10 Bananas, or you can pass under him for a 1-Up.
The house before the N has a hidden Bear Coin to the left of the green Buzz. The first house after the G is roof-only, so get on the roof when you see it.
The second bonus area is below the roof of the second house after the G. Be on the ground to get this one. Here, you will have to watch the screen carefully to figure out where the stars are so you can collect all 50. This one will take some trial and error, and you have to get them all as soon as they show up, or else you will not make it. The third one is the one you ride through; you get on the roofs of the rest.
Koin is just past the goal. Grab the steel keg just before the goal, then carry it past the goal to the right. Throw it into the right-hand wall and the DK Coin is yours. Also, if you tag throw Dixie up the nearby wall, you can get a 2-Up.
Barrel Drop Bounce
Bonus areas: Two (2)
In this stage, you will have to use barrels that slowly spin down the waterfall as platforms to get to where you want to go. This can prove a little difficult at times, since you will have to be quick to do the later jumps and also use
The first bonus area is to the left of the K. Jump across the two barrels to the left, then use the barrels again to get to the right and get in. Here, you'll have to catch 15 green bananas in 35 seconds, and you will have to use the barrels to get them. I usually use Dixie when necessary here. Also, stay away from the bottom. Also, remember to go to the left when you get all 15 bananas.
The second bonus area is to the right of the N. Get on the nearby barrel platform with the barrel cannon, get to the platform, then Helicopter Spin with Dixie to the right to reach a barrel platform. Use the platform to get in the bonus area. You'll have to use the barrels to get to the top and reach the second Bonus Coin.
Koin is to the right of the K. Helicopter Spin to the right with Dixie, then grab the steel keg throw it to the right. Keep it on screen as you hurry right, down and to the left, and when you see Koin, jump over him so the steel keg hits him in the back. You can now get the DK Coin.
You'll find Parry the Parallel Pird near the end. If you can time your jumps right, you can get a 2-Up near the goal. Use the barrel at the end to take out the Booty Bird to the right of the goal and get the G.
Wednesday, October 3, 2018
CGR Undertow reviews Donkey Kong Country 3: Dixie Kong's Double Trouble
I haven't shown CGR Undertow in quite some time, and it just so happens that I found a review for this game from them.
PrinceWatercress plays Donkey Kong Country 3: Dixie Kong's Double Trouble - Part 8 of 16
It's finally time to wrap up Mekanos!
All maps by Tropicon.
.gif)
Blazing Bazukas
Bonus areas: Two (2)
New enemy here: The Bazukas. The Bazukas carry large cannons that shoot out barrels. You can use the barrels or steel kegs as stepping stones to the other side of an area, but if those barrels are TNT barrels, stay away! Those will explode if you jump on them.
Shortly before the O, you can play as Squitter. You're going to have to play as him to get to the first bonus area as well as the DK Coin. You will have to carry the nearby TNT barrel over to the left and throw it at Bazuka, but even if you miss, you can still carefully jump into the barrel.
As mentioned earlier, Y lets you shot projectile webs to destroy enemies and Up and Down let you aim those webs, but pressing A will allow you to make platform webs just like in the second game. Press A once to create a slow-moving glob of webbing, then press it again to make the platform. Just like with the projectile webs, you can aim the platform webs as you make them. You can only have up to two platform webs on the screen at any time, and if you make one after you reach the limit, the first one you made will disappear. Also, platform webs will disappear after a certain amount of time, and you can tell they are going to do that when they rapidly twitch for a second.
Immediately upon getting Squitter, go back to where the TNT barrel was and scale upwards with platform webs. To the right will be the first bonus area. Just fight off all the incoming TNT barrels' with Squitter's projectile webs to get there. Use platform webs to make it to the other end of the room and get the first Bonus Coin. You do not need to defeat all the enemies to get there, but it can help if you defeat a few of them.
For the DK Coin, you'll want to go all the way to the left past the O with Squitter. You can reach this one with Dixie if you take Squitter to the sign after the Star Barrel. Make sure you're above Koin, then either use Squitter's platform webs or Dixie's Helicopter Spin to get the Bazuka and change the Barrel Switch above Bazuka's head from a regular wooden barrel to a steel keg. From here, you want to make your way to the right and have the steel keg smack right into Koin's back. You'll be able to get the DK Coin from there.
Use the Barrel Switch to the left of the Star Barrel if you're not playing as Squitter after the mid-level checkpoint so you can have regualr barrels to use as platforms.
The second Bonus Barrel is to the left of the vertical shaft near the end. Jump on top of Bazuka's cannon, then use Dixie's Helicopter Spin to float to the left to get to the bonus level. Here, you will have to use the barrels the Bazuka shoots out to get the seond Bonus Coin.
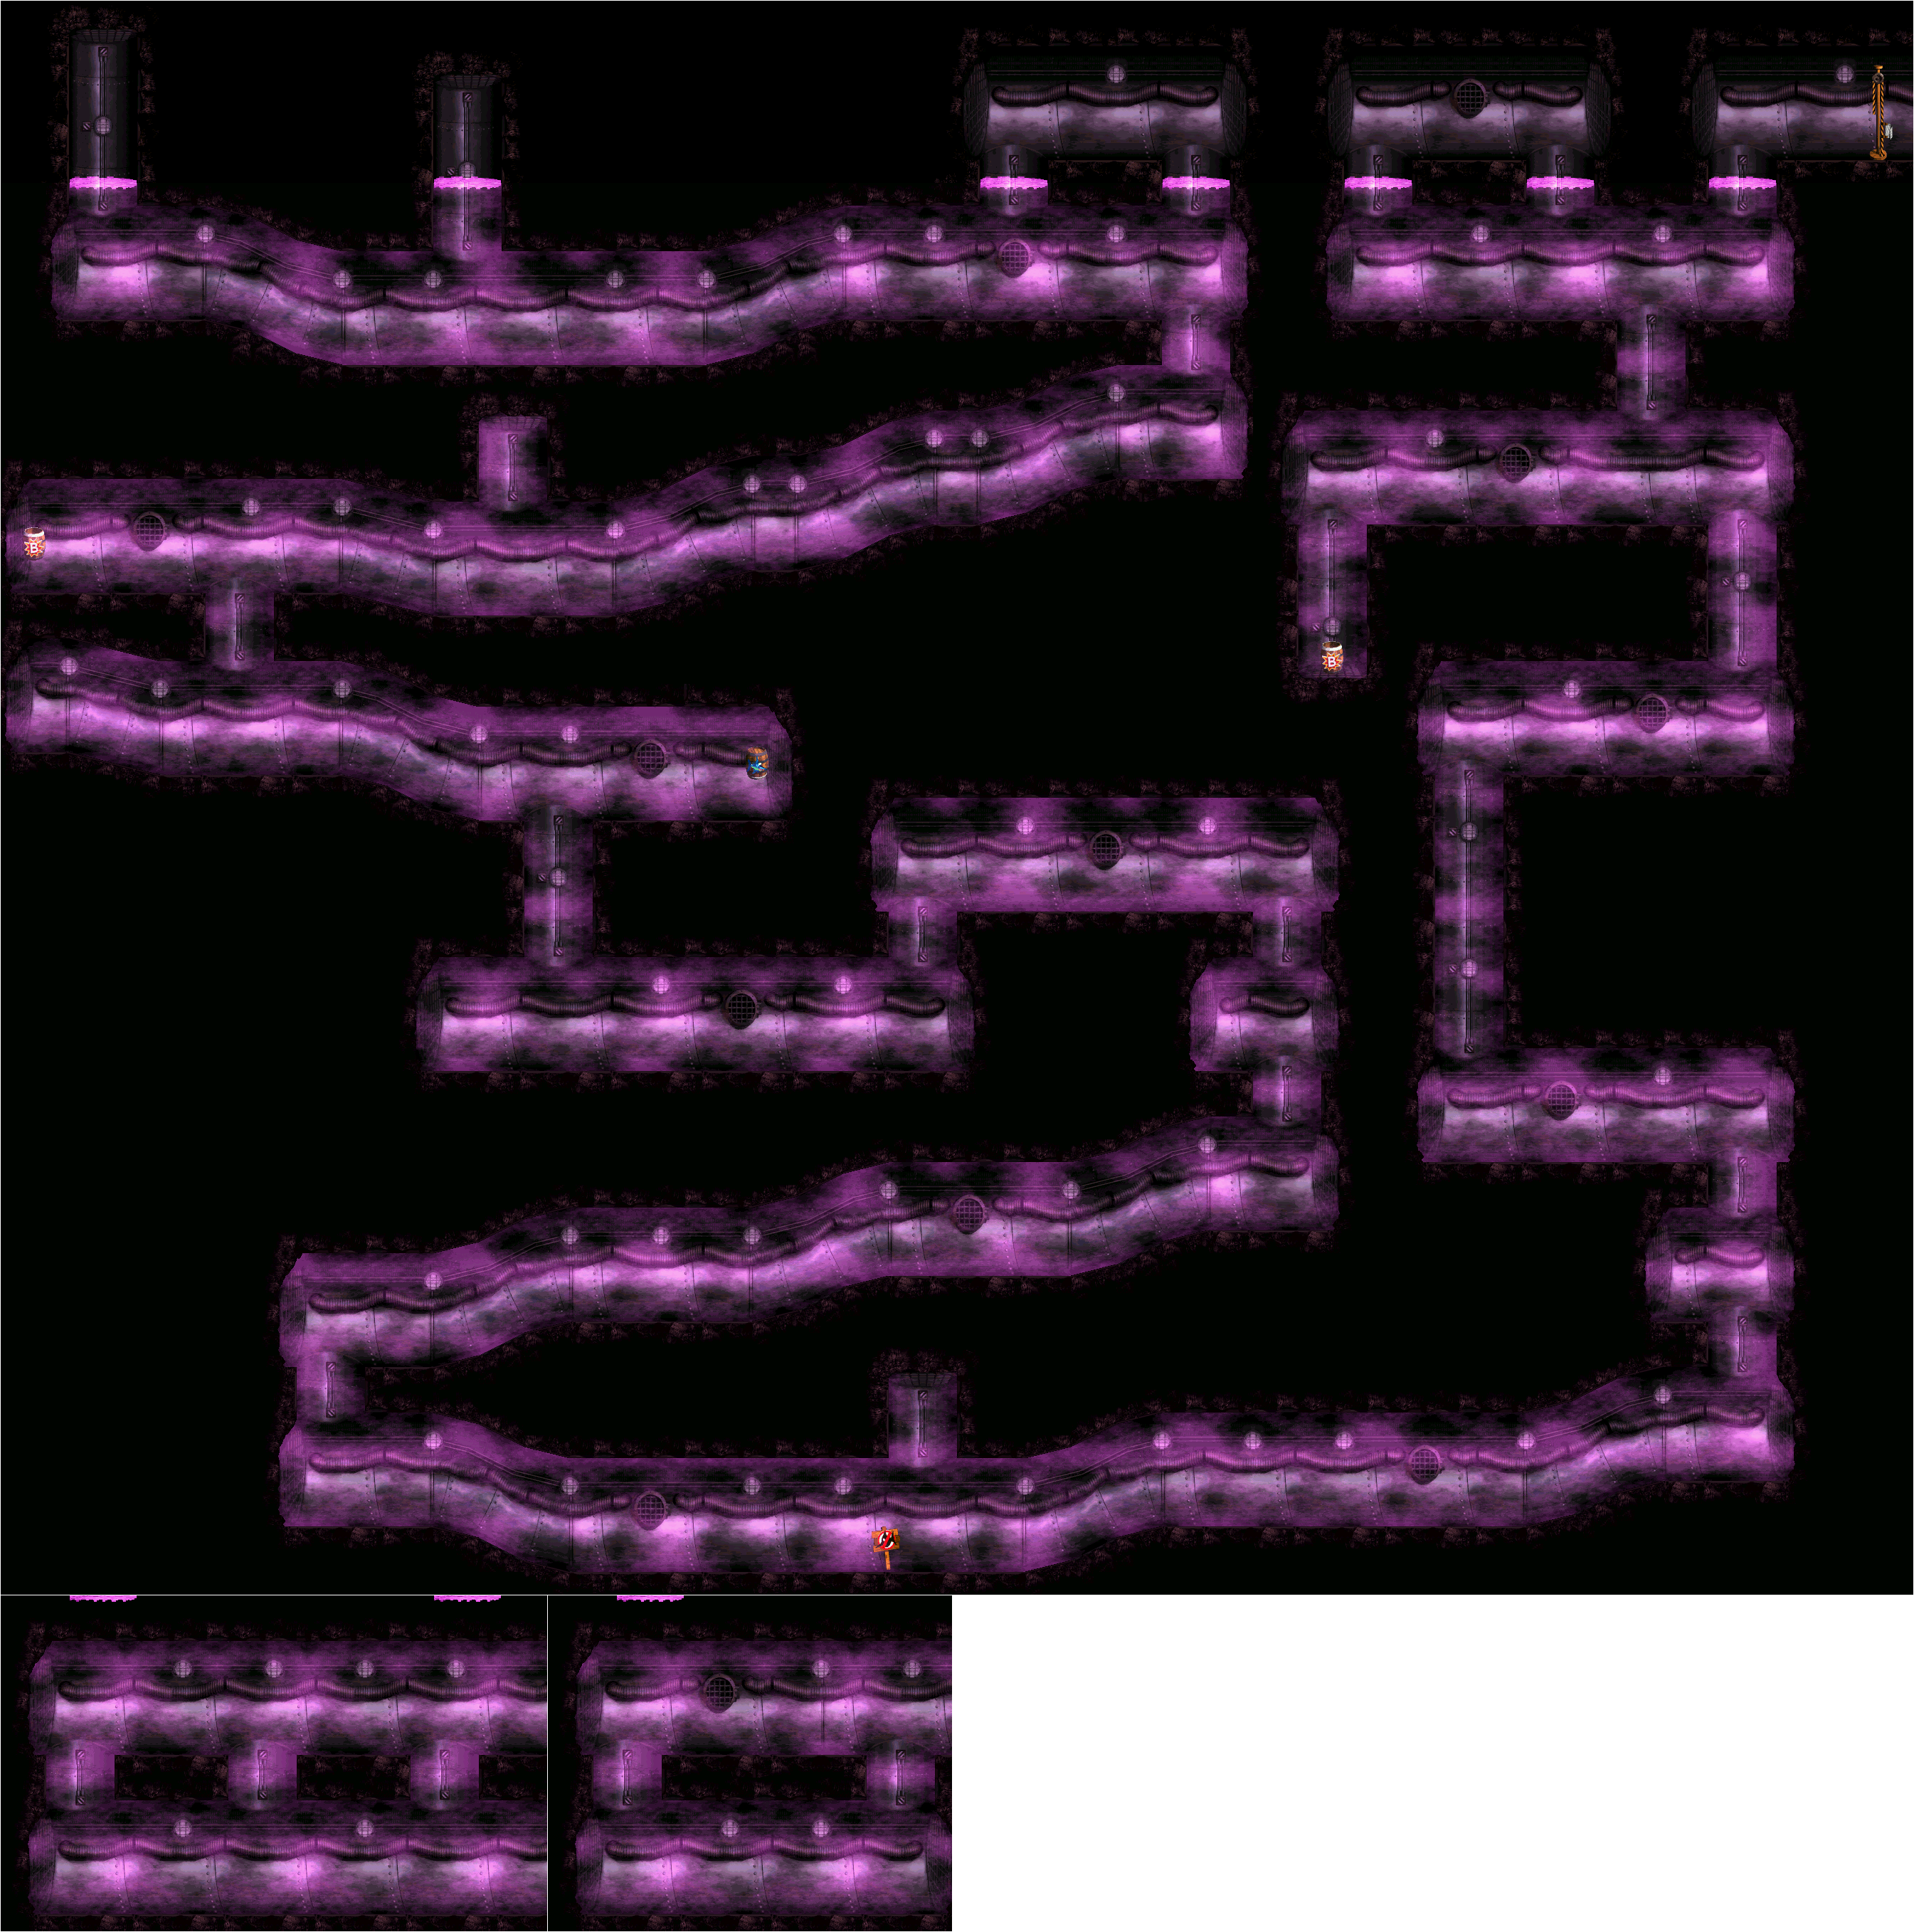
Low-G Labyrinth
Bonus areas: Two (2)
Here, you'll listen to some pretty spooky music where your movement is slowed down and your jumps will carry you to the ceiling if you're not careful! You won't go as far if you tap the jump button, but you will still go higher than normal.
You'll be seeing a lot of Buzzes in this stage. Be careful with your movements so you do not take unnecessary damage.
Shortly after the Star Barrel, you'll find an Animal Barrel with a purple Squawks in it. Quawks is back again, and this time, he can fly. However, he cannot spit eggs like his green counterpart; instead, he has to carry barrels with his feet and drop them on enemies from above in order to defend himself. Just hold Y near a barrel to pick it up, and release it when you're above the enemy.
To the left of the Quawks Barrel and the Star Barrel is the first bonus area. It is in the vertical shaft to the left of the Star Barrel, and you can easily reach it with Quawks. Collect all 80 stars before time runs out to get the first Bonus Coin. Even though the two bonus areas as well as the stage itself are low-gravity, the gravity does not seem to affect Quawks all that much.
The second Bonus Barrel is just after the N. When you see the Buzzes, go past them and go down. You'll have to use a TNT Barrel above (which is blocked by a Buzz) to take out a fast-moving Buzz. If you can't take the fast-moving Buzz out, you'll more than likely going to have to sacrifice a Kong to get down there. You'll find the second bonus area. You'll be playing as Squawks here. Spit eggs at all the Buzzes to take them down and get the second Bonus Coin.
Near the end, there are two "No Quawks" signs, one on the left and one on the right. Take the one on the left to get the steel keg. Stand on Koin's shield to assure that you can aim the keg at the wall to the right and hit him in the back for the DK Coin. The steel keg nearby when you return to the main stage can be used to take out a Buzz to get a 1-Up and a Bear Coin.
If you can go all the way to the left of the G, you can get three Bear Coins and temporary invincibility.
Kaos Karnage
Kaos is a giant robot with a couple of attacks up its sleeve. When it moves back and forth, run under it and try not to get burned by the exhaust coming out of the thruster.
When the blades slowly move around Kaos' torso, you will want to quickly jump up onto them and jump on Kaos' head to attack it. You'll want to be quick, or else you'll be knocked back - but not hurt - by giant boxing gloves.
After three hits, the helmet will fly off and be exposed, and after four hits, the helmet will fire laser beams. When the visor on the helmet turns yellow, you know a laser is about to be fired. On he fourth hit,it will be fired three times; on the fifth hit, it will be fired four times. You will want to avoid those until Kaos lowers so you can jump up the blades one more time and hit Kaos in its exposed head.
After five hits, Kaos will fly away while promising revenge, and you'll get the other ski for the next ride you'll get from Funky's Rentals: the Turbo Ski. You can hold Y to accelerate faster, which will let you ride over the waterfalls in the overworld to reach even more stages you currently couldn't reach.
To the east of Bazaar's General Store is Undercover Cove, which is another Banana Bird cove. Just use the Turbo Ski to get there.
Tuesday, October 2, 2018
PrinceWatercress plays Donkey Kong Country 3: Dixie Kong's Double Trouble - Part 7 of 16
Welcome to Mekanos. This is where the difficulty starts to pick up.
All maps by Tropicon.
Mekanos
Oh, boy. Mekanos is a pretty interesting world, but it's the most difficult one so far. You're going to have a very hard time getting extra lives, so come down here with plenty of them (preferably from Lake Orangatanga) before you go down here.
Fire-Ball Frenzy
Bonus areas: Two (2)
You'll meet a new enemy: Karbine. These owls with targets for glasses lens carry a mortar gun that shoots down a fireball. Karbines will usually be in groups, and they frequently fire in patterns. Be patient and watch them before you make your move. Don't be surprised if the Karbines follow you around in certain spots.
The pools of lava will hurt your Kongs, so you obviously don't want to land in them.
The first long vertical section ends with a platform that moves to the right when you stand on it. If you don't think you're going to make it to the other end where the Star Barrel is, jump off so that the platform moves back to the left, then try again.
When you drop down after the Star Barrel, go left. Use the super jump with Kiddy or the Helicopter Spin with Dixie to enter the first bonus area. Here, you'll be playing as Squitter for the first time. Use the Y button to attack with spider webs, and hold Up and Down on the Control Pad to aim. B still lets you jump, of course. Take out all the Buzzes before time runs out to get the first Bonus Coin. Afterwards, you can get a Bear Coin for bringing Squitter to the sign.
The next platform has two Karbines. The one on the right fires first, followed by the left. Afterwards, there is a banana hidden below a platform. Tag throw Dixie up to it, and ride it upwards to the second bonus area. Here, you'll be grabbing fifteen green bananas while avoiding the fireballs from the two Karbines in the room. This one may take a few tries.
At this point, the Karbines will have more complex patterns. The next two Karbines will fire fireballs three at a time. After the N, take the platform to the left of them to reach Koin. Get behind Koin, grab the steel keg, avoid the Karbine's fire ball, make a short hop over Koin, then throw the steel keg to the right over Koin's head to get the DK Coin.
Bazooka's Barracks
Here, you will meet Brigadier Bazooka Bear. He would like to fire Big Bessie again, but he cannot find any ammunition for it. Perhaps you will find some later to get up to the cave suspended above Mekanos...
Demolition Drain-Pipe
Bonus areas: Two (2)
We're in another racing level. This one is pretty simple: jump into the sled, follow the bananas when necessary, and avoid running into Buzzes as well as the pits and pipes in the ground. If you jump into a ceiling rail, you'll grind on it until the end or until you press B again to get off.
At one point, you will have to be on the ground, bounce off the top of one Buzz and off the top of another to grab a lone banana at the end of a rail. This is the first bonus area. You'll have to destroy all the Nik-Naks by jumping on them just like you did with the Buzzes in order to get the Bonus Coin...and it's not the easiest thing in the world! If you fail this, you will either have to lose a life or complete the stage to come back.
After the N, you'll see a Nik-Nak above a pit. You want to drop down into the next one to get to the second Bonus Area. You'll be collecting stars here. After the first group of stars, watch for two green Buzzes. You'll have to leap on top of them to get all the stars and get the second Bonus Coin.
Koin is at the end of the stage. After you take the Barrel Cannon to the flag, grab the steel keg and make a running jump to the left. Toss the steel keg to the left over Koin's head and the DK Coin is yours.
Ripsaw Rage
Bonus areas: Two (2)
This stage is a vertical auto-scroller. Stay away from the bottom here, as the band saw here will hurt one of your Kongs if you land on it.
After the O, be ready to grab a barrel and send it into the Buzz on the left to enter the first Bonus Area, which will immediately be to the left. This one also has the saw on it. You'll be collecting stars while avoiding the saw, and if you can get all the stars, you can get the Bonus Coin at the top.
Some time after the N, you will see a steel keg. Grab it, and ram it into the Buzz on the right to get to the second bonus area. You'll be invincible while standing on the saw. Make running jumps to collect at least thirteen of the fifteen green bananas before you reach the top, or else the Bonus Coin won't be there.
Below the G, there is an invisible Barrel Cannon all the way to the right. Get in and you'll be able to enter another Barrel Cannon, which will take you to a ! Barrel for some temporary invincibility. Use that invincibility to go up and right to find Koin. As you do, grab the steel keg, and stand on the far left side of the platform above Koin so that Koin is holding his shield straight up. Throw the steel keg to the left to hit Koin and get the DK Coin.
PrinceWatercress plays Donkey Kong Country 3: Dixie Kong's Double Trouble - Part 6 of 16
With this video, Cotton-Top Cove is finished! Time for Mekanos!
All maps by Tropicon.
.gif)
Tracker Barrel Trek
Bonus areas: Two (2)
The Tracker Barrels - the barrel cannons that have the "T" and the left and right arrows on them - will track your movement as you move left and right, ready to catch you as you make your way from one side of a chasm to the other.
After the first Tracker Barrel, Helicopter Spin to the right to enter the first Bonus Area. Collect all the stars with the help of the Tracker Barrels to get the first Bonus Coin. Kiddy is recommended if you want to save a little bit of time here; his larger size makes it easier to collect more stars in less time.
If you're going for the O, hold Left or Right on the Control Pad so you don't fall into a bottomless pit.
When you make your way up to the cliff with the DK Barrel on it after the Star Barrel, Helicopter Spin to the left and hug the left wall to get the 3-Up.
You'll eventually play as Ellie the Elephant again. Hold L at a waterfall to fill up on water. You'll need to shoot water at some Buzzes shortly after you get Ellie to get the Bonus Barrel. You'll be beating up seven Nik-Naks in 25 seconds. This one may take a few tries, since it is potentially easy to mess up, especially at the end.
Jump up behind the waterfall to the left of the N to get a hidden Bear Coin.
Getting Ellie to the "No Ellie" sign will give you a steel keg. Take the steel keg to the left, take it to Koin, toss it into the left wall, then leap on top of Koin so he is holding you with his shield. You'll get the DK coin. You can also hold Up on the ground behind the waterfall to do a slower throw and just stand above where Koin is to get it.
It won't be long until you reach the goal.
Fish Food Frenzy
Bonus areas: Two (2)
In this stage, you will be accompanied by a blue Nibbla. At first, he is happy, but he will soon turn red and get sad before growing fangs and turning into a real Nibbla. If you wait too long after this, you'll lose one of your Kongs.
To keep this from happening, you will have to eat the Kocos to turn him blue. Don't let him get near the Lurchins, or else he will start turning red and come closer to taking a bite out of you. Kocos good, Lurchins bad. Thankfully, keeping Nibbla away from the Lurchins can be pretty easy sometimes, and so is getting Nibbla close to the Kocos. Just keep Nibbla behind you, and use his placement to your advantage.
After you go down and left for the first time in the level, go right for the first Bonus Area. You'll be grabbing fifteen green bananas again, but this time it is really easy as it is just your Kongs in an empty underwater room.
The second bonus area is above the final Lurchin in the stage. Here, you'll have Nibbla with you this time. Have him eat all ten fish before the 40 seconds runs out and the second Bonus Coin is yours.
Koin is at the end again, since this is an underwater level. You'll need both Kongs to reach him, hover. Tag throw Dixie up and left of the goal, then grab the steel keg and toss it over Koin's head to get the DK Coin. At least there is a DK barrel that you can break beforehand.
Squirt's Showdown
You'll be playing as Ellie here. Get a few shots of water out of the waterfall, then run and jump clockwise across the stage to avoid the water. Shoot water at the eyes to close them, and close both eyes to get a hit. It is possible to get both eyes before they go back into the water.
After one hit, the water goes around twice; after two, the water goes around three times. This is easy when you know what to do.
Beating Squirt will give you a yellow ski. Bring it to Funky, and he'll tell you he will need the other ski before he can do something for you. You'll have to complete more of the game to get the other one...
Subscribe to:
Comments (Atom)