Showing posts with label part 58. Show all posts

Saturday, March 14, 2026

PrinceWatercress plays Super Mario Odyssey - Part 58 of 92


We're running out of Power Moons to hunt down in the Mushroom Kingdom, and that leads to playing a few of the boss rematches scattered all over the place.


There are six boss rematches scattered throughout the Mushroom Kingdom, and each one will net you a Multi-Moon for winning again.

Power Moons


29. Yoshi's Feast in the Sea of Clouds - The stream near the Odyssey leads to a pipe. Eat the berry blocking the pipe as Yoshi, then enter the pipe as Mario. (You can enter it as Yoshi, but you'll turn back into Mario.) From here, you'll enter another cloud area where you can play as Yoshi. Your skills as Yoshi will be put to the test here, including your wall jump (for two berries) and a flutter jump (for the eels that keep popping out of the pits). 

30. Sunken Star in the Sea of Clouds - To the left of the starting point is a hidden path to another Power Moon. If you go all the way around the level the other way, the last see-saw will take you down to that path.

34. Struggle in Steam Gardens: Rematch - This is the rematch with Torkdrift, the boss from the Wooded Kingdom. To get here, you'll need to find the seed for the vine in the Goomba Woods area, then throw it into the planter near where the tower is to get to the tower. As for the boss battle, the same strategies apply, but you now have those ring generators in the corners that will create even more rings of death that you'll have to avoid throughout the battle.

35. Dust-Up in New Donk City: Rematch - The tower northeast of the Odyssey will take you to this boss battle. It's a rematch with the Mecha-Wiggler from the Metro Kingdom...or rather, Mecha-Wigglers. You're facing two of them this time, and while the same strategies from last time apply, you'll be dealing with them from two Mecha-Wigglers simultaneously. Bringing a Life Up Heart to the battle is definitely recommended.

38. Rumble in Crumbleden: Rematch - Take control of Yoshi and eat the berry blocking the pipe in the moat. Afterwards, enter the pipe as Mario. You'll enter a room with a painting of the Dark Dragon from the Ruined Kingdom. Jump into the picture to fight the Dark Dragon again. Same strategies apply, and you'll get a Power Moon for it. Same strategies apply.

Stay on the move to avoid the purple energy as well as the chakrams that roll around that are created by it. The small mass of purple electricity on the floor indicates where the dragon is about to zap. When the dragon smacks his head on the floor, you'll need to jump over the electricity that courses along the floor. He will then be tired. This is your opportunity to jump onto the dragon's head and throw your hat at the hooks in the dragon's head. By removing all the hooks and ground pounding the glowing spot on the dragon's head afterwards before the dragon revives, you'll score a hit. In case the dragon wakes up, your progress with the hooks will stay the way that it is until you either lose all your health or complete the current attack phase.

There are four spots where you can ground pound the ground for a heart, should you need them. They will be indicated by glowing cracks in the ground.

For the second phase, you'll have to avoid more five chakrams instead of three, and the crackling energy will have slightly more complex patterns that look like double helixes. You'll also have to remove four hooks instead of three.

For the third phase, you'll have to avoid over a dozen chakrams and deal with crackling energy that forms loops that you'll need to jump between. You'll also have to deal with five hooks on the dragon's head, which means you may have to go through two attack loops to get the job done.

Saturday, October 26, 2024

PrinceWatercress plays Chrono Trigger (Super NES) - Part 58 of 70


Now that we've beaten Yakra again, it's time to go for another ending in New Game Plus.


For the next ending, you'll need to use the Telepod portal to Lavos in 1000 A.D. after you've returned from beating Yakra in the Cathedral and rescuing Queen Leene in 600 A.D. You'll also need to do this before Crono goes to prison.

Lucca will be out of the party at this point, so once again, it will be another battle where you just have Crono and Marle in the party. This time around, I equip the Gold Stud on Crono to minimize the amount of MP that he uses as I constantly cast Luminaire to do as much damage as possible. Interestingly, I barely have to use any healing items.

When you beat the Lavos Core this time around, everyone will mention that Marle is in an unnecessary disguise before croaking much like Frog does. When you talk to the two men blocking the entrance to Leene Square, Marle will start croaking like a frog. You'll head to the castle, where you'll find out that history has changed in a weird way, as you'll find footage showing Frog getting married to Queen Leene, therefore making everyone in the Guardia family tree in the last 400 years part frog. Also, the king as well as Marle will both hop and croak like frogs.

Sunday, November 14, 2021

HCBailly plays Final Fantasy II AGAIN - Part 58 of 65


In this entry, we finally re-unite with Leon and find the Jade Passage.


Wizards are the most dangerous of the Sorcerer palette swaps, and while it is possible to one-shot them at this point and it is possible to meet them in the Coliseum or Fynn Castle, they can still pack a wallop if you're not protected against their magic, such as Fire 11, Flare 10, Drain 8, Osmose 8, Stop 8, Toad 7, Break 6, Banish 7 and others. 

When you make it to the throne room and talk to Leon, Maria tries to stop him. The real Emperor - apparently he was never truly dead - shows up behind Leon and try to kill him and the rest of you with his magic. Ricard immediately readies the Hiryuu and tells everyone to get on while he sacrifices himself against the Emperor. Hope you removed everything on Ricard before talking to Leon.

You'll return back to Castle Fynn with a now-normal Leon, who will now join your party after everyone explains what happened to Hilda. Don't forget: Leon is left-handed.

For Leon, put the Ice Shield in his right hand and a Sun Sword in his left. For armor, there's the Flame Cuirass, the BlckGarb and the Thief's Gloves. Give him a Golden Shield and a Defender Sword for the items.

Castle Fynn


Talk to Hilda. She'll give you a new keyword that you need to Learn: Jade Passage. According to Hilda, the undead Emperor is in Pandemonium, and the only way to get there is through the Jade Passage. The sages of Mysidia know more about this (though you need not necessarily go there).

Ask Leila about it, and she'll tell you that the Sea of Jade lies around the thin strait east of Mysidia. Gordon will tell you it's near Kashuan if you ask him.

According to one person, Pandaemonium is a phantom castle, and you can't access it directly. That's what the Jade Passage is for.

Castle Dist


Head back to Castle Dist, talk to the woman, and Ask about "Dragoon." She'll give you the Dragoon Clan's sword: the Excalibur, which is one of the strongest swords in the game.

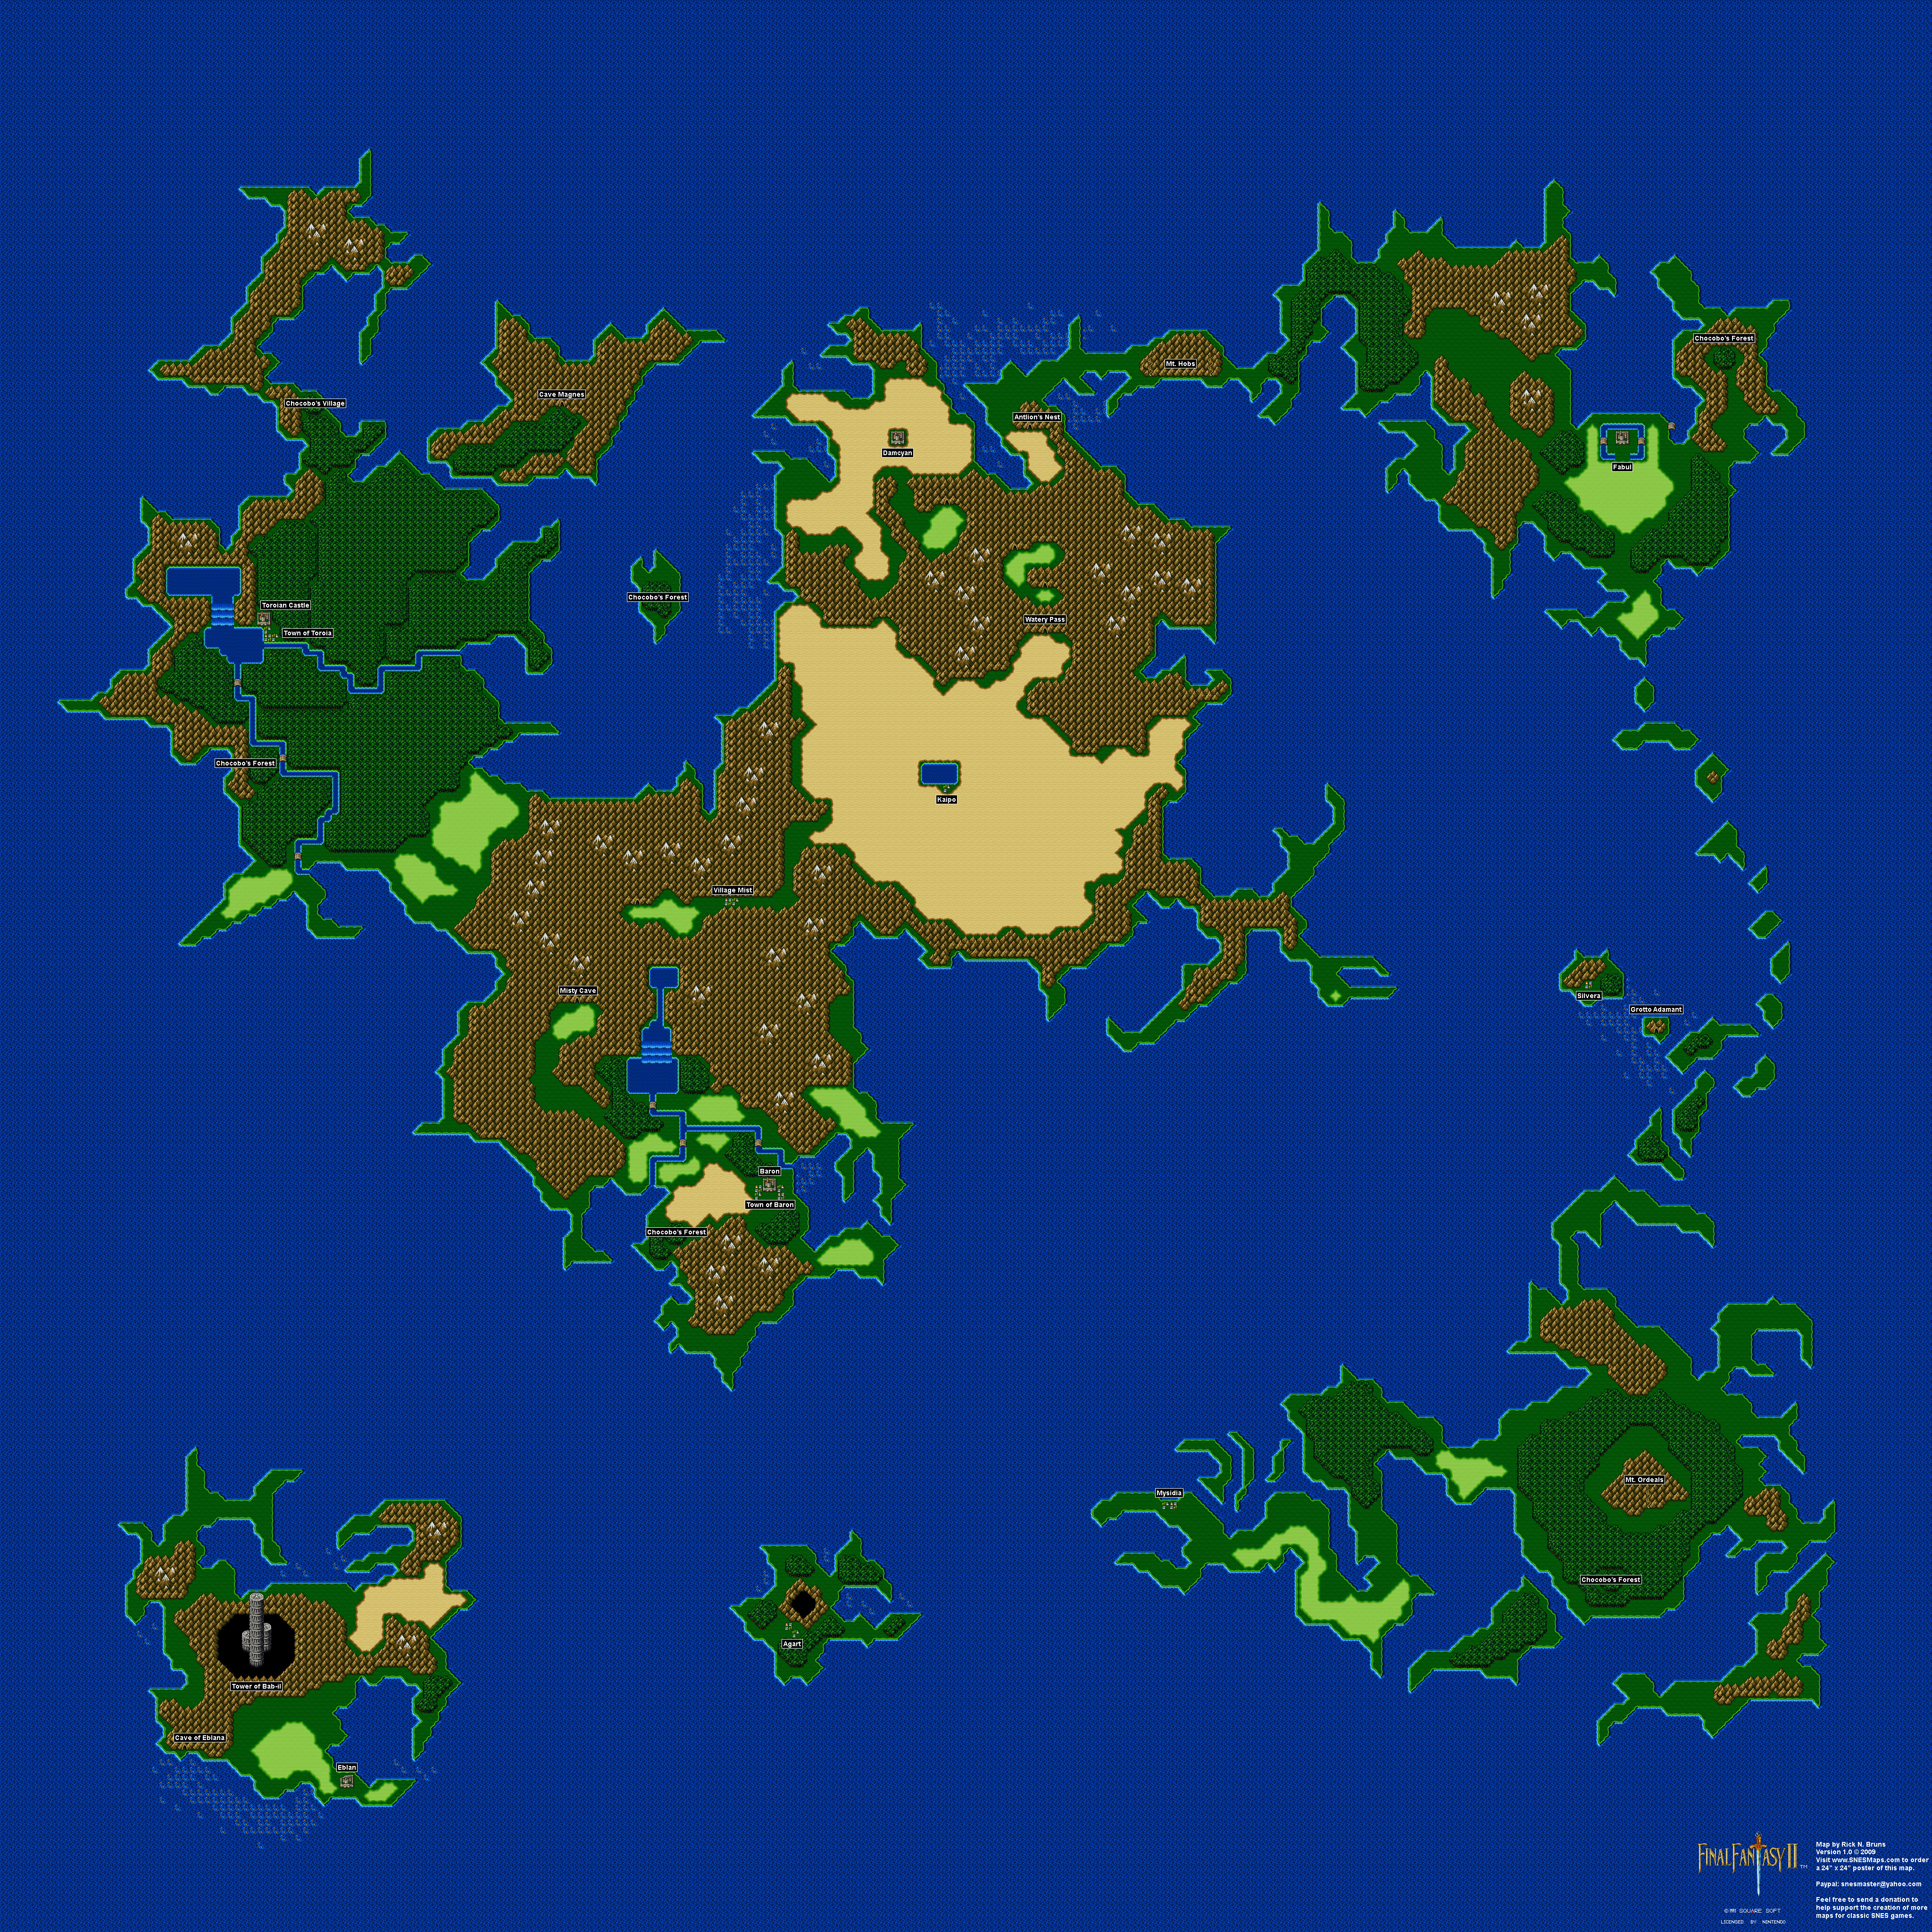
Near the mountain range on the coast southwest of Kashuan, there is a blue circle. This is the Jade Passage.

Sunday, May 26, 2019

HCBailly plays Final Fantasy IV (Super Famicom) - Part 58 of 70


The Giant of Bab-il is now on the loose. Now we have to find a way inside and stop it...

Be sure to equip the Thunder Claw on Edge and have over 50 Artemis Arrows before you do anything. From here, head back to Earth.


When you head back to Earth on the Magic Ship, you'll find out that the Giant of Bab-il has finally been set loose on the Blue Planet. Suddenly, tanks are seen firing at the Giant. Somehow, King Jiott and his men are now above ground, and Yang and the Sylphs are there with them. Cid, now recovered, is also here with a fleet of airships to fend off the Giant of Bab-il along with the Mysidia village elder and Polom and Porom, who are now no longer stoned. Edward is also captaining one of the ships.

A fierce battle ensues, and the Giant of Bab-il is confused. Cecil and company get close to the Giant in an attempt to destroy it from within, and make their way inside the giant from the top.

Giant of Bab-il


All the enemies here are weak to thunder, and are also immune to just about every single status ailment there is.

The Searcher and MachSoldier are weak to thunder. The Searchers are on the ground, so you can hit them with Quake. You can also steal Alarms repeatedly from Searchers, and if you use one outside of battle, you can summon rare enemies.

The MachCannons are also weak to thunder, but they can be taken care of rather easily.

The IronSolder (Iron Soldier) is also weak to thunder and can also be destroyed with Quake, even though it has more HP than the other enemies and can also pack a punch.

Thursday, June 14, 2018

HCBailly plays Terranigma - Part 58 of 75


In this episode, we finally meet Mr. Wong and find out what he's REALLY up to...


As Ark sulks back in the cell, we see Princess Elle being met by Mr. Wong and Royd. Turns out Elle knows that Mr. Wong killed her parents and everyone in the village so that King Henri would collect information for him. Mr. Wong doesn't care that he's killed innocent people for his own end, and says the day when only necessary people will live forever is close at hand.

Mr. Wong won't tell Elle why he wants the treasure of Storkolm, and he just tells her to shut up before commanding Royd to keep guard over her. Turns out Royd is only doing the job for the money and that he's just a drifter looking for a fistful of Gems.

The game then cuts back to Ark and Yomi in the cell. Ark hears a sound in the cell. Head to the pit, but don't go down it. Fyda is finally back and in good health, and she drops a chain for you climb up on. Make a running jump to the chain and climb up, and you'll meet Fyda.

When Fyda asks what happened, tell her about Meilin. Then, tell her you came here for airplane parts. Fyda has a feeling the Princess being brought here and the buying up of parts seem to be related, and heads to the castle's east side.

Leave the room, then head west and go back to the dungeon. If you go all the way to the south, you can get Magirock #80. From there, head back to the entry room.

You'll now want to head to the east. Take the stairs that you see, and make your way further to  the east and enter the doorway. Make your way to the north and enter the doorway, then make your way east again by jumping from platform to platform. Take the southern road and jump your way east again, and you'll find Magirock #81.

Head west, then take the northern road. You'll find a chest containing 200 Gems. Go back to the beginning and head north, and you'll meet Elle from Crysta again. She'll tell you Princess Elle is held in the room to the north, and tells you to help her.

Go into the room to the north, then make your way through the maze of tables, chairs and open treasure chests to the upper-right corner. Go in the door there. At the other end of the next room, you'll meet Princess Elle...not! It's another trap by Meilin. You'll see both Elles, and Ark will be asked which Elle he likes. Ark, thankfully, breaks out of the illusion thanks to Fyda. Fyda then tells Meilin to show herself, and she does. Turns out Meilin wants Ark to suffer in return for hurting her feelings, and Fyda responds by slapping Meilin in the face and calling her out on her crap. Meilin cries and says that Mr. Wong can easily get rid of the both of them, then runs away.

Fyda joins you at this point. Head back to the beginning of the previous room, and you'll find out that the room has been sealed off. Mr. Wong shows up and says that Meilin has done her necessary job and that she too will be eliminated. Meilin doesn't understand, and Fyda has to tell her that he's basically playing master manipulator. Meilin cries, realizing how she has hurt Ark and her grandfather, but thankfully Perel breaks the doorway down and unseals the room and tells you to go find Mr. Wong. Fyda then leaves the room. If you talk to Meilin, she'll tell you to check the wall opposite the unpaired statue, as behind that wall will be the room where Princess Elle is held before apologizing for everything she ever put you through.

Tuesday, March 13, 2018

skorch82 plays Brave Fencer Musashi - Part 58 of 70


As we go further into the mines, we take on another 3D ride section...

As you continue to the left, you'll have to swing from pole to pole while avoiding the ants. Use your double jump if you need to.

When you make it to the cavern at the other side, you'll find Knight Rumparoni. He's the last person you'll have to rescue. Go see him at the castle to learn a new technique.

Break the cracked ground here with the Wind Scroll. You'll be back at the elevators, and this time they'll be running. Take the bottom path and head back to the mine cart. The lights here are green and lit up. You can finally ride the mine cart.

Use the D-Pad to swing left or right to avoid obstacles. The cart will break after four hits, so try not to run into any ants or rocks. At least you'll hear the ants coming. The steel grates will take you by surprise if you're not paying attention, as will the rocks (though those are less likely to do so as you can still see those coming), so pay attention to the on-screen action! If your hand-eye coordination isn't the best, this will definitely take a few tries.

There is a continue point halfway through. Don't give up!

Friday, December 13, 2013

brickroadbrickroad and SovanJedi play Secret of Evermore - Part 58 of 88


In this episode, we get thrown in the dungeon. Whee!

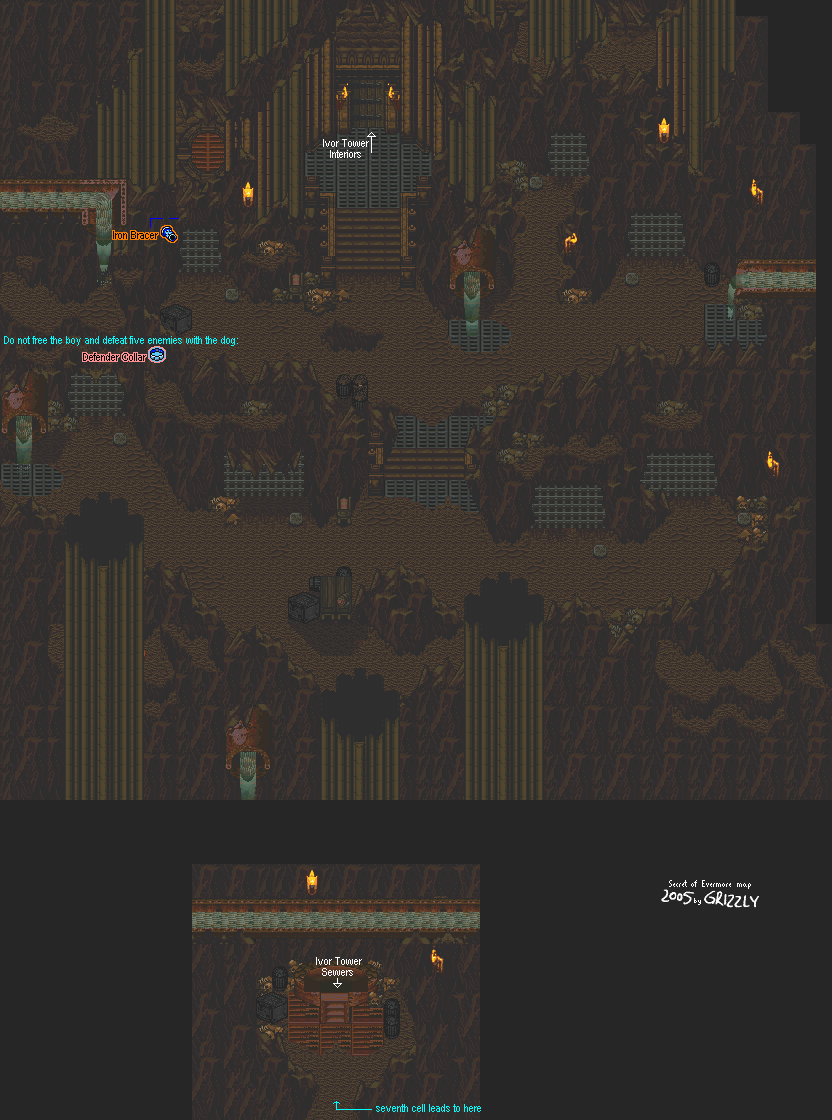
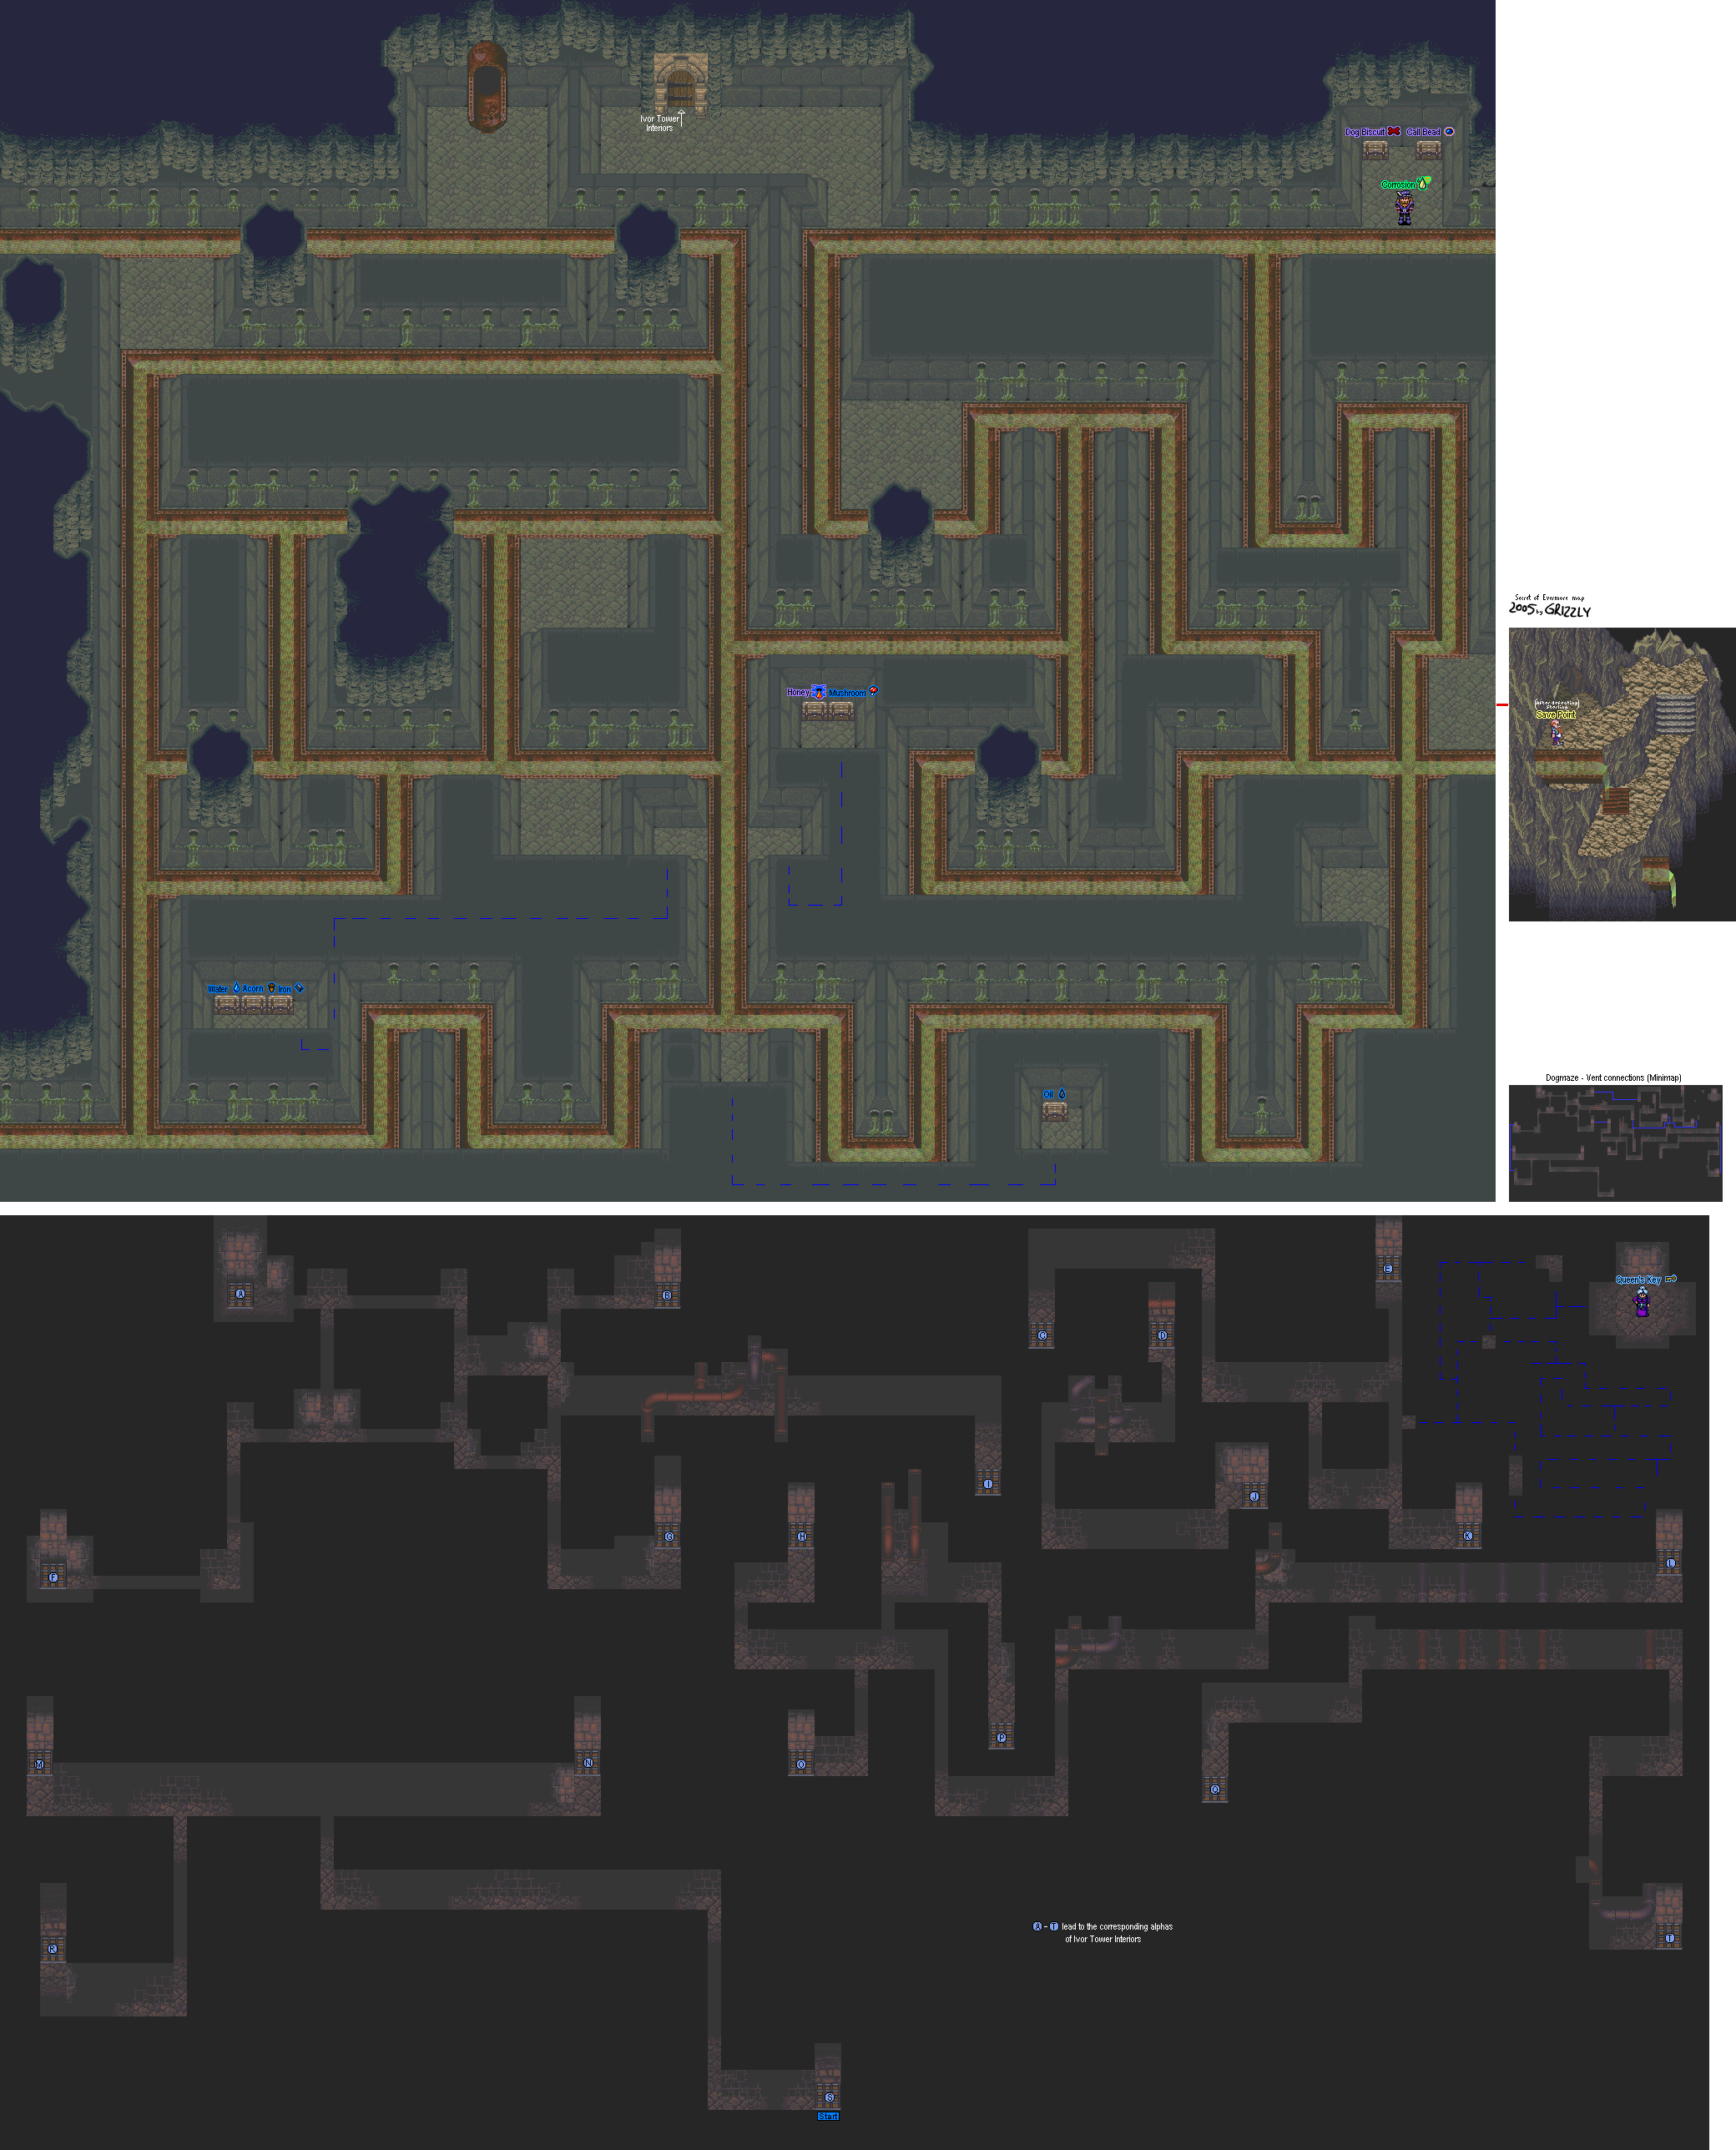
All maps by Grizzly.

Dungeon


Instead of letting The Boy out immediately, open up the other cells and destroy the enemies in them. It's nothing you haven't dealt with before, you're just using The Dog and not The Boy. If you finish them all off before freeing the boy, you'll be able to get a free Defender Collar.

Instead of leaving the same way you came in, go into the empty cell. You'll find an entrance to the sewers.

Ivor Tower Sewers


Be careful as you stand in the flowing water, as it is corrosive and drains your health.

There are some hidden passages in these sewers that will take you to hidden alchemy ingredients. Consult the map for details.