Showing posts with label part 57. Show all posts

Friday, March 13, 2026

PrinceWatercress plays Super Mario Odyssey - Part 57 of 92


We finally play as Yoshi and get the berry-related Power Moons out of the way in this entry.


Yoshi is on the roof of the castle. We saw him last time, but this time, we're actually playing as him. Just remember that you have to throw your hat at the egg to break it, then throw your hat at Yoshi to take control of him. You can't jump on top of him like you can in other games. Once you're in control, you can press Y to stick out your tongue to eat things, and you can hold B while in mid-air to do the flutter jump and hover in mid-air temporarily. Shooting your tongue at walls will allow you to stick to walls, and you can press B from there to do a wall jump.

There are thirty berries in the Mushroom Kingdom, and you can get a few Power Stars from eating them all: three Power Stars for ten berries each. Any berries you eat will turn transparent upon re-entry into the Mushroom Kingdom, while those Yoshi has not eaten yet will be solid. Keep this in mind, as eating berries fills a gauge, and filling the gauge up gives you a Power Moon.

Yes, you can eat the Goombas as Yoshi, as usual. Doing this will give you coins.

There are some berries covering up pipes: one in the moat, and another underground in front of a stream near the Odyssey, east of the castle. Eat those berries so you can go through those pipes later.

Getting 500 Power Moon will unlock the Darker Side. This is where the game's ultimate challenge will be, and we won't head there until near the end of the Let's Play.

6. Gardening for Toad: Pasture Seed - Obtainable in the garden after planting this seed.

7. Gardening for Toad: Lake Seed - Obtainable in the garden after planting this seed.

13. Gobbling Fruit with Yoshi - Eat ten of the thirty berries in the Mushroom Kingdom as Yoshi for this Power Moon.

14. Yoshi's Second Helping! - Eat twenty of the thirty berries in the Mushroom Kingdom as Yoshi for this Power Moon. 

15. Yoshi's All Filled Up! - Eat all thirty berries in the Mushroom Kingdom as Yoshi for this Power Moon.

26. Loose-Tile Trackdown - You'll need to ground pound eight loose floor tiles in Peach's Castle. They are in the following locations, in this order:

  1. Between the left and center stairs
  2. Between the left and center stairs, to the right of the first tile
  3. Up the stairs, to the right of the throne and above the hint art
  4. Near the hint art, next to the set of stairs on the right
  5. Right next to the bottom of the left stairs
  6. Up the stairs, near the left corner
  7. To the right of the center steps
  8. To the right in front of the throne

27. Totally Classic! - North of the castle near the stream in the Goomba Woods, there is a locked door. If you're wearing the Mario 64 Cap and the Mario 64 Suit, you'll be able to go in. On the other side is the courtyard from Super Mario 64 where you can could enter Big Boo Manor. Throw your hat at the statue in the middle of the fountain and hold the button to get this Power Moon.

28. Courtyard Chest Trap - In the area where you find Power Moon #27, there are eight treasure chests. Opening them all in the correct order will net you another Power Moon. Getting it wrong forces you to fight a few ghosts enemies, and makes it so that you'll have to start over. The chests to open and the order to open them in is as follows: 

  1. To the right of the fountain (it's the one with the coins revolving around it)
  2. Left chest behind the fountain
  3. Right chest behind the fountain
  4. Left chest at the entrance (In other words, left from when you came in. It's the right chest if you're actually looking at the door like you're about to exit.)
  5. Right chest at the entrance (In other words, right from when you came in. It's the left chest if you're actually looking at the door like you're about to exit.)
  6. Left of the fountain
  7. Right grass chest
  8. Left grass chest

Friday, October 25, 2024

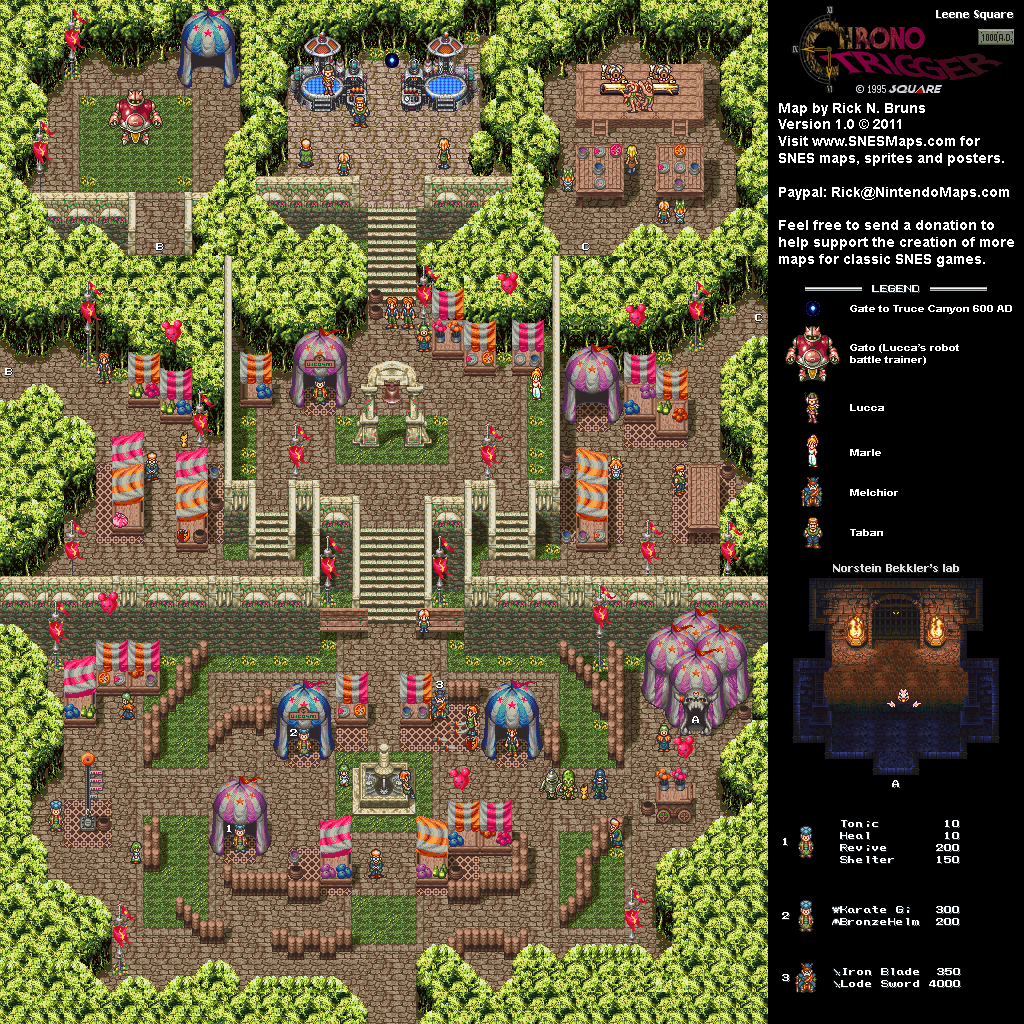
PrinceWatercress plays Chrono Trigger (Super NES) - Part 57 of 70


Ever wondered how to effectively beat Lavos with Crono? Here's how!


Believe it or not, there is a way to fight Lavos with only Crono.

After you talk to Lucca at the Telepod, Marle will step back to watch as you demonstrate the Telepod. Instead of going to the left pad, go to the right pad and use the portal there to fight Lavos alone.

For best results, you'll want to equip the PrismSpecs as an accessory if you're not fast enough. The Sun Shades will boost your attack power by 25% during battle, but the PrismSpecs will boost it by 50%. Having a Haste Helm can help, but you don't necessarily need one unless you want to speed the battle up or want to use alternate strategies, such as equipping the Gold Stud and blasting everything with Luminaire while topping up with a HyperEther every so often. 

For the shell battle, just keep using Luminaire. The attack boost from the PrismSpecs will always kick in, and you'll see the attack boost right away compared to when you don't have it. Lavos will go down a little faster with the PrismSpecs on as a result.

For the Lavos body, attack the left arm (which is the one on the right side of the screen) first until you knock 2,000 HP off its health. Confuse plus a critical hit from the Rainbow will usually do the trick. From there, keep using Luminaire. You'll destroy both arms at the same time, and if you're fast enough, you won't have to worry about Protective Seal killing off your status ailment immunity and ruining the battle. The PrismSpecs makes a much quicker solo battle against Lavos' body a reality, and also a little easier if you know what you're doing.

As for the Lavos core, the PrismSpecs will allow you to hit the left pod with Confuse and destroy it in one shot every time. From there, you can do some damage on the center pod until the right pod lowers its defense. Once that happens, let loose with Luminaire. The left pod (and the center pod, if you somehow take it out) will eventually be revived, but you'll have done enough damage on the right pod to keep the fight in your favor and you can go ahead and take out the left pod in one shot with Confuse again to keep things going smoothly. 

The Dream Team ending is the same regardless of whether or not you have Marle in your party.

Saturday, November 13, 2021

HCBailly plays Final Fantasy II AGAIN - Part 57 of 65


At this point, some earlier bosses show up as regular enemies.


Remember Gotus? Well, you'll be seeing a lot of him in Palamecia. You'll also be fighting more than one Gotus in a battle if you're not fortunate enough. You'll also be meeting the Queen Lamia again in the chest with the Sun Sword, along with a Krull.

You may also fight the Coeurl in that battle, and the Coeurl has the only non-elemental status ability in the game, Mindblast 10, which can Paralyze your entire party and can only be blocked with Shell. Also, the Coeurl's physical attack will cause instant death if it connects if you don't have Shell cast on whoever gets hit with it.

Saturday, May 25, 2019

HCBailly plays Final Fantasy IV (Super Famicom) - Part 57 of 70


In this entry, we fight Bahamut. Don't forget to cast Reflect.


The Ogre Killer is an axe that can be bought in Tomra, but can also be found in the Tower of Bab-il. It deals quadruple damage to Giants, and will work wonders against the Demon Soldiers.

As you go through the Cave of the Phantom Gods, you will eventually enter a fixed mini-boss battle with the Behemoth, and you'll have to do this a few times on your way to the end of the third basement floor. Casting spells on it will cause it to counter-attack with Maelstrom, which will nearly wreck your entire party. Instead, Berserk Cecil and have him hack away at the Behemoth with super-strong attacks. The Behemoth will counter-attack by hitting Cecil every time, but the more damage you do in less time, the fewer counter-attacks the Behemoth will perform before it dies. Since the Behemoth has a low speed, you'll be able to cut it to ribbons in this fashion, anyway. Using Rydia's Mist summon really helps, too.

The Skull Dragons are weak to Fire, so cast Fire 3 on them. As for the Dark Wizard, just Piggy them and take them out as quickly as possible. You can also use Break on the Dark Wizard, but you'll have more luck casting Piggy instead.

At the end of the third basement floor, you'll be met by two purple-haired children. They are surprised by Cecil being half-Lunarian and wondering what business you possibly have with the God of the Phantom Beasts, who is just ahead.

Be ready to equip the Artemis Arrows and Yoichi Bow on Rosa for what you're about to do. When you talk to the God of the Phantom Beasts, he will be surprised by your prowess before challenging you. He then transforms into Bahamut, whom you will then have to fight.

Bahamut has a count-down. Before he counts down to zero, use the Light Curtain and/or cast Reflect on everybody. Once Bahamut hits zero, he will cast Mega Flare. If it hits someone who has Reflect cast upon them by any means, it will hit Bahamut. From here, have Rosa attack with the Yoichi Bow and Artemis, have FuSoYa cast Flare, and have Rydia cast Tsunami. As for Cecil and Edge, have them hit hard with their strongest attacks. As long as you have Reflect up, this battle is doable. Beating Bahamut will allow Rydia to summon Bahamut in battle at any time, and with high Wisdom and Will, Bahamut will be able to pack a punch.

Thursday, June 14, 2018

HCBailly plays Terranigma - Part 57 of 75


It's time to head to Dragoon Castle in this entry.

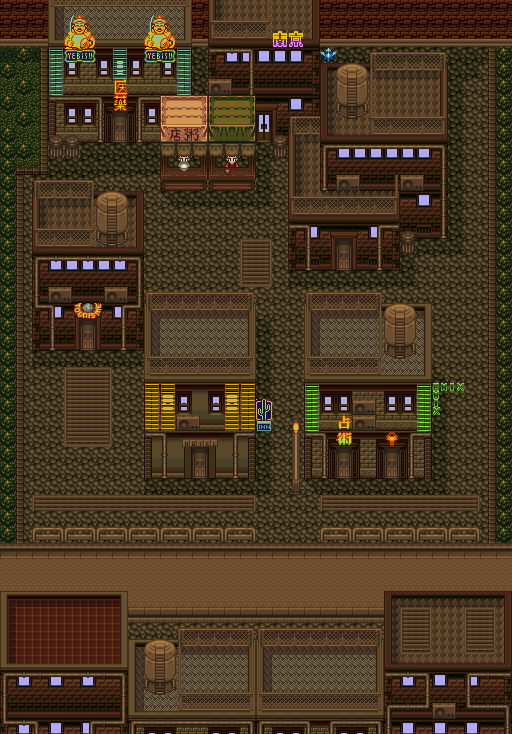
World map by Tropicon. Yunkou map by Amir Azadur.


Head to the Nomad's camp and head back to the upper-right tent where Chija was, and you'll find out that she is gone that that people who claim to be her parents came for her. You'll be told that she's probably back with her parents in Yunkou.

Yunkou


Head back to where you met Chija's parents. Talk to them, and they'll tell you that there is still a gap between them and Chija, but they intend to fill this gap slowly without hurry. Your reward is Magirock #79. If you talk to Chija, she thanks you.

Go back to the inn and give Fyda the Ginseng. You'll then see a flashback to when King Henri attacked the village of Storkolm and how she had to kill in order to find the treasure for the king. You'll also learn that King Henri raised her since she was an orphan, and that she is protecting Elle because it is the last request of her parents.

When she is about to kill Princess Elle's parents, Ark shows up and the screen goes black. Fyda blames herself for all of Princess Elle's misery. When she says that you think of her as vicious, you have a choice between staying silent and saying that's not true as she protected Princess Elle as promised, even though it doesn't absolve her of the crime. Tell her that this is not true. After Ark asks Fyda who will protect Elle, you'll be back in Yunkou. Fyda will tell you to hurry to Dragoon Castle.

When you leave the inn, you'll meet Perel. He'll tell you he knows that you're helping Will and has decided to join you. When he asks if you've discovered anything, say that you have. Perel will tell you that it is time to hit Dragoon Castle with a full frontal assault.

Dragoon Castle


Normally, you wouldn't be able to get past the guard, but now that Perel has joined in on the fun, he'll distract him so you can make your way in.

From here, you'll have more guards to deal with. If you run into their flashlights, they'll see you and toss you back to the entrance.

From the entrance, go all the way to the north. From there, jump over the pit and follow the path. If you have the Speed Shoes, you're in luck. If not, go get them. Equip them and run into the center of the north wall to open up a new door.

From here, go all the way to the north and make your way to the upper-left corner. Enter the door here, then go downstairs. You'll be in a dungeon. Explore the area and you'll eventually find Elle - your world's Elle and not Princess Elle - tied to chains situated above a pit. When Ark approaches her, she disappears. Go south, and you'll find out that you're trapped thanks to Meilin, who wants revenge for not having feelings for her. Also, she works for Mr. Wong and was ordered to trap you. What is up with this girl, anyway?

After Yomi makes a snarky comment, Ark sits there and sulks.

Monday, March 12, 2018

skorch82 plays Brave Fencer Musashi - Part 57 of 70


We've finally found all the Minkus in the game! 

Well, you could, but not just yet.

Go back, then take the entrance about that area. Use the Wind Scroll to get past the wind, and assimilate the Hop ability from the flower to climb the slopes and cross the spikes. The next room has a Minku, and you can also get the Antidote ability from the worm enemies here.

Congratulations! You have now found all thirteen Minkus and reached the maximum HP value of 500!

Climb up the wall with the fan, then strike the switch with Lumina. Go to the left as the fan blows you upwards.

Continuing to the left leads to more ants. You can assimilate their abilities, but their abilities are harmful. The blue ants are particularly nasty, as they shoot acid bubbles from their posteriors for some nasty damage. If you can make it far enough to the left, you can rescue Conductor Scores.

Thursday, December 12, 2013

brickroadbrickroad and SovanJedi play Secret of Evermore - Part 57 of 88


Finally, we're out of the dog maze!

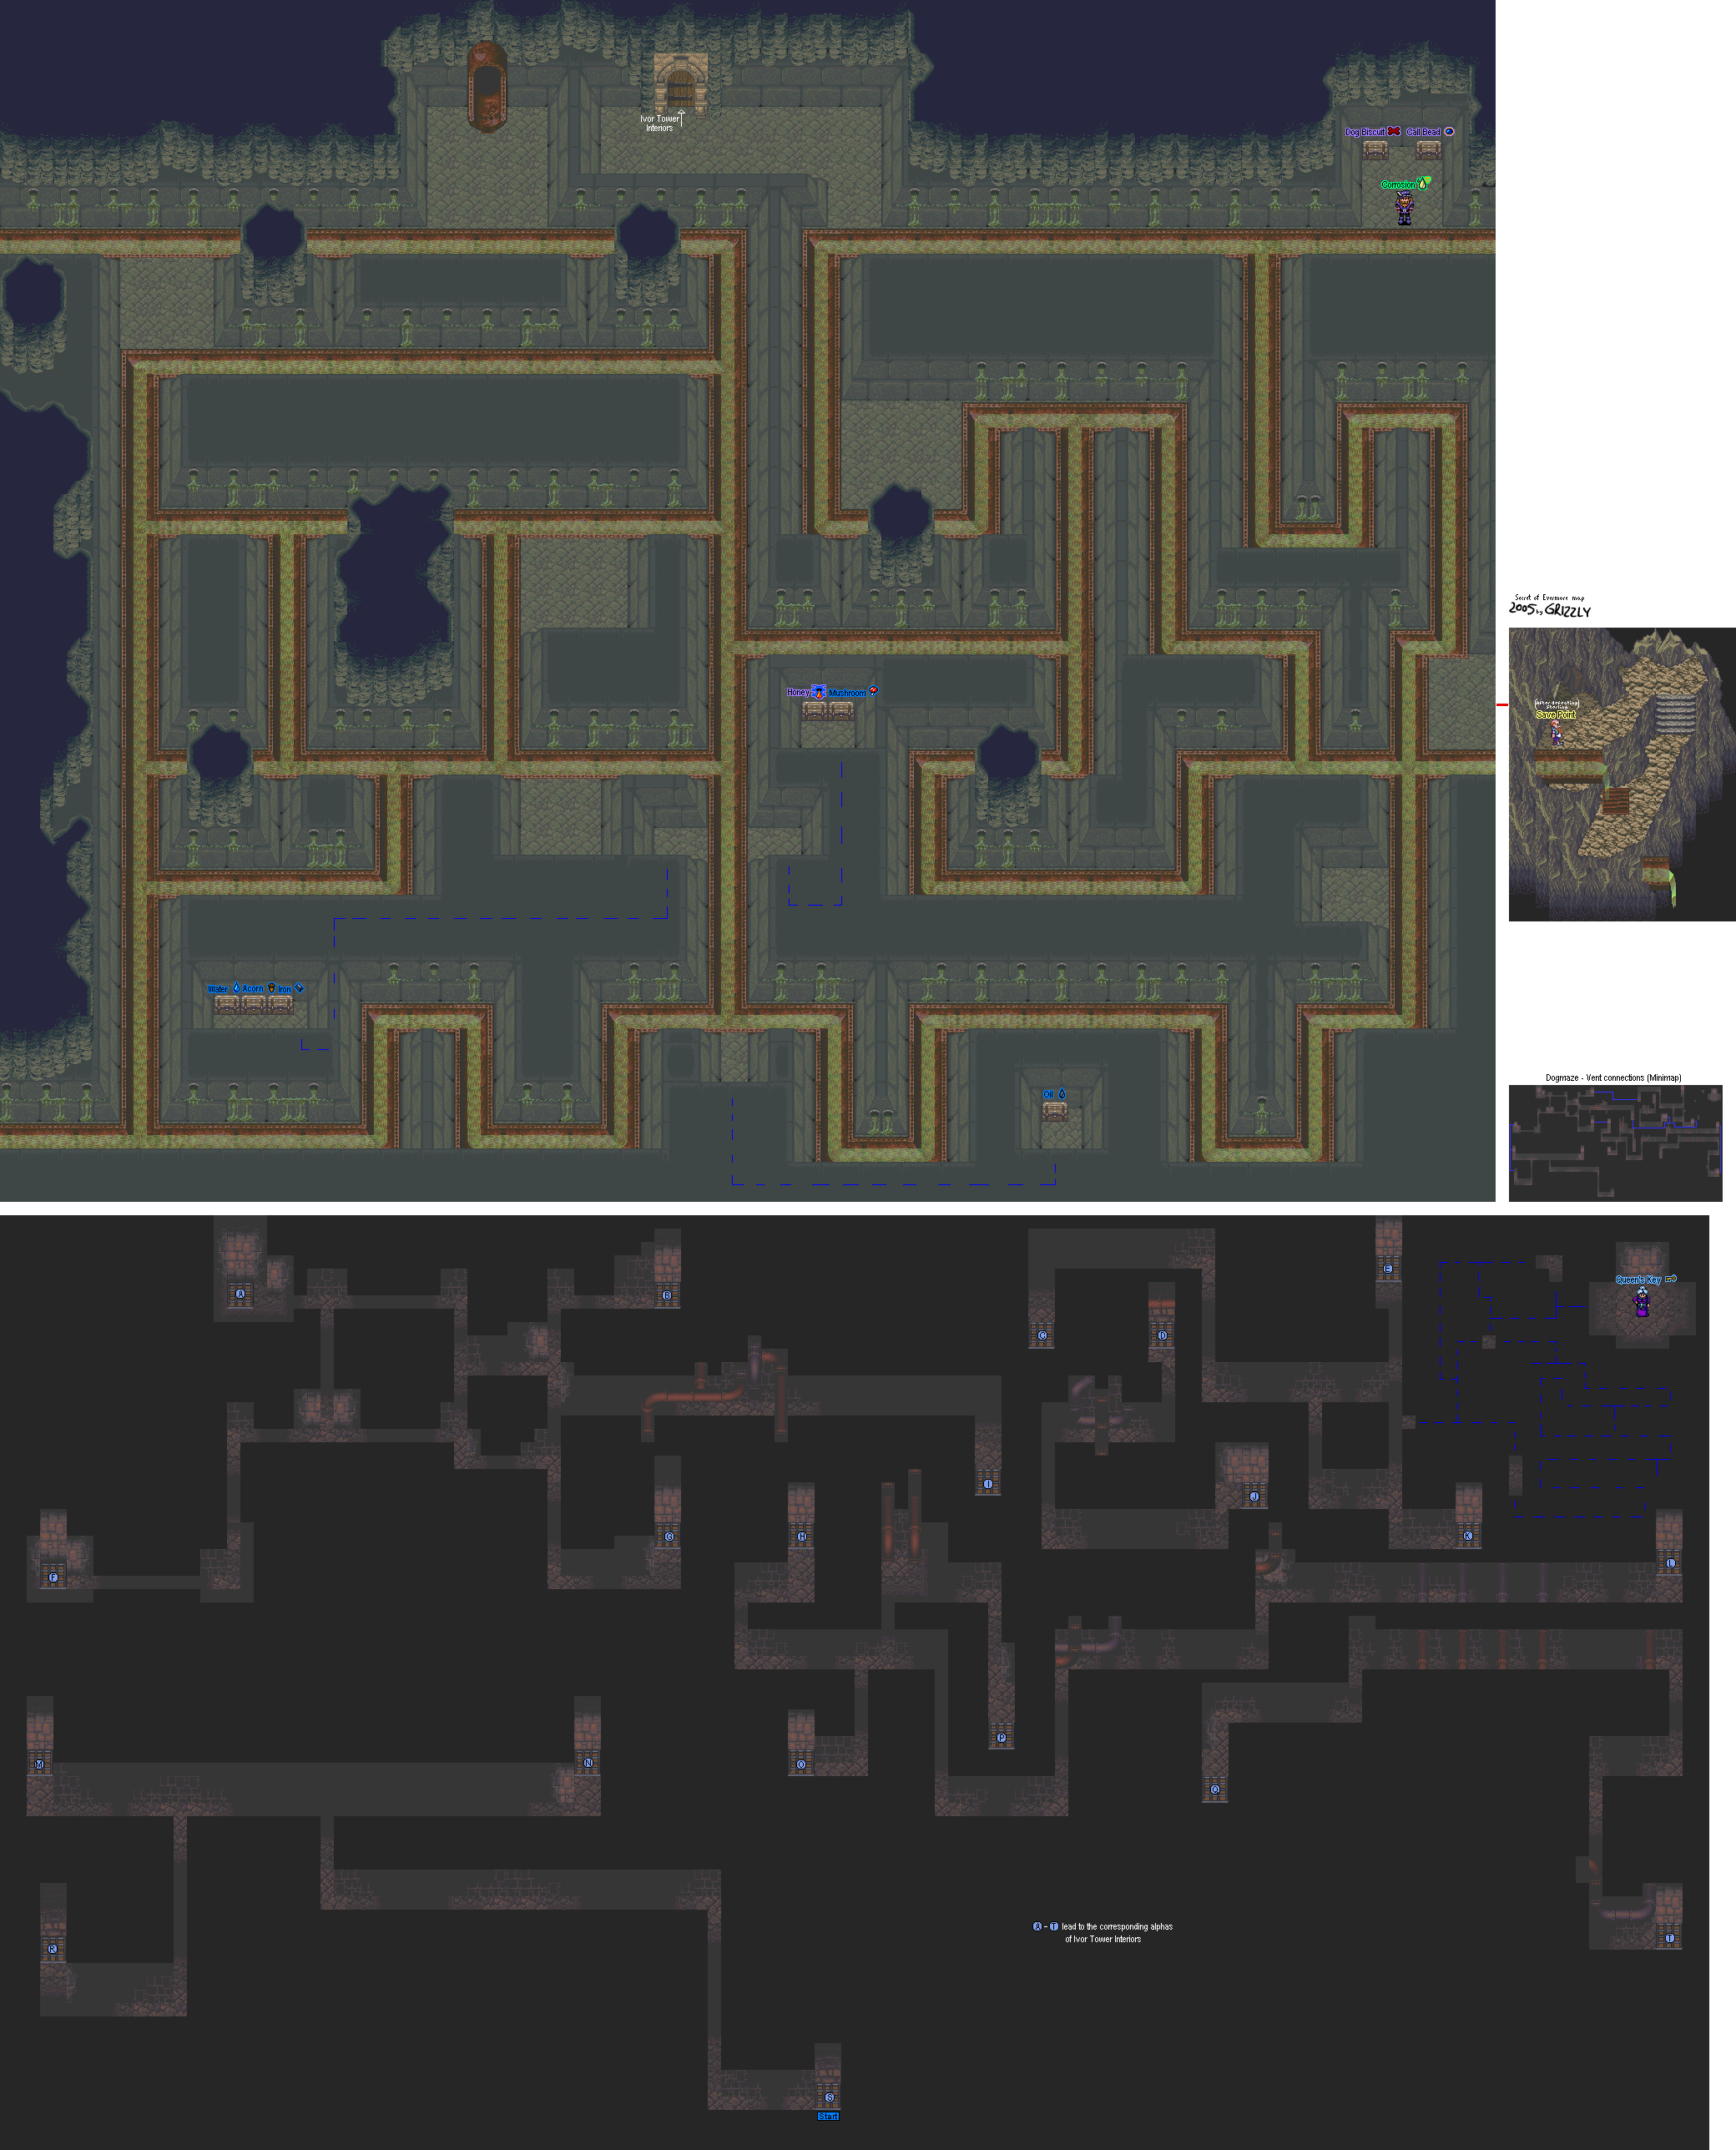
All maps by Grizzly.

Dog Maze

Map - also includes sewers

Wondering why you're lost?

Turns out, there's a bookcase you can walk behind that leads to a hidden vent. It's not very far from the beginning. It'll be right here.

When you're out of the maze, the dog will crash the dinner, and you and The Dog will both be sent to the dungeon.