Showing posts with label Sega Game Gear. Show all posts

Wednesday, August 7, 2024

PrinceWatercress plays GG Doraemon: Nora no Suke no Yabou - The Longplay


Managed to pull a longplay of this game off after tweaking the final boss battle strategies. Now I can finally put this game behind me.


World 1-1

Left and Right lets you move left and right, Down lets you duck, and Button 1 jumps. If you hold Up while jumping, you can grab onto ceilings and platforms from underneath. From there, you can hold Up and jump again to pull yourself up a platform, or you can move left and right to shimmy across platforms and ceilings.

The boxes contain power-ups. To open them up, just move into them. The things that look like sandwiches are really candy, and if you pick up five of them in a level without dying, you'll get a 1-Up at the end of the level. The cat collar bell is an extra life that you can get right out of the gate.

The laser pistol lets you shoot a shot with Button 1 that stuns enemies. From there, you can pass by them or more easily jump on them, which you'll need to do to defeat enemies. The two enemies here are robot dogs that slowly move back and forth and occasionally stop to bark at you and the little orange guys that throw projectiles and also spin the drills on their heads. Be careful when fighting enemies, because it is one hit and you're dead. If you have a weapon in your hand, however, you can take an extra hit at the expense of the weapon. Any weapon you have at the end of a level is out of your possession in the next. Also, you have almost no invincibility frames, and if you die, it's back to the start, as the game has no checkpoints.

The thing that looks like a razor gives you temporary invincibility. As long as you are flashing, you can pass through enemies, but you won't damage them when you do.

World 1-2

The bats will move up and down. Watch where they go and jump on them when they come down to your level.

If you jump into a wall, Doraemon will latch on and slowly slide down. You can use Up and Down on the D-Pad to climb, and you can also jump straight up or to the side while latched onto a wall.

The pick-up that looks like a shotgun barrel shoots a blue shot that destroys enemies entirely. It can pass through enemies and take out more than one at a time, too.

Near the end, go right from the platform to find Suneo. The four kids who act as the protagonists as the series are hidden in each world, and you'll get the better ending if you find them all. Rescuing one of the kids also acts as one of the few checkpoints that the game has, so in case you die after this, you'll go back to where you rescued the kid instead of going back to the beginning. The "C" stands for continues, by the way. Also, keep in mind that when you come back from finding one of the kids, enemies will re-spawn.

World 1-3

The one-eyed enemies will stop at regular enemies to jump. If you need to, wait for them to jump, then hit them on the way down.

Besides the sides of the buildings, you'll also be able to climb some pipes to get higher up in the first section of this level.

After that, you'll need to jump off some rooftops before you face your first boss.

World 1-4

The boss is some floating one-eyed robot with hands. Jump on it when it dives towards you as well as when it lowers straight down and then hovers towards you. This boss is as easy as it gets, and it goes down after ten hits.

World 2-1

The fat orange robots will start moving around when you jump. The monkeys on the trees have hammers which can cause coconuts to come down.

To swim, just move around in any direction with the D-Pad. Some paths do have currents that push you in a certain direction, and the nautilus enemies will shake before they move somewhat quickly in one direction. Be ready to keep your distance and avoid them.

The eggs will contain the power-ups in this world.

World 2-2

The platforms that lead down to other areas disappear when you jump onto them. If you take the right path at the start, you'll get a magic mantle. It only attacks up close, but it still gives you an extra hit and can help take out enemies in tight spots.

The lava monsters will shoot lava projectiles in two directions, but you can still stomp on their heads.

You will slide down slopes automatically, but you can duck to get through the narrow gaps.

Be ready to grab onto ceilings to get past tough gaps.

Near the end, jump right into the ceiling while holding Up, then hold Right to find Jaian.

World 2-3

This is one of two flying levels in the game. You can move in eight directions while flying, but that's about it. Thankfully, you can't fly down past the bottom of the screen and accidentally lose a life.

The main enemy you'll see here are the blue seahorse-like creatures. Some of them will fly in and out and shoot projectiles at you as they do, while some of them will bounce upwards as they fly towards you.

If you stay low, you can find all five of the sweets and some invincibility easily. Be sure to tread carefully so you don't get hit, as there are a few instances where you can get caught out if you're not careful.

World 2-4

The boss here is a pig with boxing gloves. When he hops six times, duck to avoid the projectile. After two projectiles, he will jump around. Keep jumping on his head and backing away before jumping on his head near ground level, and when he stops jumping to do the hops and the projectiles again, be ready to duck again. 

World 3-1

The snakes will start moving when you get towards them. Some of them will dive at you, while others will slide.

The enemies with the ponchos and the guns can shoot bullets, and it can be hard at times to dodge the bullets when you cannot see them coming. Ducking usually doesn't help, so you'll more often than not have to jump over the bullets instead of crouching under them. Some of them will hide in and out of barrels, so you'll need to tread carefully as you go through the stage.

You'll get a mantle to hit the enemies with at the beginning of the level. That's a good thing, as it gets harder in the second half of the game and the lack of checkpoints will become more annoying from this point.

You'll need to climb up the roof and walk across it to get the extra life near the end.

The game goes back to using boxes to contain the power-ups.

World 3-2

Two new enemies on the train: the vultures that drop bombs which will explode soon after hitting the ground, and the robots with springs that will sometimes throw what look like hammers. If they jump slightly forward, they'll just jump; if they jump in place, they'll be throwing things and will be harder to jump on unless you can time your jumps and maneuver them carefully.

Midway through the level, you can get a gun that will outright destroy enemies. Make sure you keep it for the whole level, as it makes the level easier.

Also near the end, you can drop into the train cars to pick up the power-ups inside.

World 3-3

Be careful when making your way up in the cave, as there are areas where you can climb directly into an area where a vulture is waiting to drop a bomb on you and hit you. You can jump into the ropes like you would any wall and climb them, but be careful going up.

There is a laser gun near the breakaway block platforms near the end; be sure to get it. Also, be careful on the single blocks that disappear when you jump on them, as it can be too easy to fall to your death and/or become unable to make your way back up. Near the end, you'll want to drop down and find a cave where Nobita will be waiting.

World 3-4

The dragon boss will double back twice on the right side before moving to the left side and double backing once. When he returns to the right side, he will fly upwards and shoot a fireball towards the ground. Avoid the fireball and the fire that remains after the fireball hits the ground. After that, the pattern repeats. You'll want to keep jumping on the boss' head, but you don't want to get too greedy with the damage, either, as it can be too easy to end up inside him when he stops flashing or have him move right into you and immediately hit you if you are too close.

"World 4-1"

Despite having three regular sections and a boss, World 4 is considered one whole level, and you don't get section screens in-between levels.

The bomb tossing robots can get you from off-screen if you are not careful, and their bombs from their cannons can go pretty far. The robots on wheels will speed up and move back and forth once you're on their levels.

There are conveyor belts throughout this level, but you can easily see where they slowly push you if you stand there for a second.

You'll need to climb across a long ceiling to get some invincibility, which will make it a little easier to take on some of the enemies near the end of the first section.

The sirens contain the power-ups for this world.

"World 4-2"

The moving holes have fists, and when you are directly under them, the holes will stop to open up and punch you. If you're moving directly under them, keep moving so you don't get hit. When the fist is out, you can jump on it or hit it with the moving mantle you'll find in the maze shortly after the start.

Speaking of the maze, you won't be able to see Doraemon while you're in it, but there is a trick. If you go all the way down and to the left, you can find the magic mantle in a hidden container. If you swing the mantle in the maze, you can see the mantle through the wall. Use it to gauge where you are, and jump up and to the left in the fourth column of the maze. You'll be able to find a hidden passage that leads to Shizuka, who is in the bath, as usual. You've now rescued all of the kids. If you swing the mantle and the mantle can be seen inside the fifth column, you've positioned yourself correctly and you can get to where Shizuka is, which can be pretty tough.

As for the maze itself, you can easily get through it, but you'll have to feel your way through it and even jump around to see where you can get to. Holding Up will help, as you may grab onto a wall and climb upwards, which makes it easier to get to the end. 

The satellites will point in a certain direction. When they flash, they are about to fire a laser. They can change the direction they are pointing before firing, and you can use that to get them to fire in a certain direction and hit them with a mantle later.

Near the end, there is a platform where the hole with the fist is moving. Drop down to it, then get to the right to exit.

"World 4-3"

The spiked balls will move around in a circle. The balls with the orange cores are the center of where these spiked balls rotate, and you can stand in them and be safe. You'll need to keep this in mind near the end, as some of the spiked balls have wide ranges in which they spin around and it can be a little too easy to get smacked by them as you position yourself. Keep that in mind if you're trying to get the invincibility and all of the sweets for the extra life.

There are also meteors that fly forward in some sections of this part of World 4, and you'll need to inch forward carefully so you can easily move back and avoid them where necessary. Near the end, there will be seven meteors flying forward, and you'll need to move up from the bottom (if you're at the bottom), to get away from the last one.

"World 4-4"

The boss stands in the middle of the screen and will look at you. If he looks to the side, he will fire the gun in the hand that he is looking towards, and the three-way shot from the left gun as well as the bouncing shot from the right gun can be hard to avoid. You'll want to stand near the boss' head at the inner edge of the left hand and keep jumping on the boss' head. If you can position yourself just right, the shots won't hurt you, and you'll be just outside of the hitbox for the head to the point that you can jump on the head and damage it while the head won't be able to hit you. Also, the boss will be looking at you, the player, and not to the side. He'll do a fire breath attack that goes straight down, but that's about it. This boss is easy to defeat if you know what to do and how to do it.

Another way you can do this is jump to the center of the room between the shots onto the boss' head and onto the hand you jumped from. When you head left, immediately stop moving and go to the right when he shoots the three-way shot, but make sure you land on the hand and jump on the head again. It takes a little bit of timing and practice so that you can keep doing this without the shots hitting you at all, but it can be done.

Once you beat this boss, that's it! You've beaten GG Doraemon: Nora no Suke no Yabou! If you rescued all four of the kids, Doraemon makes one final appearance on the final screen.

Tuesday, August 6, 2024

PrinceWatercress plays GG Doraemon: Nora no Suke no Yabou - Part 4 of 4


The last world takes place in the future. Can we find Shizuka and make things right?


"World 4-1"

Despite having three regular sections and a boss, World 4 is considered one whole level, and you don't get section screens in-between levels.

The bomb tossing robots can get you from off-screen if you are not careful, and their bombs from their cannons can go pretty far. The robots on wheels will speed up and move back and forth once you're on their levels.

There are conveyor belts throughout this level, but you can easily see where they slowly push you if you stand there for a second.

You'll need to climb across a long ceiling to get some invincibility, which will make it a little easier to take on some of the enemies near the end of the first section.

The sirens contain the power-ups for this world.

"World 4-2"

The moving holes have fists, and when you are directly under them, the holes will stop to open up and punch you. If you're moving directly under them, keep moving so you don't get hit. When the fist is out, you can jump on it or hit it with the moving mantle you'll find in the maze shortly after the start.

Speaking of the maze, you won't be able to see Doraemon while you're in it, but there is a trick. If you go all the way down and to the left, you can find the magic mantle in a hidden container. If you swing the mantle in the maze, you can see the mantle through the wall. Use it to gauge where you are, and jump up and to the left in the fourth column of the maze. You'll be able to find a hidden passage that leads to Shizuka, who is in the bath, as usual. You've now rescued all of the kids. If you swing the mantle and the mantle can be seen inside the fifth column, you've positioned yourself correctly and you can get to where Shizuka is, which can be pretty tough.

As for the maze itself, you can easily get through it, but you'll have to feel your way through it and even jump around to see where you can get to. Holding Up will help, as you may grab onto a wall and climb upwards, which makes it easier to get to the end. 

The satellites will point in a certain direction. When they flash, they are about to fire a laser. They can change the direction they are pointing before firing, and you can use that to get them to fire in a certain direction and hit them with a mantle later.

Near the end, there is a platform where the hole with the fist is moving. Drop down to it, then get to the right to exit.

"World 4-3"

The spiked balls will move around in a circle. The balls with the orange cores are the center of where these spiked balls rotate, and you can stand in them and be safe. You'll need to keep this in mind near the end, as some of the spiked balls have wide ranges in which they spin around and it can be a little too easy to get smacked by them as you position yourself. Keep that in mind if you're trying to get the invincibility and all of the sweets for the extra life.

There are also meteors that fly forward in some sections of this part of World 4, and you'll need to inch forward carefully so you can easily move back and avoid them where necessary. Near the end, there will be seven meteors flying forward, and you'll need to move up from the bottom (if you're at the bottom), to get away from the last one.

"World 4-4"

The boss stands in the middle of the screen and will look at you. If he looks to the side, he will fire the gun in the hand that he is looking towards, and the three-way shot from the left gun as well as the bouncing shot from the right gun can be hard to avoid. You'll want to stand near the boss' head at the inner edge of the left hand and keep jumping on the boss' head. If you can position yourself just right, the shots won't hurt you, and you'll be just outside of the hitbox for the head to the point that you can jump on the head and damage it while the head won't be able to hit you. Also, the boss will be looking at you, the player, and not to the side. He'll do a fire breath attack that goes straight down, but that's about it. This boss is easy to defeat if you know what to do and how to do it.

Another way you can do this is jump to the center of the room between the shots onto the boss' head and onto the hand you jumped from. When you head left, immediately stop moving and go to the right when he shoots the three-way shot, but make sure you land on the hand and jump on the head again. It takes a little bit of timing and practice so that you can keep doing this without the shots hitting you at all, but it can be done.

Once you beat this boss, that's it! You've beaten GG Doraemon: Nora no Suke no Yabou! If you rescued all four of the kids, Doraemon makes one final appearance on the final screen.

Monday, August 5, 2024

PrinceWatercress plays GG Doraemon: Nora no Suke no Yabou - Part 3 of 4


Our adventure continues in the Old West. This is where the game gets noticeably harder.


World 3-1

The snakes will start moving when you get towards them. Some of them will dive at you, while others will slide.

The enemies with the ponchos and the guns can shoot bullets, and it can be hard at times to dodge the bullets when you cannot see them coming. Ducking usually doesn't help, so you'll more often than not have to jump over the bullets instead of crouching under them. Some of them will hide in and out of barrels, so you'll need to tread carefully as you go through the stage.

You'll get a mantle to hit the enemies with at the beginning of the level. That's a good thing, as it gets harder in the second half of the game and the lack of checkpoints will become more annoying from this point.

You'll need to climb up the roof and walk across it to get the extra life near the end.

The game goes back to using boxes to contain the power-ups.

World 3-2

Two new enemies on the train: the vultures that drop bombs which will explode soon after hitting the ground, and the robots with springs that will sometimes throw what look like hammers. If they jump slightly forward, they'll just jump; if they jump in place, they'll be throwing things and will be harder to jump on unless you can time your jumps and maneuver them carefully.

Midway through the level, you can get a gun that will outright destroy enemies. Make sure you keep it for the whole level, as it makes the level easier.

Also near the end, you can drop into the train cars to pick up the power-ups inside.

World 3-3

Be careful when making your way up in the cave, as there are areas where you can climb directly into an area where a vulture is waiting to drop a bomb on you and hit you. You can jump into the ropes like you would any wall and climb them, but be careful going up.

There is a laser gun near the breakaway block platforms near the end; be sure to get it. Also, be careful on the single blocks that disappear when you jump on them, as it can be too easy to fall to your death and/or become unable to make your way back up. Near the end, you'll want to drop down and find a cave where Nobita will be waiting.

World 3-4

The dragon boss will double back twice on the right side before moving to the left side and double backing once. When he returns to the right side, he will fly upwards and shoot a fireball towards the ground. Avoid the fireball and the fire that remains after the fireball hits the ground. After that, the pattern repeats. You'll want to keep jumping on the boss' head, but you don't want to get too greedy with the damage, either, as it can be too easy to end up inside him when he stops flashing or have him move right into you and immediately hit you if you are too close.

Sunday, August 4, 2024

PrinceWatercress plays GG Doraemon: Nora no Suke no Yabou - Part 2 of 4


In this entry, we end up in a prehistoric jungle.


World 2-1

The fat orange robots will start moving around when you jump. The monkeys on the trees have hammers which can cause coconuts to come down.

To swim, just move around in any direction with the D-Pad. Some paths do have currents that push you in a certain direction, and the nautilus enemies will shake before they move somewhat quickly in one direction. Be ready to keep your distance and avoid them.

The eggs will contain the power-ups in this world.

World 2-2

The platforms that lead down to other areas disappear when you jump onto them. If you take the right path at the start, you'll get a magic mantle. It only attacks up close, but it still gives you an extra hit and can help take out enemies in tight spots.

The lava monsters will shoot lava projectiles in two directions, but you can still stomp on their heads.

You will slide down slopes automatically, but you can duck to get through the narrow gaps.

Be ready to grab onto ceilings to get past tough gaps.

Near the end, jump right into the ceiling while holding Up, then hold Right to find Jaian.

World 2-3

This is one of two flying levels in the game. You can move in eight directions while flying, but that's about it. Thankfully, you can't fly down past the bottom of the screen and accidentally lose a life.

The main enemy you'll see here are the blue seahorse-like creatures. Some of them will fly in and out and shoot projectiles at you as they do, while some of them will bounce upwards as they fly towards you.

If you stay low, you can find all five of the sweets and some invincibility easily. Be sure to tread carefully so you don't get hit, as there are a few instances where you can get caught out if you're not careful.

World 2-4

The boss here is a pig with boxing gloves. When he hops six times, duck to avoid the projectile. After two projectiles, he will jump around. Keep jumping on his head and backing away before jumping on his head near ground level, and when he stops jumping to do the hops and the projectiles again, be ready to duck again. 

Saturday, August 3, 2024

PrinceWatercress plays GG Doraemon: Nora no Suke no Yabou - Part 1 of 4


About time I played a Doraemon game.


World 1-1

Left and Right lets you move left and right, Down lets you duck, and Button 1 jumps. If you hold Up while jumping, you can grab onto ceilings and platforms from underneath. From there, you can hold Up and jump again to pull yourself up a platform, or you can move left and right to shimmy across platforms and ceilings.

The boxes contain power-ups. To open them up, just move into them. The things that look like sandwiches are really candy, and if you pick up five of them in a level without dying, you'll get a 1-Up at the end of the level. The cat collar bell is an extra life that you can get right out of the gate.

The laser pistol lets you shoot a shot with Button 1 that stuns enemies. From there, you can pass by them or more easily jump on them, which you'll need to do to defeat enemies. The two enemies here are robot dogs that slowly move back and forth and occasionally stop to bark at you and the little orange guys that throw projectiles and also spin the drills on their heads. Be careful when fighting enemies, because it is one hit and you're dead. If you have a weapon in your hand, however, you can take an extra hit at the expense of the weapon. Any weapon you have at the end of a level is out of your possession in the next. Also, you have almost no invincibility frames, and if you die, it's back to the start, as the game has no checkpoints.

The thing that looks like a razor gives you temporary invincibility. As long as you are flashing, you can pass through enemies, but you won't damage them when you do.

World 1-2

The bats will move up and down. Watch where they go and jump on them when they come down to your level.

If you jump into a wall, Doraemon will latch on and slowly slide down. You can use Up and Down on the D-Pad to climb, and you can also jump straight up or to the side while latched onto a wall.

The pick-up that looks like a shotgun barrel shoots a blue shot that destroys enemies entirely. It can pass through enemies and take out more than one at a time, too.

Near the end, go right from the platform to find Suneo. The four kids who act as the protagonists as the series are hidden in each world, and you'll get the better ending if you find them all. Rescuing one of the kids also acts as one of the few checkpoints that the game has, so in case you die after this, you'll go back to where you rescued the kid instead of going back to the beginning. The "C" stands for continues, by the way. Also, keep in mind that when you come back from finding one of the kids, enemies will re-spawn.

World 1-3

The one-eyed enemies will stop at regular enemies to jump. If you need to, wait for them to jump, then hit them on the way down.

Besides the sides of the buildings, you'll also be able to climb some pipes to get higher up in the first section of this level.

After that, you'll need to jump off some rooftops before you face your first boss.

World 1-4

The boss is some floating one-eyed robot with hands. Jump on it when it dives towards you as well as when it lowers straight down and then hovers towards you. This boss is as easy as it gets, and it goes down after ten hits.

Thursday, July 6, 2023

PrinceWatercress plays Ax Battler: A Legend of Golden Axe - Part 7 of 7


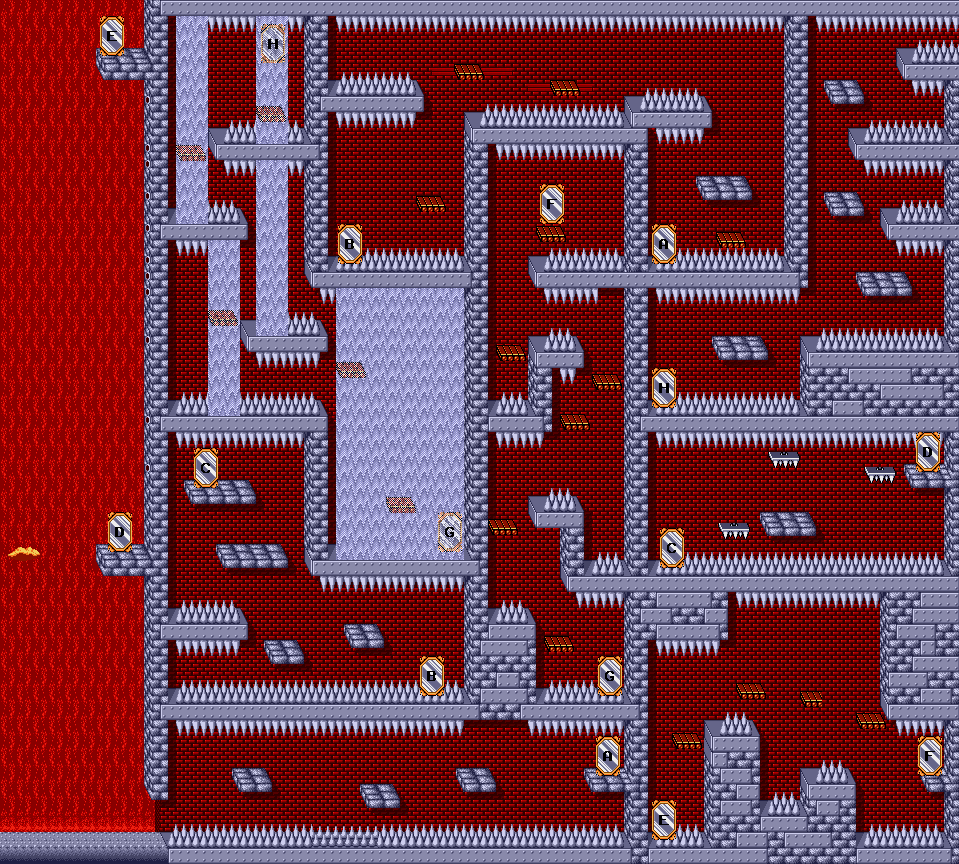
As long as you can keep out of the spikes and you take as little damage as possible, Death Adder's Keep isn't too bad. Too bad the ending is rather anti-climactic.


Death Adder's Castle


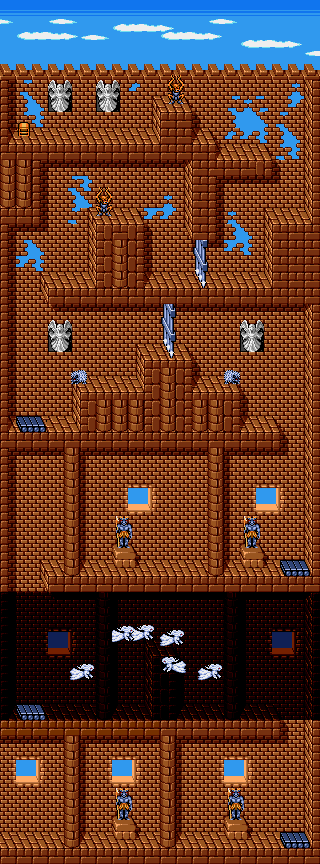
As you move across the castle, spikes will jut in and out of the floor and ceiling. Be ready to jump to a platform to avoid getting impaled by them, and be ready to attack hedgehogs.

By getting to the end of each room, you will find a mirror that will take you to the next section of the castle.

The platforms with the spikes below them obviously hurt you if you jump into their undersides.

If you stand at the edges of floors with spikes where spikes can't pop up, the spikes won't hurt you. Staying on the edge with one foot off the floor definitely helps in this regard.

When you reach the area with the red background halfway through, you will want to watch out for arrows shooting out of the right-hand wall as you ride on the platform there. If you need to, get rid of them with your magic if striking them with the sword isn't enough.

When you've reached the waterfalls, you're almost there. There will be no spikes behind the waterfalls, so feel free to use them as safe zones.

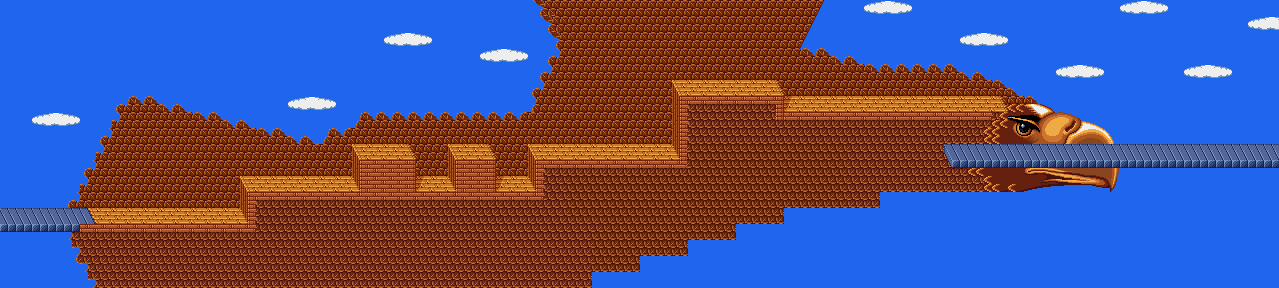
When you reach the end, you'll finally face Death Adder! Instead of a proper boss battle, Ax Battler defeats Death Adder in one swift blow and the castle blows up in the most anti-climactic ending ever, where Ax Battler takes the Golden Axe and gets on a giant eagle to show that he has brought peace back to the world. Why did we play this game again?

Wednesday, July 5, 2023

PrinceWatercress plays Ax Battler: A Legend of Golden Axe - Part 6 of 7


This game isn't getting any easier.


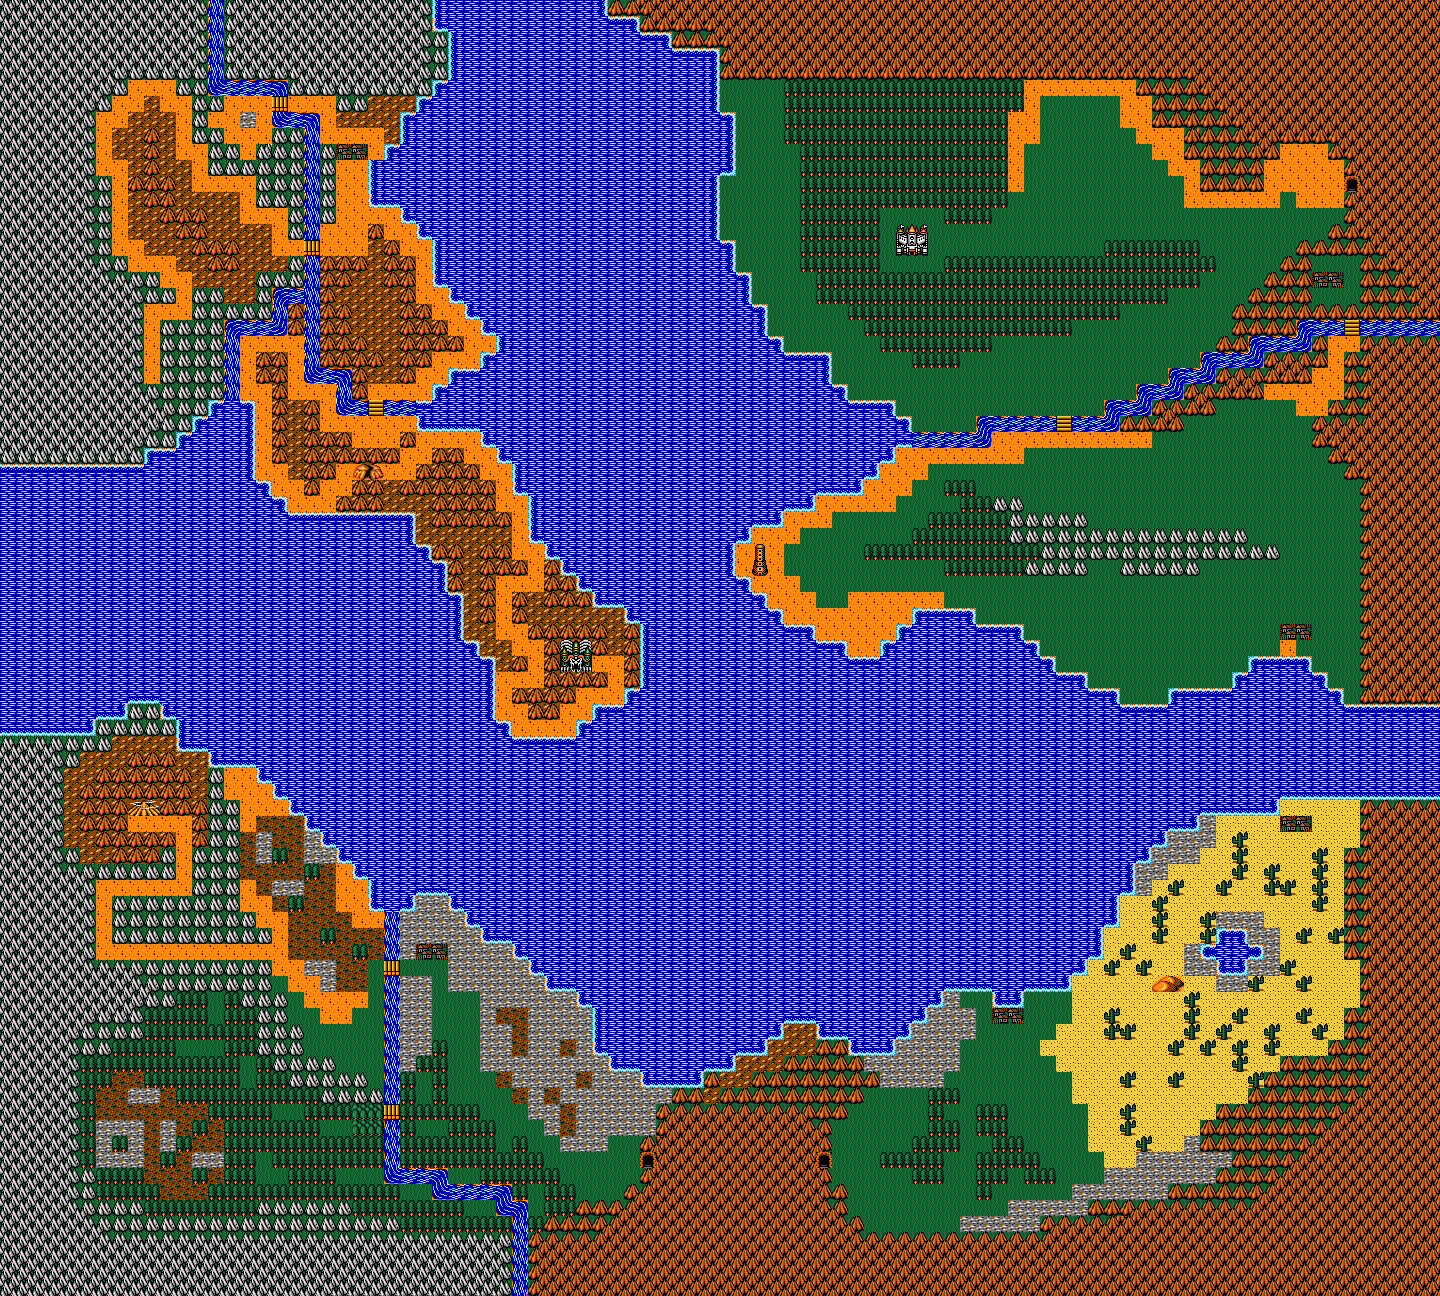
South of North Valley is the Ice Cliffs.

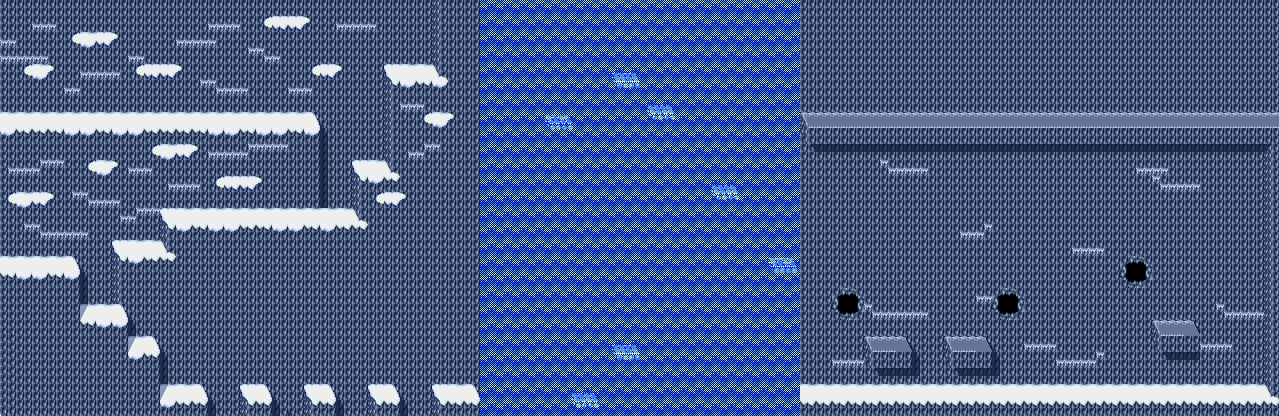
Snow Slope


The enemies in this area are enemies you've met before, such as the wolves and the snakes.

Keep jumping across the platforms when you see the avalanche so you can get past it. Use the rafts you see afterwards to get across the waterfall. Use the Jump Attack to get rid of any snakes in this part, then run to the right and high jump at the last moment to get past the avalanche or else you're getting sent back to the bottom of the waterfall section.

After this, you'll be taking a path to Death Adder's castle, the final area in the game. If you want, you can go back to North Valley and heal up and get a password. Thankfully, once you clear this area, you don't have to go through it again.

Tuesday, July 4, 2023

PrinceWatercress plays Ax Battler: A Legend of Golden Axe - Part 5 of 7


Death Adder is the worst enemy in the game. This, the next area and the Maze Forest turned this from a five- or six-video series to a seven-video series.


Cross the nearby bridge west of Brookhill. (Thankfully, you won't have to go through an action scene when you go back through the Maze Forest again). Follow the path, and you'll end up at Gayn Mountain.

Gayn Mountain


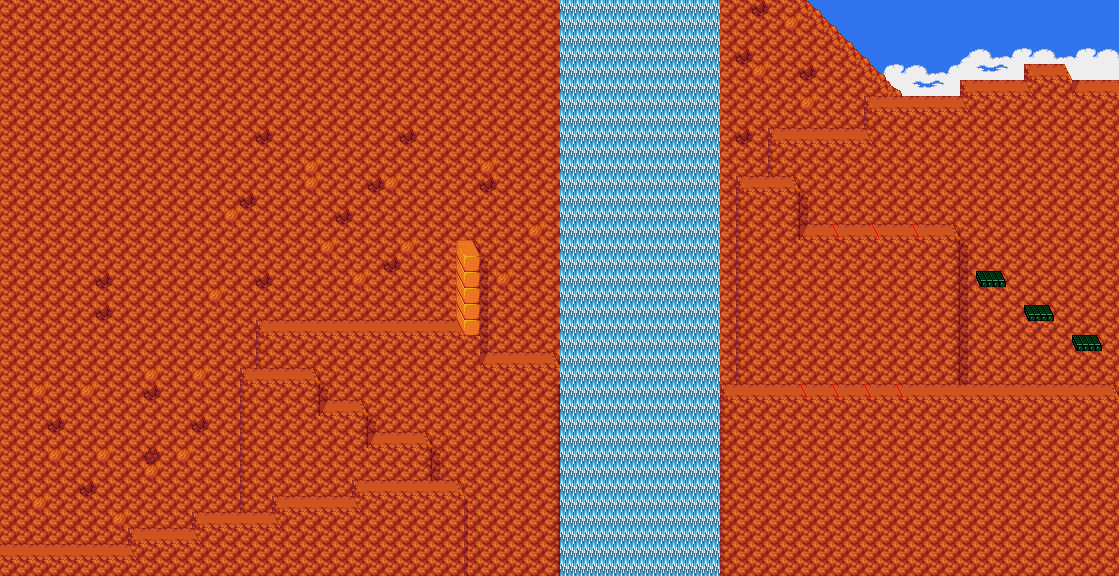
At the beginning, be ready to jump over the boulders that bounce towards you. The lizard that comes out of the wall shoots blue fire at you, but you can easily walk away from him. Use the shoulder tackle to break the wall.

At the waterfall, wait for the log to show up (which takes forever), then keep high jumping to the right. The ground will start forming pits at this point; keep jumping forward to avoid them as keep moving to avoid the boulders. At the end, you'll take a ride on an eagle and land on the Great Great Eagle.

Great Great Eagle


Watch the floorboards, and defeat the Skeletons that pop out of the ground with the Super Swing. Tread slowly so you can catch them. Pay attention to where the feathers are going so you can see if the wind is blowing you back; if the feathers are moving quickly to the left, the wind has kicked up.

At the front of the eagle, drop down and defeat the Chicken Legs, then make your way to the right to cross the bridge and end this area.

The Neo Ske. (Neo Skeleton) will try to attack you with a jumping downward stab. When it leaps up, move away, then turn around and hit it with a Super Swing when it lands.

The Neo Kni. (Neo Knight) is rather fast and will move back and forth. After the fake-out where it goes back, forward and back, execute the Super Swing.

One of the enemies on the path after the Great Great Eagle is D. Adder (Death Adder). Jump straight up over the trail of fire when it travels across the ground, then hit him with a Super Swing when he rears his ax back. If the trail of fire hits you, you will die in one shot. Wait for him to stop flashing, then move forward a bit and hit him with the Super Swing.

After the bridge at the path after the eagle, you'll be able to enter the town of North Valley.

North Valley


An old man in the village will tell you that he lived a long time due to a Magic Stone, but he has lost it somewhere.

For some reason, a few of the villagers know who Ax Battler is. How and why is never really explained.

You'll find out that Death Adder has taken over the area.

In the last training room of the game, you'll face Death Adder again. Beating him gives you the Jump Attack. Hold Down and press 1 while in the air to hit enemies with a downward stab.

A stay at the inn in this village will cost 12 Vases.

If you go north of the town, cross the bridge to the west and search the gray swamp tile, you'll find the Magic Stone. This item is not required, but you will need it to keep yourself from being killed by Death Adder outright, since his moves can instantly kill you.

Monday, July 3, 2023

PrinceWatercress plays Ax Battler: A Legend of Golden Axe - Part 4 of 7


You have no idea what I had to go through for this. Parts 4 and 5 were supposed to be one whole video, but Maze Forest and the next part of the overworld are so irritating that I had to make more parts for this than I wanted.


Past the bridge southwest of the town (and west of the exit from the cave) is Maze Forest.

You can fight Neo Barbarians, Bad Brothers and Knights randomly in this part of the overworld.

Maze Forest


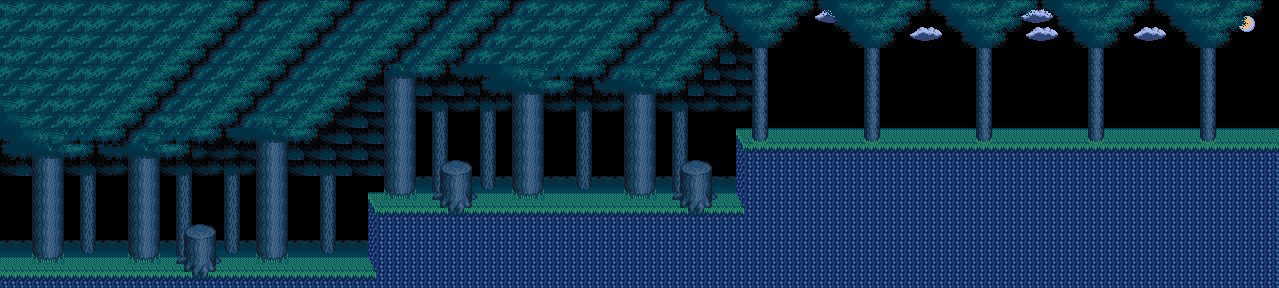
The bats will swoop at you from above, so tread slowly. The wolves will jump up from the tree stumps and charge at you.

The werewolf will jump up and down and cause projectiles to drop down from above around it, but you can easily tell where the projectiles are going to drop down from. If you shoulder tackle them while they come down, you can knock them out of the way immediately.

The guards with the spears from Peninsula Tower also show up as enemies here, and they can take out an entire bar's worth of health if they get to you.

The tree to search is the one surrounded by gray land tiles to the west of the Maze Forest exit. By using the Search command on it, you'll find a Fruit. From here, head back to Brookhill.

Sunday, July 2, 2023

PrinceWatercress plays Ax Battler: A Legend of Golden Axe - Part 3 of 7


You have no idea how much trouble I had to go through just to get through the Cursed Cave. At this rate, the kid gloves come off.


Aside from the Skeleton and the Neo Amazon (who you can use the Upper Swing against), you can also face the Bad Bra. (Bad Brother) Keep backing away, and when the Bad Brother execute the shoulder tackle, turn around and whack him, then keep swinging with the Upper Swing and he will go down.

Desert Pyramid


The sand dunes to the south of Sand Marrow are your next destination.

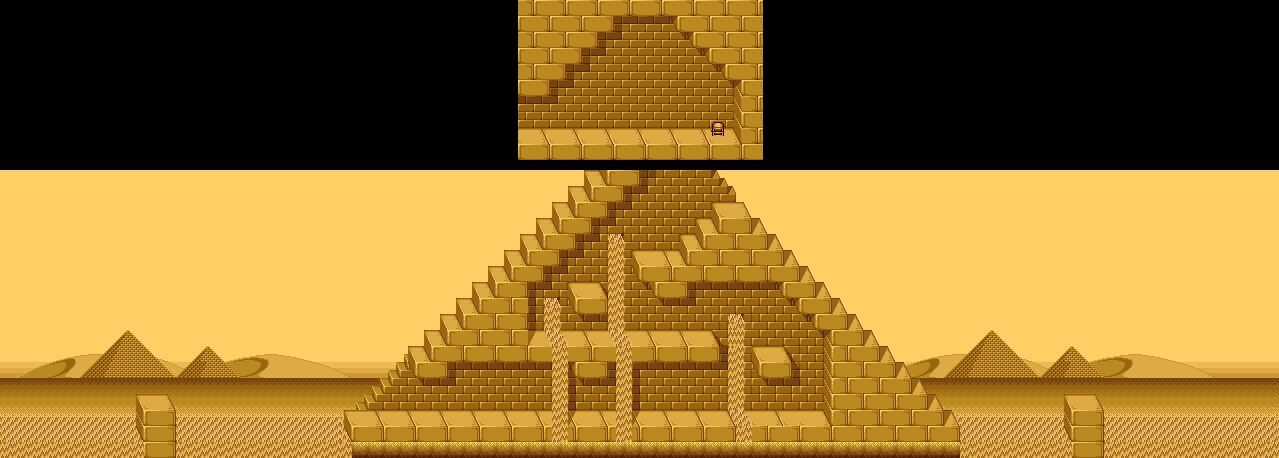
The snakes slowly come after you, while beetles will go in and out of the sand. The Chicken Legs attacks with its tail. There are scorpions that shoot fireballs, too, but you won't be dealing with them at all if you know what to do. Instead of going into the pyramid, go up. You'll find the treasure: a key.

To the west of the pyramid as well as the desert itself is the town of Southwood.

Southwood


You'll hear about a forest on the other side of the nearby cave from the villagers. Another villager, should you have the Key at this point, will tell you that the pattern on the key is also found in the nearby cave. You'll soon find out that you'll need the Key in order to move out to sea and get elsewhere.

In this town's training room, you'll face a Bad Bra. (Bad Brother) Keep backing away, and when the Bad Brother execute the shoulder tackle, turn around and whack him, then keep swinging with the Upper Swing and he will go down. Winning here nets you the Super Swing, which allows you to do more damage by holding Up and pressing 1 while on the ground.

Your next destination is the cave to the west.

Cursed Cave


This cave is the first real test of your ability to play this game, so you need to come in here with full health and with the maximum of 31 vases if you are to have any chance of survival.

The skull heads that tumble down the stairs can easily be destroyed with the Super Swing, while the spiders that shoot four fireballs downwards can easily be downed with the Jump Swing. You can easily avoid the spiders' fireballs if you are directly below them.

Despite its appearance, the green water does not harm you. It also moves you around, so you can use the water to get over the low ceiling in one part to get to the end.

The red hedgehogs attack just like the gray ones.

Holes in the wall shoot slow-moving arrows. Watch out.

If you have one foot off the edge and the other on, you'll have a good chance of clearing gaps where the red hedgehogs will be.

If you need to, use the Thunder magic to clear the screen of enemies and projectiles.

You'll meet the Knight for the first time after you leave the cave. Wait for him to stop and slash at you - which he will fail at miserably. After the slash, walk up just a little bit and execute a Super Swing, then get away. Keep doing this until he falls. You can also see the Neo Barbarian as a normal enemy in these parts.

Northwest of the cave is the town of Brookhill.

Brookhill


You'll hear about the Maze Forest to the south from the villagers, and that you can get lost in there if you're not careful.

The soldier in the middle of town will give you a Compass if you talk to him. Take it.

The inn here costs eight magic vases.

The old man near the training room will tell you to search under a tree far to the west of the Maze Forest.

In this town's training room, you'll face a Knight. If you have faced them before outside of the village, you'll know what to do here. If not, wait for him to stop and slash at you - which he will fail at miserably. After the slash, walk up just a little bit and execute a Super Swing, then get away. Beating the Knight will give you the Tackle. Double-tap left or right to run, then press 1 to perform a shoulder tackle. By learning this move, you'll also learn how to run.

Saturday, July 1, 2023

PrinceWatercress plays Ax Battler: A Legend of Golden Axe - Part 2 of 7


In this entry, we get the Crystal from the Peninsula Tower, then summon the giant turtle to get to the desert to the south.


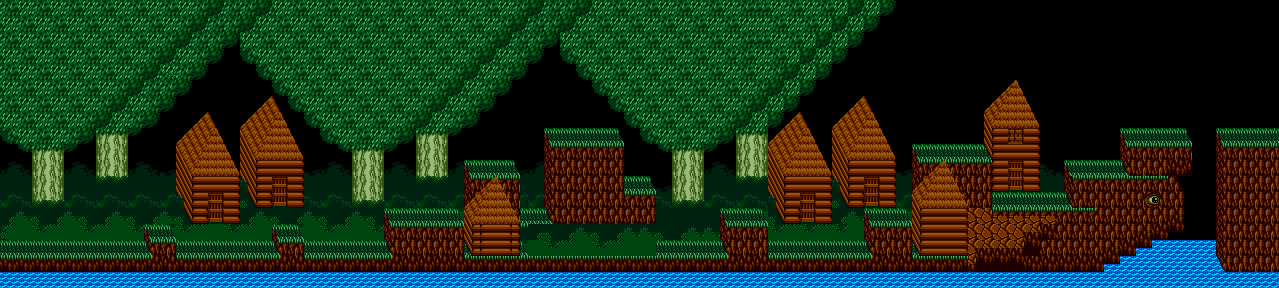
South of Firewood Village is Turtle Village. You'll want to go there before you do anything else.

Turtle Village


One of the villagers will tell you that if throw the Crystal into the sea, a giant turtle will appear. Another villager will tell you that the turtle has a city on his back.

In the training room for this village, you'll have the Neo Ama. (Neo Amazon) Do not get in close, and slash at her from a distance to win. Just keep standing there and swinging, and you'll win. By winning this battle, you'll learn the Upper Swing. Hold Down on the D-Pad and press 1 to swing upwards. You can only perform this move while crouching, and it is pretty powerful...twice as powerful as your normal swing, as a matter of fact.

You can talk to the Chicken Legs, but all they do is make tweet noises...almost. The one at the northwest corner of the village will tell you about the Crystal if you haven't found it yet, but if you've found it, the Chicken Legs will tell you to throw the Crystal into the sea.

From here, you'll want to go west. You'll find the tower.

Peninsula Tower


The statues will drop down when you walk past them...and they hurt! When they get close, jump back so you don't get stabbed. Hit them with the Upper Swing to get rid of them in one hit. When you beat them, you'll trigger an elevator to the next floor.

On the second floor, you'll meet the ghosts. You will have to wait for them to turn solid before you can hit them with the Upper Swing. (If they have a skeleton head, perform dive bomb attack and make a shrieking noise, they're solid. If you die, you'll be back at the password room of the last village you were in with fewer vases than before.

After beating all the ghosts on the second floor, you'll have to face more statues.

The gray hedgehog just rolls around slowly, and can be hit when they are out of their ball form.

The gray gates that continually raise and lower hurt you even if you run into them while they are down.

The brown jumping guy will throw bombs down that will eventually explode. They throw one near, then throw one a little further. The bombs alternate between landing to the left and to the right in two different spots, and if you can figure the pattern out, you can tell when you need to move in and strike.

The chest at the end contains a Crystal. To take out the bomb throwing guy just before the chest, get next to the wall and just below him, then perform the Upper Swing to take him out.

Go back to town and heal up, and farm for vases if you need to. When you're ready, use the Crystal at the desert tile south of Turtle Village. You'll summon the giant turtle. (Some of the villagers in Turtle Village will tell you this after you get the Crystal, and the Chicken Legs that talks from earlier will tell you flat out to do this.)

Turtle Island


The fish simply jump up and down from the water at the bottom. The dragons will advance towards you and spit out fireballs. The birds that fly by will drop boulders when you are almost exactly below them.

When you reach the end, you'll be able to enter another village.

Sand Marrow


The inn here will cost six vases instead of four.

You'll learn about a treasure in a nearby pyramid from the villagers of Sand Morrow, and that it is located in the nearby Desert of Death.

In this town's training room, you'll face another Skeleton. Compared to the last two training rooms, this is easy, especially if you know how to fight the Skeleton and you use the Upper Swing to do more damage in less time. You'll get the Jump Swing from this one. While jumping, hold Up and press 1 to slash downwards.

Friday, June 30, 2023

PrinceWatercress plays Ax Battler: A Legend of Golden Axe - Part 1 of 7


Here it is: the Golden Axe RPG in all its glory!


Long, long ago, the gods gave a gift to mortals. This gift was the Golden Axe. Legends say that the world will bow down to whomever takes the axe in hand. Countless battles took place among mortals to gain possession of the axe. Finally the king became full of sorrow and hid the axe deep in his castle where no one could find it. Peace once again returned to the world.

After many years had passed and the name of the axe as forgotten, an army of evil warriors destroyed the castle and stole the Golden Axe. The peace-loving king called on a young warrior to regain the axe. In doing so, he entrusted the fate of the world to the warrior Guided by love and courage, the warrior started on his lonely journey.

His name was...Ax Battler.

Firewood Castle


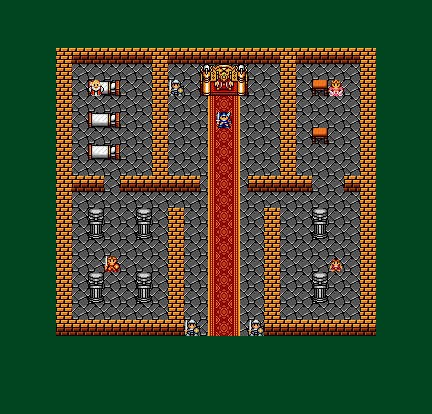
The game starts with the evil forces attacking the castle. The King asks his men to summon Ax Battler, the only man who can take ax back. Ax Battler already knows what to do. From here, you're free to move around.

The D-Pad lets you move around, while Button 2 lets you open the command menu (which allows you to talk to people, use items and search nearby) and select one of the three aforementioned options. To close the menu, press Button 1. Pressing Start will allow you to see how much life you have, how many vases you have collected, look at your magic (and how many vases you need to cast a spell) and see what special attacks you have.

The guard to the left of the king mentions a town south of the cave, and another guard to the right of the entrance will say it is to the east. Another NPC will tell you to talk to people in towns, and another still will tell you that there are monsters outside of the castle.


Going through the south end of the castle leads to the overworld. Use the D-Pad to move around. You can access the command window with 2.

If you hear frantic music at any point, that means you have just entered a random battle. During battle, you can move left and right and crouch down with the D-Pad, press 2 to jump, press 1 to attack and Start to use your magic.

The Barbarians will slowly move forward, but you can easily kill them with your sword. Just stand there and keep swinging, and you will easily beat them. By beating enemies, you will be able to get magic vases to power up your spells, and you can see how many items you have in the status screen when you press Start.

Your first destination is the cave to the east.

Spooky Cave


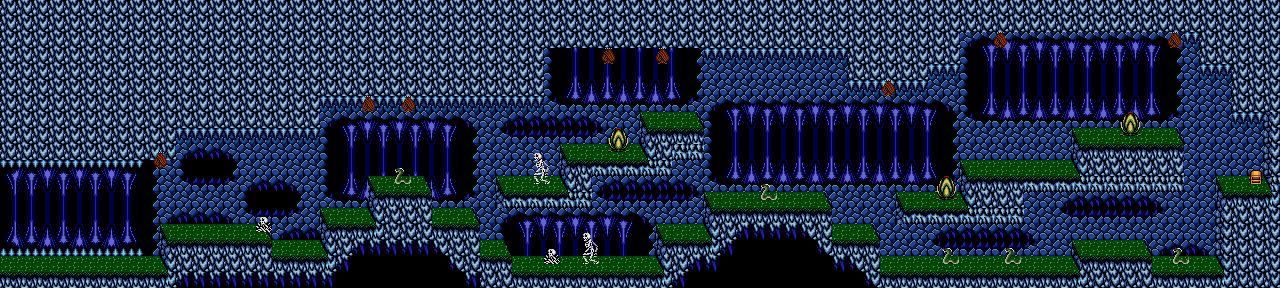
In the cave, you'll be in a side-scrolling mode much like with the random battles on the map. You'll be facing bats, snakes, skeletons and fireball spitting flowers, but they aren't too hard. The flowers will go down in a couple of hits, and as long as you watch where you're going, you'll know when the bats are going to swoop down in an effort to hit you. Enemies will respawn, so if you're forced to backtrack, you'll have to face them all over again.

You're better off getting away from the bats. You'll need to crouch down to hit the snakes. As for the flowers, back off and wait for them to spit projectiles, then move in and strike.

Your health will be in the lower-left hand corner, and as you take damage, the bars will turn from blue to orange to non-existent. When you lose all your bars, the game is over.

When you reach the treasure chest in the cave, you will automatically leave. Inside the chest is a bomb, which you'll need for later.

From the cave, you will want to go southwest to the bridge. Whenever you get on a bridge, you will automatically enter a battle with a random enemy. Skeletons can be pretty powerful, and they will knock you back - and probably out of the battlefield. To avoid this, hit the skeleton, move left so you don't get struck, then turn around and hit it again. Keep moving left and hitting the skeleton after it attacks until it falls. If you miss, the skeleton will leap back, then charge at you. Hit the skeleton during the charge. You'll then need to move left to avoid getting hit again, then move back towards the skeleton after the attack and strike. The skeleton will drop two vases when defeated.

If you get struck by an enemy, you will automatically retreat. 

If you walk onto a bridge, you will automatically trigger an enemy encounter no matter what. Take advantage of this to get practice on enemies and get more magic vases.

From the bridge, stay near the river and head east. When you see sand, go north. You'll find the town that the guards were talking about. Go to the item menu and use the bomb on the mountain to enter the town.

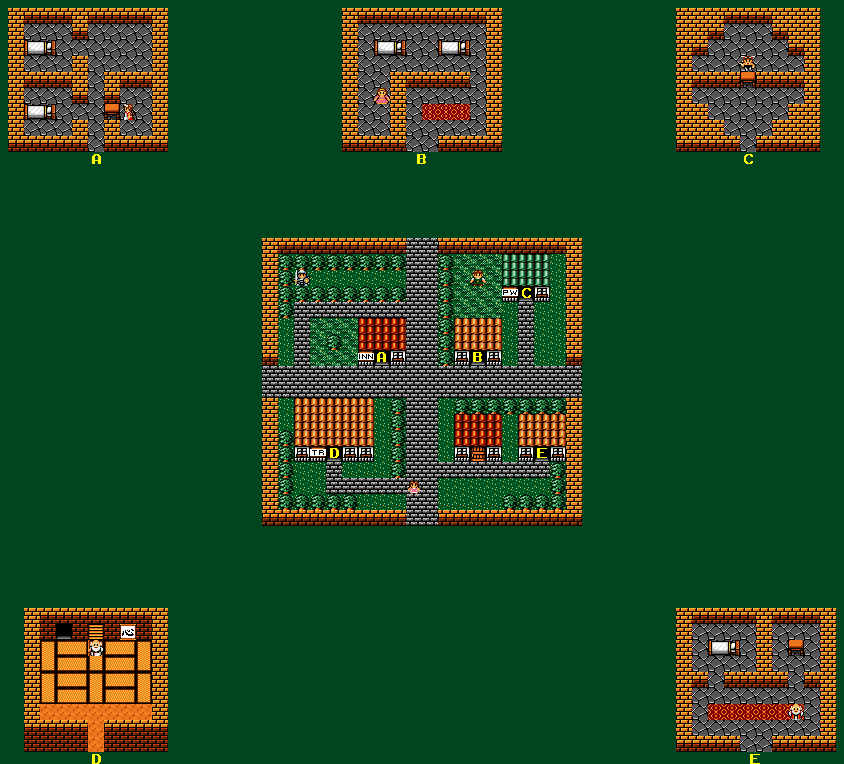
Firewood City


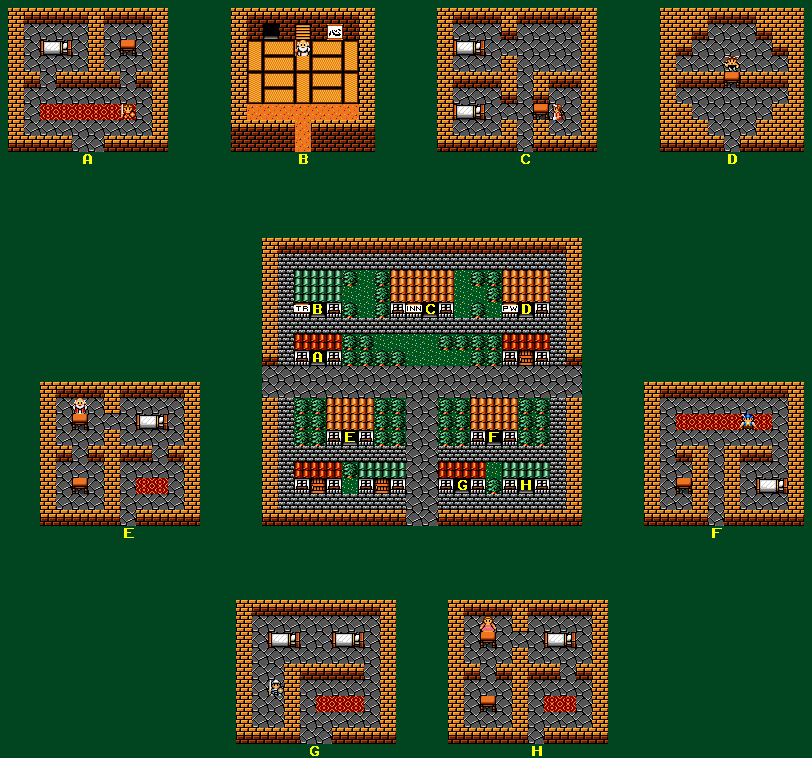
The building with "INN" on it is the inn. The magic vases not only act as magic power, but they also double as currency for the game. By paying for a room, you'll be able to fully replenish your health.

The three magics - earth, thunder and fire - can be casted by pressing Start. You can select your magic while in a town or on the overworld map, but only in those two types of locations. Earth is the weakest, while Fire is the strongest, meaning that the more magic vases a spell costs, the more powerful it will be. Keep in mind that you can only carry a maximum of 31 vases.

The building with "PW" on it is the password room. Going in here and talking to the bunny girl (Japanese bunny girls in a Golden Axe game? Weird...) will give you a password to use when you want to come back from the game. Be sure to carry the password and keep it in a safe place. Thankfully, it is only 16 characters long and split into four sections.

One of the people in town well tell you about a tower to the west, and that you should undergo training before going there.

The building with "TR" on it is a training room. By going in here, you can fight a monster in battle and learn a new ability if you win.

The Neo Bar. (Neo Barbarian) is a nastier version of the Barbarian, and has more health. Thankfully, you can fight him just like you did the Barbarian.

By beating the Neo Barbarian, you'll be able to perform a High Jump. By holding Up on the D-Pad and pressing 2, you can jump higher.

To beat the Amazon, wait for the Amazon to jump towards you, then move forward just a little bit and swing the sword. When you hit her, move forward and swing again. Keep doing this until she dies.

Saturday, October 29, 2022

PrinceWatercress plays GG Aleste - The Longplay


Now it's time for the entire game in one sitting minus commentary. Enjoy.


Here's the story, according to the instruction manual and the Aleste Wiki:

Year 2065 AD. After the failure of the first Integrated Earth State to advance into the outer planets, a huge mobile weapons army suddenly appeared in the jet-black space. They challenged the Integrated Earth State and destroyed the SDF (Space Force).

"We have taken control of the Earth. Your future lives are forfeit!"

Calling themselves "Moon Child", they conquered Earth and captured a few remaining SDF soldiers who were sent to a colony under construction. While most soldiers are overtaken by despair, some still do not give up hope... A teenage girl and a genius pilot, Ellinor Waizen...

The special fighter GG Aleste, developed specially for her, was secretly brought into the colony by the development team led by Ellinor's grandfather Seft Waizen. Ellinor now heads into the void where the battle awaits, piloting the GG Aleste to save the Earth.

Normal mode is just a normal game. Special mode, however, has enemies shooting revenge bullets at you after you kill them. This can make a no-death run really hard to do. I play on Normal mode for now.

Round 1

The D-Pad lets you fly around in eight directions, while Button 1 lets you fire your weapon. You start out with a single bullet machine gun (or a tic-tac gun, as I call it) and a laser.

There are gray and green cylinders you can shoot down to pick up P Chips. The P Chips will power up your machine gun, but you'll need a lot to go from single to double to triple and then to arrow shot, the last of which fires at a slight angle and does the most damage. There are also six special weapons, and they are as follows:

S: Spread - This fires a shot that flies forward before exploding and sending shots forward. Since it doesn't fire right away, this is the one weapon you'll probably have the hardest time dealing with, even when it's fully powered-up.

W: Wave - This shoots a three way shot that you can use to take out enemies from an angle.

N: Napalm - This shoots out an explosive shot that can take out multiple enemies in its wake.

L: Laser - You start with this one. The laser goes through enemies while hitting them, allowing you to take out multiple enemies in a straight line.

H: Homing - This shoots out a homing shot that chases after a nearby enemy. You can take out multiple enemies at one time once this thing is fully powered-up.

D: Defensive - This places a shield around the ship, and the shield revolves around you. If any enemies or enemy projectiles touch the shield, they get vaporized. You still need to be careful with this weapon, as projectiles still have a chance to get past the shield and hit you. When powered-up, this weapon also shoots beams made out of the shield itself, and these beams can also tear through enemies.

The enemies tend to spawn on the side 

Enemies worth mentioning are:
- the the ships that split up into two parts that fly around
- the ships with the green cores that teleport in and fly around in formation
- the small green Gundam-like enemies that fire tiny blue lasers that can get around the shield of the D weapon pretty darn easily
- the enemies that teleport in from the bottom of the screen (H takes care of them)
- all those turrets on the ground

The red circle with a P in it powers up your secondary weapon. Be sure to pick them up; you definitely want a powered-up secondary weapon.

To beat the first mini-boss, stay away from it when it fires at you, then line yourself up with it and shoot it for a second before moving away again. To beat the second mini-boss, line yourself up with it and fire at it with everything you've got. Don't forget that you can shoot down the green fireballs.

The third boss is a wall at the end of the space station. Wait for the walls to stop moving and avoid the bullets, then shoot at the core when they stop. You can shoot down the green bullets, thankfully.

To beat the boss, shoot at the laser cannon at the front when it's moving, and stay away from it when it stops so you don't get blasted. For the second phase, shoot at the face, and watch out for the green bullets and the missiles that both fire straight down. As long as you're paying attention, you can easily dodge those as well as the bullets.

Round 2

In this round, you'll be flying across water and you'll be shooting down a lot of ships. The red ships always come out from behind and shoot out mortar shots that travel downwards if you leave them on-screen long enough. The gray ships that come in from the front will fire at you, but if you have the H or D weapon, you can easily tear them apart.

A submarine will show up as a mid-boss. Shoot the rocket-shaped thing in the center of the submarine to damage it, and watch out for the bullets it shoots that travel diagonally.

From here, you'll be facing a lot of turrets on oil rig platforms and getting a lot of chances to get the special weapon of your choice.

The boss is a collection of turrets on a platform that moves back and forth. Shoot down the turrets when they open up to fire bullets, then fire at the red orb in the center of the platform. The red orb will shoot out loads of green fireballs; the D weapon will protect against them, but the H weapon is also heavily preferred. Once you take this boss out, it's on to Round 3.

Round 3

In this area, you'll be in an underground rail path.

There will be turrets at the far left and right sides shooting at you. There will also be mechs that rise up from the train cars. Wait for them to reach the top of the screen before shooting at them; you won't be able to hit them until then

There will also be force fields encompassing the screen. As long as you shoot one part of the force field, the force field will be disabled.

The tiny Gundam enemies with the tiny blue lasers are the worst, especially if you have the D weapon and you're expecting it to pre-emptively get rid of the lasers...because it probably won't. Get the H weapon and use it to get rid of those enemies.

The boss is a big train car on the rail track. Stay in the upper corners to avoid the mortar shots, and once it rises up, shoot the green parts. Watch out for the spiders that come out from the sides and drop down. The H weapon will make this boss easier, as it will take care of not only the boss, but the spiders. Once this boss is down, it's on to Round 4.

Round 4

The game starts with a bonus area. Shoot down all the ships in a formation to get P-chips and secondary weapon strength increases. You can only shoot your basic "tic-tac" gun in the bonus area, and enemies don't destroy you if they run into you. The more ships you shoot down, the more points you get at the end, and if you destroy them all, you'll get a perfect bonus of 200,000 points and two extra lives (you earn an extra life every 100,000 points).

Once you're out of the bonus area, you'll be able to fire your secondary weapon again, but you'll also be in danger once again, so keep an eye out for enemies.

Missiles will start flying out from the top of the screen. Be ready to avoid them or shoot them down, as they are fast.

The boss here is some sort of ship that fires off those Gundam robots as well as missiles that come down from the sides. For the first phase, stay in the bottom center when you want to fire so you can damage the center of the ship. If you have the D weapon or H weapon, you can more or less stay in that position for the whole phase, as nothing will be able to touch you.

In the second phase, just stay in the bottom center and keep firing at the same weak point. All the green projectiles will miss you, and you can easily shoot down the middle projectile of the red three-way shot. It won't be long until you are off to Round 5.

Round 5

In this round, you'll be flying across a giant battleship. There are plenty of turrets here. The tube-shaped turrets that shoot off the green lasers are the hardest to destroy. The main thing to destroy is the three-way shot cannon at the top of the ship. Thankfully, those shots don't home in on you. H and D are the best weapons.

Round 6

The round begins with another bonus area that works exactly like the one from Round 4. Once again, destroy all the enemies for P chips and secondary weapon power-ups so you can get two more extra lives.

Once you're back into normal gameplay, prepare to be flooded with all sorts of enemies that have appeared regularly throughout the first round rounds. The homing weapon will be really useful in taking care of them all, especially the turrets and tanks. At this rate, concentrate solely on survival.

For the boss, take out the turrets first, and watch out for the shots that come out of both the turrets and the core. Once all six turrets are destroyed, take out the core. Thankfully, the core's shots neatly fan out as opposed to homing in on your current position upon firing like the turrets' shots do.

Round 7

This round takes place in Moon Child's base, and there are multiple sections to go through while mowing down enemies and floor turrets. At the end of each section is a boss that you'll have to take out before continuing on.

For the second section, take out the four corner turrets first before shooting down the core. Thankfully, dodging the shots for this boss is easier than at the end of Round 6.

For the third section, watch the mortar shots as you shoot at the boss.

In the fourth section, there is a ship that flies from the bottom to the top that fires multi-way shots at you as it moves by. Stay away from the shots and focus on the smaller enemies that are easier to defeat.

For the fourth section boss, take out the two turrets at the top, then move around and shoot at the boss as you do so. Never vertically line yourself up with it so that you don't get shot when it stops.

The real boss is in the fifth and final section. You'll be able to get the D weapon before meeting it; this is the last time in the game you can get it. To beat this boss, stay away from it and its shots  as it flies around in a circle before it lands on the door in the center. Take out the turrets before taking out the ship while avoiding the mortar shots that it produces.

Round 8

The final round of the game is nothing but bosses. You'll be able to get any weapon you need (except D) one last time before the rush of bosses begins.

The first boss is some sort of mechanical skeleton. Keep firing at the face. As for the red orbs it shoots, they will bounce around at random angles, but they can be shot down. 

The second boss is a series of turrets that fire green lasers. Stay far back and on the center of the screen and shoot the "face" at the top center of the screen. This lets you avoid the green orbs that are fired by the side turrets while taking out the shots from the "face" itself. This works best if you have the H weapon, otherwise; you'll have to avoid the green orbs while shooting down the cannons and avoiding the lasers that come out of the smaller green shots shot by the "face" which split into two when they are are horizontally aligned with you.

The next boss is some machine with two faces: one of a human, one of a wolf. You'll be shooting the wolf face first. Concentrate all your firepower on it. You'll then be shooting the human face. Avoid the red shots that fan out, and when the face opens to reveal the machine gun, keep shooting at the face while avoiding the mortar shots. Hang all the way back for best results. After enough damage, the human face opens up even further. You'll have mortar shots, shots that fan out and blue orbs that home in on you. The blue orbs can be destroyed, but your best bet is to shoot at the face whenever you can. Again, the special weapons make this easier.

After you destroy the four forms of the third boss, you'll fight one last boss, which is some weird cyan -colored baby looking thing. This boss will switch between the orbs: red, green, blue, green, red, green, blue, green, so on and so forth. As long as you keep the pattern in mind, you can easily shoot down the boss as it moves back and forth on the screen. Take out red and blue; leave green alone. Also, never line yourself up with it vertically and keep firing.

Once you beat this final boss, you'll return home, with Moon Child having been beaten once and for all. Congratulations!

Friday, October 28, 2022

PrinceWatercress plays GG Aleste - Part 8 of 8


It's now time for the final bosses! If you can destroy them, you'll save the colonies!


Round 8

The final round of the game is nothing but bosses. You'll be able to get any weapon you need (except D) one last time before the rush of bosses begins.

The first boss is some sort of mechanical skeleton. Keep firing at the face. As for the red orbs it shoots, they will bounce around at random angles, but they can be shot down. 

The second boss is a series of turrets that fire green lasers. Stay far back and on the center of the screen and shoot the "face" at the top center of the screen. This lets you avoid the green orbs that are fired by the side turrets while taking out the shots from the "face" itself. This works best if you have the H weapon, otherwise; you'll have to avoid the green orbs while shooting down the cannons and avoiding the lasers that come out of the smaller green shots shot by the "face" which split into two when they are are horizontally aligned with you.

The next boss is some machine with two faces: one of a human, one of a wolf. You'll be shooting the wolf face first. Concentrate all your firepower on it. You'll then be shooting the human face. Avoid the red shots that fan out, and when the face opens to reveal the machine gun, keep shooting at the face while avoiding the mortar shots. Hang all the way back for best results. After enough damage, the human face opens up even further. You'll have mortar shots, shots that fan out and blue orbs that home in on you. The blue orbs can be destroyed, but your best bet is to shoot at the face whenever you can. Again, the special weapons make this easier.

After you destroy the four forms of the third boss, you'll fight one last boss, which is some weird cyan -colored baby looking thing. This boss will switch between the orbs: red, green, blue, green, red, green, blue, green, so on and so forth. As long as you keep the pattern in mind, you can easily shoot down the boss as it moves back and forth on the screen. Take out red and blue; leave green alone. Also, never line yourself up with it vertically and keep firing.

Once you beat this final boss, you'll return home, with Moon Child having been beaten once and for all. Congratulations!

Thursday, October 27, 2022

PrinceWatercress plays GG Aleste - Part 7 of 8


We are now in enemy territory. It's time to take the fight to the enemy and strike it where it hurts!

First | Previous | Next | End

Round 7

This round takes place in Moon Child's base, and there are multiple sections to go through while mowing down enemies and floor turrets. At the end of each section is a boss that you'll have to take out before continuing on.

For the second section, take out the four corner turrets first before shooting down the core. Thankfully, dodging the shots for this boss is easier than at the end of Round 6.

For the third section, watch the mortar shots as you shoot at the boss.

In the fourth section, there is a ship that flies from the bottom to the top that fires multi-way shots at you as it moves by. Stay away from the shots and focus on the smaller enemies that are easier to defeat.

For the fourth section boss, take out the two turrets at the top, then move around and shoot at the boss as you do so. Never vertically line yourself up with it so that you don't get shot when it stops.

The real boss is in the fifth and final section. You'll be able to get the D weapon before meeting it; this is the last time in the game you can get it. To beat this boss, stay away from it and its shots  as it flies around in a circle before it lands on the door in the center. Take out the turrets before taking out the ship while avoiding the mortar shots that it produces.

Wednesday, October 26, 2022

PrinceWatercress plays GG Aleste - Part 6 of 8


In this entry, we go through another stage, but in this stage, you'll be swarmed with plenty of enemies.


Round 6

The round begins with another bonus area that works exactly like the one from Round 4. Once again, destroy all the enemies for P chips and secondary weapon power-ups so you can get two more extra lives.

Once you're back into normal gameplay, prepare to be flooded with all sorts of enemies that have appeared regularly throughout the first round rounds. The homing weapon will be really useful in taking care of them all, especially the turrets and tanks. At this rate, concentrate solely on survival.

For the boss, take out the turrets first, and watch out for the shots that come out of both the turrets and the core. Once all six turrets are destroyed, take out the core. Thankfully, the core's shots neatly fan out as opposed to homing in on your current position upon firing like the turrets' shots do.

Tuesday, October 25, 2022

PrinceWatercress plays GG Aleste - Part 5 of 8


Well, that was short.


Round 5

In this round, you'll be flying across a giant battleship. There are plenty of turrets here. The tube-shaped turrets that shoot off the green lasers are the hardest to destroy. The main thing to destroy is the three-way shot cannon at the top of the ship. Thankfully, those shots don't home in on you. H and D are the best weapons.

Monday, October 24, 2022

PrinceWatercress plays GG Aleste - Part 4 of 8


In this entry, we get a short bonus game before getting back into action.


Round 4

The game starts with a bonus area. Shoot down all the ships in a formation to get P-chips and secondary weapon strength increases. You can only shoot your basic "tic-tac" gun in the bonus area, and enemies don't destroy you if they run into you. The more ships you shoot down, the more points you get at the end, and if you destroy them all, you'll get a perfect bonus of 200,000 points and two extra lives (you earn an extra life every 100,000 points).

Once you're out of the bonus area, you'll be able to fire your secondary weapon again, but you'll also be in danger once again, so keep an eye out for enemies.

Missiles will start flying out from the top of the screen. Be ready to avoid them or shoot them down, as they are fast.

The boss here is some sort of ship that fires off those Gundam robots as well as missiles that come down from the sides. For the first phase, stay in the bottom center when you want to fire so you can damage the center of the ship. If you have the D weapon or H weapon, you can more or less stay in that position for the whole phase, as nothing will be able to touch you.

In the second phase, just stay in the bottom center and keep firing at the same weak point. All the green projectiles will miss you, and you can easily shoot down the middle projectile of the red three-way shot. It won't be long until you are off to Round 5.

Sunday, October 23, 2022

PrinceWatercress plays GG Aleste - Part 3 of 8


This level is pretty nuts. You'll have enemies - and obstacles - coming from just about all sides. Be ready to shoot down turrets, force fields and mechs with the most annoying lasers.


Round 3

In this area, you'll be in an underground rail path.

There will be turrets at the far left and right sides shooting at you. There will also be mechs that rise up from the train cars. Wait for them to reach the top of the screen before shooting at them; you won't be able to hit them until then

There will also be force fields encompassing the screen. As long as you shoot one part of the force field, the force field will be disabled.

The tiny Gundam enemies with the tiny blue lasers are the worst, especially if you have the D weapon and you're expecting it to pre-emptively get rid of the lasers...because it probably won't. Get the H weapon and use it to get rid of those enemies.

The boss is a big train car on the rail track. Stay in the upper corners to avoid the mortar shots, and once it rises up, shoot the green parts. Watch out for the spiders that come out from the sides and drop down. The H weapon will make this boss easier, as it will take care of not only the boss, but the spiders. Once this boss is down, it's on to Round 4.

Saturday, October 22, 2022

PrinceWatercress plays GG Aleste - Part 2 of 8


Our next round takes us across an ocean, where Moon Child's ocean defense is ready to tear us apart. Unfortunately for them, not dying in the first round is the reason all their ships will be torn to shreds.


Round 2

In this round, you'll be flying across water and you'll be shooting down a lot of ships. The red ships always come out from behind and shoot out mortar shots that travel downwards if you leave them on-screen long enough. The gray ships that come in from the front will fire at you, but if you have the H or D weapon, you can easily tear them apart.

A submarine will show up as a mid-boss. Shoot the rocket-shaped thing in the center of the submarine to damage it, and watch out for the bullets it shoots that travel diagonally.

From here, you'll be facing a lot of turrets on oil rig platforms and getting a lot of chances to get the special weapon of your choice.

The boss is a collection of turrets on a platform that moves back and forth. Shoot down the turrets when they open up to fire bullets, then fire at the red orb in the center of the platform. The red orb will shoot out loads of green fireballs; the D weapon will protect against them, but the H weapon is also heavily preferred. Once you take this boss out, it's on to Round 3.