We go on the hunt for the Diamond Eyes in this entry!
All maps by Grizzly.
Horace Highwater's Camp
Madronius also mentions his brother, who has a hiding place in the Hall of Collosia. He tells you to check the walls and that he'll help you out. This is where you'll find one of the two Diamond Eyes, so keep this tidbit of information in mind.
Be sure to talk to Horace again. He'll give you two Call Beads as well as some of his spells. He has two other spells that you'll find elsewhere in the game. One of them is in the Pyramid, so check every square inch of that place when you're there.
There is also a woman at the camp that lets you sleep at the camp for 20 jewels. Take advantage of it whenever necessary during your quest for the Diamond Eyes, it's pretty useful and doesn't cost very much.
Be sure to sniff around the camp with The Dog. You'll find some useful alchemy ingredients, including some Bone and Brimstone.
Right Bank Forest
Now that we have a way of getting to the dungeon areas with the Diamond Eyes, go north to that pit and use the Revealer spell to reveal the bridge. Cross it and go north.
Hall of Collosia - Outside
You could just go right in the Hall, but feel free to take down the monsters here and level up both your characters and your weapon. That sword is the most powerful thing in your hand aside from any spells you have, so you might want to get it to at least Level 2 if you haven't done so already.
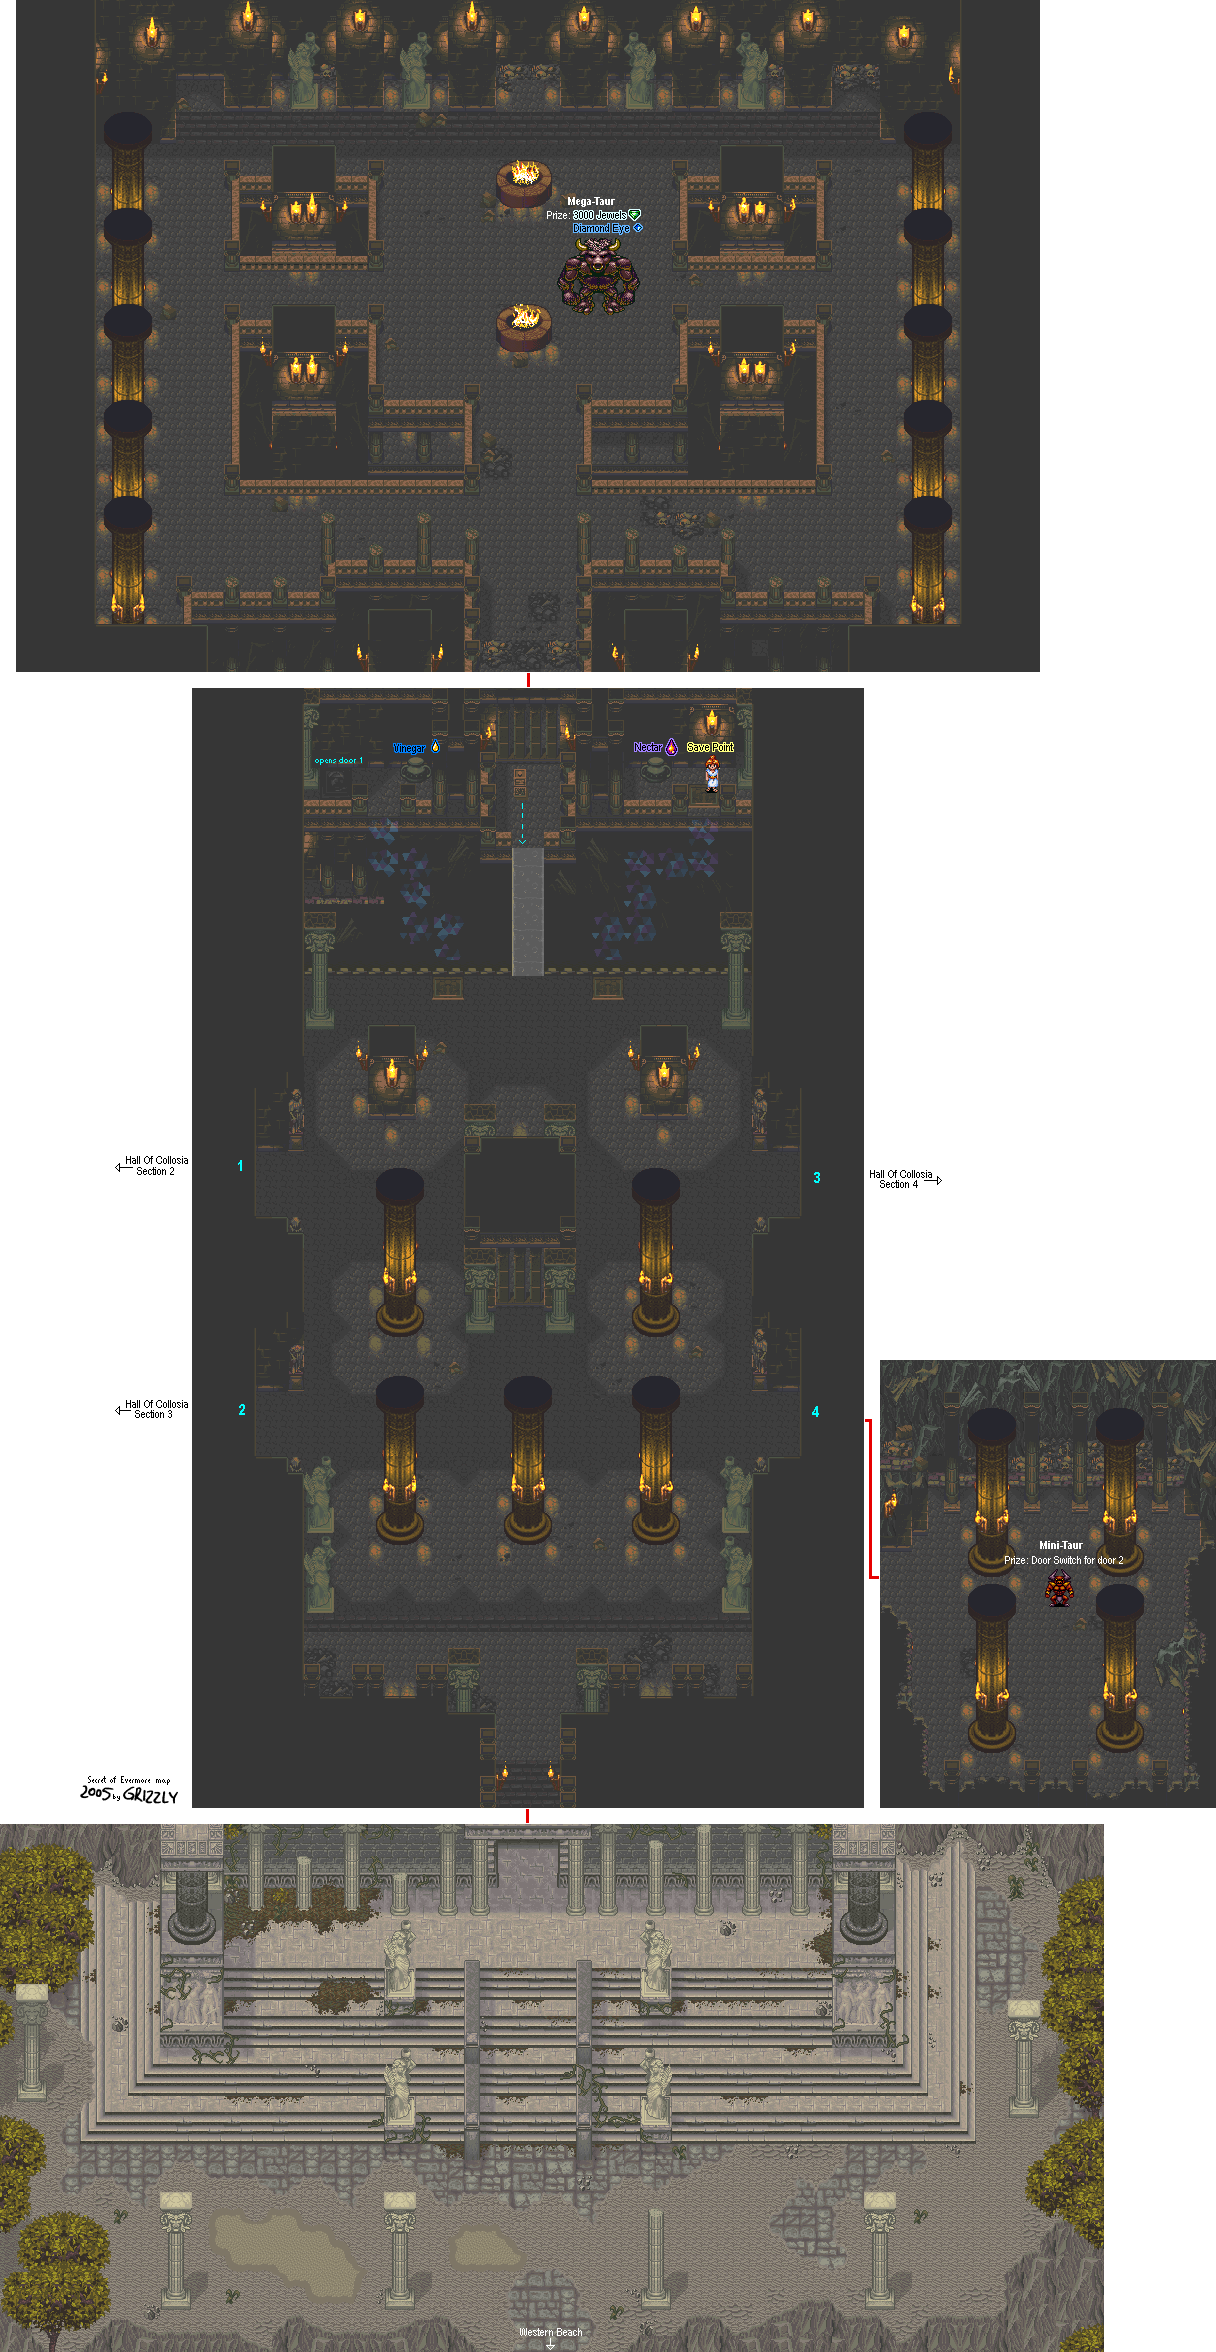
Hall of Collosia
There's a lot of rats in here, but they can't do anything to hurt you. You can defeat them for experience (characters and Gladiator Sword) and jewels, even though it isn't much. Every little bit helps.
There are also Lime Slimes hopping around. They give more experience and jewels than the rats and are thankfully easy to attack than some of the monsters that you've seen in Antiqua so far.
There are some plates that you can step on on the north end of the entrance room. The ones on the left and right are places where you can use the Revealer spell to find bridges that lead you to treasures and faceplates (as well as a woman that will save your game), but the one in the middle requires...something else. You'll find out what it is.
The bridge on the left takes you to a faceplate on the floor. When you step on it, it'll open a door in one of the walls to the left. Be sure to step on this before you go any further.
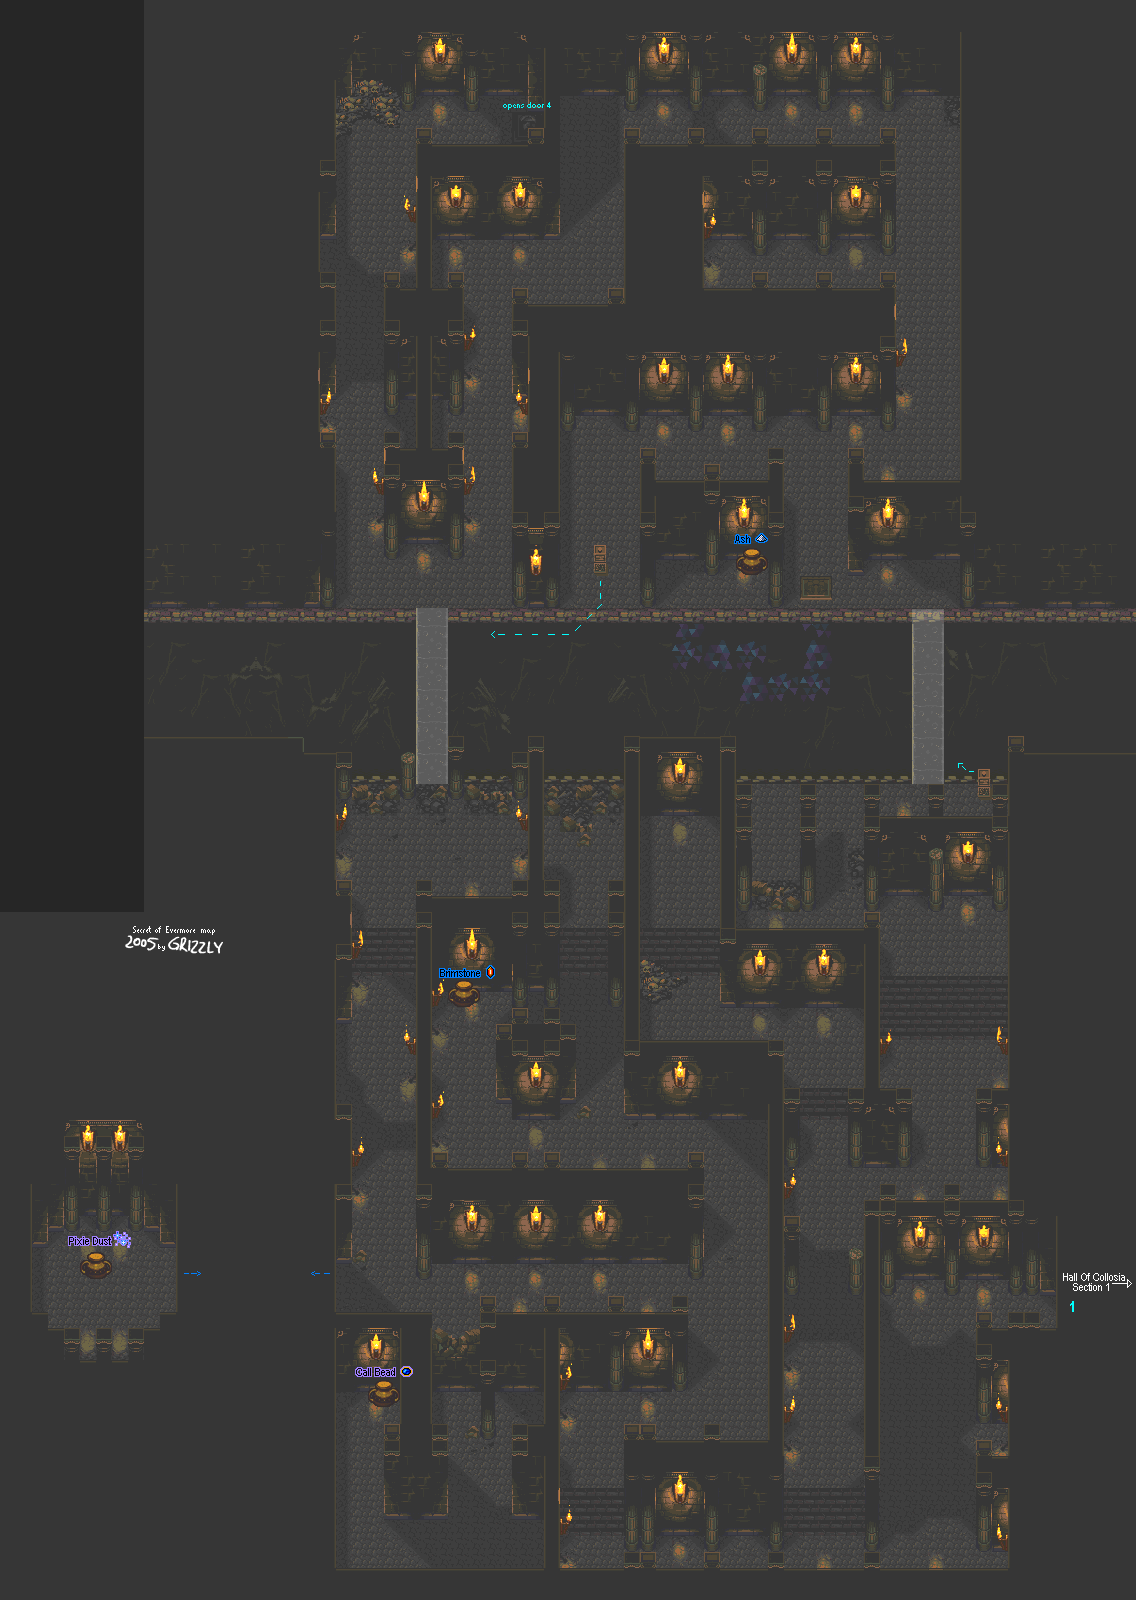
When you check the left wall, you'll see a feint light near one of the walls. Go in here and look around. As you go north, you'll find another pit. You'll have to reach the right-hand edge and hit a switch in order to cross to the other side. This opens up a bridge that comes to you. From here, you can use Revealer to find another invisible bridge that leads to a pot, as well as another switch that opens up a bridge at the other end of this part of this maze. You'll have to hurry to this bridge, as it doesn't stay opened up forever.
Before you do that, though, there's a faceplate at the northernmost wall of this room that you'll have to stand on before you trigger the bridge. Find it, then hit the switch and make a mad dash for the bridge.
No comments:
Post a Comment