Showing posts with label part 59. Show all posts

Sunday, March 15, 2026

PrinceWatercress plays Super Mario Odyssey - Part 59 of 92


In this video, we collect the last of the boss rematch Power Moons in the Mushroom Kingdom, then begin the real post-game.


21. Mushroom Kingdom Regular Cup - Win the first race against the Roving Racers in the first Koopa Freeracing race. Use the Rocket Flowers and your long jump to get to the castle.

22. Mushroom Kingdom Master Cup - Win the first race against the Roving Racers in the first Koopa Freeracing race. Use the Rocket Flowers and your long jump to get to the castle. Unlike the first race, the Purple Koopa is replaced with a Gold Koopa who will have better AI than the rest of the racers and will also go a lot faster than everyone else. 

33. Tussle in Tostarena: Rematch - The tower in the southwest corner of the kingdom leads to this battle, which is a rematch against Knucklotec. Same strategies apply.

You'll need to avoid the fists as they smash the ground. If the hands hit one of the many diamonds on the ground, they will get smashed. Possess the hand, then hold Y and avoid the diamonds that the other hand tosses as you run right into Knucklotec's face. It can be a little difficult, as the free hand can sometimes change positions to block you with a projectile attack, but if you move wildly enough, you can make it to the face quickly enough.

Any diamonds with Hearts in them can be smashed by the hands to release the hearts if you need the health. Just stand there and move out of the way before the hand hits the ground.

After each hit, Knucklotec will create some diamonds that will land on the ground and become buried in the sand. Avoid those diamonds, and repeat the process. After the second hit, you'll need to avoid the fists when Knucklotec launches them at you from far away. When he has his hands up, open and to the sides, move up and down as you move around the arena so you don't get clapped. You'll soon be able to defeat Knucklotec on the third hit and get this Power Moon.

All throughout this rematch, however, you'll have to deal with the zombies that pop out of the ground from the Sand Kingdom. You'll need to stay on the move and avoid them while facing Knucklotec. Coming into this battle with a Life Up Heart is strongly advised.

36. Battle in Bubblaine: Rematch - The pipe in the lake where Dorrie is leads to this rematch. The same strategies apply, but this time, you're in the clouds and it is raining hard with no end in sight. As a result, you'll be able to fly around indefinitely without running out of water.

37. Blowup at Mount Volbono: Rematch - The tower closest to the Odyssey is the rematch with the Cookatiel. The same strategies apply, but this time, there will be three rotating rock columns in the soup. You'll also have to deal with those spiky fruits coming down from the lava that the Cookatiel spits out when you try to hit it. 

41. Found with Mushroom Kingdom Art - You'll need to find this Hint Art first in order to unlock this Power Moon. Head back to the Cap Kingdom. Get on the bridge leading to the village, then line the tower up with the moon and ground pound near the guardrail. If you ground pound the right spot, you'll get a Power Moon.

Sunday, October 27, 2024

PrinceWatercress plays Chrono Trigger (Super NES) - Part 59 of 70


It's time for the trial...again! This time, all seven jurors declare us not guilty.


It's that time again: time to replay the whole trial thing and get all seven jurors to declare me not guilty. This time, I succeed.

When asked who started this whole mess, say you did it; saying Marle started it will be used against you. (I messed this part up, and I'll be correcting this when I go for the "all innocent" run again on New Game Plus.) When asked if you were tempted by Marle's wealth, say no both times. (Saying yes either time is used against you

If you brought the cat back to the little girl, the girl will thank you...if you talked to her. If you talk to the little girl, but you don't bring back the cat, the little girl testifies against you. If you bring the cat back to the little girl without talking to the little girl, the little girl never shows up.

If you ate the old man's lunch, the old man will testify against you.

If you tried to run away while Marle is buying candy before heading north to see Lucca's invention, someone will testify against you and call you a kidnapper.

If you picked up the pendant without talking to Marle first, this is used against you.

If you try to sell the pendant to Melchior, this is used against you.

If you lie at any point in the trial, this is used against you. Even if you did something you should not have, always tell the truth.

After the arguments of the trial, you'll get seven members of the jury who will find you guilty or not guilty depending on your actions at the Millennial Fair as well as during the trial. Here is the breakdown, courtesy of StrategyWiki:

Juror 1: Finds you guilty if you claim the fortune tempted you either time, or if you try sell the pendant. Doing neither will lead to a "not guilty."

Juror 2: Finds you guilty if you talked to the little girl and didn't bring her cat back. This one can be tough to get the "not guilty" from.
  • If you never talk to the little girl and never return the cat, they will find you not guilty, as the little girl never shows up in the trial. (Do this for best results.)
  • If you rescue the cat before you talk to the little girl, the little girl will testify in your favor, and the juror will find you not guilty.
  • If you talk to the little girl but fail to return the cat, the little girl testifies against you and the juror will find you guilty.
Juror 3: If you moved away from the candy booth with Down on the D-Pad as Marle was picking out candy, this juror will find you guilty; otherwise, they will find you not guilty.

Juror 4: If you admit that the fortune tempted you either time, or if you picked up the pendant before talking to Marle, this juror will find you guilty. Talking to Marle first after bumping into her rectifies this, as well as not being tempted by wealth.

Juror 5: If you admit that the fortune tempted you either time, this juror finds you guilty. Thankfully, admitting it didn't gives you a "not guilty."

Juror 6: Finds you guilty if you stole the old man's lunch...so don't steal the old man's lunch.

Juror 7: If you either lie at any point in the trial, say that Marle started everything, or claim you never stole something when you really did, this juror finds you guilty. If you state that you were not tempted by her wealth, but still try to sell Marle's pendant, this juror will somehow find you not guilty. Also, if you lie twice, this juror finds you guilty, but no other juror does.

For the best results, rescue the little girl's cat without talking to the little girl, don't eat the old man's lunch, don't press Down to drag Marle away from the candy booth, don't try to sell Marle's pendant, talk to Marle first before picking up the pendant when you bump into her, tell the truth by stating that you started the whole thing and admit to always stealing anything if you did, and mention that you were not tempted by Marle's fortune at all both times.

If you want all guilty, do the exact opposite, and talk to the little girl without returning her cat.

As for the amount of ethers you get, you'll get one Ether for four jurors saying not guilty, two Ethers for five, three for six, and six Ethers for the full seven. 

Sunday, November 14, 2021

HCBailly plays Final Fantasy II AGAIN - Part 59 of 65


In this entry, we enter the Jade Passage. It's time to defeat evil once and for all.

Jade Passage


The AbysWorm (Abyss Worm) should be Cursed first, as they are weak to Body- and Mind-elemental spells. Their most powerful attack is Cyclone 13, which can do massive damage to the entire party. Keep in mind that they can absorb Fire- and Death-elemental spells. You can use an Hourglass to paralyze them if you run into a group of three or four, but they have a 50% chance of breaking and disappearing from the item slot when used.

The Excalibur is strong against most enemy types except for Water-, Earth- and Magic Beast-type enemies.

Also, Leon looks like a blue Fighter. Just saying.

The Diamond Cane is the most powerful cane in the game.

The Hecteyes have a lot of spells such as Confuse 16, so protect your party with Barrier and Shell as well as any armor that protects against magic. 

Hellfire casts Fire 16 on all enemies during battle.

Salamander (Salamndr) has Blaze 16, which can wreck your entire party, but their defense is weak. Hit them with a high-level Blizzard spell for massive damage.

Sunday, May 26, 2019

HCBailly plays Final Fantasy IV (Super Famicom) - Part 59 of 70


Some of the enemies in the Giant of Bab-il are absolutely ruthless...though you can get huge experience out of here if you know what you're doing.


The Last Arm is weak to Thunder. The Electromagnetic Field casts Stop on whoever it is cast on, and Nuclear Explosion is a self-destruct attack on one party member that Last Arm does upon being destroyed.

The Machine Dragon (MachDragon) is a tough enemy with powerful spells that can damage the whole party tremendously. Have FuSoYa cast Tornado to make the battle easier.

The Giant Soldier (GiantSoldr) can be cut down to size with the Ogre Axe and the Fairy Claw. Amazingly, using both the Fairy and Thunder Claw with Edge does not do more damage, so you're better off using just the Fairy Claw.

Once you reach the save point, use the Alarms from the Searchers to summon MachDragons and GiantSoldrs to get loads of experience. You'll want Rydia to reach Level 55 and learn Flare, which will be useful in the next area. When you're done, Cecil should be in the high 50s, with everyone else at Level 55 or above.

When you reach the end, you'll face the Four Fiends again, even though you've already beaten them all before. They reveal that Lord Zemus has revived them, then Rubicante fully restores your HP and MP before you battle them all one by one again.

For Scarmiglione, have Rydia cast Fire 3 once on him. As you do this, Berserk both Edge and Cecil while Rosa and FuSoYa use strong Cure Spells. For Rubicante, cast two Ice 3 spells on him. For Cognazzo and Barbariccia, cast Bolt 3 on them until they die.

After you beat the Four Fiends, you won't be hearing from them again.

Friday, June 15, 2018

HCBailly plays Terranigma - Part 59 of 75


We finally save Princess Elle and get some more story advancement as we get out of this castle.

Turns out there was treasure part Magirock #81. Keep heading to the right and follow the path, then go north at the fork and jump over the pit to the east. You'll find an L.Bulb and 300 Gems.

From there, go back to the fork and take the path left. You'll be in the sewers. Make your way north Magirock #82 will be on an island to the east connected only by a thin wooden bridge. Enter the door there.

From there, follow the path again, and you'll find the 3 Part Rod. It raises your defense slightly, but the Enbu Pike is still stronger than this. Pick your weapon carefully.

Head back to the entrance. Head up the stairs to the west, then go northwest and enter the doorway there. Take the pots of water and throw them at the candlesticks to put the candles out. When you extinguish all six candles, the wall to the north will open up, revealing a door.

To the north is a bunch of paired statues. The statue to the north nearest you, however, is not paired. Go up to the wall across from it and interact with it, and you'll find the hidden switch that Meilin was talking about. Push the switch, and you'll open the door to the far north. Enter that door.

In the next room, run into the wall to the north with the Speed Shoes. You'll finally be in the room where Princess Elle is held captive. Talk to her. She'll tell you that she never thought she'd see you again, but here she is, seeing you again. Suddenly, Royd appears. He challenges you, but Fyda shows up and takes your place, telling you to get Princess Elle out of the castle. Get out of there, and you'll eventually meet Meilin. Follow her south, then east near the entrance, then north. Meilin will tell you that there is a drain up ahead, and it will lead you outside of the castle.

We go back to Fyda and Royd, and Fyda has the feeling she's met Royd before. Royd wants to know why Fyda is protecting Princess Elle, but Fyda says she has to no matter what. Royd lets her go, telling her to protect Elle.

You'll be back to Ark and Princess Elle. When you progress, Elle will tell you that she will wait for Fyda, as she feels that she can't leave her due to Fyda caring for her so much. She lets you go on ahead. Head east to the nearby door. Elle will then say that she can't be a burden to you anymore, and that there are things she must do.

The scene switches to Royd and Mr. Wong. Mr. Wong is ticked that Princess Elle has escaped, and that if Dr. Beruga at Mosque finds out, he will be very angry. He commands Royd to catch Elle, but when Royd finds out that Dr. Beruga is the mastermind behind whatever's happening, Royd turns on him, saying that his closest friend was one of the people killed in what was called "Preparation." Turns out Royd was a spy, and that the friend in question is King Henri. Royd then slowly approaches Mr. Wong as if to kill him.

You'll then regain control of Ark again. As you go through the sewers, Meilin will show up and say that she's managed to trick their pursuers with a fake image of Ark. Suddenly, the castle will begin to quake, and you'll be back at the entrance, unconscious. You'll be surrounded by Meilin and Perel. You'll find out that Dragoon Castle suddenly collapsed and that you and Meilin were shot up the drain. Thankfully, Ark is all right. You'll find out that the price of metal is going back down, and we can finally help Will.

Meilin apologizes again, but thanks Ark for not giving up on her. She heads back to Lhasa. Yomi shows up again, and asks what happened to Princess Elle and Fyda, then says that we should head back to Nirlake.

Tuesday, March 13, 2018

skorch82 plays Brave Fencer Musashi - Part 59 of 70


It's now time to take on the fourth Crest Guardian: the Queen Ant!

When you make it to end, you'll find a bunch of health pick-ups as well as a Memory Box. Use the Wind Scroll on the broken earth here to take on the fourth and final Crest Guardian...the Queen Ant.

Crest Guardian

Queen Ant


Jump over the claw swipes. When the queen leans forward, strike her in the face with Lumina. Once she is stunned long enough, use the Wind Scroll to destroy the crystal that appears within the poison-tipped tail. Keep moving towards the queen so that you don't get blown off the edge and take damage, taking you back to the queen's body.

Destroy the larva, and avoid the spikes and the poison cloud at the tip of the proboscis. When segments of the queen shake a little bit, jump off of them so that you don't get hit by the spikes.

Stand between the four fireballs that come down when the green fireballs show up. Avoid the non-scythe arms when they try to grab you by double-jumping over them or away from them. If they grab you, you'll be dragged into the spiky cavity in the Queen's chest.

Some of the larva will carry herbs that you can pick up if you're Poisoned. These can be used to cure you of the Poison status ailment in case you suffer from it during the battle.

As you do more damage to the core of the Queen Ant whenever it pops up, the faster the spike attacks will launch out from the Queen's body.

After three Wind Scroll strikes to the core, you've won. Use the Wind Scroll on the Wind Crest to head out of the mine. This starts the final chapter.

Friday, December 13, 2013

brickroadbrickroad and SovanJedi play Secret of Evermore - Part 59 of 88


In this episode, we escape from prison only to find out we would have been summoned from inside the prison anyway. Derp.
All maps by Grizzly.
 

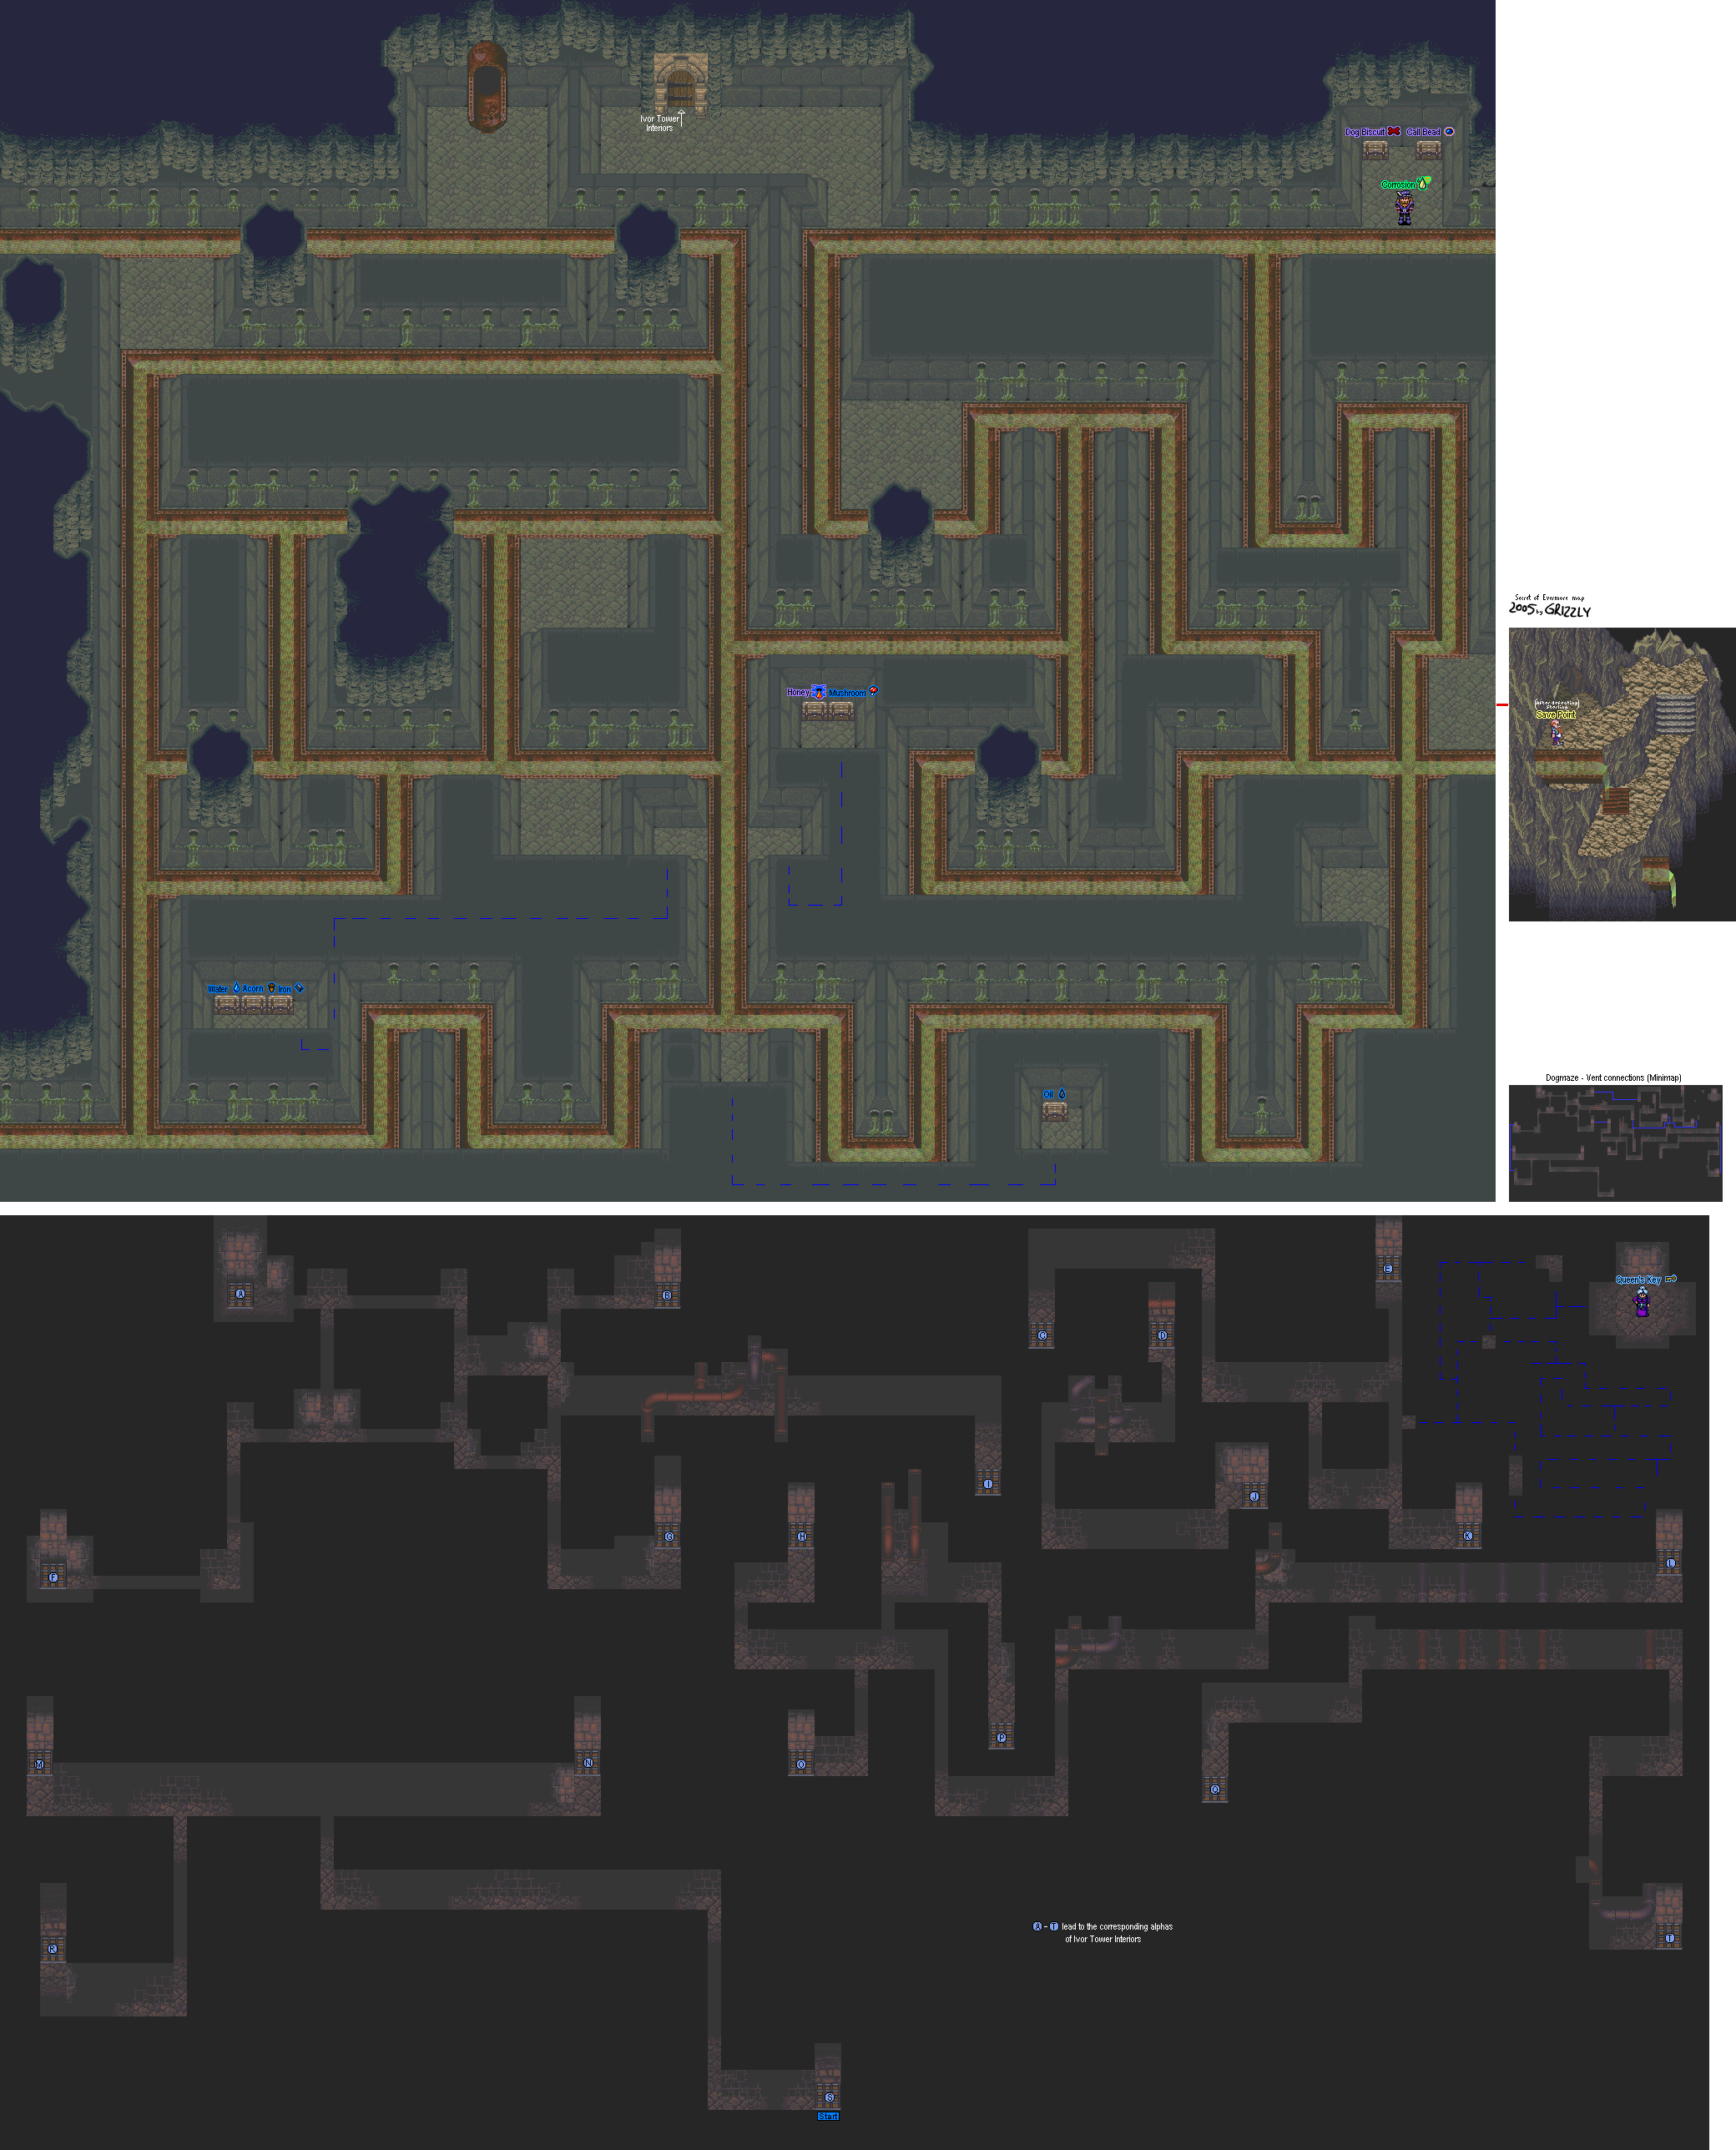
Ivor Tower Sewers

 
Map

There is also an alchemist here that gives you a new spell: Corrosion. It basically sends out a poisonous rain that gradually diminishes enemy HP on all the enemies onscreen when you cast it.

Corrosion

1 Mushroom, 3 Water

When you escape the sewers, a guard will catch you and you'll be escorted to the queen's chambers. She'll tell you to head to the old town of Ebon Keep so that her forces can attack the town and get the rest of the stragglers that are left into Ivor Tower. You'll have to get to the chessboard to reach it.

Before you leave the room, if you have found the key, The Boy will notice the key the old woman in the dog maze gave you. If you still haven't gotten it yet, you'll be able to enter the Dog Maze again. Just approach an air vent and The Dog will go into it.

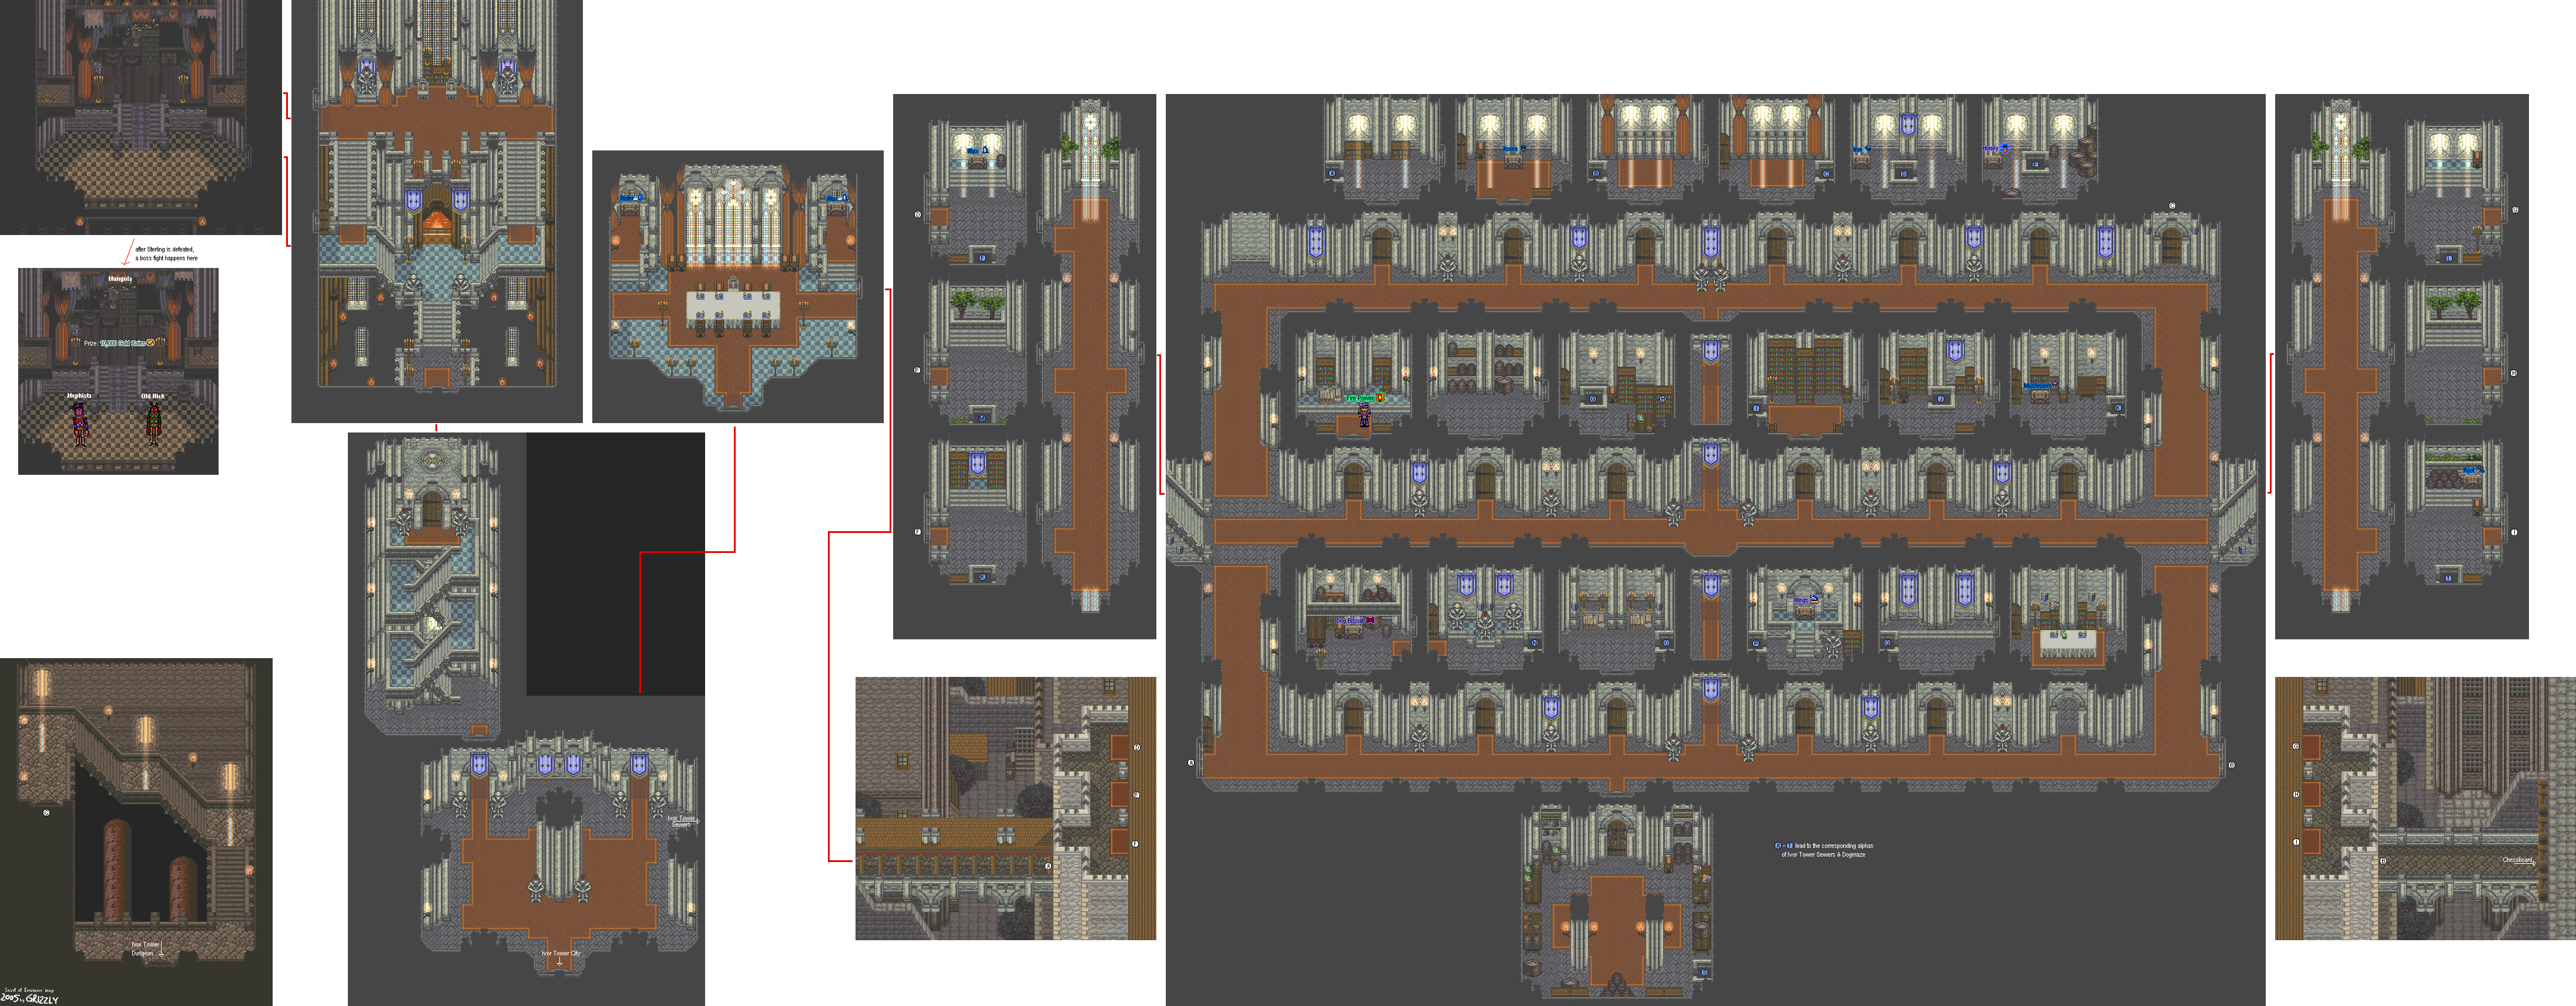
If you go left from where the Queen's throne is, you'll see the auditorium where the king is sitting in the balcony, hypnotized by a play that quotes Billy Shakespeare aka William Shakespeare (or as my high school sophomore year English teacher called him, "Willy the Shake") and repeats endlessly.

Ivor Tower Interior

 
Map

Now that you've got the Queen's Key, go ahead and explore the castle for those treasure boxes you saw earlier.

There's a man in one of the rooms. The old woman in the dog maze is his wife. If you give him his skeleton key, he'll give you the Firepower formula.

Firepower

1 Feather, 1 Brimstone

He lets you buy alchemy ingredients, but what's the point of this if you'll never get to talk to the guy again because you don't have the Queen's Key anymore?!? Especially when it costs 1000 Gold Coins for 5 Feathers for Firepower?