For this blog series' epilogue, we look back at the video that led to me playing (and re-remembering) the game in the first place. Believe it or not, the game is not as long as my Let's Play makes it seem, and if you know what you're doing, you can beat this game in around 30 minutes or so. Enjoy!
Showing posts with label CornshaqGaming. Show all posts
Showing posts with label CornshaqGaming. Show all posts
Tuesday, February 18, 2020
@Cornshaq Plays It Through - Kid Niki 3
For this blog series' epilogue, we look back at the video that led to me playing (and re-remembering) the game in the first place. Believe it or not, the game is not as long as my Let's Play makes it seem, and if you know what you're doing, you can beat this game in around 30 minutes or so. Enjoy!

Thursday, September 12, 2019
Secret Bonus Fight - Duck Vader...and more!
I never got to show this off during the Let's Play, so I had to make this the epilogue.
If the amount of carrots you have is a multiple of 11 when you defeat any boss, you'll be picked up by Duck Vader's flying saucer when you return to the map screen.
Here, you'll meet Duck Vader and two of his Stormtroopers. The Stormtroopers can't be killed, but you can leap off of them to get some extra height and reach Duck Vader. You'll have to wait for him to get a little lower before you can leap on his head. Until then, dodge the lasers that shoot out from the top of the screen.
As always, it takes three bops on the head to beat Duck Vader. When you do, you'll be rewarded with a large heart with the Acme logo on it. Pick it up to get three lives and leave the area.
Here's my longplay for this game. Enjoy.
And finally, here's every musical track from this game.
Thursday, March 28, 2019
Cornshaq plays Batman - Part 3 of 3
Here it is: the hardest stage of all.
Stage 5
Here we are: the cathedral.
Be ready to deal with gears, a ton of enemies, tough jumps and even a little bit of slowdown.
At a few points, you'll have to drop down at the edge of a platform, then wall jump off the side to get somewhere.
The first boss is Firebug. Stay all the way to the left and throw Batarangs. He will jump around and throw fireballs, but you can easily jump over all the fireballs and you won't have to deal with his punches and kicks. As soon as you see him throw the fireball, you want to hold A to make the highest jump you can. This will take a while to get the timing down, but it can be accomplished.
After this, you'll get one more cutscene with The Joker, then you'll fight The Joker. Get close and punch him, and step back a bit to avoid the lighting strikes he summons when he raises his hand. If he shoots, jump over the bullet. Do not crouch, because you will get hit and you will lose three units of health, which is more damage than anything else in the game deals. He will shoot up to three bullets on either side of the screen before running to the other side; if he runs to the other side before the third bullet, there is a chance that he will shoot at you again as soon as he turns around. If you keep punching him while he summons the lightning (which he sometimes does twice), he won't be able to hurt you when he charges at you (which is true of any enemy; if you keep hitting them, they can't damage you while they're flashing).
There is an alternate strategy (sort of). For best results, jump towards The Joker and punch when he moves his hand back before summoning the lightning, then keep punching him while in a crouching state. If he runs to the other side, follow him immediately. It is better to take damage from touching The Joker himself than from being shot by him. The Joker also cannot damage you if he is flashing, and while that can be hard to keep going for a short amount of time, if you can wail on him, so be it. Getting up and close to The Joker is the best thing I can think of, if numerous Awesome Games Done Quick runs of the game are any indication.
You'll eventually beat The Joker, then you'll get the ending. You've beaten Batman on NES!

Wednesday, March 27, 2019
Cornshaq plays Batman - Part 2 of 3
If the strategies here seem different than what's on the video, that's because I made this a guide, played through the game on my own, figured things out, edited this before putting it all on Blogger, and then passed the stuff I figured out on to you. That's why.
The green turrets on the ceilings will drop bombs that go after you.
The gears on the pipe wall will damage you if you touch them, so try not to jump into them.
The boss here is The Electrocutioner. He will jump to the left and slash, then throw huge energy blasts to the left and right. He will also jump not only straight up, but also to the other side of the room. You will want to stay on the two platforms above and stay close, but not too close. Shoot at him with the gun, and when he jumps towards you, jump away from him and wall jump back to the platform. If you have a lot of ammo and you can keep the pattern going, you can beat him. If you run out of ammo, you'll have to position yourself just right so that you can punch The Electrocutioner in the head as he jumps around.
Basically, it works like this. Get on the left platform at the start of the battle and wait for the boss to unsheathe his weapon. Do not attack him immediately at the start of the battle or else it will not end well. When he jumps at you, jump to the left wall, then get back on the platform. Move to the right edge of the platform, face left, duck down and shoot The Electrocutioner with the gun when he jumps straight up. From there, jump to the right platform, make your way to the right edge, jump to the wall when he jumps at you, then wall back to the platform. Stay on the center of the platform, face right, and duck down. When The Electrocutioner jumps straight up, shoot him with the gun from a ducking position. From there, go back to the left platform. Repeat the sequence. The timing will take some getting used to, as well as some trial and error, and while this battle will be a bit long in the tooth if you can keep this movement pattern going, this battle can be won.
After another cutscene with The Joker, you'll be in Stage 4.
Stage 4
Gotta love the monitors with The Joker on them. Sunsoft knew how to do graphics on the NES at times.
The floors made out of rotating ears are like spikes, so you want to stay above them on the platforms. You'll also see them on ceilings, sometimes above sets of spinning gears on floor, so you'll have to be careful with your jumps at times.
To get past the last two jumps over the gear spikes, you have to jump to the corner of the gray wall, then leap off that wall to the right. You'll be right on the corner, and you'll have to hold the jump button to clear it. Never mind the fact that the first jump has a drone dropper on the ceiling, you'll still be able to make it. Just watch out for those three blue spike robots when you're at this point and be ready to punch them all or hit them all with the Batarang.
The orange robots can destroyed, but you're better off avoiding them as well as the nearby electric barriers that zap in and out from time to time. Also, you have a flame pit and small, square-shaped conveyor belt platforms in the third section. Oh, my.
There are very few new enemies in Stage 4, and the majority of them are going to be enemies you've seen before.
The fourth boss is the Dual-Container Alarm. For this one, stay to the far left, face right and keep crouch-punching so that when the cubes come your way, they can't damage you. You may take damage. That's all right.
Both boxes have individual health bars, and if one box gets destroyed, the other one speeds up, changes form to have a red circle in the center and shoots fireballs across the room. Stay where you are and don't jump so the three pairs of fireballs that go across the screen don't hurt you. Even those fireballs will touch Batman's feet, they won't hurt him. Apparently his feet are not part of his hitbox. When the cube moves away, throw shurikens. When it moves forward, get back. Repeat until it dies.
Cornshaq plays Batman - Part 1 of 3
Here it is: the NES Batman game based on the 1989 movie and the one that many have a love-hate relationship with.
This game is pretty short but pretty hard. Like in the movie, you have to stop The Joker from terrorizing Gotham City. However, the game takes liberties with the story of the movie, and as a result, you meet enemies - and bosses - who are not in the movie.
Left and Right allow you to move, Down lets you crouch, A lets you jump, B lets you attack/shoot, Select lets you pause the game, and Start lets you switch between your fists, the Batarangs, and a gun. If you hold A while jumping, you'll be able to glide. If you press A while jumping towards a wall, you'll be able to perform a wall jump.
The game begins with Batman coming out of the Batmobile. He then drops down when you reach the gameplay screen (Why? I dunno.), and then you'll have control of Batman.
Stage 1
When you beat up enemies, you may get little blue squares. The B squares are bonus points, the missile squares give you ammunition for your weapons, and the heart will restore one unit of health. Your health is on the upper-left corner of the screen.
The guys running at you can easily be punched. The blue, spike tank-like enemies can be easily jumped over, but if you're on their level, they get faster, like that one enemy in the Mega Man series.
Wait for the flamethrower guys to stop shooting fire before walking up to them and hitting them.
Wait for the orange guys who stand still and fire to shoot their bullets, then jump over their bullets and hit them.
The blue mines will move towards you when you get close enough, then explode. Be ready to jump over them once you get next to them
The jetpack enemies can be taken out with one or two Batarangs, but you can easily hit them with punches if they stop in front of you.
The ninja who leans on the background wall can easily be punched to death as long as you don't walk past him and don't keep him on-screen for too long. Otherwise, he attacks.
The boss here is Flame Moth. Equip the Batarang, then stay on the left or right side of the screen to avoid his dive and spread shot attacks. When he gets close, hit him.
Stage 2
The stage starts with the Batmobile shooting a hole into a metal door to allow the Batmobile in. Once Batman is inside, it's time to get into the Axis Chemical Factory.
The green guys with the claws will stop to slash at you if you're close enough. Be ready to punch them multiple times so they don't do that.
Your jumping skills will soon be put to the test. Watch out for the acid droplets that drop from the ceilings and the underside of some platforms; they will hurt you.
The wires with the electricity coursing through them will zap you if you touch them.
The machines with the tridents on them will extend their tridents out a little bit if you get close enough. Prepare to learn how to wall jump...and fast.
The conveyor belts will move Batman around, and the circular saw blades on the walls, floors and ceilings will hurt you if you touch them.
The second boss is the Machine Intelligence System of the Axis Chemical Factory. Switch to the gun and shoot at the twin turret directly across from where Batman starts. Duck every time you shoot. The upper turret fires twice, followed by the lower turret always firing twice before the pattern repeats. From there, move to the upper conveyor belt and shoot at the blue light on the left wall with Batarangs. When you destroy that, the electric barrier near the last part will go down. Avoid the last part's three way shot and attack the blue light when it opens up. To do that, you'll have to get close - but not too close - and punch the blue light. Duck to avoid the three-way shot. If you don't take any damage, you're in the right position. This one's over.
You'll then see a cutscene with The Joker, then you'll be in the sewers.
Stage 3
The big jumping guy can be easily passed by, but in case you can't get him out of your hair, be ready to throw Batarangs at him. If you pay attention, you can tell where he's going to land when he jumps. You may have to fight these guys, so be ready.
The rotating blades on some walls and ceilings will hurt you if you run into them.
The tanks in the third section will shoot fireballs downwards. Shoot at them with the gun.
Saturday, January 6, 2018
Cornshaq plays The Adventures of Tom Sawyer
Today's Tom Sawyer gets high on you, the space he invades, he gets by on you.
Wizard of Oz wasn't the only thing that Seta has taken extreme liberties with. The Adventures of Tom Sawyer for NES also got that same treatment.
In this game, you play as Tom Sawyer, who has to rescue Becky from Injun Joe. Of course, this is all a dream, as Tom Sawyer falls asleep.
In case you're playing a two-player game, the second player will be Huckleberry Finn.
Stage 1
The game begins on a pirate ship.
You can throw rocks, but they have a quick, falling arc.
Jump over the barrels and mice, and throw rocks at the pirates.
Pick up the T's. 100 gives you an extra life. The four-digit number above the number of T's you've collected indicates how much time you've taken through the stage.
Wait for the pirates to pass by before climbing up or down a ladder, whenever applicable.
When fighting the giant mouse, stay near the bottom and avoid the soundwaves it shoots. Jump up and throw rocks until it dies.
You'll be seeing a couple of octopi. Take your time here so that you don't get pelted by their rocks.
When you reach an all-black section, you've reached the boss. The first boss is a giant octopus. Stand near the octopus, destroy or avoid the babies it launches at you, and keep throwing rocks at the giant octopus' eyes until you beat it. As long as you repeatedly throw rocks at it, it won't be able to hurt you.
When you beat a stage, you'll find out how fast you went, both for that stage and through all the stages in general. There are six stages in all.
Stage 2
You'll be riding on a raft down the river...and it's gonna get nasty.
Throw rocks at the logs and fish. You still have a limited range in these top-down raft stages, so be careful.
You can jump to avoid bridges and other low overheads, as well as the paddles that sweep back and forth in the water.
The heart gives you temporary invincibility. The slingshot gives you faster ammo that moves all the way to the other side of the screen.
Watch out for the whirlpools. Also watch out for the flogs that jump from one island to another.
The boys that are on land will throw rocks at you. Watch out for their projectiles, especially if you take the left path on the second fork.
The boss is a giant crocodile. To kill it, repeatedly throw rocks into its mouth between its front teeth. As long as you don't run into it, it can't hurt you. The mini-whirlpools it shoots out only push you back.
Stage 3
Here, you'll be dealing with the local wildlife. As long as you jump only when necessary and don't jump into any enemies, and stay low to the ground when you have the multiple platforms shortly after the beginning, you'll be able to get through this area pretty quickly.
The skull icon takes away all your T's.
Take the top path after jumping across the mushrooms. Ditto when jumping across the tree branches.
The boss is a giant gorilla. Throw a rock at his face, then throw another when it stops flashing. In case it throws the rock that will break apart, just stay to the right and you won't take damage. A few hits will do the giant gorilla in.
Stage 4
If the candles in the background shoot flames, just stand directly below them. The fire will not hurt you.
If you see the skeleton knight, keep attacking it until it dies. You shouldn't have too much to worry about.
The witch takes four hits to kill.
Take the top path when you reach the broken stairway near the end in order to avoid most of the enemies. Jump over the spider when it goes down.
The boss is a demon statue. Attack the orb on the trident. When it summons a devil, avoid the projectiles and tiny demons they create and throw rocks at the devil. After that, attack the orb on the trident again.
Stage 5
This stage is in the clouds. Watch out for the birds as well as the water droplets.
The clouds shoot four lightning bolts. Stand directly below them.
Keep running to the right to avoid the stars. Jump over the fireballs that shoot out of the volcanoes if you have to.
Watch out for the clouds that change into dragons, as those things will attack you.
To kill the guy flying around on the cloud, stand on the far left side of the cloud and throw a rock at him when he's lowered down. One hit will do him in.
Grabbing the balloon will turn it into a cloud. You can move in eight directions now. You'll face a blimp. Throw rocks at the cannons when they open, and take care of anything else that shoots at you.
Throw multiple rocks at the blimp engine to end the level.
Stage 6
Now for the cave.
You'll be zig-zagging down the cave.
Take your time on the top level so you can avoid the bats and scorpions. Run away from the bats that hang on the ceiling.
Watch out for the fish that jump out of the waterfall.
Keep running in the ice section to avoid all the spikes, as well as the snakes.
To beat the fire dragons, stand on the middle platforms and keep attacking until you destroy them all.
You'll then face Injun Joe on a dinosaur. Keep jumping and fire at him, and stay close to avoid the arrows. You'll be reunited with Becky, and the dinosaur will smile at you, too!
The end has Tom Sawyer waking up, with Injun Joe's feathers on his desk. Was this a dream? Who knows...?


Thursday, December 28, 2017
Cornshaq plays Kung Fu
Here's that NES beat-'em-up classic Kung Fu, also known as Kung Fu Master and Spartan X.
You are Thomas, and you must save your girlfriend Sylvia from the evil Mr. X! Travel up five floors, defeat the enemies, avoid the dangers, and beat Mr. X at his own game!
Game B is harder than Game A as enemies are faster and more numerous. 2-Player Mode is, of course, alternating.
You do have a life bar, so you won't die in one hit unlike other games from the time this game came out.
Use Left and Right to move. Press Up to jump and Down to crouch. A lets you punch and B lets you kick.
Floor 1
The enemies here are pretty easy. Punch or kick them when they get near you.
If you see the knife throwing guy, you'll want to take him out immediately. Duck under the high knives and jump over the low ones, and immediately attack him twice to defeat him, unless you want to be stabbed at point-blank range.
The boss is some guy with a stick. Get close so he attacks, then move back when he rears the stick back. When he attacks, smack him immediately, then move away when he rears back again. Repeat until he's dead.
Floor 2
The pots can easily be broken with a punch or kick while still in midair.
The green ones send out a snake that comes after you if they break. You can jump over them, or you can crouch and kick them to get rid of them.
The greenish-yellow disk-like objects can also be destroyed, but if you can't get them in time, they release a dragon that spits fire and disappears. If you're near one, duck down to avoid the flame and attack it immediately. The yellow ones that shake in mid-air are the worst. If you don't take them out right away, they'll split into a downward three-way shot that does a lot of damage if the shards hit.
Midway through, you'll meet the normal enemies.
To beat the boss, duck over the first boomerang, jump over the second, then immediately pummel him repeatedly. Dodge the boomerangs when they return.
Beating this stage will give you a cutscene, then it's on to Floor 3.
Floor 3
The green midgets show up here. Their flip attacks do a good amount of damage, but most of the time they'll stay low to the ground and vulnerable to a crouching punch or kick. If they show up in packs, at least one of them will do the attack. You can stand up to hit them with a jump kick or punch, assuming you can do so in time.
The boss is a heavy-set guy in a wifebeater. Get in front of him and duck under his punches, then attack him as he punches. If he kicks at you, you can jump over the kick or back away from him.
Floor 4
The hornets take one hit to kill. Punch or kick them when they're at attack level. If you need to, crouch down.
Halfway through the stage, the hornets will stop showing up. You'll eventually meet a hunchback who can throw fireballs. Get in front of him, duck to avoid his fireballs and attack. When he teleports, watch for where the cloud is so you can get in front of him when he reappears. Keep crouch attacking until he's dead. If you use a standing attack, he'll just keep teleporting, so remember to duck for the whole battle.
Floor 5
After the cutscene repeats, it's the last floor. Try to take as little damage as possible.
To beat Mr. X. Get in close and crouch kick from a distance. Hit him a few times, then back off from his attack. Repeat until he's dead. He slowly regains health, too, so keep that in mind.
When you beat Mr. X, you'll save Sylvia. From here, you'll go back to Floor 1 and play the game all over again.


Wednesday, December 27, 2017
Cornshaq plays The Untouchables for NES
Remember the movie "The Untouchables?" Well, there was an NES game based on it.
Scene 1 - On The Street
There are a few streets you'll have to clear of gangsters...but watch the timer. You only have about thirty seconds before time runs out.
You have up to two shots, and you'll have only two shots before you have to hide behind the building and reload.
The first street has three enemies, the second street has five, and the third street has eight.
This takes quite a bit of practice, but once you've got this one down, you'll be able to beat this stage without too much difficulty.
When you complete this scene, you...go back to the title screen? Believe it or not, this is going to happen every time you finish a scene. Press Start, and you'll start Scene 2. You'll have to do this every time you clear a scene, and it's very annoying.
Scene 2 - The Warehouse
You're now in a side-scrolling scene where you shoot enemies. There are two kinds of enemies: the guys with the yellow hats, which try to take you out, and the guys with the grey hats that drop evidence (the grey pieces of paper). You'll have to collect pieces of evidence to complete the screen to get 100% of the evidence.
Sometimes the yellow hat enemies will drop enemies when you kill them. That's nice, considering that you have a limited amount of ammo, and as long as you don't miss, you'll be able to get enough ammo to complete the level.
Even though there are two floors, stay on the first one. You'll encounter all the enemies you need to shoot down and complete the scene with here.
Scene 3 - The Border Raid
You'll have to shoot the bottles to find evidence, but there are a ton of enemies trying to kill you. Keep rolling around, and take out any bottles whenever you see them.
You have four characters to choose from instead of just Elliot Ness, so if you get killed off you'll still have three characters in reserve. Switch characters when your health gets low to restore that character's health and get a new health bar.
You'll have to shoot about 25 bottles in order to get 100% evidence, and you only have 4 minutes to complete the scene. At least you have unlimited ammo, so hold the fire button so you can tell where you're shooting. Just keep rolling every so often so you can delay being near death.
Scene 4 - The Alleys
This is just like the first scene, except you can switch between characters and you can earn bonus time for subsequent streets by going through each street as quickly as possible. You'll want to have a lot of seconds on the clock, so you can add the remainder of how much time you had left to the next street, allowing you to take your time.
The first three streets are the same as Scene 1, but there are eight streets. Street 4 has 10 enemies, Street 5 has 15 enemies, Street 6 has 20 enemies, Street 7 has 24 enemies and Street 8 is the boss.
Street 8 is easy when you know where the boss is going to stand. Shoot him twice whenever he gets close, and you should have him. Just watch your health.
Scene 5 - The Railway Station
Here, you'll be guiding and defending a baby carriage. This carriage will continue moving, and you'll want to keep it away from both walls and enemy bullets. At least the baby has a health meter, but it can still be difficult.
Just keep walking into the carriage in order to guide it, Walk behind the carriage so it doesn't tip over the stairs, and keep it away from walls so the baby doesn't fly out. Either scenario will cause you to start the scene all over again.
You'll definitely be going through this level a lot in order to memorize the level and figure out how to guide the baby carriage so it doesn't run into anything, as you'll be going through some tight avenues with enemies shooting you down at every turn...but it can be done.
Scene 6 - Free the Hostage
You'll have to hit the hat of the guy in brown...but you have only one shot. If you miss, you'll have to start this scene over. There is a practice round that you can access by pressing A instead of B. Keep playing it until you're ready.
You'll want to get a clear shot of the guy in the yellow, and you'll want to take it as soon as you can. When you do, you'll be able to save the guy in gray, who is a vital witness. Again, you only have one shot. Make it count. Move the gun up and down and you should be able to get it in.
Scene 7 - The Rooftop
You have limited ammo, but it's like the alley levels. Shoot Al Capone when you have a clean shot. You have only six bullets, and you can't waste a shot.
When you shoot Capone, you'll push him back. After six shots, you'll push him over the balcony of the building. You've won!

Wednesday, November 22, 2017
Cornshaq beats Doug's Big Game in less than four minutes
There is a bit of a lag between input and what is actually shown on the screen. Forgot about that. Whoops.
But yeah, if you know exactly what you're doing, speed through the text get the right missions, you can beat the game in less than four minutes.
Sunday, November 19, 2017
Cornshaq plays Back to the Future III for Sega Genesis
You thought Karate Kid was hard? Here's the real four hardest levels to make up an entire game ever!
Level 1
At the beginning of the game, you'll play as Doc Brown, chasing after the You'll have to duck the birds, shoot at all the tomahawks, grab all the items you can, jump over the gaps and other obstacles lying on the ground, and shoot down the enemies behind you while ducking their bullets.
This level takes complete memorization to beat in one shot. Being knocked off the horse really sucks, because if you get knocked off the horse just once, it's enough to keep you from saving Clara Barton and continuing the game.
The hazards always show up in the same place every time, so it's a huge matter of memorizing everything for this level.
Level 2
Here, you shoot one of Colt's patent firearms for target practice. You'll want to shoot down everything you can, including the gunman targets, the big birds that fly up and the colored birds that show up at the bottom. You'll have to press another button to switch between shooting low and shooting high.
The ducks at the bottom give the lowest amount of points, but if you can get a chance to shoot them, do so. You'll be shooting a lot of bullets here, and while there's also memorization here, there's not as much to remember.
The anachronistic items show up at the bottom near the end. You'll want to shoot those down, too.
You have to reach a minimum score (as dictated in the upper-left corner), but as long as you can successfully shoot everything down, it shouldn't be much trouble.
Level 3
For this level, you'll be throwing pie plates at Beauford "Mad Dog" Tannen's henchmen. Use the Control Pad to walk around as well as to aim. You'll only be able to take a few hits to the metal serving tray, and once it's full of bullet holes, you're one hit away from death.
There are six henchmen in the portrait to the upper-left. As you finish one off by throwing enough pie plates at him, the others will pop in and out as well as shoot at you faster. Thankfully, each one always shows up in the same spot.
To reload pie plates, simply walk up to the stack of pie plates on the table.
You'll want to reload after you finish off all of the henchman, since you'll have to take on "Mad Dog" Tannen himself. You'll have to hit him six times before he punches a whole bunch of holes into the metal serving tray. Walking to the far left side and hitting him from there usually helps.
Level 4
For the last level, you'll have to go back...but there's trouble with the train: it can't reach 88 MPH!
You'll be going across the train, throwing pie plates at bad guys and increasing the boiler temperature along the way. To increase the boiler temperature, you'll have to pick up gray, striped discs in order to bring it up. To do that, walk up to the gray discs and crouch down on it. The color of the stripes will always match the next value on the boiler temperature gauge, and you must collect them in order or else you won't be able to complete the level and the game.
On top of that, there's a timer for this level that you'll also have to beat. You'll have to be quick to increase the boiler temperature all the way to the maximum.
When you increase the boiler temperature, smoke will blow from the left to the right, the color matching the current value on the temperature gauge, indicating you did just that. Watch out for the smoke, because it can knock you down as well as the enemies. At least you can crawl by holding the diagonal down directions on the Control Pad.
Enemies can also be taken out by the train steam, but they can also get knocked off by walking off an edge at the top of the train.
You'll fist-fight with enemies if you strike them in close.
Jump over the posts when you're at the top of the train to keep Marty from being knocked off the train for a few seconds. If he gets knocked off, it'll take a few seconds for him to get back on the train with the hoverboard from the second movie...and those seconds count.
When you reach the engine, walk across carefully so you don't get hit by the highly pressurized geysers of steam that come out of the train. The geysers pop out at random locations, so be careful.
When you reach the other side, you can finally bring the train to 88 MPH and return to the present day! You've won! Enjoy your one-screen ending!

Thursday, September 21, 2017
Cornshaq plays Where's Waldo? for NES
I've been wanting to do this one for a while now. Thankfully, I found a Let's Play that was actually good enough to do this with!
Finally! A game based on Where's Waldo?, also known as Where's Wally? in its native UK.
Believe it or not, the game was developed by Bethesda. Yeah, that Bethesda. Before publishing the Elder Scrolls games, Bethesda was both a publisher and a developer before turning strictly to publishing in 2001. You'd think that since Bethesda is involved here that this would be a good game, but like the other games that they published during the time, this is based on a licensed property, meaning that this is absolute dreck and won't end well if history is to be observed.
The game is just like the book: just move the cursor around with the Control Pad and press A when you think you've found Waldo. Unfortunately, the game falls victim to the limits of the NES hardware, making this harder than it should be.
When you start the game, you get a ticket to the moon...which has a timer that ticks down. This is the in-game timer, and it starts ticking as soon as you start the game! It ticks down on the ticket screen, it ticks down on the map screen, it ticks down when you're looking for Waldo...it ticks down non-stop. If you make a wrong guess while looking for Waldo, you lose 10 seconds. To make matters worse, trying to get back whatever time you've lost is near-impossible and a bit of a gamble.
Waldo's random walking around on the map screen - which you have no control over - is frustrating if you're short on time. I know what level we're going to, Waldo, just get your dumb ass the fuck over there before I turn the damn game off.
It doesn't matter what difficulty you play on, the ending is always the same, which is good because Hard is a nightmare.
Train Station
It should be noted that everything is placed on the map at random, being a Game Pak that has the ability to place stuff at random instead of a book that is always the same every time. This makes playing through the game over and over again a must if you want to beat this game and cross it off your bucket list.
At least Waldo is wearing his red and white stripes here, so that makes it easier when you search for him. He'll usually be standing straight whenever you find him, so keep that in mind.
The Forest
Waldo may be green with red stripes here. If you've been paying attention to the guide so far, this is what I meant when I said that the limits of the NES hardware make the game harder than it should be. There's something to be said for the Super NES's 256 colors here.
The Cave
This stage is different from all the rest. Here, you'll have to move the cursor around as you stumble around looking for Waldo in the dark. Waldo apparently thinks it's funny to walk around in a dark cave while you're looking for him. We'll see who's laughing when you trip and fall and break your glasses on an invisible stalagmite.
When you have Waldo in your sights, press A. You'll have complete control of Waldo. Get him out of the cave by moving him into the white square.
You could grab the hourglass, but this is where the gamble happens. You could gain more time...or you could lose more time than you already have from playing this game and guessing wrong a zillion times. Therefore, the hourglass isn't worth taking the few extra seconds to pick up.
The Fairgrounds
Waldo could be green and white instead of his usual red and white. Heck, he could be any color and white. As long as you know how his posture is, you'll be able to find him.
The City
Waldo may be driving one of the cars or peering out of one of the manholes, as seen in Cornshaq's playthrough of this. Those are two spots he usually likes to hang out on this map.
Odds are good that he'll be colored correctly here.
The Subway
You'll be a blue bullet going through the purple subway baths. Use the Control Pad to move around and switch directions at the black spaces. Press B to rotate the octagons and change the direction you're heading.
You'll need to get both Waldo and his glasses before making your way to the arrow on the right side of the screen. If you run into the evil wizard, you'll start losing a lot of time to the point that it's very, very possible to get a game over on the subway.
The Castle
Once again, Waldo can be one of a few different colors here: red, green or blue. At least there aren't as many people here (or so it seems).
Launch Pad
It's a slot machine. Obviously, you'll have to get all three slots to show Waldo. Thankfully, the order of which the characters show up on the reels is the same every time.
Waldo always shows up after the man with the blue turban, so press A as soon as Waldo shows up to get him to appear when you stop one of the reels.
When you get three Waldos, you've won! Enjoy your crappy one screen ending! Don't question why Waldo wanted to go to the moon, just enjoy it.

Friday, September 15, 2017
Cornshaq plays Last Action Hero for NES - Part 2 of 2
By Jove, this game is bland and uninteresting!
Level 6
You'll have to jump up the slopes in order to move up them, as the hills act like a series of individual platforms.
To beat the boss, which is some guy with a gun, just stay in one spot, duck down and keep punching. He'll be gone in no time and he'll barely do any real damage to you.
Level 7
This is yet another "go up to the next floor for several floors" level. If you don't see a door with an up arrow, there'll be an elevator that only takes you up one floor.
The boss here is the same as the last boss.
Level 8
This is just an enemy gauntlet where the same enemy just drops down over and over from a helicopter that moves back and forth between two spots until you kill everyone who comes down.
They're not even trying anymore.
Level 9
We're back in the real world, and we have to take on Death after a short walk to the right and a couple of punched-out cops.
Death won't be knocked back when you hit him, so just duck down and repeatedly duck punch him.
Level 10
At the end of the first floor, just keep going to the right and you'll end up on the second floor. From there, just keep heading to the left and you'll reach the last level.
Level 11
You're at the rooftop, and it's time to face The Ripper again. The rematch is just like the first battle: just kick him in the face repeatedly and jump over every other axe that he throws.
You've finally beaten this terrible game.

Thursday, September 14, 2017
Cornshaq plays Last Action Hero for NES - Part 1 of 2
Sony Imagesoft, what have you done?
Yep, it's that movie where Arnold Schwarzenegger plays a hero. In this case, he's fictional LAPD officer Jack Slater, the hero inside the movie. He has to help out a kid who gets sucked into the movie, and together they have to stop a movie villian, who manages to enter the real world and tries to kill the real Arnold Schwarzenegger, which would effectively kill off Slater at the same time.
Level 1
The controls are a little wacky here. You jump with the B button and attack with the A button. A does a punch, while Up+A does a kick. While the kick has a slightly longer range, it will sometimes miss completely due to the terrible hit detection in the game.
You'll want to avoid the gunshots and bombs from the guys in the background. They'll be far more likely to kill you than the guys with with facial hair who try to punch you to death in the city streets. You'll have to punch and/or kick enemies when they're a certain distance away from you
The boss here is some guy with a white jacket who takes multiple hits, which are signified in the upper-left corner underneath the number of lives you have left. He fights just like the regular enemies you've fought off on the way here. No surprise there.
You'll be able to refill your health before you take him on. Just pick up the big heart by walking up to it and pressing Down on the Control Pad, and all of your hearts will be refilled. Dying can be a bit of a surprise in this game, as you just lose a life and have your health restored on your last hit, and if you're not paying attention, you'll be short a life and not knowing why.
Level 2
Here, you'll face The Ripper, who throws axes at you. Get close to him, and jump over every other axe. You'll take damage, but you'll be able to get close and beat up The Ripper before he can destroy you. Once you get the pattern down, it's more tolerable.
Level 3
Level 3 has Danny, the kid from the movie, falling asleep in class and having a dream about what he thinks Shakespeare's Hamlet should be like: starring Jack Slater and featuring ninjas and guys with bows and arrows. For this level, you'll have to make it to the flight of stairs leading up at the end of every floor.
Punch the doors to open them. Duck down and attack to beat up the bow and arrow guys as well as anyone below you if you're standing on a bed.
The mid-boss as well as the boss are both guys with swords. Just stand in one spot and kick these guys to death when you have them close enough to you. You'll more than likely keep them from moving past you.
Level 4
We're in a graveyard now. Why?
Just go right and you'll fight a balding guy with red facial hair. Just stand in one spot and kick him to death.
Level 5
Now we're in the movie. Even though the game follows the movie fairly well, you don't get much of an explanation as to what's going on, and the game just magically skips from one section of the movie's plot to the next as if you're being jerked around.
The bad guys here can shoot at you, so watch them and duck if you see bullets. You'll bounce off the couches and beds if you stand on them.
The boss is another bad guy with a Hawaiian shirt on. Just duck down and repeatedly punch.
Saturday, September 9, 2017
Cornshaq plays The Little Mermaid - Part 2 of 2
Told you this was an easy game.
All maps by Will Mallia.
Stage 4: Undersea Volcano
After Stage 3, Flounder will tell you there's serious stuff going on at the undersea volcano area. That serious stuff comes in the form of erupting undersea volcanoes. At least the fireballs from them are easy to dodge, as they come out very slowly.
You'll also see sandfish hiding in some sand pits in this stage. If you don't get close enough to them, you won't have to worry about sand popping out before they rise up to hit you.
The shrimp are the most annoying enemies in the game. They move quickly in your direction after they stand still for about a second.
The boss here is a fish with a music conductor's rod. He'll command the cannons on the sunken ship to shoot at you. Avoid the urchins and encase the fish that are shot out of the cannons with your bubbles, then send them back at him. It only takes a few hits to take this guy out of commission.
Stage 5: Ursula's Castle
Go right until you find a door with flashing eyes. Go in, then go back through the door. You'll be in an enclosed area. Go through the door again and you'll finally be on the right track. The rest of the maze is pretty straightforward.
Aside from the sleeping fish that shoot three miniature fish at you, there isn't much in terms of new enemies.
Ursula is dead simple. She shoots a bunch of spiked balls that turn into fish, starfish and sea urchins, but everything's really easy to avoid. Encase the fish in bubbles and shoot them at her head. That's it, honestly.
But just when you think you've got this won, you have to face a much larger Ursula with a trident.
Believe it or not, she's even easier. All she does is send fish (and nothing else) at you from both sides of the lower half of the screen and change the current of the water, making it a little bit more difficult to move around. Unfortunately, that's all she does, and you can just encase the fish in bubbles and send them flying towards her head.
When you beat Ursula a second time, you've done it! You've won!

Friday, September 8, 2017
Cornshaq plays The Little Mermaid - Part 1 of 2
Didn't think you'd see this as a Nintendo Entertainment System game, did you? Ah, but it was...and it's not that bad!
The game takes place after the movie, it seems. Ursula is back, and she's taken control of the fish and making them do her bidding. If she isn't stopped, she'll eventually take over the whole sea. Ariel becomes a mermaid and heads back into the sea to stop her.
Being meant for little girls, this is probably the easiest of the Disney games...but it's actually really fun if you like Capcom's Disney-based material.
All maps by Will Mallia.
Stage 1: Sea of Coral
Well, you're underwater, so feel free to move in any direction you need to. Ariel can move pretty quickly if you need her to, and it's like a shoot-'em-up where you can move in any direction as well as turn around. It really makes the game easier to get into.
Though you have five hearts for your life bar, you'll always start with three. This happens whenever you start a new stage. You can find hearts in certain areas that will be able to add one heart to your current health.
The enemies are pretty easy to deal with for the most part. Most of them will just swim towards you, but a few of them, such as the octopi, will shoot projectiles. You can fire bubbles at enemies with your tail, trapping them inside a bubble and allowing you to grab them to either throw them into a ceiling or at other enemies or hold them in your hands and ram through them. You can also pick up conch shells that you may find to do the exact same thing, but they also let you break open the chests to get treasure and health, so you'll definitely need them. The treasure just adds points to your score.
The red and green pearls are the most useful. The green pearls give your bubbles increased range, while the red pearls give you increased power. You can only have range or power...not both. You can increase your range or power up to three times, and if you switch from range to power (or vice versa), you'll increase the new stat while the old stat goes back to normal.
The Ariel doll, if you find one, will grant you an extra life.
The octopi will be the first of the bigger normal enemies in the game. Unlike the smaller enemies, the bigger enemies cannot be encased with the bubble attack. Instead, you'll have to encase a smaller enemy and let them loose on the bigger ones.
The boss here is a shark. He takes four hits to defeat. He sends fish after you, which you can then attack with bubbles and send into him. He'll move to the other side of the screen and send more fish at you, but he's a real pushover.
When you beat a stage, you'll get a stage clear bonus as well as bonus points for any treasures you collected.
Flounder will tell you that Urusla is headed towards the sunken ship.
Stage 2: Sunken Ship
Hit the barrels with your tail to send them moving. They can get rid of enemies and also open chests if they run into one.
You can leap out of the water and onto dry land, but if you do that, Ariel will just hop around in the direction you move her until she enters water again. If there's a conch shell in the way, Ariel will push it forward. When it drops into the water, you can use it to open a chest and take down enemies on the way. Much like the smaller enemies, you can send them upwards, which is useful for reaching treasures on dry land. Just send them up through the surface of the water towards the chest.
The sea urchins move across floors and are indestructible. At least they aren't very big.
There are certain gaps in floors and corners where you can drop conch shells and bubble-encased enemies to get power-ups. You can get hearts to refill and extend your health this way, so give it a go.
The boss here is Ursula's pet eels, Flotsam and Jetsam. They'll always change places as crabs drop from the ceiling. Hit the crabs with the bubble attack when they stand up, then toss the crabs at them.
When you beat this stage, you'll find out Ursula has frozen the sea. Yes, even though the game takes place almost entirely underwater, we still have ice physics.
Stage 3: Sea of Ice
Well, at least the ice physics apply to the platforms only. You'll hop a little farther on dry land, but not by much.
At this point in the game, you'll come across treasure chests that contain nothing in them. Once you get used to where everything is, you'll know which to avoid. They usually show up in areas where there are two chests nearby, but only one conch shell.
The seahorses will usually move downwards when you move towards them if you time it right, so getting rid of them isn't a problem.
The boss here is a walrus. Use the conch shells he sends at you and throw them back at him. The frozen fish in the ice cubes cannot be used against him, so just wait for the conch shells to come down and hit the boss with them. Yet another easy boss.
Monday, September 4, 2017

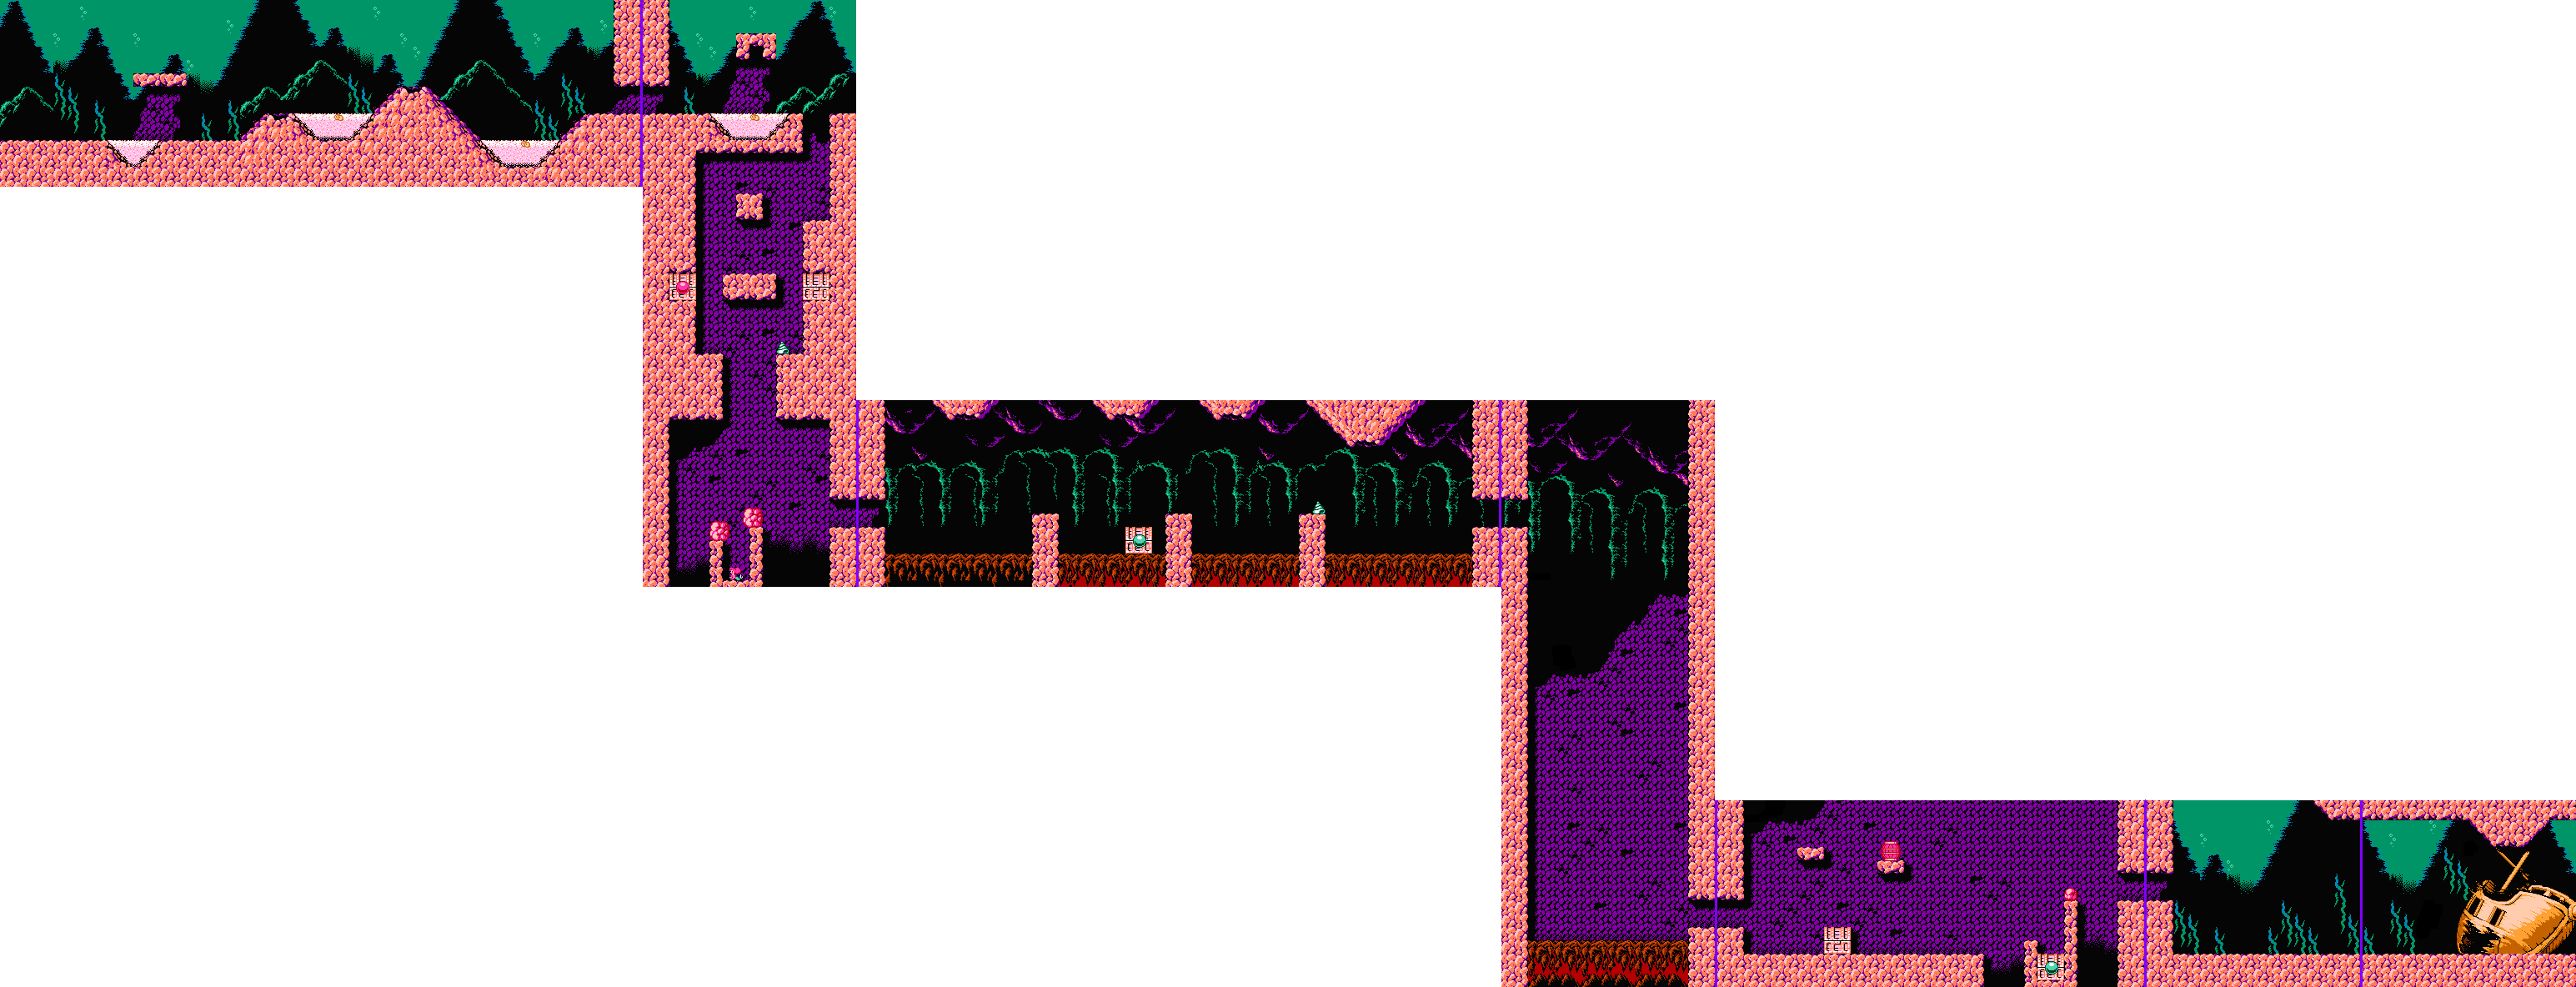
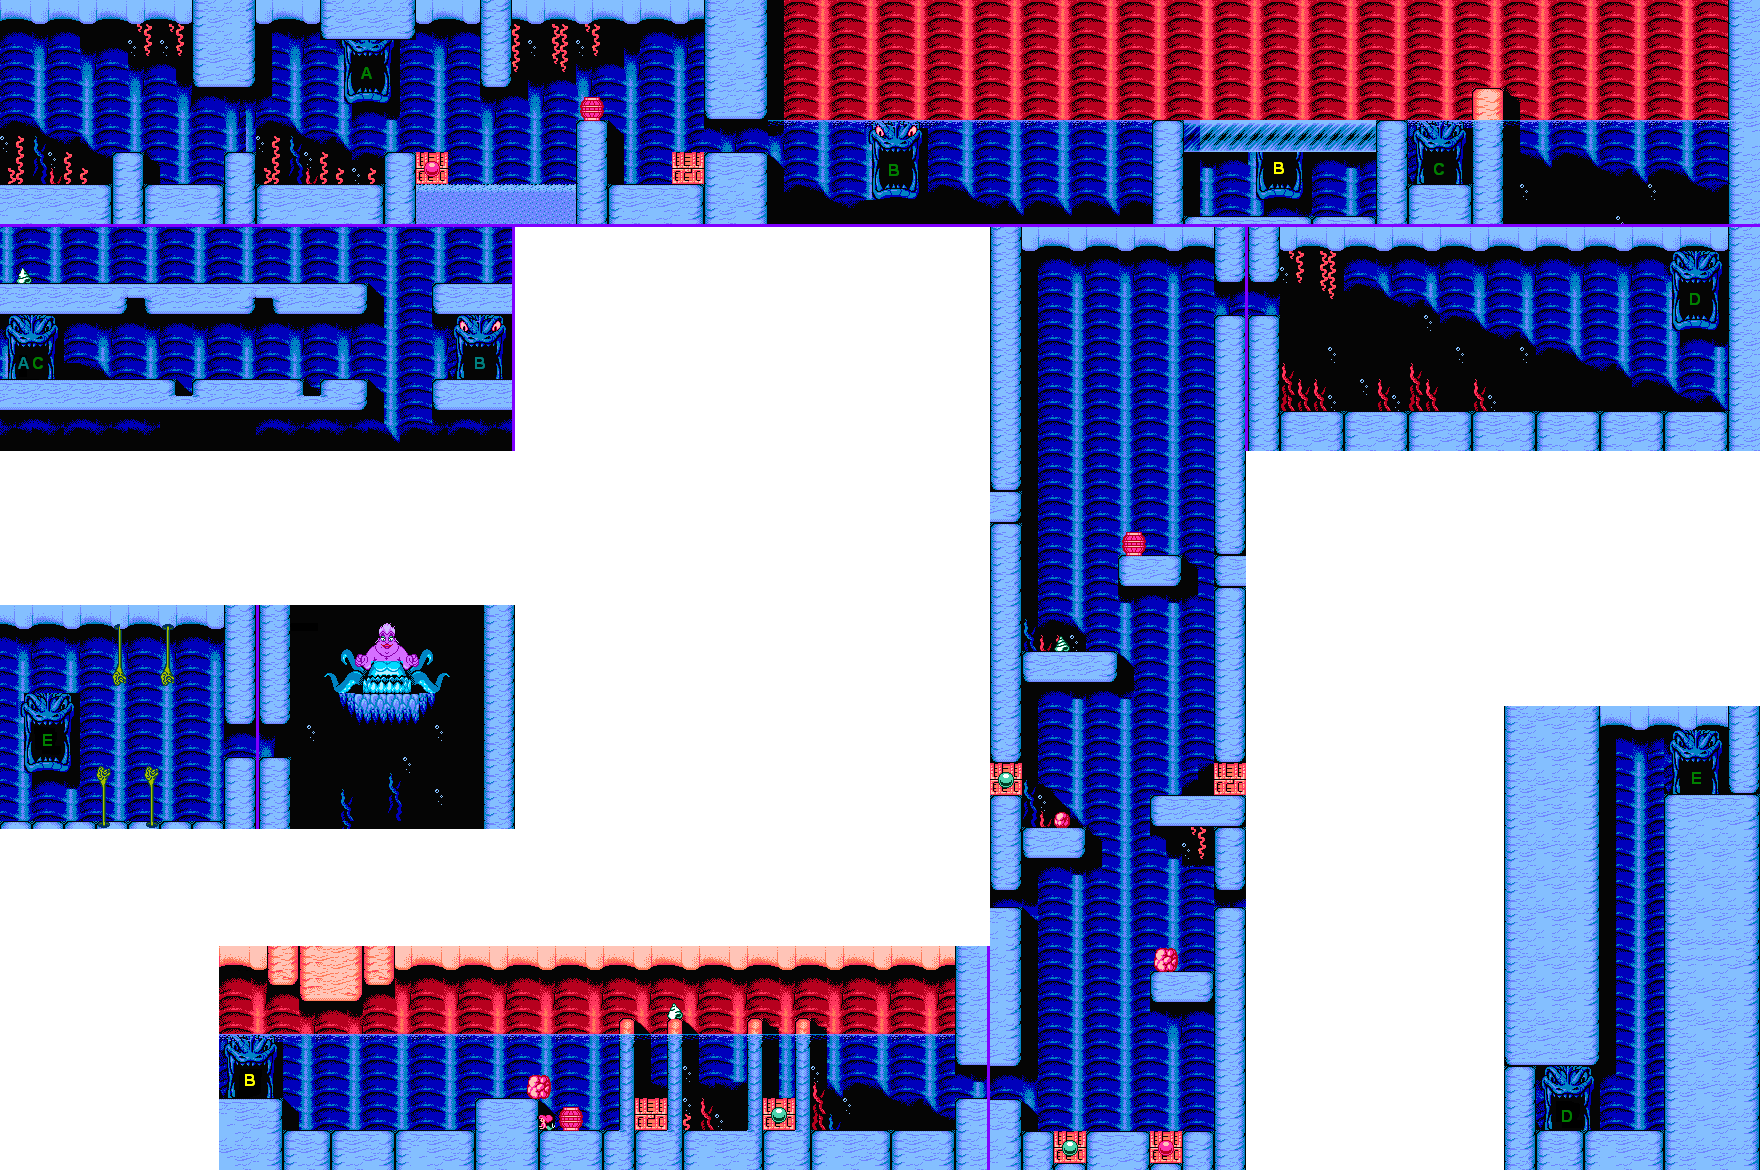
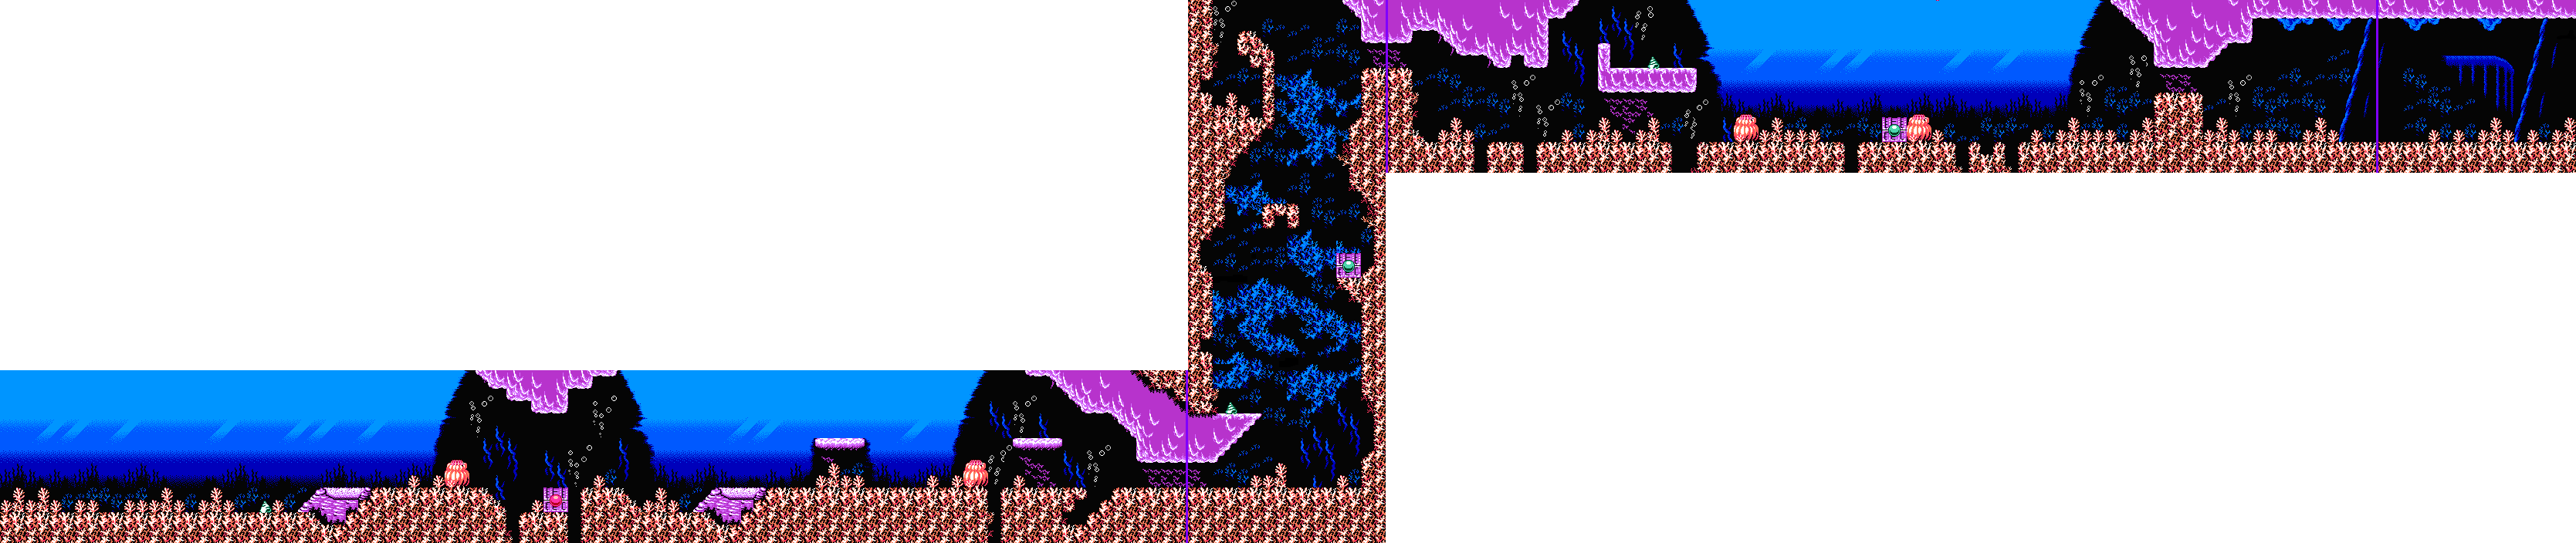


Cornshaq plays Ninja Gaiden for Game Gear - Part 2 of 3
Well, this didn't take long.
Act 4 - Counterattack
You'll wake up in India, a prisoner of Central Commmand. The man who confronts you has no choice but to eliminate you.
Collect whatever power-ups you need, then go to the right. You'll face the Indian guy from earlier, who flies on a magic carpet and shoots fireballs downward. The upward-facing chevron is the best weapon, since you can hit him directly from below. He shoots fireballs every so often, so stay on the move.
The second form is three face inside the statue at the lower-right. These things will shoot fireballs at you every few seconds. The fireballs will go low, medium, high, medium, low, medium, high and just keep going up and down like this. Jump over the low and medium fireballs and strike the heads with either your sword or your Force power-up.
During the second form, there are some gems that contain more power-ups, including a 3-way shot and a scroll for 30 Force. You'll definitely need these for this form of the boss.
After the boss, you'll find out that nations are preparing for war against the evil Siragane, who is the mastermind behind this whole plot.
You'll soon be able to move again. Head to the right, avoiding spikes that move up and down as well as falling rocks that come down when you get close enough. You'll be dealing with the birds again, too.
Some of the columns you'll be climbing on have certain parts that are a solid color without the brick pattern, and two red lines on the top and bottom. You can move to the other side on these partitions to get to the next column. You'll have to switch back and forth to both avoid some of the falling rocks and trigger their falling animation at the same time.
The skulls on the columns shoot fireballs that can be easily avoided if you don't go too fast, or if you double back on the partitions in the columns.
You'll find the upwards boomerang from the last battle midway through the stage. You'll need this for the final boss.
If you're quick enough, you can get past the climbing guys that drop down and kick you without taking damage. Just get to the next pillar as quickly as possible and you'll usually avoid them.
On the last pillar, climb all the way up before jumping to the right so you don't fall into the pit near the door to the final boss.
The final boss is Siragane himself. He wants the Dragon Sword to boost his power by nearly double and control minds, and just bringing the sword to him ups his power.
Siragane moves back and forth at the top of the screen. He will fire lasers down from his hands at the left, middle and right sides of the screen whenever he reaches them, but they are easily avoidable. Use the upwards boomerange to easily hit him, and you'll soon face his second form.
The second form is mostly the same, but he fires fireballs in an arcing pattern when he's in the fireballs.
His third form fires nothing but fireballs. The first six fireballs fire all at once and at different angles, depending on where you are. The second four fire slowly and fixate on your current position. Stay on the move and keep using the upwards boomerang, and if you run out of Force, switch between moving away from the fireballs and jump slashing Siragane's face.
When you beat the third form, you've done it! You've won!
Sunday, September 3, 2017
Cornshaq plays Ninja Gaiden for Game Gear - Part 1 of 3
This time around, an evil organization planning on starting World War III wants the power of Ryu Hayabusa's Dragon Sword! It's up to Ryu himself to stop these madmen!
Act 1 - Assault
This game plays differently from the other Ninja Gaiden games. Ryu seems to both move and cut through enemies a lot more quickly, which is interesting considering that we're playing on the Game Gear.
Slash at the gems in the air to get Force replenishment and weapon power-ups. The blue orbs give you 5 Force, which works just like the Ninjitsu in the other games from this time. Red orbs give you 10, while scrolls give you 30. The maximum Force you can have is 99.
The shuriken is your everyday normal shuriken. The chevron that is pointed upwards is a wave that can be shot into the air. Using your Force weapons is a little different in this game, as you have to hold Down on the Control Pad instead of Up before attacking in order to use them.
There are two types of ninja enemies in this act: you'll have ninjas running at you as well as ninjas jumping and down with their blades pointed at the floor. Also, is it me, or do all the ninjas (including Ryu) wear no shoes?
You can also climb walls in this game, much like in the second and third games for the NES.
The blue bottle will restore your health.
When you enter the shrine, you'll face a boss. To beat him, simply get up close, then immediately move away. Strike him as soon as he rears his club back.
When you beat the boss, he'll tell you to head to Kobe Harbor to find more answers as to why someone is after your sword.
Act 2 - Smuggling
Before the level begins, Ryu uses the Dragon Sword to look for a source of evil. He spies it on a nearby ship.
There are guys with crew cuts that throw Molotov cocktails and shoot at you. Those guys are pretty easy, but the real enemies here are the orange scuba divers that snipe at you with their harpoon guns as they leap in and out of the water. You'll have to play through this level a couple of times to see where they'll appear.
The pyramid made of three flames is a temporary fire shield. With this shield, you can run through enemies and destroy them for a limited time. Use it to get closer to the end of the act.
You cannot walk on the red ropes between the boats, so don't even bother.
The icon with the three bullets is a three-way shot. You can take care of both grounded and airbourne enemies at the same time with this.
The boss is some sort of strongman. Avoid the fireballs that shoot down from the smokestack of the ship, and hit the strongman with your sword when he pops out of the window to throw Molotov cocktails at you. As long as you pay attention to what's going on, this shouldn't be a difficult battle.
When you beat the boss, you'll find out Totenkof (who Ryu just fought) is an arms dealer.
Act 3 - Skyscraper
Someone will try to contact Captain Totenkof. Ryu pretends to be Totenkof to find out some more info. Mr. Tsin is wanting a special shipment from Totenkof.
A few hours later, Ryu finds Mr. Tsin's office building.
The office windows flickering from one side to the other is a PC issue on Cornshaq's end.
In this level, Ryu will be climbing up two buildings. You'll be switching between them constantly to avoid falling vases, fire extinguishers, birds and martial artists that try to dive at you from the top of the screen. Dodge the martial artists as as they fully show up on screen.
The heart with the word "1UP" below it is an extra life.
The boss here is Mr. Tsin. Get close, slash him, then immediately jump over his bullets and slash him again. Once you get the timing down, you can take Mr. Tsin down flawlessly.
Mr. Tsin has a second form where he goes from a business suit to a martial arts uniform. Even though he shoots out energy waves, the tactics are still the same, so keep up the pressure on him.
When you beat Mr. Tsin, gas will fill the room...
Sunday, July 9, 2017
Cornshaq plays 8 Eyes - Part 4 of 4
It's time to head to the House of Ruth and place the jewels!
All maps by Loquo.
The House of Ruth

If you couldn't tell by looking at the map, it's a boss rush, er, Duke rush.
There is a lot of hope riding on these battles, however. You have maxed out maximum health, all weapons, and full item energy at the beginning of the level.
When you beat a Duke, always grab the cross he leaves behind. This refills your health and item energies. There is also an S Drink hidden in every room in case your health gets low, so your really have no excuse to lose here.
Remember the Duke from Italy? All you have to do is stay away from the panther and trap the Duke in the corner so you can slash him to death! The panther won't even leave the upper level!
To beat Ruth, just throw the white orb at her and strike her repeatedly. Her attacks are much slower because she'll constantly be flashing. She'll fall before you do, and you'll get the last jewel from defeating her.
You'll then have to play the jewels in the proper order. The correct order is yellow, white, green, orange, blue, purple, red, black. Here are the clues again:
"Between Green and Purple are two jewels."
"White, Orange and Purple are all separated."
"White is next to Yellow."
"Black is next to Red."
"Purple is next to Red."
"Between Black and White, there is no Yellow."
"Black is on the far right."
Black is on the far right side. Red will obviously be next to that, and next to red will be purple. Green will be two jewels away - to the left - from purple. The two jewels green and purple will not be both white and orange specifically, meaning that those two colors of jewel will be in places away from each other. Through process of elimination, white will be kept away from between green and purple, and yellow will be right next to it on the far left. Orange will be between green and purple after all, but it will not be next to white. This leaves only place where blue will be: between green and purple.
When you get the order right, you'll beat the game and get the password to the second quest: TAXANTAXAN. You have to beat the game three times to get the true ending (much like the four times in Mystery Quest, which Taxan also published, even though the two games are from different developers). Again, it's barely even worth it. Just enjoy the fact that you've beaten it once and be done with it.

Saturday, July 8, 2017
Cornshaq plays 8 Eyes - Part 3 of 4
We complete the remainder of the regular stages before taking on the House of Ruth!
All maps by Loquo.
Africa (continued)
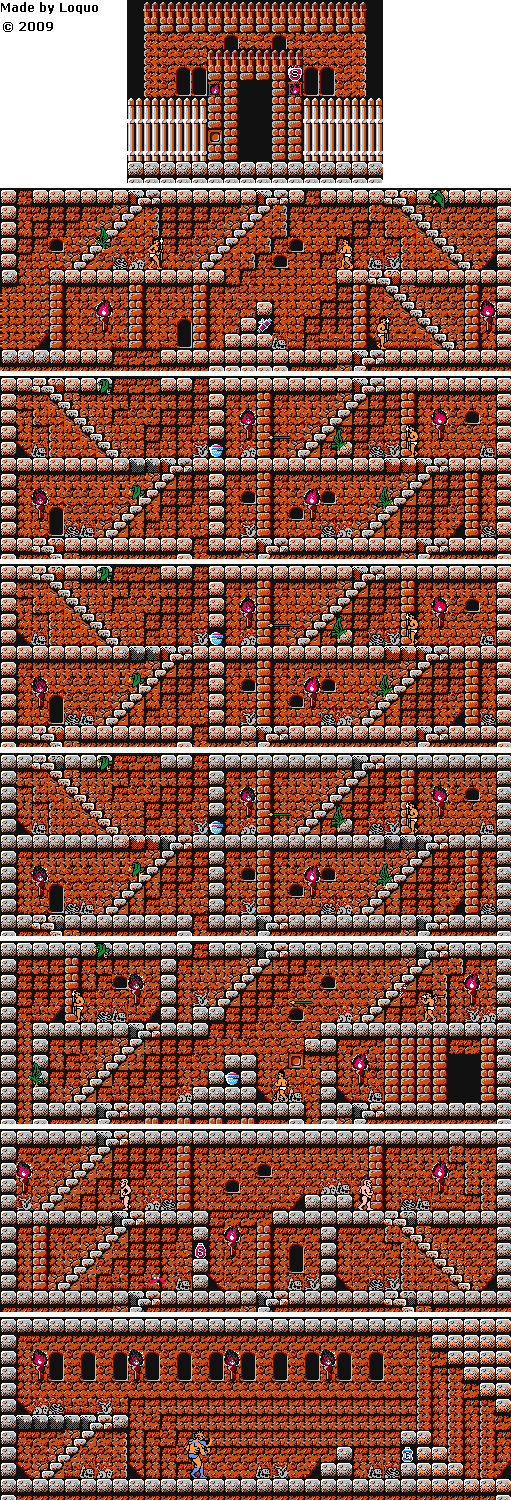
Go left, duck down and hit the wall for another Blue Sphere if you need to extend your health even more.
From there, keep heading up. Drop down at the pit in the upper level and attack the wall to the left to get an S Drink. Go down the stairs and then go down one level. Repeat what you did to get to the boss. When you reach the stairs going up and to the right, go up them to fight the Duke. Strike the left edge of the bricks near the door to enter the Duke's room.
Near the entrance, strike the wall to your right to get a G Drink. Let loose on the Duke, then use the white orb on him if your invincibility runs out. He should be easy to defeat before the G Drink wears off, as he stands around when he attacks you.
Germany
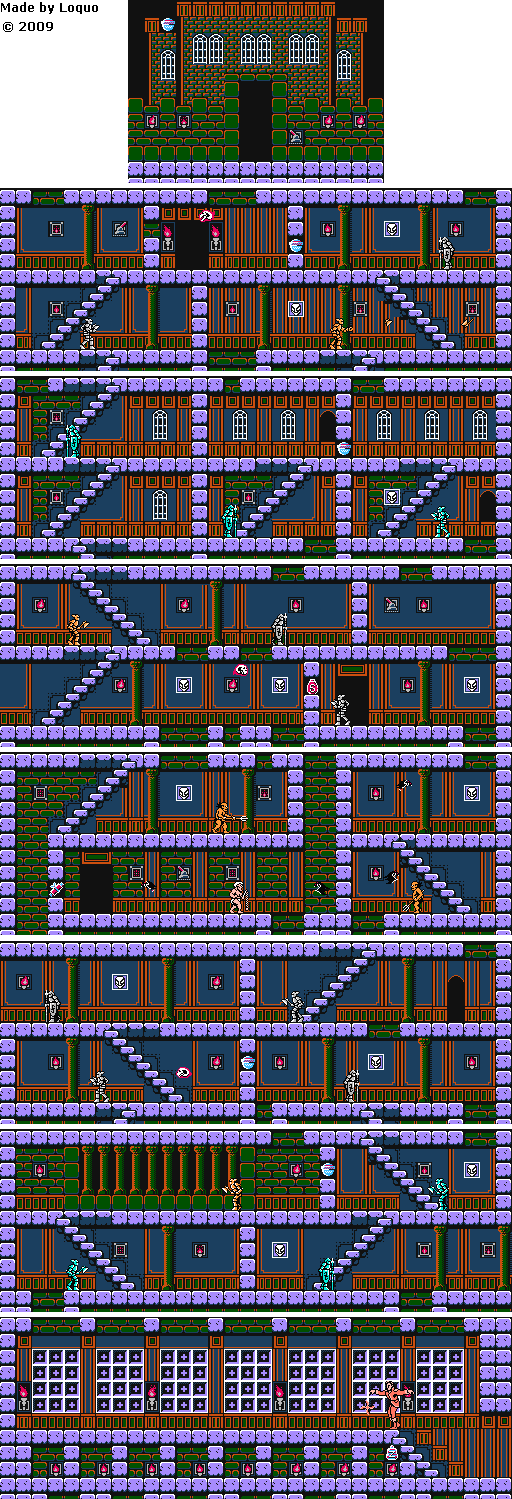
Leap to the right and jump into the small pit near the end. Go two screens down. You'll find the scroll near the door. "Between Black and White, there is no Yellow." Hit the switch and enter the nearby door.
The armored guys with the shields have pretty good reaches with their pikes.
Drop down three screens. There is an S Drink in the wall near the door on the first one you drop to. Jump over the gap to the stairs to the left. Go up the stairs, then drop down the pit to the left. Hit the switch to the left of the room with Cutrus and enter the door that opens. You'll meet the Duke.
Along the way, you'll also meet the armored guys with the hand axes, who have a much shorter reach than the pike guys.
There is a Z drink behind the center of the stairs that lead to the Duke. When the Duke shows up, take it and do as much damage to him as you possibly can. You also want to destroy his shurikens as quickly as possible during your attempts at getting close to him.
Arabia
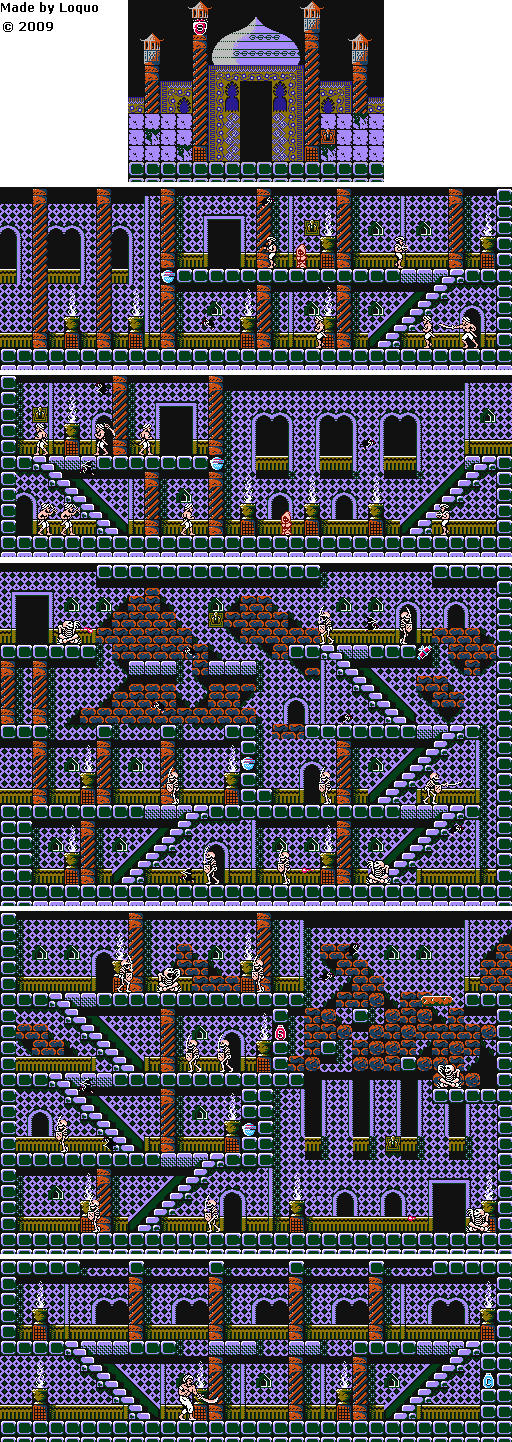
This level is mercifully more linear in design. At least you're not doing mazes anymore.
The guys with the crossbows can be pretty annoying. Attack their arrows as your approac them.
The scroll is hidden inside the edge of a ledge, which you can uncover with Cutrus. "Black is on the far right."
Stun the Duke here with the white orb, then keep whacking him until he strikes. You'll want to back away and strike repeatedly a couple of times before using the orb on him again. He'll throw knives and hit you every third strike, but he's still fall before Orin does.
Congratulations! You've completed all the regular stages! Now it's time for the House of Ruth!
Subscribe to:
Posts (Atom)