You can tell that I have the first episode of the game on lockdown.
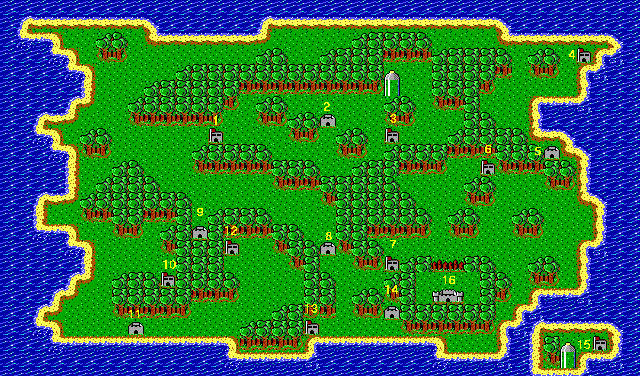
Area 2
This one is really easy compared to the earlier levels. Get the bullets and avoid being shot by the turrets, take out the sentry, then go up the stairs and the platforms to get the blue key. As you do this, watch out for protruding spikes. Get to the blue door and take out the ninja master, then get the blue key in the room. Open the next blue door, destroy the ceiling turret and grab the dynamite.
Make your way further up and take out the robot to the left. When you hit it with three bullets, retreat and jump away from the shrapnel that shoots out in both directions. You won't be able to do anything further to the left due to the laser field, so go further up (watch out for protruding spikes) and go to the right. The S will be on the way to the green key. Shoot the robot in the head when it exposes its human face to take it out, or else it will never die. Get the green key, then open the green door and get the disk.
Take the disk back up and to the left where the exit is to deactivate the laser field. Watch out for the invincible zapping robot and take out the satellite dish. Since you'll have the S at this point, the P is where the dynamite was and the Y is where the satellite dish was. You may now exit.
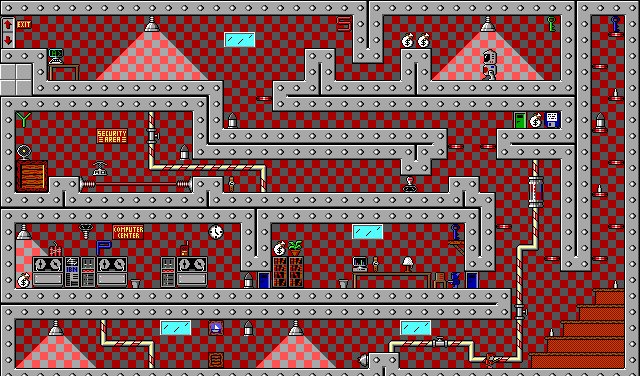
Area 3
Start by jumping on the bookcase to get the green key. Open the green door and take out the robot. Use the push barrel to get the red key above where you currently are, then push the push barrel to the right to get the blue key. Go up and open the red door, and watch out for the bomb on the way there. Use the push barrel to get to the red platform above so you can enter the armory for bullets, the dynamite and the floppy disk.
The question mark reverses your left and right commands. You'll get a windows saying you are confused when you grab it, and another one that tells you that you are less confused when it wears off.
Go back down and pen the blue door and go to the right, taking out the enemies and getting the keys as you go. Once you make your way down, stay near the right-hand wall. Take the platform to the computer and put the floppy disk in to disable the laser field. From here, go left and use the push barrels to make it easier to get to where the Y is. The S is in the starting room above the "D.V.S. Rules" sign and can be grabbed with the push barrel, while the P is near the red door in the upper-left corner of the level, so you should be able to get the 10K bonus by now. Thankfully, maneuvering one push barrel to the edge of the lower red platform is pretty simple if you use the push barrel on the floor, too. Jump to the Y, then jump over the spikes and take out the robot. Blow up the exit. You're done.
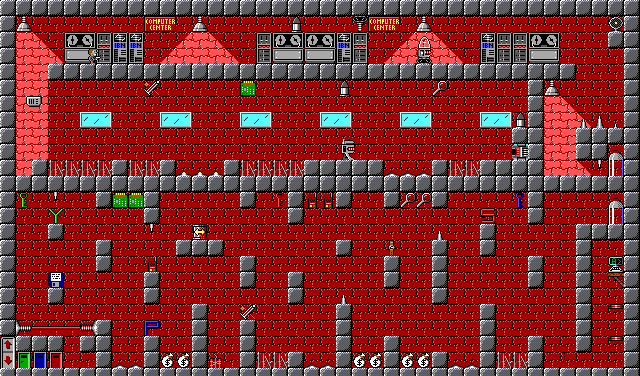
Area 15
Jump your way to the right while avoiding the spikes and bombs. Shoot down the robot when its visor is up. Avoid the rocket from the rocket launcher as you make your way up. Wait for the platform, then ride it to the left. Jump to the platform above and take out the thug, the ceiling turret and the glass dome robot on the way to the right. At the other end of the room is the satellite dish. Shoot it down, then drop down to the teleporter and watch out for protruding spikes on the floors and ceilings on the way there.
From here, you'll need to be careful as you jump around in the area to the left, as there are some bombs and spikes at the bottom of some of these areas and there are also spikes on a few of the places where you can rest, so keep a look-out. The "SPY" letters will be in various positions as you go from the right side of the left side, but if you know what you're doing, you can easily get them in order for the 10K bonus. The red, blue and green keys leading to the exit are also in various positions in this maze. As for the push barrel, push it off the edge to the right and let it drop down; you'll need it to get out of the hole where the dynamite is. The disk is directly above the laser field; grab it and take it to the computer directly underneath the teleporter to disable the laser field. As long as you're super careful with where you're jumping in this area, you can get though this area without taking a lot of damage and you'll be able to exit this area.
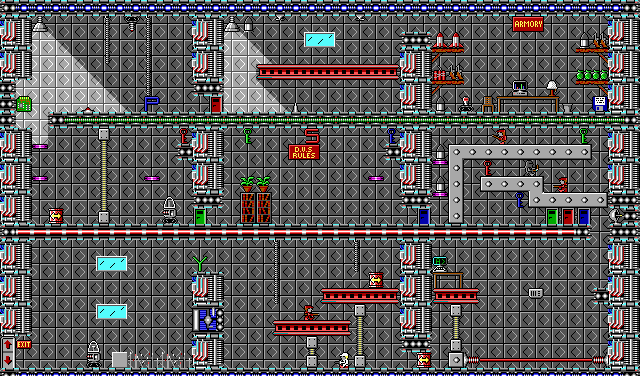
Area 9
Start by pushing the push barrel all the way down as you go through the start of the level. Watch out for the bullets from the wall turrets as you push the barrel and grab stuff for points and ammo. At the bottom, take out the two ceiling turrets and use the push barrel to get all three keys. After unlocking the green and blue doors, take the push barrel all the way to the right.
From here, you'll want to take the platform moving around and get the X-Ray specs. The S will be above the green key, the P will be above the blue key, and there will be nothing above the Y. At the bottom of this area is the dynamite and a red door blocking another red key and a satellite dish you'll need to blow to bits. Thankfully, you've got the X-Ray specs at this point, so getting out of this area is possible compared to if you didn't.
From here, you'll have to battle your way up to the exit. Use the push barrel to get rid of that blue turnkey thing under the glass dome to deactivate the laser field before the exit. Take the push barrel all the way down to where the dynamite is and get the dynamite, then bring it to the exit. There will be two falling money bags worth 5,000 points each; grab 'em if you can. You're done.
No comments:
Post a Comment