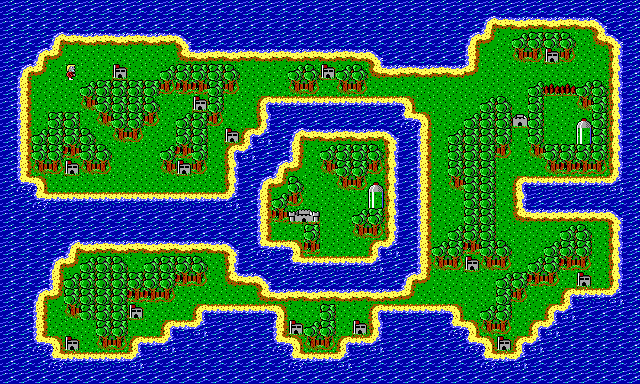
With the first blueprint collected, it's time to collect the other two. It's time to tackle a whole new set of levels in Episode Two.
Now that we've gotten the first of three blueprints for Red Rock Rover and completed Episode One, it's time to tackle Episode Two, which has a whole new island and a whole new set of levels.
Area 2
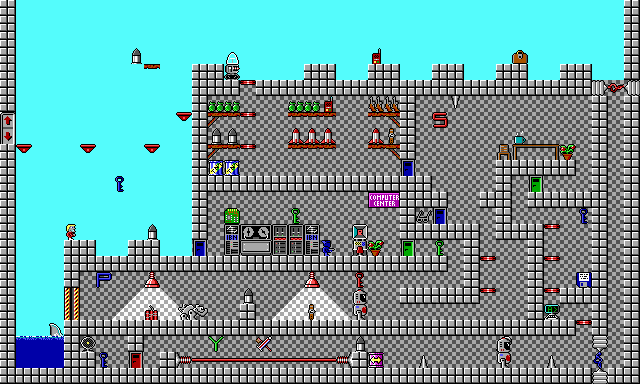
Get the blue key and the ammo, then open the blue door. Get the green key. If you need to, take care of the ninja master. Open the green door and get the green key after it, then take out the robot when its face is exposed and get the red key. To the left is a guard dog and the dynamite; be sure to get the dynamite.
From there, you want to make your way up and to the right. You'll find the S along the way. Get to the green door, open it and get the blue key and the floppy disk. Don't get the X-Ray Specs yet; instead, open up the door to the armory, get the ammo and make your way to the roof. Head to the right, try not to get zapped in the process, then take out the robot when its face is exposed. Use the pushbarrel to get to the computer and watch out for spikes as you get to the computer to deactivate the laser field.
From here, you'll need to loop all the way back and get to the deactivated laser field. The Y will be there, but you'll want to head further left, open the red door, get the blue key and take out the satellite dish. You can now get the X-Ray specs, head back to the roof and head left to the exit.
The S is on the way to the armory. The P is near the dynamite. The Y will be at the deactivated laser field area.
Area 6
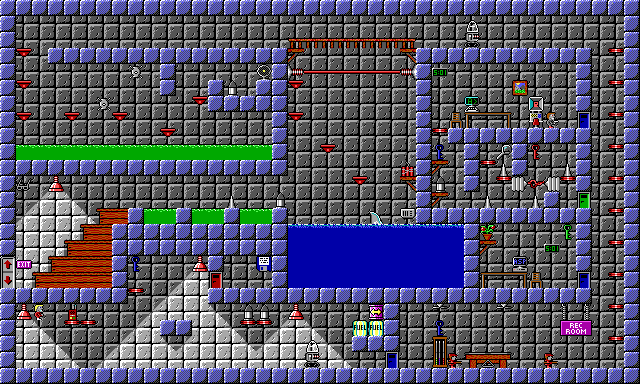
Take out the glass dome robot (which shoots rings this time instead of diamonds), then use the pushbarrel to get the ammo and the blue key. Go right and open the blue door, get the blue key and take out the sentries. Make our way up and open the first blue door to your left. Get the green key, then make your way further up and get the green door opened. Be careful and watch out for spikes and electric currents as you get the red key, the blue key and the ammo. Take out the thug and unlock the blue door. Head back to the start and open the red key to get the disk.
From here, you'll need to go back to where you opened that green door and put the disk in the computer to deactivate the laser field. Take out the robot Drop down where the laser field and hug the right wall to land safely and get the dynamite. Ride the moving platform to the left (and jump over the shark fin on the way), and watch out for the floor spike that shoots in and out as well as the green water as you jump. You'll find the exit as well as the X-Ray Specs. You're not done yet.
Head back to where you picked up the dynamite. Take the red platforms over to the left, then follow the path to the satellite dish and take it out. From here, you'll have to make those jumps across the green pools of water one more time to finish this level.
Area 7
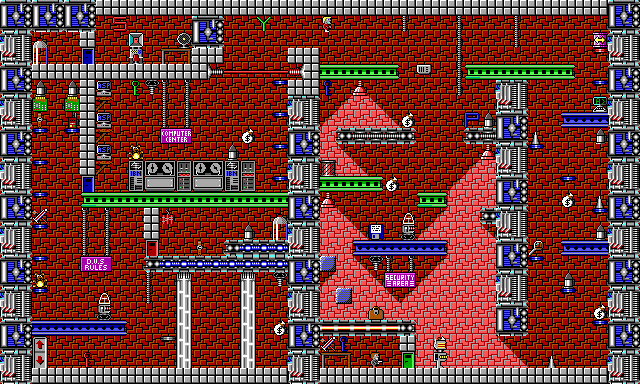
Go all the way to the right. Push the pushbarrel all the way down and to the green door. Use it to get to the disk as well as the blue key, then put the disk in the computer. Watch out for spikes. The laser field is to the left of where you started; take out the ceiling turret and get the green key, then open the blue door. Go back to where the green door below where the disk was, open the door, take out the thug and get the blue key.
Go back to the computer center below the deactivated laser field and unlock the blue door, then take out the glass dome robot and the ceiling turret to more safely get the red key. Go back up. jump onto the nearby purple sin and open the red door and get the dynamite, then take the teleporter, open the blue door and take out the satellite dish. Once it's taken out, you're gone.
The S is near the satellite dish. The P is to the right of the blue key near the start. The Y is above the laser field.
No comments:
Post a Comment