The mine cart section is the most confusing part, but at least the second half of it is far easier to deal with.
All maps by Frank15.
Stage 4
Area 1
Bonus Area 2
Bonus Area 6
When you start this stage, there will be water below you. Gadget cannot swim, and if he is deep water for long enough, he will die.
The MAD agents in the safari suits will not only send out scorpions that travel across the ground, they'll also send out butterflies that will fly at you and do damage.
The MAD agents in the blue suits with the guns will aim at you if you get close enough. Get even closer and they'll jump back and forth much like the snowmen from the second stage.Finish them off with the arrow.
When you reach the platform at the far end, the water will drop and you'll be able to continue left and go through more of the level. However, the water level will continuously rise and fall, and if you're in too deep for too long, you'll die. You'll need to use the walls in the background as platforms in order to survive and make your way to the second area.
Area 2
Bonus Area 4
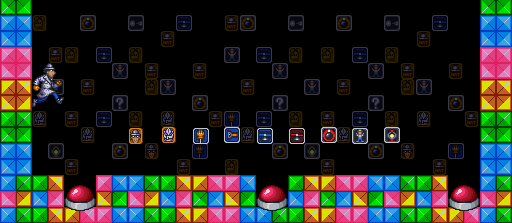
Here, you'll have to ride the mine carts in order to get to the other end of the mine shaft.
The bombs with the "B" on them are, of course, bombs. You don't want to touch these, but you can attack them to get some power-ups.
The MAD agents that hang onto ceilings and the undersides of mine cart tracks will dive down at you in an attempt to knock you off the car you're currently on.
In case you hit an intersection, the mine cart you're currently on will keep going in its original direction.
You'll want to make your way to the lower-left part of the area where the guy with the gun is. From there, get on the mine cart above you and get on either the next car you see or the one after that (which is just before you start going down into the pit). Avoid the bombs, and you're done. The upper exit has a bonus area.
Area 3
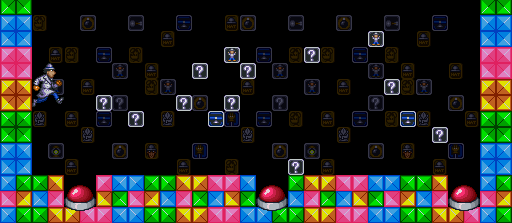
You'll have conveyor belts to deal with, as well as more mine carts, but at least the whole area isn't dominated by the mine carts.
Area 4
You'll be on a circular belt with five platforms on it. You'll want to stay on those platforms, but also keep your distance from Dr. Claw so the three fists on his chair don't pound away at you. This is probably the first boss area that will give you any real difficulty.
If the fists glow, they're about to strike. Keep that in mind as you constantly reposition yourself to get in the needed five hits to get out of here.
Gadgets and Power-ups
Grappling Hand: Lets you grab rings and other handholds above you.
Plungers: Fires sticky mini-plungers from your hat which can stick to walls. Use these to climb walls.
Blue Copter: Lets you glide in mid-air.
Red Copter: You can't fly with this copter, but you can send it upwards to attack enemies. You can guide it with Left and Right, but Gadget will move when you do this, so be careful.
Arrow: Fire arrows at enemies.
Bomb: Drop a bomb nearby. If the explosion hits an enemy, it'll do massive damage.
Lantern: Lets you light your way through dark areas. You can even throw the lantern on the ground and damage enemies with the flames!
Mini-Gadget: Sends out miniature Inspector Gadgets which will walk towards enemies
Question Mark: Drops an anvil.
Hats: Hats are your energy for your gadgets. Each icon gives you two hats.
Inspector Gadget Head: Extra life.
Inspector Gadget Suit: Extra hit. You can only have one extra hit at any given time.
Brain Icon: Increase the range of your regular attack. Your range goes back to the default minimum when you die.
No comments:
Post a Comment