Showing posts with label Inspector Gadget. Show all posts

Friday, January 5, 2024

PrinceWatercress plays Inspector Gadget AGAIN - Stage 6 of 6


Not only does this stage have good music, but so does the credits. Anyway, we finally make it to Dr. Claw and beat him at his own game again. See you next time.


Stage 6


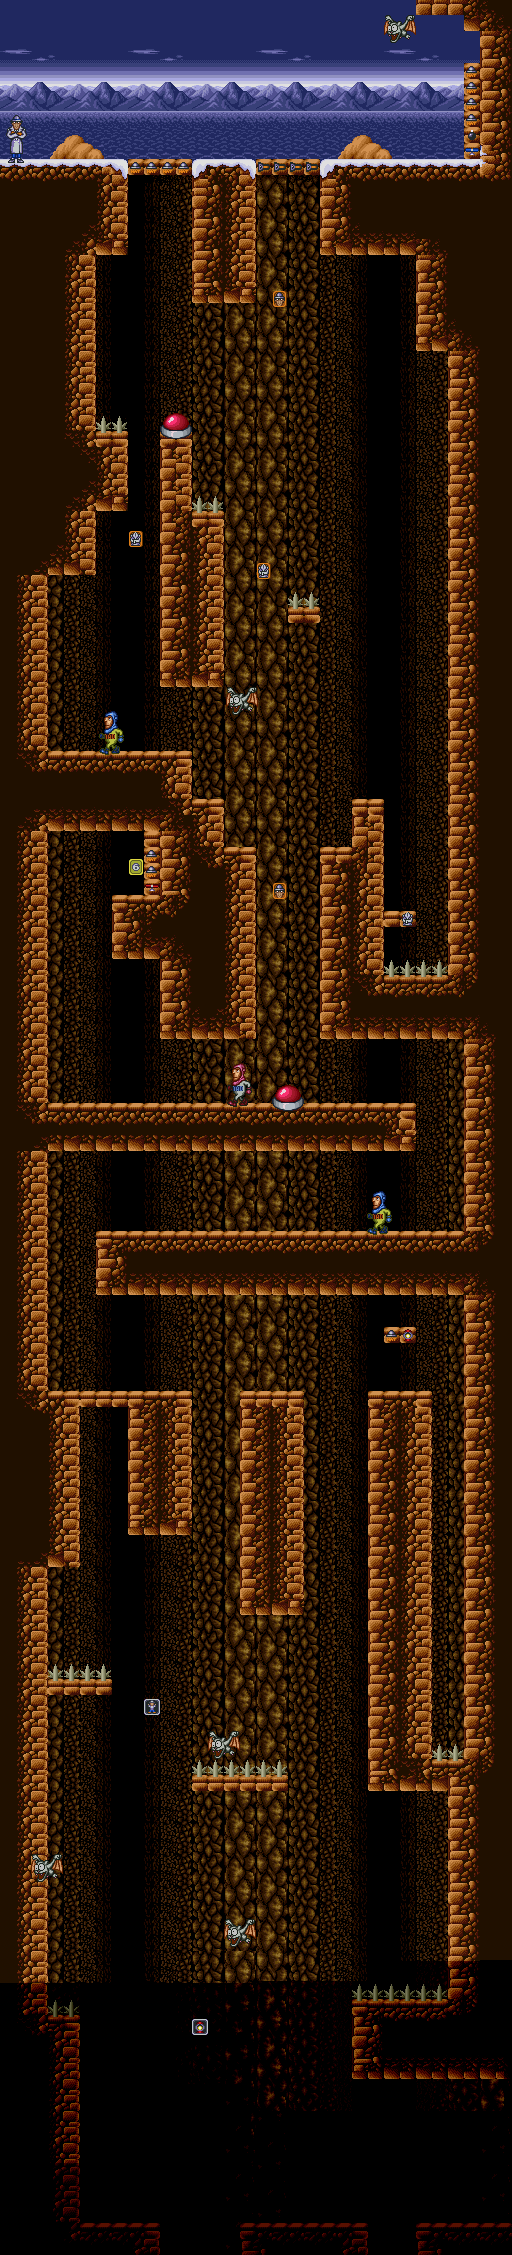
Here, you'll be dropping down into the caverns leading closer to Dr. Claw's lair. Be careful. One wrong move, and you'll have to use your plungers to dig yourself out of spike pits.

The bats will divebomb you if you're under them.

If you get to close to the MAD agents here, they'll block your attacks.


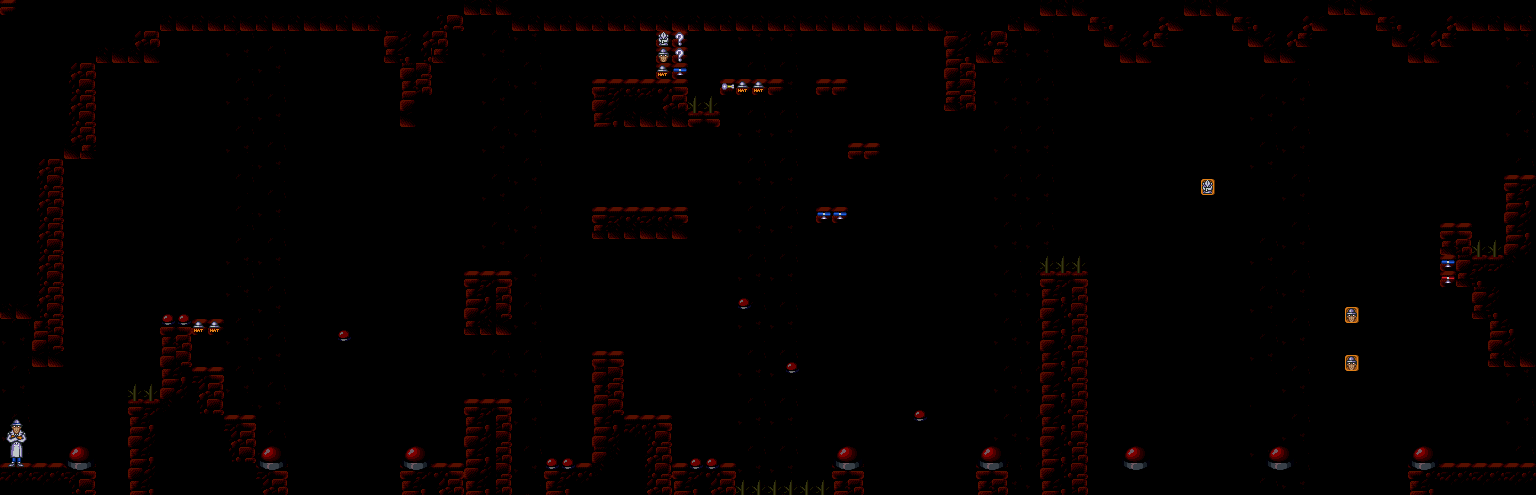
You'll be leaping from spring to spring in this darkened area. Thankfully, there's not much you can't see here, save for the invisible blocks.


You'll finally break your way out into Dr. Claw's lair. There's a bonus level at the top-left if you need a free life.


The final section before the final battle!

You'll have to stand on top of the cable cars if you want to get anywhere. Whatever happened to just opening the door?

The MAD agents from the beginning of the stage are back, and so are those stupid robots from Stage 2 whose heads fly off after you hit them. If you get close enough, you can hit the robots without having to be right next to them.

The snow on the cables act as platforms to get from one set of cables to another.

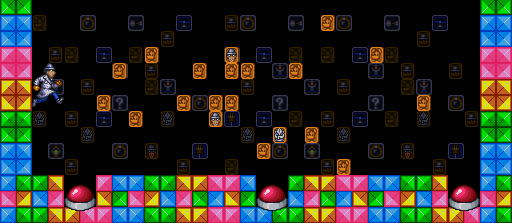
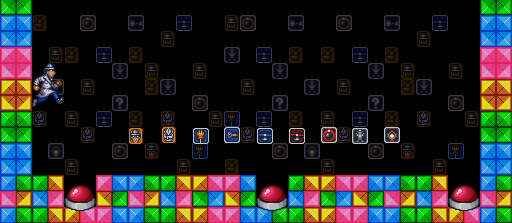
There's one last bonus area hidden in a bunch of blocks that gives you a bunch of Hats and a suit for a free hit if you need them.

When you reach the steel platform, you'll finally take on Dr. Claw himself.


You'll finally see what Dr. Claw looks like! At last!

Keep moving to the left a little bit so you don't get blown off the platforms.

There will be a few icons flying around. You'll get a few hats, two extra hits and an extra life blowing in the wind and there's a good chance of you picking them when they fly right into you. 

Destroy the MAD agents that come out of the turrets with your regular attacks. Do the same with the afterburners at the rear of the plane. The roof of the spaceship is the easiest, since you can just let the wind move you to the right, allowing you to crouch down and kick the guys with the rocket launchers as soon as they show up.

Once everything is destroyed, the platform that moves around the plane will be able to take to the plane. Get back on it. Since the afterburners are destroyed, you won't have to worry about being blown to the right. A force field will surround the top of the platform, allowing you safe access to the inside of the ship.

Once you get in the ship, go left to face Dr. Claw. You'll lose all your hats, so it's just you and your fists against Dr. Claw and his mech. Dr. Claw will try to jump over you, but you can duck underneath his jump and hit him from below. He also has fireballs that you can jump over as well as a ball and chain that you can easily stay away from. Just keep hitting Dr. Claw with your regular attack whenever he's standing still, and he'll go down after about a couple of hits. Once you've beaten him, go left and go after Penny. Gadget will rescue Penny and everything will be well again...until you find out Chief Quimby has been kidnapped. Not again! Sadly, there never was a sequel to this game. But hey, you've finally beaten Inspector Gadget!

Gadgets and Power-ups


Grappling Hand: Lets you grab rings and other handholds above you.

Plungers: Fires sticky mini-plungers from your hat which can stick to walls. Use these to climb walls.

Blue Copter: Lets you glide in mid-air.

Red Copter: You can't fly with this copter, but you can send it upwards to attack enemies. You can guide it with Left and Right, but Gadget will move when you do this, so be careful.

Arrow: Fire arrows at enemies.

Bomb: Drop a bomb nearby. If the explosion hits an enemy, it'll do massive damage.

Lantern: Lets you light your way through dark areas. You can even throw the lantern on the ground and damage enemies with the flames!

Mini-Gadget: Sends out miniature Inspector Gadgets which will walk towards enemies.

Question Mark: Drops an anvil.

Hats: Hats are your energy for your gadgets. Each icon gives you two hats.

Inspector Gadget Head: Extra life.

Inspector Gadget Suit: Extra hit. You can only have one extra hit at any given time.

Brain Icon: Increase the range of your regular attack. Your range goes back to the default minimum when you die.

Thursday, January 4, 2024

PrinceWatercress plays Inspector Gadget AGAIN - Stage 5 of 6


Have to admit I had a tough time here. At least I don't have to deal with mine carts again.


Stage 5


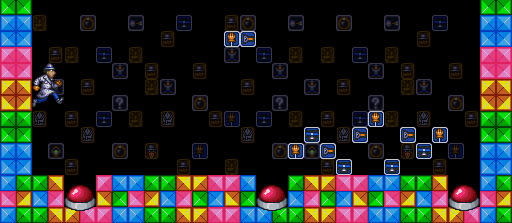
Hit the red switches with your regular attacks in order to turn off the flames that block your path.

The mummies that fly around will attack you with their bandages. The short, stout guys that jump around will send inner tubes that move across the ground after you.

There is a bit of a maze here, but thankfully it's not as bad as the mine cart sections in the last stage.

The first of the two bonus areas to access is a joke. It contains just one lousy Hat icon. The second one requires finding blocks with the Magnifying Glass, but I'm too stupid to check.


Another vertical section. You'll finally use the lantern here for the first time. You can see somewhat without it, but the lantern kills the short stout guys that are in your way in one shot if you've powered it up.


The ceiling spikes will slowly ascend and descend. At least you can duck at the bottom of the area to keep the top of your head from being impaled.

The bonus area near the start contains a lonely extra life. Better than nothing.


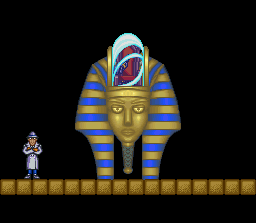
The boss is Dr. Claw riding a giant King Tutankhamun head. The Red Copter is your friend here, as you can use it to take down not only Dr. Claw but also the cat vase missiles he fires as he goes in and out of the screen. This will make it easier to jump from one moving platform to another as you take him down.

Gadgets and Power-ups


Grappling Hand: Lets you grab rings and other handholds above you.

Plungers: Fires sticky mini-plungers from your hat which can stick to walls. Use these to climb walls.

Blue Copter: Lets you glide in mid-air.

Red Copter: You can't fly with this copter, but you can send it upwards to attack enemies. You can guide it with Left and Right, but Gadget will move when you do this, so be careful.

Arrow: Fire arrows at enemies.

Bomb: Drop a bomb nearby. If the explosion hits an enemy, it'll do massive damage.

Lantern: Lets you light your way through dark areas. You can even throw the lantern on the ground and damage enemies with the flames!

Mini-Gadget: Sends out miniature Inspector Gadgets which will walk towards enemies.

Question Mark: Drops an anvil.

Hats: Hats are your energy for your gadgets. Each icon gives you two hats.

Inspector Gadget Head: Extra life.

Inspector Gadget Suit: Extra hit. You can only have one extra hit at any given time.

Brain Icon: Increase the range of your regular attack. Your range goes back to the default minimum when you die.

Wednesday, January 3, 2024

PrinceWatercress plays Inspector Gadget AGAIN - Stage 4 of 6


I STILL don't like those mine carts.


Stage 4


When you start this stage, there will be water below you. Gadget cannot swim, and if he is deep water for long enough, he will die.

The MAD agents in the safari suits will not only send out scorpions that travel across the ground, but they'll also send out butterflies that will fly at you and do damage.

The MAD agents in the blue suits with the guns will aim at you if you get close enough. Get even closer and they'll jump back and forth much like the snowmen from the second stage. Finish them off with the arrow.

When you reach the platform at the far end, the water will drop and you'll be able to continue left and go through more of the level. However, the water level will continuously rise and fall, and if you're in too deep for too long, you'll die. You'll need to use the walls in the background as platforms in order to survive and make your way to the second area.


Here, you'll have to ride the mine carts in order to get to the other end of the mine shaft.

The bombs with the "B" on them are, of course, bombs. You don't want to touch these, but you can attack them to get some power-ups.

The MAD agents that hang onto ceilings and the undersides of mine cart tracks will dive down at you in an attempt to knock you off the car you're currently on.

In case you hit an intersection, the mine cart you're currently on will keep going in its original direction.

You'll want to make your way to the lower-left part of the area where the guy with the gun is. To do that, you'll want to stay on the top, and when you make your way past the MAD agent on the underside of the tracks above you, you'll want to use the blue copter to fly to the bonus stage. Once you're out of there, jump on the mine cart that is down and to the left. When you reach the right end of the spiked platform you see after that descent followed by the big ascent, you'll want to jump straight up, use the blue copter and land directly on the mine cart below. From there, you can use the copter again and make a big jump to the left to get to the guy with the gun. Take the mine cart

From there, get on the mine cart just after the MAD agent that you'll pass by, then ride it to the end.


You'll have conveyor belts to deal with, as well as more mine carts, but at least the whole area isn't dominated by the mine carts. If you manage to land just above the tracks leading to the exit, you can activate the blue copter, walk off the edge and immediately hold Right to float over to the exit.


You'll be on a circular belt with five platforms on it. You'll want to stay on those platforms, but also keep your distance from Dr. Claw so the three fists on his chair don't pound away at you. This is probably the first boss area that will give you any real difficulty.

If the fists glow, they're about to strike. Keep that in mind as you constantly reposition yourself to get in the needed five hits to get out of here.

Gadgets and Power-ups


Grappling Hand: Lets you grab rings and other handholds above you.

Plungers: Fires sticky mini-plungers from your hat which can stick to walls. Use these to climb walls.

Blue Copter: Lets you glide in mid-air.

Red Copter: You can't fly with this copter, but you can send it upwards to attack enemies. You can guide it with Left and Right, but Gadget will move when you do this, so be careful.

Arrow: Fire arrows at enemies.

Bomb: Drop a bomb nearby. If the explosion hits an enemy, it'll do massive damage.

Lantern: Lets you light your way through dark areas. You can even throw the lantern on the ground and damage enemies with the flames!

Mini-Gadget: Sends out miniature Inspector Gadgets which will walk towards enemies.

Question Mark: Drops an anvil.

Hats: Hats are your energy for your gadgets. Each icon gives you two hats.

Inspector Gadget Head: Extra life.

Inspector Gadget Suit: Extra hit. You can only have one extra hit at any given time.

Brain Icon: Increase the range of your regular attack. Your range goes back to the default minimum when you die.
Tuesday, January 2, 2024

PrinceWatercress plays Inspector Gadget AGAIN - Stage 3 of 6


In this video, we go through the Amazon jungle fairly quickly as we go looking for Penny again.


Stage 3


Not much to this area. Take down the monkeys whenever you can, and avoid the spears thrown by the MAD agents in the masks and grass skirts.

The monkeys will throw fruit at you in two directions, and they can also jump straight up from the platform they are hanging on by their tails. The bombs make quick work of them if you're fighting them from above.

The lifesavers will keep you out of the water, which is instant death. The one that Brain is riding on is a springboard, and there is a bonus area right above him.


The fruits act as the breakable blocks here, but there are some hidden blocks at the very beginning of the area that I didn't notice when I played through it the first time. I noticed them the second time around.

Watch out for the fish that jump out of the water here. At the apex of their jump, they emit and electric shock and a robot fish skeleton drops out. The jump is the worst part of all this, as a well-placed jump can knock you right off the boat and into the water for a cheap death.

The wooden dummies will shoot darts into the sky that fall towards you. The dummies and the fish can send you to a cheap death if you're not careful.

When you get on the first boat, you can use the Blue Copter to save yourself from being knocked into the river by the fish if you've powered it up to the point that it's flashing when you have it selected. This will make you invincible against the fish here that are very hard to dodge.

When you step on the second boat, you'll face the boss.


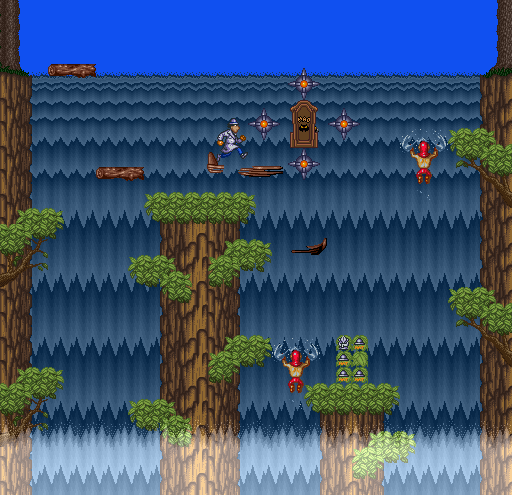
You'll land at the cliffs on the waterfall, breaking the boat. Dr. Claw will come at you with four spiked balls rotating around him. Attack the spiked balls four times to get rid of them. As you remove the spiked balls, Dr. Claw will move more slowly. The red copter will take out the spiked balls from below fairly quickly, and after you get rid of them, Dr. Claw is fair game to the arrow.

The logs on the left side of the area and the MAD agents on the right will act as platforms. Use your regular attack and punch upwards if you need to, and use the arrow to hit both Dr. Claw and the spiked balls from afar.

Gadgets and Power-ups


Grappling Hand: Lets you grab rings and other handholds above you.

Plungers: Fires sticky mini-plungers from your hat which can stick to walls. Use these to climb walls.

Blue Copter: Lets you glide in mid-air.

Red Copter: You can't fly with this copter, but you can send it upwards to attack enemies. You can guide it with Left and Right, but Gadget will move when you do this, so be careful.

Arrow: Fire arrows at enemies.

Bomb: Drop a bomb nearby. If the explosion hits an enemy, it'll do massive damage.

Lantern: Lets you light your way through dark areas. You can even throw the lantern on the ground and damage enemies with the flames!

Mini-Gadget: Sends out miniature Inspector Gadgets which will walk towards enemies.

Question Mark: Drops an anvil.

Hats: Hats are your energy for your gadgets. Each icon gives you two hats.

Inspector Gadget Head: Extra life.

Inspector Gadget Suit: Extra hit. You can only have one extra hit at any given time.

Brain Icon: Increase the range of your regular attack. Your range goes back to the default minimum when you die.
Monday, January 1, 2024

PrinceWatercress plays Inspector Gadget AGAIN - Stage 2 of 6


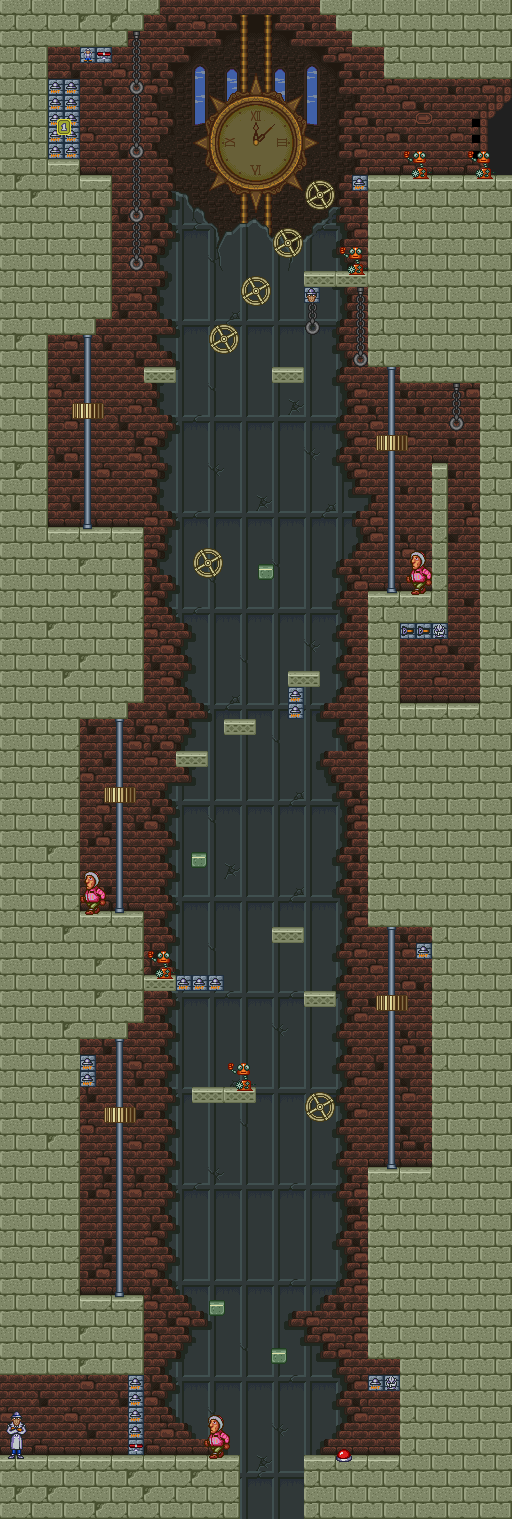
In this entry, we head through the Swiss wilderness and through a clock tower in our continuing quest to rescue Penny.


Stage 2


There's a bonus area just under the start. Step on the ledge in the floor (which tends to blend in with the ground) and use the Blue Copter as soon as you start falling to get there.

The MAD agents are here and they're dressed for the cold. They're also ready to lob snowballs at a moment's notice and jump when they see you jump. The snowmen will bounce around wildly when you approach them and take four hits to get rid of.

Be ready to use the blue copter to make some glides to some areas; falling into the pits here is not fun.


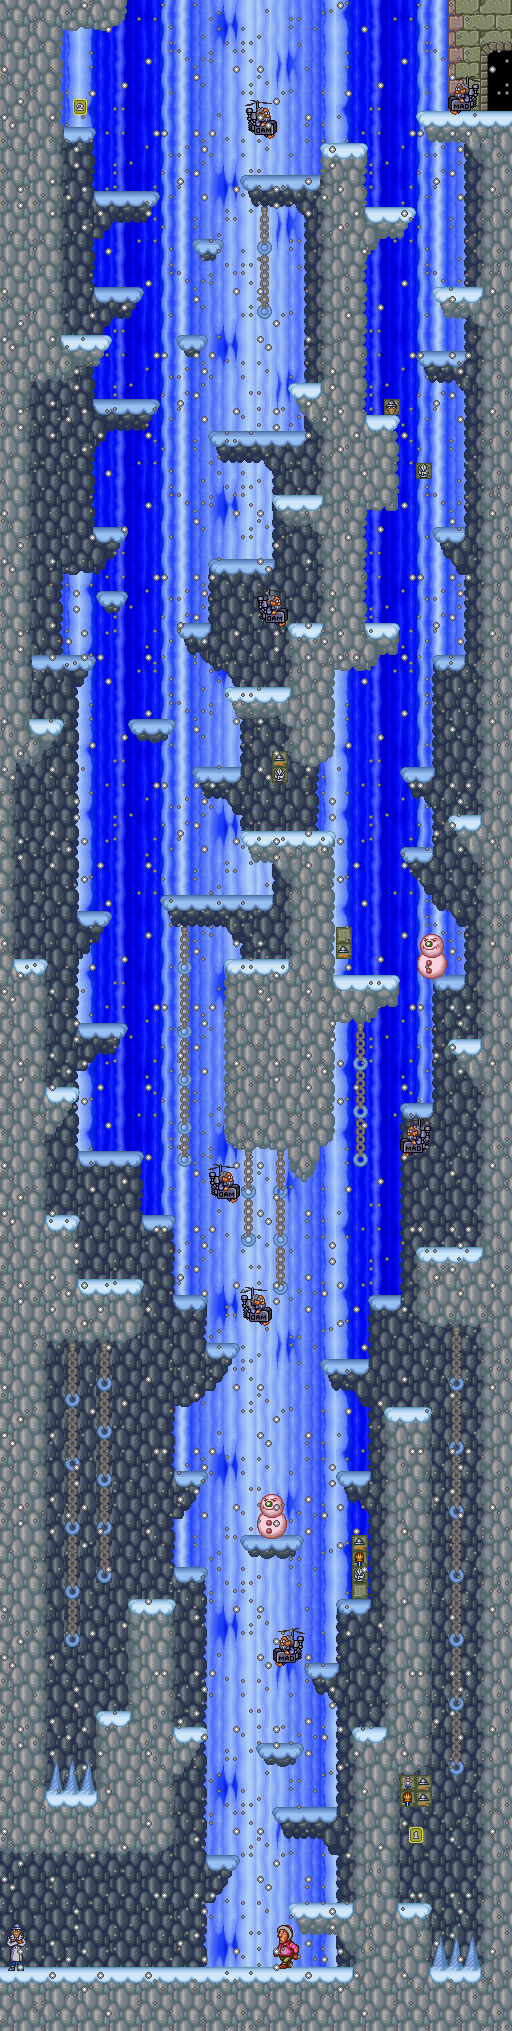
Now it's time for our first strictly vertical area. The mechanical planes will try to drop bolts down at you, and they take two hits to kill. Your Red Copter will come in handy to take care of some of the enemies here.

The snowmen here are tinted red, and they're mercifully easier to destroy (two hits versus four from the last section).

Watch the snow. Wherever it blows, that is where you'll be slowly pushed, especially in the air. It changes direction every couple of seconds, so watch it closely and time your movements to reach certain ledges.


Aside from the blocks that fly around in circles and the clock gear platforms that move up and down, you'll also have the wheel platforms that have you running in place when you walk on them.

Using the arrow will let you pick enemies off from afar.

You've also got the robots to contend with. When you hit them, the upper half will fly off, and will seemingly fly towards you. Even when they're dismembered, even touching the upper half while it's on the ground will cause damage. Either wait for it to die on its own or attack it with a ducking attack.


Dr. Claw is severely easy here. Keep your distance and hit him with three arrows. When he loses the swinging blade, hit three more times with the arrow while staying away from the spiked projectiles he tries to hit you with.

Gadgets and Power-ups


Grappling Hand: Lets you grab rings and other handholds above you.

Plungers: Fires sticky mini-plungers from your hat which can stick to walls. Use these to climb walls.

Blue Copter: Lets you glide in mid-air.

Red Copter: You can't fly with this copter, but you can send it upwards to attack enemies. You can guide it with Left and Right, but Gadget will move when you do this, so be careful.

Arrow: Fire arrows at enemies.

Bomb: Drop a bomb nearby. If the explosion hits an enemy, it'll do massive damage.

Lantern: Lets you light your way through dark areas. You can even throw the lantern on the ground and damage enemies with the flames!

Mini-Gadget: Sends out miniature Inspector Gadgets which will walk towards enemies.

Question Mark: Drops an anvil.

Hats: Hats are your energy for your gadgets. Each icon gives you two hats.

Inspector Gadget Head: Extra life.

Inspector Gadget Suit: Extra hit. You can only have one extra hit at any given time.

Brain Icon: Increase the range of your regular attack. Your range goes back to the default minimum when you die.
Sunday, December 31, 2023

PrinceWatercress plays Inspector Gadget AGAIN - Stage 1 of 6


Well, for some reason, this one put me on the map a little bit when I played it about ten years ago, so I might as well play this game again with much better quality. So here's this game again!


Penny has been kidnapped by Dr. Claw. Only the bumbling yet very successful Inspector Gadget can save her, but he'll have to make his away all over the world in order to find her!

Stage 1


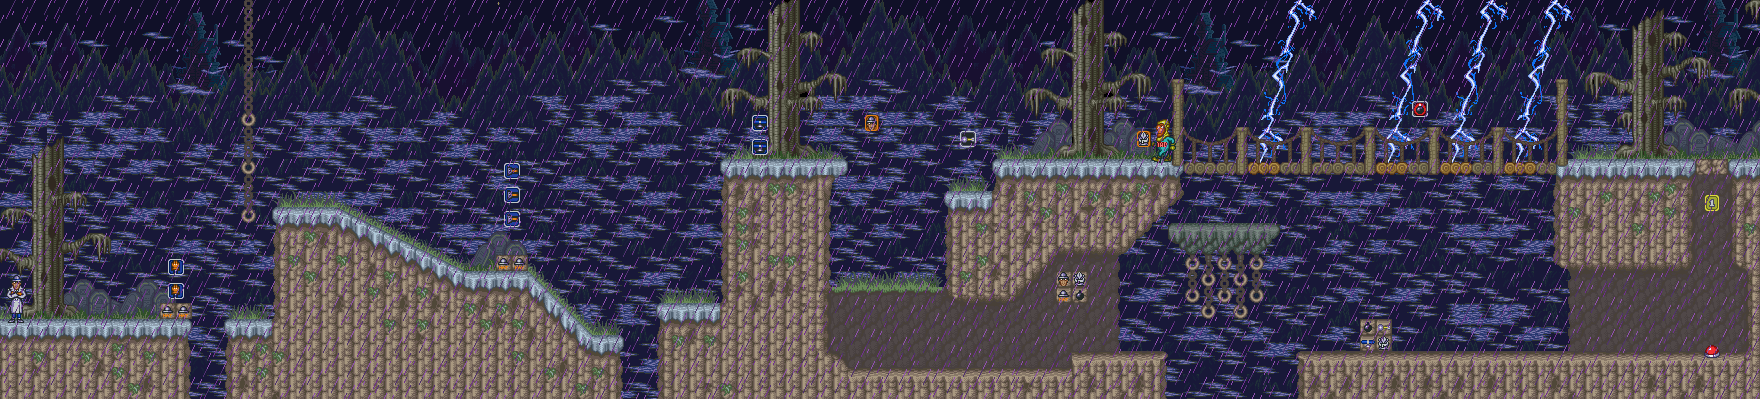
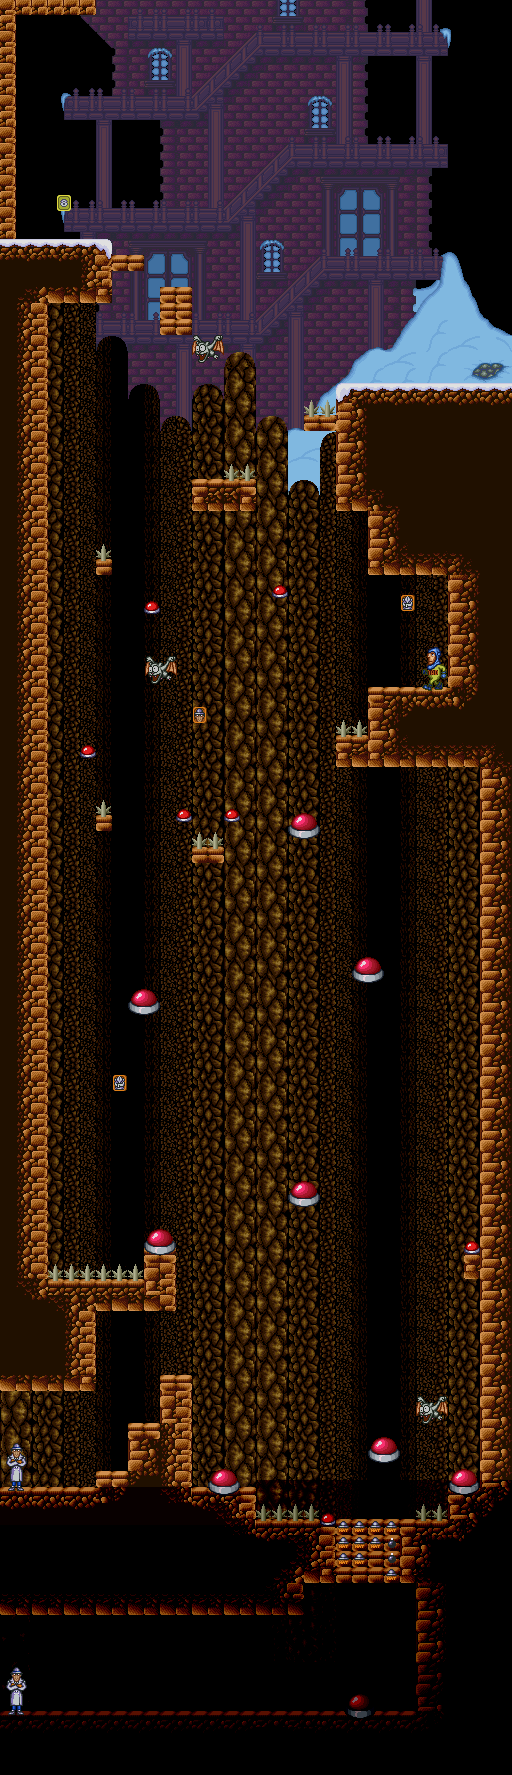
You'll start the game learning how to use the gadgets to get around. Use L and R to switch between the Grappling Hand and the Plungers. The Grappling Hand will let you grab the rings above you, while the Plungers will let you climb walls. Thankfully, you can also switch special abilities when the game is paused.

Break blocks to get hats and other power-ups. You'll definitely find Hats doing this, and you'll want to get Hats to power your gadgets.

When picking up gadgets, feel absolutely free to grab stuff you've already found. You're better off dong this, as you can power-up your gadget two more times after you initially collect them and add them to your collection of gadgets. Powering them up will add to their power and range, which can be a big help in the later levels.

Collecting an icon for a gadget you've fully powered-up will make the icon flash when you have it selected at the top of the screen. This gives you a one-time only use that's even more powerful than maximum level. If you want to use it again, you'll have to pick up its respective icon again.

The MAD agents will move back and try to throw hammers at you like boomerangs. Always duck down when you get close to them, so you can duck under the hammer. Kick them when they get close after their hammers return. If you have the Arrow gadget, fire it at them to make progress a little easier.

The yellow agents require one hit to kill, while the purples ones require two.

Parts of the bridge will be struck by lightning when you get near them them, so be careful. The lighter ones will be the ones to take the hit.

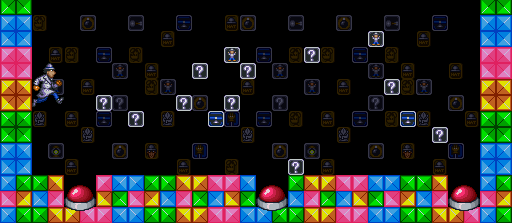
You can hold Down for a second to get Inspector Gadget to duck down and look through his magnifying glass. When he does this, look around the screen for flashing blocks. When you let go of Down, they'll disappear, but they'll still be there. Attack those areas to uncover the blocks and find some hidden power-ups!

The red button-shaped things on the ground are springs. Jump on them to get bounced up. Jumping on them repeatedly will allow you to jump higher on subsequent bounces.

The spinning yellow squares are bonus areas. Pick them up and you'll be shuttled to one. Pick up everything, then jump onto one of the big springs to leave.

You have a specific amount of time to get through the entire stage, and the only way to get more time is to lose a life. The timer stops when you're in a bonus area. You don't get more time upon entering the next section of the level, unfortunately. 


At least it's not raining anymore.

The MAD agents in the tree costumes will leap up and come down very swiftly when you get close. They'll open their eyes first, then they'll jump if you tred closer. You can hit them with your regular attack if you're quick enough, and you can get some good power-ups from them if you're lucky.

You can attack the boulders that roll around, but it'll take three punches. You'd better be quick if you actually want to do it.

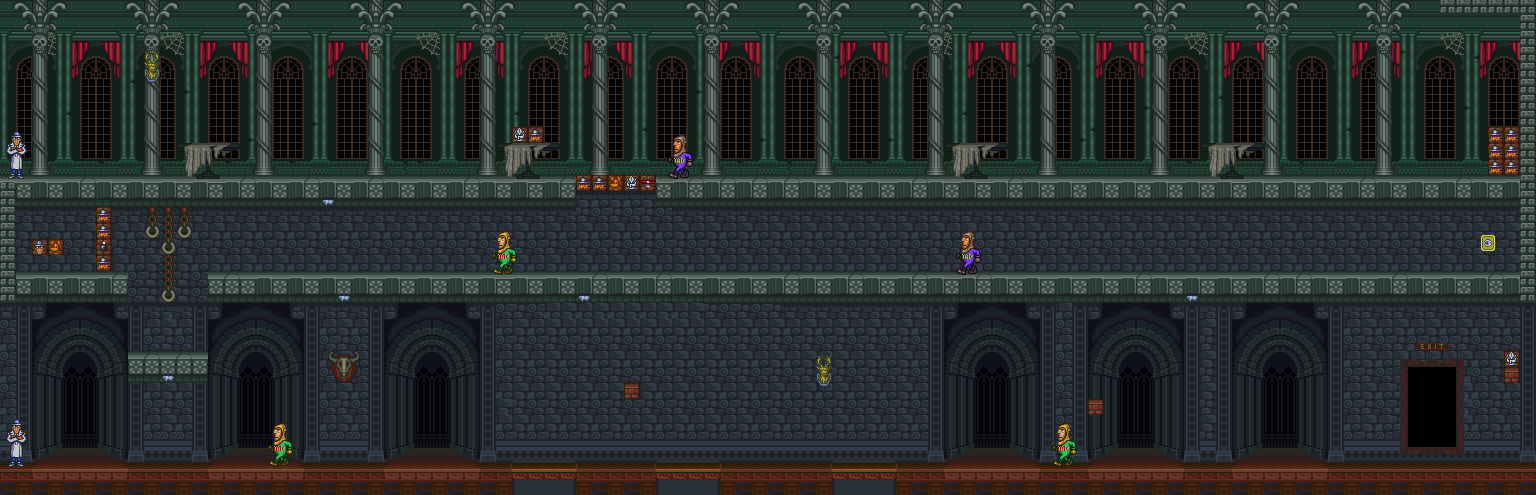
You can leave this area by going all the way to the right on either the low road of the high road, but if you want to explore more of the upcoming haunted house, take on the high road near the end. Don't worry about the balloons, as they'll only pop when the reach their highest point. If you're stuck at the bottom, no worries. Just climb up the rings with the Grappling Hands to get up there. You should have it maxed out by now.


The moose heads will drop down when you're below them, but you can hit them with your regular attacks.

The purple MAD agents require two hits compared to just the one for the yellow ones.

The mice walk on the ceilings, and will drop down when you're below them.

Jump over the floor tile sets that are above pits. They will tip over and send you falling when you walk on them, causing a lost life.

The Brain icons are the best. Collect a whole bunch of them to extend the range of your regular attack.

Jump over the exit to get an extra hit if you need it.


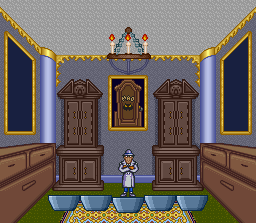
The boss here is the chandelier, and this battle is really easy. After Dr. Claw lands inside the picture frame, use Red Copters and Arrows to destroy the chandelier, and avoid the candle flames and MAD agents that come down as the room spins around in all its Mode 7 glory.

You won't find Penny, but you will find out that Penny has been taken to somewhere in the Swiss Alps.

Oh, and your health isn't restored when you enter a new stage.

Gadgets and Power-ups


Grappling Hand: Lets you grab rings and other handholds above you.

Plungers: Fires sticky mini-plungers from your hat which can stick to walls. Use these to climb walls.

Blue Copter: Lets you glide in mid-air.

Red Copter: You can't fly with this copter, but you can send it upwards to attack enemies. You can guide it with Left and Right, but Gadget will move when you do this, so be careful.

Arrow: Fire arrows at enemies.

Bomb: Drop a bomb nearby. If the explosion hits an enemy, it'll do massive damage.

Lantern: Lets you light your way through dark areas. You can even throw the lantern on the ground and damage enemies with the flames!

Mini-Gadget: Sends out miniature Inspector Gadgets which will walk towards enemies and damage them.

Hats: Hats are your energy for your gadgets. Each icon gives you two hats.

Inspector Gadget Head: Extra life.

Inspector Gadget Suit: Extra hit. You can only have one extra hit at any given time.

Brain Icon: Increase the range of your regular attack. Your range goes back to the default minimum when you die.
Controls:


Control Pad: Move around (Left and Right), attack upwards (hold Up) duck (Down). Holding Down for a few seconds lets you uncover hidden power-ups.
A: Use special weapon (requires Hats)
B: Jump
Y: Regular Attack (fist on ground, kick while crouching, headbutt in mid-air)
L and R: Switch between gadgets

Wednesday, April 16, 2014

PrinceWatercress plays Inspector Gadget - Stage 6 of 6


Why does this vid have over 2000 20000 views

Why

All maps by Frank15.

Stage 6


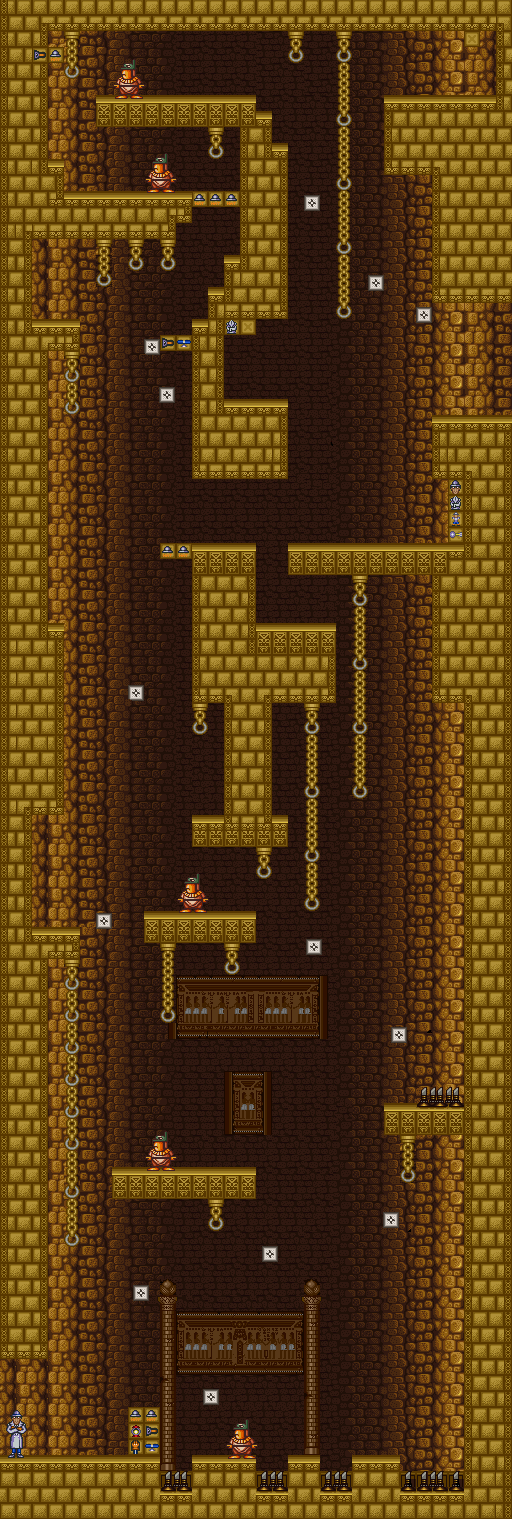
Here, you'll be dropping down into the caverns leading closer to Dr. Claw's lair. Be careful. One wrong move, and you'll have to use your plungers to dig yourself out of spike pits.

The bats will divebomb you if you're under them.

If you get to close to the MAD agents here, they'll block your attacks.


You'll be leaping from spring to spring in this darkened area. Thankfully, there's not much you can't see here, save for the invisible blocks.


You'll finally break your way out into Dr. Claw's lair. There's a bonus level at the top-left if you need a free life.


The final section before the final battle!

You'll have to stand on top of the cable cars if you want to get anywhere. Whatever happened to just opening the door?

The MAD agents from the beginning of the stage are back, and so are those stupid robots from Stage 2 whose heads fly off after you hit them. If you get close enough

The snow on the cables act as platforms to get from one set of cables to another.

There's one last bonus area hidden in a bunch of blocks that gives you a bunch of Hats and a suit for a free hit if you need them.

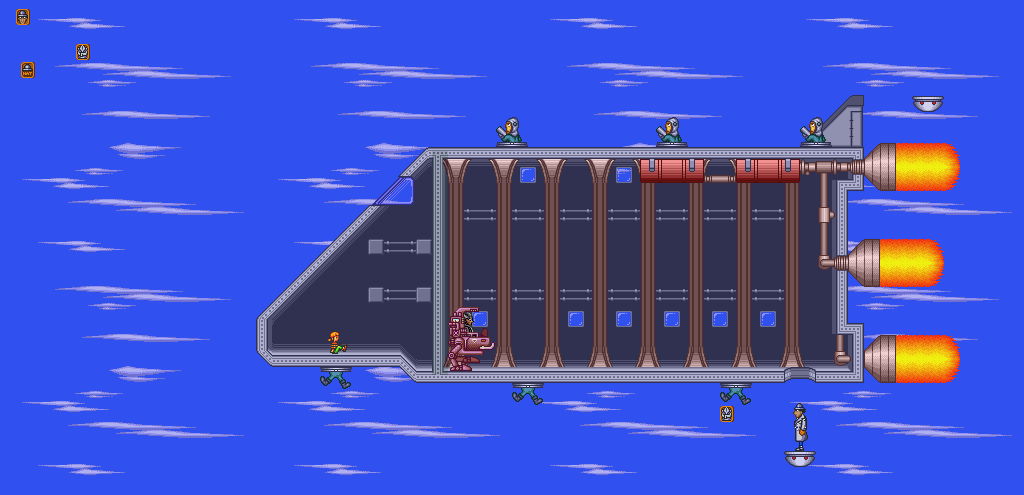
When you reach the steel platform, you'll finally take on Dr. Claw himself.


You'll finally see what Dr. Claw looks like! At last!

Keep moving to the left a little bit so you don't get blown off the platforms.

There will be a few icons flying around. You'll get a few hats, two extra hits and an extra life blowing in the wind and there's a good chance of you picking them when they fly right into you.

Destroy the MAD agents that come out of the turrets with your regular attacks. Do the same with the afterburners at the rear of the plane. The roof of the spaceship is the easiest, since you can just let the wind move you to the right, allowing you to crouch down and kick the guys with the rocket launchers as soon as they show up.

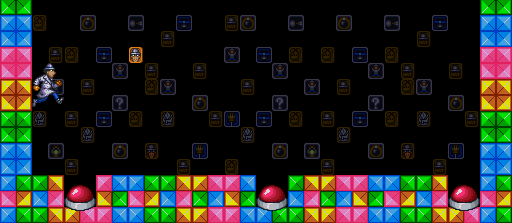
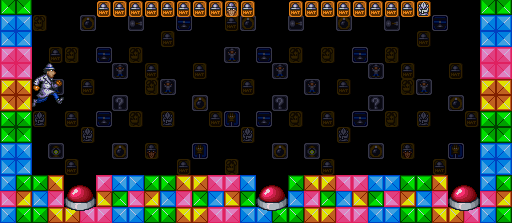
Once everything is destroyed, the platform that moves around the plane will be able to take to the plane. Get back on it. Since the afterburners are destroyed, you won't have to worry about being blown to the right. A force field will surround the top of the platform, allowing you safe access to the inside of the ship.

Once you get in the ship, go left to face Dr. Claw. You'll lose all your hats, so it's just you and your fists against Dr. Claw and his mech. Dr. Claw will try to jump over you, but you can duck underneath his jump. He also has fireballs that you can jump over as well as a ball and chain that you can easily stay away from. Just keep hitting Dr. Claw with your regular attack whenever he's standing still, and he'll go down after about a couple of hits. Once you've beaten him, go left and go after Penny. Gadget will rescue Penny and everything will be well again...until you find out Chief Quimby has been kidnapped. Not again!

Oh, and I still had the 15-minute limit working against me, hence why I end the video slightly abruptly. I got rid of it soon after.


PrinceWatercress plays Inspector Gadget - Stage 5 of 6


EGYPT EGYPT

All maps by Frank15.

Area 1

Bonus Area 4

Bonus Area 7

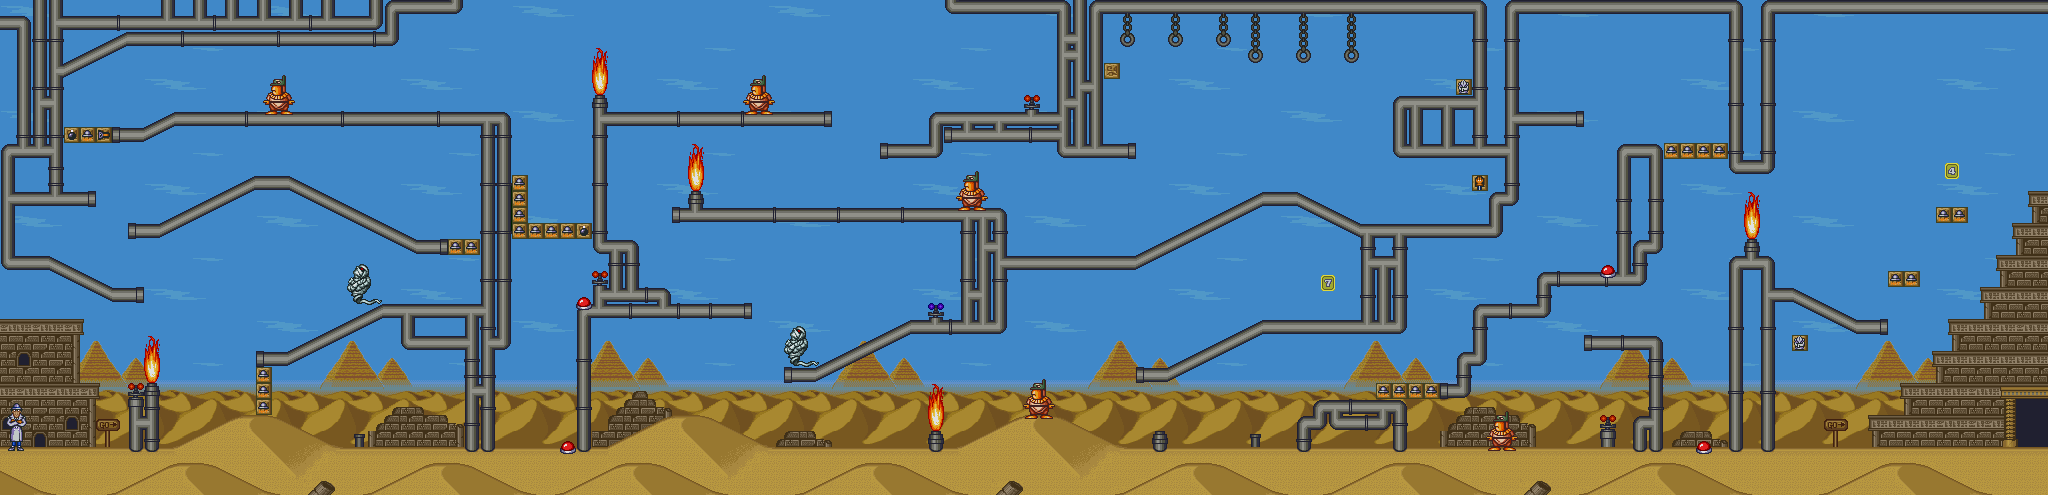
Hit the red switches with your regular attacks in order to turn off the flames that block your path.

The mummies that fly around will attack you with their bandages. The short, stout guys that jump around will send inner tubes that move across the ground after you.

There is a bit of a maze here, but thankfully it's not as bad as the mine cart sections in the last stage.

The first of the two bonus areas to access is a joke. It contains just one lousy Hat icon. The second one requires finding blocks with the Magnifying Glass, but I'm too stupid to check.

Area 2

Another vertical section. You'll finally use the lantern here for the first time. You can see somewhat without it, but the lantern kills the short stout guys that are in your way in one shot if you've powered it up.

Area 3

Bonus Area 3

Bonus Area 8

The ceiling spikes will slowly ascend and descend. At least you can duck at the bottom of the area to keep the top of your head from being impaled.

The bonus area near the start contains a lonely extra life. Better than nothing.

Area 4

The boss is Dr. Claw riding a giant King Tutankhamen head. The Red Copter is your friend here, as you can use it to take down not only Dr. Claw but also the cat vase missiles he fires as he goes in and out of the screen. This will make it easier to jump from one moving platform to another as you take him down.

Gadgets and Power-ups


Grappling Hand: Lets you grab rings and other handholds above you.

Plungers: Fires sticky mini-plungers from your hat which can stick to walls. Use these to climb walls.

Blue Copter: Lets you glide in mid-air.

Red Copter: You can't fly with this copter, but you can send it upwards to attack enemies. You can guide it with Left and Right, but Gadget will move when you do this, so be careful.

Arrow: Fire arrows at enemies.

Bomb: Drop a bomb nearby. If the explosion hits an enemy, it'll do massive damage.

Lantern: Lets you light your way through dark areas. You can even throw the lantern on the ground and damage enemies with the flames!

Mini-Gadget: Sends out miniature Inspector Gadgets which will walk towards enemies

Question Mark: Drops an anvil.

Hats: Hats are your energy for your gadgets. Each icon gives you two hats.

Inspector Gadget Head: Extra life.

Inspector Gadget Suit: Extra hit. You can only have one extra hit at any given time.


Brain Icon: Increase the range of your regular attack. Your range goes back to the default minimum when you die.
Tuesday, April 15, 2014

PrinceWatercress plays Inspector Gadget - Stage 4 of 6


The mine cart section is the most confusing part, but at least the second half of it is far easier to deal with.

All maps by Frank15.

Stage 4


Area 1

Bonus Area 2

Bonus Area 6

When you start this stage, there will be water below you. Gadget cannot swim, and if he is deep water for long enough, he will die.

The MAD agents in the safari suits will not only send out scorpions that travel across the ground, they'll also send out butterflies that will fly at you and do damage.

The MAD agents in the blue suits with the guns will aim at you if you get close enough. Get even closer and they'll jump back and forth much like the snowmen from the second stage.Finish them off with the arrow.

When you reach the platform at the far end, the water will drop and you'll be able to continue left and go through more of the level. However, the water level will continuously rise and fall, and if you're in too deep for too long, you'll die. You'll need to use the walls in the background as platforms in order to survive and make your way to the second area.

Area 2

Bonus Area 4

Here, you'll have to ride the mine carts in order to get to the other end of the mine shaft.

The bombs with the "B" on them are, of course, bombs. You don't want to touch these, but you can attack them to get some power-ups.

The MAD agents that hang onto ceilings and the undersides of mine cart tracks will dive down at you in an attempt to knock you off the car you're currently on.

In case you hit an intersection, the mine cart you're currently on will keep going in its original direction.

You'll want to make your way to the lower-left part of the area where the guy with the gun is. From there, get on the mine cart above you and get on either the next car you see or the one after that (which is just before you start going down into the pit). Avoid the bombs, and you're done. The upper exit has a bonus area.

Area 3

You'll have conveyor belts to deal with, as well as more mine carts, but at least the whole area isn't dominated by the mine carts.

Area 4

You'll be on a circular belt with five platforms on it. You'll want to stay on those platforms, but also keep your distance from Dr. Claw so the three fists on his chair don't pound away at you. This is probably the first boss area that will give you any real difficulty.

If the fists glow, they're about to strike. Keep that in mind as you constantly reposition yourself to get in the needed five hits to get out of here.

Gadgets and Power-ups


Grappling Hand: Lets you grab rings and other handholds above you.

Plungers: Fires sticky mini-plungers from your hat which can stick to walls. Use these to climb walls.

Blue Copter: Lets you glide in mid-air.

Red Copter: You can't fly with this copter, but you can send it upwards to attack enemies. You can guide it with Left and Right, but Gadget will move when you do this, so be careful.

Arrow: Fire arrows at enemies.

Bomb: Drop a bomb nearby. If the explosion hits an enemy, it'll do massive damage.

Lantern: Lets you light your way through dark areas. You can even throw the lantern on the ground and damage enemies with the flames!

Mini-Gadget: Sends out miniature Inspector Gadgets which will walk towards enemies

Question Mark: Drops an anvil.

Hats: Hats are your energy for your gadgets. Each icon gives you two hats.

Inspector Gadget Head: Extra life.

Inspector Gadget Suit: Extra hit. You can only have one extra hit at any given time.

Brain Icon: Increase the range of your regular attack. Your range goes back to the default minimum when you die.

Inspector Gadget Theme


Here you go.

Monday, April 14, 2014

PrinceWatercress plays Inspector Gadget - Stage 3 of 6


Welcome to the jungle. It's gonna bring you down...hoo-uh!


All maps by Frank15.

Stage 3


Area 1

Bonus Area 2

Bonus Area 5

Not much to this area. Take down the monkeys whenever you can, and avoid the spears thrown by the MAD agents in the masks and grass skirts.

The monkeys will throw fruit at you in two directions, and they can also jump straight up from the platform they are hanging on by their tails. The bombs make quick work of them if you're fighting them from above.

The lifesavers will keep you out of the water, which is instant death. The one that Brain is riding on is a springboard, and there is a bonus area right above him.

Area 2

The fruits act as the breakable blocks here, but there are some hidden ones at the very beginning of the area that I didn't notice when I played through it.

Watch out for the fish that jump out of the water here. At the apex of their jump, they emit and electric shock and a robot fish skeleton drops out. The jump is the worst part of all this, as a well-placed jump can knock you right off the boat and into the water for a cheap death.

The wooden dummies will shoot darts into the sky that fall towards you. These two can send you to a cheap death if you're not careful.

When you get on the first boat, you can use the Blue Copter to save yourself from being knocked into the river by the fish if you've powered it up to the point that it's flashing when you have it selected. This will make you invincible against the fish here that are very hard to dodge.

When you step on the second boat, you'll face the bosss.

Area 3

You'll land at the cliffs on the waterfall, breaking the boat. Dr. Claw will come at you with four spiked balls rotating around him. Attack the spiked balls four times to get rid of them. As you remove the spiked balls, Dr. Claw will move more slowly.

The logs on the left side of the area and the MAD agents on the right will act as platforms. Use your regular attack and punch upwards if you need to, and use the arrow to hit both Dr. Claw and the spiked balls from afar.

Gadgets and Power-ups


Grappling Hand: Lets you grab rings and other handholds above you.

Plungers: Fires sticky mini-plungers from your hat which can stick to walls. Use these to climb walls.

Blue Copter: Lets you glide in mid-air.

Red Copter: You can't fly with this copter, but you can send it upwards to attack enemies. You can guide it with Left and Right, but Gadget will move when you do this, so be careful.

Arrow: Fire arrows at enemies.

Bomb: Drop a bomb nearby. If the explosion hits an enemy, it'll do massive damage.

Lantern: Lets you light your way through dark areas. You can even throw the lantern on the ground and damage enemies with the flames!

Mini-Gadget: Sends out miniature Inspector Gadgets which will walk towards enemies

Question Mark: Drops an anvil.

Hats: Hats are your energy for your gadgets. Each icon gives you two hats.

Inspector Gadget Head: Extra life.

Inspector Gadget Suit: Extra hit. You can only have one extra hit at any given time.


Brain Icon: Increase the range of your regular attack. Your range goes back to the default minimum when you die.
PrinceWatercress plays Inspector Gadget - Stage 2 of 6


It's time to head to the Swiss Alps to see if we can find Penny again...


All maps by Frank15.

Stage 2


Area 1

Bonus Area 4

Bonus Area 5

There's a bonus area just under the start. Step on the ledge in the floor (which tends to blend in with the ground) and use the Blue Copter as soon as you start falling to get there.

The MAD agents are here and they're dressed for the cold. They're also ready to lob snowballs at a moment's notice and jump when they see you jump. The snowmen will bounce around wildly when you approach them and take four hits to get rid of.

Area 2

Bonus Area 1

Bonus Area 2

Now it's time for our first strictly vertical area. The mechanical planes will try to drop bolts down at you, and they take two hits to kill. Your Red Copter will come in handy to take care of some of the enemies here.

The snowmen here are tinted red, and they're mercifully easier to destroy (two hits versus four from the last section).

Watch the snow. Wherever it blows, that where you'll be slowly pushed, especially in the air. It changes direction every couple of seconds, so watch it closely and time your movements to reach certain ledges.

Area 3

Bonus Area 1

Aside from the blocks that fly around in circles and the clock gear platforms that move up and down, you'll also have the wheel platforms that have you running in place when you walk on them.

Using the arrow will let you pick enemies off from afar.

You've also got the robots to contend with. When you hit them, the upper half will fly off, and will seemingly fly towards you. Even when they're dismembered, even touching the upper half while it's on the ground will cause damage. Either wait for it to die on its own or attack it with a ducking attack.

Boss

Dr. Claw is severely easy here. Keep your distance and hit him with three arrows. When he loses the swinging blade, hit three more times with the arrow while staying away from the spiked projectiles he tries to hit you with.

Gadgets and Power-ups


Grappling Hand: Lets you grab rings and other handholds above you.

Plungers: Fires sticky mini-plungers from your hat which can stick to walls. Use these to climb walls.

Blue Copter: Lets you glide in mid-air.

Red Copter: You can't fly with this copter, but you can send it upwards to attack enemies. You can guide it with Left and Right, but Gadget will move when you do this, so be careful.

Arrow: Fire arrows at enemies.

Bomb: Drop a bomb nearby. If the explosion hits an enemy, it'll do massive damage.

Lantern: Lets you light your way through dark areas. You can even throw the lantern on the ground and damage enemies with the flames!

Mini-Gadget: Sends out miniature Inspector Gadgets which will walk towards enemies

Question Mark: Drops an anvil.

Hats: Hats are your energy for your gadgets. Each icon gives you two hats.

Inspector Gadget Head: Extra life.

Inspector Gadget Suit: Extra hit. You can only have one extra hit at any given time.


Brain Icon: Increase the range of your regular attack. Your range goes back to the default minimum when you die.
Sunday, April 13, 2014

PrinceWatercress plays Inspector Gadget - Stage 1 of 6


"What's this? Watercress just Let's Plays something before making a guide for it? Wait, Watercress did this before with Batman Returns? Okay, nevermind..."

Seriously, though, this is one of the more interesting games I've worked on.

All maps by Frank15.

Penny has been kidnapped by Dr. Claw. Only the bumbling yet very successful Inspector Gadget can save her, but he'll have to make his away all over the world in order to find her!

Stage 1


Area 1

Bonus Area 1

You'll start the game learning how to use the gadgets to get around. Use L and R to switch between the Grappling Hand and the Plungers. The Grappling Hand will let you grab the rings above you, while the Plungers will let you climb walls.

Break blocks to get hats and other power-ups. You'll definitely find Hats doing this, and you'll want to get Hats to power your gadgets.

When picking up gadgets, feel absolutely free to grab stuff you've already found. You're better off dong this, as you can power-up your gadget two more times after you initially collect them and add them to your collection of gadgets. Powering them up will add to their power and range, which can be a big help in the later levels.

Collecting an icon for a gadget you've fully powered-up will make the icon flash when you have it selected at the top of the screen. This gives you a one-time only use that's even more powerful than maximum level. If you want to use it again, you'll have to pick up its respective icon again.

The MAD agents will move back and try to throw hammers at you like boomerangs. Always duck down when you get close to them, so you can duck under the hammer. Kick them when they get close after their hammers return. If you have the Arrow gadget, fire it at them to make progress a little easier.

The yellow agents require one hit to kill, while the purples ones require two.

Parts of the bridge will be struck by lightning when you get near them them, so be careful. The lighter ones will be the ones to take the hit.

You can hold Down for a second to get Inspector Gadget to duck down and look through his magnifying glass. When he does this, look around the screen for flashing blocks. When you let go of Down, they'll disappear, but they'll still be there. Attack those areas to uncover the blocks and find some hidden power-ups!

The red button-shaped things on the ground are springs. Jump on them to get bounced up. Jumping on them repeatedly will allow you to jump higher on subsequent bounces.

The spinning yellow squares are bonus areas. Pick them up and you'll be shuttled to one. Pick up everything, then jump onto one of the big springs to leave.

You have a specific amount of time to get through the entire stage, and the only way to get more time is to lose a life. The timer stops when you're in a bonus area. You don't get more time upon entering a new area, and I find this out the hard way, sadly.

Area 2

Bonus Area 2

At least it's not raining anymore.

The MAD agents in the tree costumes will leap up and come down very swiftly when you get close. They'll open their eyes first, then they'll jump if you tred closer. You can hit them with your regular attack if you're quick enough, and you can get some good power-ups from them if you're lucky.

You can attack the boulders that roll around, but it'll take three punches. You'd better be quick if you actually want to do it.

You can leave this area by going all the way to the right on either the low road of the high road, but if you want to explore more of the upcoming haunted house, take on the high road near the end. Don't worry about the balloons, as they'll only pop when the reach their highest point. If you're stuck at the bottom, no worries. Just climb up the rings with the Grappling Hands to get up there. You should have it maxed out by now.

Area 3

Bonus Area 3

The moose heads will drop down when you're below them, but you can hit them with your regular attacks.

The purple MAD agents require two hits compared to just the one for the yellow ones.

The mice walk on the ceilings, and will drop down when you're below them.

Jump over the floor tile sets that are above pits. They will tip over and send you falling when you walk on them, causing a lost life.

The Brain icons are the best. Collect a whole bunch of them to extend the range of your regular attack.

Jump over the exit to get an extra hit if you need it.

Boss

The boss here is the chandelier, and this battle is really easy. After Dr. Claw lands inside the picture frame, use Red Copters and Arrows to destroy the chandelier, and avoid the candle flames and MAD agents that come down as the room spins around in all its Mode 7 glory.

You won't find Penny, but you will find out that Penny has been taken to somewhere in the Swiss Alps.

Oh, and your health isn't restored when you enter a new stage.

Gadgets and Power-ups


Grappling Hand: Lets you grab rings and other handholds above you.

Plungers: Fires sticky mini-plungers from your hat which can stick to walls. Use these to climb walls.

Blue Copter: Lets you glide in mid-air.

Red Copter: You can't fly with this copter, but you can send it upwards to attack enemies. You can guide it with Left and Right, but Gadget will move when you do this, so be careful.

Arrow: Fire arrows at enemies.

Bomb: Drop a bomb nearby. If the explosion hits an enemy, it'll do massive damage.

Lantern: Lets you light your way through dark areas. You can even throw the lantern on the ground and damage enemies with the flames!

Mini-Gadget: Sends out miniature Inspector Gadgets which will walk towards enemies

Hats: Hats are your energy for your gadgets. Each icon gives you two hats.

Inspector Gadget Head: Extra life.

Inspector Gadget Suit: Extra hit. You can only have one extra hit at any given time.

Brain Icon: Increase the range of your regular attack. Your range goes back to the default minimum when you die.
Controls


Control Pad: Move around (Left and Right), attack upwards (hold Up) duck (Down). Holding Down for a few seconds lets you uncover hidden power-ups.
A: Use special weapon (requires Hats)
B: Jump
Y: Regular Attack (fist on ground, kick while crouching, headbutt in mid-air)

L and R: Switch between gadgets