Showing posts with label part 60. Show all posts

Monday, March 16, 2026

PrinceWatercress plays Super Mario Odyssey - Part 60 of 92


The post-game has officially begun, and we head back to the Cap Kingdom and pick up some more Power Moons.


We're going back to all the kingdoms we've been to, in order. Now that Bowser is beaten, there's a few more Power Moons in each world that we can pick up, and there's also a Moon Rock that we can activate for even more moons. We'll go for the post-Bowser Moons first, then activate the Moon Rock and get whatever is left.

Peach is now in all of the previous worlds and is taking a world tour with Tiara, and if you find her, she will give you a Power Moon. Believe it or not, you don't have to go through all the kingdoms again in order, despite what she says after giving you a Power Moon.


The Moon Rock is on an island in the fog. Fly to it with a Para-Goomba, then get out of the Para-Goomba and attack the Power Moon. You'll unlock Power Moons 19-31. When you do so, you'll get the locations of all the new Power Moons on your map and compass. If you missed any moons that were unlockable in the main game, you'll get the locations for those, too. Moon Rock Moons will have yellow X's (or numbers, in case there is more than one in a specific area), while pre-Moon Rock Moons will be in cyan.

Power Moons


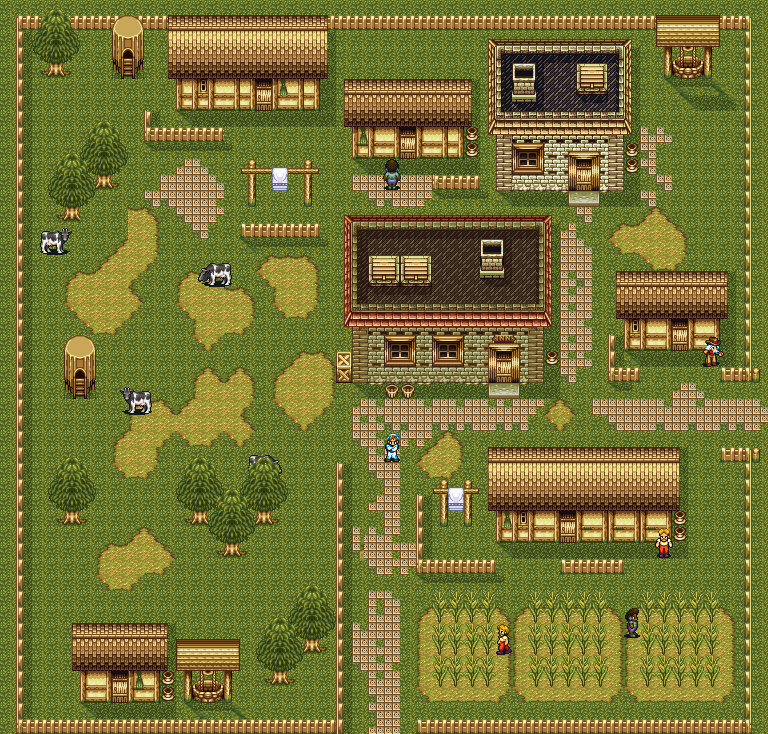
12. The Forgotten Treasure - There is a Bonneter that you can talk to on top of a hat house, and if you talk to him, you'll trigger a quest for a lost treasure. You'll be going under the crates near the Crazy Cap Shop, the narrow passageway within the fog, Glasses Bridge, and the biggest hill in the Kingdom, which is near the Odyssey, before heading towards the Moon. When Cappy tells you that the Power Moon is not there and tells you where to go next, you're on the right track. The Power Moon will be at the steps just before the bridge near the Odyssey. Cappy will tell you that you're right on it when you are, and Mario will even look down on the ground and even kick on the exact spot if you're on it. Ground pound that spot for a Power Moon.

13. Taxi Flying Through Bonneton - In the Central Plaza, take control of the binoculars and take a look at the balloons flying about in the sky. One of them is a Taxi, and if you zoom in and focus on it for a few seconds, you'll get a Power Moon. It will land above a street light.

14. Bonneter Blockade - There is a Bonneter guarding a Power Moon inside of a house. He says he is not scared of anything including Para-Goombas. Find a Para-Goomba, take control of it and return to the house for a Power Moon.

15. Cap Kingdom Regular Cup - Koopa Freerunning will be near where you faced the Broodals. During this race, you'll need to get to the biggest hill in the kingdom near the Odyssey. Use the Ground Pound to save yourself time at the beginning, and keep long jumping and triple jumping where necessary to get this Power Moon.

16. Peach in the Cap Kingdom - After talking to the Toad outside Peach's Castle in the Mushroom Kingdom, you'll find Peach in all the other kingdom. You'll find Peach in the Cap Kingdom near the central plaza, and Tiara will be with her. She'll hand you a Power Moon. From here on out, you'll have to look for Peach in all of the other worlds for a Power Moon, so keep an eye out!

17. Found with Cap Kingdom Art - You'll need the Hint Art from earlier (see above) to unlock this one. Go up to where the Lochlady from the Water Kingdom is near the Odyssey in the Moon Kingdom and ground pound the ground behind her for this hidden Power Moon.

18. Next to Glasses Bridge - This one will be in plain sight once you activate the Moon Rock next to the bridge near the Odyssey.

19. Danger Sign - There is a skull sign in the fog near the Odyssey. After you activate the Moon Rock, there will be a Power Moon above it; fly up to it with a Para-Goomba.

22. Spin the Hat, Get a Prize - After activating the Moon Rock, get on the arch near the end of Glasses Bridge and hit the hat in the center with your cap. Instead of a coin, you'll get a Power Moon.

23. Hidden in a Sunken Hat - There is a light emanating from a top of a house in the fog near the second bridge (also known as Sometimes Bridge) once you activate the Moon Rock. Throw your hat at the pole on top of the house for a Power Moon.

25. Bird Travelling in the Fog - You'll need to get a Para-Goomba from a higher elevation to get this one. After you activate the Moon Rock, a bird will fly around surrounded by glowing lights. Chase after it and catch up to it to get a Power Moon.

26. Caught Hopping Near the Ship - On the biggest hill in the kingdom near the Odyssey, there is a rabbit. Catch it for a Power Moon. Throwing your hat at it makes this one easier.

27. Taking Notes: In the Fog - To the west of the Central Plaza, there is a Treble Clef in the fog. Grab it with a Para-Goomba, then fly around and get all the notes before time runs out to get a Power Moon.

Monday, October 28, 2024

PrinceWatercress plays Chrono Trigger (Super NES) - Part 60 of 70


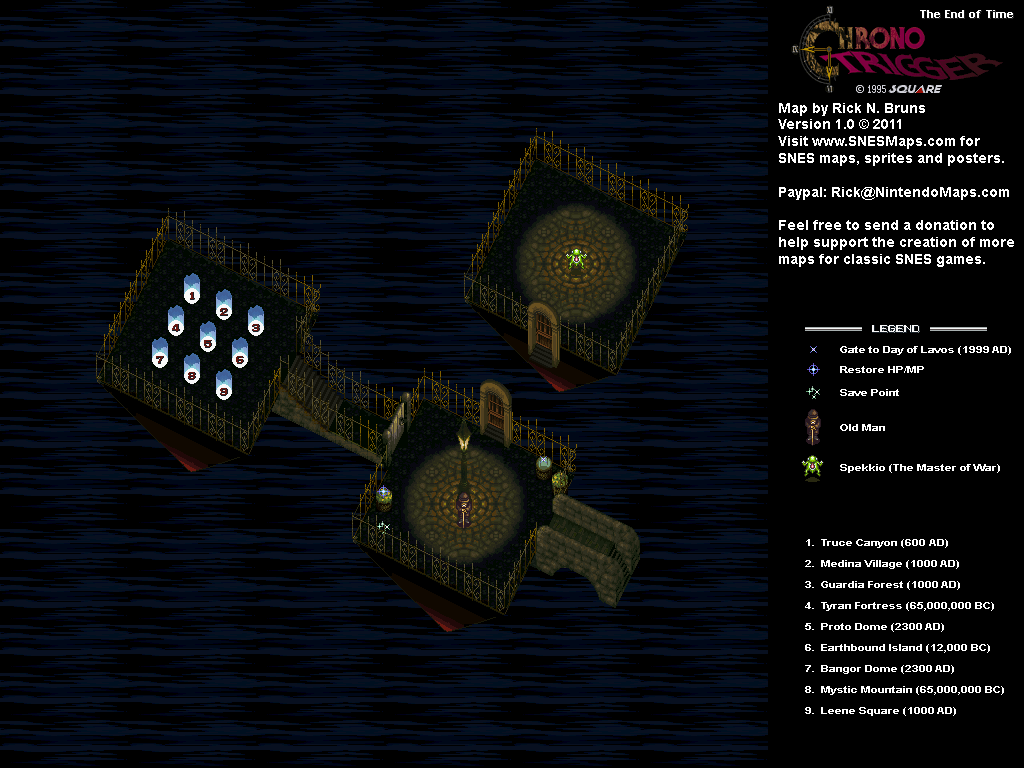
The End of Time leads us to another ending...but first, we have to face Spekkio again.


For the next ending, you'll need to beat Lavos when you first enter The End of Time and before you return to the End of Time with the Telepod Gate and head back to 600 A.D.

Believe it or not, the blue Masa & Mune is the second Spekkio battle that I've done. He can hit you with a weak Lightning attack that can also cause Chaos, Fire 2, Dark Bomb, Ice 2, and Lightning 2. He can also hit one party member with an instant death attack. For best results, Haste everyone with Marle, and cast something on Spekkio that will do over 2000 HP per shot so you can easily burn through this form's 10,000 HP.

For beating this form, you get the Graceful set, which gives you a Magic Tab, a Speed Tab, a Power Tab and ten Elixirs.

As for Lavos, I have to get through the boss rush part again, but at least I won't have to do it for the remainder of this part of the Let's Play where I'm getting all of the endings. 

For the Lavos battles here, I equip a Gold Stud on Lucca, since the SightScope is going to be absolutely useless here.

When you beat Lavos at this point in New Game Plus, you'll see a simple ending where a frog, a Nu and a Kilwala fool around while the credits roll.

Monday, November 15, 2021

HCBailly plays Final Fantasy II AGAIN - Part 60 of 65


In this entry, we fight a bunch of Molbors and dragons.


The Great Molbors (G.Mlboro) are more like the Molbors we know and love, as they can inflict just about every status ailment in the game with their physical attacks. They are Rank 6 Earth types and pretty powerful, so be ready to Curse them and protect yourself with Shell. Sadly, you can't exploit any weaknesses they have with Excalibur.

Mega Parasites and Ice Lizards could be met earlier, but we can meat them here. Mega Parasites are weak to Ice and can cast Drain 16 and Osmose 16 in addition to inflicting Amnesia. Ice Lizards can cast Snowstorm 16 on the entire party for a lot of damage.

The chest with the Cat Claw knife contains a Blue Dragon. Thankfully, this thing can be Toaded or Mini'd like the other Dragons. If you don't have either powered up, keep in mind it can cast Thunder-elemental spells. Curse it and Osmose it so that you don't have to deal with the magic, and use Protect to shield yourself from its powerful physical attack. The Blue Dragon is also weak to Poison.

The Blue Dragon can drop a Holy Lance as a rare drop. It is strong against Dragon-type enemies in this game. As for the CatClaw, it is strong against Spellcaster-type enemies and gives a massive boost in attack power.

The White Dragon (W. Dragon) will show up as a random enemy here.

The Chimera Sphinx (C.Sphinx) can cast Blaze 16, Petryifying Mist and Dispel 16 and are considered Dragon-type and Magic Beast-type enemies. As long as you can cast protection spells on your party, you're set.

You take damage from the un-animated waterfall. Why? I don't know. But you do.

The Rune Axe is the most powerful axe in the game, but to walk away with it, you'll have to take on a King Behemoth (K.Bhmoth). This Behemoth is harder than the other one, and you'll definitely need to Curse and Osmose it as you buff up your protection. It has no elemental attacks or weaknesses; it just has a very high attack power. The King Behemoth is an Earth-type monster, but you cannot really exploit that.

You can get a Power Vest off the King Behemoth as a rare drop.

Monday, May 27, 2019

HCBailly plays Final Fantasy IV (Super Famicom) - Part 60 of 70


Uh, Cecil? Edge? We kinda need a good healer and a good spellcaster not named FuSoYa for this. Guys? Guys?!?


From where you fought the Four Feinds, go north. You'll fight off the core of the Giant.

Destroy the DefenseSys (the lower-right orb). Have Rydia summon the Sylphs to destroy it immediately while attacking the other two Orbs. From here, you can attack the ControlSys with your strongest physical attacks and summons. The Attack Sys (the upper-right orb) will cast Reflect on the ControlSys so it can cast Laser on it and hit the whole party. From here, do not destroy the AttackSys before destroying the ControlSys, or else the ControlSys will cast Globe 199 and do some immense damage.

After destroying the core, the giant will be stopped, then Golbez storms in. FuSoYa confronts him and tries to get Golbez to remember who he is. Golbez comes to his senses, and it is revealed that Golbez really is Cecil's brother and that he was controlled by Zemus. Golbez plans to end everything by fighting Zemus on the moon, and FuSoYa goes with him. Before Cecil can go after Golbez, the Giant of Bab-il begins to collapse. Suddenly, Kain shows up, this time back to his senses again, and helps Cecil and company get out as the giant explodes.

Back on the Magical Ship, Kain announces that he is back to his senses again, and Edge nearly attacks Kain for summoning the giant, but Rosa reminds him that Kain was also under Zemus' control while explaining to Kain what is going on. Edge is still reluctant to trust Kain in case he loses control again, but Kain tells him to kill him outright if he becomes evil again.

Rydia and Rosa tell Cecil they want to go, but Cecil tells them to stay here while he, Edge and Kain take on Zemus themselves, as there is no guarantee that they will come back alive, with Edge telling Rydia to be a good little girl and Rydia telling Edge she would hate to be him if he weren't kidding, saying he would end his reproductive years rather quickly. Edge, Kain and Cecil fly to the moon after they leave, then it is revealed that Rosa and Cecil never left. Rosa refuses to move unless Cecil takes him with her. Cecil reluctantly lets her come with them, then Rydia shows up and tells Rosa that she knew this would work and says that this is everyone's fight. You'll then be back on the moon. (I swear this whole part of the story is absolutely crap - I mean, it's pretty obvious from the get-go that everyone has their reasons to fight here - and is an even worse idea than Budget rental jetpacks. Why on earth would you tell the only women in your party - as well as the source of your strongest magical attacks and healing throughout most of the game - to go home and "let the men do it because we might not come back alive?" This accomplishes absolutely jack shit for the story - as you'll see later - and was not even necessary, even in the DS and Steam PC versions. As a matter of fact, it was so unnecessary that even Wikipedia itself refuses to acknowledge it.)

(By the way, if you go back to Blacksmith Kukuro's house in the underworld, you can buy Shurikens, HellWind Shurkines and Yoichi Arrows in case you really need any.)

Friday, June 15, 2018

HCBailly plays Terranigma - Part 60 of 75


Now that we know that Beruga is behind all of the trouble that's happening in this world, it's time we paid him a visit...

World map by Tropicon. Nirlake, Freedom and Mosque maps by Amir Azadur.


Nirlake


If you talk to Mr. Lon in Yunkou, he'll tell you that you did what you had to do and that Mr. Wong brought it on himself.

Head back to Will's house. Will and Anita will be there. Talk to Will, and he'll tell you his airplane should be finished as metal is available again. The airplane is now yours!

From the runway, press A. Once you're in the air, use L and R to ascend and descend respectively and press Y to accelerate. To land at an airfield, fly low and press A.

With the creation of the airstrip, Freedom has expanded once more.

Freedom


Freedom is now a bigger city than before.

Bell's office is now in a building in the upper-right corner of town. Bell will tell you he's getting orders for phones from all over, and that he feels fulfilled. He admits that maybe people can't go on any more without hearing other people. Upstairs, you'll meet Bell's new girlfriend, who remained close - wait for it - through the telephone. Bell has rebounded! Take that, Amanda! If you talk to Bell again after this, he'll just tell you it's a relationship conducted over the phone.

The door to the left of Bell's is Eddy's. You'll find out from the people on the first floor that he's studying other subjects. If you go upstairs and talk to Eddy, he'll tell you that he worries about how much light from electricity has changed lives and how it's changed human interaction (or something like that).

To the left of Eddy's is Kidsgart. Believe it or not, if you talk to the woman nearby, she'll tell you that the kids of Kidsgart are honest and adorable, which is a change of heart from how she felt about them before. If you go in, you'll find out that there's more to Kidsgart now, such as a shelf full of books, a television and even some respect, as the people of the town now like them after Will invented the airplane. One of the kids will tell you that Perel enjoys being with you so much that he has decided to follow you. Looks like we have one more ally. The room in the back is a bedroom, and an adult is there tending to the bedroom alongside being a teacher.

The lottery has a new item: the X-Spear. If you can somehow get your hands on it, it's a pretty good weapon: despite being weaker, it raises your luck as well as your critical hit rate.

The rest of the houses are just villagers, and they don't really say anything different from before the second expansion. Also, the Tourism building is across the street from the southern entrance.

Our next stop is Mosque. To get there, you'll need the airplane. You'll want to go to Taklama, which is in the center of Asia, and land on the runway there. To the north is Mosque, which is a reference to Moscow.

Mosque


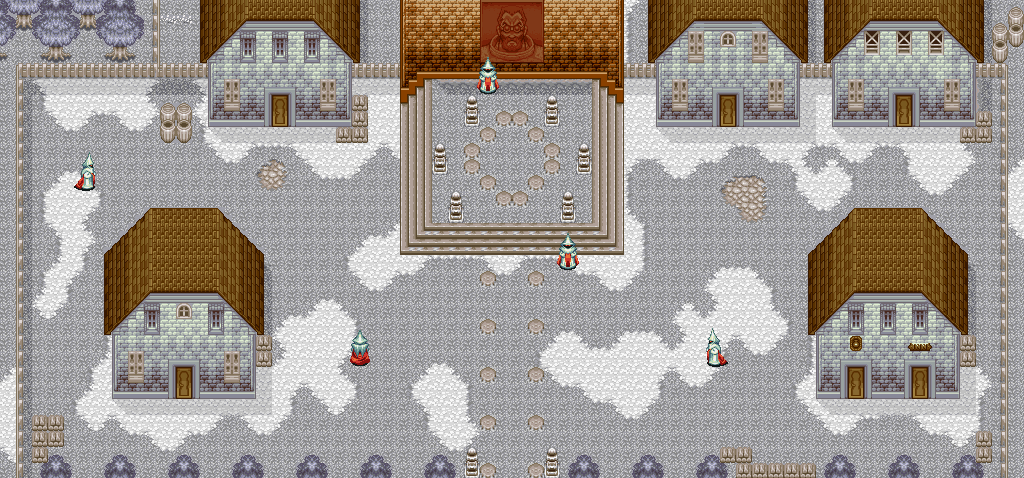
It's the Soviet Union all over again. Everyone here is dressed in white robes with red sashes. It's like they're Ku Klux Klan members in more royal regalia...and if I'm saying that, then you know something's up with this town.

In the center, you'll be told to head to the Disciples' Quarters to learn more about Beruga. You'll also see a shrine to Beruga himself. Everybody worships this guy like he's a god.

To the west of the shrine is a Domicile. If you talk to the guy in the room, he'll ask if you see Beruga's word. Say yes, and he'll tell you to enter the back room to be educated by a disciple. One of the disciples will tell you that Beruga is n a castle in the lake to the south.

From there, take a seat between the two disciples in the front. You'll learn that Beruga won a Nobel Prize for his biotechnology and perfect DNA engineering to cure diseases. He is now dedicating himself to achieving the secrets of human immortality so people can live forever. You'll then be told that humans shun silence and fear the dark for they are afraid of death, that dying and being incarnated brings unimaginable pain, and that when human immortality is achieved, change will cease and there will be peace forever in what will be Beruga's utopia. You'll then learn that Beruga is in cryogenic sleep and will soon awaken.

Wednesday, March 14, 2018

skorch82 plays Brave Fencer Musashi - Part 60 of 70


The final chapter is about to begin!

Chapter 6: The Sword of Luminescence


You'll be outside of the mine and in the forest after this. Leno (remember Leno?) will wake you up, and you'll meet Jon for the first time in a while. Jon will give you clues on how to find the Sky Scroll: a pillar of wind...day of the sky...tears of God fall on the forest...prodigious tree.

Now that Jon has done his job, he says goodbye. He warns you that once you get the Sky Scroll, there's no turning back. Musashi notices something about Jon as he leaves.

Head back to the castle, and Musashi will tell Steward Ribson about all that has happened so far. 

Talk to KnightD (Knight Rumparoni) to learn Rumparoni-SP. Pressing Triangle after the double jump will cause you to do a diving attack with both Lumina and Fusion.

Saturday, December 14, 2013

brickroadbrickroad and SovanJedi play Secret of Evermore - Part 60 of 88


The chessboard! Yay!

All maps by Grizzly.
 

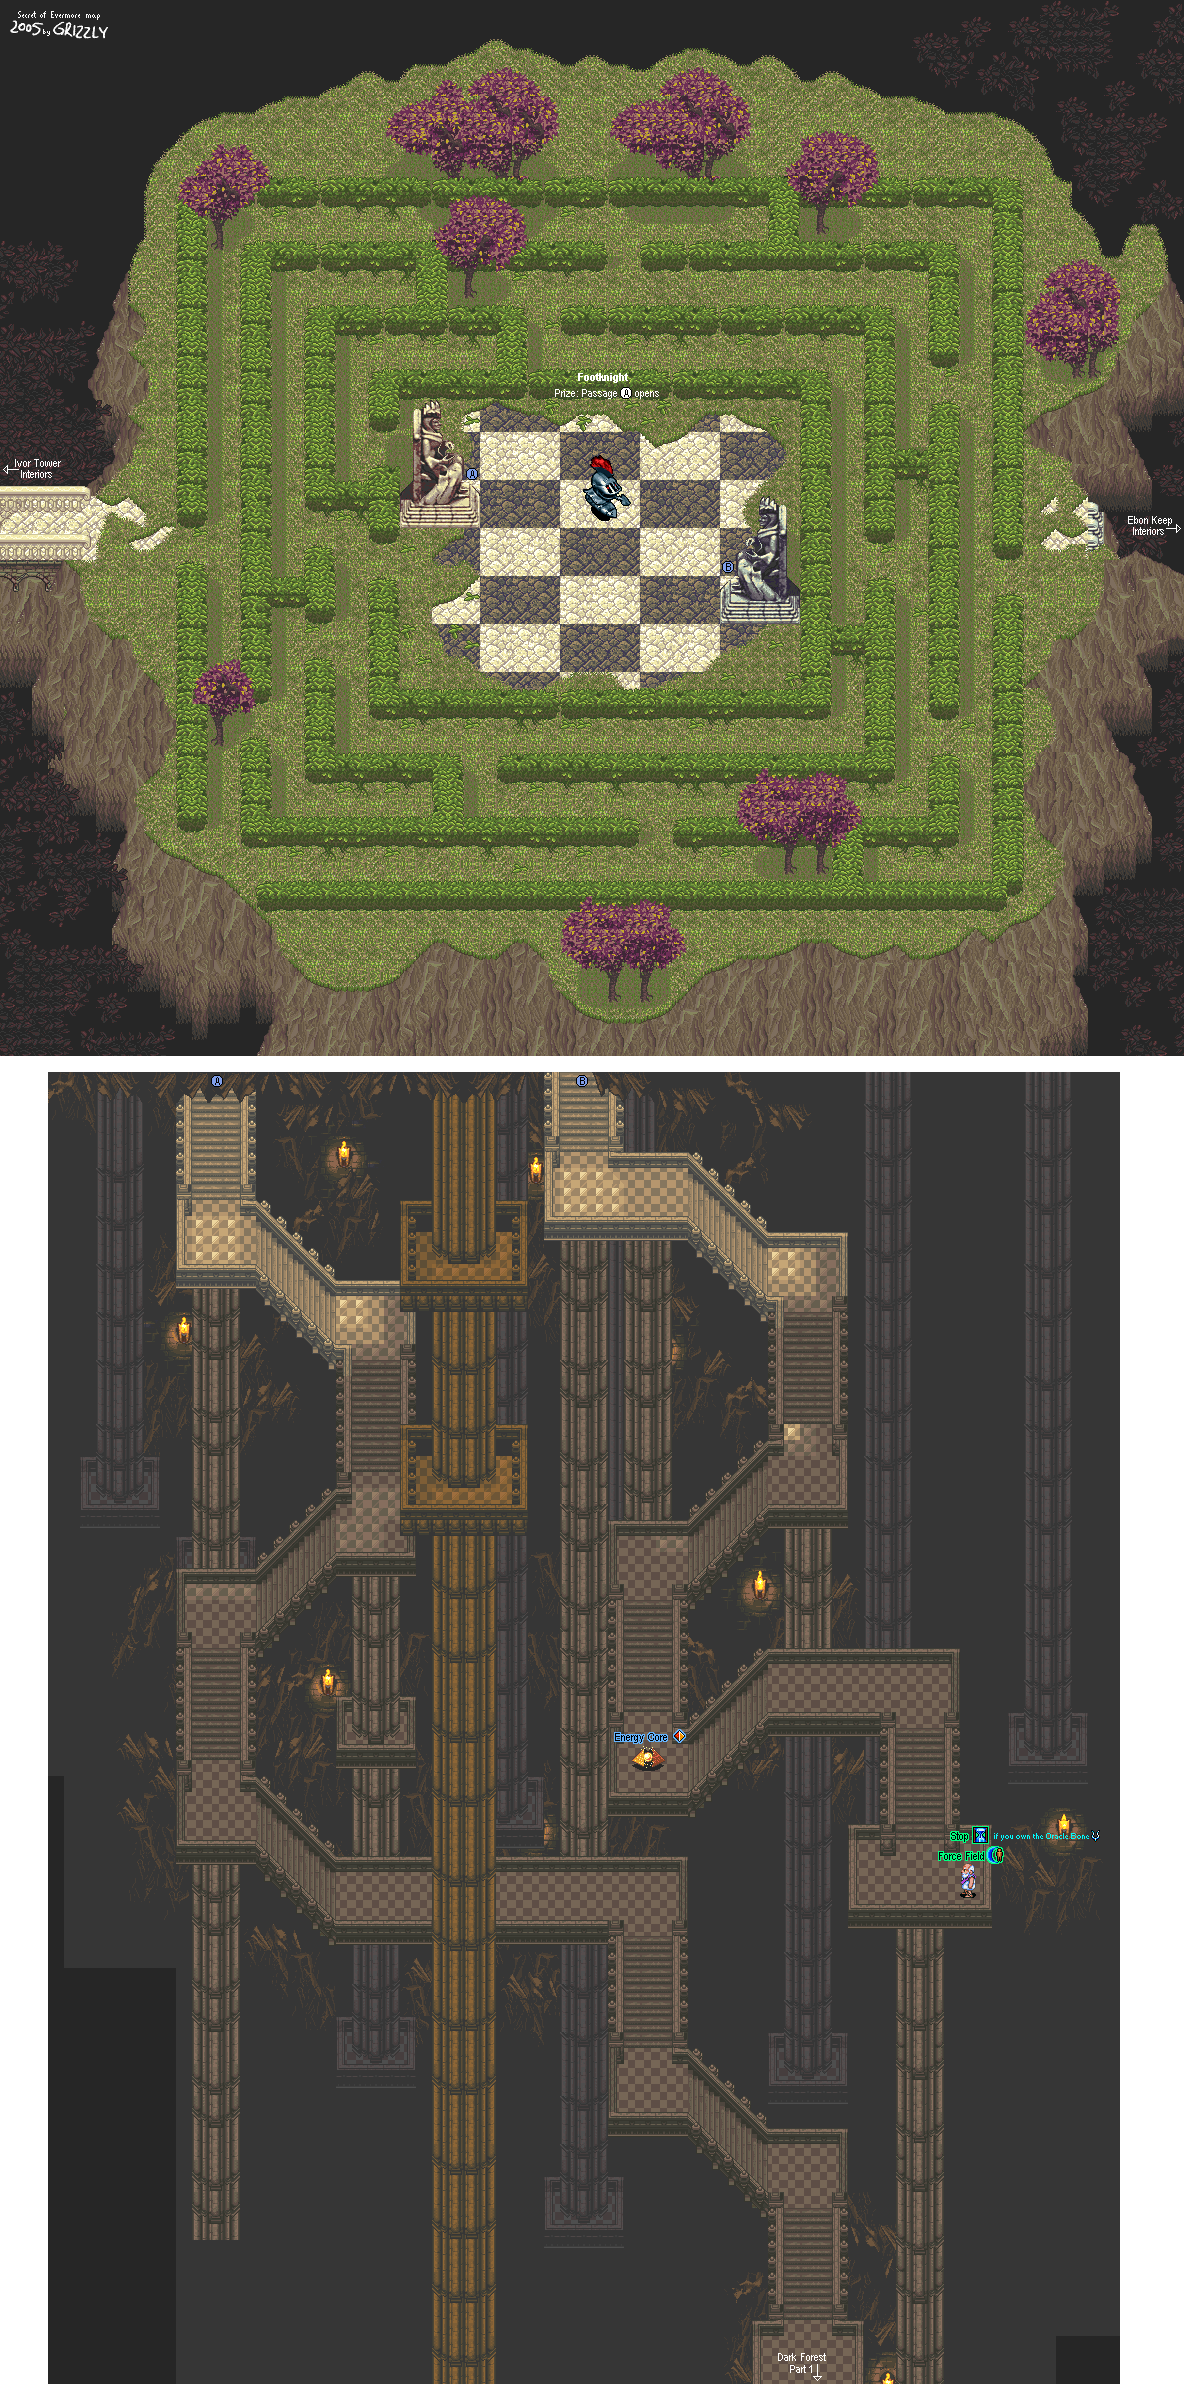
Chessboard Maze


Map

You'll be taking down a bunch of Skullclaws here while you go from end of the maze to the chessboard in the center. You may also find some Acorns near the trees, too, so use the Sniff function whenever you can.

Boss - Footknight


The Footknight will try to follow you around a lot and will ram into you whenever possible, so be ready to strike with your weapon and cast as many spells on him as you can. If The Dog can land a Level 3 attack on it, it'll help quite a bit.

When you win, a staircase will open up in front of the statue on the left. Go down this and you'll find a hidden staircase that leads you to the forest.

You'll see an Energy Core on your way down the stairs, but you won't be able to get it quite yet.

When you make your way down, you'll trigger a cutscene where Queen Camilla talks to her servant Eronio. You'll find out that there's some cruel intentions behind the journey she gave you...

Entrance to Dark Forest


When you reach the bottom, you'll come out of a cave near a waterfall. Talk to the guy walking around so you can save your game, which will prove necessary since the Dark Forest Maze can be tough.