Showing posts with label ProtonJon. Show all posts

Monday, June 5, 2017

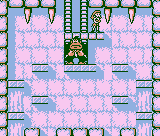
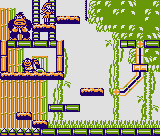
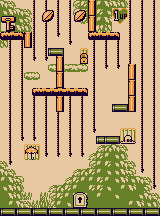
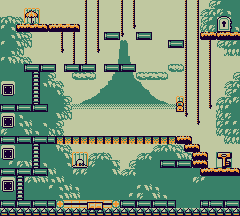
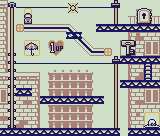
Proton Jon plays Donkey Kong for Game Boy - Part 5 of 5


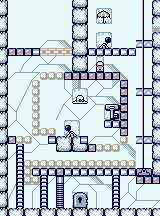
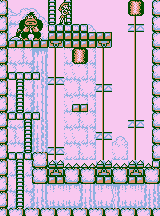
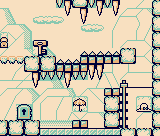
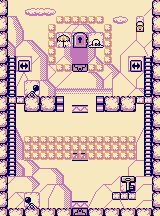
Here it is: the thrilling conclusion to Donkey Kong for Game Boy! Just two more worlds to go!


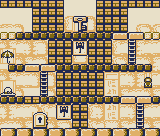
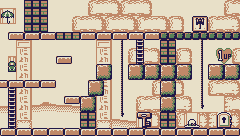
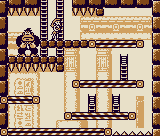
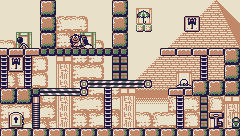
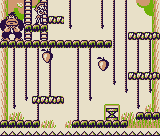
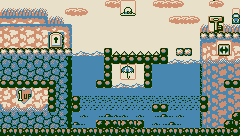
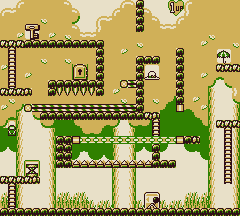
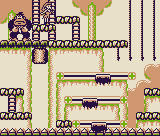
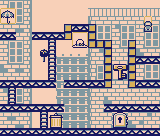
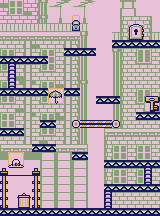
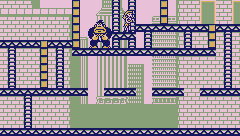
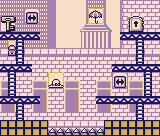
All maps by Captain Drake.

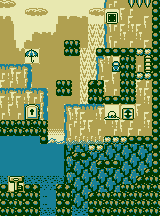
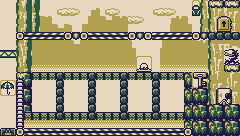
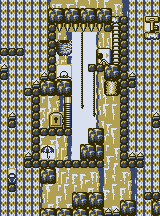
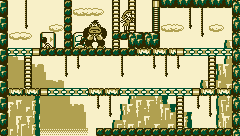
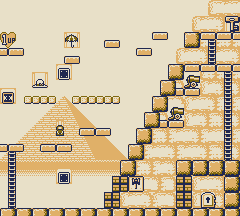
World 8: Rocky Valley

Stage 8-1


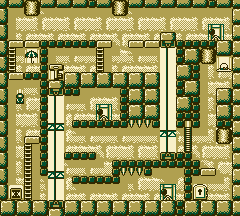
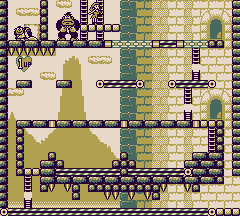
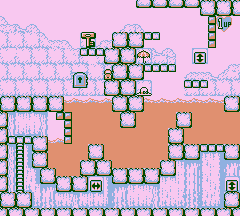
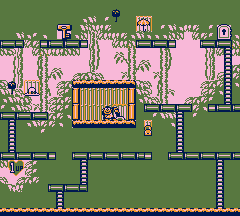
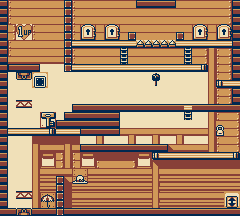
Get in the water, grab the key and toss the key up once you're all the way to the right. Go up, plant the magical ladder so that you can climb upwards. Toss the key up over where the hat is. Climb up and get the key before it disappears. Avoid the armadillos on the way to the door. You're done.

Stage 8-2


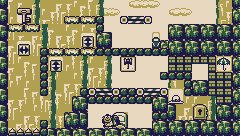
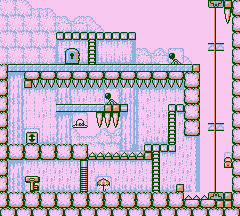
Go to the right, hit the switch, then jump over where the hedgehogs are on the way back. Go up and then take the conveyor belts.

Stage 8-3


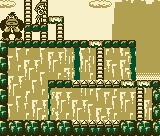
You can swim inside the waterfalls, and you can ascend if you hammer the A button fast enough. Use this to your advantage to swim to the top of the stage, then go down the ladder and toggle the switch to open the door to the exit. Go back up, get the key, drop down while avoiding the spikes, and ride the crusher to get to the door.

All this time, you'll have to avoid both the bird and the eggs it drops, so watch the skies.

Stage 8-4


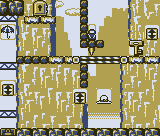
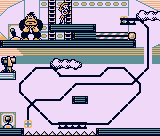
Avoid the hedgehogs, and go for the switch as soon as you can get to it (DK will be playing with a switch that controls the bridges.)

Stage 8-5


Just use the Super Hammer to get rid of the bricks and the hedgehogs. This is easy. You don't even need the ladder, since you can get around easily with the handstand jump.

Stage 8-6


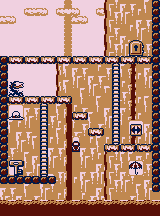
Place the magical springboard under the handbag, then use it to get up. Avoid the crushers as you go right. Go down and get the key. Take the moving platforms, flip the switch just under where the key was. Avoid the crushers as you make your way to the door.

Stage 8-7


The Panzers make their first appearance since Super Mario Bros. 2 and all of its ports. 

Avoid the Panzer, get the key, hit the magical bridge platform and use the platform to break your fall. DK Jr. will be playing with the switch, but all he'll be doing is reversing the direction of the conveyor belts.

Stage 8-8


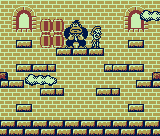
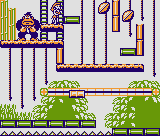
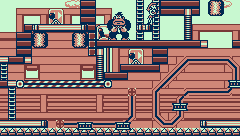
All you're really doing here is avoiding the rocks that Donkey Kong throws as you make your way towards Pauline.

Stage 8-9


If you want to skip the water, you can always get hit by a Mini Mushroom so you can take the bottom route. Otherwise, be careful around the fish and don't let them bite you.

Stage 8-10


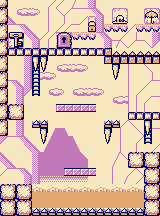
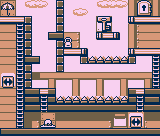
For this one, get to the magical springboard with the handstand jump and position it so you can get the key. Make sure that the tiny, singular bottom platform does not fall down. Once you grab the key, stand on that platform and ride it down to the door. You could continue to collect magic springboards, but you might find this to be easier.

You've also got the wind working against you much like in some of the Airplane stages here, so be careful. In this stage, it is all too easy to fall to your death.

Stage 8-11


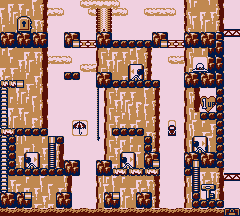
Go to the left, get the magical ladder icon with the handstand jump and place it near the key. Place the key on the conveyor belt, get the magical ladder icon to the right, and use it to gain access to the other side of the conveyor belt. Hurry over there and get the key, then use the last magical ladder icon so you can climb to the exit door. This one will definitely require some crackerjack timing to pull off, but it is possible.

Stage 8-12


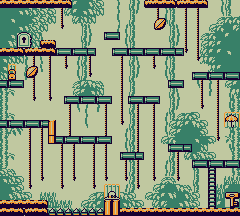
Stay underneath the dark, square-shaped platforms whenever possible. The boulders cannot tumble straight down from above them.

The lava is instant death. Don't let the intermission fool you!

Stage 8-13


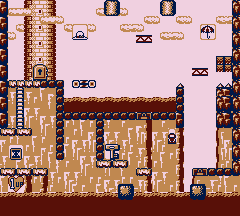
For this one, you'll want to place the magical bridge so that it's flush with the platform where the key is. From there you can throw the key up and get back to the door by using the seed-spitting flower as a platform.

Stage 8-14


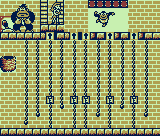
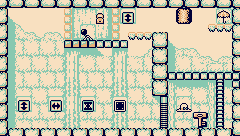
There are four switches. The top switch will be called "Switch 1." The bottom three, from left to right, will be "Switch 2," "Switch 3," and "Switch 4." As you're moving through this stage, watch out for the fireballs that are shot downward by the Panzer.

Toggle Switch 3 first. From there, go up and go right to Switch 4, then go left and hit Switch 2. Go up and hit Switch 1, and wait for the block enemy to be right-side up before jump on and then over him.

Go back down and hit Switch 2 so the block guy on the left reaches the bottom, then hit Switch 4. When the block guy on the right hits the bottom, toggle it again. This will ensure that the door blocking the key is open. You can now grab the key and get out of here.

Stage 8-15


Go up, and wait on the conveyor belt as the first crusher comes down. Jump onto it and jump on the moving platforms, and get the second crusher to come down. Jump onto it, then go to the right. Use the crumbling blocks to wait on the moving platforms nearby if you need to. Get the key, and use the rocks moving on the lava as platforms. Again, keep jumping on them so they don't sink into the lava. Use the magical springboard to get to the ladder leading back to the starting point.

Stage 8-16


You'll be dealing with the wind as well as egg-pooping birds as you throw walking rocks at DK. Focus on throwing the walking rocks at DK, as DK may inadvertently kill the bird. Of course, the bird will respond, but at least you won't have to deal with it for a few seconds.

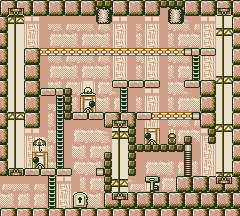
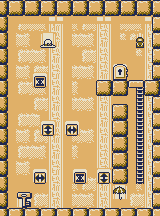
World 9: Tower

Stage 9-1


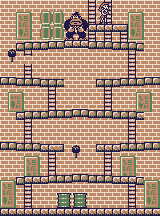
For the final world, you will be dealing with Donkey Kong and Donkey Kong Jr.

For this first stage, you'll have to brave the conveyor belts to get to Pauline and try not to get hit in the head by falling objects. At least you can backflip to the bridge if it's triggered, as DK Jr. will be playing around with the switch up top.

Stage 9-2


DK Jr. will be throwing springboards while DK Jr. will be toggling the bridges, but if you're quick enough you should be able to get through this without any problems.

Stage 9-3


For this one, DK Jr. will be playing with the switches, and you're going to be doing quite a bit of waiting. The switch will toggle both doors and bridges. Do not land on the walking horned skulls, as jumping onto them is instant death if you do.

You'll also be waiting on ladders to move their way up, and you'll also have the Mini Mushrooms to avoid again.

Stage 9-4


This one is similar to the final stage of Donkey Kong Jr. For this one, you'll have to move five keys to the top while avoid the eggs of the bird as well as Mini Mushrooms. When you move all five keys up to the top, you'll lock DK Jr. in a cage. We won't be seeing him again.

Stage 9-5


Just use your backflip to get to the top. This is simple.

Stage 9-6


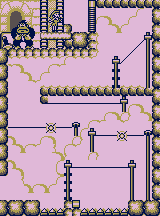
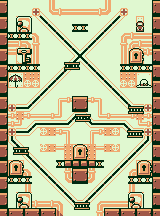
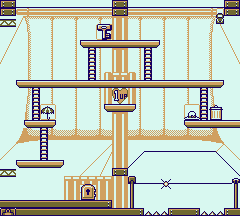
For this one, you're spinning on wires to get to the top. For the final, diagonal wire, spin five or six times to land in front of Pauline. Any more and you'll be sailing straight into DK. Just make sure the switch is triggered so that the door blocking the end is open.

Stage 9-7


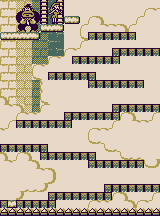
For this level, all the blocks will dissolve. You'll want to avoid the Mini Mushrooms, otherwise you'll have to time your jumps carefully so you don't screw it up at the end. You definitely don't want to fall to the bottom here.

Stage 9-8


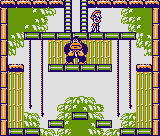
There's wind this high up in the tower, and the barrels drop Mini Mushrooms when you throw them into Donkey Kong. Unless you use the handstand, the barrels will not stop at all.

When you beat DK here, you'll finally be reunited with Pauline.

Stage 9-9


Uh-oh! DK's back, and he's eaten some Mega Mushrooms to get bigger!

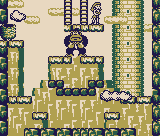
When he pounds the floor, you'll want to be out of the way. Some debris will fall, but some of it are barells. One of them will continue to fall. Stop it with your handstand and throw it at DK's face.

The best place to stand is on DK's nose, since all you'll have to worry about is the debris.

After two hits, DK will smash his knuckles together to try to hit you if you're on his nose. To avoid it, stand on his nose and jump straight up. He'll still cause barrels and debris to rain from the sky, but you'lve got to be quick with the barrels. If you can't get your hands on one before DK shakes the screen, the barrel on the floor will disintegrate and you'll have to wait to get another one.

If DK lifts his hands up, he's going to do two fist crushes. If his hands slide sideways, he's about to clap his hands together.

After two more hits, DK will hide under the floor and pound at the ground with his fists. Handstand jump to the other side to avoid his fist and the debris. After this, you'll have to deal with the usual tactics from this battle and get two more hits in. Thankfully, these two hits are the last, and once you land them, it's over! You've beaten Donkey Kong for Game Boy!


Proton Jon plays Donkey Kong for Game Boy - Part 4 of 5


We're on top of an airplane? Where WON'T we be going?

All maps by Captain Drake.

World 6: Airplane

Stage 6-1


Since you're moving around on top of the plane (as opposed to inside it), the wind blows you backward. This can be bad depending on what it is you're trying to do.

If you're going to go for the parasol, you're going to have a slightly difficult time due to the cannons and the wind.

Stage 6-2


Go left, ride the crusher, then go right and toggle the switch. Go back to the start and toggle the switch there. You'll be able to get the key. Leave it on the bridge, trigger the switch at the start again to get rid of the bridge, and grab the key again before it disappears. You can now open the locked door Pauline was taken through, which is second from left out of the five at the bottom.

Stage 6-3


Correct door is the center door at the bottom.

You'll be using handstand double jumps and backflips off of moving platforms to get to where you want to go. The switches control the movement of the platforms.

At least you're inside the airplane now, so you won't have to deal with the wind pushing you back.

Stage 6-4


The wind may be pushing you back, but it's still not too hard staying on the platforms. It's the fact that even though there is a switch at the lower-left that lets you reverse direction, Donkey Kong has a switch near him that does the same thing, which can mess up what you're trying to do when you least expect it.

Just avoid the bullets from the cannon, and avoid the spiked wheel that rolls around the platform in the bottom center, and just pay attention to what Donkey Kong is doing so you can anticipate when the platforms will reverse direction.

The cutscene here shows off the turrets, which appear only on the airplane and shoot slower bullets.

Stage 6-5


The turrets make their first appearance here, and unlike the cannons, they will try to track you to some extent even though they can only shoot straight.

Just remember that you can take damage and not die if you have the key in your hand.

Stage 6-6


You're in the clouds this time around.

Getting to the key is easy, it's the way back that's slightly more difficult. Just be sure to leap off the very edge so you don't land in the spikes.

Stage 6-7


Go all the way to the top and get the key. Throw it on the conveyor belt, then toggle the switch and go down one level. Grab the key before it returns to where you found it. Toggle the switch again, then keep repeating this step until you make it to the next-to-the-bottom-most level. Hit the magical ladder icon and place it so that you can climb down to the beginning, then do the conveyor belt stuff one more time. Grab the key, then toss it up the platforms until you reach the upper-left-most locked door. You're done.

Stage 6-8


This isn't any different from the other levels where you toss barrels at Donkey Kong, but you're doing it outside of the plane and the wind is involved. Be careful.

The cutscene here shows that the walking flames will cause ice bridges to melt.

World 7: Iceberg

Stage 7-1


Let the walking flame at the beginning clear out the ice blocks that are in your path. From there, take the moving platforms up and hit the switch. This not only removes the bridge to the left and lets the two walking flames near it move around and clear more ice blocks, it also reverse the direction of the moving platforms.

You'll want to toggle the bridge when they leave the upper-left corner, so they can clear the ice blocks and give you access to the key.

Being that this is an ice level, the ice platforms will have you slipping and sliding around. Use your jump to fine-tune your positioning.

Stage 7-2


The octopus will try to latch onto you. Move left and right rapidly to shake it off.

The walrus will lunge at you with his teeth when he sees you.

The icebergs will sink the longer you stand on them. Keep jumping on them to keep them on the surface.

To beat this one, flip the switch in the lower-right corner to turn on the moving platforms, underneath the water. Mind the octopus. From there, you'll be able to get the key. Just watch out for the walrus.

While on the iceberg, be sure not to fall into the water with the key. Otherwise, you'll have to get the key all over again as you won't be able to swim with the key.

Stage 7-3


The door is near the hat, but there's a rather interesting conundrum involving the door: it's invisible. Expect to see them a few more times in the Iceberg world and remember where they are in each level.

This one's pretty simple. Just jump onto one of the penguins and grab and throw it into the other when you reach the switch. Toggle the switch, grab the key and you're good.

Stage 7-4


The main thing to watch out for here are the crushers. Not only will you be dealing with that, but you'll also have to deal with Donkey Kong reversing the direction of the moving platforms every so often.

The intermission shows off a new hazard: falling icicles that will get in your way.

Stage 7-5


The icicles, when they fall, will act as platforms. When they shake, they're about to disappear before they slowly respawn on the ceilings. You'll have to be ready to jump from one icicle to another.

Stage 7-6


For this one, wait for the walking flames to fall after running out of ice blocks to melt, then wait for two of them to get on the bridge above the moving platforms. Toggle the switch and the rest of the ice blocks will be melted.

The switch also reverse the direction of the moving platforms, so grab the key, go up on the moving platforms and toggle the switch when you have fire near the exit again.

From there, you'll want to place one of the magical bridges so that the fire will walk on them and melt the ice blocks surrounding the exit. Place another one directly under the exit, and you're good to go.

Stage 7-7


For this one, grab the key and get in the water. Position yourself so that when the fish sees you, he swims into you while you hold the key, causing you to drop it and get rid of the squids that swim back and forth, blocking your path.

Leave the key there, then use the magical platforms and bridges to make your way to the door. Watch out for the squid when you get back in the water.

Stage 7-8


After keeping the icebergs on the surface of the water, you'll be taking a quick ride on conveyor belts while avoiding a (literally) crushing defeat. Thankfully, the conveyor belts go in the direction where you want them to go, so if you can time your movements perfectly, you can get to Pauline before DK shakes the screen more than once.

Stage 7-9


Head to the right and flip the switch, and carefully ride to the bottom of the moving platforms with the icicle. Stand on the walrus to trigger the icicles into falling down, then go up and cross the icicle bridge. Use the magical ladder to reach the nearby switch and toggle it. This switch causes a bridge to appear to your immediate right and also causes the moving platforms to go back up. You'll also open the door blocking the key, so get the key and get back to the start.

Stage 7-10


You'll need to use the icicles as platforms to get to the end. You'll want to run across the second icicle as it's falling. For the ladder before the end, you'll want to get on the last icicle while it's in mid-air in order to climb the ladder, as you cannot grab a ladder while jumping.

The three bonus items are at the end.

Stage 7-11


The invisible door is in mid-air between the magical bridge and ladder icons. It's not exactly between them (it's a little higher up), but it's in that relative location.

Use the magical ladder at the top to get to the switch and toggle it. You can get the key, but there's still the problem of getting to the door. Let the walking flame run out and melt the ice blocks in your way, then drop down from the left and get the magical springboard. Place it in Mario's fall path, and you'll save yourself from falling too high.

If you put the magical bridge where the door is, the game won't let you position the bridge there as it will overlap the door. From there, you can use the magical platform and springboard to get to the bridge. The bridge must be touching the top half of the fourth wall block of the bottom.

Stage 7-12


The icicles make it slightly harder to grab some of the barrels. Thankfully, there are three spots where the barrels will stop moving and stand upright, so you should have plenty of ammunition to hit DK with.

Sunday, June 4, 2017

Proton Jon plays Donkey Kong for Game Boy - Part 3 of 5


These worlds are getting longer and longer...

All maps by Captain Drake.


World 4: Jungle

Stage 4-1


There's a new enemy here: the chompers that climb the vines from Donkey Kong Jr.

Touch the nuts to sends them falling. If they touch enemies on the way down, you'll be rid of them.

You'll see a new magical platform icon, this time with a springboard on it. This magical springboard works just like the magical bridges and ladders time-wise.

Stage 4-2


This stage is pretty easy for the most part if you use the handstand jump to get ahead. Watch out for the crusher as well as the seed-spitting flowers.

Stage 4-3


New enemy here: the monkeys. The monkey's tail will act like vines. If you grab onto two monkey tails at the same time, they'll both stop in their tracks and make squeaky noises. This will come in handy for later puzzles.

Stage 4-4


DK's back...and so is DK Jr.! DK Jr. will flip the switch that activates the bridge at random, leaving you at his mercy as DK throws springboards at you. You'll have to be quick and careful to get to Pauline.

The intermission shows off the Mini Mushroom, which shrinks Mario for a brief amount of time.

Stage 4-5


The vampire bats will knock you off the vines and stun you if they run into you.

Throw the key down once you get it, and pick it up before it disappears.

Stage 4-6


The icons with the black square on them are magical platforms. They're just individual tiles that can be used as platforms. You can use them here on the platform with the spiders to get them away from the ladder...or you can take a shortcut away from them like Proton Jon did.

Stage 4-7


DK Jr. appears again, and once again, he's playing around with the switch that activates all the bridges in the stage just like in 4-4.

Stage 4-8


DK will toss Mini Mushrooms at you. If you get hit by one, you'll be shrunk down and all you can do is the standard jump. You won't even be able to grab onto vines or climb them, either. Time your movements and be careful.

The intermission shows off hammer throwing. Just press a button and you'll throw the hammer upwards in case you want to use it somewhere else or climb a ladder.

Stage 4-9


Go up and hit the switch. You'll want one monkey to go to the bridge to the riht that you've activated. From there, drop down and trigger the switch below. If the monkey is on the bridge, you'll trigger the bridge as well as the door below (which both switches toggle) and the monkey will fall. Hit the switch again to open the door below and use the monkey's tail to get over the spikes. Getting the key and exiting is easy at this point.

Stage 4-10


The frogs will jump high whenever you jump onto them, allowing you to reach new platforms.

Stage 4-11


Some of the ladders will slide up and down regularly, so you'll have to wait for the sliding segments to be up before you can climb them.

DK Jr. is now tossing Mini Mushrooms, but they won't be much of a problem here.

Stage 4-12


Watch out when you throw barrels at DK. When they break, Mini Mushrooms will come out of them.

The intermission here shows off the Super Hammer. Not only does it respawn where you found it, it also can break bricks.

World 5: Desert

Stage 5-1


This is where the Super Hammer makes its first appearance, and boy, will you ever find out how it works here.

The transparent blocks at the sides on the top level will bring you back to the bottom of the level safely.

Feel free to blast through this stage, as there aren't any enemies.

Stage 5-2


The stone men move very slowly, but the skulls are worse. If you're near the skulls, they'll stop moving and throw bones at you. You can destroy the bones and the skulls with the Super Hammer, but you'd better time it right so you accidentally don't get hit by them (especially the bones).

Stage 5-3


You'll have to use the magical platform and ladder to reach the switch. Toggle the switch, then take the key to the door. That's all there is too it.

Stage 5-4


You'll be climbing moving ladders to get to Pauline. This is amazingly easy as long as you don't get crushed.

The intermission here shows how you can stand on enemies, grab them and throw them at other enemies a la Super Mario Bros. 2.

Stage 5-5


This level takes some practice to get done. Take the key, throw it on the conveyor belts and get to the key quickly enough so you can grab it again before it disappears.

Stage 5-6


Donkey Kong Jr. is at the switch again, but it's a minor inconvenience even at worst, as all the switch does is control the direction the conveyor belts go.

Stage 5-7


The armadillos act just like the ladybugs: they'll walk on walls, ceilings and platform undersides.

The cannons shoot bullets at regular intervals. If you're near them, keep an eye on them.

Stage 5-8


Once again, you're making your way to Pauline. This level is in more of a traditional sense, as you're going to the top and avoiding the barrels in a more linear, arcade-y level design.

Stage 5-9


Climb up, hit the switch, climb up the next ladder and hit the switch near the hat. Go to the right, toggle the switch near the handbag (watch out for the crushers!), then drop down to get the key. Use the key to get back to the switch you just toggled, and toggle it again. Grab the key again, take the platforms to the right, and go let on the second-highest level. Go left and toggle the switch below the hat. Toss the key to the highest level and onto the bridge you've just re-activated, and use your backflips to get over there. Go all the way to the left and take the platforms. They should be going downward. If they are, you're done.

Stage 5-10


There are six icons you'll have to use to get to the exit.

Use the magical bridges just low enough for you to get the key up to it, and for you to do a backflip or springboard jump to it. You'll want to place the magical springboards evenly between the two magical bridges. The ladders will kinda throw you off...unless you want the hat and handbag. Then you can put the magical ladders to good use.

Stage 5-11


Use the switch below to get to the key.

The scorpions are just like the spiders, and they seem to move more efficiently and fluidly, too.

Stage 5-12


This time around, you're throwing King Tut heads at Donkey Kong instead of barrels. They move slowly, but you can still jump on top of them and pick them up to throw at DK with ease.

Saturday, June 3, 2017

Proton Jon plays Donkey Kong for Game Boy - Part 2 of 5


Not one, but two worlds get completed in this video. This Let's Play has got quite a lot in terms of content.

All maps by Captain Drake.

World 2: Forest

Stage 2-1


This stage is very easy. The bugs around here will walk on walls and ceilings, much like the mice. The spiders have spikes on them, and unlike most enemies, even jumping on them to hitch a ride will immediately kill you.

Hit the switch to trigger the bridges.

Stage 2-2


The switch here will trigger more of the platforms. Yet another easy stage.

Stage 2-3


The switch is used to open the door blocking the exit, but you easily avoid this, the conveyor belts and the plants that spit seeds at you with this simple step.

Hit the magical ladder icon, and place the ladder where the door that will block the exit will be. As long as the ladder is there, the door is forced open. There you go.

Stage 2-4


Interesting homage to Donkey Kong Jr. here. Avoid the chomping lizards and use the springboard to get to the upper half of the level quickly. Not much to this mini-boss.

The intermission shows off the handstand, and how it can stop thrown barrels.

Stage 2-5


You can swim underwater by tapping the A button.

Stage 2-6


Hit the switch, then go up and head right past the first springboard. Flip the switch here, then ride on one of the ladybugs to get to the top. The bugs are tough to avoid, so you're better off just doing this.

Stage 2-7


Hit the switch to let the bugs out, then hit it again to bring the bridge across the spikes back.

To get the key to the door, throw the key onto the conveyor belts, then climb down the ladder and get it before it falls off. The key flashes after its leaves your hands, and if you don't get it in time while it's flashing, the key will return to where it was in the level.

Stage 2-8


You could play this one the old-fashioned way, but why do that when you can handstand jump off of the rock platform that goes up and down as soon as it gets close to Donkey Kong? At least it's possible to do and miss the springboard that he's tossing.

The intermission shows off the backflip.

Stage 2-9


New enemy here: the bird flies across the stage and tries to drop eggs on you.

Use the magical bridge platform above the spikes.

Stage 2-10


The big-eared enemies will sprout out of the ground and rush in one direction when you jump over them.

Stage 2-11


You can either backflip your way to the key, or use the magical ladder. It's up to you.

Stage 2-12


Once again, you're throwing barrels at Donkey Kong. This time, you have mini-springboards to assist you with that. Again, use your handstand to deflect the barrels so you can throw them right back at DK.

The intermission shows off the angled wires. These work just like the power lines in the first world, except you can now launch yourself at a 45-degree angle.

World 3: Ship

Stage 3-1


The angry blocks will help you over the spikes if you jump on them.

Use the magical platform on the gap on the way to the key. Handstand jump your way onto the lone block guy, get the key, then get back on the block guy and take the key to the door.

Stage 3-2


The knights will push you back, while the crab will follow you around and make life miserable.

Stage 3-3


To get past the narrow gaps, duck down and let the knight push you all the way past it. If you let go of Down on the Control Pad at any time while you're in the narrow gap, you will be crushed and you will lose a life.

Remember which door Pauline screams for help from at the start of the level. The other door(s) will be fake, and you don't want to unlock those.

Stage 3-4


The switch above the crushers will turn the crushers off, but it also reverse the direction of the platforms. You can skip it entirely and just go for the one to the right of the two crushers below it if you're skilled enough.

Once you've triggered it, all that's left is going for Donkey Kong...and avoiding the last crusher at the end.

The intermission shows off the handstand jump.

Stage 3-5


You could use Proton Jon's shortcut of doing a handstand jump followed by an immediate backflip, but the wires are more likely to work as long as you avoid the spark.

Stage 3-6


You could place one of the magical bridges near the two robots so that they'll get away from the ladder, but there's a shortcut.

Put one magical bridge directly below the spikes near the two robots, then place the other above the longer set of spikes below that. If you can time it right, you can backflip your way to where the purse is and get the key very easily.

Stage 3-7


Hit the switch at the top, wait for the lower of the two knights to get on the bridge, then hit it again to drop the lower knight. Use the lower knight to get under the narrow passage, then jump to the other switch. Trigger it, and use the magical ladder to get to the key. You're done here.

Stage 3-8


More barrel throwing. Once again, use your handstand.

Proton Jon plays Donkey Kong for Game Boy - Part 1 of 5


Here's one I've been wanting to look at for a while. 

Yep, it's Donkey Kong. It's using the Control Pad to run around and climb ladders while using the jump button to jump over barrels and grab ladders. But it becomes a little more complex after the beginning...

All maps by Captain Drake.

World 0

Stage 0-1


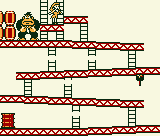
The first four stages are the original Donkey Kong game. Climb up the ladders, avoid the barrels, and hit the barrels with the hammers for points if you want to. The hammers don't last forever, though, and they keep you from jumping or climbing ladders. The flames from the oil barrel will keep you from taking too long, so watch your six.

You could play these the original way, but there are new controls for this version of Donkey Kong. The backflip that Proton Jon does is simple. Move in one direction, then immediately press the opposite direction on the Control Pad and the A button at the same time. You'll be able to clear the girders in record time.

You'll get a time bonus for every second you have left on the clock. These will be totaled in at the end of the world.

Stage 0-2


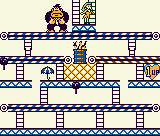
Here's the pie factory. Keep moving on the conveyor belts and avoid the pies.

The 1-Up heart gives you an extra life. The parasol gives you points.

Stage 0-3


The handbag gives you points.

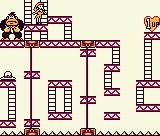
Watch out for the flames as well as the jumping boards that Donkey Kong tosses. The platforms can be used to get through the stage.

Be careful not to touch the spikes at the bottom of the stage.

Stage 0-4


All you need to do now is to remove the six girders that keep the platforms in place. Once you do that, you'll save Pauline...but not for long! DK gets revenge and steal Pauline again, and this time you're going to have to unlock doors and make your way through several areas just to get her back.

Now the game truly begins.

For every 100 seconds you store from each set of four stages, you'll get an extra life. If you don't have any groups of 100 left, you'll still get an extra one for what you have left.

World 1: Big City


Stage 1-1


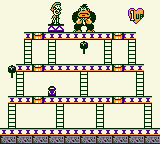
Instead of chasing Donkey Kong around, you'll now have to find the key and open the door with it to proceed to the next stage.

The flaming oil platform will move up and down, while the duck men will run at you when you're at their level and they can see you.

Here's an interesting new thing you can do with the hammer: you can toss it in mid-air, then catch it on its way down to prolong how long it lasts and take it other areas that you normally wouldn't be able to take it.

Pauline's hat, handbag and parasol appear in every normal stage. If you collect them all, you can play a bonus game when you beat the level.

To get the key, press B while standing on it to pick it up (a la Super Mario Bros. 2) and Mario will physically lift it. All that's left it to take to the door with the keyhole so Mario can automatically unlock it. You can throw the key to destroy most (but not all) enemies and also make it easier to get to the exit, but it will flash after a while if it hasn't been picked up. Pick the key up again before it returns to its original position. If you get hit while holding the key, you'll drop it instead of losing a life. You can use the B button to throw the key to get rid of enemies or get it somewhere you wouldn't be able to take it while holding it.

You can also stand on top of enemies, pick them up and throw them at enemies, much like in Super Mario Bros. 2 as well.

The slot machine bonus game will allow you to get some extra lives. Thankfully, it's pretty generous, so expect to get at least one extra life out of it.

Stage 1-2


You can stand on enemies. This is yet another hold-over from Super Mario Bros. 2.

The mice will walk all over the platform they're on. When they reach the end, they walk of the side and then walk upside down before reaching another edge and turning themselves right-side up again.

The wire lets Mario perform some wicked jumps. Just hang off of one, then hold Up on the Control Pad. The faster Mario spins on the wire, the higher the jump will be.

The wheel mini-game will give you either a 1-Up or a 2-Up. At least you get something.

Stage 1-3


Even in this version of the game, it is still possible to be hit while Mario is holding the hammer straight up. Be careful.

To do a handstand, hold Down on the Control Pad while jumping. Pressing A again during the handstand will let you do a slightly higher jump. If you press A right when you do the handstand, the jump will be even higher.

The trash cans will come alive when you stand on them, and slowly walk back and forth.

Sparks will travel through telephone wires, and will shock to the touch.

Stage 1-4


After three regular stages, you will face a boss battle with Donkey Kong. Whenever you beat him, the amount of time you had left from this and the last three stages will be totaled up and converted into more extra lives, just like at the beginning of the game.

This one is simple enough. Get to Pauline while avoiding the falling debris that DK causes to rain down. Use your handstand jump and backflip to get around more quickly.

When you beat this boss battle, you'll also be introduced to a new game mechanic: magical platforms. Collect the arrow that points in two directions to create a bridge or ladder (depending on the arrow) and you'll be able to get around.

Stage 1-5


You'll be able to test out the magical platform here. Just touch the icon, then place the bridge where you want to put it. The bridge will disappear after nine seconds (once the music for the magic platforms is playing at its fastest speed), so hurry up.

Be careful when falling. If you fall from high enough, Mario will tuck and roll when he lands. If he jumps from a little higher, Mario will land on his back and will be stunned for about two seconds. If you jump from too high up, Mario will land on his head and die.

Stage 1-6


Now you get to play around with magical ladders, and use both the magical bridges and ladders in tandem. Another very simple stage. Just watch out for those fireballs with legs. They can also walk on walls and ceilings.

Stage 1-7


Be sure to place the magical bridge so that it's lined up with the platform where the exit is. That way, you can more easily avoid the duck guy.

Stage 1-8


This time, you fight Donkey Kong. Stop the barrels with your Handstand (or let the barrels hit the walls to the side) and throw them at Donkey Kong. Three will do him in.

You'll then be introduced to switches before getting some extra lives. Press B when over them to flip them.

Monday, November 2, 2015

Deleted Scenes...and More!


Deleted scenes! Yay!
Proton Jon plays Ninja Gaiden III - Act 7, Part 2


...and this series goes out with a bang!

First Boss (7-4)


Ryu finally meets a really big Bio-Noid...and believe it or not, it's Clancy.

Clancy can be pretty tough. When he raises his hand, start running around the room immediately. He'll start shooting thunder down from the sky and even throwing red energy balls at you. 

Second Boss (7-5)


Thankfully, every time you beat one of Clancy's forms, you'll get your health refilled, which is nice.

Anyway, Clancy turns into some alien that's stuck to the wall. When a fireball goes to his left hand, duck under the right platform. When a fireball goes to his right hand, duck under the left platform. The fireball will go straight above you every single time. All the while, swing at his head.

Third Boss (7-6)


Now Clancy is a big, giant Bio-Gundam. What the heck.

Avoid the energy waves as well as the little lasers that bounce off the ground and go into the air. Hit the thing's face until it explodes, then hit the red circle.

Once you have to start hitting the red circle, keep moving around ever so slightly so the lasers don't hit you. When you defeat this boss, it's finally over! You did it!

Sunday, November 1, 2015

Proton Jon plays Ninja Gaiden III - Act 7, Part 1


The final act is as deadly as it is beautiful. At least the game goes out with a bang graphically.

Act 7

7-1


As you move across the outside of the ship, you'll be blown slowly to the right. Keep going to the left and destroy everything, and be sure you jump off the very edge of every platform as you go along.

7-2


The Fire Shield makes everything a lot easier here, as you can go through the force fields without taking damage. If you find it, get it, get a lot of Ninjitsu, and hold on to that power-up for dear life. You'll need it to make 7-2 a hell of a lot easier.

FFFFFFFUUUUUUUUUUUU

7-3


Oh, boy. The spikes that contract in and out come back with a vengeance, and this time around they cover parts of the walls.

In part B, watch out with the rectangular platforms. The square bits decay once you stand on them. Really, game?


Part C has you playing the waiting game with a zillion sets of contracting spikes, while part D is straightforward.

Proton Jon plays Ninja Gaiden III - Act 6


Apparently there's more to this dimensional rift thing.

Act 6

6-1


The first part of this is an ice level. You'll have to move fast to get away from all the enemies in part B. The ice crystals can act as spikes, so be careful where you jump.

6-2


The game now decides to become Contra. Then again, we're in an alternate dimension, so it kinda makes sense.

You can actually sink through the floor. You can die doing this, so keep jumping to stay on the ground when you need to.

6-3


Guess what? The fake Ryu is still alive, and he's now a Bio-Noid.

He'll walk toward you, shoot a fireball, and then charge into the wall and cause debris to fall down. You want to climb the wall and jump over him before he hits the wall, then hit him while avoiding the debris.


Once you beat the fake Ryu one last time, you'll meet Clancy again. He'll be blue, as he's absorbed Life Energy. He's basically turning into a Bio-Noid, and he tells you that the ruins are really a dimensional warship!

Saturday, October 31, 2015

Proton Jon plays Ninja Gaiden III - Act 5


...and this is where the story REALLY picks up.

Act 5

5-1


Holy cow, this section looks beautiful.

Expect to see a lot of enemies on the screen at once, especially in part B.

The one-eyed robots just somersault back and forth.

5-2


The tripod laser shooting robots have invincible lasers. You can duck and slash them, and you'll never be able to destroy them. That is bullcrap.

Sometimes, if there's too many enemies, enemy shots or a combination of the two, enemies won't show up where they're supposed to sometimes, due to sprite limitations. You'll also have to deal with a collapsing bridge in part C.

When you make it to the end, Ryu meets Foster, who decides to kill Ryu, extract the secrets of the Dragon Clan and make a superior Bio-Noid. He even sends Evil Ryu after you.

Foster gets surprised from behind by none other than...Irene Lew?!? Apparently, she's still alive and has a machine gun pointed at Foster. Evil Ryu decides to finally go Super Bio-Noid and change into some hideous giant blue humanoid.

5-3


Beating Clancy here is pretty simple. Jump over his shurikens as you slash at him, and avoid the fireballs he shoots downward as he somersaults to the other side of the room. If you have the Fire Shield, you can abuse it to destroy Clancy in no time flat.


After the boss fight, an earthquake occurs and Clancy shows up. He used Ryu and Irene to reclaim the ruins and "thanks" them as the dimensional rift opens up. Clancy goes in, but Foster gets torn to pieces and is killed instantly.

Friday, October 30, 2015

Proton Jon plays Ninja Gaiden III - Act 4


Fun fact: did you notice the red line under the words "The Ancient Ship Of Doom" in the sig image for this guide? I only used it to line up the words. I never got rid of it because it actually looked really good when I zoomed back to 100%. Sometimes, it's the little things.

Act 4

4-1


Oh, god. It's Guts Man's stage. If you fall into the drills, it's all over.

4-2


You'll be dealing with spikes that pop in and out of the floor, more of those moving platforms, tiny purple planes and blue eyes that shoot at you. If you get the Fire Shield power-up, don't lose it. It makes getting through this act a lot easier.

The boss is really easy. Slash at him as he comes at you, and when he sinks into the ground, avoid the flames that come out of the ground. If you have the Fire Shield here, this is a snap.

You'll meet Fake Ryu again. We finally find out what his name is: Clancy. He's also been working on "Biohazard" with Foster. He can't work with him anymore, though, because Foster has created a Bio-Noid. You'll also learn about the dimensional rift created when the demon Jacquio summoned died, which has allowed an unlimited supply of Life Energy to flow into the fortress, and that Foster has experimented with it to create the Bio-Noid - a human fused with Life Energy that becomes a superhuman creature. Turns out it was a Bio-Noid that did away with Irene, and Foster is in control of all of the Bio-Noids.

Proton Jon plays Ninja Gaiden III - Act 3


In this episode, we deal with demon dogs for a third time, waterfalls and a whole squad of guys who just want to run into you because they can.

Act 3

3-1


Well, here's a slight variation in the whole Ninja Gaiden formula. We're going left instead of right.

As you jump from platform to platform and climb on vines in this jungle, you'll be taking on fish, robots, and flying things that all want you dead.

3-2


As you go down the waterfalls, you'll be dealing with enemy ninjas and those little spiked ball things from the volcanic segments of Act 2. The pulsating things that throb like beating hearts spit fireballs out like volcanoes.

You'll then be dealing with guys with guns and bugs that act just like the ever-popular Ninja Gaiden Birds before climbing up walls. Welcome to Paradise.

The Flame Shield makes a big difference here. If you die in the middle of a section, you get sent back to part A.

When you get the Sword Extension power-up for this act, you'd better be ready to turn back and destroy that bug that wants to divebomb you.

...

Good lord, those guys that rush across the screen file out in droves.

3-3


The boss is just like the demon dog statues from the first two games. Only one of them actually takes damage. When they jump three times, they toss shurikens that home in on your current position at the time they are thrown. As long as you don't touch them and move around so the shurikens don't hit you, you should definitely be okay.


After you beat the boss (which is probably the hardest one outside of the final fight), you'll meet up with the fake Ryu. He is the one who did away with Irene, and he's working for Foster. He'll wait for you at the Castle Rock fortress.

Thursday, October 29, 2015

Proton Jon plays Ninja Gaiden III - Act 2


As soon as the graphics glitched at the beginning, I totally lost it.

Also, the music in the game gets really awesome at this point. I know...I'm surprised, too.

Act 2

2-1


Holy fuck, parallax scrolling! The background elements and the foreground move independently. Nice job, Tecmo.

The quicksand can make things pretty nasty pretty fast. You want to stay on top of it at all times.

The flying enemies will home in on you. Those things plus the aforementioned quicksand make for a dangerous combination. You always want to be at the top when you're fighting those things.

The guys that curl up into a ball and look like rocks somersault everywhere when you get close. If you have the default shuriken attack, you can take care of them and everything coming at you from behind quickly and easily.

2-2


You definitely don't want to touch the spiked ceilings. They hurt.

The first two sections are simple enough. The cannons can be bullets can be best hit from behind, and they can only be hit when they open up to fire. The second section is really easy. 2-2C, though, is a vertical auto-scrolling section where it's you racing against the lava. There is a 1-up here, but you have to know what you're doing to get it. There is also the scroll that increases your maximum Ninjitsu by 10 points just before it, and it's mercifully easier to reach and obtain.

When you enter 2-2D, watch out for the fireballs that shoot out of the lava. They split into four, much like those bombs that fly out of the bottomless pits in Bomb Man's stage in the first Mega Man game.

The boss here is also pretty easy. Its only attack is a bunch of fireballs in a V-pattern, which it only shoots straight down. You'd have to be a fool to be under the boss when it stops to shoot. As long as it doesn't run into you, you're okay.

Ryu finds out that Foster is still alive after a huge video monitor with his face lights up from behind. He's apparently making good on his promise to get rid of Ryu once and for all from the first game...

Proton Jon plays Ninja Gaiden III - Act 1


C'mon, it was bound to happen.

Anyway, the third game takes place between NG1 and NG2. This is confirmed by the game manual, of all things, hence why Ryu still has the Dragon Sword.

Also, you only have a limited number of continues, which makes this game even harder than the second one in ways you can't even imagine. You'll have to dig down deep in order to beat the game without losing them all.

Having said that, let's get on with the game.

Act 1


Why did someone pose as Ryu and eliminate Irene? Is Irene actually still alive? Let's find out!

The controls for this game is basically like the second one. There are some real changes, though. There's no normal blue shuriken this time around, and you start out with the red shuriken that has the ability to boomerang back and forth every time you jump over it. Also, the power-up icons actually show what's inside before you slash at them with your sword. That's really nice, because you'll need to get the right power-up at the right time sometimes like in the first two games. The two waves that go both up and down is the only new special attack in the game, and you can also extend the reach of your sword with the red sword power-up.

In the American version of the game, all the enemies do double damage compared to the original Japanese. Thanks, Tecmo.

The boss is easy. Wait for him to expose his chest and shoot flames at the floor that come at you. Slash at him as he's exposed, then run away while he's moving and wait for him to expose himself again.

Ryu will find out that the lab that Irene Lew was investigating isn't your run-of-the-mill lab. Some random guy shows up and tells him to look for the Castle Rock fortress if he wants to find out what's going on.

Wednesday, August 27, 2014

ProtonJonSA plays Ninja Gaiden 2 - Act 7, Part 3

Enjoy your ending.

Ryu gets Irene and high-tails it out of there. The Tower of Lahja falls apart. Ryu laments the death of Irene when the Dragon Sword glows and turns into a sparkle of light. It travels towards Irene and revives her. They both watch the sun set.


Tuesday, August 26, 2014

ProtonJonSA plays Ninja Gaiden 2 - Act 7, Part 2

In this episode, an all-too-familiar face returns from the dead...

Act 7 (continued)


When you make it to the end of 7-2, you'll meet - of all people - Jaquio from the first game. Turns out you never really killed him. Instead, you killed the demon and therefore resurrected him. Turns out defeating that demon gave rise to the true spirits of evil. Apparently Ashtar was a pawn all along...

Jaquio basically fights like he did in the last game. He just flies around in a circular pattern all across the room and shoots flames at you. Thankfulyl, having Shadow Clones, a lot of Ninjitsu and a good power-up will make beating him easier. If you run out of Ninjitsu, just slash at him when he comes close to the ground and get away from him quickly. Also, let your Shadow Clones slash at him whenever necessary.

Beating him saves Irene from having her energy sapped out of her to summon even more demons from the Gate of Darkness. Before you can destroy the altar and get out of there, though, Jaquio's blood awakens the Sword of Chaos. Jaquio is revived, turns into a giant alien wall, and then proceeds to attack you.

Slash at the face and use Ninjitsu on it. Avoid the droplets of acid that come out of the ceiling, and pay attention to it to see where the droplets will come out from. This battle will require some practice and will definitely take a while.


You'll then have to face one more boss, and he looks a lot like the final boss from the last game. Slash at his face and duck avoid the upper hand. Stay away from the stuff that thing spits out. Since you won't be able to keep jumping and avoid the lower hand, just run all the way to the left. The lower hand won't be able to touch you from there. When you destroy the head, you'll have to destroy the heart, which is the orb in the middle of its body. Avoid the stuff that comes out of where its head used to be and keep slashing at that orb. When you destroy this thing, you've done it! You've beaten Ninja Gaiden II!

ProtonJonSA plays Ninja Gaiden 2 - Act 7, Part 1

Well, here it is. The final act! And this level looks pretty wacky...

Act 7


You'll have to stop the Gate of Darkness from opening if you don't want the tribe to come in from the other side and cause chaos.

Anyway, as you try not to be hypnotized by the giant green waterfall in the background while taking on more of all the enemies you've faced thus far, you'll be climbing up for a while. You'll meet a new enemy that runs at you, jumps up and throws daggers down at you, then run towards you again and throws some more down at you. Jerk.

As you're making your way to the Gate, Robert's getting creamed and he's about ready to die. Crap.

Section 2 switches between the first level music and the train music, which is actually pretty nice because I like both songs. If the columns with the three birds actually give you trouble (use your Ninjitsu!), you'll be able to replenish your health right after it. Thanks, game.


Anyway, Section 2 looks very Contra-ish. There are what look like the demon statues from the first game in the bigger platforms, and the wall actually has beating hearts inside of it.