MrWhitman shows A LOT OF WAYS to do it this time...because there IS a lot of ways to do it.
Showing posts with label Codename: Iceman. Show all posts
Showing posts with label Codename: Iceman. Show all posts
Thursday, December 27, 2018
Ways To Die In Codename: Iceman
MrWhitman shows A LOT OF WAYS to do it this time...because there IS a lot of ways to do it.

The Gaming Corner plays Codename: Iceman - Part 5 of 5
...and the crowd goes wild! Chris from The Gaming Corner kicks Jim Walls' butt and gets full score!
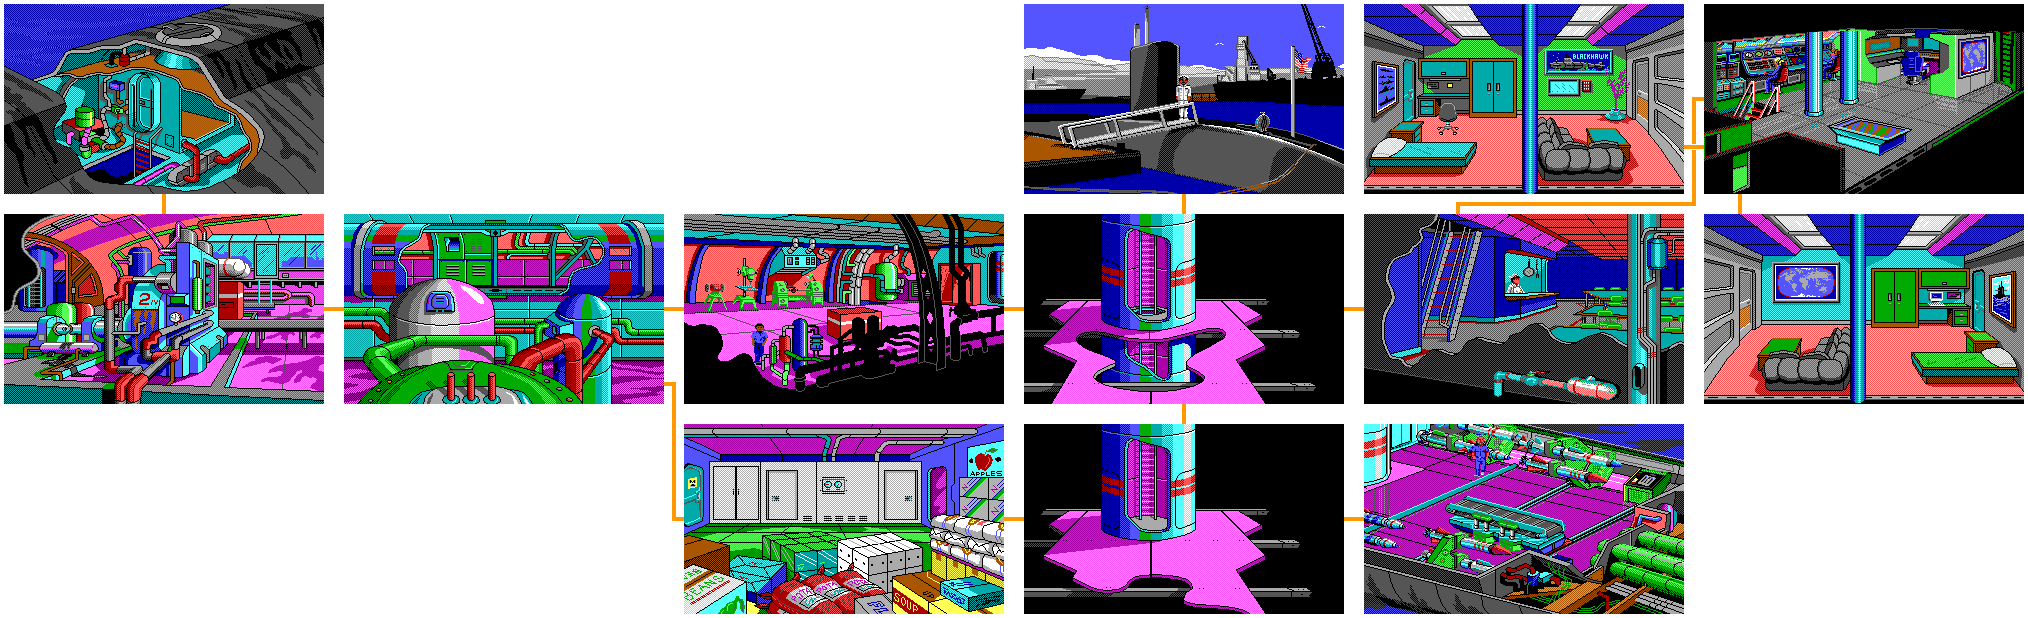
Hat tip to StrategyWiki for getting some stuff figured out.
If you can keep the submarine icon near the cross to the best of your ability (and with that, under the USS Coontz), you'll get maximum points when you reach the upper-right corner of the screen.
Afterwards, the Captain will come back, still a bit weak from the concussion, and congratulate you before asking you to come to periscope depth and speed. After that, they can have a look around.
Get the depth gauge to 70, then move the engine lever so that only one light is on above it. When the captain says you did a good job and to see what is out there, stand up. The captain will say that there is more on our hands than anticipated and that a gunboat is out there keeping a close watch on the harbor entrance. Head to the periscope and take a look.
Use the left and right buttons to look around. The heading of the periscope will be in the lower right corner. At 282 degrees, you will see the oil rig mentioned in one of the messages that you must destroy through means other than your weapons. At 40 degrees, you will see the harbor being blocked by a ship. Press down to exit, then go up to the sonar man and ping the oil rig. You will learn that the rig is 2850 yards away. Ping the harbor, and you will learn it is 1640 yards away. Be sure to get the distances to get points.
Go down the stairs and head west to the elevator. At the machinery room, talk to the man there (whose name is Johnson) and ask for the key. You will get the key to the hatch. (If you ask for it any earlier than this, he won't give it to you; you have to get through all the navigation stuff first to get it.)
Go back to the ladderwell and climb down. Go to the torpedo room and head to the cabinet in the northwest corner of the screen. The cabinet will open and you will see plastic explosives for underwater demolition and two boxes of flares. Get the explosives and the flares (get the flares twice), then head west to the storage room and enter the cabinet near the door to the west. Johnson will show up and take the scuba gear to the escape hatch for you, then leave.
If you want, you can go through the door to the west with the radiation symbol on it and expose yourself to the radiation of the nuclear-powered engine of the USS Black Hawk. Save before you go through this door, as you will not be able to avoid dying after doing this. You will not die in the room, but if you go back to the storage room, you will.
From here, head back to the ladderwell and climb up. Go west to the machinery room and keep going west to the escape hatch. Press the button at the hatch, then get the diver. Check the diver. You will see that is runs fine except for a slight vibration. If you examine it, you will notice it is coming from the shaft. Examine the shaft, and you will learn that a nut and washer used to secure the prop are missing.
Measure the shaft. You will learn it is 1/2" in diameter. Drop the diver to place it back in the compartment, then head to the machinery room. Go to the cabinet and get a 1/2" washer and a 1/2" nut, then close the cabinet. Head back to the hatch and open the drawer of the nearby cabinet. Put the hammer back in the drawer, then get the 1'2" wrench and close the drawer. Get the diver again, then install the washer and the nut to the diver. Since you have the 1/2", the washer and the nut will be installed. Make sure to tighten the nut down. Check the diver again, and you will notice it runs smoothly. Go back to the drawer and put the wrench away, then close the drawer again.
Get the diver one more time, then enter the coordinates. For waypoint #1, enter "2850" for the distance and "282" for the heading. For waypoint #2, enter "1640" for the distance and "40" for the heading. You can now climb the ladder leading to the escape hatch.
At the hatch, open the door, go in and wear the suit. As you do this, you will press the button that fills the hatch up with water. If you press the button without wearing the suit, YOU WILL DIE. You will then leave the submarine through the hatch and enter the open sea. With the distances and headings entered, you'll be able to go to where you need to go instantly.
As you swim, watch your heading, the amount of yards to your target and the amount as well as your air. Swim to the west until your heading is 321 degrees with 525 yards to go, then go north until you reach your destination. When you see the oil rig to your left, go west and place the explosives on the rig. Westland will place the explosions and start the timer. Go east immediately. Keep going east. At 71 degrees with 1650 yards to go, the explosives will go off and destroy the rig if you kept going east immediately after planting them.
At 11 degrees with 600 yards to go, go north. Keep going north, and you will make it to the ocean floor. If you won the magnetic device in the card game, you can just go north and this part will be over. However, if you don't, you will have to do this the hard way. Thankfully, the hard way gives you more points. Here's how you do it.
Go west two screens until and enter the cave in the background. If you haven't won the bottle from the card game, you will find a bottle in a rocky hole two screens in in that direction. Just approach it and get the bottle. After that, enter the cave in the background. When you go in, light the flare. The first one will be a dud, but the next one won't be. Notice that a trace of the flare will be moving north when the flare goes out. Go north, then light a flare again. Once again, the first flare is a dud, but the second one won't be. (Good thing you got both boxes of flares, huh?) The game will hint that you need to go west next. Go there.
It should be noted that using the flares gives you points.
From there, the flares will tell you to go north, then east, then east again. However, if you go north again after going north the first time and then go east, you'll end up at the same place early: a wall of rocks. Pass through the gab in the southeast corner of the wall. From there, go south and then east. If you have yet to light all your flares, do so now before you run out of air and before you go east. The maximum number of points you can get from the flares is eight.
There. You've made it past the magnetic field and got even more points. Go north.
Go east on this screen. A net will show up, Put the bottle in the net. The net will rise up into the water. Wait a little while, and the net will come back. Go east two screens and hide the diver, then go back to the screen with the net and go north. (You can hide the diver before putting the bottle in the net if you need to.)
When you surface, walk up to the fisherman to the west. Type "say Iceman," and Westland will mention the code name of Iceman in Arabic. The fisherman acknowledges by shaking his head and handing you a fish. Look at the fish, and you will notice a line sticking out of the mouth. Remove the line, and you will notice something attached to the line just above the hook. This is the weight. Look at it, and you will learn it is actually a small capsule. Open the capsule, and you will find a small map. Look at the map. You will learn the directions to your disguise.
From here, go towards the background and west behind the wall. Enter the door to the west and go behind the open window. Look around and you will find a wooden crate in the corner. Open the crate and you will find clothing. Get the clothes, and Westland will automatically swap the diving suit for the clothes as well as drop the fish and the map so you aren't given away.
Head to the east from here, then go north. At the fork, go west and you will find the oasis. Talk "say iceman" to the woman there, and she will respond in English. It's Stacy from Tahiti! She will wish you luck on the remainder of the mission, From here, get the map from Stacy. She will give you a map, a key to her apartment and a phony ID. Stacy will tell you to find your way to the apartment so she can meet you there later. She then tells you she will make contact with the USS Saratoga and let them know that everything is on schedule, and that there are things in the apartment for you in the kitchen.
Look at the map and you will get directions to Stacy's apartment. Be sure to give the map back to Stacy to get another point that is easy to miss and to keep your cover from being blown.
From the oasis, head east two screens, then head north, then head west. The doors on the northeast corner of the screen is the apartment. Approach them to enter.
In the apartment, go up to the small canister on the counter and grab one of them. Open it, and you will find coffee. Search the canister, and you will find nothing. From there, drop the canister and grab the medium canister. Open it up and search it, and you will find flour and nothing else. Drop the medium-sized canister and grab the large one, which will be bottom-heavy. Open the canister to find sugar. Search inside to find a false bottom on the canister. Empty the canister to pour out the sugar, then open the bottom to find foam rubber underneath. Take it, and you will find a weapon. Take the weapon. If you look at it, you will learn that it is a gun that shoots tranquilizer darts.
Go up to the refrigerator and take the tape sitting on top, then open the icebox. Look inside and you will find food. Drink the remaining, milk, eat the entire block of cheese and get the butter dish. Open the dish and you will find a plastic bag that appears to contain a folded piece of paper. Remove the folded piece of paper, which will return the butter dish to the icebox. Close the icebox, then read the paper. You will learn that a catering business by the name of "Bagdad's Fast Foods" makes a twice-daily delivery to the compound, and that both deliveries are at the same time each day. Stacy's log file also reveals that one of the two guards will search the caterer prior to entry, and that the guard then always accompanies the caterer inside.
Go up to the north wall and take the green business card off the wall. Look through the window. You will see the caterer do his delivery. Look at the card, and you will see it is a card for Bagdad's Fast Food Catering Service. Another phone number will be written on it in blue. Use the nearby phone and call the number that is written in blue. You'll get a man named Basal. Talk to the man, and Westland will explain that a new caterer will be making the delivery to the compound. You now have a way in.
Use the phone again, then call the number that was in red. You will call the catering service. Talk to the man on the other end, and Westland will place an order with a phony name and the apartment number (which is 84). When the caterer hangs up, wait at the door. You will hear footsteps outside the apartment door followed by a knock. Open the door, and Westland will let the caterer inside. He will lay the order down on the kitchen counter, he will ask for money. Use the gun on the caterer, then take his uniform. When he undresses, use the tape to bind the hands and feet and tape his mouth shut. West will don the caterer's uniform as a disguise.
Wait there, and Stacy will show up, asking you if you found the weapon and the notes. When she arrives, say yes. Stacy will tell you that they must work quickly, as the Ambassador is going to be moved. Stacy then leaves to contract her superior and arrange for a helicopter before advising you to take the caterer's van and begin the rescue. She also tells you to conceal the weapon.
Leave the apartment and get in the van. You will take the van to the compound. Hide your weapon in the food, then get the food and open the door to step out of the van. Walk up to the guard, and Westland will identify himself with the fake name. With the gun in the food, the search from the other guard will produce nothing. You will be lead to the Ambassador.
Put the food on the table, then open the lid and get the gun. Shoot the gun, then quickly shoot again. You must enter both "shoot" commands twice quickly enough, or else you'll have to start this over. Go up to the Ambassador and free him, then look at the guards. You'll notice that one of them is wearing a ring with a KGB symbol, revealing that the Russians are in on this. Tell the Ambassador to change clothes by typing "change clothes," then type "leave."
On the way out, the guard will point his gun at you, but Stacy will shoot him in the head, killing him. The three of you will get in the van.
From here, you will have to drive the van to the helicopter in this last scene. Use the Left and Right arrow keys to turn, and Up and Down to go faster and slower respectively. You will need to speed up to get over the hills and slow down on the turns to avoid crashing into the wall, and you do not want to make a wrong turn unless you want to tip the van over and cause it to roll over the edge, killing the three of you. Whatever you do, do not let the enemy's vehicle catch up with you.
You can skip this segment by pressing F8, but you will miss out on points if you do this. You must complete this section the hard way to get a full-points run.
When you make it to the top, you will get in the helicopter and head to the USS Saratoga.
From here, you get the ending sequence. Westland attends a mandatory debriefing with the Captain and his staff where you learn that the terrorist group guilty of the abduction of Ambassador Loyd was infiltrated by the KGB, who instigated the abduction knowing the incident would strain relations between the United States and Tunisia, causing Tunisia to sever relations with the United States and halt the oil trade, giving Russia most of the oil, if not all. This would have had definite negative impact on the U.S. economy.
Thanks to Westland's efforts, the tables have been turned on the KGB, and the KGB's devious methods of operation will be exposed to the world. The Captain then congratulates you, and announces that a special award ceremony awaits you on the flight deck.
On the flight deck, the Rear Admiral awards Westland with his Submarine Warfare Insignia (aka "the Gold Dolphins") and the Naval Distinguished Service Medal. After a salute, Westland is promoted to Captain. Westland kisses Stacy, and the game ends.
And with that, you should have 300 points! Enjoy the credits!

Wednesday, December 26, 2018
The Gaming Corner plays Codename: Iceman - Part 4 of 5
This one's even longer...and at this point, the adventure is nearly over. However, this is probably going to be the most difficult stretch of the game.
Hat tip to StrategyWiki for getting some stuff figured out.
From the galley, go est under the stairs to go back to the ladderwell. Go west again to enter the machine room. Going west again will take you over the nuclear reactor. Going west still will take you to the engine room. If look around in the engine room, you will find a ladder leading to an escape hatch toward the stern.
In the engine room, go up to the red box near the ending, open the drawer and get the hammer, Close the drawer, then go back down the ladderwell and go east to enter the torpedo room. Talk to the man there (who is the same guy you gambled with) and he will tell you that his equipment sounds a bit strange and that there could be a problem. If you go up to the console on the east and start a test, you will see a torpedo placed on a conveyor to be placed in a tube. As this goes on, you will notice that the conveyor will not feed the weapon towards an open torpedo tube.
Examine the conveyor belt that the torpedo was placed on. You will find a sheared cylinder and remove it. If you measure the cylinder, you will find out that the diameter of the sheared cylinder is 1", and the cotter pin hole is 1/4". Unfortunately, you cannot tell how long the cylinder was because it has been sheared off. Measure the belt, and Westland will determine the replacement cylinder must be 6" long and 1" in diameter.
Go back to the machine room. Open the cabinet near the door and get a cotter pin. Measure the pin to make sure it fits in a 1/4" hole. You will find out it is two inches long and that it will fit a quarter inch hole. From there, get a cylinder, and when asked what size, pick 6". Close the cabinet, then go west to the lathe and put the cylinder in the lathe. Set the lathe to a 1" diameter, then turn the lathe on. You will cut the cylinder to a 1" diameter and take the cylinder back. Go west to the drill and drill the cylinder, then type "select bit" and select the 1/4" bit. Then, turn the drill on. When the drill is turned off, go to the grinder to the west to grind the edges off the cylinder. Measure the cylinder again, and you will find out it is 6" long and has been milled to a diameter of 1" with a 1/4" hold drilled near one end and the rough edges ground smooth.
Head back to the ladderwell and climb down the ladder. Go back to the torpedo room and install the cylinder into the conveyor. Install the pin (make sure you have the hammer; if you don't, go back to the engine room and get it), then start the test at the console again. This time, the conveyor will successfully feed the torpedo into the tube.
From there, head back up to the galley and climb the stairs back up to the bridge. The Captain will be back, and he will ask you to take the helm so he can direct you to the next radio contact. Here's what to do:
- "Maintain current heading." You don't need to do anything here.
- "All ahead full." Move the engine lever so that all four lights above it are lit up.
- "Set depth to 300 feet." Move the dive lever so that the depth gauge reads 300.
- "Acknowledge when depth obtained." When you get the depth of the submarine to 300, type "depth obtained."
- "Aye aye, Commander! Maintain course and depth." You don't need to do anything here.
- "Reduce speed to 2/3." Move the engine lever so that only three lights are on above it.
- "Make your depth 100 ft." Move the dive lever so that the depth gauge reads 100.
- "Ahead slow." Move the engine lever so that only one light is on above it.
- "Surface." Move the dive lever so that the depth gauge reaches 35.
From there, the Captain will tap you on the shoulder and tell you that your shift replacement is here, You and the Captain will then go topside while radio makes contact.
Stand up, then Westland will follow the Captain up the ladder to the east. You and the Captain will scan the horizon. Talk to him, and he tells you that there are a couple of ships on the horizon, with one bearing down on the USS Black Hawk and another appearing to head port to starboard. Westland looks through the binoculars, then the Captain sizes up the situation and notices that the two ships are Russian war ships, with one of them heading right for the USS Black Hawk. It is now time to get back to the controls, but as you do, the Captain gets a little too excited and falls on the way down the ladder, hitting his head on the floor and suffering a concussion. As the Captain gets medical position, it is up to you to get the USS Black Hawk out of danger.
Westland will go back to the controls. You'll find out that a Russian destroyer is 18,800 yards away and closing. You'll then learn how the tactical display works.
The top (white) bar extending from the right represents the approaching enemy vessel. Other bars extending from the right represent the approaching enemy weapons.
Lower (black) bars extending from the left represent your weapons approaching the enemy.
Activate Silent Running Mode (press Shift+F4, or click on the triangle shaped button above the throttle speed indicator lights), then press the Fire Control Panel Activate Button (you can either click on it with the mouse, or use Shift+F2). After that, dive down to 600-700 feet and maintain a slow speed.
Let the enemy attack first. ALWAYS. OTHERWISE, YOU WILL GAME OVER.
When you see the schematic of the missile, select a decoy (either use Shift+F5 or press the first button on the Fire Control Panel), lock (with Shift+F6 or the second button on the Fire Control Panel), and fire (Shift+F8, or the fourth button on the Fire Control Panel). Hopefully, the decoy will attract a torpedo.
The harpoon has the three sets of "wings" on the side and has that small dark tip. The torpedoes are long and have the green tips on the sides on them, and have a narrow tip. The decoy is shorter than the other two missiles. You only have a few of each weapon, so be careful.
When you see the top white bar extending from the right appear, be ready to fire the missiles. Select the missiles, then save your game first before you fire. If the lower black bar on the screen goes all the way to the right, that means you missed. Restore your game if that happens.
If any bars below the top one near the red ship symbolizing the Russian destroyer go all the way to the left, that means their torpedo missed you.
Once you're close enough, select the harpoons (stingers) and fire. You only have four harpoons, so make those count and remember to save your game, too.
You can only take three hits before the USS Black Hawk sinks. Once you've taken three hits, the Black Hawk is dead in the water and the game is over.
Once you've destroyed the destroyer and taken care of all of the enemy missiles, the sonar will be silent and the coast will be clear. You'll then get coded messages again.
Stand up, then talk to the radioman. You'll get a coded message from Washington and a coded message from the CIA. Here are the examples Chris gets (yours, once again, may be different):
Washington messages: FF-F-C, FH-E-D (11-1-6) (15-2-4)
CIA messages: E-A-J, BE-D-G, (2-0-9) (10-4-3); (5-3-2) (15-7-6) with Navy offset
Go back to the computer in Westland's cabin and dig out the technical manual again, and start doing the whole "page-line-word" thing again.
Numbers higher than 10 are handled interestingly with the coded message. If you have two letters and the first one is a F (which is a 1), that number acts as a "tens place." If a two-letter combination starts with anything other than F, then you have to add the two numbers together. Therefore, "BE" will be 10, and not 82. (If it was 82, you'd be getting nowhere fast, believe me.) By going up, you go to 13, which doesn't have a red box with code words. Therefore, it goes up two pages to 15. In case that happens, you'll know why. (At least, that's how I think it works.)
Remember that you have to go up three with the numbers on the CIA messages, as per the offsets mentioned on the microfilm.
Using the examples Chris has, the primary word key is "redwood" and the secondary wood key is "steer" for the Washington message. The Washington message reads as follows:
Contacting fisherman...
After exiting water,
contact agent for further
instructions
It looks like this goes with the other Washington message.
For the CIA message, the primary word key is "destroy" and the secondary word key is "directly." The CIA message reads as follows:
After polar crossing is
achieved...
Do not surface for remainder
of mission
Once we're past the North Pole, we cannot surface the submarine for any reason or else we may compromise the mission.
From here, go back to the controls of the submarine. Be sure to slow the game speed down and save if you need to before getting back in the control seat. Sonar will report many icebergs. Turn on the closed circuit monitor (either press Shift+F1, or press the green button above the Fire Control Panel Activate Button). Then, make sure the the engine lever down so that only one light is and the speed indicator reads five (5) knots.
When the music starts, use the wheel to drive away from icebergs and make sure they do not hit you dead center on the screen. It may look like some may hit you, but if they are not fully visible when they are super close and they are not dead center on the screen, you won't have much to worry about. If you can make it past all the icebergs without getting hit once, you'll get full points. You can take up to three hits before sinking, and if you take hits, you can survive, but you won't be able to get the full amount of points. Hope you saved before you did this whole sequence!
When you make it through the ice pack, there will be a break in the ice. You will also pick up and active sonar on the 150 degree arc, 100 miles south of true north.
Contact the station, and the radio will report the contact. Turn off the closed circuit TV monitor. The radio will be standing by with a coded message.
Stand up and talk to the radioman again. You'll get a coded message in alpha from Naval High Command in Washington, D.C. You'll also get a coded message from the CIA. Once again, they may be random, but here's what we get in this video:
Washington message: J-G-F FH-I-C (9-3-1) (15-7-6)
CIA message: E-A-J E-E-F (2-0-9) (2-2-1); (5-3-2) (5-5-4) with Navy offset
Go back to Westland's cabin and go to the computer.
Going by the examples once again, the primary word key is "latitude" and the secondary word key is "directly" for the Washington message. The Washington message reads as follows:
Rendezvous with USS Coontz...
36 degrees latitude 12
degrees longitude.
Listen for erratic sonar.
At that time, signal
presence with one active
ping.
Pass through straits
under Coontz
So when we make it to our destination, we will have to get to where we need to go with another ship. We just have to know how to tell them who we are. Interesting.
For the CIA message, the primary word key is "destroy" and the secondary word key is "coontz." The CIA message reads as follows:
Diversion tactic necessary
Locate nearest off-shore
drilling rig and destroy
Do not use Blackhawk
weaponry
This will definitely come into play later, as will all the coded messages.
From here, go back to the controls of the submarine. This time, there is an inversion layer at 1,000 feet. Move the dive lever so that the depth gauge reads 1200, then activate silent running. Later, you will be pinged by a Russian submarine, triggering another battle.
This time around, if you get hit once, the game is over. If you see any torpedo lines extending from the right, fire a decoy to get rid of it. (The inversion layer is supposed to divert the enemy torpedoes, but all of them will hit nevertheless.) Use your torpedoes to destroy the sub, as your harpoons will be useless (assuming you still have any). Save your game before firing any torpedoes (which you should do when you see the thin white line at the top extending from the right), and restore your game if they miss. When two torpedoes hit the enemy submarine, all you have to do is deal with any enemy torpedoes and you should be good.
And as always, let the enemy attack first.
After you beat the submarine, you'll be off the coast of Portugal. You will get single pings coming at irregular intervals. Press the Sonar On/Off button (which is to the left of silent running button and indicator lights), then press it again immediately. The pings will stop. You will have contacted the USS Coontz and properly identified yourself. The mission will continue as planned. The aerial view will be shown on the monitor, with the USS Coontz displayed as a cross.
Bring the submarine (which is you) to the cross. If you can get directly under the Coontz, you will give the maximum score of five points out of five.
From here, keep the submarine icon right where the cross is with the Left and Right arrow keys. Be sure your speed is matching the Coontz, and that you aren't going too fast or two slow.
The Coontz will move straight up for a while, moves over to the right for a while, then goes straight to the right. When it turns right, set your heading to 45 degrees and adjust as necessary.
Tuesday, December 25, 2018
The Gaming Corner plays Codename: Iceman - Part 3 of 5
This one's a long one, but the things we get done here are going to be absolutely crucial.
Hat tip to StrategyWiki for getting some stuff figured out.
After getting your half of the combination right, the briefcase will be opened. Inside is an envelope. Open the envelope, and you will learn that inside are a chart and a set of orders. By reading the chart, you will learn that your destination will be over the Mediterranean. By reading the orders, you will be asked to commit the words on the orders to memory before destroying them, as the expediency of the mission is of utmost importance to the survival of the Ambassador.
You will be asked to use extreme caution navigating the Bering Sea, as the USSR is threatening a blockade of the Straits due to claimed violations of United States military operating inside her territorial waters. Washington has denied these accusations and has issued a counter-communique warning the Soviets that appropriate action would be taken if any blockade is encountered.
The orders are as follows: "Arrive Mediterranean at 12 degrees longitude and 36 degrees latitude no later than 0700 January 29th. Rendezvous with female CIA agent at nearby oasis at 1000 hours January 29th. Come to periscope depth at 0930 hours this date for further coded messages.
Your destination is the Mediterranean Sea and the east coast of Tunisia. The route you must follow will include the following areas: Bering Sea, Bering Straits, Arctic Ocean, Greenland Sea, Denmark Strait between Greenland and Iceland. Proceed south through the North Atlantic, east through the Straits of Gibraltar into the Mediterranean.
From time to time you will receive additional orders by radio. Good luck and Godspeed!"
From here, the Captain will tell you that he will handle the destruction of the orders before telling you to make sure you figure out the coordinates of the proposed route and enter them into the computerized charts table. You will have to do this before you can continue.
Before you go, type "get combination." The safe combination is "23448803" and the briefcase opens with "762134." After that, exit out of the Captain's cabin or else you will get fired and the game is over. (Yes, this can happen. Thanks to StrategyWiki for making this known.)
The computerized charts table will be the table on the center of the bridge, and when you type "look map," you can plot out your route. To get started, type "plot course." From here, you can use the directional keys until the latitude and longitude you have calculated are displayed. If you need to change a waypoint you have already entered, type "change point." When entering the last waypoint, press the Enter key twice.
When entering your way points, you must be able to deviate no more than nautical miles from an optional course. The ones used here are pretty close to an optimal course and will be accepted by the on-board computer:
30 N, 170 W
72 N, 170 W
86 N, 86 W
83 N, 2 W
65 N, 23 W
36 N, 12 W
If you are off by a little bit from the 36 N, 12 W coordinates, you'll eventually have 36 N, 12 W as your final waypoint anyway. You may be off by 50 nautical miles, but you will still get full points.
After that, you'll be directed to the next radio contact. Time to take control of the submarine and
- "Maintain current heading, Commander." Don't do anything here.
- "All ahead 2/3." Move the ending lever up so that three lights are on above it.
- "Set depth for 300 feet." Move the dive lever down so that the depth gauge (the top numerical in the column of five on the far right) reaches 300.
- "Acknowledge when depth is obtained." When you reach 300 or get very close to it, type "depth confirmed."
- "Aye aye Commander! Maintain course and depth." Don't do anything here.
- "Sonar contact. Twin screws bearing 330 degrees off port bow. Range 17000' and closing. Stand by for signature identification. Sonar computerized signature scan. Friendly. Type... French "Frigate." Class... "FL 3000." " You don't need to do anything here.
- "Come to periscope depth." Move the dive lever so that the depth gauge reads 70.
- "Reduce speed to 1/3." Move the engine lever down so that two lights are on above it.
- "All ahead slow." Move the engine lever down a little bit more so that one light is on above it.
- "Commander... Radio is standing by with coded messages." Type "stand." Talk to the radioman (the one with the brown hair). You will get a coded message from Washington. They will be different every time you play. You'll also get a second coded message from CIA command headquarters. Be sure to write them down if you need to.
Washington message: I-I-I J-C-D (7-7-7) (9-6-4)
CIA message: E-E-F C-A-B (2-2-1) (6-0-8); (5-5-4) (9-3-1) with Navy offset
From here, you will need the manual. Enter the captain's room, which is the darkened doorway to the west. Go to the safe, and type "enter code." The code is "22348803." You'll open the safe, and Westland will get the briefcase. Enter "762134" when asked for the briefcase combination. Insert your ID card into the slot, and you will convert it into a microfilm viewer that magnifies microfilm so it is readable.
Insert the microfilm. You will get some CIA decoding offsets to Washington codes by branch:
A = -2
N = 3
AF = -1
M = 5
A is Army, N is Navy, AF is Air Force and M is Marines. Obviously, we want to use the Navy offset.
Close the briefcase. You'll get your ID card, and Westland will place the briefcase back into the safe. Leave the Captain's cabin, then enter your cabin, which is directly across from it. Use the computer. Because you met with Stacy and got her earring, got your correct ID from the Pentagon and asked the Captain for his combination when you had the chance, you'll be able to decode the messages.
The Washington message is "I-I-I J-C-D." Using the code book, we find out that the two messages are 777 and 964, respectively. The first number is the page, the second number is the line and the third number is the word. Pull out the technical manual, go to Page 7 and look at the red box with all the random words in. Go to the seventh line, and input the seventh word in that line for the primary word key, which is "ship." For "964," go to page 9, go to the sixth line and insert the fourth word for the secondary word key, which is "russian."
You'll get the following message:
Contacting fisherman...
Locate fisherman's net
Signal you presence by
placing a bottle in net
When way is clear...
Fisherman will remove bottle
Recieve next communique at
next waypoint
"Receive" is spelled wrong, obviously.
When asked if you want to decode another message, press Y.
Now for the CIA one. E-E-F and C-A-B are 221 and 608. However, there is an offset of 3, since we are currently in the Navy, and we need to take all the numbers in each coded message and add three to them. All the numbers go from 0 to 9, and if you go past 9, you roll over to 0 and continue from there. Wit that, 221 will be 554, and 608 will be 931. The primary word key will be page 5, line 5, 4th word. In this case, it is "coontz." The secondary word key is page 9, line 3, 1st word. In this case, it is "latitude." You will get the following message:
Russian war ships on patrol
Use extreme caution in Bering
sea
Use alternate entry to
harbor
It looks like the Russians will be on patrol in the Bering sea, and you will have to be careful by taking another route.
Leave your cabin. From here, go down the stairwell near the sonarman (the guy with the blonde hair). You'll enter the galley. Get the bottle on the table. As you try to get it, a man will enter the galley and ask if you are interested in wagering a $10 bill for his bottle of rum. Type "yes," and you'll play a dice game with the man. Hope you have the technical manual and it's set to page 30, because you're going to need the dice game instructions.
Before we begin, it should be mentioned that you can only save three times during a dice game session; otherwise you will be accused of cheating and you'll game over. Also, you can play with either the directional keys or the mouse.
Both of you will roll, and if you have the better hand, you will be the Boss. The Boss will be able to call the game based on the strength of his hand.
From here, highlight the die/dice you want to get rid off, then select "R" to Roll. After this, you can select "C" to tell the opponent to "come on up" and try to beat your hand, or you can select "N" to start the round over. If you start the round, both players start over clean.
There are some special rules. If you become Boss with two pairs, you cannot roll for a full house and you must roll three dice. Also, if both players have two pairs, it is a push, or a draw. If one player has one pair and the other has two pairs at the start, and they both match on the high pair, it is also a push.
If your opponent cannot beat your hand, you win a round. If you can win two rounds, you'll get the bottle.
The hands you can win with, from best to worse, are as follows: Five of a kind, four of a kind, full house (three of one number and two of another), three of a kind, two pair, and one pair. (Straights are not counted in this game and are considered "high card.")
If your opponent is the Boss, you will not be able to see your opponent's second roll, should he do it, so you will not know the strength of his hand.
Once you win the bottle, you can play again two more times, one for the man's money and again for the KGB's magnetic device he has that neutralizes magnetic fields. Keep on playing, save when you absolutely need to, and don't give up. This might take a while.
The Gaming Corner plays Codename: Iceman - Part 2 of 5
So much for the vacation. It's time to head to Washington, D.C., then we board the USS Blackhawk to learn how to control a nuclear submarine.
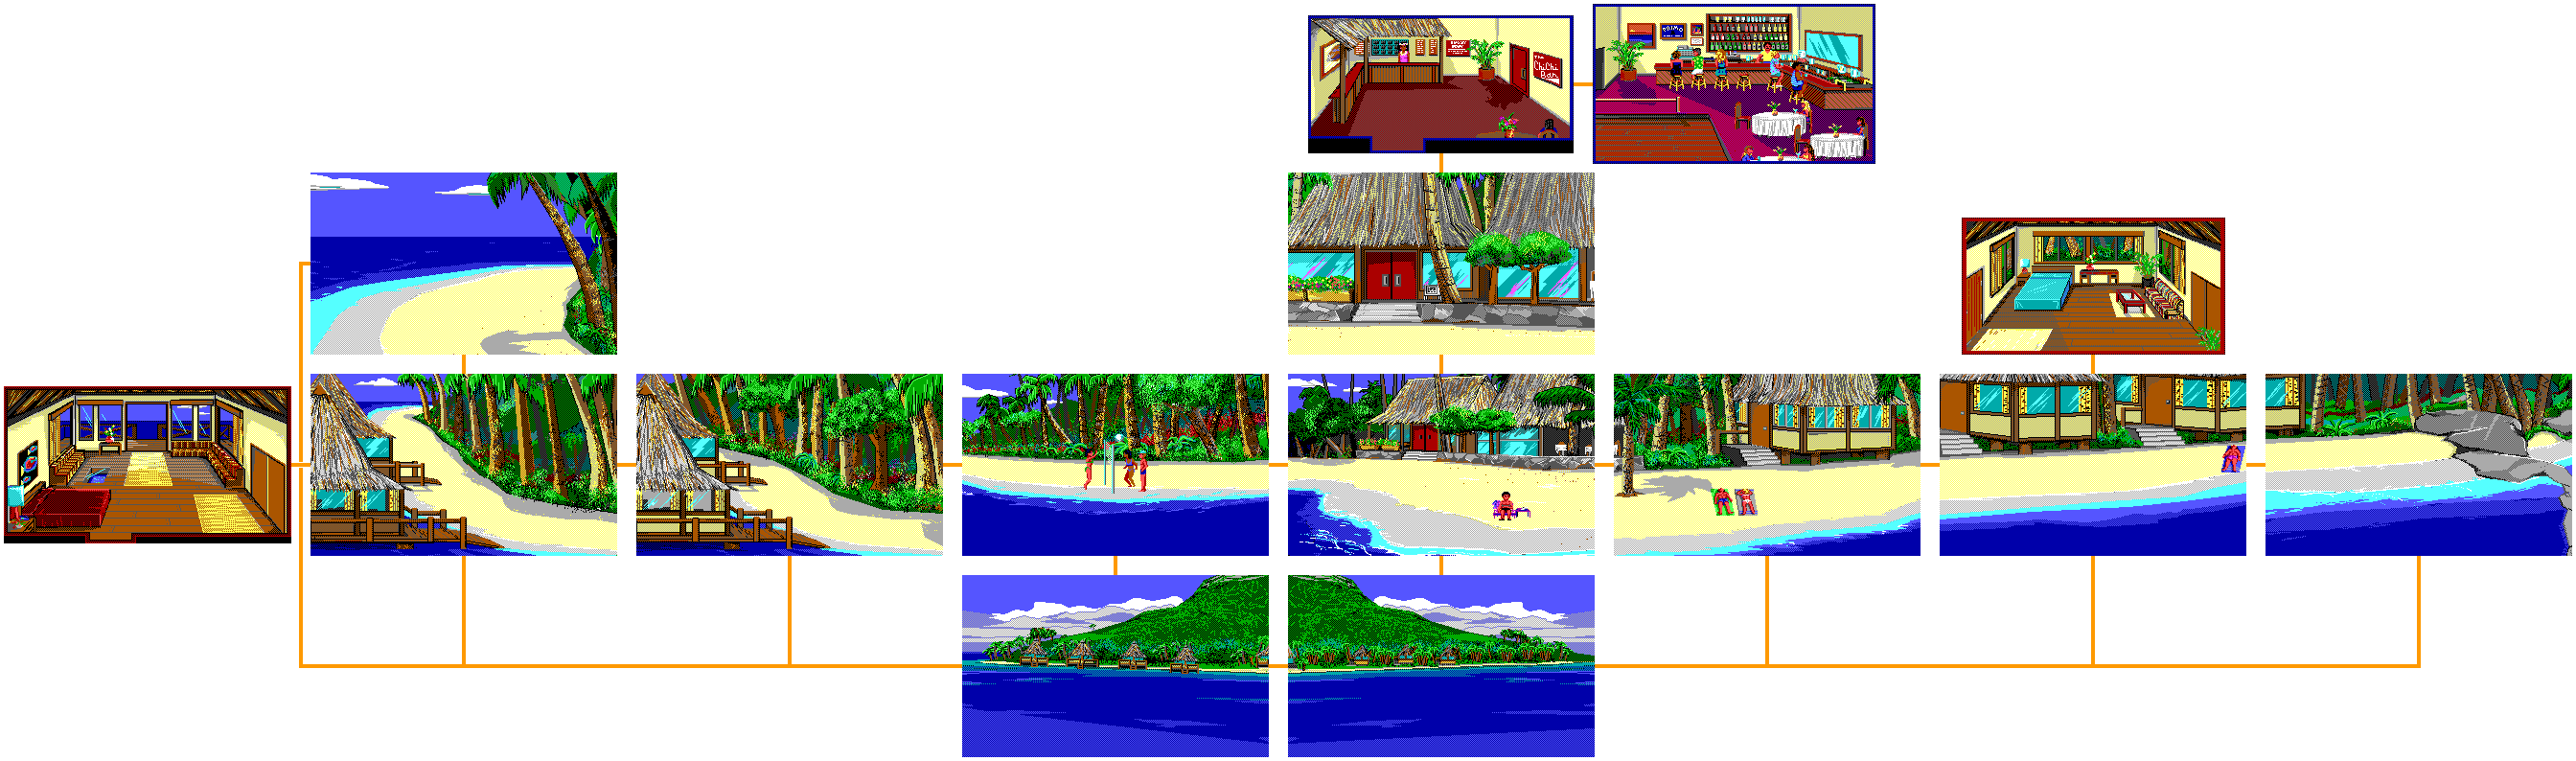
Hat tip to StrategyWiki for getting some stuff figured out.
After talking into the phone while calling the dinghy service, the person on the other end will tell you to head to the dinghy in front of the hotel entrance. Head back to where you began the game and get on the ramp to the dingy. You'll automatically leave Tahiti and take a plane to the airport.
At the airport entrance, wait for a black limousine to arrive. The driver will ask if you are Commander Westland. Show him your ID card, and you'll be able to take a ride to Washington, D.C.
The Pentagon

You'll automatically enter the Pentagon. At the desk, talk to the guard at the desk, then show him your ID card when he asks for it. You'll be able to pass. Go up to the east elevator and press the button, then you'll go in.
In the hallway, a guard will ask for proper identification. Show your ID to the guard, who will take it before letting you pass. From here, head into the door on the east and you'll enter the maximum security briefing room. Inside, you'll be met by General Braxton. He will tell you that this meeting has been called due to the recent kidnapping of Ambassador Richard Loyd by terrorist Jaharah Khommini Sieb Abdul - the same story you read about in the magazine at the start of the game. He will tell you that the compound where the Ambassador is being held has been located, and that the location will not be disclosed in the meeting for security reasons. The President has sent the United States 7th Fleet into the Mediterranean as a diversion, and that there is now a mission to rescue the Ambassador by taking advantage of a covert operation, code-named "ICEMAN."
You, Commander Westland, have been chosen to carry out the mission due to past outstanding performances. You will be temporarily assigned to the nuclear attack submarine, USS Blackhawk and you will rendezvous with the boat at Pearl Harbor. The papers authorizing your assignment are in the sealed manila envelope located on the table in front of you, and you will report only to the Captain of the USS Blackhawk, Jonathan Hawkins. Meanwhile, the mission details will be locked in the safe of the Blackhawk. Braxton will ask you to commit the numbers "134" to memory.
Braxton will then turn the meeting over to Forrest Collins of the CIA (Central Intelligence Agency). Collins will show you a picture of the compound where Ambassador Loyd is being held, and tell you that you must make contact with a female agent who will be disguised as a Muslim. You will also be using the code name "ICEMAN." Also, the female agent will have a map directing you where to go.
From Pearl Harbor, you will set a course heading of 30 degrees latitude and 170 degrees longitude. You will not unlock and review your order before reaching these coordinates.
You'll then learn about the USS Blackhawk itself, which is set apart from other attack submarines with a device called the Electronic Noise Cancellation Transducer. This transducer is attached to the drive shaft where it picks up generated noise, feeds it through a computer, and cancels it for much improved silent running.
The meeting will the nbe turned back over to General Braxton, who will then tell you that it will be necessary for you to be checked out on a few of the control room systems while aboard the Blackhawk, and that the systems qualification will entitle you to earn your Submarine Warfare Insignia, also known as "the gold dolphins."
With that, the message is over. Stand up, then take the envelope. Be sure to salute the flag before you leave. Once you're out of the room, get your ID from the guard, but be sure to look at it. If it doesn't have the name "Commander John B. Westland" on it, show him the ID again and you'll exchange the ID. Look at it again, and make sure it does. MAKE SURE YOU DO THIS.
From here, go back to the elevator on the right and press the button to get back down to the lobby. Leave the building. You'll automatically get back in the limo, and you'll be on a flight to Pearl Harbor. Westland ponders what has caused this mission to take place, as well as what will happen to the world should it fail. He then reviews the orders assigning him to the USS Blackhawk.
You'll then come out of the airport. Show the driver in front of the car your ID, then say "yes" when he asks if you are Commander Westland. When he asks you to show him your orders, show him the orders. You'll be at the pier where the USS Blackhawk is moored.
USS Blackhawk
Walk onto the gangplank, then salute the flag, salute the Officer of the Deck, then talk to the Officer of the Deck. Show your orders to the Officer of the Deck, then you'll be allowed on the USS Blackhawk. You'll be told the Captain is expecting you. Also, for follwoing proper military procedures before getting in, you'll get three extra points, which you'll need if you want the full score of 300 points.
Westland will go to his quarters and change clothes. Open the desk drawer and take the vernier caliper. From there, open the shelf and look at the books. You'll find a book entitled "Decoding." Take "Decoding" from the shelf. If you look at the code book, you'll find an alphanumeric code where a number is assigned to the first ten letters. Be sure to write this down for the future.
Enter the door to the left, and you will be on the bridge. You'll be greeted by the Captain, who welcomes you to the team and tells you that the success of the mission dpends on how fast the USS Blackhawk can move. From here, you'll be taking control of the submarine and you'll be learning how to run the submarine.
You'll then see the controls of the submarine themselves. You will have to perform all the commands in a timely manner, or else your game will come to an end. Here's all the commands and what you need to do. If you don't know what a certain knob or button or doo-hickey is, there is always the link to the manual at the top of the blog entry.
- All ahead slow. Move the engine lever so that there is only one light on above it. (You can use + or - to accelerate or decelerate respectively, or you can move the lever with the mouse.)
- Right full rudder... set course to 180 degrees. Move the wheel all the way to the right. (You can use the mouse, or you can use the left and right arrow keys to move the wheel to the direction you want.) Watch the number below the map screen, and turn the wheel back to the center when it is just about to hit 180 degrees. (This is the heading indicator.) Also, you want to make sure that you get the engine throttle going fast enough so that you are going at least five knots. (There is a column of five numerical values on the far right; from top to bottom, the fourth one is the speed indicator displayed in knots. The fifth, which is below it, is the engine RPM, or revolutions per minute. Otherwise, you'll get the "Watch your speed, Johnny!" message, which means you need to slow down.
- Right full rudder... change course to 270 degrees. Move the wheel to the right again, and this time get the heading indicator below the map to 270. When you get close, be ready to move the wheel to the center again.
- Let's roll! All ahead 1/3. Move the engine lever up so that two lights are on above it.
- Prepare for dive sequence... acknowledge green board. Make sure the hatch is closed; if it isn't, close the hatch. To do so, enter the phrase "close hatch." Westland will order the hatches closed via the PA system. Then, type "green board" to acknowledge the green board.
- Dive! Dive! Dive! Rig planes for 10 degrees. You don't have to do anything here.
- Level off at 200 ft... confirm when depth attained. Move the dive lever (which is to the right of the engine lever) forward so that the first number on the column of numerical values on the far right (which will be referred to hereafter as the depth gauge) so that it reaches 200. (You can use the up and down arrow keys to move the lever up and down, or you can move the lever with the mouse.) The number can go up a little fast, and as long as you're off by one or two, you should be good; otherwise, you're getting a game over. After you manage this, type "depth obtained."
- Aye, Commander Westland... change heading to 360 degrees. Now that you have confirmed the depth, use the wheel to get the heading indicator to 360 degrees. Be careful so that the heading indicator does not roll back over to zero. Again, as long as you're off by one or two, you should be good.
- OK, Westland, let's bow this puppy out and take her on a speed run! All ahead full... hold on to your jockstraps! Move the engine lever so that four lights are on.
- Bring her left to 355 degrees. You'll be doing some fine-tuning with the wheel to bring the heading indicator to 355 degrees. (You may be reminded "Steady as she goes" while turning the wheel; just keep it cool and watch the heading indicator.)
- Maintain current heading and speed. Don't mess with anything.
You'll then get a message saying that you have reached your first rendezvous point.
- All stop. Move the engine lever down so that there are no lights on above it, meaning the throttle is stopped. Don't move too far down, or else all four lights will be red, meaning you're going in reverse. When the speed and RPM indicators both drop down to zero, you're done.
The USS Blackhawk will come to a stop, and the Captain will ask you to meet him in his quarters to open the briefcase. Type in "exit," and you'll be back on the bridge. You will follow the Captain to his headquarters, When he asks for your half of the combination, type "134." If you somehow get this wrong three times, the mission fails and you get a game over.
Monday, December 24, 2018
The Gaming Corner plays Codename: Iceman - Part 1 of 5
Are you ready for a text parser adventure that requires paying attention to detail and doing things in a very procedural manner? Do you want said adventure to be balls-to-the-wall hard? This game's for you!
Also, The Gaming Corner, for those not aware, was originally saxcat20, who has been on here in the past for his Let's Play of Back to the Future for NES with aherr21.
This game is a brainchild of author and designer Jim Walls, who also came up with the Police Quest series. That game was also very procedural in how you did things, so if you've played that, you have an idea of what to expect with Codename: Iceman.
Also, you'll probably be needing the manual. Thankfully, it's right here.
The game begins in sunny Tahiti in the South Pacific. You're Commander John B. Westland of the United States Navy, currently on leave from his recent assignment.
After a brief camera pan-out of the island, you'll see Commander Westland people watching from a lounge chair. From here, the game begins.
There will be a magazine on the table next to you. Take the magazine to read it. Westland will read an article on the North African country of Tunisia, which finds itself in a powerful political position due to the fact that they have a lot of oil and the world is currently in a global oil shortage. Not surprisingly, the country has a neutral stance and the United States and Russia (or the USSR in this case; the game has a 1990 copyright date despite being released in November 1989) are fighting over the oil.
After reading this, you'll put the magazine down. Congratulations, you got one point out of 300.
Stand up, then take your shirt off the chair. Westland will put it on. Head west. There will be a volleyball net, but people will only play near it if your shirt is off, so go ahead and take your shirt off at the chair so Westland places it back on the chair. This time, there will be people.
Type in "play ball," and Westland will play volleyball with everyone else around the net. As you play, you will gain more points. After you gain eight points, the ball will go into the ocean. One of the women will go after it, but you will soon hear calls for help. Go south and you will find the girl unconscious and bring her back.
The next part is copy protection, and is in the manual that I linked to earlier. Here is what you do, according to the manual:
- shake and shout
- call for help
The other man at the net will go for help.
- establish airway
- look listen and feel
- give two good breaths
- look listen and feel
- check pulse
- begin compression
From here, you will have to wait exactly one minute. As this happens, a doctor will show up and examine the girl, then tells you that the woman will be just fine, and the woman you just saved will come out of unconsciousness and thank you. She will then leave with the other woman.
Go back to the chair and get your shirt, then go into the nearby building with the red door to the north. Open the door to go into the Chichi bar. Look at the woman at the counter, then talk to her. Ask for your key with "get key," and you will get your room key. From here, type "look sign." You will look at the nearby sign for the Nosinky Dinghy transportation service, and the phone number on the sign will be different every time you play. Save your game and write it down if you have to.
The lady at the table in the southeast corner cannot be interacted with.
From here, open the door to the east. Try to sit at the table to the southeast corner with the woman with the dark hair, and try to sit down. She will ask if you are going to buy a drink first. Get close to her and enter "buy drink," and the woman will say she will not mind sharing a bottle of champagne with you. Westland will go to the bar for a bottle of champagne and two glasses, then take them back to the table. You will pour her a glass, and after that, you can dance with her by typing in "dance." After a while, you can stop dancing by entering "stop."
From here, head back over to the woman. Talk to her, and she will admire your dance moves. Sit down at the table with her, and she will ask if you want to come back to her place. Say yes, then you will both go to her hotel room.
It should be noted that you can right-click on someone or something, you can look at it (at least in the Amiga version).
If you look at the blonde woman at the table north of the woman you just wined and danced with, the guy sitting with her will get up and you'll get punched in the face. This is considered a death sequence by the game and you will have to restart or restore. Hope you saved your game. So don't do it.
You'll be at the hotels. Kiss the woman, then she will ask if you would like to come in for awhile. Say yes, then you will go into her hotel room. The woman will ask you to come over to the bed and have a seat. Go over to the bed and sit on it, then talk to the woman. You will learn that her name is Stacy, and she will tell you that her vacation has been beautiful, save for one thing: she lost an earring that is very important to her, and she can't find it. She will tell you that she had it on when she left the room, but did notnotice it went missing until she was about to walk into the hotel lobby. She will tell you that she would be the happiest woman alive if she could find it.
Kiss Stacy five times. Afterwards, you will see fireworks, and the game implies that you both had sex. When the game returns to the room, you will be alone in bed. There will be a note on the table. Look at it, take it and read it. It will be from Stacy, who will tell you that she has urgent business to tend to and must leave and that she thanks you for making her vacation so wonderful.
Leave the room. When you go outside, you will see a glimmering sparkle between the two huts. Go up to it and look at the ground. You will see the glimmer. Look at the glimmer, and you will find out it is the earring that Stacy is searching for. Take the earring. Look at the earring, and you will find out the top can be opened. Open it, and you will find out it is hollow. Look inside the earring, and you will find a tiny roll of microfilm. Turns out Stacy was an undercover agent, and Westland has no idea who she is working for.
Go west and going in that direction until you go west past the volleyball net. Go behind the hut in the background and go west, then go to the hut in the foreground. The ramp leading up to the hut can be a bit tricky to go up, so you may have to re-position yourself once or twice. This is your hut. Open the closet, then check the shirt pocket. You will find a little black book. Take the black book and look at it. You will get the numbers for General Braxton and Gigi Boloni.
From here, go to the dresser next to the bed and open the drawer. There will be loose change and an ID card inside; take them both. From here, go back to the hotel. At the red door, buy a newspaper with the loose change in your inventory. You will learn that the cold war between the USSR and the United States is beginning to heat up as the Russian-supported radical terrorist group led by Jaharah Khommini Sieb Abdul has taken the United States Ambassador to the Middle East as a hostage, and that the terrorist group is demanding ten million dollars in ransom money to purchase arms within 30 days or else the Ambassador will be shot in the head and his body will be dumped in front of the US Embassy. As a result, the United States has ordered its 7th Fleet into the area, and the President has vowed that if the Ambassador is not released unharmed within a reasonable amount of time, the United States will not hesitate to take an aggressive military stance against the terrorist group. Westland will then discard the paper.
Go into the hotel and talk to the girl behind the counter again. You will find out there is an urgent message from General Braxton. Get the message, and read it. Braxton will want you to call him immediately. Go back to your hut, then use the phone at the dresser and call General Braxton. From here, type in "talk," and Westland will tell the General he received his message. It turns out there is an explosive situation going on in Washington, D.C. and he cannot give any details over the phone due to the sensitive nature of the situation. He asks you to return to Washington, D.C. and head to the maximum security briefing room. From here, call the dinghy service and type in talk. You're about to leave Tahiti. So much for your vacation.
Subscribe to:
Posts (Atom)