So much for the vacation. It's time to head to Washington, D.C., then we board the USS Blackhawk to learn how to control a nuclear submarine.
Hat tip to StrategyWiki for getting some stuff figured out.
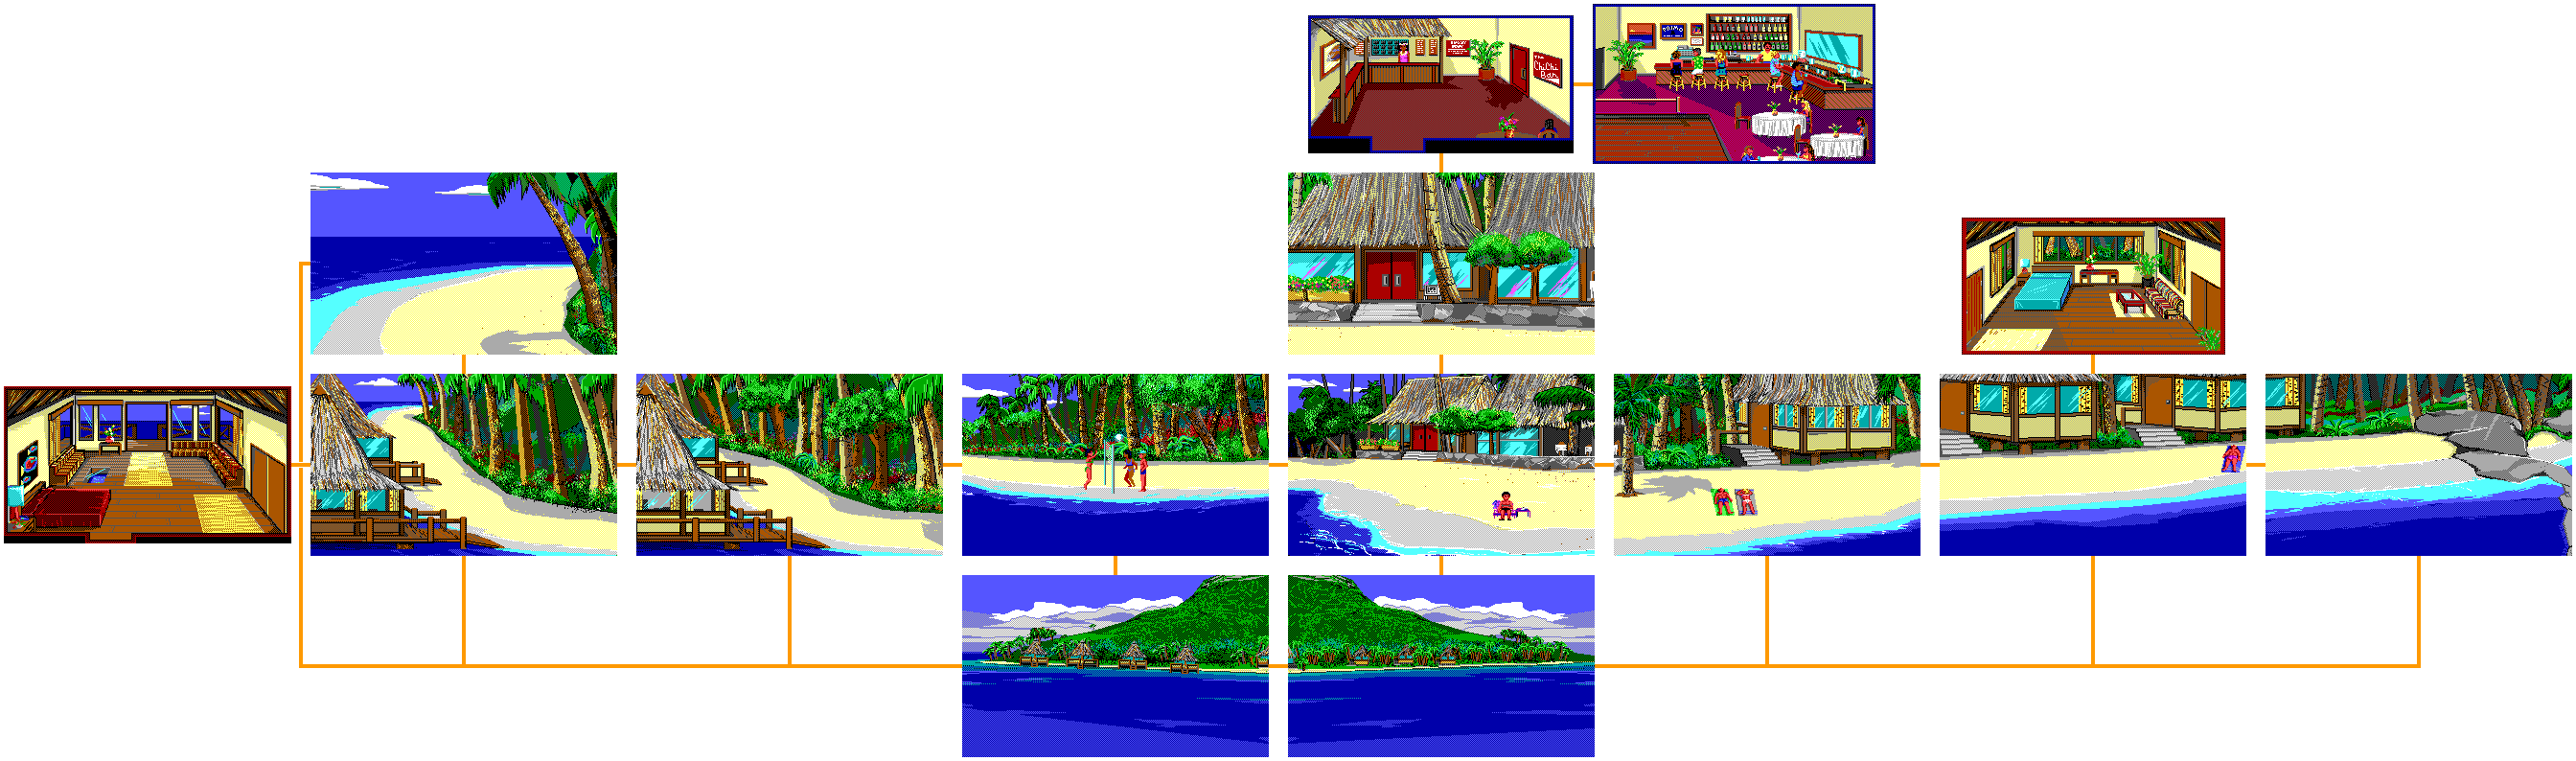
After talking into the phone while calling the dinghy service, the person on the other end will tell you to head to the dinghy in front of the hotel entrance. Head back to where you began the game and get on the ramp to the dingy. You'll automatically leave Tahiti and take a plane to the airport.
At the airport entrance, wait for a black limousine to arrive. The driver will ask if you are Commander Westland. Show him your ID card, and you'll be able to take a ride to Washington, D.C.
The Pentagon
You'll automatically enter the Pentagon. At the desk, talk to the guard at the desk, then show him your ID card when he asks for it. You'll be able to pass. Go up to the east elevator and press the button, then you'll go in.
In the hallway, a guard will ask for proper identification. Show your ID to the guard, who will take it before letting you pass. From here, head into the door on the east and you'll enter the maximum security briefing room. Inside, you'll be met by General Braxton. He will tell you that this meeting has been called due to the recent kidnapping of Ambassador Richard Loyd by terrorist Jaharah Khommini Sieb Abdul - the same story you read about in the magazine at the start of the game. He will tell you that the compound where the Ambassador is being held has been located, and that the location will not be disclosed in the meeting for security reasons. The President has sent the United States 7th Fleet into the Mediterranean as a diversion, and that there is now a mission to rescue the Ambassador by taking advantage of a covert operation, code-named "ICEMAN."
You, Commander Westland, have been chosen to carry out the mission due to past outstanding performances. You will be temporarily assigned to the nuclear attack submarine, USS Blackhawk and you will rendezvous with the boat at Pearl Harbor. The papers authorizing your assignment are in the sealed manila envelope located on the table in front of you, and you will report only to the Captain of the USS Blackhawk, Jonathan Hawkins. Meanwhile, the mission details will be locked in the safe of the Blackhawk. Braxton will ask you to commit the numbers "134" to memory.
Braxton will then turn the meeting over to Forrest Collins of the CIA (Central Intelligence Agency). Collins will show you a picture of the compound where Ambassador Loyd is being held, and tell you that you must make contact with a female agent who will be disguised as a Muslim. You will also be using the code name "ICEMAN." Also, the female agent will have a map directing you where to go.
From Pearl Harbor, you will set a course heading of 30 degrees latitude and 170 degrees longitude. You will not unlock and review your order before reaching these coordinates.
You'll then learn about the USS Blackhawk itself, which is set apart from other attack submarines with a device called the Electronic Noise Cancellation Transducer. This transducer is attached to the drive shaft where it picks up generated noise, feeds it through a computer, and cancels it for much improved silent running.
The meeting will the nbe turned back over to General Braxton, who will then tell you that it will be necessary for you to be checked out on a few of the control room systems while aboard the Blackhawk, and that the systems qualification will entitle you to earn your Submarine Warfare Insignia, also known as "the gold dolphins."
With that, the message is over. Stand up, then take the envelope. Be sure to salute the flag before you leave. Once you're out of the room, get your ID from the guard, but be sure to look at it. If it doesn't have the name "Commander John B. Westland" on it, show him the ID again and you'll exchange the ID. Look at it again, and make sure it does. MAKE SURE YOU DO THIS.
From here, go back to the elevator on the right and press the button to get back down to the lobby. Leave the building. You'll automatically get back in the limo, and you'll be on a flight to Pearl Harbor. Westland ponders what has caused this mission to take place, as well as what will happen to the world should it fail. He then reviews the orders assigning him to the USS Blackhawk.
You'll then come out of the airport. Show the driver in front of the car your ID, then say "yes" when he asks if you are Commander Westland. When he asks you to show him your orders, show him the orders. You'll be at the pier where the USS Blackhawk is moored.
USS Blackhawk
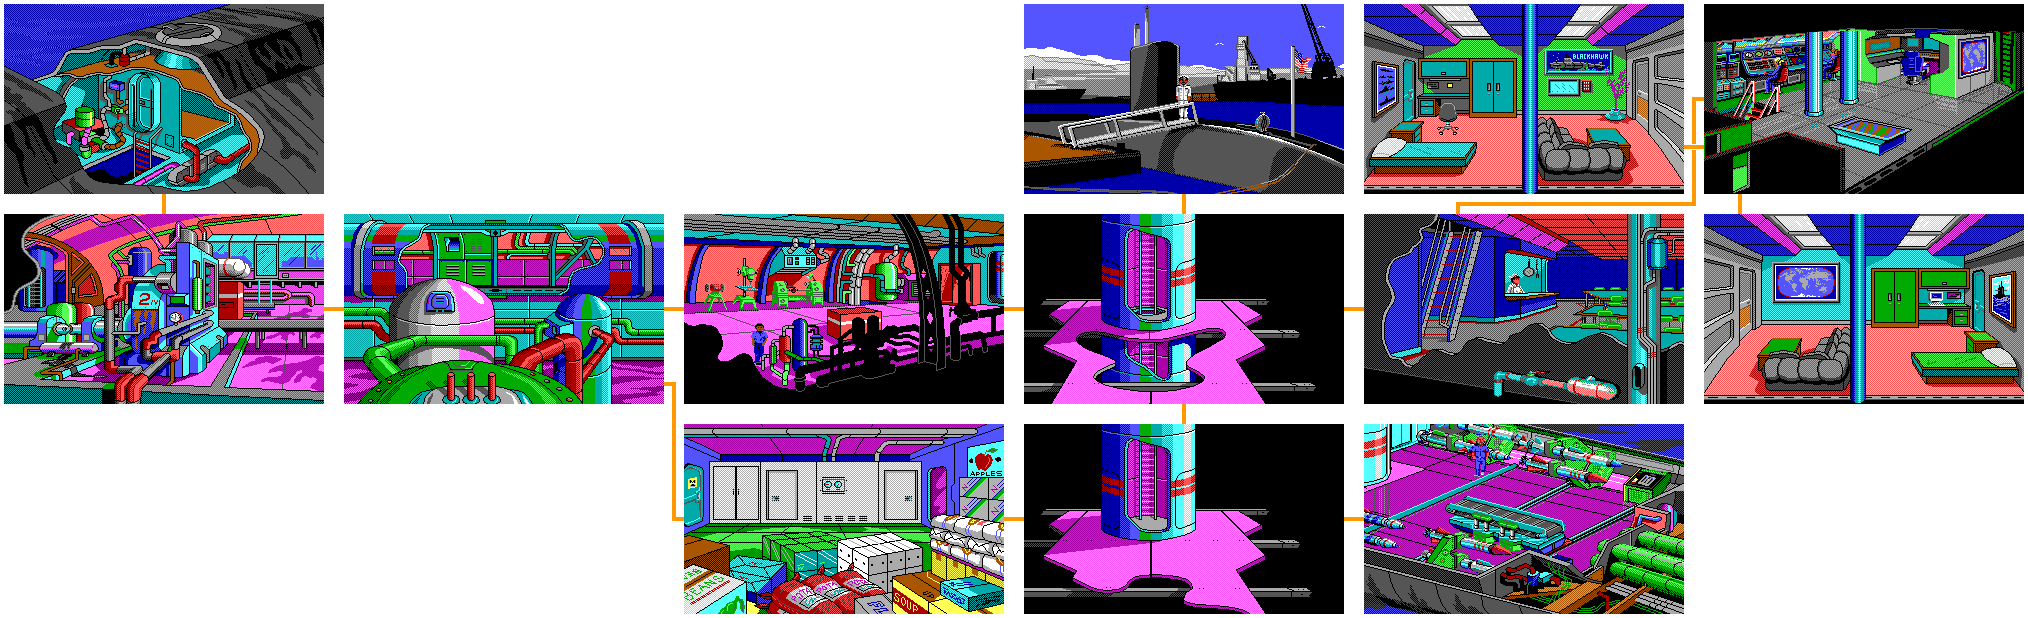
Walk onto the gangplank, then salute the flag, salute the Officer of the Deck, then talk to the Officer of the Deck. Show your orders to the Officer of the Deck, then you'll be allowed on the USS Blackhawk. You'll be told the Captain is expecting you. Also, for follwoing proper military procedures before getting in, you'll get three extra points, which you'll need if you want the full score of 300 points.
Westland will go to his quarters and change clothes. Open the desk drawer and take the vernier caliper. From there, open the shelf and look at the books. You'll find a book entitled "Decoding." Take "Decoding" from the shelf. If you look at the code book, you'll find an alphanumeric code where a number is assigned to the first ten letters. Be sure to write this down for the future.
Enter the door to the left, and you will be on the bridge. You'll be greeted by the Captain, who welcomes you to the team and tells you that the success of the mission dpends on how fast the USS Blackhawk can move. From here, you'll be taking control of the submarine and you'll be learning how to run the submarine.
You'll then see the controls of the submarine themselves. You will have to perform all the commands in a timely manner, or else your game will come to an end. Here's all the commands and what you need to do. If you don't know what a certain knob or button or doo-hickey is, there is always the link to the manual at the top of the blog entry.
- All ahead slow. Move the engine lever so that there is only one light on above it. (You can use + or - to accelerate or decelerate respectively, or you can move the lever with the mouse.)
- Right full rudder... set course to 180 degrees. Move the wheel all the way to the right. (You can use the mouse, or you can use the left and right arrow keys to move the wheel to the direction you want.) Watch the number below the map screen, and turn the wheel back to the center when it is just about to hit 180 degrees. (This is the heading indicator.) Also, you want to make sure that you get the engine throttle going fast enough so that you are going at least five knots. (There is a column of five numerical values on the far right; from top to bottom, the fourth one is the speed indicator displayed in knots. The fifth, which is below it, is the engine RPM, or revolutions per minute. Otherwise, you'll get the "Watch your speed, Johnny!" message, which means you need to slow down.
- Right full rudder... change course to 270 degrees. Move the wheel to the right again, and this time get the heading indicator below the map to 270. When you get close, be ready to move the wheel to the center again.
- Let's roll! All ahead 1/3. Move the engine lever up so that two lights are on above it.
- Prepare for dive sequence... acknowledge green board. Make sure the hatch is closed; if it isn't, close the hatch. To do so, enter the phrase "close hatch." Westland will order the hatches closed via the PA system. Then, type "green board" to acknowledge the green board.
- Dive! Dive! Dive! Rig planes for 10 degrees. You don't have to do anything here.
- Level off at 200 ft... confirm when depth attained. Move the dive lever (which is to the right of the engine lever) forward so that the first number on the column of numerical values on the far right (which will be referred to hereafter as the depth gauge) so that it reaches 200. (You can use the up and down arrow keys to move the lever up and down, or you can move the lever with the mouse.) The number can go up a little fast, and as long as you're off by one or two, you should be good; otherwise, you're getting a game over. After you manage this, type "depth obtained."
- Aye, Commander Westland... change heading to 360 degrees. Now that you have confirmed the depth, use the wheel to get the heading indicator to 360 degrees. Be careful so that the heading indicator does not roll back over to zero. Again, as long as you're off by one or two, you should be good.
- OK, Westland, let's bow this puppy out and take her on a speed run! All ahead full... hold on to your jockstraps! Move the engine lever so that four lights are on.
- Bring her left to 355 degrees. You'll be doing some fine-tuning with the wheel to bring the heading indicator to 355 degrees. (You may be reminded "Steady as she goes" while turning the wheel; just keep it cool and watch the heading indicator.)
- Maintain current heading and speed. Don't mess with anything.
You'll then get a message saying that you have reached your first rendezvous point.
- All stop. Move the engine lever down so that there are no lights on above it, meaning the throttle is stopped. Don't move too far down, or else all four lights will be red, meaning you're going in reverse. When the speed and RPM indicators both drop down to zero, you're done.
The USS Blackhawk will come to a stop, and the Captain will ask you to meet him in his quarters to open the briefcase. Type in "exit," and you'll be back on the bridge. You will follow the Captain to his headquarters, When he asks for your half of the combination, type "134." If you somehow get this wrong three times, the mission fails and you get a game over.
No comments:
Post a Comment