Wednesday, December 4, 2019

PrinceWatercress plays Donkey Kong Land 2 - Part 7 of 15


Rickety Race? More like Rickety RAGE!

All maps by Shiny.

Target Terror

Bonus areas: Two (2)


Welcome to the first roller coaster/amusement park level. Just jump on the coaster car to ride it. While on the car, you can get the car to jump by pressing A.

There are barrels with checkmarks and X's on them. The checkmarks open the gates, while the X's close them. If you run into a closed gate, you lose a Kong or a life, depending on whether you have two Kongs.

When you see your first Flitter, don't jump. Move off the edge. You'll find your first bonus area. All you need to do is survive and you'll get the first Kremkoin here.

At one point, there is an X Barrel before a Flitter. Jump onto that Flitter to get the DK Coin. From there, take the lower path to reach the second bonus area. Once again, you have to survive, and unlike Country 2, you cannot jump on Zingers. If you make it to the end, you'll get the second Kremkoin.

Bramble Blast

Bonus areas: Two (2)


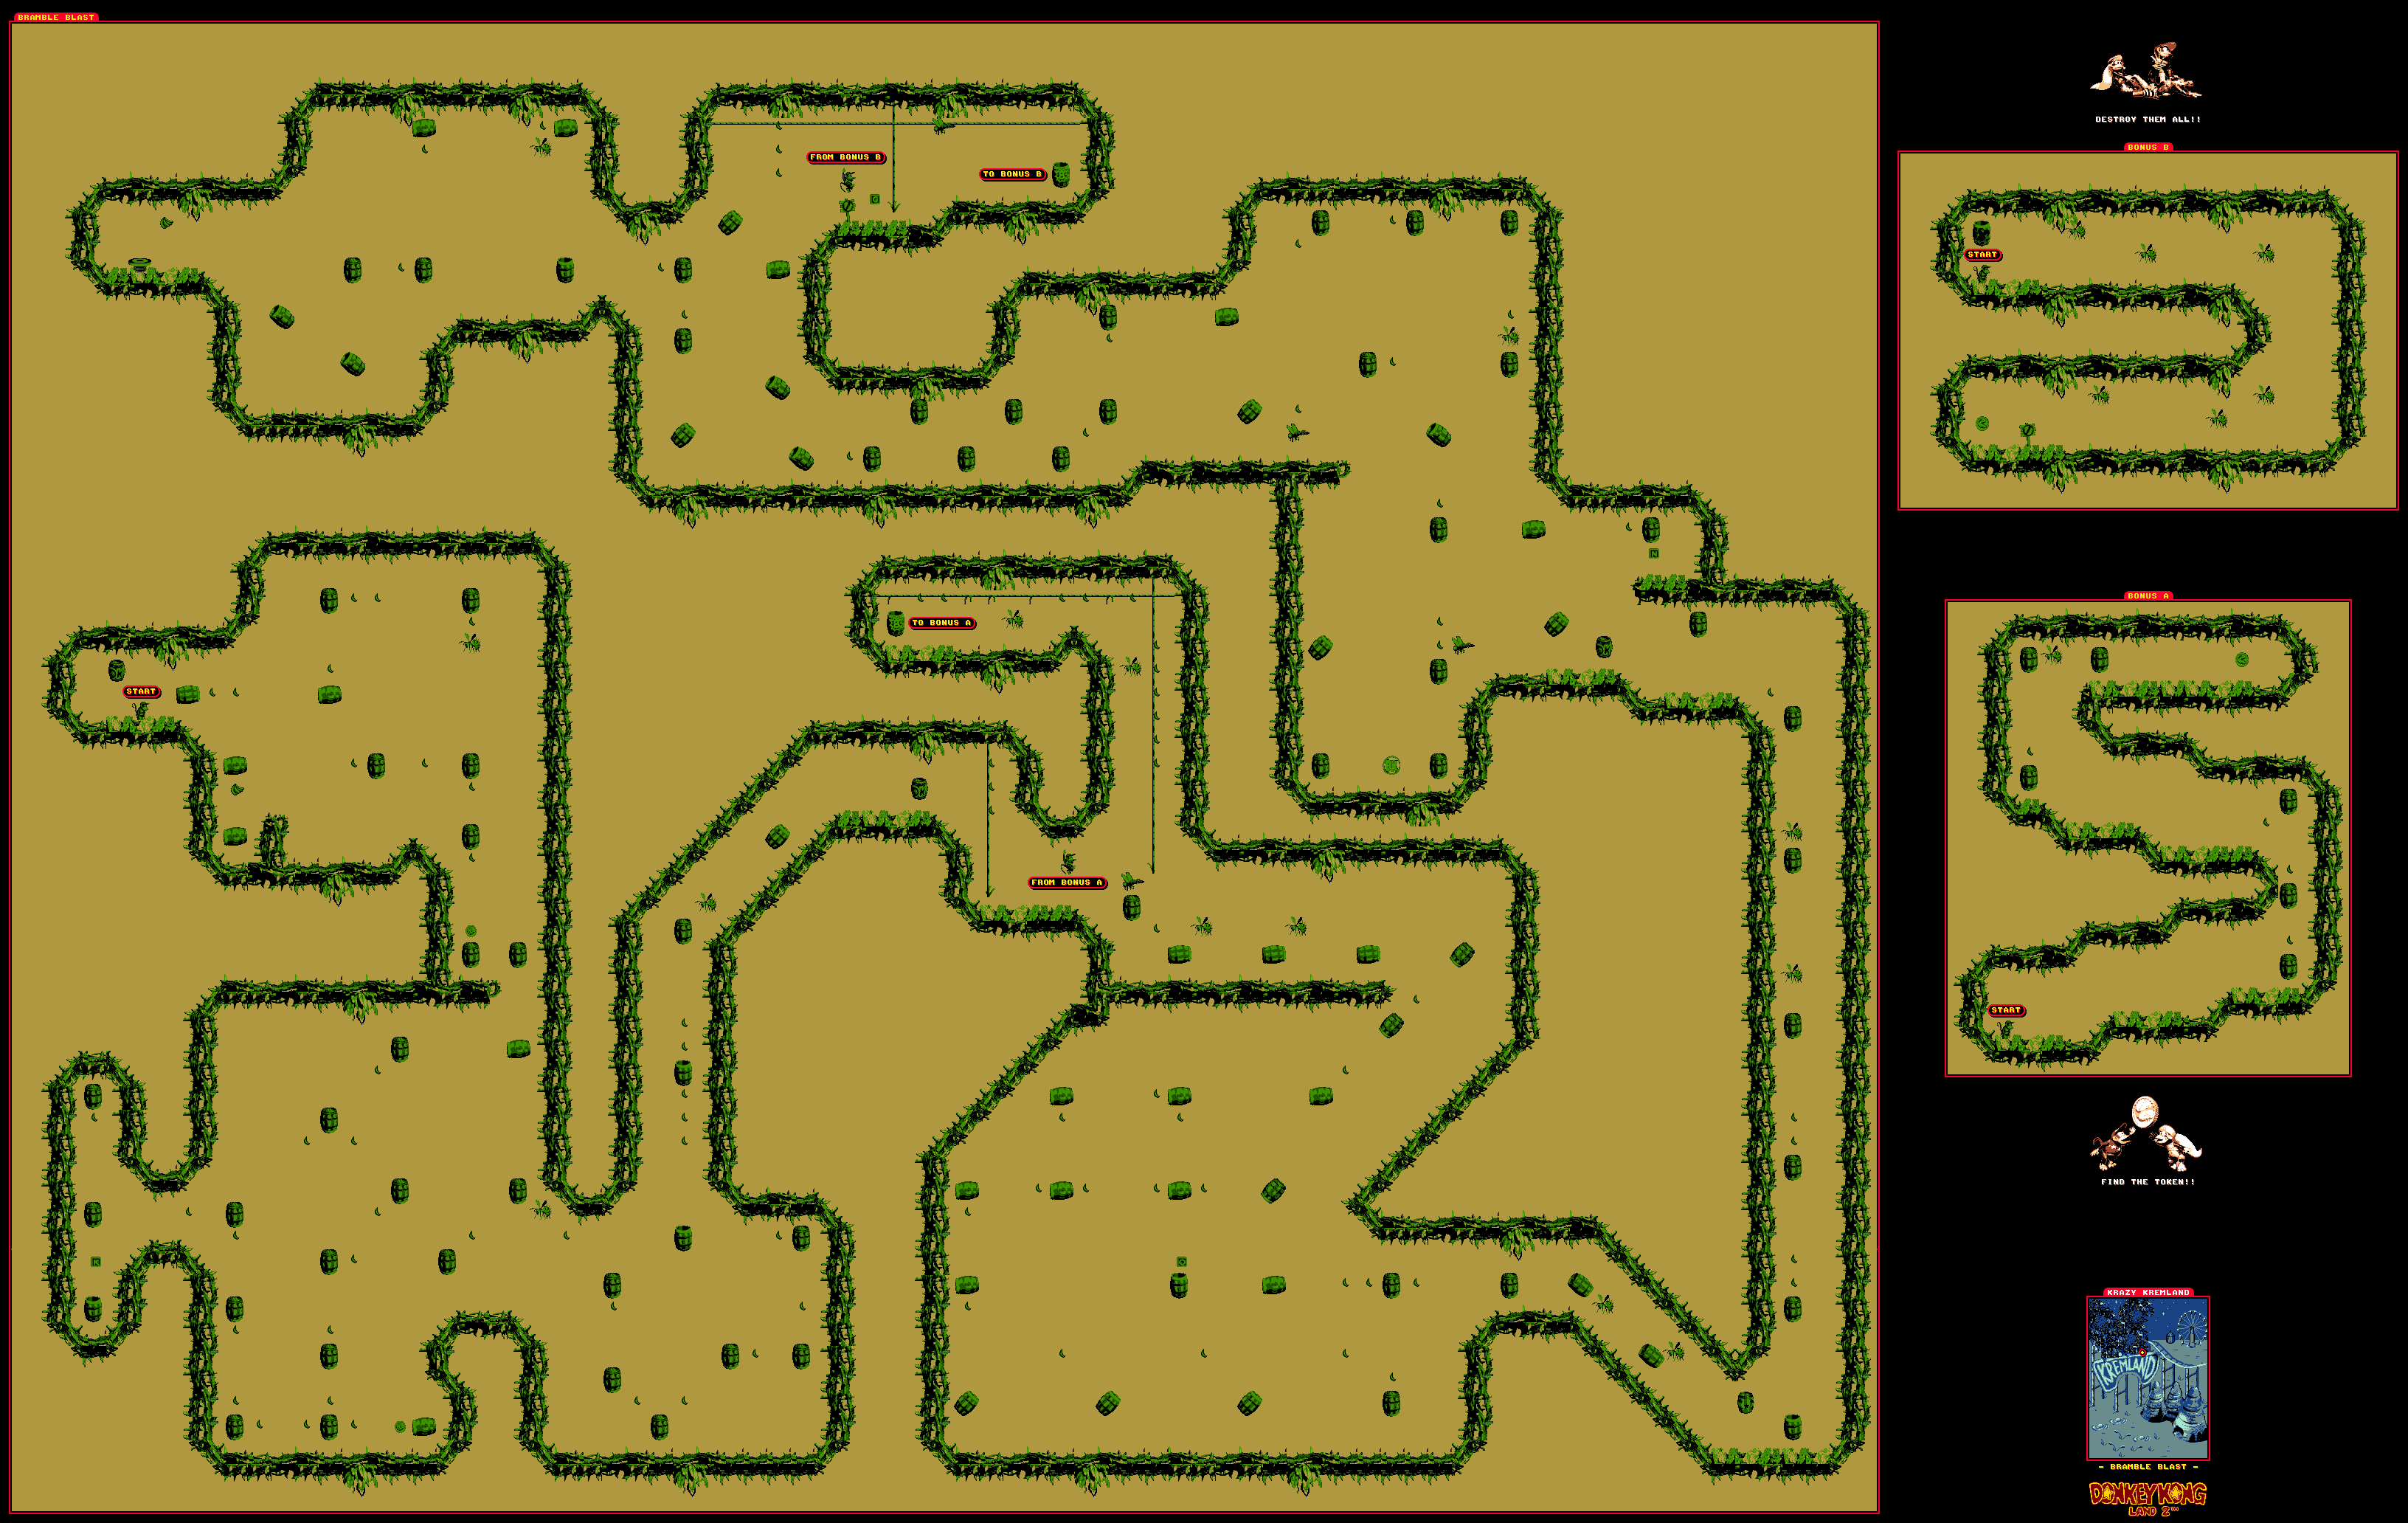
You'll be shooting yourself out of a lot of barrel cannons here. Just like in Country 2, touching the bramble walls and floors that aren't covered in wooden planks does damage

For the first part, follow the bananas, and shoot yourself out of the barrel cannons when the barrel cannons are aimed towards them. If you go left after the Zinger, you'll get some extra bananas, and you can make your way back.

After the while, the barrel cannons will rotate fully instead of switch between three or four directions. Be very careful and watch the barrel cannons.

If you see a horizontal vine and a vertical line cross, combine the direction you're going with where you want to go to make crossing the intersections easier. If you're going up and want to go to the left, hold Up and Left.

Shortly after the second DK Barrel, there is a vine leading up. Climb up it and go left to find the first bonus area. Watch where the barrel cannons aim and watch out for Zingers to get the first Kremkoin.

Jump to the left after getting the N or you will take a hit. Also, you want to go down after reaching the area with the N to get the DK Coin.

For the barrel cannon that requires bouncing off a Flitter, hold Left after the bounce.

If you go right near the end of the stage, you'll find the G. Further to the right is the second bonus area, and you'll need to climb to it to get there. Here, you'll play as Squawks. Defeat all the Zingers as you make your way to the end to get another Kremkoin.

Rickety Race

Bonus areas: none


Interestingly, the Game Boy version of Rickety Race has no bonus areas. All you have to worry about it making it past or jumping onto the Kremlings on the coaster cars - you can also knock them off the track into the bottomless pit below - and making it to pole position. There are five guys in all.

If you fight the first guy too early, you'll pay for it by jumping into a pit. Wait until after the first pit, then take him out.

If you hit the Zinger at the end, you're doing this whole stage all over again, because there's no checkpoint anywhere and you have no bananas hinting at where and when to jump! This is one of my biggest gripes in this stage. Seriously, getting the DK Coin was hard enough; Rare couldn't make it easier to get to the exit?


Tuesday, December 3, 2019

PrinceWatercress plays Donkey Kong Land 2 - Part 6 of 15


After four videos, we FINALLY make it out of the second world.

All maps by Shiny.

Slime Climb

Bonus areas: One (1)


Snapjaw does not make an appearance here; however, the water itself is poisonous to the touch and will take one of your Kongs away if you land in it.

Just like in Country 2, you'll have to carefully make your way to the top without going too fast or two slow. You will want to be able to see enemies as you go, but you don't want the rising water to be too close to you, either.

Shortly after the star barrel, you will see a Flitters as you make your way past the rising water. Bounce off it to the left to hit another Flitter, and keep going left to get the DK Coin.

After the N, there is an invincibility barrel. When you hit it, drop into the water. Down and to the left of where you found the invincibility barrel is the bonus area. If you make a big jump to the right after getting to the right end of the first horizontal rope, you can skip everything else and get the Kremkoin.

If you're fast, you can get the 1-Up Balloon at the end.

Kleever's Kiln


This battle is a little different from Country 2.

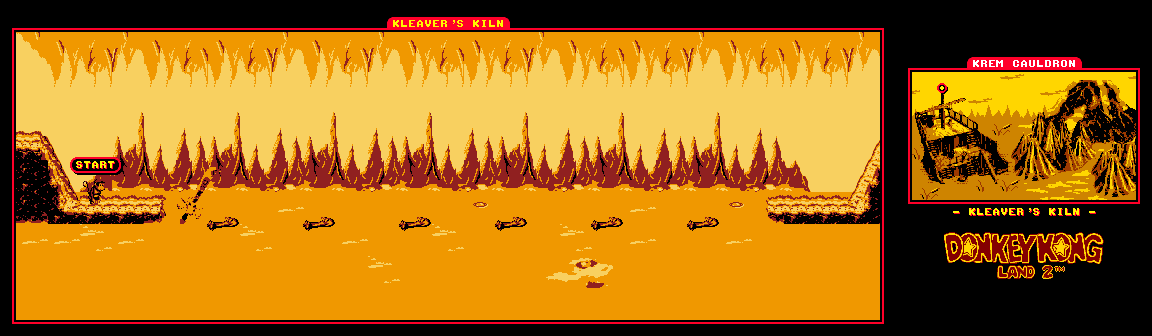
Avoid the fireballs that Kleever shoots. After two fireballs, he shoots a barrel. Jump on it to uncover a cannonball. Throw it at Kleever, then use the Krockheads to get to the other side of the room. You'll have to do this again. Thankfully, the cannonball protects you from fireballs and doesn't disappear if the fireballs hit it.

After two hits, Kleever will charge at you. Jump over him, then press B in front of the cannon that appears while Kleever is above it. You'll have to go to the other side of the room for the next hit, but the next hit will be the last.

Krazy Kremland


Hornet Hole

Bonus areas: One (1)


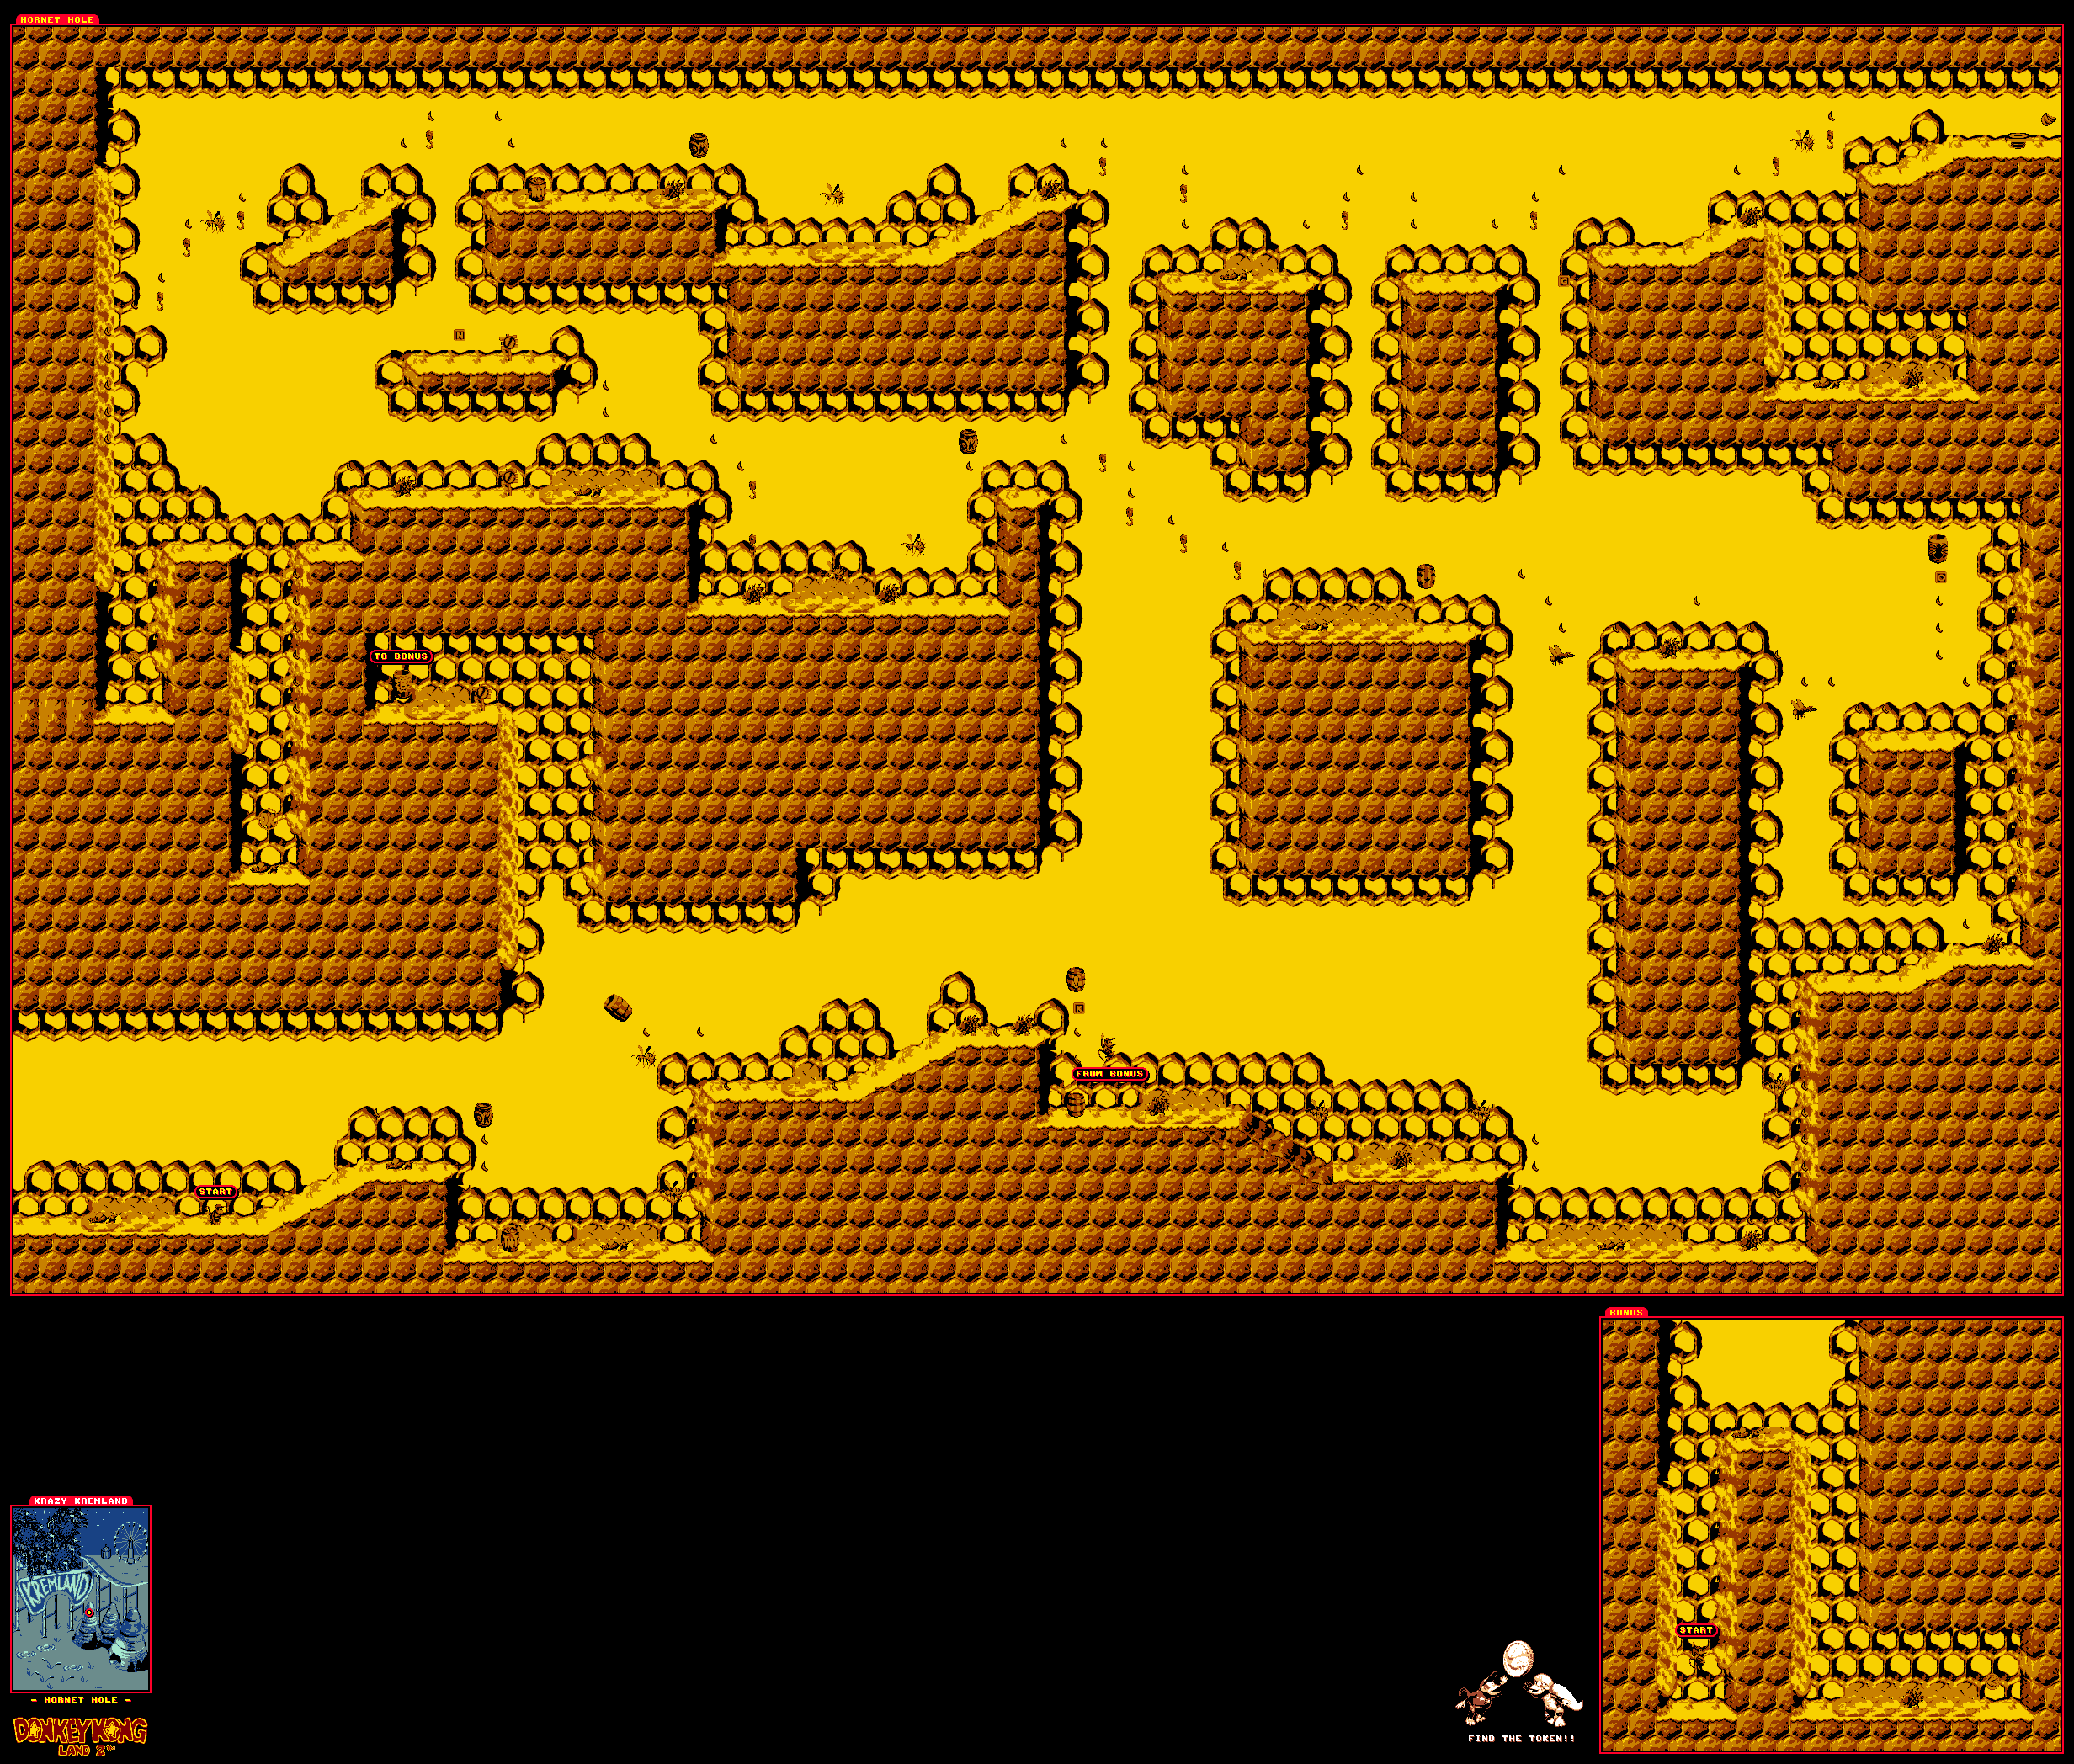
The dark blobs on the walls and floors are honey. If it's on the floor, you'll have to jump your way out of it; if it's on the walls, you can keep jumping away and back towards it to climb up the wall and get to other places. You'll also have to use hooks to get to other places.

Shortly after the start, you will see a banana and a barrel cannon above a Zinger. Further to the right are two Spinys - porcupine enemies that only be rolled into from the front in order to be defeated - and an invincibility barrel. Hit the barrel, then go back to that Zinger and jump off of it into the barrel cannon. Climb up the wall and you'll find the lone bonus area. Just wall jump off the walls, then get to the other end to get the Kremkoin.. You can also sacrifice a Kong to get in that barrel cannon, if you wish.

The Spiny enemies are porcupines. You can only hit them with a roll to the face; hitting them from above or behind will cost you a Kong or a life.

You'll find Squitter shortly after the bonus areas. Thankfully, he can walk on the floor honey without getting stuck on it. If you go above the "No Squitter" sign, you'll find one as well as the N.

If you leap into the pit after the "No Squitter" sign, you'll find the DK Coin.

Donkey Kong Land 2 Commercial - "Primates"


I've never really seen Western commercials for this one, personally, so here you go.

Monday, December 2, 2019

PrinceWatercress plays Donkey Kong Land 2 - Part 5 of 15


Our trek through the second world continues with three more levels!

All maps by Shiny.

Glimmer's Galleon

Bonus areas: Two (2)


Unlike Country 2, where Glimmer had an actual appearance, you'll have to swim into barrels with a ceiling lamp on it to turn the lights on. They eventually blink before the screen goes dark again.

If you go to the right at the start, you'll find the first bonus area. Collect all the stars and a Kremkoin will be yours.

You'll eventually find Enguarde shortly after the start of the level. He makes getting around a little easier.

The Kong letters are all in hidden locations, and you'll have to go through fake walls in order to find them. You'll have to do the same for the Hero Coin, too, which is right after the second fork in the maze that makes up this level.

When you find the goal, go back and go down. There are crates to the right that make up a fake wall leading to the second bonus area, which is above the water. You'll find the Kremkoin at the end of a very short maze with two possible paths, one of which is lined with room-lighting barrels.

Krockhead Klamber

Bonus areas: One (1)


The cattails in this levels act like ropes that you can climb up and down on. Watch 

After the fifth cattail, jump onto the Flitter to the right and keep going right to enter the first area. Rotate the barrel cannons with the Control Pad and use the bananas as a guide to launch yourself to the lone Kremkoin of this stage.

The Krockhead Barrel will cause Krockheads to rise out of the swamp water. If you're not fast, the Krockheads will sink back into the water.

After the N, you'll have to watch out for the DK Coin. Just before the G, you'll see a few Flitters. By jumping on the Flitter that moves left and right and heading right as you bounce, you'll get the DK Coin.

Wait for the Kaboings to come down before trying to jump on them.

Rattle Battle

Bonus areas: One (1)


Just like in Country 2, you'll be playing as Rattly for the whole stage and you'll be taking on a whole bunch of Kaboings wile using Zingers and Flitters as platforms.

The second stack of five barrels that you see in the stage leads to the bonus area. Leap off the Zinger to the left onto another Zinger, then continue left to the bonus area. Be careful as you move to the top of Zingers to jump off of them to get the Kremkoin.

Just before the checkpoint, there is a single barrel you can stand on with an up arrow made of bananas above it. Superjump here, and the DK Coin is yours.

Superjump to the right after the second Kannon to continue the level.

There is a Banana Coin to the right of the exit.

PrinceWatercress plays Donkey Kong Land 2 - Part 4 of 15


...and here is where the slightly eclectic variety of stage settings starts to pop up. This should be fun.

All maps by Shiny.

Red Hot Ride

Bonus areas: One (1)


By sending the Klobber into the Zingers to the left of the start, you can get a Banana Coin in a chest.

For this stage, you'll be using balloons to get across the lava. Jump on a balloon, then control it with Left and Right as it descends. To get off, just jump in the direction you want to go. Unlike Donkey Kong Country 2, there are no columns of hot air to keep the balloons in place, so you'd better know where you're going.

The bonus area is just after the checkpoint. Get to the DK barrel on the next patch of land, then jump to the left with Dixie's helicopter spin to reach the balloon. Take it left and jump into the bonus barrel, then collect the stars to get a Kremkoin.

Shortly after you get out of the bonus area, jump over the Zinger, jump onto the Flitter, then land on the balloon. As you go right, you'll find a lone banana near the bottom of the level. Follow it and you'll find the DK Coin.

Go to the left from the end of the stage, and you'll find a 1-Up. Grab it before it flies away.

Squawks' Shaft

Bonus areas: Two (2)


It's time for another vertical stage, but this time you'll find a barrel with a parrot face. This turns you into Squawks. Press A to fly, and press B to spit eggs at enemies.

The barrel cannons will now do different things, such as quickly spin around. Press A to shoot out of the barrel cannon when it's aiming where you want it to be facing.

Krook is back. Just like in Country 2, he will throw his hook at you like a boomerang when you are horizontally lined up with him.

After the first Krook, go up, then go left and jump off the edge. Use Dixie's helicopter spin, and you'll be able to reach the K and the first bonus area. Defeat all the Kremlings here to get a Kremkoin.

When you come out of the bonus area, go left after taking the barrel cannon near you up and left. You'll find the DK Coin.

The second bonus area is in the Squawks section. After the platforms with the two Krooks, head to the right. If you see a DK barrel instead of a bonus barrel, that means you'll have to take out the Zingers that you'll soon see, then head to the right. You'll find it there. (If you see a Kannon or his cannonballs, you went too far.) If you need to, spit eggs at the Krooks' boomerang hooks. It makes it easier to take out the Krooks themselves. Defeat all the enemies with Squawks to get another Kremkoin.

Barrel Bayou

Bonus areas: Two (2)


The first bonus area is at the start. Go to the left and jump into the barrel cannon. You can control where it goes by holding Left or Right, then press A when you're ready to shoot yourself out of it. Use it to shoot your Kongs up and left to get to the first bonus barrel. Use the cannonball to get rid of all the Zingers to get a Kremkoin.

The swamp water is a bottomless pit. Use the platforms in the water to get over it.

In this stage, not only do the Krockheads come back, but you can control the barrel cannons with Left and Right on the Control Pad, then press A to launch yourself when aimed in one of eight directions. Thankfully, you can fire whenever you're ready.

At one point, you'll be able to play as Rambi. Shortly after this, there will be a series of barrel cannons. When you have a choice between a high road and a low road, take the low road. You'll get the DK Coin for taking it.

The second bonus area involves taking a cannonball to a cannon. This time, you'll be playing as Squitter. Make web platforms and take out Zingers as you make your way to the right and get the Kremkoin.

Sunday, December 1, 2019

PrinceWatercress plays Donkey Kong Land 2 - Part 3 of 15


The difficulty goes up just a little bit in the second world, which combines both Crocodile Cauldron and Krem Quay from the game's Super Nintendo counterpart and gives you a bit of level variety for this point in the game, as well.

Also, you'd think I'd know better than to practice stuff after making this video. If the future is any indication, I don't.


All maps by Shiny.

Krem Cauldron


Hothead Hop

Bonus areas: Two (2)


At this point, most levels will have one or two bonus areas.

The chest to the left of the start contains a Banana Coin.

The Krockheads in the lava act as platforms. Some of them launch you into the air when landed on.

The Klap Trap-like enemies cannot be rolled into; if you do, you will lose a Kong or a life. You can only jump on them.

The first bonus area is just after the short, but you won't be able to get to it with the Kongs. Instead, you'll have to continue on and jump into the barrel with the spider on it. This transforms you into Squitter the Spider. Press B to spit webs at enemies, and hold Up and Down on the Control Pad before pressing B to aim them. If you have a web projectile on the screen, you can press the Select Button to turn it into a web platform. (This can be awkward, as it is possible to accidentally leave the level if you've automatically completed it just by your big fat thumbs fumbling onto Start and then Select.) You can only have one web platform on the screen at any time, and if you try to make a second, the one you made earlier will disappear after a few seconds, so you'll have to leap to the one you just made quickly.. The web platforms also disappear if you leave them on-screen for too long, so do what you need to do. Now that you have web spitting knowledge, head back to the left and make web platforms as you do. You'll be able to reach that bonus area now. Just use Squitter's web platforms and you'll get to the end where the Kremkoin is.

The DK Coin is just above the checkpoint. Just use Squitter's web platforms to get there.

The second bonus area requires the Kannonball. Jump on all the enemies and the Kremkoin is yours.

Kannon's Klaim

Bonus areas: One (1)


This stage is a purely vertical climb full of platforms and barrel cannons. You'll be going from one barrel cannon - or platform - to another to reach the very top. One of them will require to press A or B to shoot yourself out manually to avoid a Zinger.

Both the bonus area and DK coin come after the checkpoint. At the checkpoint, jump onto the hook to the right, jump to the platform to the right of that, then use Dixie's helicopter spin to get to the platform above the checkpoint. Use the barrel cannons to get to the top and the Kremkoin will be yours.

At one point after the checkpoint, there will be a hook above a barrel cannon. Hang on it, then jump to the right and stay to the right. You'll land on a platform where you will find the DK Coin.

There are two new enemies here: Necky, who swoops down at you when you close; and Kannon, who stands in place and shoots indestructible cannonballs at you.

Lava Lagoon

Bonus areas: Two (2)


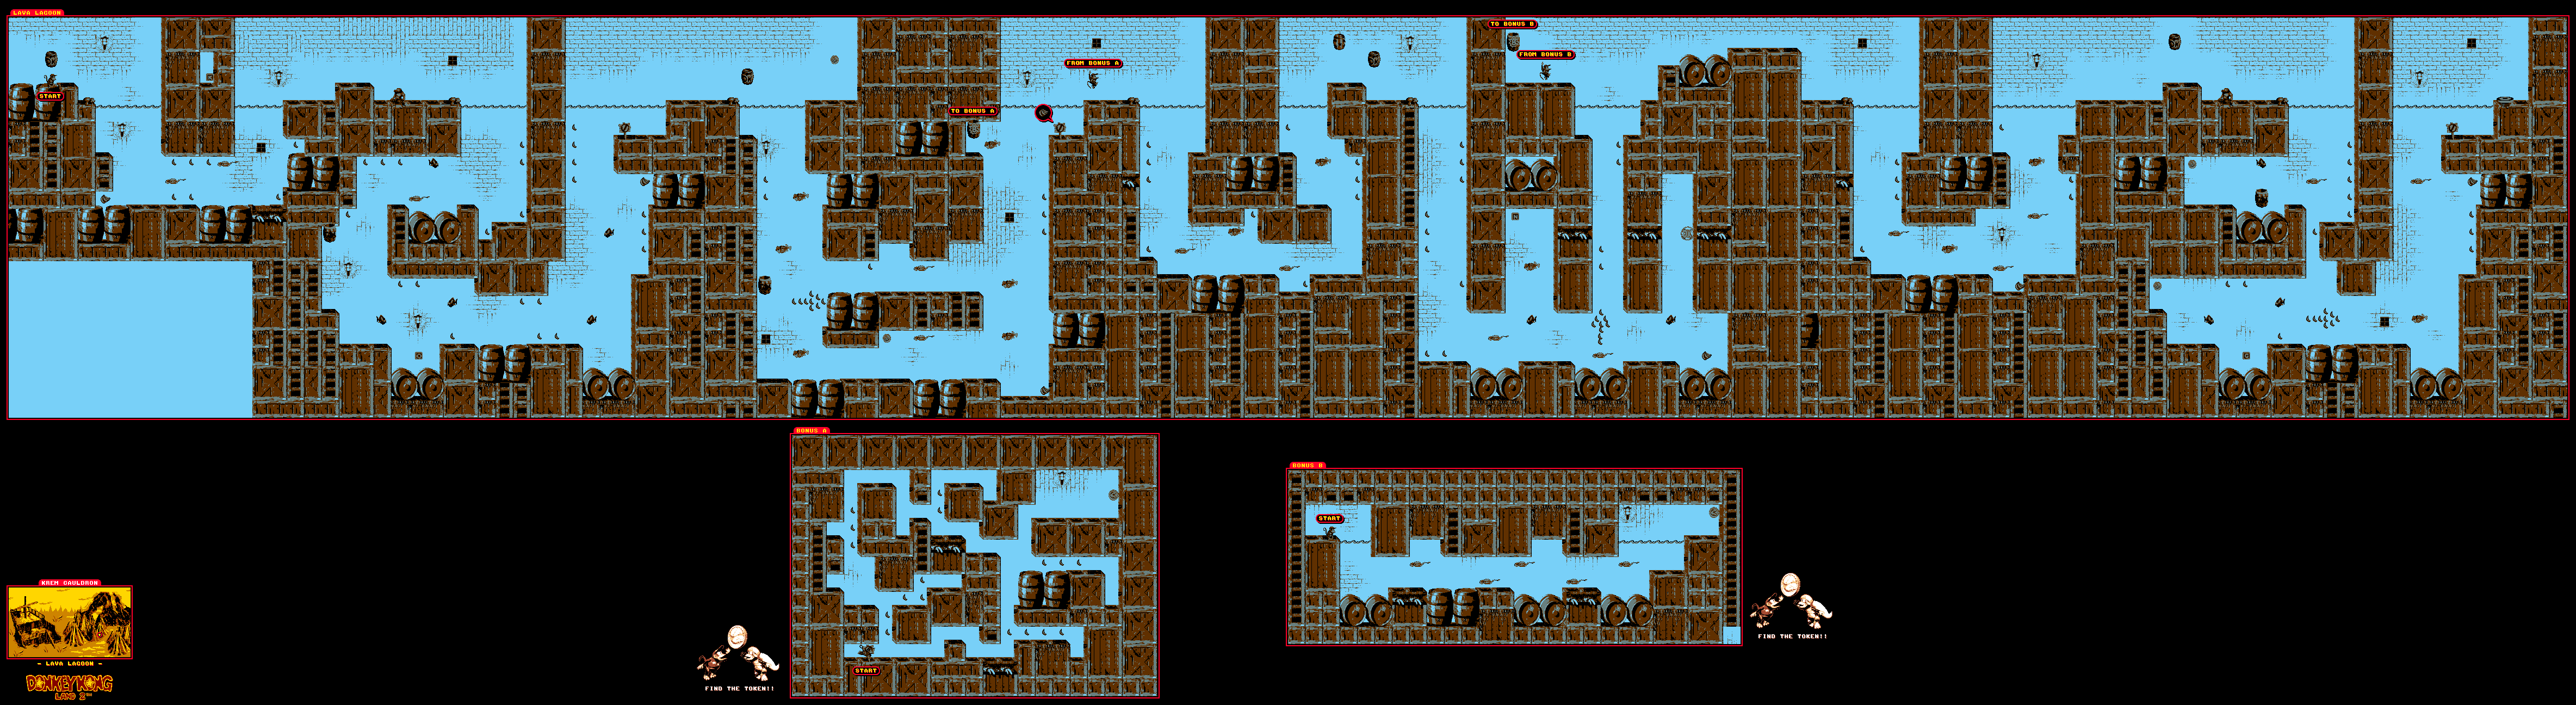
Clapper the Seal will be waiting for you, and if you jump on him, he will cool the water down. If the water is a dark color, it is lava that you do not want to jump into unless you want to lose a Kong or a life. If the color of the water is flashing, you need to get out of there before taking damage, as Clapper's cooling breath won't last forever.

You'll also meet Puftup the puffer fish, a new enemy for this stage. Some of them move back and forth, while others will stay in place. 

The first bonus area is to the left of the second "No Enguarde" sign in the stage. Here, you'll be going through a short maze. Keep going up and right and you should be able to get the Kremkoin.

At one point near the N (or the fifth Clapper), there is a fork in the road with an arrow made of bananas pointing up. Go right here, and when you're able to go up from there, you'll be able to get the DK Coin.

The second bonus area is after the DK coin. When you're about to surface out of the water, go left. You'll find the second bonus area. Just dodge the Flotsams on your way to the right and you'll get another Kremkoin.

PrinceWatercress plays Donkey Kong Land 2 - Part 2 of 15


In this episode, we finish up the first world of the game while collecting all of the stuff for a full clear and also finding all the warp barrels.

All maps by Shiny.

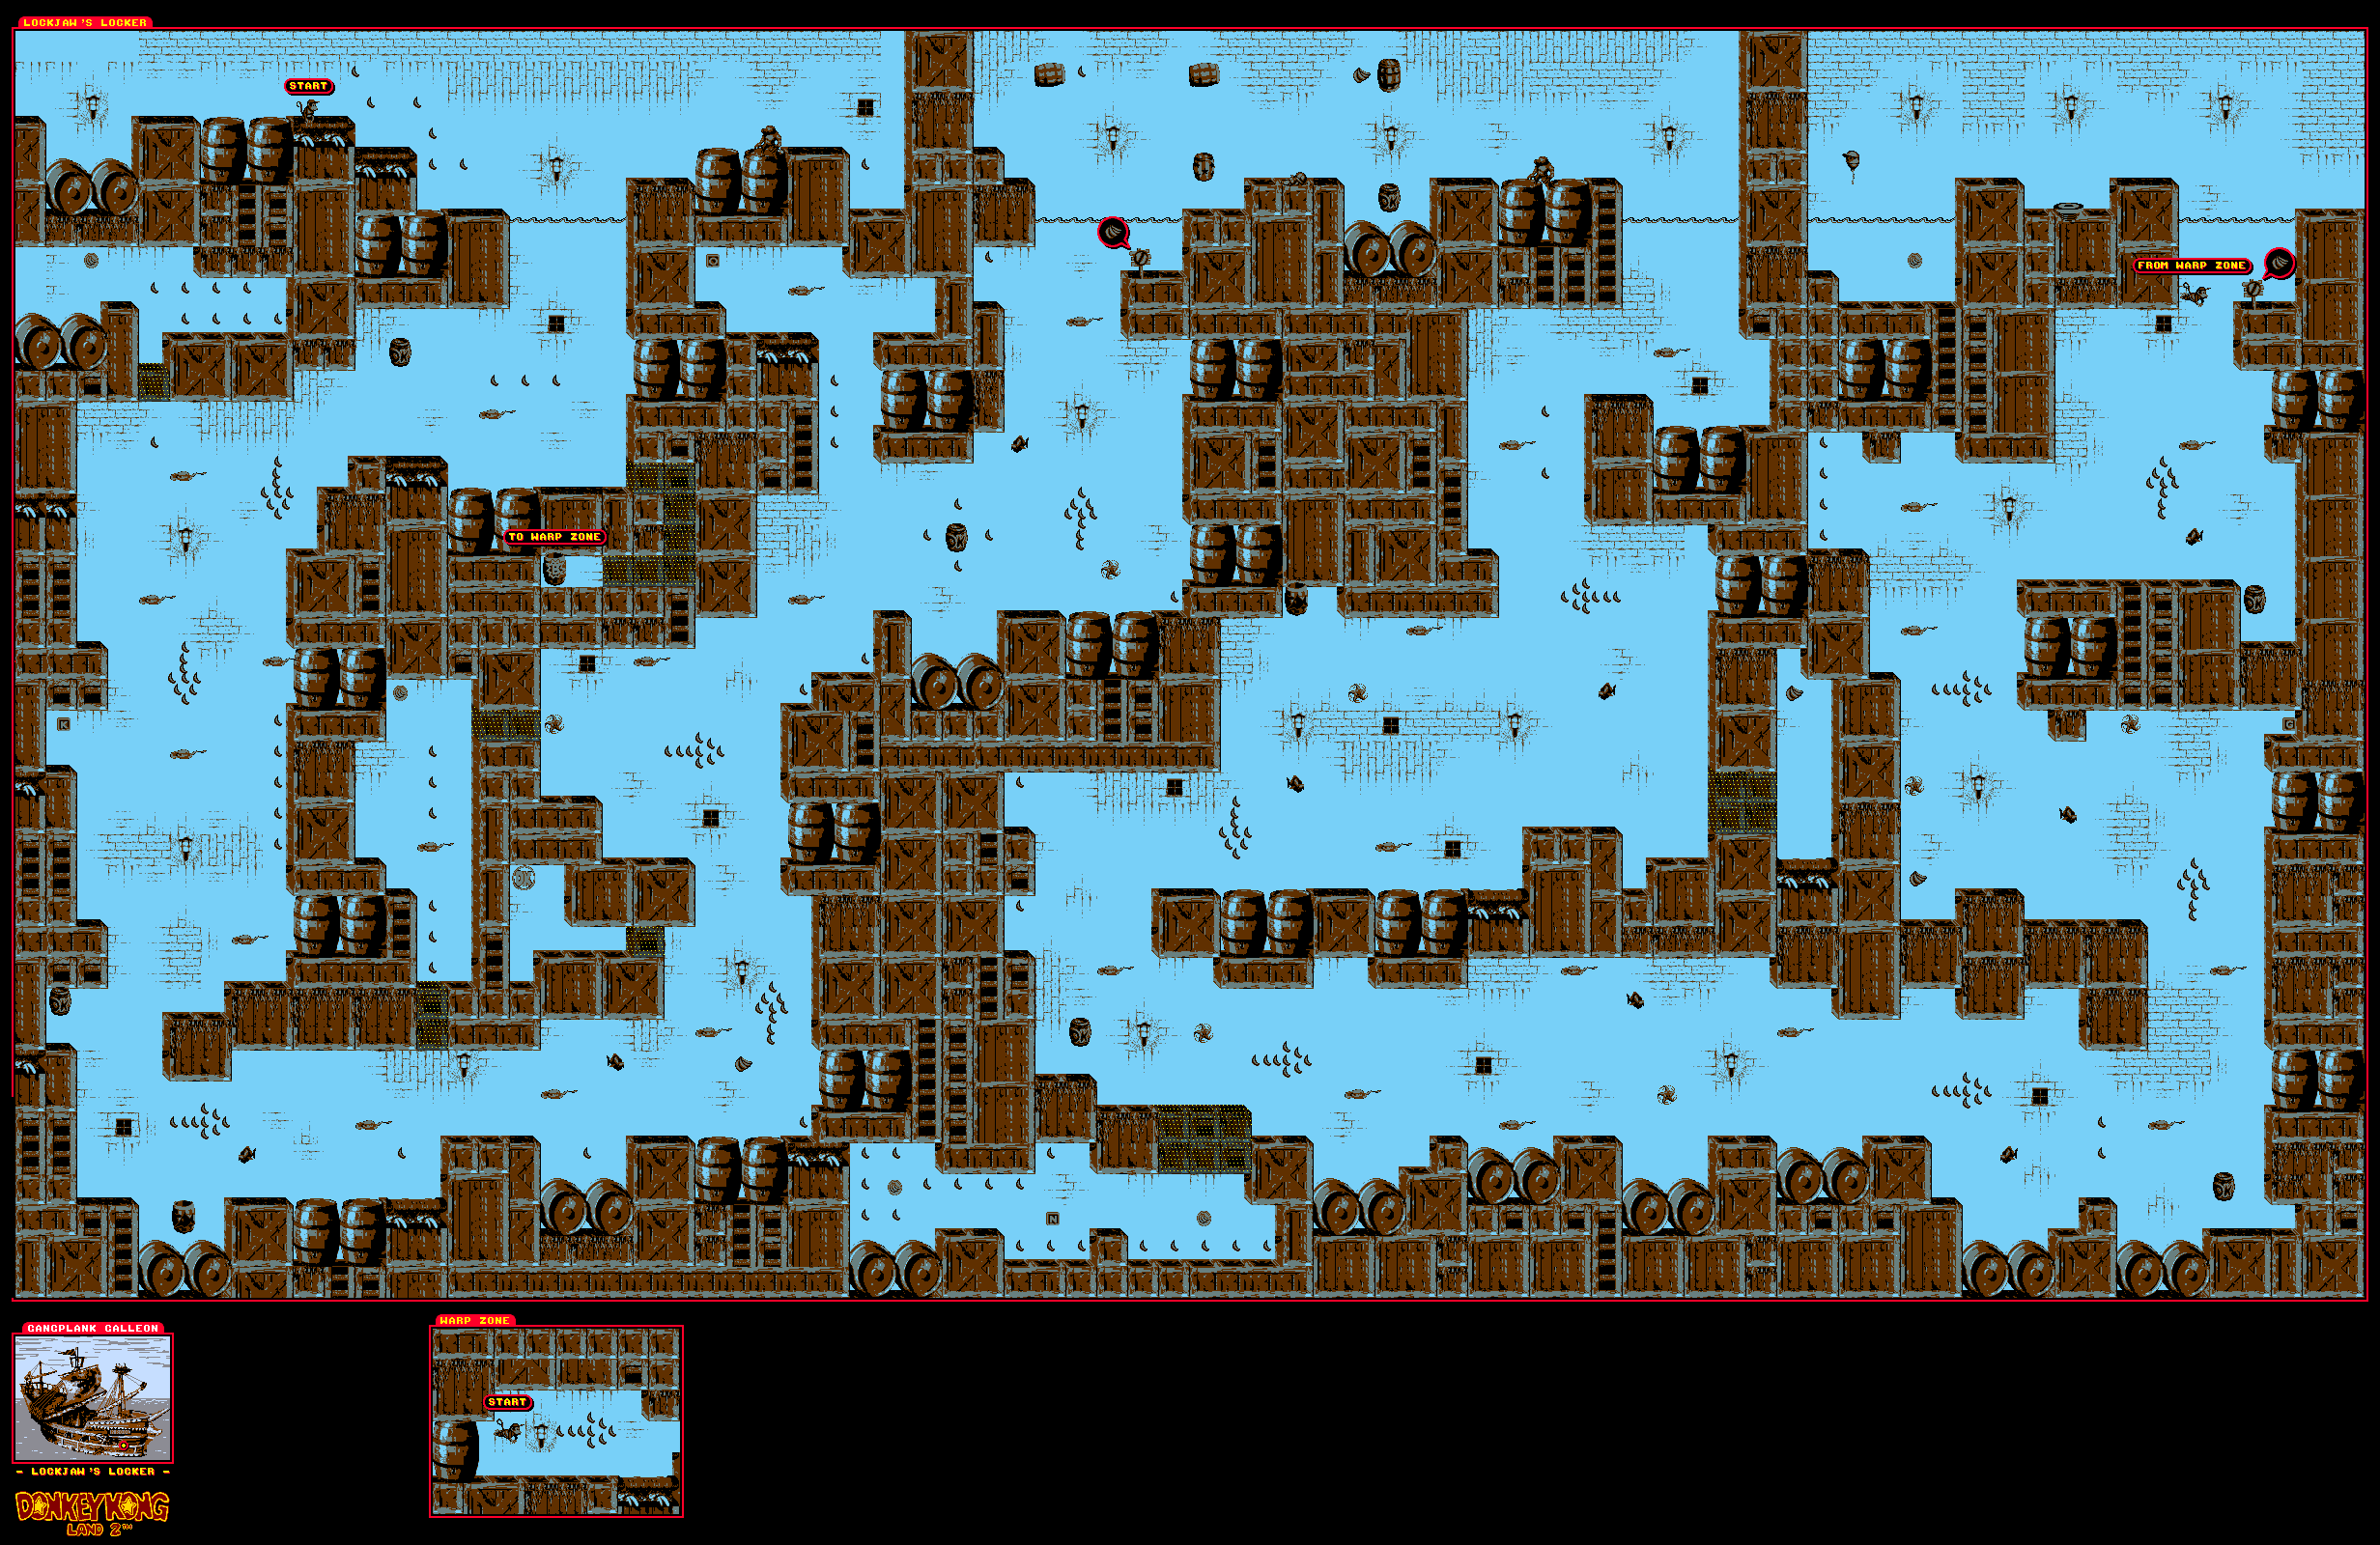
Lockjaw's Locker

Bonus areas: none


To find the warp zone, go down and to the right as soon as you go underwater at the start. You'll be able to go through some crates and find a path leading to it.

Swimming is easy to do. Just keep pressing A to ascend when you need to, use Left and Right to switch directions and hold Down to descend quickly when you need to.

There are some hidden walls if you know where to look, and these hidden compartments lead to Banana Coins as well as the N and a DK Coin. To find the DK Coin, go left directly after the first "up arrow" made out of bananas and go through the wall. You'll find the DK Coin. Thankfully, the path here is very linear despite the fact that there are banana arrows telling you where to go.

The swordfish barrel lets you play as Enguarde. You can move in any direction with the Control Pad while playing as Enguard. Use B to stab enemies, and hold Select to do the supercharge, which lets you run through multiple enemies until you hit a wall or touch the Control Pad.

Enemies returning here include Flotsam the manta ray (who moves back and forth), Shuri the starfish (who careens at you when you get too close) and Lockjaw (the fish the slowly moves back and forth and tries to take a bite out of you if you get too close).

There is a 1-Up to the left of the exit. If you're quick and you can use Dixie's helicopter spin, you can get it.

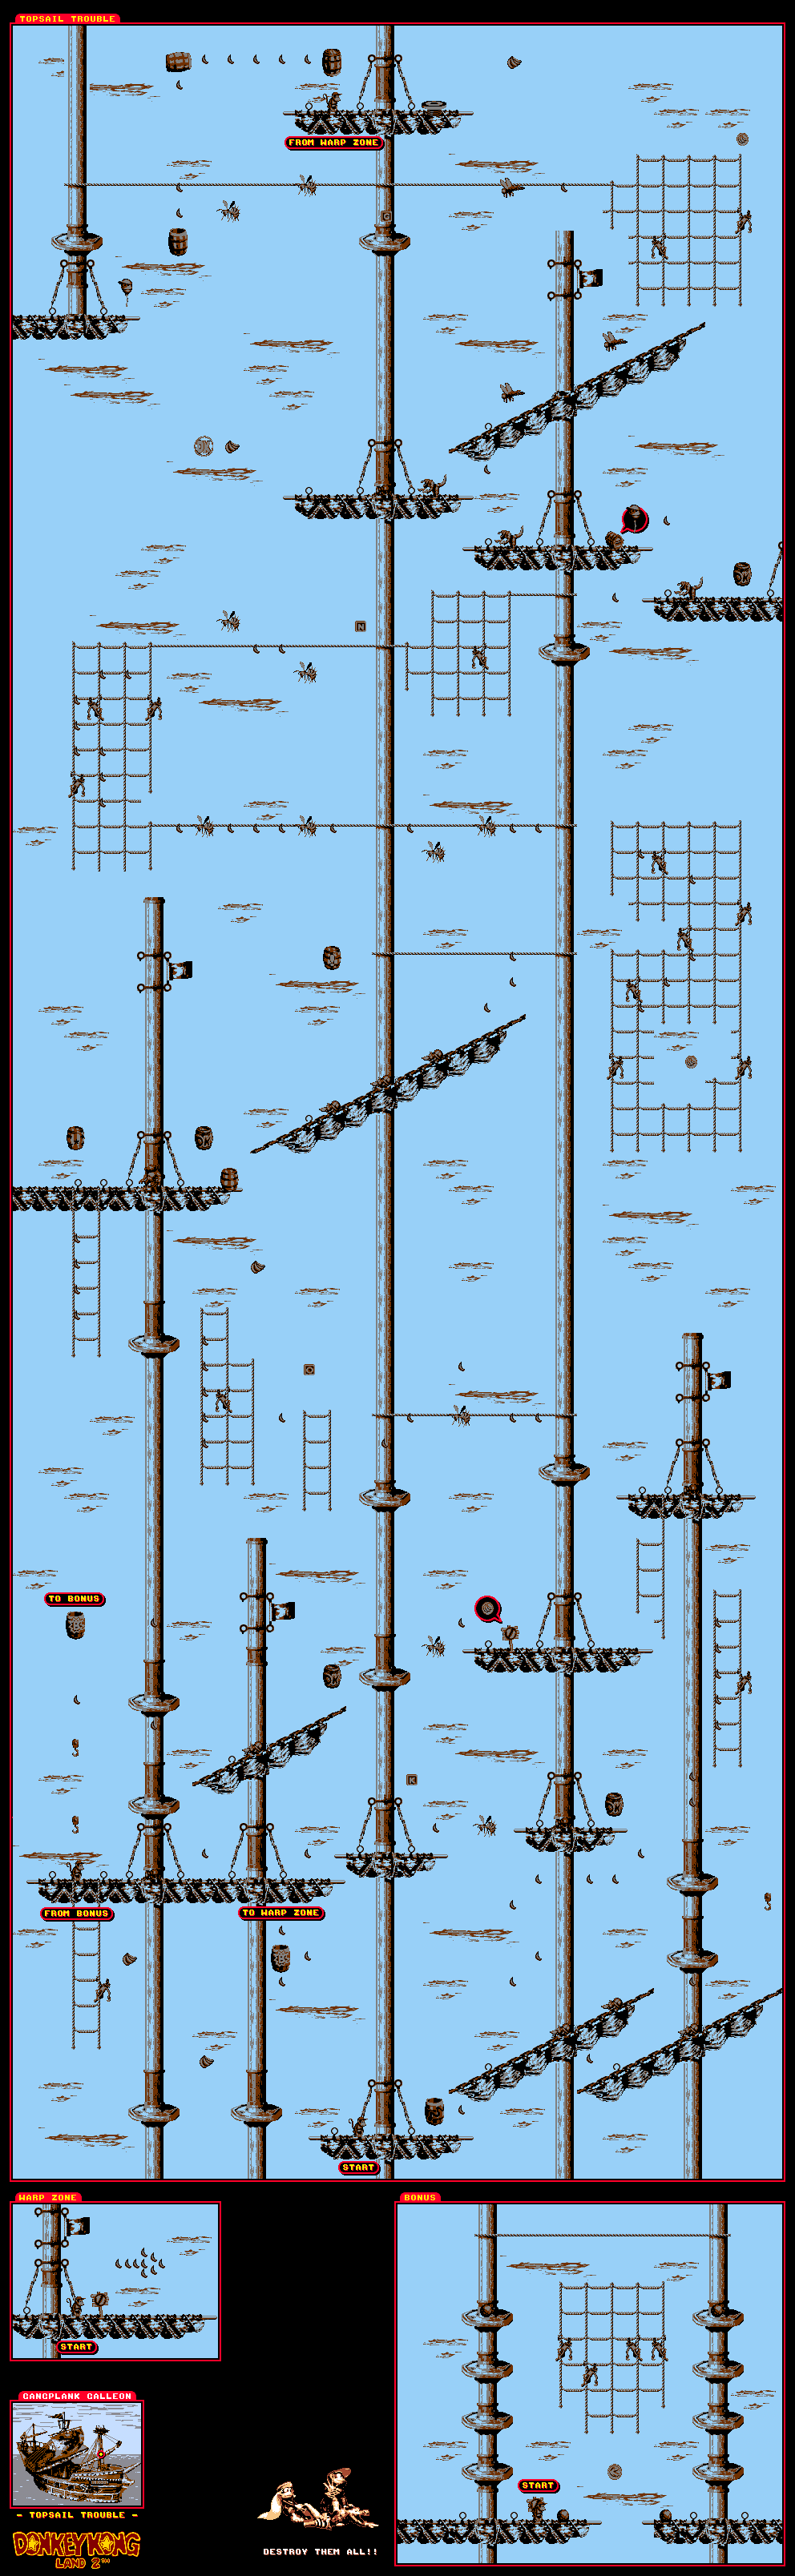
Topsail Trouble

Bonus areas: One (1)


This time around, you'll be playing as Rattly. You can attack enemies by jumping, and holding Select down until Rattly bobs up and down very fast allows you to do a superjump straight up into the air. Rattly's jump attack will also allow you to defeat Zingers without taking damage and use them as platforms to where you need to go next.

The Warp Zone is above the platform to the left of the start. Superjump up with Rattly and stay to the right side of the mast in the background to find it. The bananas will clue you in on where to move.

Further to the left of the Warp Zone is a rope ladder with a Klinger, and directly above it is the bonus area for this stage. You can get there the hard way with Rattly, but you can get there as the Kongs provided you use the nearby hooks. When you reach that area, you'll have to superjump to another platform above, then jump to the left to get there. Destroy all four Klingers with the cannonballs, and the Kremkoin will be yours.

In the second half of the level, you'll be doing a lot of rope climbing and a lot of Klinger dodging. Remember, if you can shit to another rope and move right into a Klinger, you can bump the Klinger off. There is a "!" barrel that gives you temporarily invincibility if you know where to look, and you can burn through the early part of the second half of the level with it.

There is a chest with a 1-Up inside. To break the chest and get the contents, just toss it into an enemy like you would a crate or a barrel. Further to the left is the DK Coin. You can use Dixie's helicopter spin to get it.

If you see the barrel cannon below the horizontal rope, go further to the left and drop to the nearby platform to find an easy-to-miss 1-Up.

Funky's Flights


If you've completed more than one world - and you can get to it - you can pay Funky Kong two Banana Coins to go to a previous world to load up on more lives or find missed bonus areas and DK Coins.

Funky and Wrinkly Kong are the only two Kongs in this game; you won't be able to get hints from Cranky Kong or answer questions with Swanky Kong in this one.

Krow's Nest


To beat Krow, jump over him as he swoops down with the egg, then wait for him to drop the egg. Grab the egg when it stops moving, then hit Krow with it.

After two hits, eggs will rain down one at a time after Krow rams the mast in the background. One will eventually land on the floor, and you'll be able to tell which one it is as that egg will not be spinning on its way down. Grab it, and send it back at Krow. After the fourth hit, Krow is history.

It should be mentioned that whenever you enter a boss level, you will automatically have both Kongs when the boss level starts.

After the boss battle, you'll be able to go to Krem Cauldron, which combines levels from Crocodile Cauldron and Krem Quay. Before you go there - or any other freshly unlocked world - go back to the previous one and save your game at Kong Kollege.