Friday, October 4, 2019

PrinceWatercress plays King's Quest V for NES - Part 4 of 7


So much to do, so many ways to mess the rest of the game up.


From the village, go west until you reach the inn. Go in, and the innkeeper will toss you in the cellar after his little buddy tries to rub you out. Since you just saved the mouse earlier, he'll eat at the ropes that bind you and free you. But don't leave just yet! Grab the rope before you do anything else, then use the cobbler's hammer on the door to break the lock. Go into the next room and open the cupboard with the hand icon to find a leg of lamb. Get it and go through the door on the left. It will lock back when you're back outside. DO NOT GO BACK INTO THE INN UNLESS YOU HAVE A DEATH WISH. IF YOU DO NOT TAKE THE ROPE, THE GAME IS UNWINNABLE. THE GAME IS ALSO UNWINNABLE IF YOU FAIL TO TAKE THE LEG OF LAMB.

Go back to where you met the poisonous viper and use the tambourine on the viper to frighten it away. We're now going to the mountains!


First things first - put the cloak on so the cold won't kill you. Select the cloak, then press A when the arrow is on Graham. You'll put it on.

Go right, and you'll reach a supposed dead end. Use the rope on the rock overhang poking out of the cliff side, then climb up by using the hand icon on the rope. DO NOT USE IT ON THE BRANCH NEXT TO IT, YOU WILL DIE.

When the game tells you Graham is getting hungry, eat the leg of lamb. When you're ready to climb the rope, use the hand on it.

The "M" on the screen-top menu (the eighth icon) gives you a password if you select Save. Write the password down and enter it when you decide to Restore your game. I can almost picture the AVGN's rage over this. You also have two save files that last as long as the power is on, and you can use these to quickly go back in case you mess anything up.

Next is the columns between the cliffs. Take the upper path (the lower path kills you) and move the arrow below Graham when you're almost at the other side to make it to the other side. Go right.

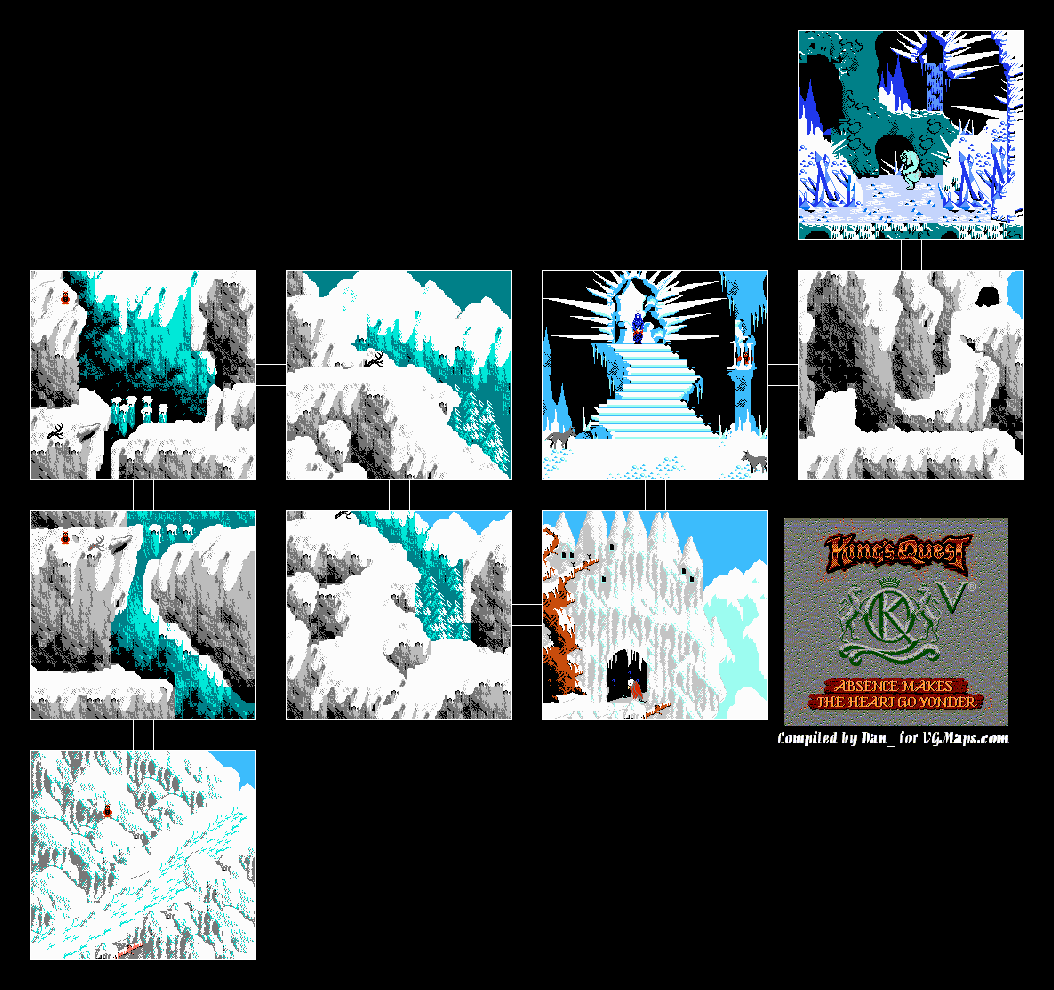
A wolf will kidnap Cedric on the next screen. Use the sled on the slope to go after him!

Go right and talk to the eagle. He's hungry and cannot fly. Give him the rest of the leg of lamb, then he'll thank you before flying off. IF YOU DO NOT DO THIS, YOU WILL MAKE THE GAME UNWINNABLE. Go into the cave, and you'll displease Queen Icebella. Play the harp by using it on Graham to stop the wolves and move Icebella's heart into freeing you. She wants you to remove a yeti from her crystal cave before she can release you. Sir Greywolf will show you to the cave.

On the next screen, go to the cave in the upper-right corner, and be careful not to fall over the edge. To keep from dying, hug the wall.

Once you're in the cave, select the pie. Throw it at the yeti and he'll fall over the edge. Go up to the crystals blocking the doorway in the center of the screen and use the cobbler's hammer on it. You'll get a crystal that will come into play later. IF YOU DO NOT TAKE IT, THE GAME WILL BECOME UNWINNABLE.

Go back to Sir Greywolf. Queen Icebella, now knowing who you are, will hold her promise and release you. Greywolf will show you out again and ask you to follow the path east. When you take it, a two-headed roc gets you. You will end up in the two-headed roc's nest. Pick up the shining object next to you - it's a golden locket. IF YOU DO NOT TAKE IT, THE GAME WILL BECOME UNWINNABLE. Since you fed the eagle, he'll show up in the nick of time to rescue you and drop you off in yet another part of Serenia - his home, perhaps?

Thursday, October 3, 2019

PrinceWatercress plays King's Quest V for NES - Part 3 of 7


In this video, we go through the dark forest and outsmart the witch, then take care of some things in the village.

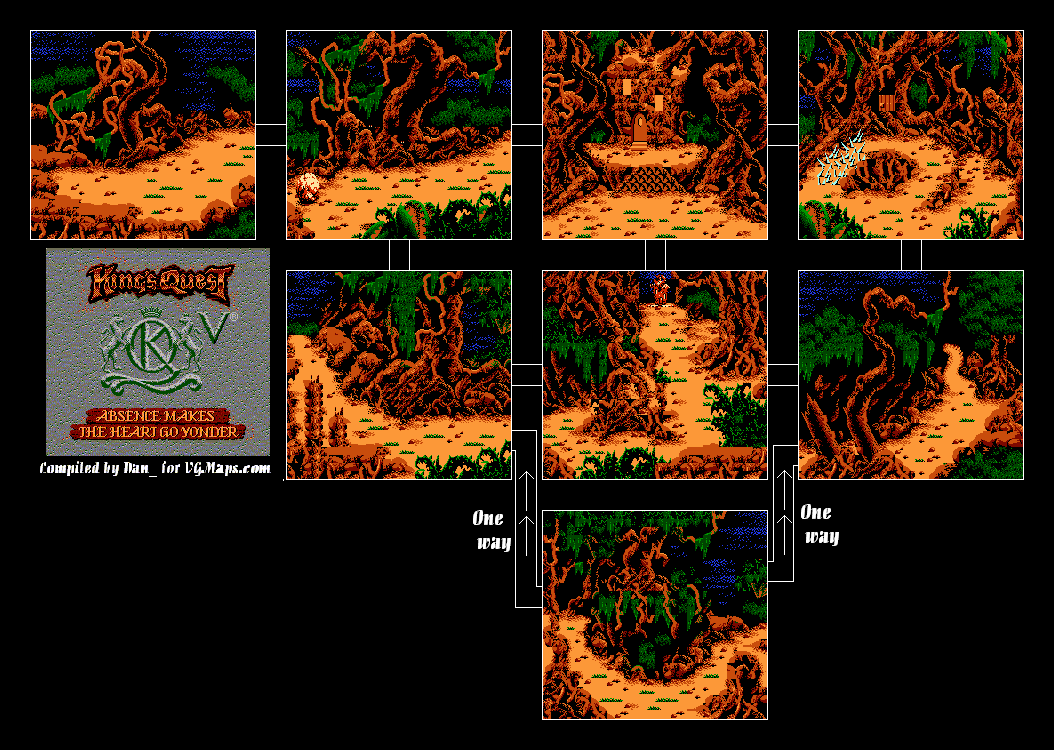
From here, go one screen east. We're entering the dark forest to the north.


Go two screens to the right, then go up. Go right, and then you'll meet the Dark Witch, who tries to zap you with a spell that turns you into a frog. Since you're wearing the amulet, it (obviously) fails. Talk to her, then go up and then left. She'll follow you all the while. When you're at the house, use the brass bottle on the witch, and she'll open it. This is why I told you not to open the bottle - the genie comes out and traps her inside for 500 years. Take care not to fall off the sides of the bridge as you enter her house. Go to the lantern hanging off the tree in the room to find a small key. Open the trunk below it to find a small spinning wheel. Go to the drawer to the left and use the hand on it to get three emeralds.

Leave the house, then use the key on the door that's one screen to the right and one screen to the north. Take the right path, as taking the left will expose you to spikes that will kill you. It's the golden heart! Take it, then go two screens to the left, then go north. . Use the honeycomb on the eyes in the tree. You'll squeeze the honey out on the ground, leaving you with a piece of beeswax. Use the emeralds on the eyes, and on the third emerald you'll catch the elf. He'll show you the way out by talking to the rock that blocks your path to the left (it's a living creature that looks like a rock, strangely - a tiny golem, perhaps?) and taking you to an underground chamber.

King Graham will take the pair of shoes that are in front of the elf, then he'll climb through the passage on the right and push a log out of the way. You're out of the Dark Forest! Go left and give the golden heart to the weeping willow. She'll turn back into a human princess and drop her harp before leaving with her husband-to-be. Take it.

To the west is where Madam Mushka's wagon is located. It is now gone, and if you come here now, the wagon will be gone and a tambourine will be on the floor. Take it.

East of the anthill - or west of where you found the young man looking for his fiance - is a gnome and his son.. Talk to the gnome sitting down. He'll tell you that he made the marionette for his grandson and it will cost a pretty penny if you want it. Give him the spinning wheel, and he will not only thank you for taking the spinning wheel from the Dark Witch, he will tell you that wheel is able to spin straw into gold - a reference to Rumpelstiltskin. In exchange for the spinning wheel, you'll get the marionette.

If you go down from here, you'll see the Inn. DO NOT GO IN HERE YET. YOU WILL DIE. Head back to town and give the marionette to the toymaker. You'll be able to get the sled in exchange.

Go back to the shoe cobblers and give the man on the right the shoes you got from the elves. He will remark that the shoes are of such fine quality that he can retire off the sales of the shoes. In exchange for the shoes, the old man will give you his cobbler's hammer.

PrinceWatercress plays King's Quest V for NES - Part 2 of 7


Your first challenge is the desert. Yeah, that's gangsta, Sierra.


West of where you met the bear is the desert itself. We're going in.


If you go south from the screen west of the beehive, you will be stung by a scorpion and you will die.

Go west until you reach an oasis two screens in. Switch to the hand icon, then press A on the oasis to drink from it. Sadly, the "Nectar of the gods!" line is edited out due to Nintendo of America's policy on religious reference in games published for the system. You will always want to drink from an oasis every so often; otherwise Graham will die of thirst. If you ever see vultures show up, you'll know you went too long without water. Thankfully, the game will warn you beforehand. Take the warning seriously.

From here, go north two screens until you hit a wall, then go west two screens. Hide much of Graham behind the nearby rock as much as possible, or else you will die. A bandit will show up. You'll watch him open the door, go in, grab something and leave. Drink from the small pool of water near the rock (you'll need to do this to keep from dying from thirst in the desert area), then go east one screen and south three. On the way to the oasis, you will see some sun-bleached bones and what looks like a boot. Use the hand icon to grab the boot. Go south one more screen to find another oasis. Drink the water here.

Go south one screen, then keep going west until you reach a set of tents. You'll see a guy show up. It's that bandit, and he's been stabbed to death. If you go to the pot, you can drink some more water; I definitely recommend it here. Go into the second smaller tent and grab the staff (don't wake up the guy that's sleeping, and don't take too long!), then get out. If you enter the big tent, you will die.

Head one screen east, and keep going north until you reach an oasis. Drink from the oasis. Keep going north until you reach the rock wall again. From there, go one screen east to the temple. Drink from the nearby puddle, then go north into the temple. Use the sceptre you just picked up on the door, and the scepter will break. Grab the shining coin and the brass bottle to the left, then get out. If you take too long, you will die. If you leave without taking both items, you will make the game unwinnable.

Leave the temple, go two screens east and two screens south. Drink from the oasis here. From here, keep going east, and you'll be back at the beehive.

North of the anthill is the fortune teller's wagon. By approaching the wagon, the man standing guard tells you it will cost you one gold coin to see Madam Mushka. Thankfully, we found a gold coin in the temple, so give it to him. You'll go in to meet Madam Mushka and find out that both the castle and the royal family have been miniaturized, and that Mordack is the brother of Manannan - the main villian from King's Quest III: To Heir Is Human. Alexander turned Manannan into a cat in that game, and Mordack wants Alexander to change him back as he casted the spell and is the only one who can reverse the spell. Madame Mushka then gives you a magic amulet that protects you from evil magic. You'll leave after that. Select the amulet from your inventory, then press A after you put the arrow on King Graham. You'll automatically put it on. Do this as soon as you get it, you'll definitely need it for later.

From here, head to the inn and save your game. Go east to the bakery, stand on the right side of the screen, and get the boot you found in the desert from your inventory. A mouse will be running to the right, and a cat will chase after it and eventually catch it. Throw the boot at the cat before that happens. The mouse will thank you and tell you that he will eventually pay it forward later. If you do not do this, the game becomes unwinnable. If you fail to do this, re-load your game and try again until you do.

From here, head back to where you met the viper and go west. Talk to the young man sitting on the log. He'll tell you about his fiancee, who has gone missing. He thinks the old witch in the Dark Forest is responsible for her disappearance. Go up from here, then go to the left and talk to the weeping willow. Turns out the tree is the man's fiancee, and the old witch did get her after her husband-to-be rejected the witch's advances. You have to find her heart (which has been turned to gold) so she can become human again.

Wednesday, October 2, 2019

PrinceWatercress plays King's Quest V for NES - Part 1 of 7


This is a pretty interesting situation for a console. It's a weird little gem on the PC, but for some strange reason it was ported to...the NES?!? And Konami published it? Oh, this is intriguing, indeed...

Believe it or not, this isn't the first time a King's Quest game appeared on a console. The first game appeared on the Sega Master System.

The Story Begins


The game begins with an evil wizard appearing out of thin air near the Castle of Daventry. He raises his arms and lightning surrounded the castle. A dark cloud causes the screen to alternate between light and dark as the castle disappears...and the wizard with it!

Meanwhile, King Graham, fair ruler of the kingdom of Daventry and the patriarch of the royal family, is out for a walk when this happens (adventurer's cap and all) only to return to his home and find it missing. A talking owl named Cedric flies out of a nearby tree and tells you that the evil wizard Mordack has cast a spell on the castle, causing it to disappear. With a sprinkle of fairy dust, he takes you to Serenia, where he and his master Crispinophur (Crispin for short) live, to get to the bottom of this.

Land of Serenia


You'll land with a dull thud in the shallow water, near Crispin's residence. You and Cedric will both go inside. Crispin will tell you more about Mordack, then he gives you a piece of magical white snake which lets you speak to the natural and animal world's inhabitants. He also gives you an old wand before he sands you on your way.

Unlike the PC diskette version, where the wand was used to cast spells to get past the copy protection (which you'd need the manual for), the wand doesn't come into play much.

Once you leave the house, Cedric recommends visiting the town first. After this, you finally have control of the game. The Control Pad will let you move Graham around. Pressing B opens the menu, which will allow you to touch and look at items, speak to people, get a password, create a temporary save file and look at and use inventory items. If you select the hand, mouth or eye, move the mouse cursor onto something and press A, you can see if you can interact with it.

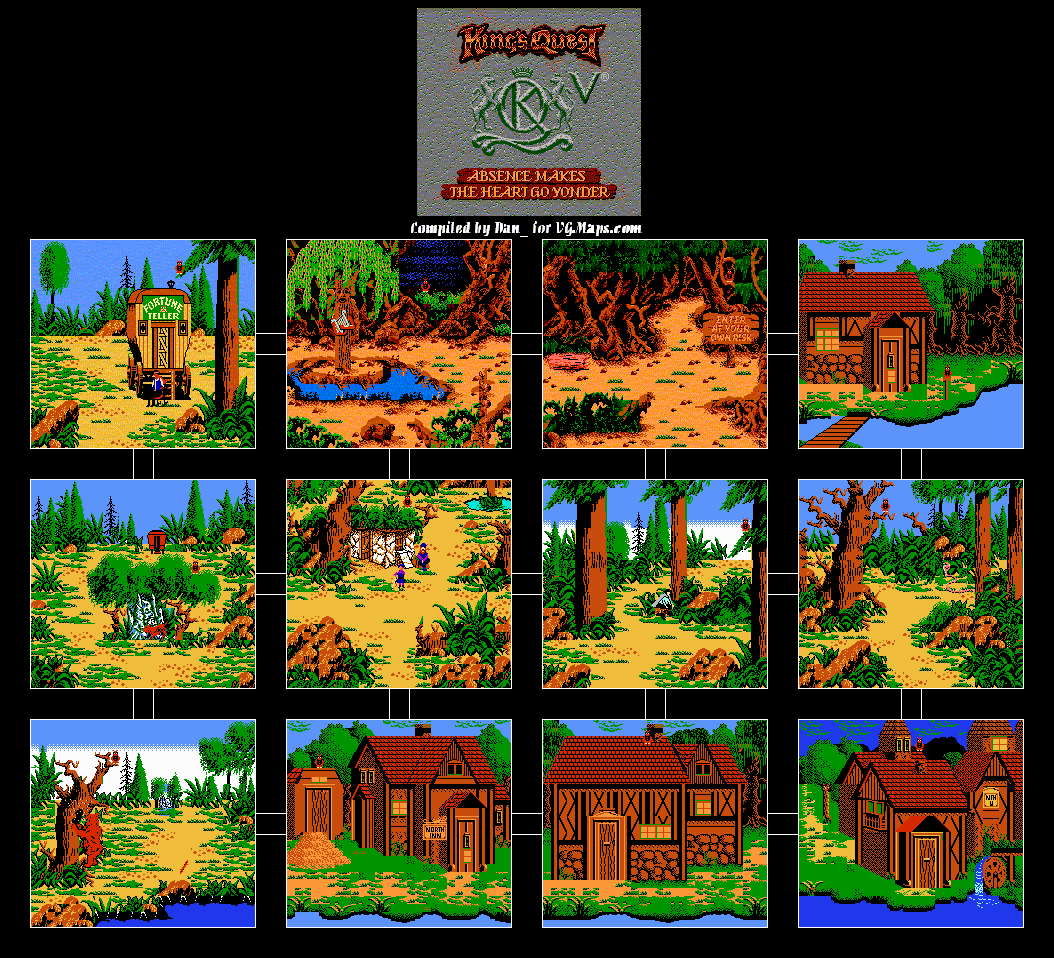
Go down (taking the bridge as you go), and you'll come to a fork in the road. The path to the right has a poisonous snake, and if you touch it, you will die. Go down once again from here, and you'll reach the town. Take the light green bath between the buildings and you'll enter it. Talk to the guy near the entrance that's standing behind the wagon, and go through any of the doors and head back out. . There will be something shining on the ground near that wagon near the entrance, and if you use the hand on it, you'll pick it up. It's a silver coin, and it'll come in handy later. If you use the hand on the barrel, you can grab a fish. This (like all the items you find in the game) also comes in handy a little later on.

The first door is a pair of cobblers. You won't be able to do anything here...yet.

The second door leads to a tailor. There's a blue cloak that you can get, but you won't be able to get it right away. If you examine it with the hand, you'll notice it fits you perfectly.

The third door is the toymaker. Talk to the toymaker and examine the sled with both the eye (look) and the lips (speak).

Leave town the same way you came in and go left. Inside the building is a baker. Give him the silver coin to receive a pie. DO NOT EAT THE PIE; YOU WILL MAKE THE GAME UNWINNABLE. To get it, select the backpack (the seventh icon on the screen-top menu), then select the coin from your inventory. The silver coin will then appear on the sixth slot in the screen-top menu; select that slot, then move the arrow and press A on the baker. Congratulations, you have a pie.

To the west of the baker is the inn. Don't go in here yet; YOU WILL DIE. Instead, go another screen west. You'll find a bear. Don't even go near it; instead, give it the fish, and it'll eat it and run away. Queen Beetrice, the queen of the hive, will let you take a honeycomb from the hive. Use the hand on the hole in the tree to get it, then grab the stick on the ground. Go north, and throw the stick to the dog near the ant hill to make it go away. You'll meet King Antony the Great, who will offer his help when you need it again.

Go back to the inn, then use the hand icon on the nearby haystack. Now that you've saved King Antony, Antony and his colony will find a golden needle inside the haystack. From here, head back into town and go to the tailor. Give the tailor the golden needle, and you'll find out that he had been looking for the needle and that the innkeeper is a jerk. You'll then be able to get the cloak in the store in exchange for the golden needle.

There's nothing else that we can do for now. From here, we'll be heading to the desert.

THE OWENS SUES THE SHANE


I RAN OUT OF PAST LONGPLAYS THAT DIDN'T HAVE A BLOG ENTRY SO HAVE SOME MORE KEVIN OWENS

Tuesday, October 1, 2019

PrinceWatercress plays Secret of Evermore - Part 35 of 35


Here's the final battle - and the ending - for this wonderful game. Enjoy.

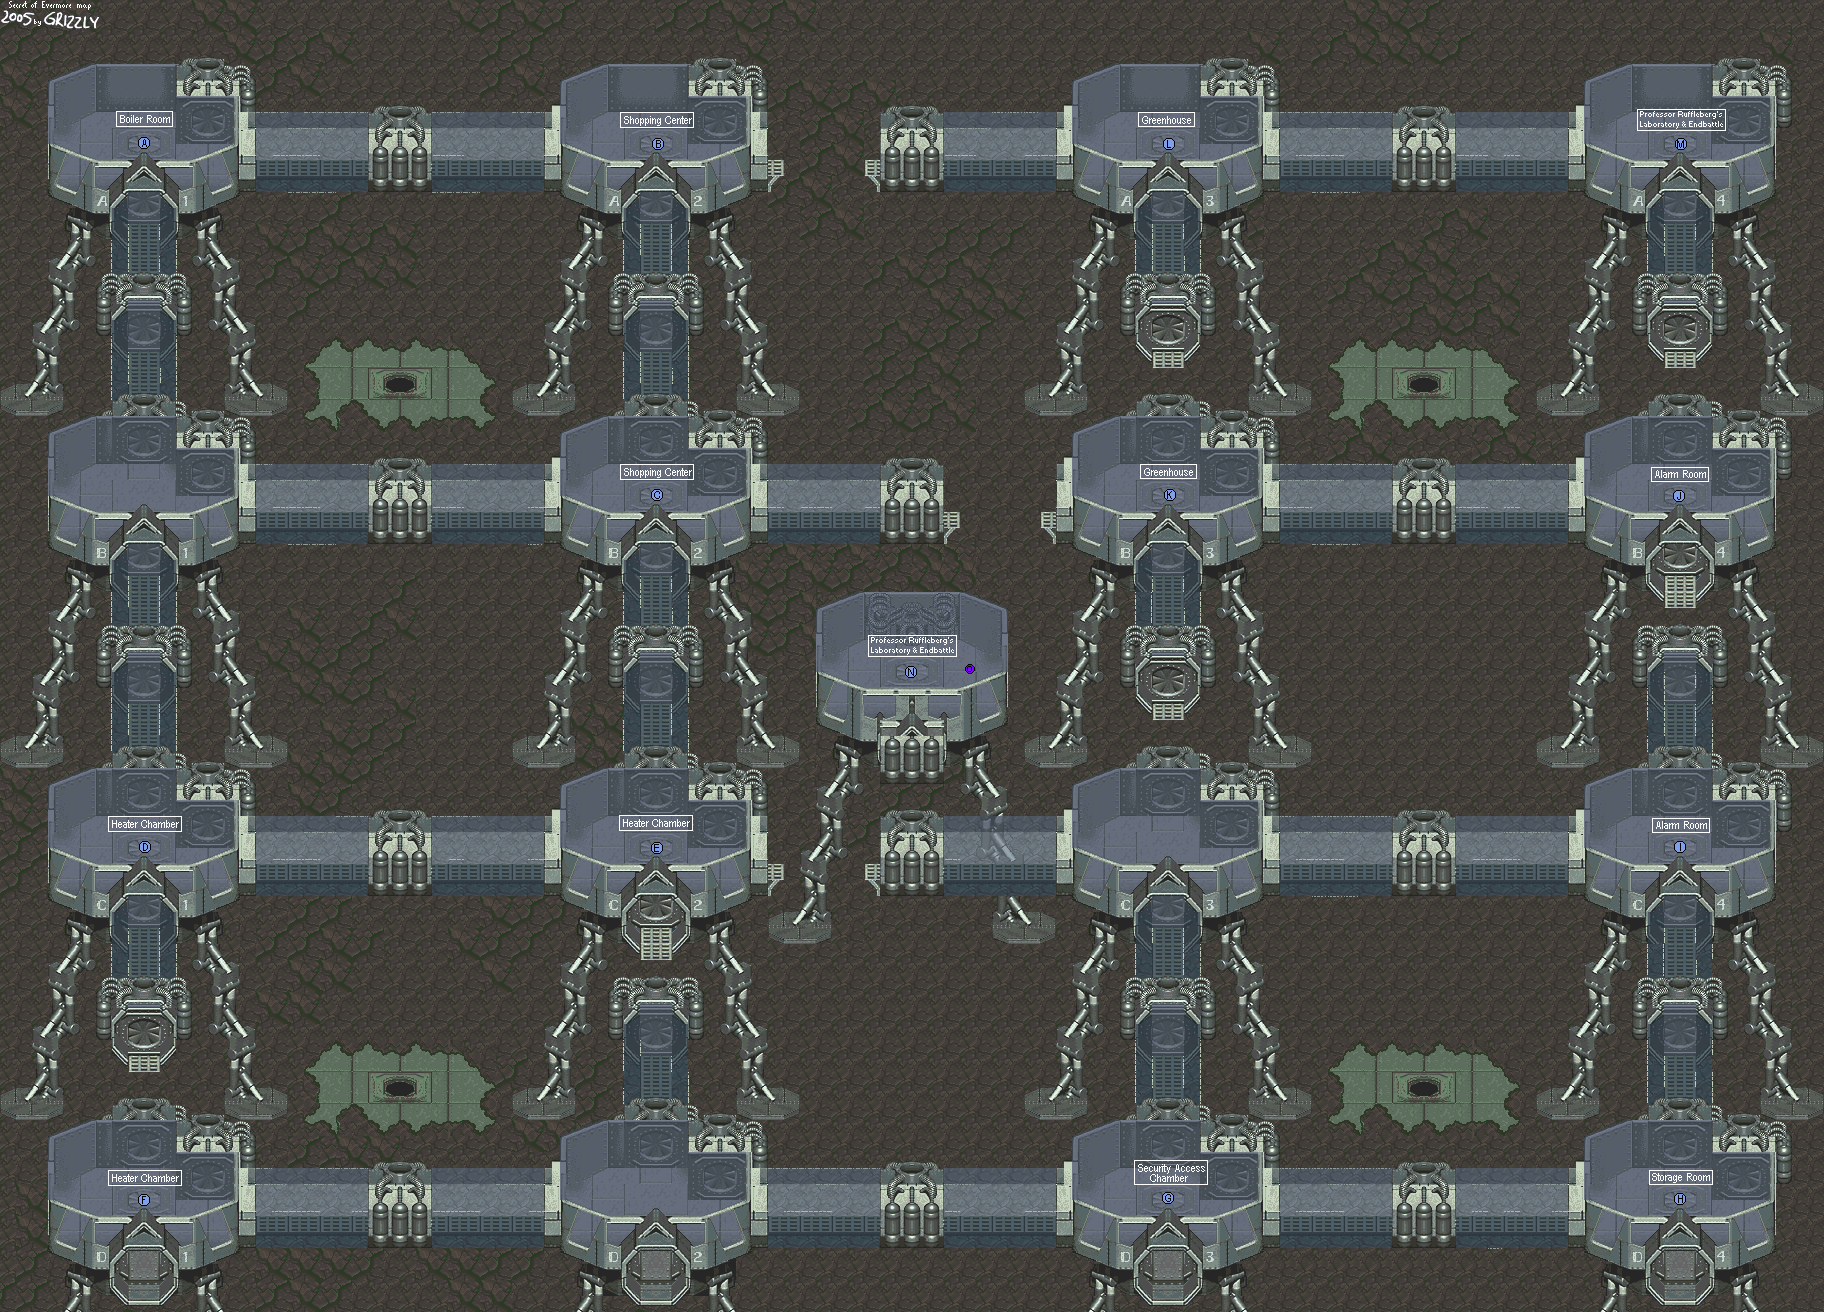
All maps by Grizzly.

Final Preparations


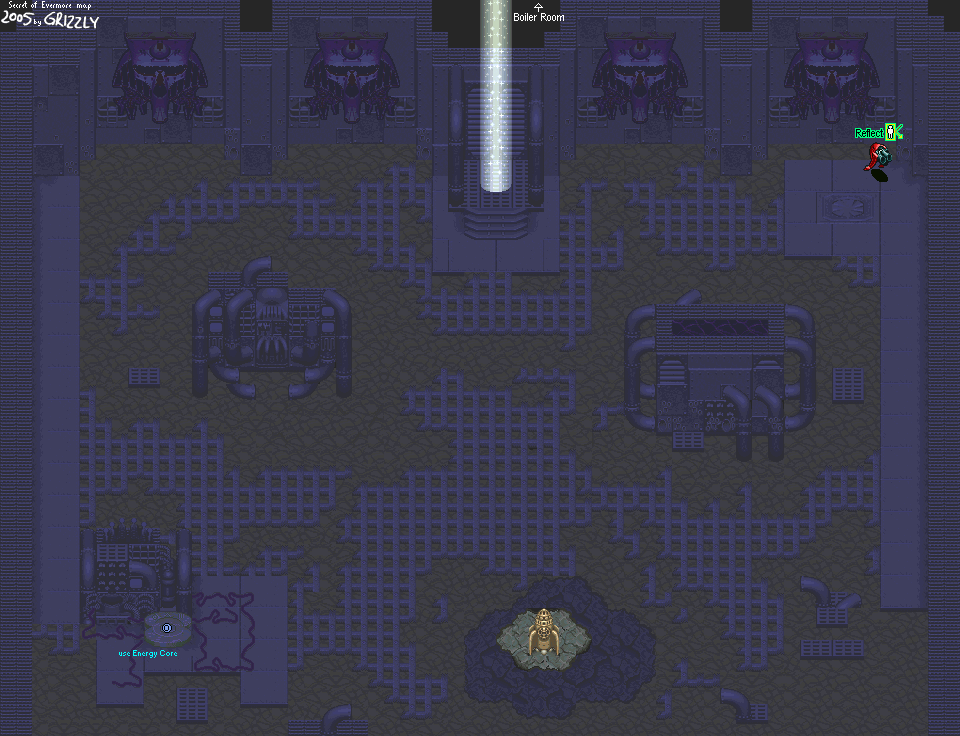
Time to go through the Main District one more time. Leave the Professor's laboratory and head to the Boiler Room.


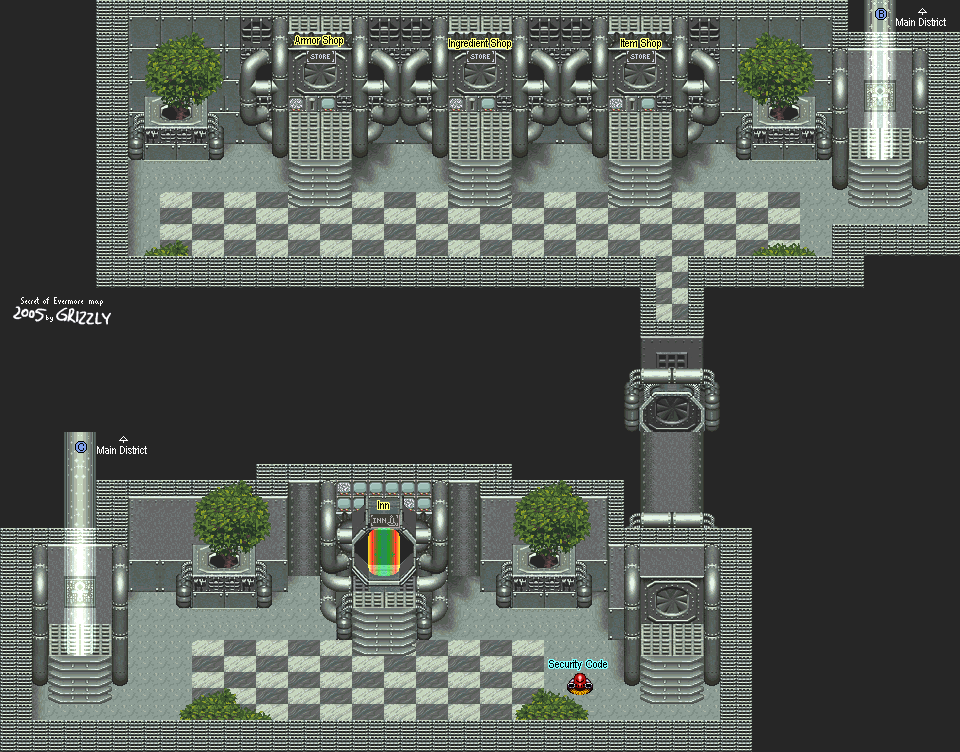
If you need Iron, go to the Shopping Center; it's the easiest place to find it. Go ahead and use the Inn and save here, while you're at it.

Get to the left end of the Boiler Room, get to the junkyard, and go west of the rocket. There will be the teleporter that takes you to Carltron. Insert the Energy Core, and you'll step onto the teleporter pad. This will take you to the room in the middle of the Main District. Go down the porthole. There's no turning back, so you'd better be prepared!


Final Boss


Fans and Speakers[


Your first order of business is to destroy all the fans and speakers on the northern wall. The fans blow you back a little less gently than normal, but the speakers quickly knock you all the way back to the other side of the room. Either way, you'll be constantly blown back, so use Energize on both characters (use it solely on The Dog and get the bazooka equipped on The Boy for best results). Take the bombs that come out of the pipes and knock them into the fans and speakers with your melee weapons. The Cryoblast bazooka ammo will also work well here, as well as with all the bosses in this final chamber. Remember, you have infinite ammo because of the programming, so use it.

When you destroy all the fans and speakers, get healed up and prepared and whatnot. Then, flick all the switches and you'll trigger a large video wall...and epic boss music!

Metal Raptors


Your first opponents in this epic battle are six, metallic blue Raptors. They'll teleport into the room from the video screen...and boy, do they pack a punch or what?

They fight just like the regular Raptors. Take to them with Energized Dog Attacks and Cryoblast. These things have a lot of hit points (as well as a really nice high metallic screech when they attack).

Whenever you destroy a monster, it turns into dust. When you defeat one wave, a cleaning robot comes in to clean up the mess. DO NOT DESTROY THE CLEANING ROBOTS. If you do, a Death Spider comes in, and those things are quite powerful, especially when you're up against more than one. If you do trigger a Death Spider, you'll have to destroy any and all of them on the screen before you can begin the next wave.

When you destroy the first two, you'll take on two more. Finish them off like you did before. Then let the cleaning robot do his thing. And you'll get one last wave. After the cleaning robot makes another pass, you'll then get...

Eyes of Rimsala


You get three of these, and just like their red and gold Antiquan cousin, these will roll all over the room. Thankfully, these things are weaker than the metal Raptors, especially since The Boy and The Dog are both Energized. This shouldn't be too hard, just keep them away from you.

Bad Boy and Dark Toaster


Once you take down the Eyes of Rimsala and the cleaning robot takes care of business, you'll fight Bad Boy. Guess what? The Level 3 Dog Attack wipes him out in one shot. Watch him turn to dust, then you'll take on the Dark Toaster...an evil clone of the robot dog.

Guess what? He's nothing like Bad Dawg.

This thing will attack with The Dog's laser attack, which does double-digit damage when it connects. Keep your characters healed.

Metal Magmar


The next opponent is a much more powerful version of Magmar. He has the same attacks, and the video screen acts as the lava in this face. If he leaps towards it, hit him. That'll make him change his mind really quickly. 

He also has the ability to cast Crush as well as Heat Wave, so be on the lookout for that.

Carltron's Robot


Here it is...the moment you've been waiting for!

Carltron's Robot jumps around and fires rockets at you from the north side of the wall. If you ever get close, you'll set off explosions that will cause a lot of damage.

Your best bet it to hit him while he's in mid-air. That way, you don't have to worry about trading punches every single time you attack.

When you take him down, the game is over. The video wall is destroyed with a brilliant white flash. Carltron was controlling the robot via a remote, which he still presses the buttons on when it's destroyed. Professor Ruffleberg turns him off, and then Carltron disappears.

Professor Ruffleberg holographically sends you back to Evermore, where you'll witness Evermore imploding on itself now that Carltron's influence has been destroyed. The only way to let Evermore survive is to remove the influence of both you and the people involved in the botched experiment. Your only hope is to find Elizabeth, Horace and Camellia and bring them back to the space station so that the Professor can send everyone back.

The Boy and The Dog get everyone back, and everyone returns to the real world. The Dog is back in his real form when they return to Podunk.

The Boy wonders if everything they went through was real, then return to the theatre and find that the movie currently playing is called "The Secret of Evermore." Meanwhile, the others are back at Professor Ruffleberg's abandoned mansion, wondering what will become of Evermore.

Strong Heart is the new leader of Fire Eyes' Village, Madronius is the new leader of Nobilia, and the King now rules Ebon Keep. We also see the Windwalker one last time, and the evil robot clones are now part of Percival Plank's exhibit.

When you wait a while after it says "The End," you'll find that Carltron is now a docile robot...or is he?

You'll then get another credit, and if you wait several minutes more, you'll get another one.


PrinceWatercress plays Secret of Evermore - Part 34 of 35


Now that the escape pod works, we can fly back down to Evermore, get that power core and confront Carltron!


All maps by Grizzly.


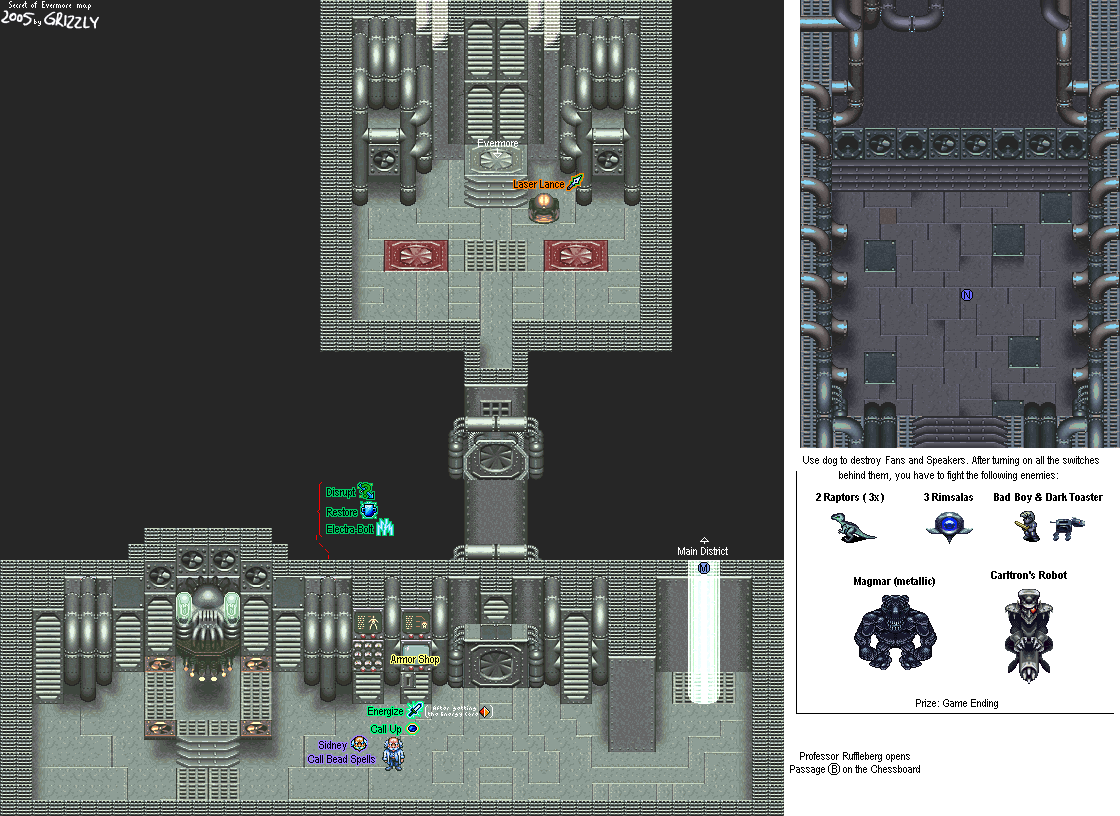
Go through the door that led to the Guardbot chamber. The treasure bubble that used to hold the Bazooka now carries the Laser Lance, which is the fourth and last spear weapon in the game. The porthole you went down to Prehistoria from now takes you to a working spaceship, which controls exactly like the Windwalker.

Tinker's Lab


When you head back to Tinker's Lab, you'll find the treasure box closed again and another spell on the table. The chest now contains the Atom Smasher, the last axe in the game. There is also the spell for Nitro.

The formula on the table next to the chest is the one for Nitro.

Nitro
1 Gunpowder, 2 Grease

Chessboard


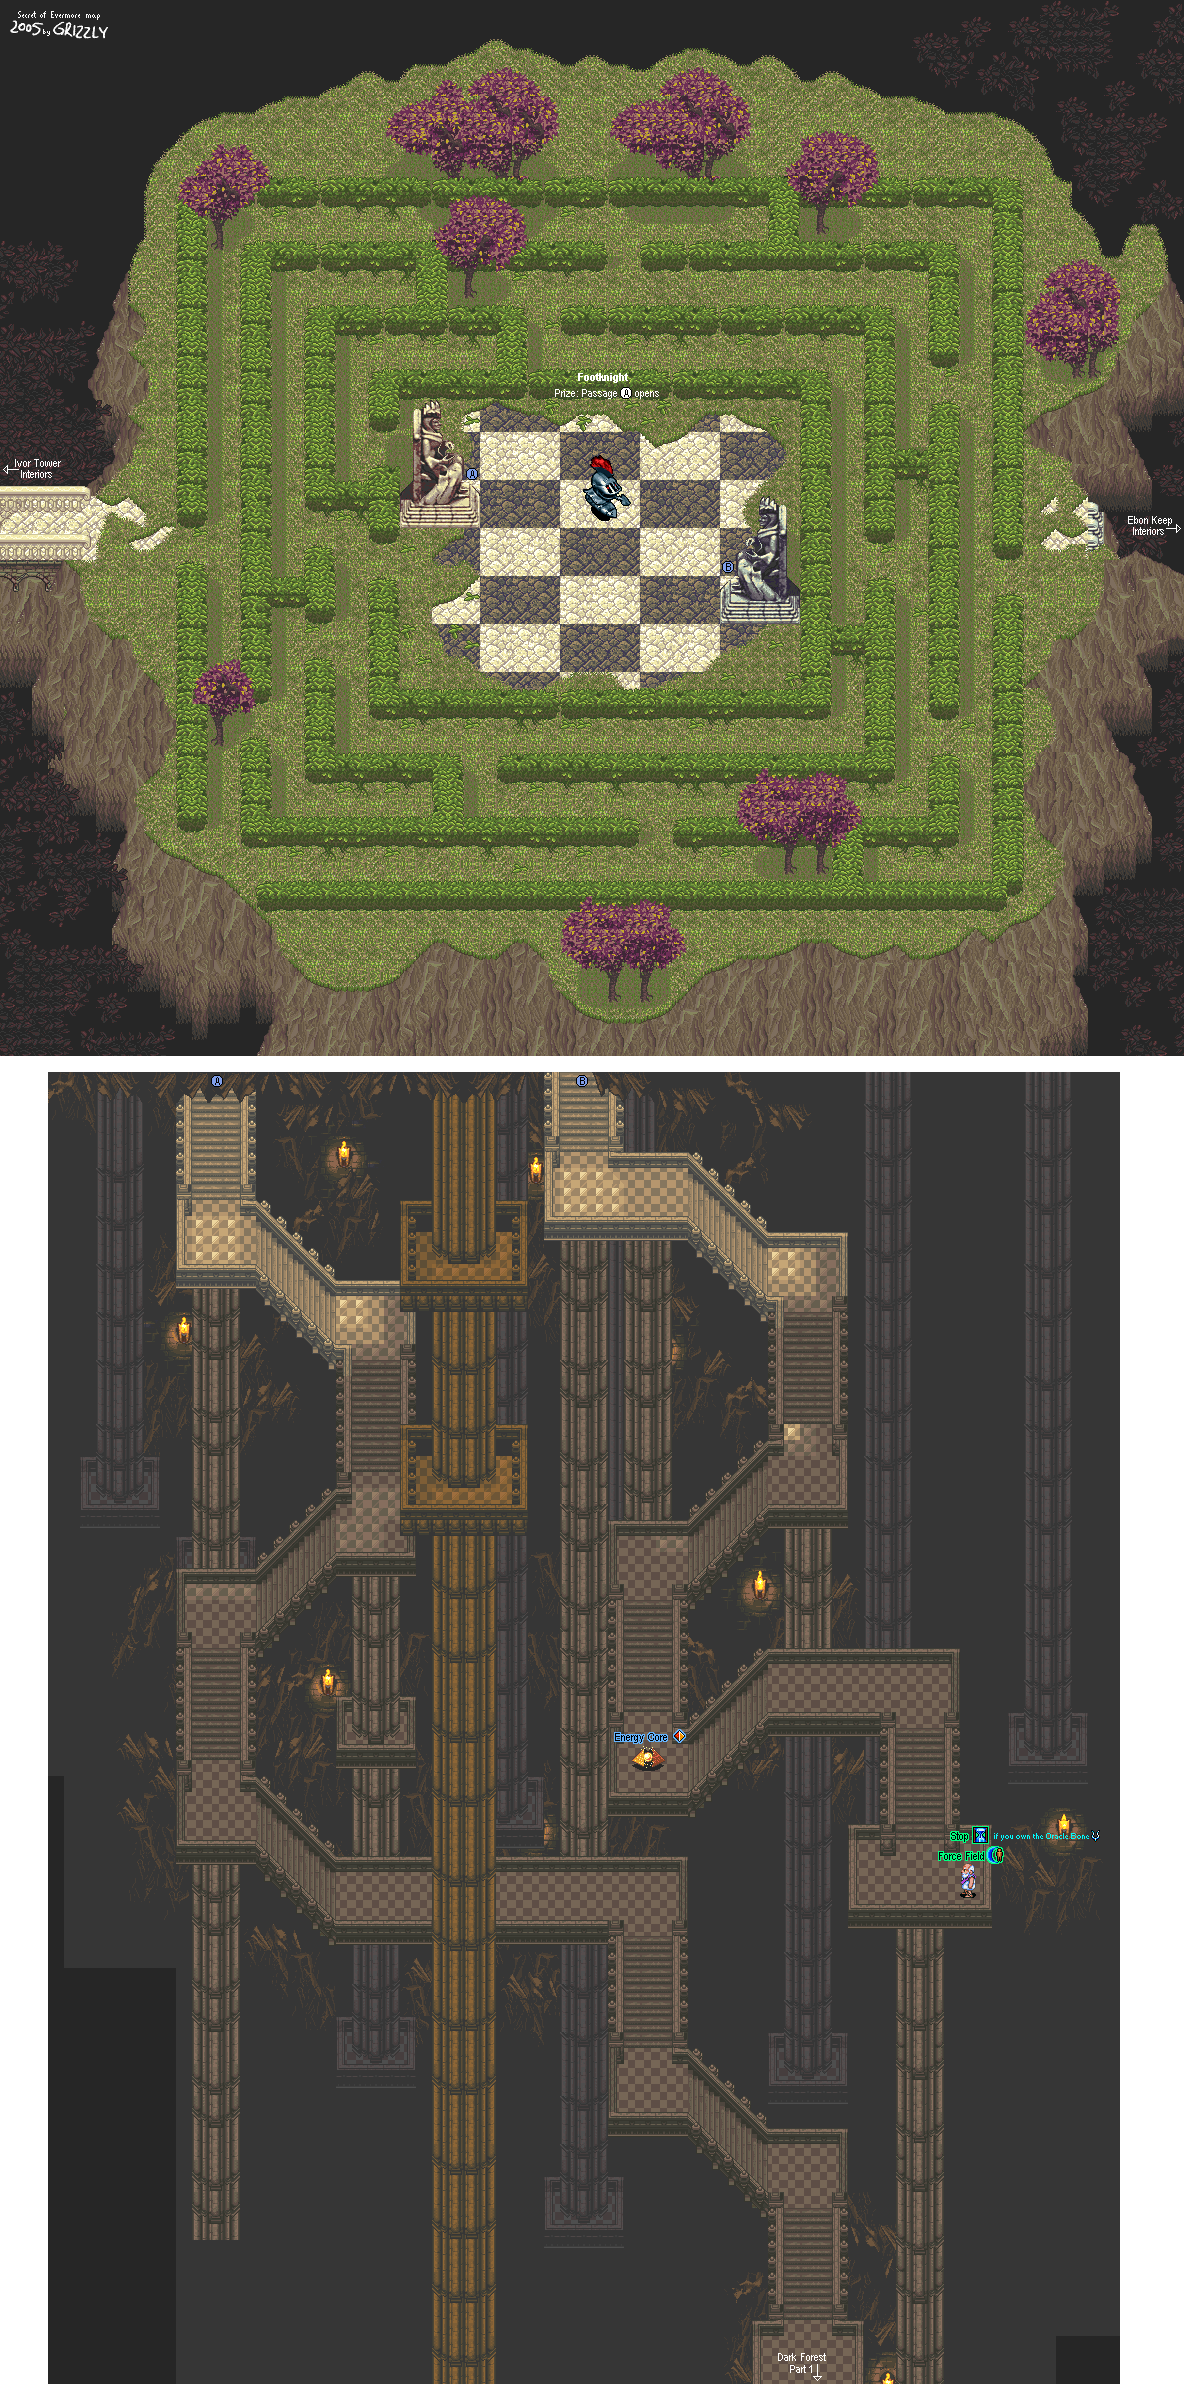
Make your way to the staircase on the right of the chessboard that the Professor just opened. Go down the stairs and you'll find the Energy Core. Go up to it, press B, and you'll pick it up.

If you go down further, you'll find another alchemist. He'll give you Force Field, which protects the hero from one enemy attack.

Force Field
1 Grease, 1 Iron

If you have the Oracle Bone, talk to him again. He'll give you Stop, which halts enemy attacks.

Stop
2 Wax, 1 Crystal

If you need alchemy ingredients for both of these formulas, you'll be able to buy them from him...but nothing else.

Head back to Tinker's Lab and get back on the Spaceship. When it asks if you want to go to Omnitopia, select "Yes" and you'll automatically fly up into the atmosphere and head back to the Professor's laboratory.

Professor Ruffleberg's Laboratory


Go back to Professor Ruffleberg and talk to him. He'll give you the Energize formula, which lets you do nothing but max power attacks for as long as it's in effect. Equip this, since you're going to need it for the final battle.

Energize
1 Crystal, 1 Iron

You now have all the spells in the game.

Security Access Chamber


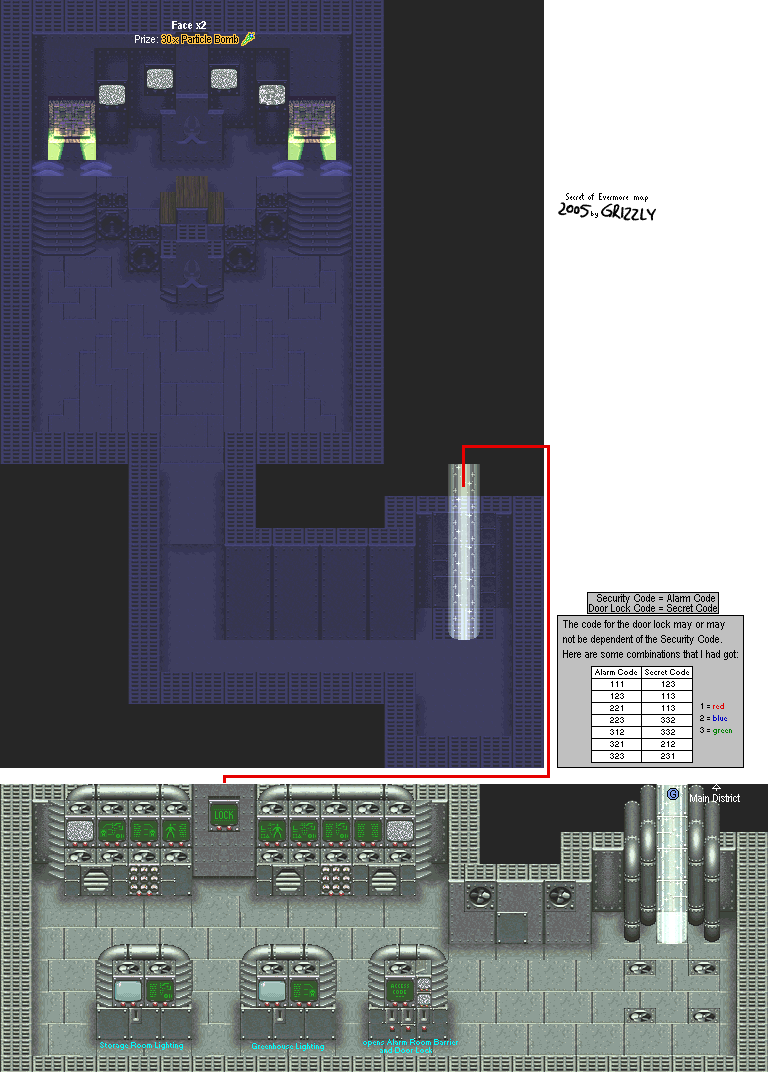
There is a green monochrome screen that says lock. Play around with all the possible combinations after turning on the greenhouse and storage room lighting and you'll eventually open a passage that leads to a hidden boss through trial and error.

Boss: Face Man


The two faces will cast powerful forms of Flash on both The Boy and The Dog. It's easier to take one face down before taking the other one on. Cast Reflect on both characters, keep both characters healed and give one face all you have as quickly as you can. Spells, Level 3 Dog Attacks, Level 3 spear strikes, Cryo-Blast projectiles, everything. Use. It. All.

When you win, you'll get 30 Particle Shot bullets. That's it, really. Powerful boss, wimpy prize. But it is optional.