Showing posts with label part 71. Show all posts

Friday, March 27, 2026

PrinceWatercress plays Super Mario Odyssey - Part 71 of 92


This time around, we're heading to the Lost Kingdom, and this is going to be yet another quick sweep.


It's time to head through the Lost Kingdom for Power Moons for this video. 

The Moon Rock is off the coast near the Swamp Hill checkpoint. Activating it will increase the amount of Power Moons in the Lost Kingdom from 25 to 35.

22. Taxi Flying Through Forgotten Isle - After defeating Bowser, capture the Binoculars and focus on the taxi on the balloon for a Power Moon.

23. I Met a Tropical Wiggler - Warp to Swamp Hill, capture a Tropical Wiggler, then take it to the Bonneter on the nearby narrow platform. You'll get a Power Moon for showing him a Tropical Wiggler up close.

24. Lost Kingdom Regular Cup - For this cup, you'll need to do a lot of long jumping and triple jumping to get to the part with the worms, as well as a ground pound jump. At the worms, take your time before making your move. You'll need the enemies to blow up the first set of blocks, but you can use the hat jump and dive jump to get past the second before hitting the switch and wall jumping up to the goal near the Crazy Cap store and get the Power Moon. (You can use the hat jump and dive jump to get past both sets of blocks if you know what you're doing.)

25. Peach in the Lost Kingdom - Peach and Tiara will be at the Rocky Mountain Summit where the Crazy Cap Store is; talk to them for a Power Moon.

26. The Shining Fruit - North of the Odyssey and east of Luigi, there is a tree with red palm leaves. Climb up it for a Power Moon.

27. Jump Down to the Top of a Tree - Near the Swamp Hill checkpoint, there is a tree platform off a ledge. Land it on it for a Power Moon.

29. Taking Notes: Stretch and Shrink - At the Swamp Hill checkpoint, you'll need to take control of a Tropical Wiggler, then get to the series of spinning platforms and stretch to the treble clef. From there, you'll need to utilize your stretching ability quickly to get all the notes before the time runs out. Doing this will net you a Power Moon.

31. Lost Kingdom Timer Challenge - There is a scarecrow in the southeast corner of the Rocky Mountain area near the sprouts that are lined up in the shape of a triangle. Throw your cap at the scarecrow, then run across the platform and long jump towards the Odyssey at the edge. By long jumping towards the Odyssey, you'll also long jump towards the Power Moon, which is above a nearby tree. Get ready to climb up the tree and grab it before time runs out.

32. Stretch and Traverse the Jungle - There is a Moon Rock Pipe near the Odyssey. In this area, you'll need to capture a Tropical Wiggler, then hit the P Switches to lower the plumes of lava and stretch yourself across the platforms to get to the other side before the plumes of lava come back. After that, you'll need to stretch into the blocks to break them. At the exit, you'll find a Power Moon.

33. Aglow in the Jungle - In the area where you find Power Moon #32, you'll find a Fire Piranha Plan. Trick the Piranha Plant into spitting fireballs at the two torches to the sides to get another Power Moon.

Thursday, June 21, 2018

HCBailly plays Terranigma - Part 71 of 75


This is it. We are now at endgame scenario. It's time to defeat Beruga once and for all.


World map by Tropicon. Suncoast and Zoo maps by Amir Azadur.

Suncoast - The Expansion


In the upper-left corner of the town is the zoo.


There's not much to do at the zoo. You can read the signs to see what the animals are. Other than that, there's not much you can do here and you can't save the animals.

There's not much else you can do. All that's left is to stop Beruga and Dark Gaia. Land on the airstrip in Russia, then make your way to the east to Siberia. In the northeast corner of that region is Beruga's Tower.

At this point, if you've forgotten anything, you'll want to go back and do it now. Once you make it to the end of the tower, you won't be able to return to the world map screen. 

Labtower


Talk to Perel, Meilin and Meihou. Meihou will tell you that Beruga is being controlled by someone underground as he "resurrects" the world, and that he, Perel and Meilin will do everything to help. Meihou and Perel then leave. As you head north, Meilin will tell you that there is a surveillance camera ahead, and she takes care of it for you after several seconds. Once you get the text box from Meilin, you'll be able to move to the north. Another screen north, Meilin will create a mirage to help you. Head to the west, then take the door to the south. In the next area, you'll be grabbed by a claw...but it's really Perel helping you out. He'll tell you that Royd was controlling the crane. Head to the west.

On the next screen, Perel will tell you that there are lasers ahead. Perel uses his skateboard to disarm the lasers. Once he gives you the all clear, go on ahead. Talk to Perel, then head east. Go all the way east, then go up the stairs. Take out the cubes where necessary. At the end, go west. You'll run into Fyda, who tells you that two levers must be worked at the same time to open the nearby shutters.

Go to the lever on the north, and Ark and Fyda will automatically activate it. Head to the south and follow the path, and head all the way to the north when you reach the wide spread of floor at the end.

The final Magirock, Magirock #96, will be on the next path. Head left before you go to the next set of stairs, and you'll get it.

At the next set of stairs, you'll deal with the robot enemies you met in Beruga's Lab. Thankfully, the path through the tower is very, very linear. You won't have too much of a problem making your way around.

The gun guys will now throw grenades. Thankfully, they're easy to avoid.

You'll reach another set of levers. Royd will control one of them to shoot down the door up ahead. You'll soon reach another set of stairs. Go up, and you'll come across four rooms. Inside the one in the upper-left is the last treasure in the game: another Life Potion. Talk to Meihou, and he'll tell you to open the shutters. To the right is Meilin's room, and in the lower-right corner is Perel's room. Everyone will have to trigger a lever at the same time in order to open the shutters.

There is a mech robot you can fight near Perel's room. Keep going in and out of the room and keep killing the robot, and you can eventually get all the experience you need.

Friday, December 20, 2013

brickroadbrickroad and SovanJedi play Secret of Evermore - Part 71 of 88


In this entry, we climb up a rickety tower and somehow find a working elevator in it. HOW IS THIS EVEN POSSIBLE

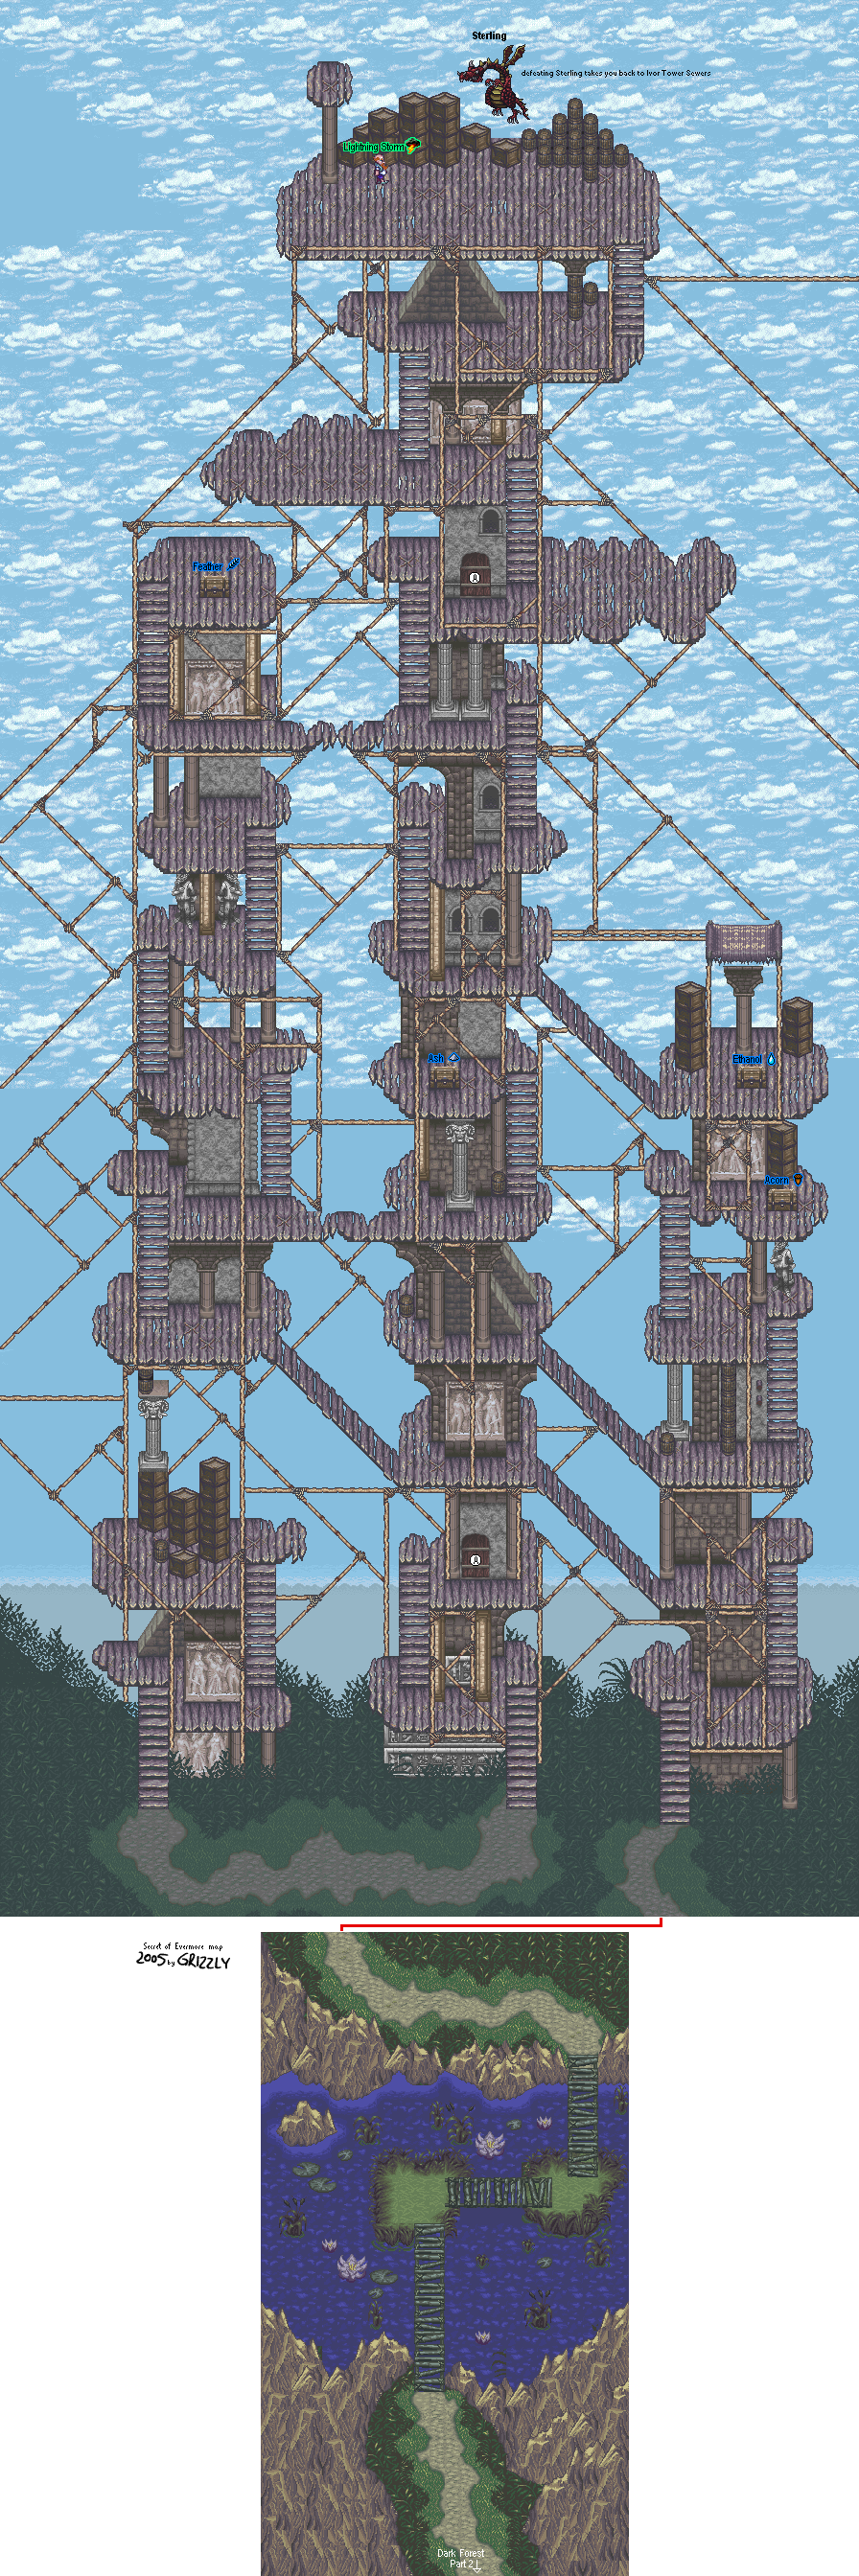
All maps by Grizzly.

Gomi's Tower


Map

The part where you return to the barriers is dead simple. Just go north and break the barriers with the Knight Basher.

The Gargons are just like the Dragoyles, except with higher HP. You also have the Gore Grubs, which are red versions of the Maggots from the Bugmuck.

Be careful as you make your way to the top, as parts of the floors will break away when you step on them. Thankfully, there is an elevator (of sorts) that makes it easier to get up to the very top.