In this entry, we get a few items and take on a boss that we shouldn't really be taking on this early in the game.
.png)
When you get out of Area I, you'll be on the overworld map. You can fly forward with Up, turn with Left and Right and brake with Down. Holding Y lets you land. As long as you're looking in the general direction of your destination, you won't have a hard time landing in places.
If you press Start, you'll see an overhead view of the map, Use Left and Right on the Control Pad to move the red circles to point in the direction you want to go, then press Start again and hold Up until you get to where you want to go.
Our next destination is Area II. Area II will be the walled city to the west of Area II. As we face that direction, there will be a house with a blue roof. We'll enter that first.
Trio The Pago - Level 1
For 5 G.P., you can play a mini-game. Here, you'll need to headbutt twelve skulls before all eight torches go out to win a prize. The trick to this is jumping up and pressing A at the right to them to hit the skulls, especially at the right height, as you stay in place when Firebrand thrusts his head towards the background. You'll have to headbutt on your way up to hit the skulls on the top rope. It takes some practice, but it can be done. The faster you do this, the more money you get (5 G.P. for each torch remaining).
Before I head to the city, I want to go into Area III, which is the skeleton just north of the cathedral.
Area III: Thorn Grove
There is an urn near the end of the first area. Since the brambles on the ground do not kill you upon contact, you can walk and climb up them to get to the urn.
The flying enemies with one eye take two hits to kill.
There is an easier way to do this, but we don't have the abilities needed to do it like that. I'll mention it later.
If you lose all your health, you'll die (and see Firebrand turn into a skeleton), and you'll have the choice of starting the current section over, going back to the overworld map, or ending the game to get a password. We're going back to the overworld map and entering that walled city, but first, we're checking out the shops with the red roofs to the north of Area III.
The shop to the west is the magic shop. Shadow increased your defense, Hold stops enemies briefly, Imp summons an imp that attacks enemies for you but requires a steady stream of money to keep on-screen (and employed), and Shock summons an earthquake that damages enemies on the ground. You must have one empty vellum sheet to buy a spell.
The shop to the east is the potion shop. Mercury teleports you back to the beginning of the level, Sulfur teleports you to the overworld map and works much like Exit from the Mega Man X series, Herb replenishes five hit points, and Elixir automatically revives you with five hit points assuming you have it equipped on the pause menu.
To use a vellum or an urn with a spell or potion in it, equip it and press X. You must choose between a vellum and a potion for the equippable item in the second inventory slot on the upper-right corner of the screen; you cannot equip one of each.
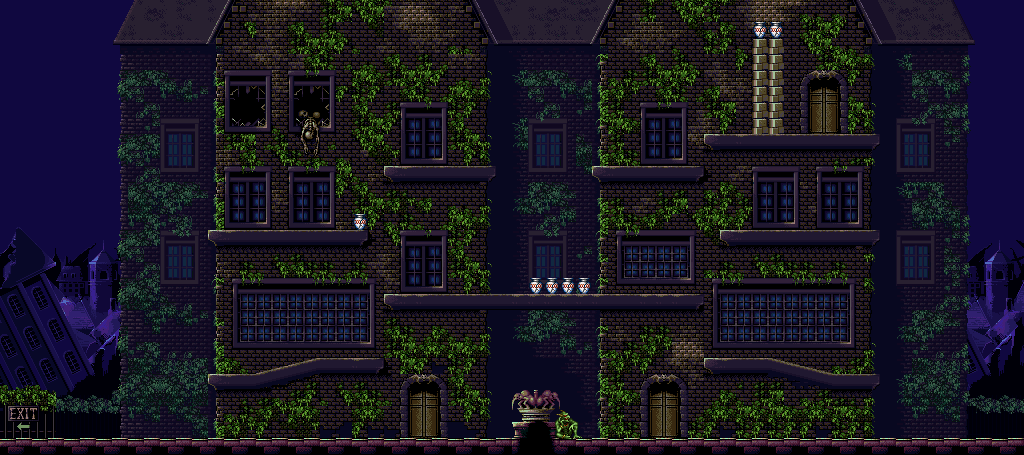
Area II: City
Unlike other levels, you can head left to go back to the overworld map. This will be useful later.
By heading right, you can destroy pots for coins.
The Ground Gargoyle shoots a projectile that travels across the ground, and while you can't fly, you can charge at things by holding A. If you shoot the projectile in the air, it will stay airborne.
If you talk to the green demon near the fountain, you'll find out what's going on. This is how you find out about the names of Firebrand and Phalanx, the main protagonist and antagonist of the game, respectively.
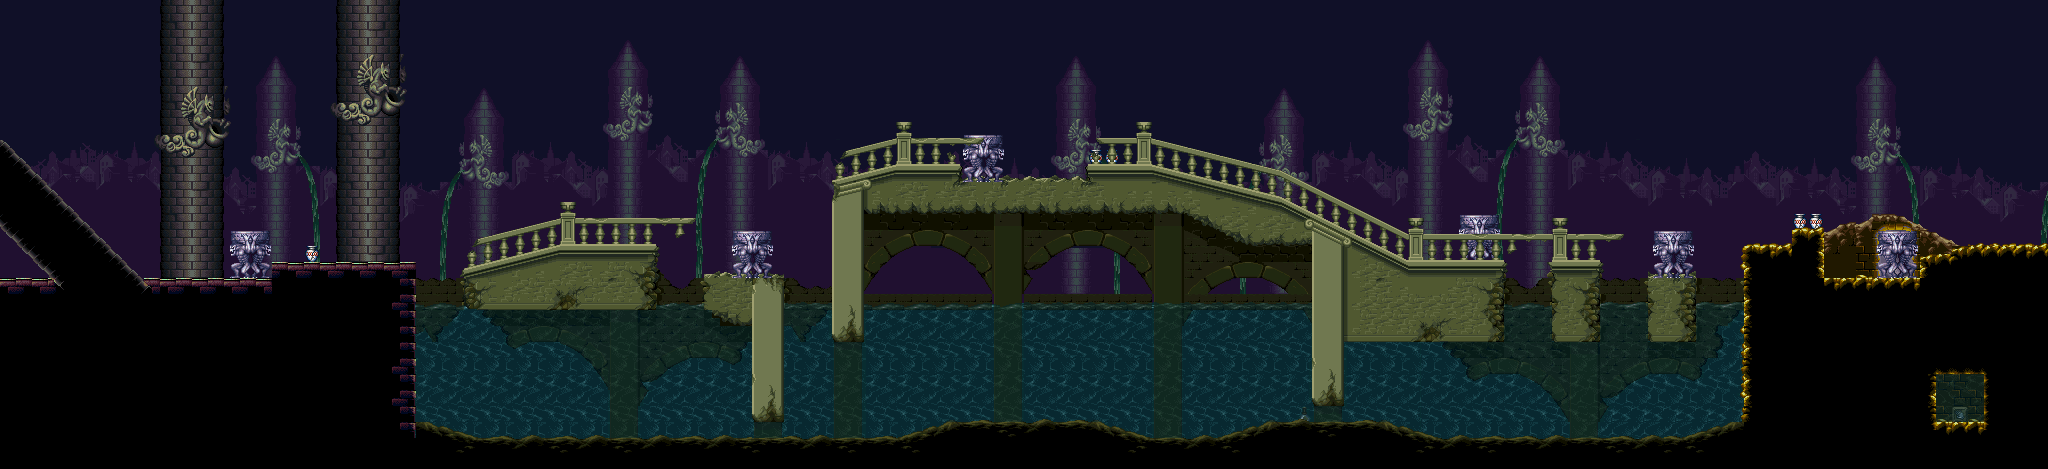
Heading further to the right takes you to the broken bridge.
Area II: Bridge
The flame statues can shoot fire upwards a little bit to make themselves unsafe to stand on, and they can also spit fireballs to the sides. Be careful near them.
There are mermen underneath the water below the bridge. If they put their arms down, you're close enough to them. Shoot them down as they make their way up to the surface, and avoid the projectiles that they spit before they get back into the water. Also, don't go into the water, as you will drown and lose all your health bit by bit if you stay in it for too long. You won't be able to rectify that until later.
The ghosts take two hits, but they constantly spawn and make spooky noises. Get them out of your way and move on.
Area II: Boneyard
The enemies here will throw skulls at you. You can destroy the skulls with your fireballs, but you want to destroy the skull-throwers, obviously. If you get close enough to them, they will run at you.
Watch out for the hands that reach up from below the ground. If you get grabbed, mash the D-Pad and the Y button to break free. If you stay on the ground too long, a zombie-like skull will show up and try to eat you.
The armored ghosts will fly forward if you push them back by attacking from the front, but if you attack them from behind, you'll kill them.
The boss here is Belth. You should wait until you have more abilities and items before taking this guy on, but if you want to take him on right away, here's what to know:
Whatever you do, don't let yourself get cornered. Hover over him if you can, but make sure he doesn't have his hand up so you don't get hit in the process. Also, have both urns filled with the Herb potion. When shooting fireballs at him, keep your distance, and hover over him after he jumps if you can to keep yourself from being cornered. Belth can pack a punch, especially early on in the game. If Belth gestures to you to move forward, stay away and be ready for the dashing slice that he performs immediately afterwards. Beating Belth gives you a health extension.
No comments:
Post a Comment