Monday, January 13, 2025

PrinceWatercress plays Berzerk (Atari 2600) - Game 12 Longplay


Once again, I save the easiest mode for last.


Game 12 is the easiest game variation of all. The robots don't shoot at you, the game gives you an extra life every 1,000 points, and Evil Otto does not show up at all. As a result, this is a very good game mode to play for young children or anyone who is not used to how the game plays.

Sunday, January 12, 2025

PrinceWatercress plays Frankenstein: The Monster Returns - Part 4 of 4


You'd better be ready for the final stage, as this stage is chockful of boss fights. Once you get through all of them, though, you'll save Emily!

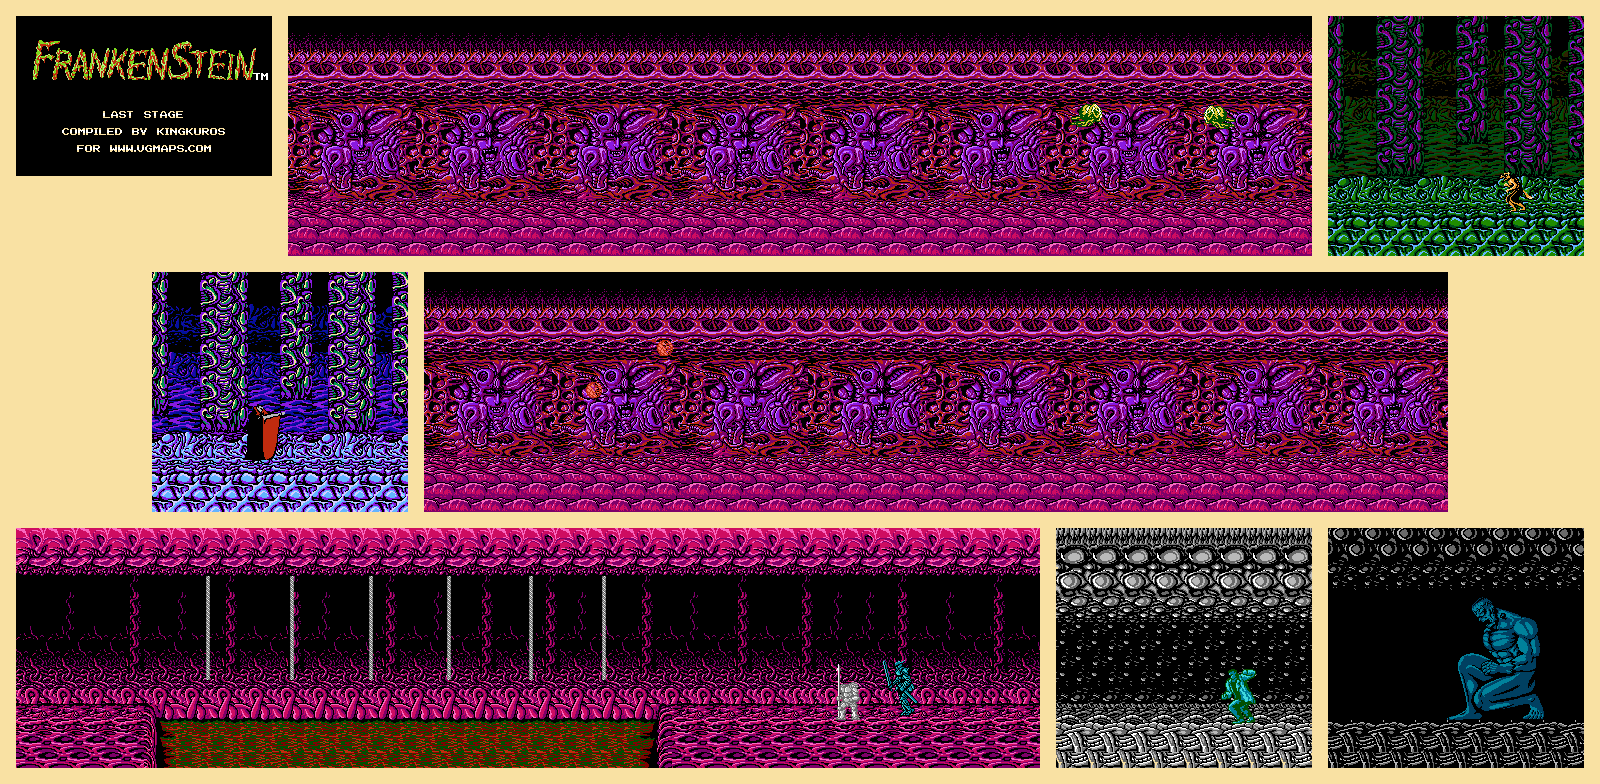
Last Stage


At the start, keep heading to the right. You'll want to destroy the yellow things that look like stumps with the sword immediately before they shoot projectiles. As for the green alien skulls, they will fly up and float downwards at you when you get the chance. You'll want to jump kick them when they float upwards When you defeat the enemies around here, they will sometimes drop purple potions. DO NOT pick these up, as they actually DECREASE your maximum health by one unit and you will need all the health you can get.

You'll then fight some flying brain enemies. You'll need to jump up and hit them with the sword while avoiding the eyeball projectiles that they shoot out, which travel to your current position at the time of firing. It takes two sword strikes in mid-air to take out each one.

Head further to the right to face the Man-Wolf. You'll want to jump back and forth and jump-kick, and you'll also want to hit him with the sword if he leaps at you and happens to be low to the ground at the time. Keep in mind that if he is jumping at you when you hit him, his jump attack will continue when he comes out of being stunned. Beating him will net you three-way fire, which works much like it did in Stage III: it fires one shot upwards, one forward, and one diagonally forwards and upwards.

In the next section, head left, and use the three-way fire to take out the green balls that fly around and gradually descend to your level. If any of them drop any blue potions, grab them; they'll increase your maximum health up to eight units while fully healing you at the same time. As for the yellow worm enemies that stay to the ground, hit them with a jump kick, then keep hitting them with crouching sword strikes until they die. Make sure you don't get hit, as you'll lose the three-way fire if you do.

You'll then fight a series of orange balls that similar to the green ones. If you have the three-way fire, this is easy. If you don't, you'll want to strike them with the sword when they lower. Just hitting them once will stop their descent just long enough for you to get yourself re-situated. Three hits will do them in.

Further to the left is the Vampire. There are two times when you can hit him: when his cape is open and when he is flying around in bat form. If he fires any small bats out of his cape, you'll want to destroy them, too. Just stay to the ground and keep striking him with the sword, and you'll eventually take him down. Beating him will net you a bomb, which works much like the thunder magic from Stage III: just hold Up and press B to perform a powerful screen-clearing magic attack. Head left to enter the next section.

In the next section, you'll need to swing from one vine to the next, and the vines will swing back and forth at varying speeds. Make sure the vine you are on is all the way to the right and that the next vine is swinging towards you at the same time to ensure that you don't fall into the life-draining pool of sludge below. If you do fall down, keep jumping to the right and grab a vine immediately. As for the headless armor with the spear, just keep moving back and forth in mid-air while jump kicking to take it down.

You'll then face the Dark Warrior again. Since you don't have the whip, you'll need to jump to avoid the magical attack that travels along the ground and jump kick the Dark Warrior when he gets close. Other than that, he fights the same way that he did in Stage III. You'll also want to use the bomb to do some damage on him immediately in case you still have it, so you don't lose it. When you defeat him, he leaves a heart behind, you'll definitely need to get it. Also, don't be surprised if you have to press Select to use a potion in this battle.

Further to the right is Frankenstein's first form. Frankenstein will hop around, and you'll want to give yourself some distance between yourself and Frankenstein. Sometimes he makes small hops; other times, he makes big ones. If he takes small hops, you can easily jump kick him. Just keep striking him and then backing off immediately when you do to ensure some space. Also, do not stand at the sides of the screen; you will potentially get popped with no way to escape it if you do. With that said, if you need to move through him after hitting him to get that distance, do it. It is also better to take contact damage from the hops than from the punches he throws afterwards, as the punches takes off two units of health instead of one. If he manages to hit you, hit him back with the sword.

After beating Frankenstein, go up to the door that opens to the left and press Up. You're not done yet. Emily will give you a fireball just like the one you got in Stage II - except it doesn't disappear when you get hit, then Frankenstein will come back stronger than ever. Avoid all the fireballs that Frankenstein spits at you by staying on the move, as they fly at your current position at the time of firing, and shoot fireballs at both his hand and all of his weak points. When you destroy all of the weak points, Frankenstein's head will float back and forth spitting projectiles. If you walk under Frankenstein's head, it will stop moving, and you'll want to get behind him to avoid the projectiles so they just move down. After that, strike at the head when it drops down and do some damage before it makes its way back up. From there, you'll want to keep walking under him to avoid all the projectiles and strike him when he dives down.

After you beat Frankenstein's second form, you'll beat Frankenstein for good and you'll save Emily! Congratulations! Afterwards, you'll get an image of some evil eyes opening and closing, but sadly, the game never got a sequel. You'll get your final score, then you'll go back to the title screen when you press A. You just beat Frankenstein: The Monster Returns!


Saturday, January 11, 2025

PrinceWatercress plays Frankenstein: The Monster Returns - Part 3 of 4


Things get more difficult here...but you ain't seen nothin' yet.


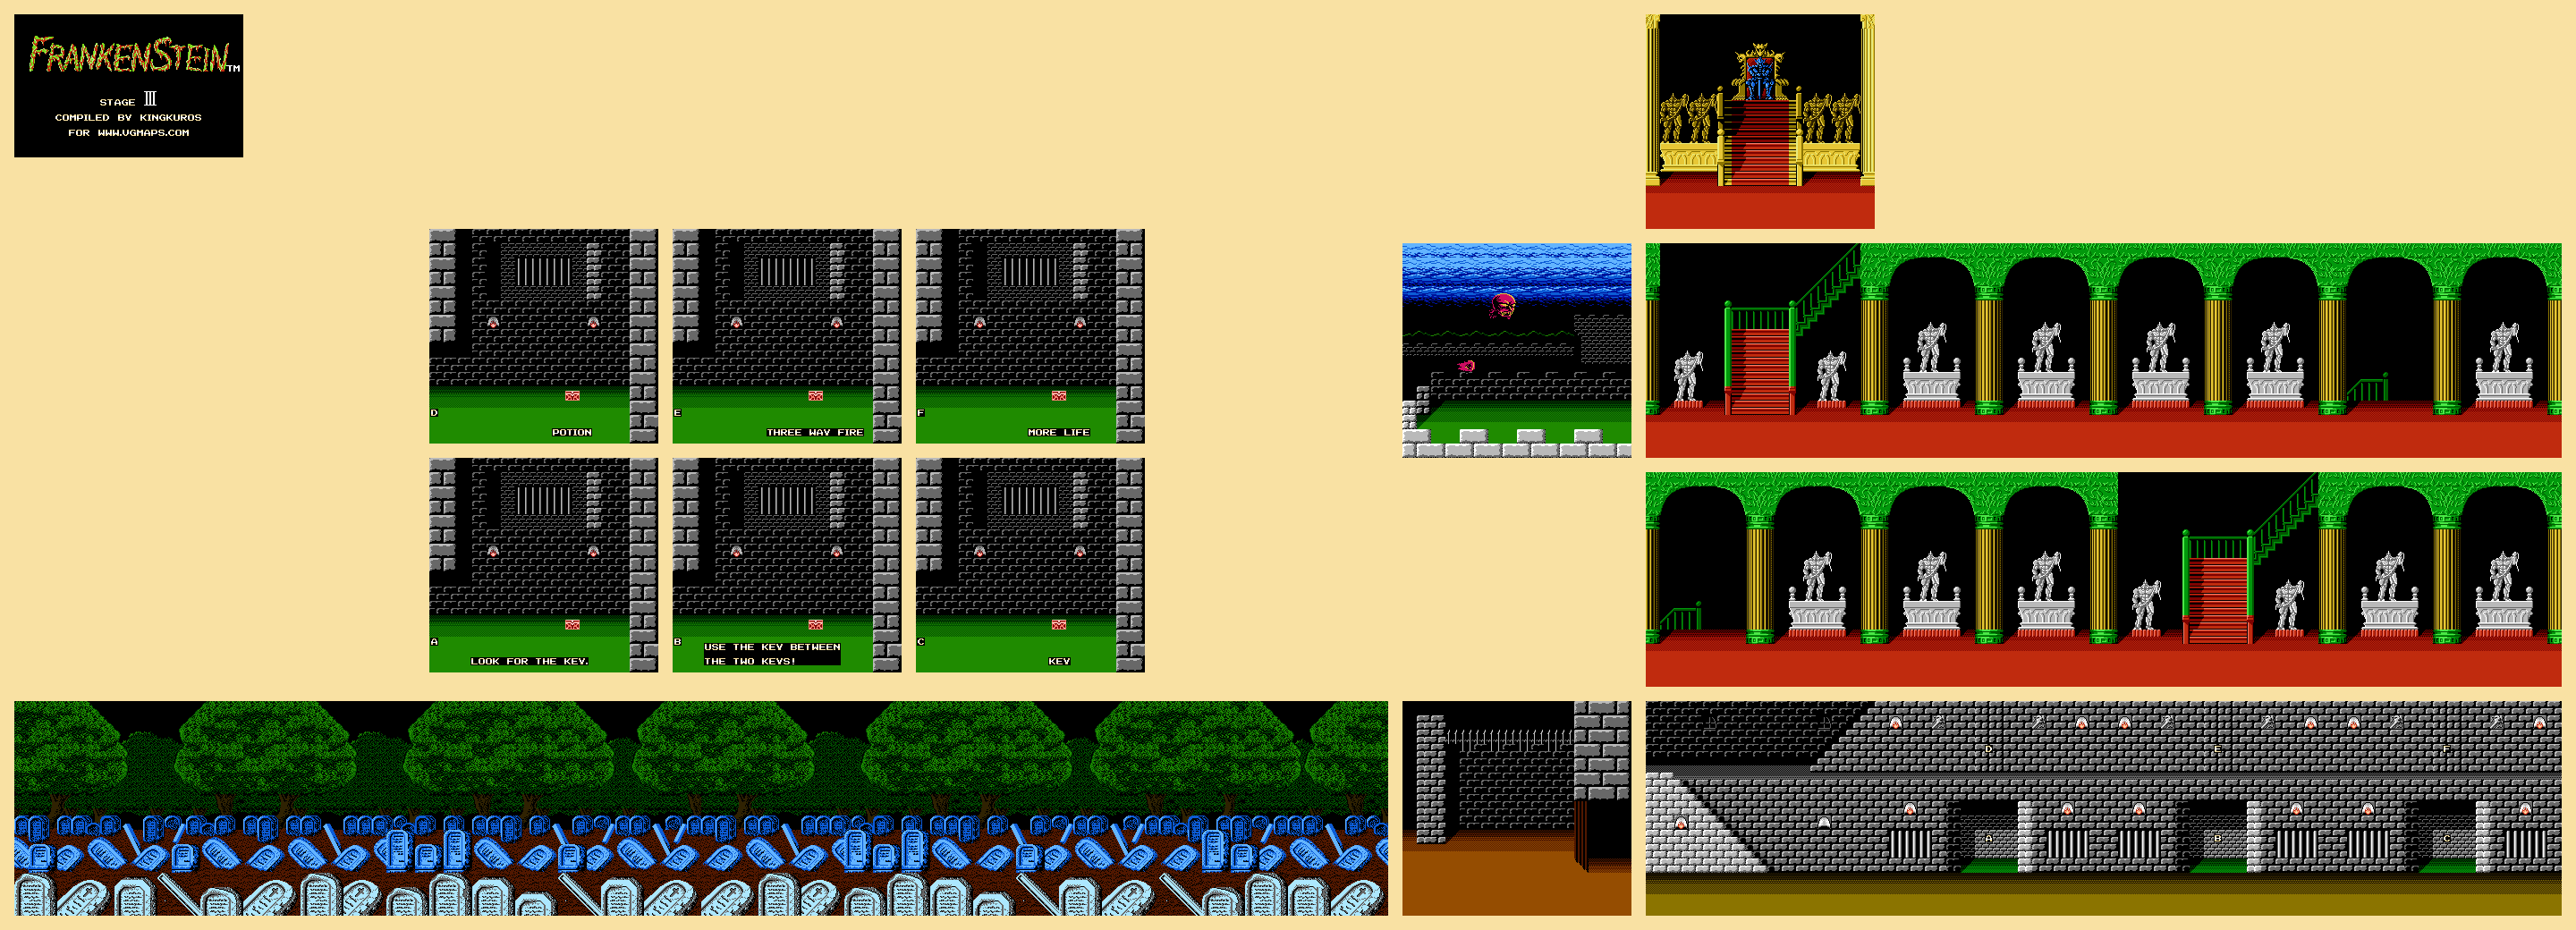
Stage III


The third stage starts in a graveyard. Some of the tombstones will jump back and forth, and you may need to duck down to avoid some of them. As for the orange demons that fly towards you, strike them when they get close to kill them and take the orbs that they leave. This time around, the orbs will not give you a projectile, but instead, they will give you thunder magic that you can perform once by holding Up and pressing B. You'll want to save this for the next section!

When you get to the castle entrance, a green flying demon will show up that looks much like the orange ones. If you have the thunder magic from earlier, use it to get rid of the guy immediately. If you don't have it, you'll have to fight it with your sword like you did with the flying demons from earlier in the stage.

Inside the castle, you'll want to explore the lower floor and enter the doorways that you see. This will net you some clues as to what to do on the upper floor. You'll need to get a key, which is on the far end, and press Up at the background walls between the columns with the keys on them on the upper floor to find some hidden treasures: a blue potion, a three-way fire projectile you can fire out of the sword and a life potion. The spots where you'll have to press Up are a little more pronounced, and if you pay attention, you'll know where they're at.

When getting the key, make sure to use the openings on the way back, as it helps clear out the enemies. The skeletons are better off avoided than fought, and you'll need to jump over the bars to avoid the blue tentacles that come out to grab at you.

Once you go up the stairs, keep going right to avoid the tridents that fall down, then use jump kicks to take out the statue enemies that come to life and try to hit you with their whips as well as to avoid their attacks. When they drop a whip upon defeat, grab it; you're going to need it for the rest of the castle. 

You'll soon find a staircase leading up. Go up the stairs, then head left. You can either use the jump kick or use the whip; you'll want to move back to the right a little bit and strike to the whip so you can knock them off-screen to the left side and out of existence. Keep doing this on the way left, and slowly make your way left as you do so. At the fourth statue, watch the sky for the tridents that fall, and back away to the right as soon as you see them. Do the same at the empty podium at the end where there is no statue.

You'll soon face the Gatekeeper. It is possible to get a free shot with the whip enemy before you get the text box. To beat the Gatekeeper, you'll want to destroy the hand first, as they will be source of all of the Gatekeeper's attacks. You'll want to strike at the head as it moves up and down and spits projectiles at your current position. The whip makes it easier, but if you can't hit with it, try using jump kicks. Use a potion before opening the chest after if you have four life potions, as you won't be able to carry more than four and the chest will contain the last one you can get in the game.

Head back to the right, then go up the stairs. You'll soon meet the Dark Warrior, and in order to face him, you'll need to face all of his servants, who fight just like the statues from earlier in the stage. Thankfully, it is easy to use jump kicks to avoid their strikes and corner them on the side of the screen to hit them endlessly. You can use the whip if you want, but the jump kick strategy may end up being a little easier. If your jump kick somehow misses, use the whip immediately. 

You'll then face the Dark Warrior himself. Use the whip to hit him as soon as he appears, and make sure you're not too close to him as he teleports in and out so you don't get hit with the sword. He can also hit you with thunder magic, so you'll want to hit him with the whip when he pops back up and stops flashing.

When you beat the Dark Warrior, the Dark Warrior will take you to the Evil Dimension, where Frankenstein's most powerful monsters dwell. He will tell you that Emily is in grave danger and that Frankenstein is nigh invincible, but if you have beaten him, then you may have a chance. He will give you another sword, then take you to the Evil Dimension.

Friday, January 10, 2025

PrinceWatercress plays Frankenstein: The Monster Returns - Part 2 of 4


Our adventure continues into the forest...


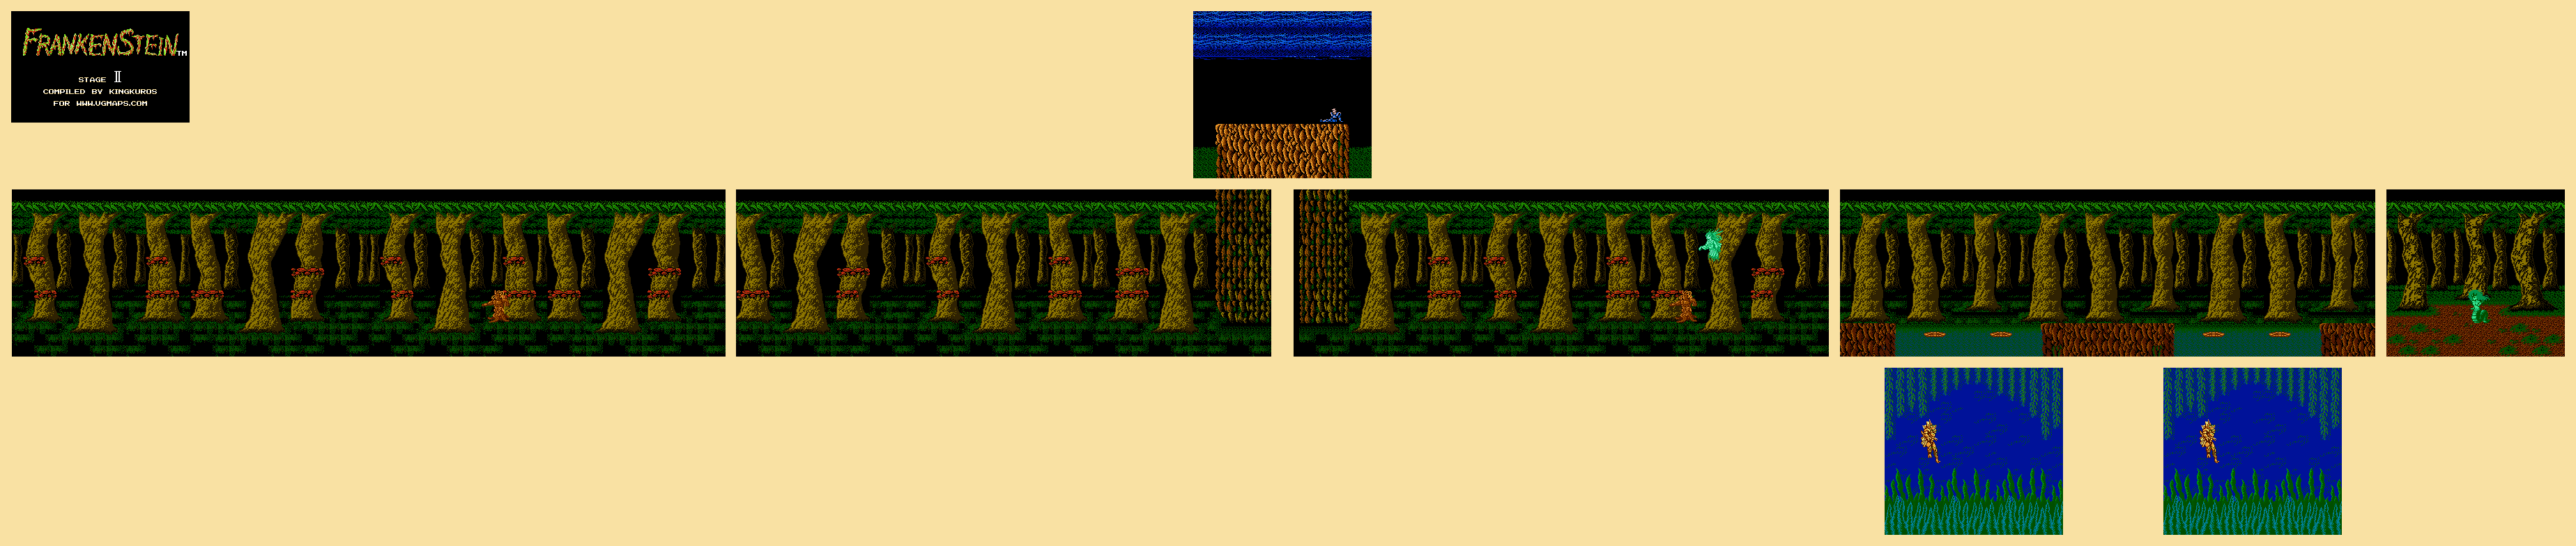
Stage II


The first enemies you'll meet are these black things with pink lips that try to chomp at you. Thankfully, the sword that you have in your hands will make it easy to hit and destroy them.

If an enemy drops an orange orb, pick it up. The projectile you'll be able to launch from your sword will make this stage even easier.

You'll eventually face the He-Monster. He will rush at you if you are at ground level, so get on the mushroom platforms on the trees and use them to make him slow down. You'll want to hit him from behind if you don't have the projectile. If you still have it, taking him out is a breeze. When you do enough damage, he will leave and drop some health, which you'll want to get if you need it.

In the second section, there will be purple beasts who will rush at you. They will drop clubs, but the sword is a much better weapon. When you reach the rock wall, stand in front of it and hold Up on the D-Pad to climb it. You'll meet a blademaster who has been bettered by the Demon Horse, and he will give you a secret potion in a chest. Walk up to the chest to get a blue potion that will increase your maximum health by one unit. From here, head right to drop off the cliff. On the way out, the blademaster will ask you if you have faced the He- and She-Monster.

In the next section, watch the skies. If you see a seed fall down, head in the opposite direction immediately to avoid it. You'll soon face the He- and She-Monster. Take out the She-Monster, as she is easier to hit and her projectiles are easy to avoid, especially if you still have one of your own. When you beat the She-Monster, the He-Monster will come to his senses.

Talking to the He-Monster will reveal that Frankenstein has taken control of the creatures of the forest. You'll then get a chance that contains another Life Potion.

In the next section, you'll want to jump off the very edges of the lily pad platforms. Falling into the water will cause you to fight a mer-beast. You'll have to keep jumping to get higher in the water, and the way that you move around in the water feels like how one moves around in water in real life. As a result, getting close to this mer-beast enemy without getting hit can be a bit of a chore. When you beat the mer-beast, you'll also have to start the whole section over. As for the flying beetle enemies, you'll want to make sure you take them out before you continue on, as they can make getting through this short section miserable as they fly around.

You'll then fight the Medusa. If you have the projectile, you can get a shot in for free before you get the text box. For the first phase, you'll need to hit her and then jump over her if you don't have the projectile. If you do have it, it's easy, although you'll still have to hit her and then jump over her at least once to keep from getting cornered.

You'll then face the second phase, which is a big floating face. You'll want to walk under her and keep walking, then turn around and hit her once she is low enough to hit with a jumping sword strike. The more hits you get in, the faster Medusa gets. 

After the battle, Medusa will come to her senses, and will tell you to destroy Frankenstein. Frankenstein will then show up with Emily and mock you, and Emily will tell the hero to run away, but the hero has come too far to give up now. Frankenstein then runs away with Emily into a castle...

Thursday, January 9, 2025

PrinceWatercress plays Frankenstein: The Monster Returns - Part 1 of 4


After playing plenty of obscure platformers, it was probably high time that I played this one.


When you start the game, you can input your name, and you have up to six letters to work with. The D-Pad selects letters, A confirms and B acts as the backspace key.

You'll then see the story. Frankenstein has come back from the dead, and he has laid waste to the neighboring village. He also kidnaps a young girl named Emily, who happens to be a friend of the main protagonist. From here, Stage I starts.

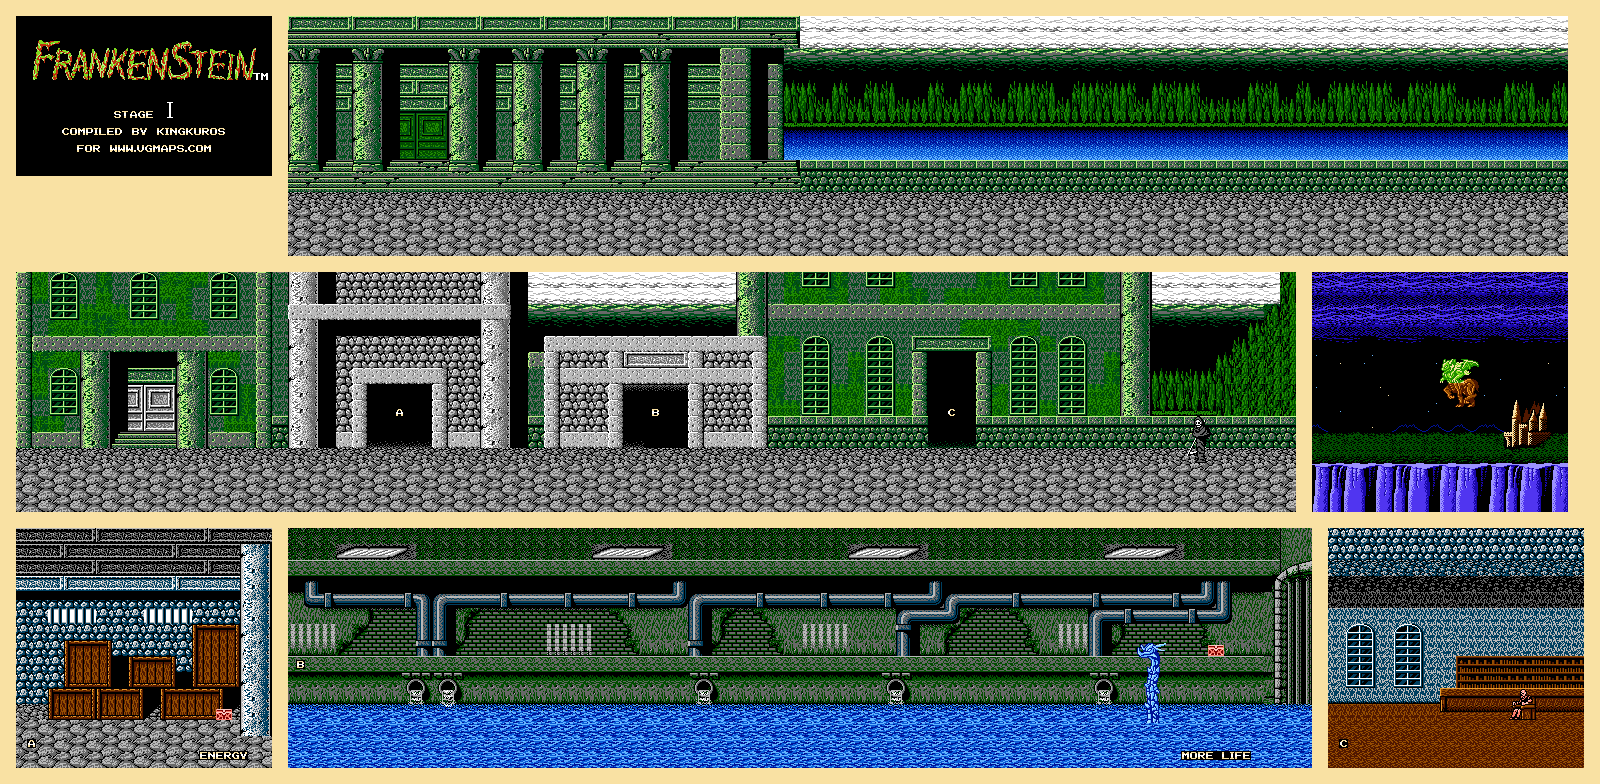
Stage I


Left and Right let you move left and Right, Down ducks, A jumps and B attacks. B attacks with your fists, but there are other weapons you can find. If you press A in mid-air, you'll perform a jump kick. Your health is in the upper-left corner, and it will deplete when you take damage. If you lose all your health, it's game over, and you'll have to use a continue.

When you enter the village, you'll fight wolves that will run at you and then lunge. Just face them and keep pressing the B button, and you'll take them down. You'll also face some trolls who will approach you and hit you with their clubs, but if you can hit them, you can knock the club out of their hands and take it as a weapon. The club will give you a little more range than your fists, so you'll want to pick it up. Just watch out for the occasional jump they can perform, as it can take you by surprise. If you get hit, you'll drop the club; pick the club back off the ground by walking up to it and pressing Down when you're above it.

Some enemies will have hearts fly out of them when they die. You'll want to pick those hearts up, as opportunities to restore health are few and far between.

If an enemy drops an orange orb, pick it up. It will allow you to fire a projectile from your weapon, and you'll need that projectile to fight enemies from a distance. The projectile lasts until you get hit, in which case you'll have to find another one to get your projectiles back.

At one point, you'll have to fight a bunch of wolves before you can move further. The last wolf that you beat up will drop a blue potion. Pick it up by walking up to it and pressing Down, and you'll increase your maximum health by one.

Watch out for the flying enemies; walk past them, and only attack them if they get in your face. The purple slimes will turn into clones of the main protagonist; attack them to get them out of the way. The first open door in the background can by entered by standing in front of it and pressing Up on the D-Pad; by doing so, you'll find a chest. Walk up to the chest to open it, and you'll be able to refill your health, should you need it.

After leaving the building, keep heading right. There will be another opening, and this leads to the sewers. Stay on the high road and keep hitting the blue bugs that leap at you. You'll soon face a Water Dragon. Avoid the fireballs and hit the Water Dragon in the face. This is a lot easier if you still have your club projectiles. When the Water Dragon is defeated, you can leap up to the platform above the pipe where the water is flowing from in the background, then get back on the high road and approach the chest to get an orange potion. This orange potion will completely refill your health if you press the Select button. You'll also have an orange bar with an L on it in the lower-right corner to tell you that you have a potion. You can carry up to four. After this, head to the left and keep heading in that direction to leave the sewers.

Shortly after you leave the sewers, you'll find one more building with an opening to the right. Go inside and talk to the old man. This is the village elder, who will ask you to bring Emily back. You'll also get a potion, and when you return to the gameplay, there will be a treasure chest in the middle of the room. Walk up to the chest to get your second potion.

Heading right from this building takes you to a battle with the Grim Reaper. You'll need to pay attention to where he teleports, then move up to him and jump kick him. If you still have the projectile for the club, you can hit him from a distance. Just make sure he doesn't hit you and smack you back towards the left side of the screen with his scythe.

After you defeat the Grim Reaper, a giant bat-like creature will show up. Stay all the way to the left, and when it dives down at you, jump kick it. If it touches you, you're going to be sent back to an earlier point in the stage, and you'll have to make your way back to fight it again.

After this double boss battle, head all the way to the right. An earthquake will strike, then you'll be sent underground, where the Demon Horse is waiting for a powerful human challenger. If you have the club projectile, keep hitting him with it; otherwise, you're going to have to stay away from him until he lands on the ground to jump kick him. The Demon Horse will move back and forth and will lower himself from the top of the screen to the ground, and he also has a flame breath attack that he can use up close. If he pauses to use it while on the ground, he will be easier to hit. You may have to duck down in the corner to avoid him as he makes his way down to the ground.

After enough hits, you'll defeat the Demon Horse. Frankenstein will show up with Emily in his arms and mock you, then run off. You'll also get a sword that you can use in Stage II.

Wednesday, January 8, 2025

PrinceWatercress plays Berzerk (Atari 2600) - Game 11 Longplay


Yet another mode I'm able to spend a lot of time in and get a lot of points!


Game 11 is just like Game 10 in which the robots don't shoot at you and you get an extra life every 1,000 points, but this time, Evil Otto can be shot down and taken out temporarily, making this variation easier than Game 10. But the easiest game mode is yet to come...

Tuesday, January 7, 2025

PrinceWatercress plays Dragonfire - The Longplay


Now for a commentary-free gameplay video of this game! Enjoy!


In Dragonfire for the Atari 2600, you have to go from castle to castle and get all the treasure avoiding the various fireballs being shot at you by the dragon in each one.

There are two sections. The first is a side-scrolling section where you must get from the right side to the left while avoiding fireballs. Left and Right on the joystick runs left and right, Down ducks, and the fire button jumps. There is only one safe zone, and that is at the far right of the screen, as the fireballs cannot travel there. Be ready to jump over the low fireballs and duck under the high ones, and remember that the fireballs can shoot out from the left side of the screen when you least expect them to. If you get fried, you'll lose a life, and you'll start back at the right side of the screen. You start out with seven lives with no way of getting any extra ones, so you'll need to play very well to get a high score in this game.

The second is inside the castle. You start where the door is, and the dragon will be at the bottom of the screen moving back and forth, shooting fireballs towards the north side of the screen. You'll want to pick up all of the treasures while avoiding the fireballs that the dragon spits at you. You start out at the closed door in the lower-right corner, and as soon as you start moving left, you'll come out of the room and you'll be susceptible to the dragon's fire. Some treasures will definitely be worth more than others, but the main goal is to collect them all regardless of point value. If you need to hide from the dragon's fire, you can move back into the entrance to use it as a hiding place, but the instant you move left, you'll leave the room and you'll have to face the dragon again. When you collect the last treasure, the exit will appear in the upper-left corner, and when you get to that door, you'll enter the bridge section of a different-colored castle, and you'll have to do this all over again, and with each castle you reach, the difficulty will be increased. If you get hit by any of the dragon's fireballs, you'll be sent back to the entrance. Move around to leave the entrance as soon as your ready.

The game ends when you lose all seven of your lives, and your final score will flash on the screen. If you want to play again on the same game variation you were playing, press the fire button.

The game select switch allows you to start on either the first level (green dragon), third level (blue dragon), fifth level (red dragon) or the seventh level (orange dragon), and also allows you to pick between the one- and two-player modes. The first number selects the game level that you start on, while the second number indicates whether you are on the one- or two-player mode.

The dragons range from green (the easiest) to white (which is nearly impossible). You'll need to be very fast and very crafty to get past the white dragon.

When you're on the bridge, you want to get to the other side as quickly as possible, but you also want to anticipate when the flames show up so you don't accidentally get blasted. As for the dragon rooms, using the entrance as a hiding place can definitely save your bacon on more than one occasion, so don't be afraid to use it to get away from the dragon's fire.

Imagic made a fast, frantic game for the Atari 2600 with this one. It's just a shame that this game came out in 1982, and if it came out a few years ago, this would probably a game that people would be talking about to this day. Alas, it's one of the titles from later in the console's lifespan, and as a result, it's more of a hidden gem than anything else. Still, the game looks, sounds and plays much like you would want an Atari 2600 game to play, even though running around on the bridge can be a bit slippery, and this is one game in the Atari 2600 and from Imagic that's worth checking out for the on-your-toes gameplay that it provides, especially if you get pretty far in the game.