Monday, September 4, 2017

Cornshaq plays Ninja Gaiden for Game Gear - Part 2 of 3


Well, this didn't take long.


Act 4 - Counterattack


You'll wake up in India, a prisoner of Central Commmand. The man who confronts you has no choice but to eliminate you. 

Collect whatever power-ups you need, then go to the right. You'll face the Indian guy from earlier, who flies on a magic carpet and shoots fireballs downward. The upward-facing chevron is the best weapon, since you can hit him directly from below. He shoots fireballs every so often, so stay on the move.

The second form is three face inside the statue at the lower-right. These things will shoot fireballs at you every few seconds. The fireballs will go low, medium, high, medium, low, medium, high and just keep going up and down like this. Jump over the low and medium fireballs and strike the heads with either your sword or your Force power-up.

During the second form, there are some gems that contain more power-ups, including a 3-way shot and a scroll for 30 Force. You'll definitely need these for this form of the boss.

After the boss, you'll find out that nations are preparing for war against the evil Siragane, who is the mastermind behind this whole plot.

You'll soon be able to move again. Head to the right, avoiding spikes that move up and down as well as falling rocks that come down when you get close enough. You'll be dealing with the birds again, too.

Some of the columns you'll be climbing on have certain parts that are a solid color without the brick pattern, and two red lines on the top and bottom. You can move to the other side on these partitions to get to the next column. You'll have to switch back and forth to both avoid some of the falling rocks and trigger their falling animation at the same time.

The skulls on the columns shoot fireballs that can be easily avoided if you don't go too fast, or if you double back on the partitions in the columns.

You'll find the upwards boomerang from the last battle midway through the stage. You'll need this for the final boss.

If you're quick enough, you can get past the climbing guys that drop down and kick you without taking damage. Just get to the next pillar as quickly as possible and you'll usually avoid them.

On the last pillar, climb all the way up before jumping to the right so you don't fall into the pit near the door to the final boss.

The final boss is Siragane himself. He wants the Dragon Sword to boost his power by nearly double and control minds, and just bringing the sword to him ups his power.

Siragane moves back and forth at the top of the screen. He will fire lasers down from his hands at the left, middle and right sides of the screen whenever he reaches them, but they are easily avoidable. Use the upwards boomerange to easily hit him, and you'll soon face his second form.

The second form is mostly the same, but he fires fireballs in an arcing pattern when he's in the fireballs.

His third form fires nothing but fireballs. The first six fireballs fire all at once and at different angles, depending on where you are. The second four fire slowly and fixate on your current position. Stay on the move and keep using the upwards boomerang, and if you run out of Force, switch between moving away from the fireballs and jump slashing Siragane's face.

When you beat the third form, you've done it! You've won!

Sunday, September 3, 2017

Cornshaq plays Ninja Gaiden for Game Gear - Part 1 of 3


This time around, an evil organization planning on starting World War III wants the power of Ryu Hayabusa's Dragon Sword! It's up to Ryu himself to stop these madmen!

Act 1 - Assault


This game plays differently from the other Ninja Gaiden games. Ryu seems to both move and cut through enemies a lot more quickly, which is interesting considering that we're playing on the Game Gear.

Slash at the gems in the air to get Force replenishment and weapon power-ups. The blue orbs give you 5 Force, which works just like the Ninjitsu in the other games from this time. Red orbs give you 10, while scrolls give you 30. The maximum Force you can have is 99.

The shuriken is your everyday normal shuriken. The chevron that is pointed upwards is a wave that can be shot into the air. Using your Force weapons is a little different in this game, as you have to hold Down on the Control Pad instead of Up before attacking in order to use them.

There are two types of ninja enemies in this act: you'll have ninjas running at you as well as ninjas jumping and down with their blades pointed at the floor. Also, is it me, or do all the ninjas (including Ryu) wear no shoes?

You can also climb walls in this game, much like in the second and third games for the NES.

The blue bottle will restore your health.

When you enter the shrine, you'll face a boss. To beat him, simply get up close, then immediately move away. Strike him as soon as he rears his club back.

When you beat the boss, he'll tell you to head to Kobe Harbor to find more answers as to why someone is after your sword.

Act 2 - Smuggling


Before the level begins, Ryu uses the Dragon Sword to look for a source of evil. He spies it on a nearby ship.

There are guys with crew cuts that throw Molotov cocktails and shoot at you. Those guys are pretty easy, but the real enemies here are the orange scuba divers that snipe at you with their harpoon guns as they leap in and out of the water. You'll have to play through this level a couple of times to see where they'll appear.

The pyramid made of three flames is a temporary fire shield. With this shield, you can run through enemies and destroy them for a limited time. Use it to get closer to the end of the act.

You cannot walk on the red ropes between the boats, so don't even bother.

The icon with the three bullets is a three-way shot. You can take care of both grounded and airbourne enemies at the same time with this.

The boss is some sort of strongman. Avoid the fireballs that shoot down from the smokestack of the ship, and hit the strongman with your sword when he pops out of the window to throw Molotov cocktails at you. As long as you pay attention to what's going on, this shouldn't be a difficult battle.

When you beat the boss, you'll find out Totenkof (who Ryu just fought) is an arms dealer.

Act 3 - Skyscraper


Someone will try to contact Captain Totenkof. Ryu pretends to be Totenkof to find out some more info. Mr. Tsin is wanting a special shipment from Totenkof.

A few hours later, Ryu finds Mr. Tsin's office building.

The office windows flickering from one side to the other is a PC issue on Cornshaq's end.

In this level, Ryu will be climbing up two buildings. You'll be switching between them constantly to avoid falling vases, fire extinguishers, birds and martial artists that try to dive at you from the top of the screen. Dodge the martial artists as as they fully show up on screen.

The heart with the word "1UP" below it is an extra life.

The boss here is Mr. Tsin. Get close, slash him, then immediately jump over his bullets and slash him again. Once you get the timing down, you can take Mr. Tsin down flawlessly.

Mr. Tsin has a second form where he goes from a business suit to a martial arts uniform. Even though he shoots out energy waves, the tactics are still the same, so keep up the pressure on him.

When you beat Mr. Tsin, gas will fill the room...

King's Quest VI: Heir Today, Gone Tomorrow - The OST


Here it is in playlist form...


...and here it is in two separate videos.

Saturday, September 2, 2017

Dilandau3000 plays King's Quest VI: Heir Today, Gone Tomorrow - Part 43 of 43

\
Time to climb the tower and fight Vizier Abdul al-Hazred...and get the better ending this time!

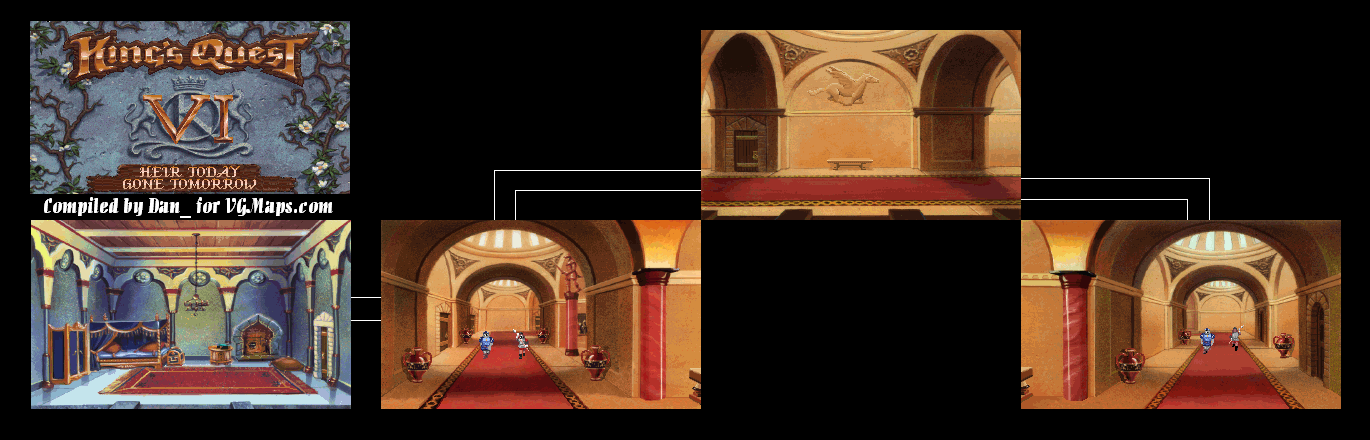
All maps by Dan_.


When you catch up with the Vizier, he'll sic Shamir on you again. Jollo will show up and give you the genie's lamp. Use it on Shamir to free him from al-Hazred's control. You'll drop the lamp down the stairs when Abdul draws his sword. Grab the ceremonial sword on the wall and you'll start fighting with Abdul. Since you gave Cassima the dagger, she'll stab him with it. Click on the Vizier with the sword icon and you'll knock him out.

Alexander finally pops the question, and Cassima and Alexander kiss until they're interrupted by the guards. A week later, the wedding occurs. Since you freed the genie from Vizier Abdul al-Hazred's control, he's able to fix the ferry that goes between the islands and bring King Graham, Queen Valanice and Princess Rosella of Daventry to the castle! Also, because you looked at all four stolen treasures, the people of the four other islands will show up. Since you befriended Jollo, he'll be happy rather than concerned when the marriage is official.  King Caliphim and Queen Alloria give Cassima away, and Alexander's family recognizes the marriage.

King Caliphim and Queen Alloria placed trust in Abdul al-Hazred as they desperately wanted a son and someone for Cassima to marry, but realized in the end that they were wrong. Even though they are alive once more, they feel they cannot reign again and want Alexander and Cassima to take their place. King Graham, Queen Valanice and Princess Rosella give their blessing, and thanks to Shamir Shamazel's powers, he'll be able to visit Daventry often. You'll also find out your crew from the voyage here at the beginning of the game is alive, too!

Alexander and Cassima are finally married, and a new era begins in the Land of the Green Isles! You've won!

Dilandau3000 plays King's Quest VI: Heir Today, Gone Tomorrow - Part 42 of 43


That letter from Shadrack wasn't the only deep, dark secret the Vizier was hiding.

All maps by Dan_.


Time to look under the drapery. When you look underneath, you'll find the legendary treasures of the Green Isles! He stole them from everyone all along! The Beast's coat of arms, the Druids' miniature oak tree, the Winged Ones' gold fleece and the Singing Stone of the Isle of Wonder. Look at all four treasures to get the points (and make the good ending even better and cover all the loose ends) and Alexander will figure it all out. But why did he steal everything? Simple. The islands would be too busy feuding with each other to form a united front against the Vizier when he tried to take over the Land of the Green Isles.

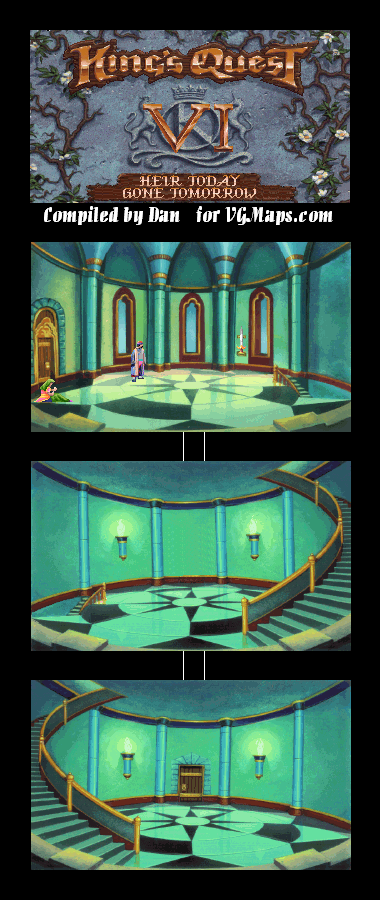
Leave the room. You'll hear wedding music...and the footsteps of guard dogs! Quickly head to the east end of the basement and head up the stairs. (Be sure not to get caught by the lone guard that enters the door!) Use the hand icon on the open door at the top of the stairs to enter the first floor of the castle.


When you enter the first floor, you'll shortly meet up with Captain Saladin. Give him the note from Cassima, then the Vizier's letter.

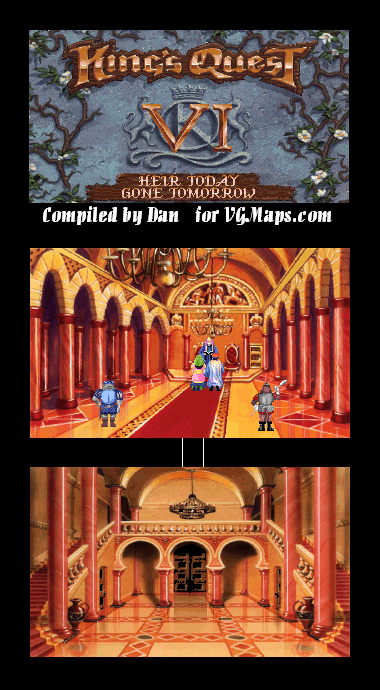
You'll be in the throne room again, with Cassima and Vizier al-Hazred exchanging vows. Speak to Cassima, and you'll go through the cutscene where Shamir Shamazel is disguising himself as Cassima. As soon as Saladin draws his sword, King Caliphim and Queen Alloria show up to stop him (along with supporters that aren't seen behind the king and queen). They see through Shamir's disguise, and Shamir fires his magic at the guards as al-Hazred gets away. Go after him! Quickly!

Friday, September 1, 2017

Dilandau3000 plays King's Quest VI: Heir Today, Gone Tomorrow - Part 41 of 43


We finally meet Cassima! But time is short...

All maps by Dan_.


Go back to the stairs and look through the hole in the wall. You'll finally meet Cassima. Again, Cassima tells you that you're endangering yourself and tell you to do what you can from your end. When she wants to look at you, give her the letter in the Vizier's chest to give her something to prove her suspicions, and give her the dagger you got from Lady Celeste.

After some time, Cassima will hear someone coming. You'll hear her cry briefly, then silence.

Climb back down the stairs and exit the secret passage.


Go back to the west end of the basement and speak to the door in the  west wall with the speech bubble icon. The password is "ALI ZEBU." Alexander will intimidate the door into opening along with the password.

Inside is the treasure room. A small table is covered with a drapery with the initials A.A. - Abdul al-Hazred. Something's under it...

Dilandau3000 plays King's Quest VI: Heir Today, Gone Tomorrow - Part 40 of 43


We've found the secret passage! Now it's time to do some damage to the Vizier's plans!

All maps by Dan_.


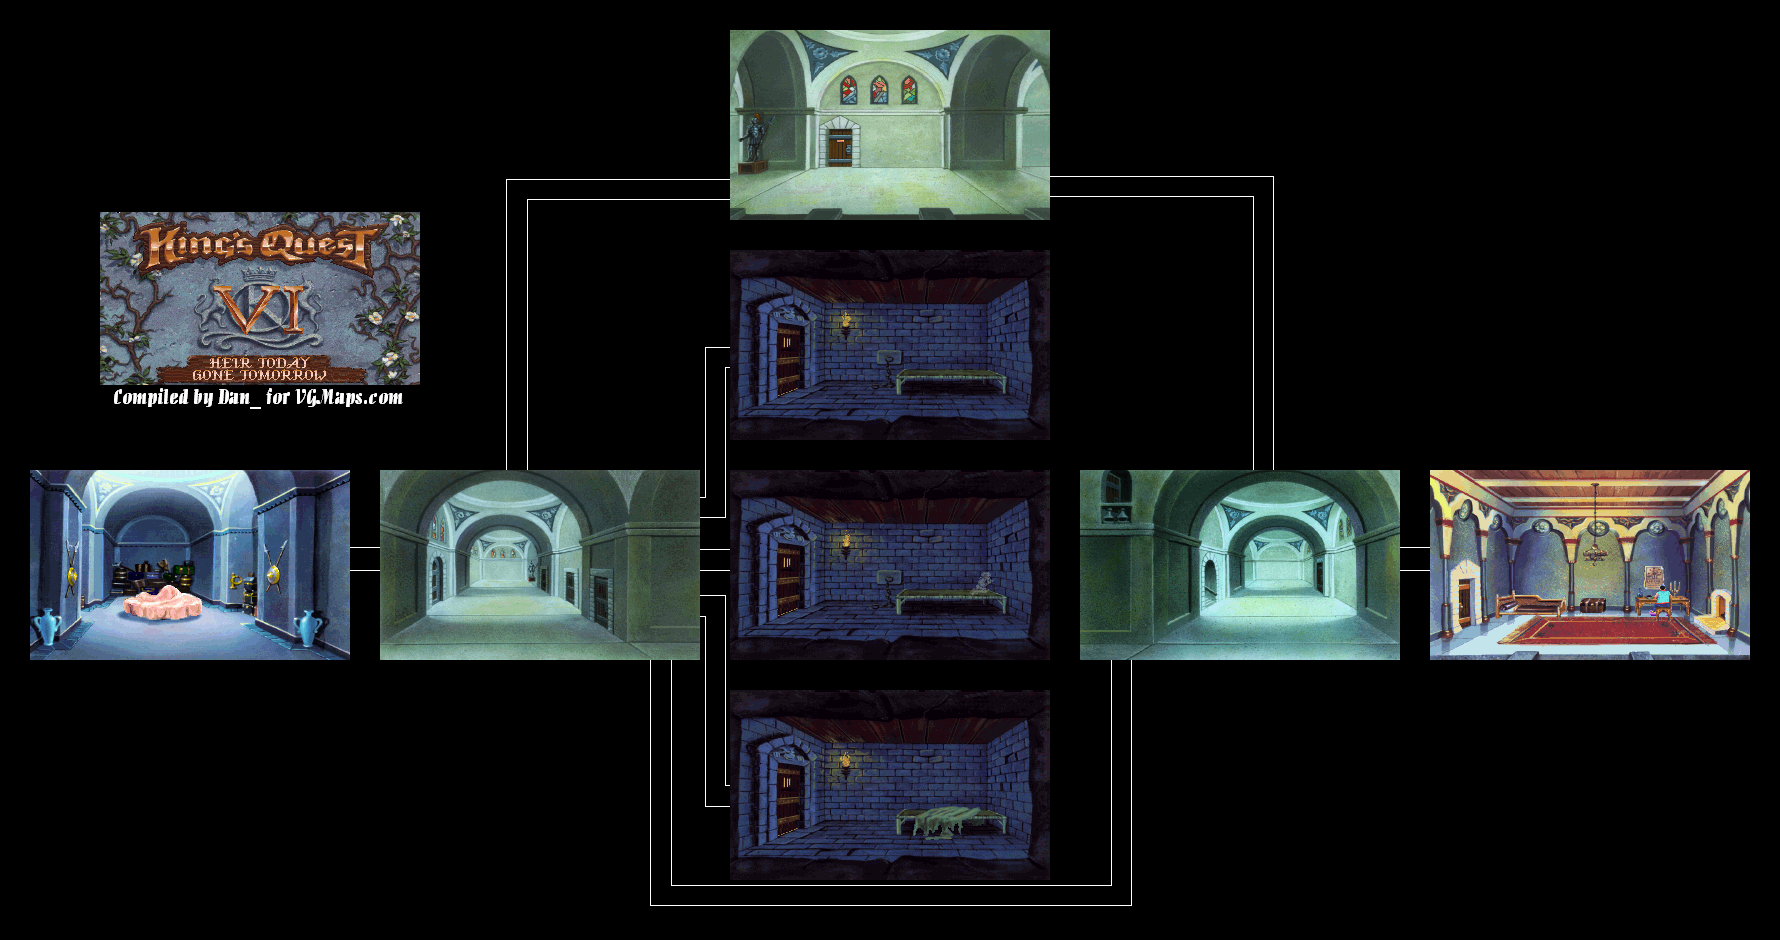
In the guard room hallway is a suit of armor. Use the hand icon on the right arm of the "man of iron" and you'll find a secret passage. Alexander automatically goes in.


Use the eye on the chink in the wall. You'll overhear one of the guards talking to Captain Saladin. It is said that Cassima is pounding on her bedroom door, wanting to be let out. Saladin tells him that al-Hazred is aware of a foreign intruder trying to assassinate Cassima, and that Cassima should be left under lock and key until the wedding. Even Saladin has his doubts about the Vizier.

You'll also hear about a door that the Vizier has enchanted with some sort of magic, and magic words are required to open it (the first word being "Ali"). From there, you can stop peering through the hole in the wall and go upstairs.

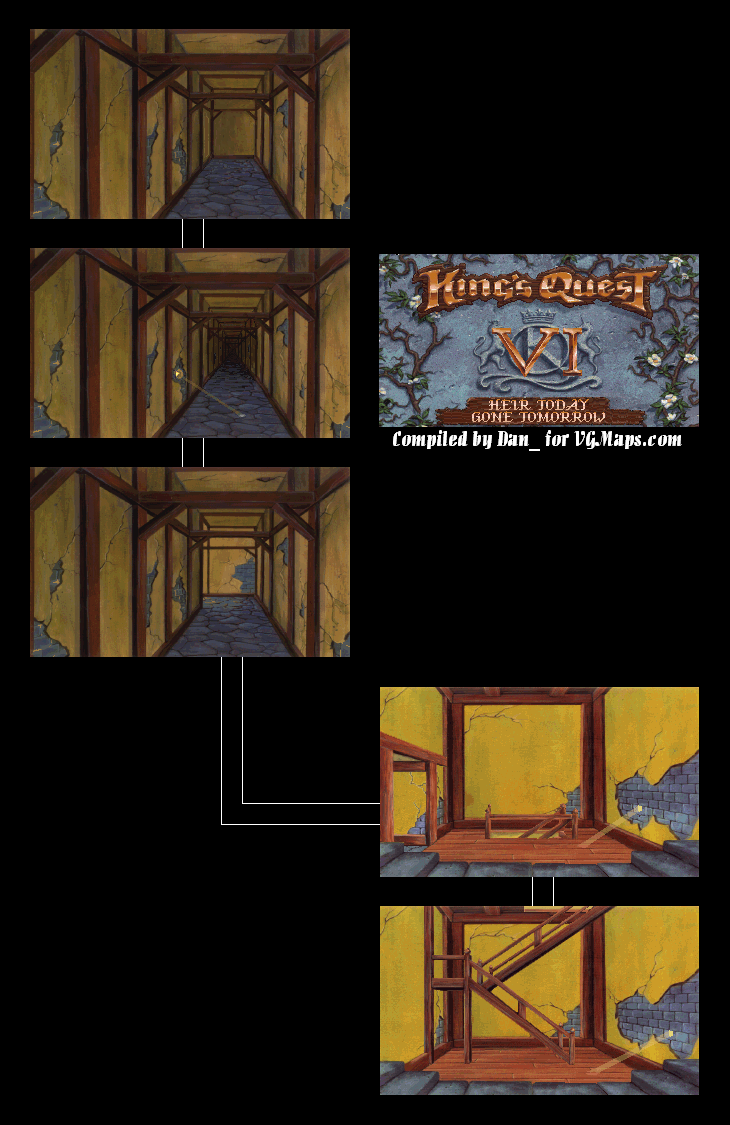
There's another chink in the wall when you make your way up. You'll hear a girl crying. Go to the left and keep going through the hidden passage. On the second screen, you'll hear the sound of scratching. There is another hole in the wall to the left. It's the Vizier!

The Vizier writes a letter to Shadrack. He plans to kill Cassima so she doesn't alert the guards to the treason, and that he plans to stage another "accident."

Go north one more screen. It may seem like a dead end, but a vague outline of what looks like a door is on the left wall near the dead end. Inside is a hallway leading to Vizier al-Hazred's bedroom!


Once again, open up the trunk at the foot of the bed. Since you don't have the nail this time, use the Skeleton Key. Take the letter from the chest just like you did last time.

Be sure to look at the ebony box on the table. Read the piece of paper. It has the word "ZEBU" on it. Ali Zebu? Is that the password for the enchanted door?

If you look through the keyhole, you'll find that the guard dogs are there. If you open the door, you'll be caught. Instead, open up the wardrobe and go back into the secret passage to get out of here.