Showing posts with label part 82. Show all posts

Tuesday, April 7, 2026

PrinceWatercress plays Super Mario Odyssey - Part 82 of 92


In this video, we head to the Ruined Kingdom. This won't take long at all.


Next up is the Ruined Kingdom. The Moon Rock is off to the side at the beginning of the stairs leading up to the Ruined Dragon. Shimmy across the handhold on the wall to get there; don't long jump or else you'll fall short. Activating it will increase the amount of Power Moons from five to ten.

5. Peach in the Ruined Kingdom - This is the only Power Moon you can get after beating Bowser and before activating the Moon Rock. Peach and Tiara will be near the Ruined Dragon; talk to them for a Power Moon.

6. Caught on a Big Horn - Throw your cap at the dragon's left horn and hold the button to get this Power Moon to appear.

7. Upon the Broken Arch - Before the pylon that leads to the dragon, there is a glowing light on top of the broken arch on the right side of the staircase. Backflip and grab your way up there, then ground pound the flashing light for a Power Moon.

8. Rolling Rock on the Battlefield - Near the dragon, there is a rock on the ground that you must hit in any way possible up to 50 times. Breaking this rock reveals a Power Moon.

9. Charging Through an Army - There is a Moon Rock Pipe near the Odyssey. Enter it, then throw your hat at the switch to open the cage and release a Chargin' Chuck. Possess the Chargin' Chuck and take it up the nearby ramps, then bust open the cage with a tackle to free a Power Moon.

10. The Mummy Army's Curse - With the Chargin' Chuck in the Moon Rock Pipe area, break the blocks below where the area starts. This will cause some Chinchos to spawn near the beginning. One of them will have a glowing light; you'll need to defeat that Chincho to get a Power Moon.

Thursday, December 26, 2013

brickroadbrickroad and SovanJedi play Secret of Evermore - Part 82 of 88


As we explore Omnitopia, we forget to turn off the alarm in the alarm room. D'oh!

All maps by Grizzly.

Main District


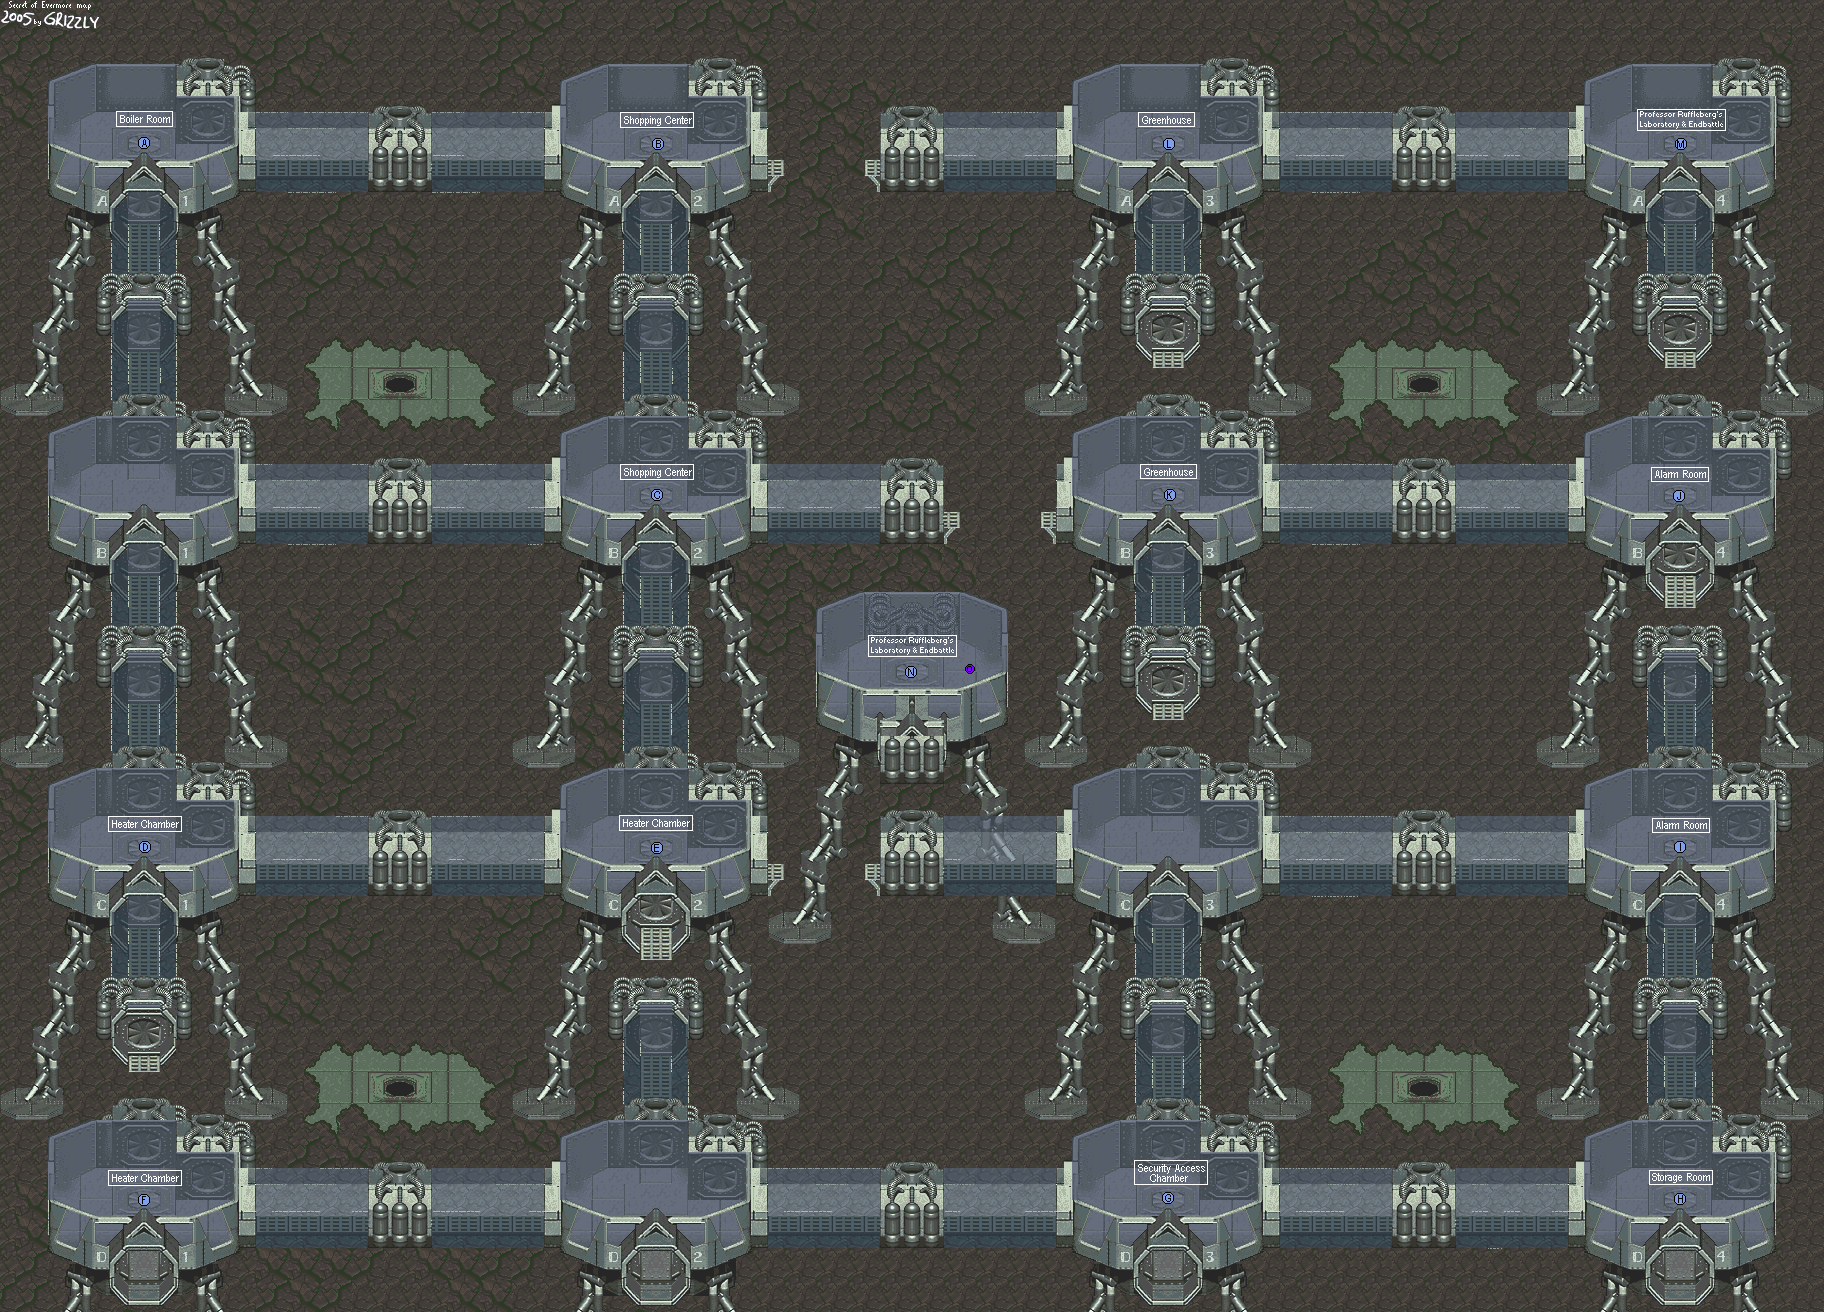
Really useful map

The portals to the outside world can only be accessed fully by The Dog. From there, The Dog can go anywhere he wants and blast the orb-shaped robots shooting lasers to smithereens, opening up doors to other rooms. These things will track The Dog quite well, so power up the Dog Attack to Level 3 before you even think about attacking these things. If there's a port hole in the ground, it can be accessed to enter different areas of Omnitopia. You'll have to go through some of these to complete your first order of business, which is to find Professor Ruffleberg.

If the focus is on The Boy in the two-player patch, The Dog can kill it and get away with it scot-free. lolGameBreaking

There are also blue Eyes of Rimsala moving back and forth in some of the horizontal walkways. Killing one not only makes getting around a lot easier, you'll be able to get 1000 credits. There isn't much to Omnitopia, but there are a few stores littered amongst the Main District, as well as an inn. This will make getting some Credits at the beginning of Omnitopia a bit easier.
 

Shopping Center


Map 

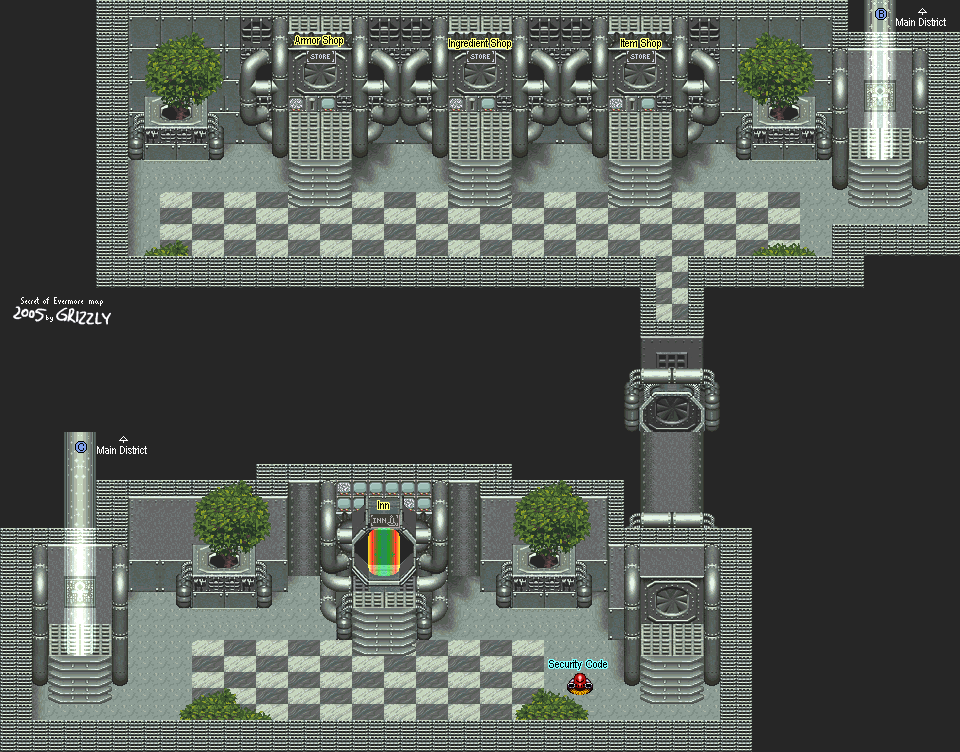
The porthole in A-2 sends you to the Shopping Center. Here, you can buy some armor for both The Boy and The Dog and even use the Inn. One of the cleaning droids gives you a color combination that will come into use later.

B-2 leads to the other transporter beam on the other end.

Be sure to buy Particle Shot and Cryoblast for the Bazooka. Unlike Thunder Ball, they both give you infinite ammo because of a glitch in the game that fails to count down your ammo for both of these weapons by one when you fire it. Whoo-hoo.
 

Heater Chamber


Map

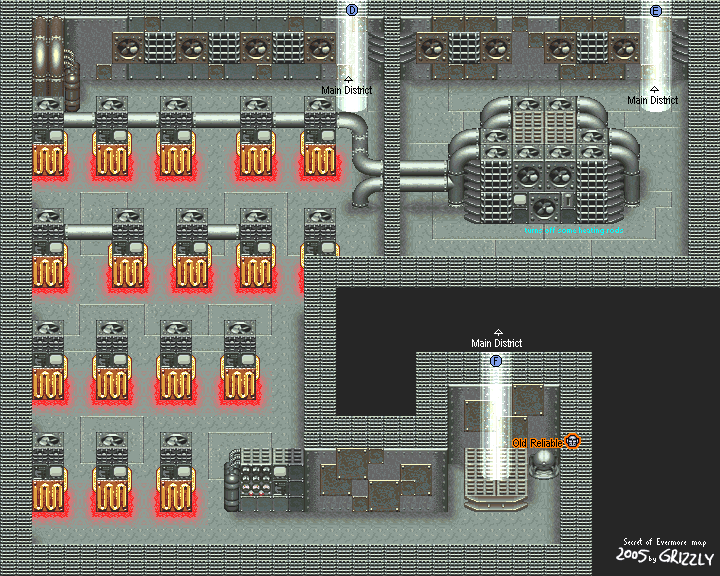
C-1 leads to a bunch of heaters. If you touch them, however, you will take damage. In order to get to the other side of these things, you'll have to turn the switch off that controls some of these. To do this, you'll have to go to C-2, flick the switch, then return to C-1. When you do, some of them will be turned off and you'll be able to get to the other side without a problem.

Unless you're playing the two-player patch. Then you can use The Dog's smaller hit box to your advantage and instantly make your way to D-1. lolGameBreaking

Be sure to open the little bubble next to the teleporter when you reach the other side, too. It contains Old Reliable, which is stronger than what you can get in the Shopping Center.
 

Alarm Room


Map

There is a switch that turns the alarm in the Alarm Room off somewhere in Omnitopia.

Guess what? We ain't usin' it.

For our trouble, we'll have to fight off eight Guardbots before we can continue on. Hope you got the more powerful Bazooka Ammo before you got here.

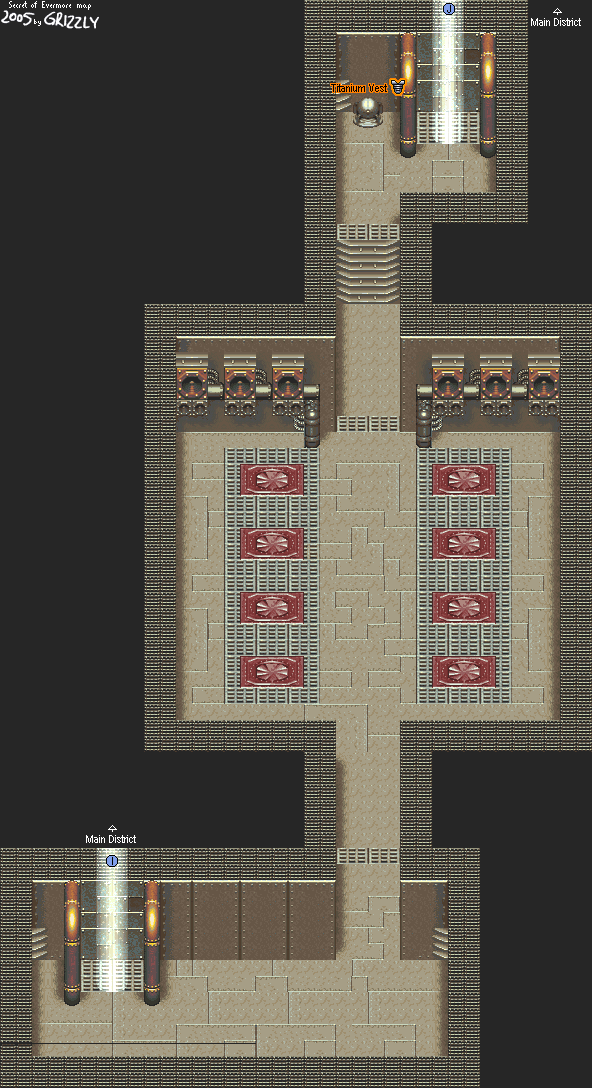
The little bubble here gives you the Titanium Vest when you get to the transporter beam on the other side. Sweet!