Showing posts with label Mega Man X4. Show all posts

Thursday, August 12, 2021

PrinceWatercress plays Mega Man X4 as Mega Man X - Part 9 of 9


We finally meet Sigma and face him one last time...again.


Now it's time for the boss rush.

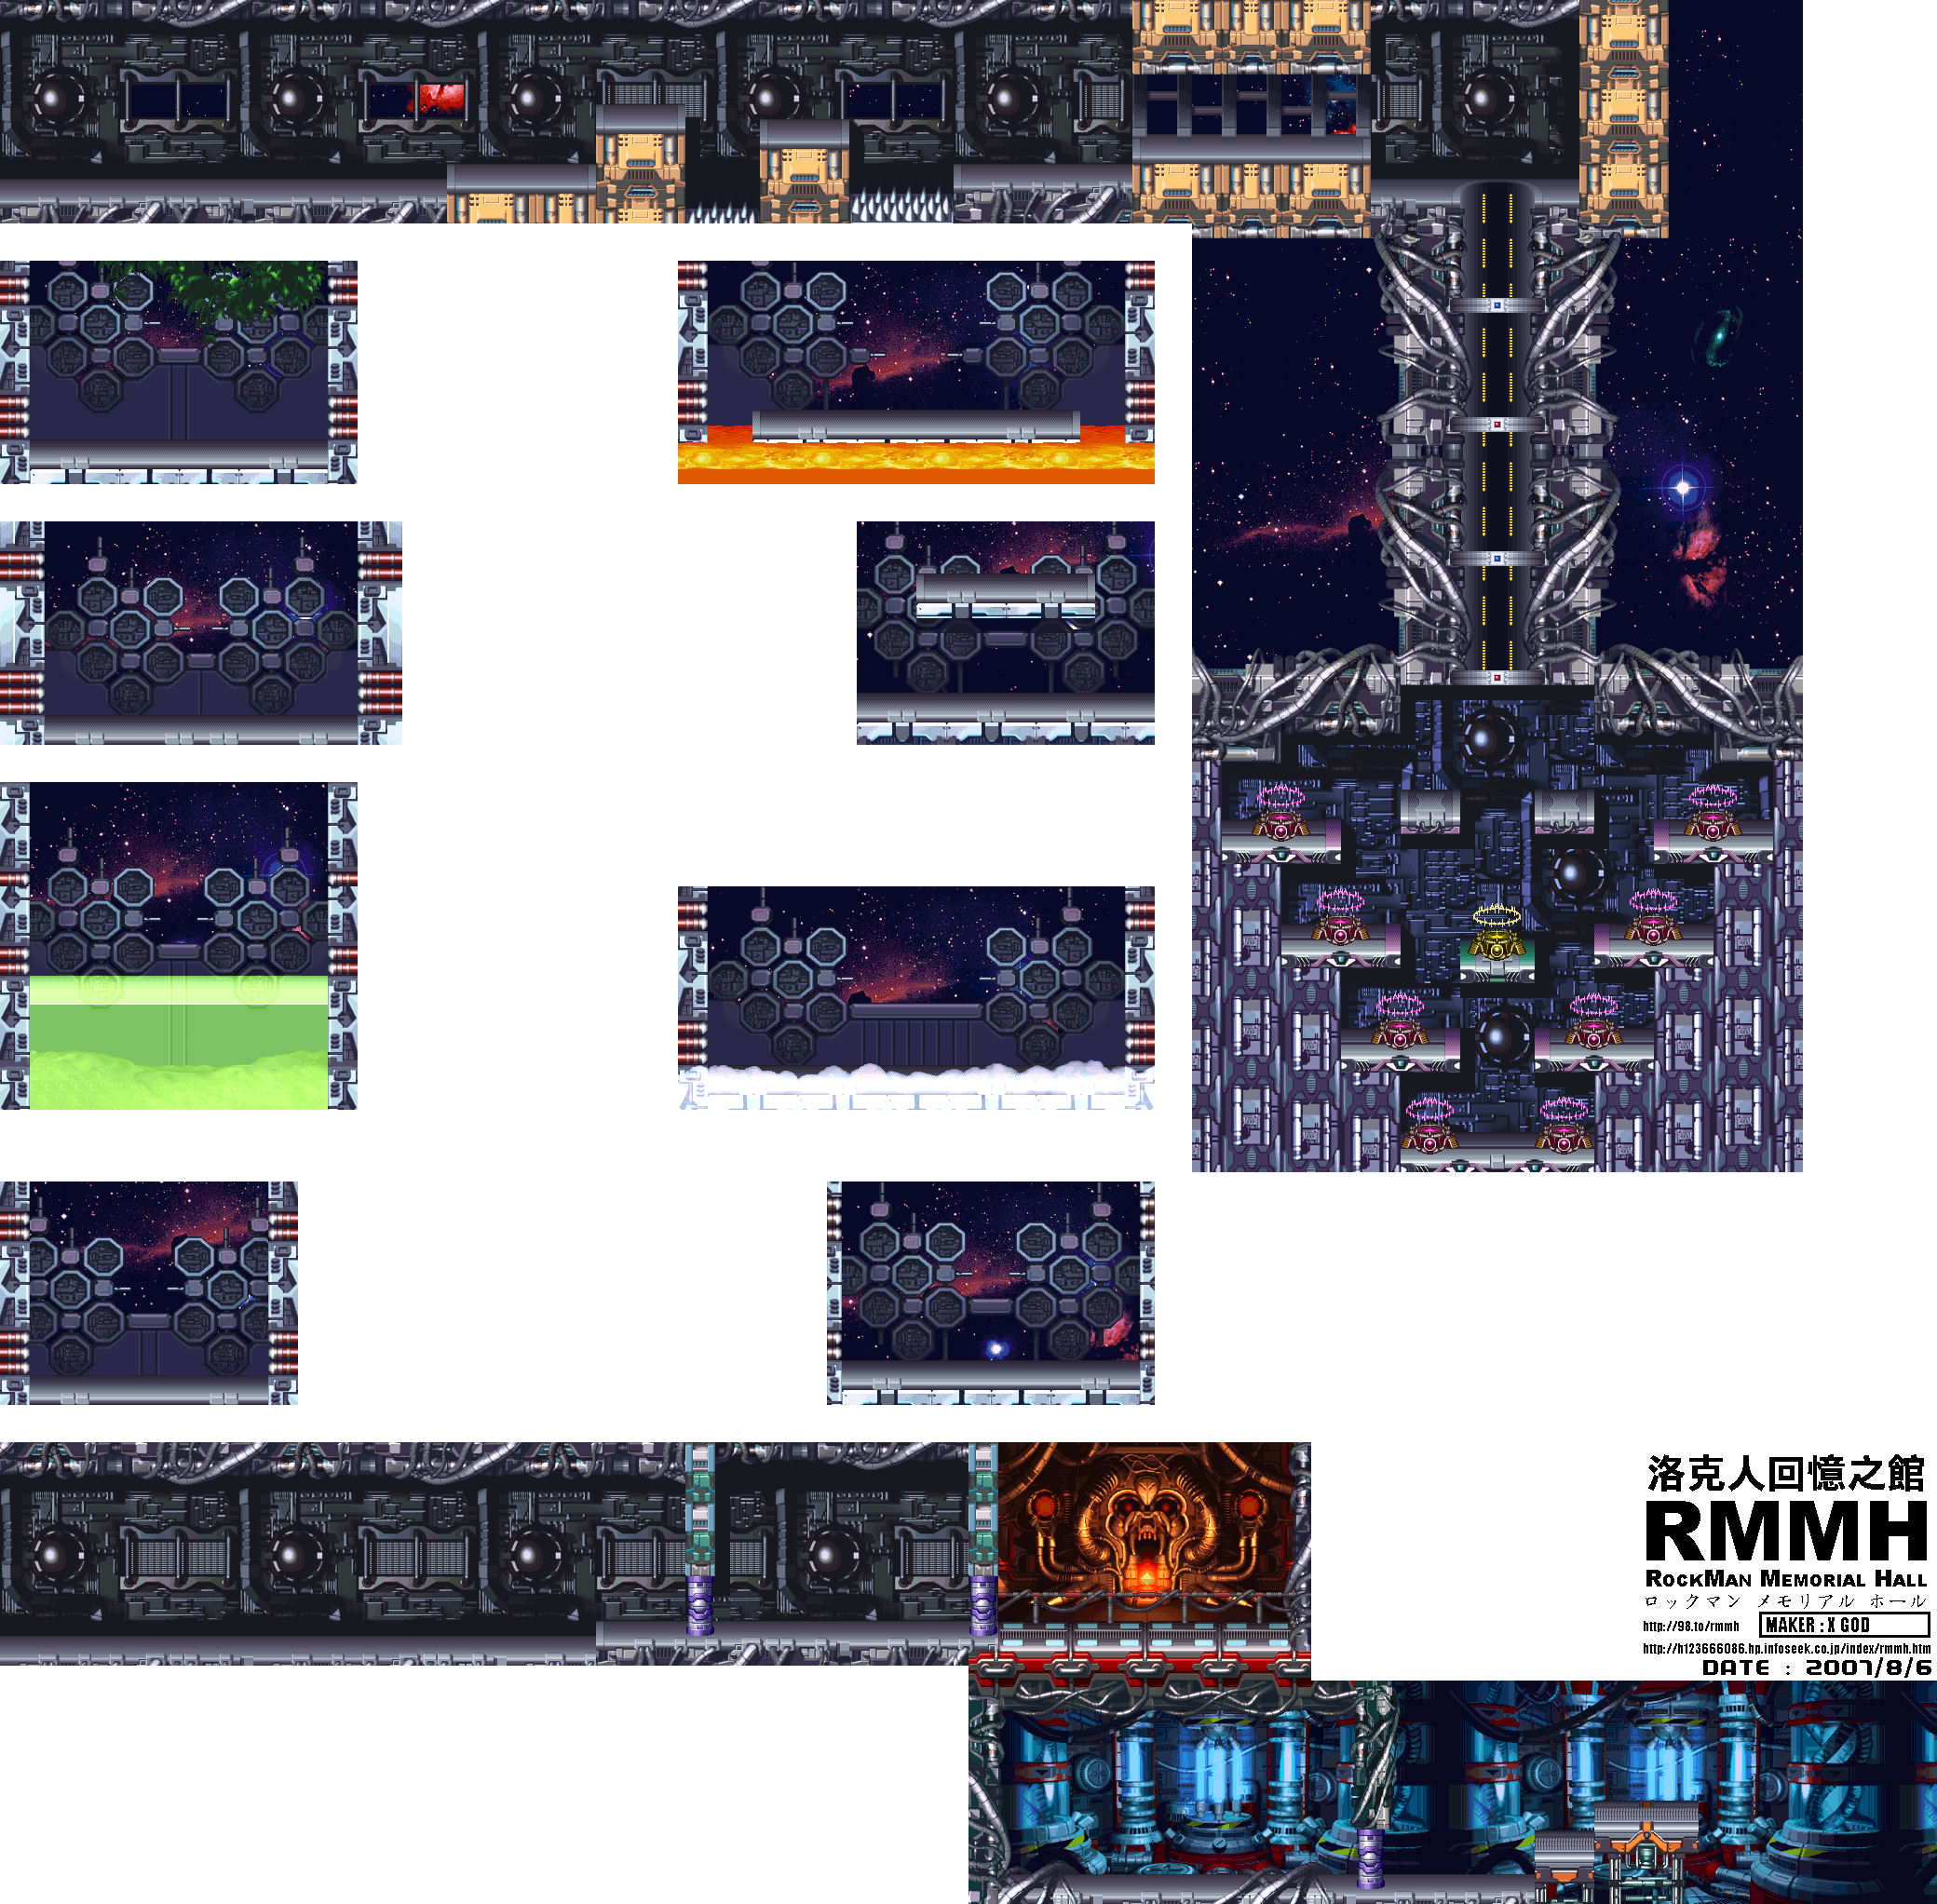
The left side of the teleporter room, from top to bottom is Web Spider, Cyber Peacock, Jet Stingray and Split Mushroom. The right side, from top to bottom, is Magma Dragoon, Storm Owl, Frost Walrus and Slash Beast. Same strategies apply.

Once you beat all eight Mavericks, enter the gold teleporter in the center and keep going right. You'll meet the hooded figure responsible for all this mess.

It was Sigma all along...and he's still alive. Apparently Dr. Doppler's efforts from the last game were in vain.

Sigma shows up, gloating how his plan of pitting Repliforce and the Maverick Hunters was a stunning success and that he's finally able to pit the weapon the Repliforce used against Earth.

The first form is the hooded figure with the scythe. Use Rising Fire against him. Charge it up and use it while you're under him to destroy half of his health. He'll try to rush at you with the scythe if you give him time, but with the ability to charge your special weapons, that's a thing of the past.

The second form is Sigma without the cloak. He'll throw the scythe in a circular motion in front of him. If the scythe hits a wall, energy will surge across the wall. He'll then jump to the end of the room opposite the scythe and shoot out eye lasers. Use the hover ability of the leg enhancement to avoid it completely.

Dash to the other side of the room to avoid the first throw. You want to jump before Sigma throws the scythe for the second throw so that it's guaranteed to hit the wall. Otherwise, the scythe will pierce the floor and the energy will surge across it, leaving you pinned to the wall.

For this form, hit Sigma with Lightning Web to do the most damage outside of the Rising Fire. You can also do what I did and use the plasma shot upgrade for the X-Buster.

You think you're done yet? After beating the second form, you'll drop down into a room underneath where you just fought. Sigma has a third form this time around, and it's pretty complex compared to the other two. Be sure to pick up the energy capsule you land next to when the fight begins.

The three heads that show up are red, blue and yellow and have fire, ice and lightning attacks respectively. The red head will shoot series of four fireballs at you through the room, and you'll have to wall jump off the heads to dodge the first three sets and dash to avoid the fourth. The blue head will shoot an ice breath at you that will freeze you if you're too close. The yellow head will shoot lightning orbs at your current position. Stay on the move, and remember that the electricity will course through the floor upon contact with it.

The heads will fall if you do enough damage to them, believe it or not.

There are two forms of Sigma's body, and you'll have to destroy both of them in order to beat Sigma for a fourth time.

The Sigma face that sometimes appears in the lower-left area of the room is weak to Ground Chaser. When it opens its mouth to try to blow you into the spiked wall to the right, dash towards the head and attack the mouth with Ground Chaser. If he tries to suck you into its mouth, keep dashing away. Sometimes this form will cause boulders to fall down. You'll want to avoid the boulders, obviously.

The other one is the giant body with Sigma's face on the top of its head that you saw when you dropped down to this room, and it appears on the right side of the room. It will try to shoot you with a gun. Wall jump and wall slide off the heads to avoid the laser. Aim fully-charged X-Buster shots at the head. If Sigma says "The end" in this form, immediately get to the left wall and wall jump on it until he stops firing his explosive laser attack at the floor, which will damage you regardless of where you are on the floor.

When you beat Sigma's third form, you'll be able to head through the wall on the right. Head to the right, and you'll meet General. He sacrifices himself to stop the weapon and fall with his now-destroyed comrades. X escapes.

The Final Weapon is destroyed, and X escapes on a battle cruiser. He thinks about all that has transpired when he gets a transmission from Zero. He tells Zero to destroy him, if he becomes one of the Mavericks to destroy him. Zero tells him not to worry about that, but X is still concerned as he heads back to base...

If you pay attention to the Final Weapon after the end of the credits music, you'll see a whitish-purple comet head back to earth. Could it be...Sigma?

Wednesday, August 11, 2021

PrinceWatercress plays Mega Man X4 as Mega Man X - Part 8 of 9


We've taken care of all our unfinished business. Now it's time to take the head to the spaceport and stop the Repliforce once and for all!


After beating all eight Mavericks, you'll find out the Repliforce is at the spaceport, and that they are planning to go to space!

Space Port


The shield robots can only be damaged from behind.

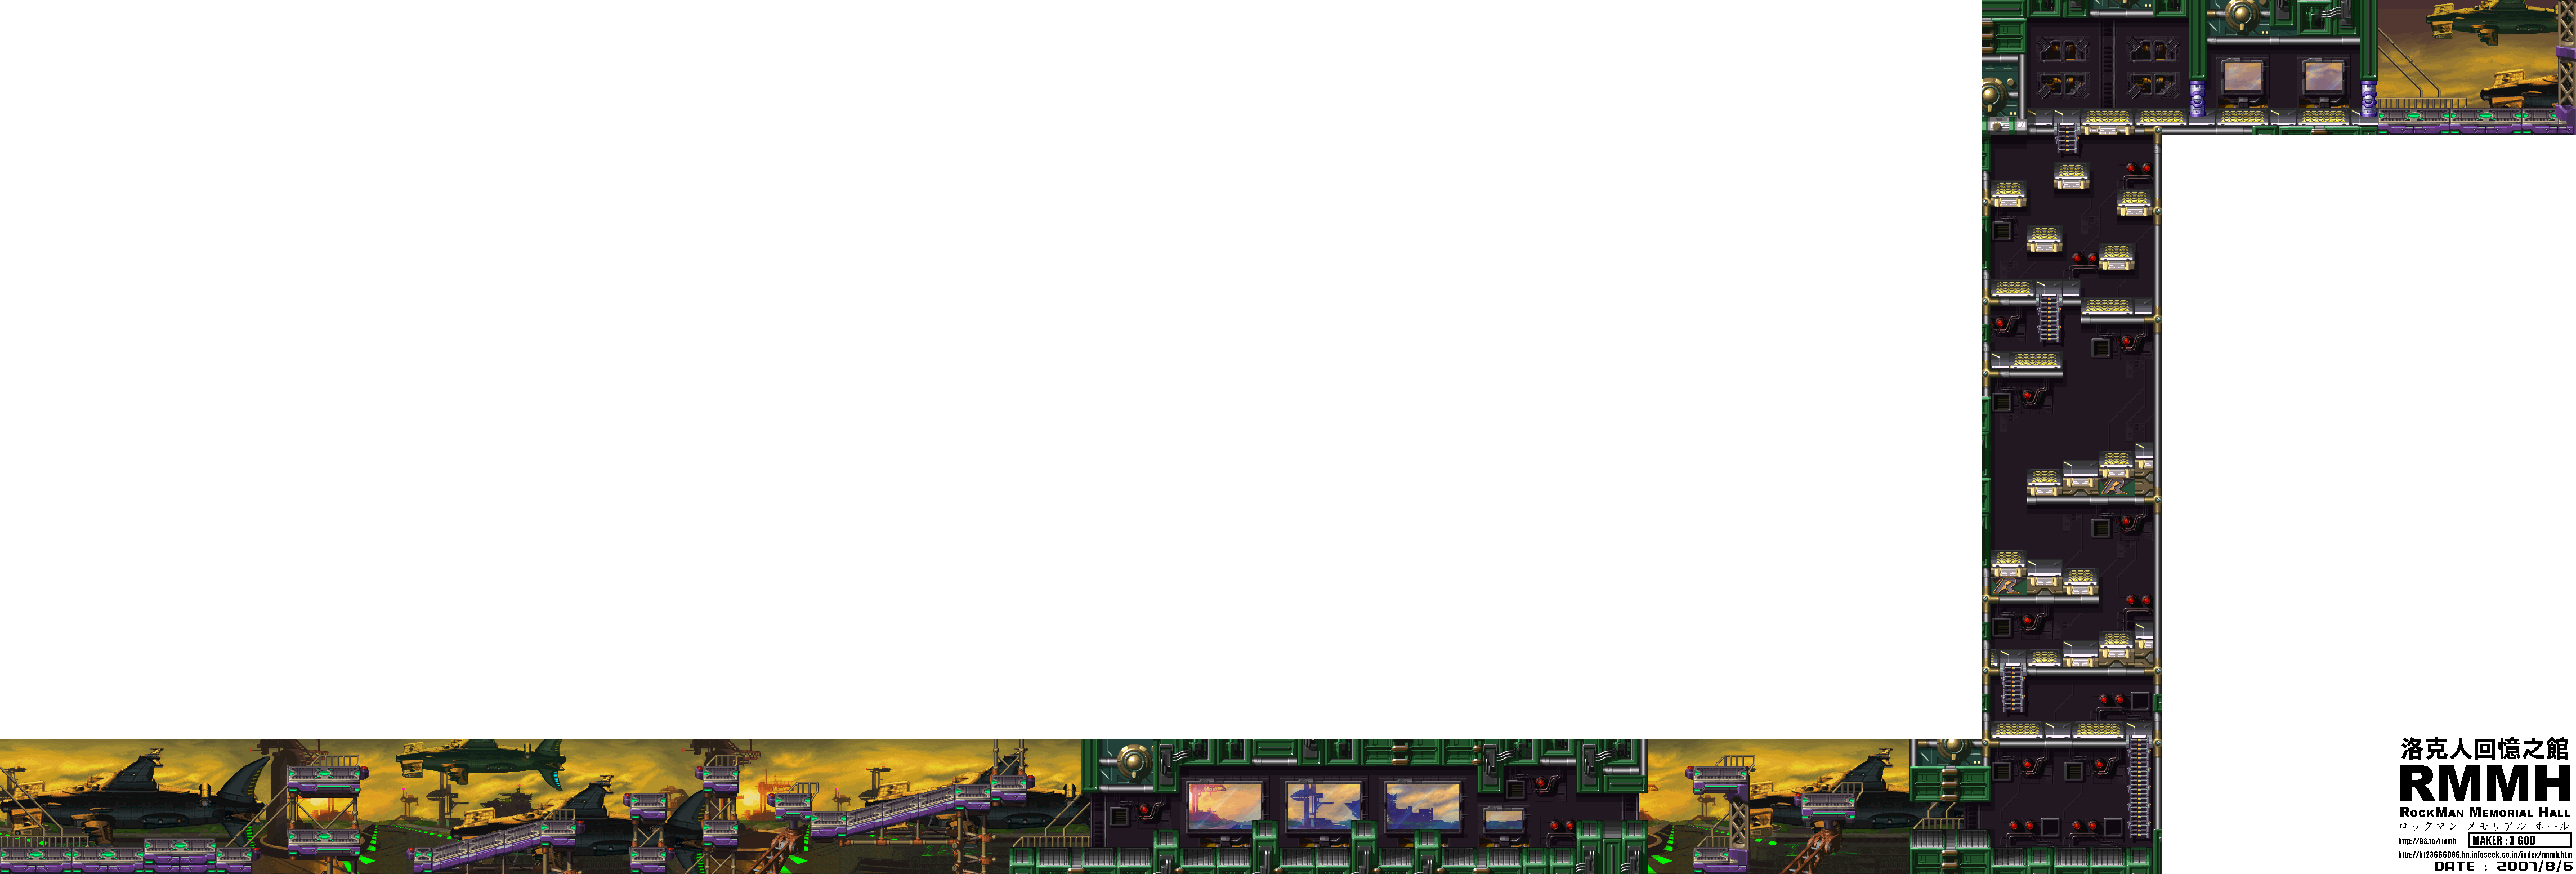
Despite being a short level, you'll be dealing with a whole lot of spiked ball robots and Repliforce soldiers.

At the end, you'll face Colonel...this time for real. He's much faster, and he has a new attack where he sends electricity across the ground that zaps into the sky. Stand near one of the green panels on the floor and jump to avoid both attacks. He also sends a purple wave on the ground, but it's easy to avoid.

Frost Tower will do the most damage on Colonel out of all the special weapons. Drop them from above so you don't have to risk life and limb to hit him. If you stay in the upper-left or upper-right corner and keep dropping them from there, you're set.

When you beat Colonel, you'll find out the Repliforce is already in space. You'll have to track them down and stop them!

Final Weapon

X takes off for the Repliforce and leaves Double in charge of the ship. This proves to be a mistake, as Double transforms into a much more demonic version of himself and kills a bunch of officers after receiving a command not to let the Maverick Hunters onto the ship.


It won't be long before you meet Double, who transforms and goes on a rampage. Double will fire tons of projectiles and launch attacks, all of which are hard to avoid: flying robots that track you down and fire downwards at you as well as large energy waves and shurikens. He'll also try to attack you with his sword with a dash attack and a wall jump attack. Keep hitting him with Double Cyclone to deal the most damage. You'll definitely need your S-tanks for this one. When you defeat him, you'll find out Double was a spy sent to watch you from the very beginning.

After beating Double, you'll have a choice between one of two paths. The upper path has ton of spikes and superlasers from the Storm Owl stage, while the lower path has a lot of bottomless and tricky jumps to make. Pick your poison.

Regardless of which path you take, you'll reach the same destination every time: the Area 1 boss. This time around, you'll face General.

General will face blue energy shots at you, and will also fire his fists forward. You'll need to wall jump onto the fists and ride them to General, then shoot him in the face with Twin Slasher. Sometimes he'll switch to the other side of the room. If that happens, smack him in the back of the head with Twin Slasher.

General will be heavily damaged, but not out. The weapon shakes, and General tells you that someone else is controlling the Final Weapon. X now has to stop the weapon himself.

Tuesday, August 10, 2021

PrinceWatercress plays Mega Man X4 as Mega Man X - Part 7 of 9


Before we head to the spaceport, we get the last of the collectibles.

Airport

When you see the spiked walls leading up shortly after the beginning of Area 2., use the Lightning Web to find the Arm upgrade. There are two capsules.

The first one gives you the ability to fire four charged blasts at once. It takes a while to charge up to that point, but it can be worth it. 

But if you wall kick off the top of the capsule and go further to the left, you'll find a second one. This one will give you the Plasma shot, which allows you to shoot a plasma ball at enemies. If it connects with an enemy, plasma will be generated and cause additional damage.

Thankfully, you can always go back to this area if you want the other one, and you can change between the two as much as you want. Regardless of which one you get, you'll be able to charge up all of your special weapons just like in the first three games.

Jungle

In Area 2, there are parts of the platforms with thick walls that stop the X Buster cold. If you burn them with Rising Fire, you can get rid of them. One of them will contain a Heart Tank.

As for the charged-up versions of the special weapons:

Lightning Web: shoots out a damaging web that hurts enemies, which only lasts a limited time

Frost Tower: causes multiple giant icicles to come down all over the screen

Soul Body: creates a decoy that you can move and shoot around with for a limited time

Rising Fire: a Dragon Punch

Ground Hunter: shoots a larger projectile

Aiming Laser: shoots a big green laser that zaps anything it touches

Double Cyclone: shoots out two big horizontal projectiles

Twin Slasher: shoots a bunch of larger shots that encompass the screen in the direction you are facing

Volcano

Reach the second area. When you reach the Robot Ride armor, use it to dash jump to the right. There is a wall you can wall jump off of. Just disembark at the height of your jump, then charge up Twin Slasher with your newly-acquired Arm Cannon. You'll get the Armor enhancement, which lets you cut down on damage and accumulate the damage that is reduced from within to power up the invincible Nova Strike. It destroys everything on-screen, and if you use it, you'll have to charge it back up again.

Snow Base

Remember the platform near the end of the snow platform slides you couldn't reach? Equip Lightning Web, then get on the wall under it. Use Lightning Web to get to the platform and get the EX-Tank, which allows you to start where you left off with five lives instead of three. You can also do what I did and use the charged-up Rising Fire followed by the hover.

Monday, August 9, 2021

PrinceWatercress plays Mega Man X4 as Mega Man X - Part 6 of 9


We take on Magma Dragoon and get some much-needed pick-ups in this entry. Next time, we take care of the last bit of collectibles.

Snow Cave

Also, you can go up at the start to find some energy to refill your Sub-Tanks with. You'll also find an extra life. Keep exiting and re-entering the level to get your fill of extra energy and lives! You can also use Lightning Web to make your way further to the right to get even more stuff you can use to refill the tanks.

Also, the Escape Unit is active when you are in a level where you've already beaten the Maverick. Just select "Escape" and press X. 

Cyber Space

With the Soul Body, you can get rid of the yellow spheres that get in your way more quickly.

Also, I finally get the Heart Tank and the helmet upgrade. As mentioned earlier, this upgrade reduces the amount of special weapon energy you use when you fire a special weapon down to near zero. What this means is that if you fire the normal versions of your special weapons, you won't use energy. Charging up the special weapons with an arm upgrade will still consume energy, however.

Volcano


The spiked balls will bounce towards you, but if you can position yourself and time your movements carefully, you can walk under them.

Volcanic rocks will go up and down the bottomless pits soon after the start, so don't cocky and simply dash jump over every single one. You might get smacked by one of those rocks for your impatience.

If an energy pick-up is laying on its side, it's a small pick-up. If it's upright, it's a large one.

The bats will drop bombs, and the Mettaurs just move towards you. There are craters which spew volcanic lava out, which damages to the touch.

The squid robots have three cannons and will fire missiles at you. Fire a fully-charged X-Buster shot at it, then lay waste to it with regular shots. They always fire missiles high, low, both, and then repeat, so be prepared to jump over some missiles if you're not quick enough at destroying them.

Near the end of the first section, watch out for the rolling rocks. They drop down at the top of the slope and then go down the slope, and it can be tough to jump over them as they can sometimes comes down in pairs.

Shoot the wall to get to the second section.


If you're low on health at the end of one area, you'll be completely refilled at the next one.

In the second section, you'll have to dash jump from one platform to the next. You'll be dealing with the volcanic rocks shooting up and down the screen again, and some of them will destroy the platforms after enough of these rocks hit them, so you'll want to be a little quicker when you see that happening.

The Reploids in the Robot Ride armors will slash at you if you get close enough to them.

After the first Robot Ride enemy, dash jump off the left edge to get a Heart Tank and increase your maximum health.

At this point, you'll see volcanic rocks coming down from above like meteors. Keep an eye out while progressing.

When you make it to the lava, you'll find a free Robot Ride armor. You can use this to destroy any volcanic rocks and to traverse the lava, which is really awesome. The Robot Ride has an overhead slash attack as opposed to previous games, and despite being something to get used to, it's pretty efficient. You can even use it to take a lower path and go straight to Magma Dragoon. You'll find out he was the one to let the Sky Lagoon fall, making it official that he's gone Maverick.

He's pretty easy to take on with the Robot Ride armor. Just pound away at him with it, since you'll have a lot of health on it to withstand more than enough punishment while whittling Magma Dragoon's health bar down. If you lose the Robot Ride armor, just blast him with fully-charged X-Buster shots.

Magma Dragoon will leap around the room, landing either at the center or one of the sides. He has a diving jump kick and will also shoot Street Fighter-esque Hadokens at you: one high and one low. He also has a Shoryuken, a flame thrower attack that covers the whole platform and can also be shot into the air, but more often than not, he'll be hitting you with Hadokens.

If you have Storm Owl's Double Cyclone, use it on him. It does the most damage. When it connects, Magma Dragoon will leap to the other side of the room, so follow him and hit him with it again. He'll keep leaping to the opposite end of the platform over and over.

When you beat Magma Dragoon, you'll find out someone goaded him into joining Repliforce and fighting Mega Man X. But who?

Beating Magma Dragoon with X will give you Rising Fire. It shoots fire vertically, affecting airborne enemies. It can also burn certain objects as well.

Snow Cave

Now that we have Rising Fire, we can melt the giant ice block in the ceiling shortly after the start to get the Heart Tank here.

Sunday, August 8, 2021

PrinceWatercress plays Mega Man X4 as Mega Man X - Part 5 of 9


In this entry, we try - and fail - to get all the secrets in Cyber Peacock's stage as we take down the game's two resident bird Mavericks.

Cyber Space


Unlike other stages, this whole stage is a race against time. You'll have to get from the start of one section to the end. The faster you are, the better your letter grade. The highest is S, and that's the one you want to gun for. If you're ever told to hurry up, you'll lose a letter grade for every time the game does so. If you score any lower than an A rank, you'll have to re-do the section.

The triangles will fly at you if you leave them on the screen long enough. You can destroy them with the X Buster or Twin Slasher.

If you can get S rank on the first obstacle course, you'll get a Heart Tank. If you get S on the second, you'll get a Sub-Tank.

Getting S on the third will give you the Head upgrade capsule. This reduces the amount of special weapon energy you use when you fire a special weapon down to near zero.

You'll want to avoid touching the yellow energy balls, since all they'll do is slow you down for about four seconds. Use Soul Body to mow them down before they can touch you.


You've got one more section to go. Hit the buttons to turn the room upside down, causing the balls that are in your path to drop down and out of your way. They'll roll down slopes, too.

After this last section, you'll take on Cyber Peacock. Like Split Mushroom, he pledges allegiance to Sigma and not the Repliforce. Equip Soul Body and use it on him whenever he shows up. He'll disappear and re-appear somewhere else in the room. Stay on the move so that he doesn't teleport right where you're standing.

If you don't have Soul Body, be prepared to dodge the feathers that Cyber Peacock shoots at you.

Beating Cyber Peacock as X gives you Aiming Laser. This lets you aim at enemies and shoot at them from anywhere on the screen.

Air Force


There will be blue and white ships that will fire missiles at you. You can use them as platforms, but there will be instances where you'll have to get rid of them to free up the path through the stage.

The blue Robot Ride armor has the ability to hover. Just jump and hold the button in mid-air to get some extra length into your jump. You'll also be able to fire at enemies with the attached laser cannon. Charge the gun for a three-way shot!

The small cannons on legs will follow you around and even jump around once they reach you.

Shortly after you reach the first big ship you can walk on, you'll see a superlaser positioned above two purple ships. Get on top of it and get the Heart Tank before the ships are demolished! (You're better off not riding the Robot Ride Armor to get to this one, as you'll need to be fast to get this.)


The second area is shorter and mercifully easier.

Use fully-charged X-Buster shots to destroy the green laser turrets.

In the next room, you'll deal with a wall cannon. Use fully charged shots to destroy it, and take care of the smaller green cannons if you need to. You can only damage the wall cannon when the eye is open.

To beat Storm Owl, equip the Aiming Laser. Use Up and Down to aim the square on the aiming dial in front of X. Get close to Storm Owl, and move the square on him. You'll catch him in some sort of green tractor beam. Fire the Aiming Laser. That's all there is to it. He'll fly away, but he'll quickly return. Just keep doing this whenever he reappears and he's done.

His Double Cyclone projectiles will home in on your current position after he shoots off five of them.

Beating Storm Owl with X gives you the Double Cyclone. This fires two energy shots to the left and right that are really useful against airborne enemies.

Saturday, August 7, 2021

PrinceWatercress plays Mega Man X4 as Mega Man X - Part 4 of 9


In this entry, we fight Colonel in the Memorial Hall, then we find out that a certain someone is part of this struggle with the Repliforce and doesn't want us to win.


Wait for Colonel to stop blocking with his sword, then shoot at him as he launches three waves at you. It's always in a high-low-high pattern, but you can jump over all three of them. He'll disappear, then re-appear in front of you and slash his sword at you, so be ready to jump away from him when he shows up again. He'll then back away and shoot the waves at you again. Thankfully, that's all there is to his attack.

Once you do enough damage, you'll beat him, but you'll have to meet him again.

Split Mushroom


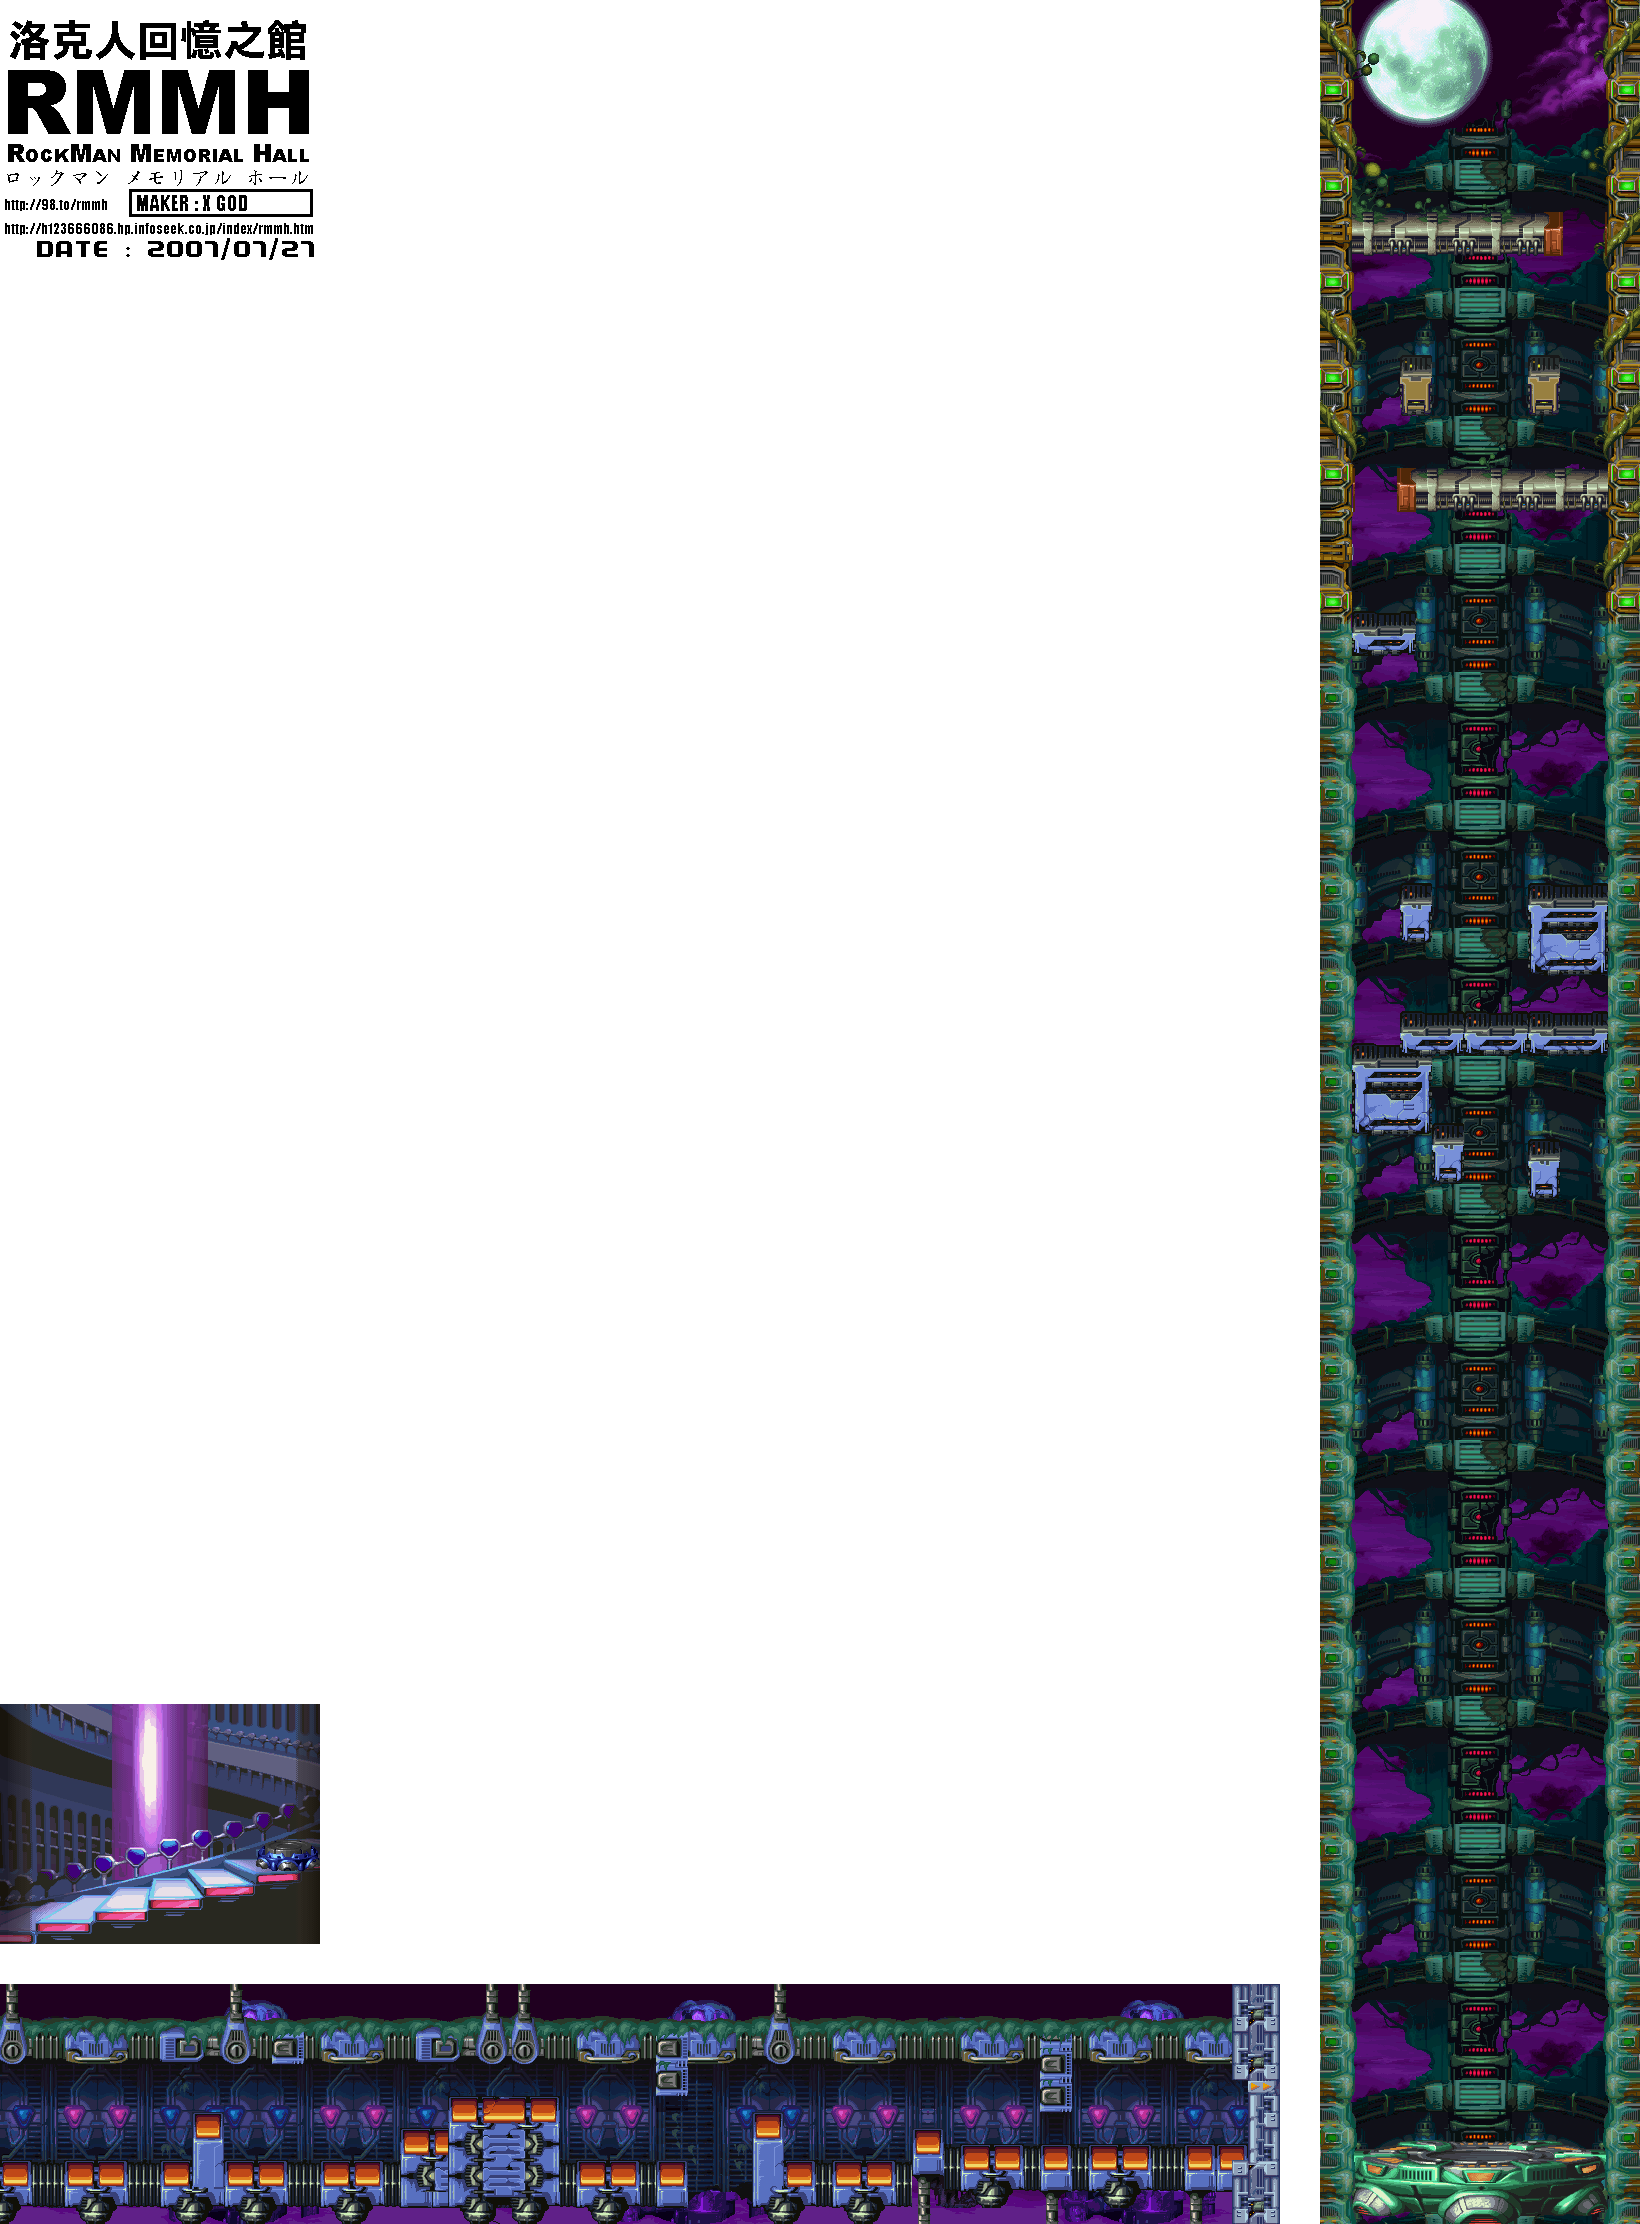
You start at an endless flight of stairs. You'll want to go up the stairs quickly to avoid the indestructible spiked shield robot that chases after you. Shoot down the flying robots when they raise their shields. You'll eventually come across a teleporter. Step onto it. 

In the second section, you'll meet some flying enemies that look like small fish. These guys will fly towards you, hit you, then fly away. Keep your X-Buster charged.

The flower robots are just weak turrets, while the ladybug robots slowly fly back and forth. If they move off of a ledge, they'll gently fly straight down.

The black spiked robots will crash into each other in an attempt to crush you. At least they can't kill you, but nevertheless, make your move as they're separating.

Watch out for the thorns on the walls. They count as insta-kill spikes.

The mini-boss for the first area is a purple bug robot. Charge up your X-Buster, and watch out when he stops for a brief second and activates its spikes. Every time he does this, he'll rise up and destroy the platform you're standing on, so move away, hit him with a fully-charged X-Buster shot and deal as much damage as you can before he drops back down. He'll stay up at your level for a few seconds, so before he drops back down for another platform to claim.

Once you've destroyed the mini-boss, the spikes below will disappear and you'll be able to head to Area 2.


You'll go up another stairway full of flying cannons and spiked bouncy balls...and of course, that stupid shield robot that follows you. Get on the teleporter.

The second section of the second area has the Heart Tank. The black spiked robots are back, and they're destroying the segments of the hallway you start in. One of them will succeed at the very beginning of the section. You'll want to get on the ceiling as that segment drops down, then wall jump up to the Heart Tank. You have only one shot to get this Heart Tank, and if you fail, you'll have to lose a life or play through the entire level again to get back over there.

You'll then take an elevator. Shoot down the blue robot flowers that spit bombs at you, as well as anything else that gets in your way. There will also be blue platforms that will get in your way. They will be crushed whenever the elevator runs into them, so in case you're seemingly trapped, you'll still be able to reposition yourself if you're quick. Some of the flowers will pop out, but not bloom. They won't do anything except be in the path of the elevator, so just stay away from them.

When you meet Split Mushroom, you'll find out that he's under orders to destroy you. Unlike the other Mavericks, which have a Repliforce logo below their energy meter, he's got the Sigma logo. There's your wild guess.

When Split Mushroom latches onto the wall, immediately hit him with the Lightning Web. He'll leap to the other wall, giving you free reign to repeatedly tag him with it. He can send out clones to attack you if you give him enough time, but the Lightning Web puts a stop to all that.

Beating Split Mushroom with X gives you Soul Body. This allows you to create a rainbow-colored clone of yourself, and if enemies are struck by the clone, they'll take damage. It wears out after six seconds or heavy damage.

Friday, August 6, 2021

PrinceWatercress plays Mega Man X4 as Mega Man X - Part 3 of 9


In this entry, we take on Slash Beast and Web Spider, then forget that midway stages are a thing.

Military Train


You'll be destroying crates and shooting Mettaurs at the beginning. When you reach the first car coupling, a soldier will bomb it. Quickly dash jump to the next car! You'll be doing this a couple of times.

The turrets will shoot lasers. When they charge up, stay away and low enough so that the lasers go right over your head.

Be sure to watch out for the bats that drop bombs, too. Take them out with fully charged Buster shots whenever possible. It should be mentioned that these bats are the Armored Armadillo bats from X1.

The mini-boss is a purple car with three spikes. Shoot at the middle spike first, then go for the top and then the bottom (you can also do the bottom second and then the top). The spikes will still stab at you, but that's all they'll do. Once you've destroyed all three, you'll enter the tunnel leading to the second area.


You'll be taking on a lot of Robot Ride soldiers here. You'll also find a Robot Ride armor that you can ride. Get in it and destroy the brown train cars. One of them contains a Heart Tank. The Heart Tank will be on top of a car, but if you destroy it, the Heart Tank will drop down, but you'll still be able to grab it.

The blue boxes with the lion head on them can only be destroyed with the Robot Ride armor.

When you reach the head car, the train will stop. Go to the next train, avoiding the bottomless pits as you go.

When you reach the long platform on the second car, you'll face Slash Beast. Hit him with the Ground Hunter. He'll charge at you, so jump over him. When he reaches the other side of the platform, hit him with it again.

Beating Slash Beast as X will give you the Twin Slasher. It fires in two directions and can be used to take out enemies from a distance.

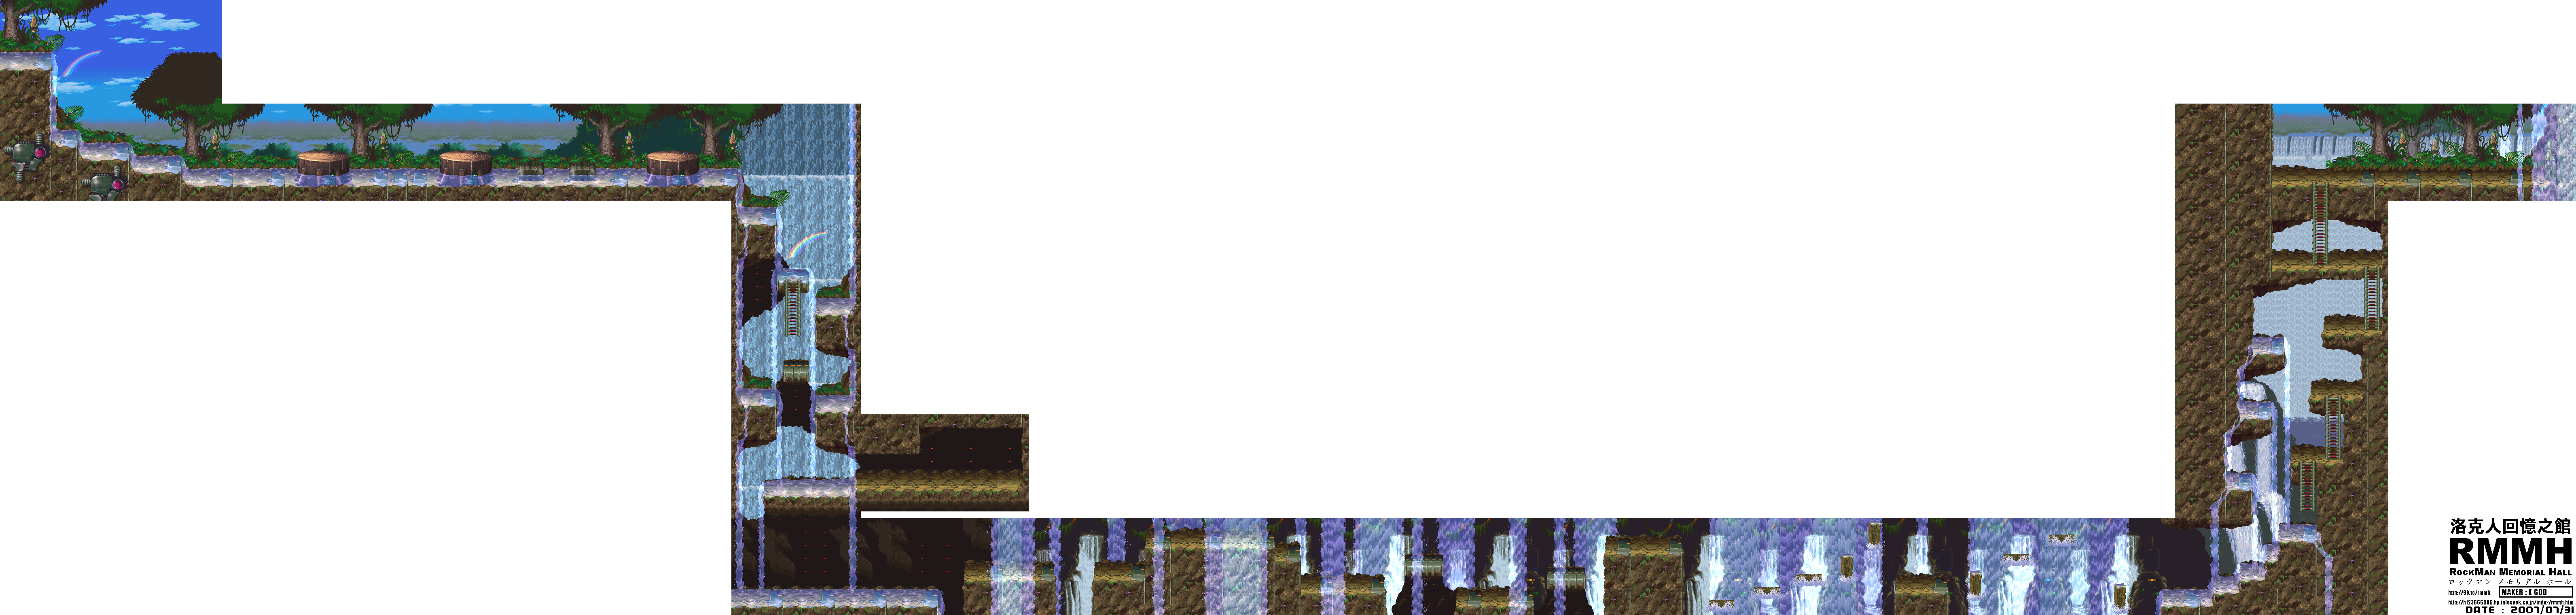
Jungle


The fish robots as well as the robot fish men want you dead. The fish leap up and come at you, while the mermen will shoot spikes out of their backs.

The spinning spiked robot can be destroyed with the Ground Hunter.

When you reach the waterfall, you'll see some wall-walking robots. They shoot singular shots and they're painfully slow.

Shortly after you start going down the waterfall, be ready to head to the right to find a hidden enhancement capsule behind a waterfall. This is the Leg upgrade. Once you get it, press the Jump button twice to hover. You'll be able to float left and right and stay airborne for a few seconds.

Watch out for the fish enemies that pop out of the pits; they'll come at you fast. The fish man robots will shoot projectiles at you, so have charged X-Buster shots ready.

The logs on the waterfalls act as platforms. The vertically-oriented logs go faster when you stand on them.

Once you reach the door, shoot it down to enter the next area.


You'll meet some new enemies here: worms and spiders. Worms move back and forth, while the spiders will shoot an electric web in one of two directions, repositioning themselves every so often to attempt to block your path.

The wasps are back, and this time you'll see their nests. Charge up the X-Buster to destroy the hornets and their nests in one blow.

After you drop down, equip Rising Fire and attack the all-wood portions of the trees. One of them will contain a Heart Tank. (We don't have this yet, unfortunately, so keep note of this for now.)

To beat Web Spider, avoid the webs that he throws. Equip the Twin Slasher and attack the web strand he hangs off of. This will cut it. Keep doing this for a while until he makes a series of webs after reaching half health. When he makes a series of webs and starts sending smaller spiders at you, keep hitting him with Twin Buster.

Beating Web Spider with X will give you the Lightning Web. This shoots an electric web forward. Besides attacking enemies, you can use it as a temporarily wall that you can wall jump off of, allowing you to reach things you couldn't normally get to.

Memorial Hall

When you defeat four Mavericks, you'll face The Colonel after getting a message from him at Maverick Hunter HQ telling you to meet him at the Memorial Hall.

Thursday, August 5, 2021

PrinceWatercress plays Mega Man X4 as Mega Man X - Part 2 of 9


The real gameplay begins! We start off by taking down Frost Walrus and Jet Stingray will grabbing a bunch of pick-ups that will help us survive later on.

Snow Base


You'll see Blizzard Buffalo's frozen, battered body at the start of the stage. Blizzard Buffalo was in the third game.

The white gorilla robot will try to attack you with snow. Stay a good distance away when you shoot at him.

Shoot down the ice block above you shortly after the start with Rising Fire to get a Heart Tank. (We don't have this yet, but when we do...)

The snowman robots will try to dive at you when you're close enough to them.

The snow platforms will break when you wall-jump onto them or land on them. You'll have to wait a few seconds for them to reset. Some of the larger ones will be situated above spikes and will have snowboarding robots that will get in your way with their extreme sports escapades. Shoot them down with a charged shot.

The upper-right corner of the stage has an item that we can't get to quite yet...

Near the end, you'll be seeing ice platforms rising from a bottomless pit. Yes, there's a bottomless pit, so you want to make sure you have something to land on as you drop towards the door to the mini-boss.

The mini-boss here is a sphere-shaped robot that encases itself in ice and becomes a three-pronged ice claw. Shoot it in its red center, then dash under it as it flies around in a sine wave pattern. When it takes enough damage, it balls up, jumps through the ceiling and comes down on the floor hard, causing some of the icicles on the ceiling to fall down. It will also try to dash at you, trying to catch you and put you in a vice-grip, so you'll want to wall-jump over it when it does that.

At half-health, the mini-boss turns into a large ice crystal and bounces around the room at 45-degree angles, shooting diagonal ice crystal spikes every so often.

Throughout the battle, you'll want to use Rising Fire (if you have it) as it will do more damage than the X-Buster. Just wait for it to be above you and let loose. Otherwise, fire off nothing but fully-charged X-Buster shots.


Whenever you enter a new area, your health and weapon energy will be refilled. Keep this in mind as you progress through the game.

There are ice blocks to shoot down here. Some will contain Mettaurs and miniature flying enemies that fly back and forth and shoot at you, while others will contain bombs that take out whatever is above and below it.

There is also a whole field of ice blocks, and the upper-right most one contains the W-Tank of the game. This will collect weapon energy if all of your special weapons are full.

The ice birds will try to freeze the entire screen, and you'll want to destroy them as soon as possible. If they do freeze the screen, watch out for the icicles that are produced, as they will fall and cause damage. If any enemies are on the screen at the time, they'll be frozen.

To beat Frost Walrus, equip Rising Fire and fire it when you're right under his arm. This assumes you have it. If you don't, fire at him from a distance with nothing from fully-charged shots from the X Buster, 

When Frost Walrus slides forward, do a dashing wall jump over him as he will not stop until he hits the wall.

Frost Walrus' freeze breath will create an icicle that he will shoot at you. Thankfully, it's very easy to take out, but if you can't get near where it lands so the six smaller icicles it splits into won't hit you.

Beating Frost Walrus as X will give you Frost Tower. It creates a huge ice block that acts as a shield, but it can also trap enemies if they're caught in the arctic chill while you create it.

Jet Stingray


Believe it or not, Area 1 and Area 2 maps are the same area.

You'll be on a jet-bike here. Keep on firing so you can take out any enemies when necessary. If you go up or down a slope, the projectiles will tilt upwards or downwards accordingly. Be ready to jump over pits.

Watch out for the bombs. If you run into them, you're going to take damage.

There are tons of ways to die, and you won't be able to heal yourself, so bring plenty of lives.

Halfway through this part, you'll see an upper path and a lower path. Jump and juke around so that you land on the lower path and get the Heart Tank.

Press the Dash button (Circle) while in the air to stay airborne a little longer.

The bridges explode when you take them. Shoot down the walls to get them out of your way.


Now for the second area.

You'll be outside and in the water, Shoot down all the jet bikers as well as any bombs that are in your way. Be ready to jump through gaps in the walls so you don't get crushed by the screen scrolling.

As you take to the water, you'll meet Jet Stingray. For the first time, you meet the stage boss before the end. Avoid or shoot down the miniature stingrays that he shoots at you.

Near the end, Jet Stingray will lower himself to the lower-left and attack you from behind with stingrays that skim the water. Stay away from him and the projectiles, and be ready to jump to a platform, then jump again and dash. You'll get a Sub-Tank if you can pull it off. Once you've seen three yellow boxes (a single box followed by a pair of them), you'll know when to gun it for the Sub-Tank.

Unlike the previous three games, you only get two Sub-Tanks and one W-Tank...so be careful.

Sadly, you won't be able to damage Jet Stingray until you take him on for real. (Sorry.) You'll be able to heal yourself fully before taking on Jet Stingray, so take the opportunity to do so after the hardest Maverick level in the game.

Jump up and get close to Jet Stingray and use Frost Tower. You'll freeze him if the chilling crystal touches him. When he jumps up after breaking out of the ice, be ready to jump up and hit him with it again. If you can keep the rhythm going, you can beat Jet Stingray without him landing a single attack. (This isn't the only aquatic enemy that this happened with in the series. Toxic Seahorse fell the same way with Frost Shield in the third game.)

Jet Stingray will dive at you, fly up and down the screen and also shoot Ground Hunter at you if you let him...but he's so easy to beat with Frost Tower if you know what to do.

If you have trouble beating Jet Stingray, wall jump up to the upper-left corner of the room and stay there. Jet Stingray will slowly drop down from there every single time, and if you hit him in the feet as he descends, you'll be able to freeze him. You can repeat this until he goes down.

Beating Jet Stingray with X gives you Ground Hunter. It's the miniature stingrays you've seen Jet Stingray shoot at you. They move across the ground and is effective against enemies on walls and floors. Press Down while the Stingrays are on the screen to command them to fall.

Wednesday, August 4, 2021

PrinceWatercress plays Mega Man X4 as Mega Man X - Part 1 of 9


Finally! About time I played this game! This one is about as good as the Super NES game and is perhaps the last good game in the X series.


Unlike the last game, which lets you switch between X and Zero, X4 has you choosing one and forcing you to stick with that character for the entire game.

The game begins with a cloaked figure talking to a rather large Reploid, telling him to unleash the Repliforce on the Maverick Hunters and destroy them, lest the Reploids suffer under the watchful eye of the Hunters. The Reploid refuses, but the cloaked figure tells him he'll be sorry.

At Hunter H.Q., an alarm is called for a Maverick sighting. They have taken over the Sky Lagoon with the most advanced weaponry available. The army appears to be that of the Repliforce. X heads down there without delay.

Sky Lagoon


The roly-poly robots will throw grenades at you and shoot at you with guns, while the bulldozer enemies with the spikes will try to run into you. The ball robots walk towards you, while the dragonfly robots fly around.

Shoot down the doors that block your path. Do it quickly so the giant dragon robot in the background doesn't destroy you.

When you reach the reactor, you'll meet Magma Dragoon. He'll tell you that a Maverick destroyed the power reactor. As a result, the Sky Lagoon is about to come crashing down. Magma Dragoon escapes. and X has no choice but to head to the city below and get everyone out.


When you reach the city, you'll find out it's already been destroyed.

Wall-hanging robots will come out of the walls, blocking your path at times, and walls will drop down as you head to the right. Sometimes parts of the floor will rise up. If there are any cracked rock walls, destroy them with the X-Buster.

Near the end, the floor will collapse on you. You'll find full health (red canister with yellow core inside) and an extra life (X's helmet). You'll want to get back up to solid ground with the wall kick before you get crushed by the wall to your left. The weapons pick-ups are blue balls with two horizontal lines, for future reference. Unlike previous games, the weapon and health pick-ups come in three sizes: small, medium and large. Small gives you a small amount, medium refills one-fourth of the respective meter and large is a complete refill.

Once you avoid being crushed to death, you'll soon take on that giant dragon boss from earlier. This dragon has two attacks: firing energy balls from its mouth as well as a flamethrower-style energy ball flurry that hits only if you're close to it. Keep charging up the X-Buster and fire fully-charged shots at its body. That's all you have to do.

Once you beat the intro stage boss, you'll meet Colonel, the Colonel of the Repliforce. He's only here to save his sister and that the army responsible for all the carnage is not part of the Repliforce. X wants him to come to Maverick HQ quietly, but Colonel refuses to lay down his arms, saying the only time the Repliforce will drop their weapons is if they cannot fight any longer. Colonel then teleports away after telling X to deem the Repliforce Mavericks if they wish, leaving the situation even more tense than before.

The large yellow Reploid from the introductory cutscene (identified in the following cutscene as General, the General of the Repliforce) soon tells his soldiers through the media that it is now time to create their own utopia for all Reploids and usher in a new golden age to advanced civil rights and liberties for Reploid-kind, also saying that this is not about insurrection or rebellion against their human creators. Meanwhile, the hooded figure laughs...

After the post-intro cutscene, you'll enter the stage select screen. You'll meet Double, the rookie hunter. He's jumped ship from the Repliforce after their coup. Also, X calls him Colonel due to a game mistranslation.

You'll then get acquainted with the eight Maverick stages and their missions, which have no bearing on the game whatsoever other than creating a reason as to why you're going there:

Jungle: Infiltrate enemy-occupied jungle and destroy the weapon under construction. (Web Spider)

Cyber Space: A bug has corrupted the network. Dive into cyberspace and exterminate it. (Cyber Peacock)

Air Force: The Repliforce ship has taken off. Pursue and blast it out of the air. (Storm Owl)

Volcano: Dragoon of the 14th unit is a traitor. Locate and bring him back to Hunter HQ. (Magma Dragoon)

Marine Base: Repliforce decimated the city and left. Pursue them aboard a Land Chaser. (Jet Stingray)

Bio Lab: The abandoned lab is now operational. Investigate and destroy the lab. (Split Mushroom)

Military Train: A military train is moving supplies. Cut off Repliforce's supply route. (Slash Beast)

Snow Base: We've discovered a hidden snow base. Halt production of their new weapon. (Frost Walrus)

Sunday, October 22, 2017

Megaman X4 100% (Zero) No Damage Completion Run


We've seen the one for X, now it's time to see the one for Zero.

ClementJ64 plays Mega Man X4 as Zero - Part 8 of 8


Here it is! The stunning conclusion to Mega Man X4 as Zero!

When you beat Sigma's third form, you'll be able to head through the foor on the right. Head to the right, and you'll meet General. He sacrifices himself to stop the weapon and fall with his now-destroyed comrades. Zero escapes and mourns for all that he has lost.

...and that's it! The game has ended, but both endings are far from rosy and everything regardless of who you play as, and there are more questions than answers...

Saturday, October 21, 2017

ClementJ64 plays Mega Man X4 as Zero - Part 7 of 8


We've finally met Sigma again. Now let's take him out and go home.

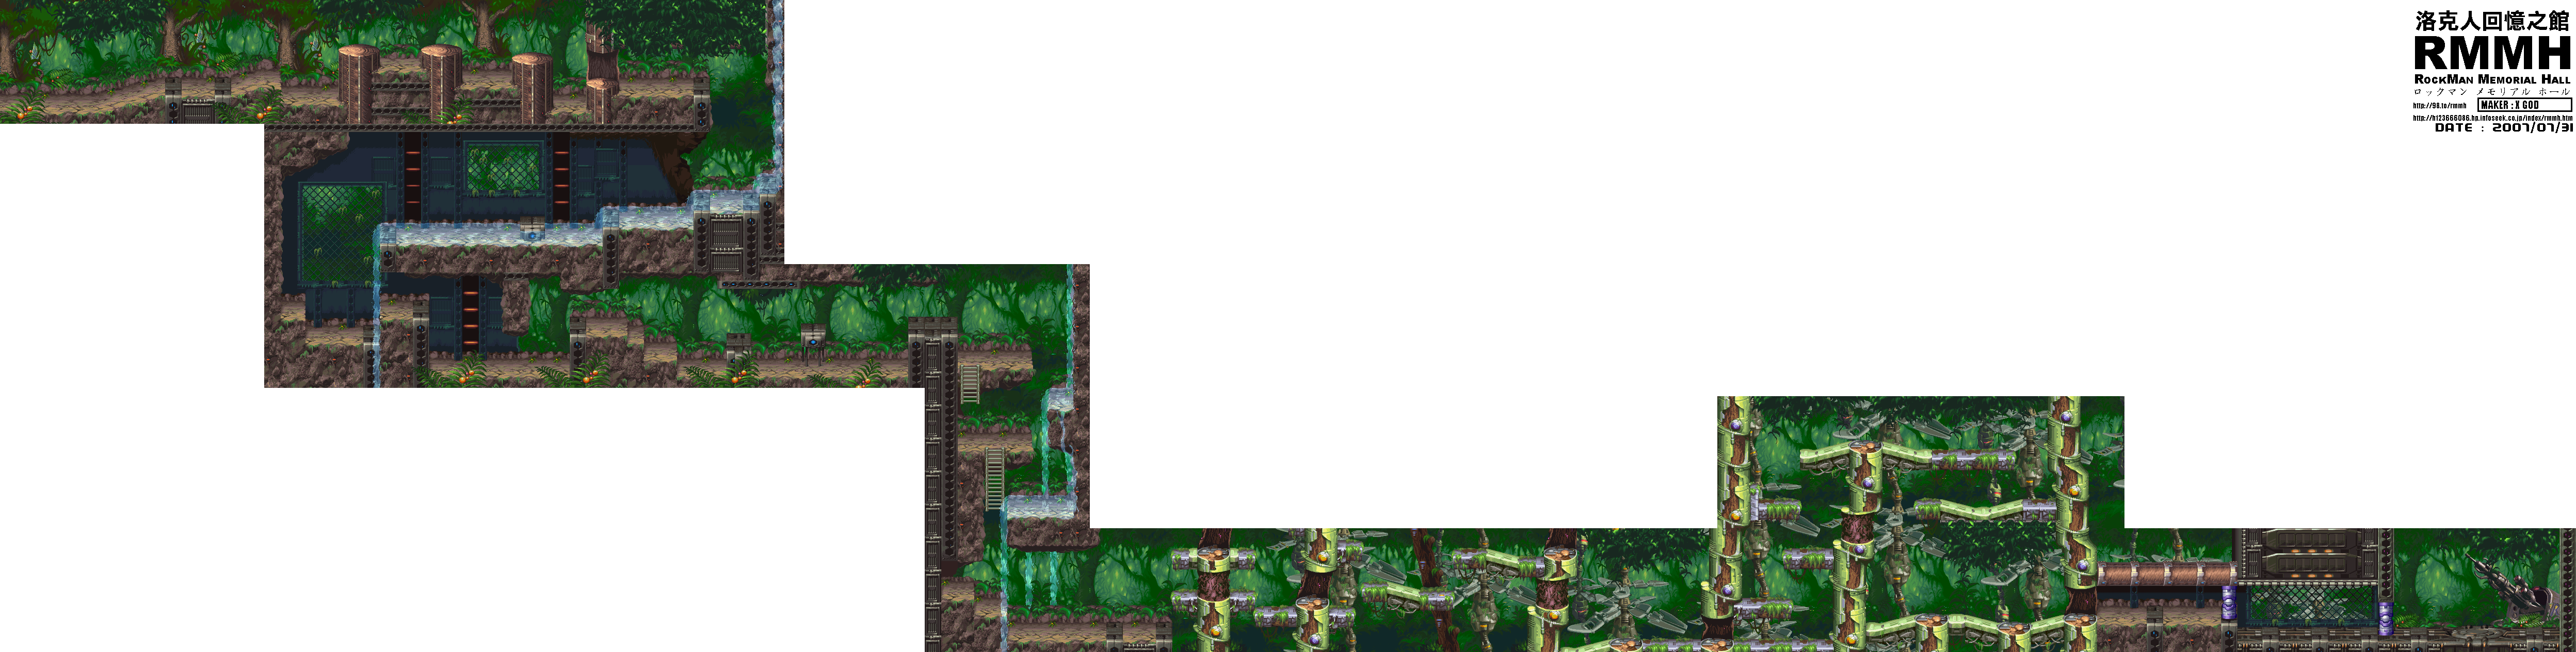
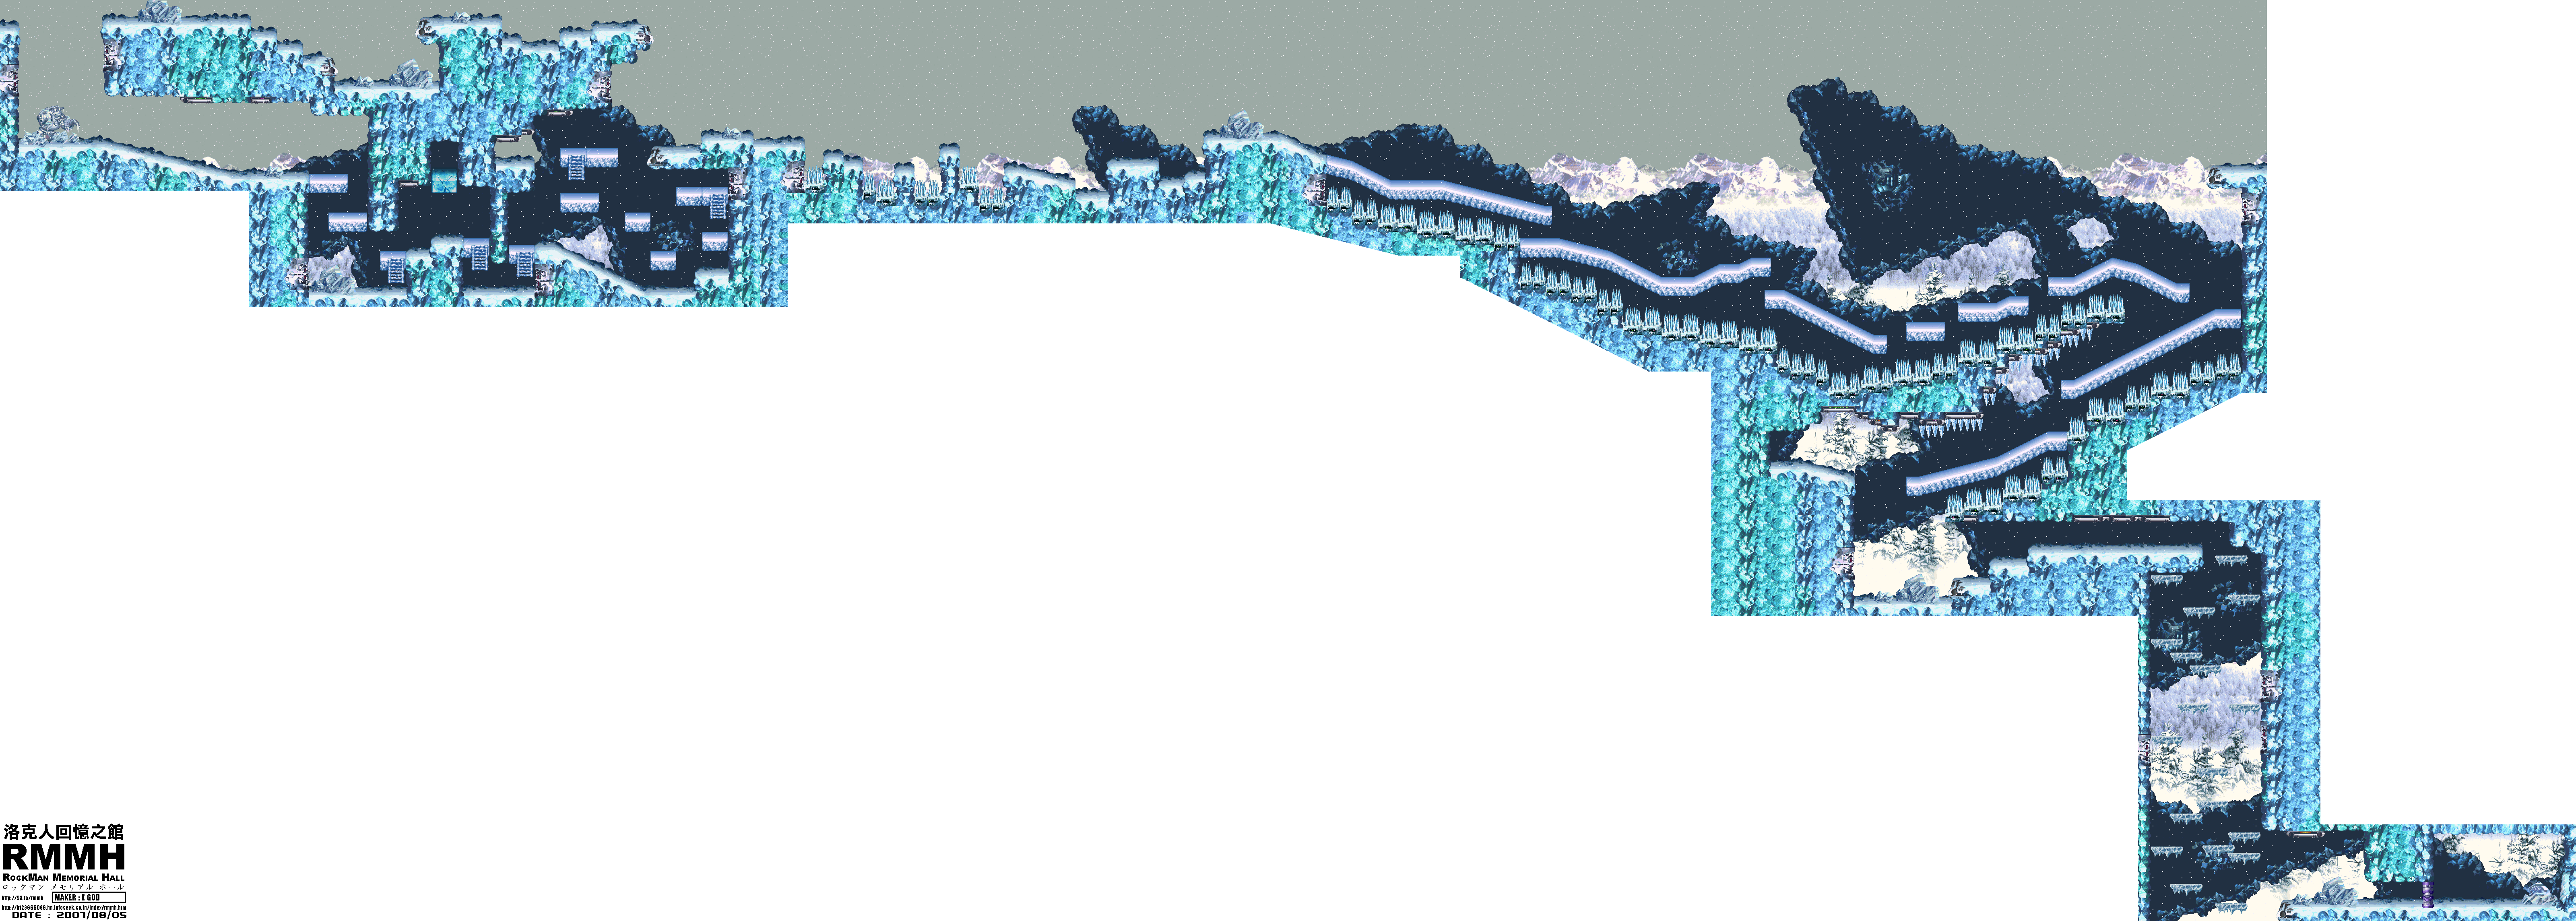
All maps by X GOD.

Once you beat all eight Mavericks, enter the gold teleporter in the center and keep going right. You'll meet the hooded figure responsible for all this mess.

It was Sigma all along...and he's still alive. Apparently Dr. Doppler's efforts from the last game were in vain. Sigma shows up, gloating how his plan of pitting Repliforce and the Maverick Hunters was a stunning success and that he's finally able to pit the weapon the Repliforce used against Earth.

When you play as Zero, you get a cutscene that reveals some interesting backstory.

Sigma tells you that he was once leader of the Maverick Hunters...but then he fought Zero. Zero was originally Maverick until he fought Sigma. During their fierce battle, Sigma lost his arm and was cornered, until a bright white "W" appeared on the blue jewel on his forehead, causing Zero to freak out and Sigma to finally beat him. Sigma walks away victorious, but commands his officers to take him to Dr. Cain to have him studied.

The first form is the hooded figure with the scythe. Use Ryuenjin against him. Use it while you're under him to destroy half of his health. He'll try to rush at you with the scythe if you give him time, but you can simply dash under it.

The second form is Sigma without the cloak. He'll throw the scythe in a circular motion in front of him. If the scythe hits a wall, energy will surge across the wall. He'll then jump to the end of the room opposite the scythe and shoot out eye lasers. Dash to the wall opposite Sigma and wall jump upwards.

Dash to the other side of the room to avoid the first throw. You want to jump before Sigma throws the scythe for the second throw so that it's guaranteed to hit the wall. Otherwise, the scythe will pierce the floor and the energy will surge across it, leaving you pinned to the wall.

Hit him with Raijingeki when he lands on the ground to do the most damage. Otherwise, use Ryuenjin and your somersault slash when he's in the air.

You think you're done yet? After beating the second form, you'll drop down into a room underneath where you just fought. Sigma has a third form this time around, and it's pretty complex compared to the other two. Be sure to pick up the energy capsule you land next to when the fight begins.

The three heads that show up are red, blue and yellow and have fire, ice and lightning attacks respectively. The red head will shoot series of four fireballs at you through the room, and you'll have to wall jump off the heads to dodge the first three sets and dash to avoid the fourth. The blue head will shoot an ice breath at you that will freeze you if you're too close. The yellow head will shoot lightning orbs at your current position. Stay on the move, and remember that the electricity will course through the floor upon contact with it.

The heads will fall if you do enough damage to them, believe it or not.

There are two forms of Sigma's body, and you'll have to destroy both of them in order to beat Sigma for a fourth time.

The first is the Sigma face that sometimes appears in the lower-left area of the room. When it opens its mouth to try to blow you into the spiked wall to the right, dash towards the head and attack the mouth with your sword. If he tries to suck you into its mouth, keep dashing away. Sometimes this form will cause boulders to fall down. You'll want to avoid the boulders, obviously. Your somersault slash will do quite a bit of damage here.

The other one is the giant body with Sigma's face on the top of its head that you saw when you dropped down to this room, and it appears on the right side of the room. It will try to shoot you with a gun. You can hit it with the somersault slash a few times before it shoots. Wall jump and wall slide off the heads to avoid the laser. If Sigma says "The end" in this form, immediately get to the left wall and wall jump on it until he stops firing his explosive laser attack at the floor, which will damage you regardless of where you are on the floor.

ClementJ64 plays Mega Man X4 as Zero - Part 6 of 8


It's time to take on the Final Weapon once again!

All maps by X GOD.

When Zero returns to Maverick Hunter HQ, he finds out that Iris has left with the Repliforce into space.

Final Weapon


You'll meet Iris shortly after the beginning. She raises up a dark purple energy ball, which creates a Robot Ride armor suit around her.

Use the somersault slash on the Robot Ride suit. This will cause bombs to come out of the suit and eventually fly at you. You can destroy those with the somersault slash as well. A purple crystal will come out of the mech. Hit it with Ryuenjin.

When Iris charges up her laser cannon, get to the wall immediately, as the crystal will shoot a similar laser upwards. The crystal will follow you around until Iris fires her laser, so you want to stagger your retreat to the wall a little bit.

When you beat Iris, you'll get a cutscene where Iris dies, clinging firmly to the belief of a world where only Reploids exist.

After beating Double, you'll have a choice between one of two paths. The upper path has ton of spikes and superlasers from the Storm Owl stage, while the lower path has a lot of bottomless and tricky jumps to make. Pick your poison.

Regardless of which path you take, you'll reach the same destination every time: the Area 1 boss. This time around, you'll face General.

General will face blue energy shots at you, and will also fire his fists forward. You'll need to wall jump onto the fists and ride them to General, then slash him in the face with the somersault slash. This is much harder, since your attacks are all close-range only. Sometimes he'll switch to the other side of the room. If that happens, smack him in the back of the head with your sword after he stops moving.

General will be heavily damaged, but not out. The weapon shakes, and General tells you that someone else is controlling the Final Weapon. X now has to stop the weapon himself.


Now it's time for the boss rush.

The left side of the teleporter room, from top to bottom is Web Spider, Cyber Peacock, Jet Stingray and Split Mushroom. The right side, from top to bottom, is Magma Dragoon, Storm Owl, Frost Walrus and Slash Beast. Same strategies apply.

Friday, October 20, 2017

ClementJ64 plays Mega Man X4 as Zero - Part 5 of 8


In which we beat all the Mavericks and we find out Clement is robosexual.

All maps by X GOD.

After this last section, you'll take on Cyber Peacock. Like Split Mushroom, he pledges allegience to Sigma and not the Repliforce. Stay on the move and use Ryuenjin on him to stop all of his attacks, causing him to teleport in and out of the room, usually coming back in on top of your current locaiton.

If you don't Ryuenjin, be prepared to dodge the feathers that Cyber Peacock shoots at you as well as his dive attacks..

Beating Cyber Peacock gives you Rakuhouha. Using this attack clears out all enemies currently on the screen, and unlike X's Nova Strike, you can use this up to five times. You'll have to collect weapon pick-ups to refill it, though.

Air Force


There will be blue and white ships that will fire missiles at you. You can use them as platforms, but there will be instances where you'll have to get rid of them to free up the path through the stage.

The blue Robot Ride armor has the ability to hover. Just jump and hold the button in mid-air to get some extra length into your jump. You'll also be able to fire at enemies with the attached laser cannon. Charge the gun for a three-way shot!

The small cannons on legs will follow you around and even jump around once they reach you.

Shortly after you reach the first big ship you can walk on, you'll see a superlaser positioned above two purple ships. Get on top of it and get the Heart Tank before the ships are demolished!


The second area is shorter and mercifully easier.

Use fully-charged X-Buster shots to destroy the green laser turrets.

When you see the spiked walls, use the Lightning Web to find the Arm upgrade. There are two capsules.

In the next room, you'll deal with a wall cannon. Use somersault slashes to destroy it, and take care of the smaller green cannons if you need to. You can only damage the wall cannon when the eye is open.

To beat Storm Owl, equip Rakuhouha. You'll be able to bring him down to half health. From there, just keep using your somersault slash attack on him.

His Double Cyclone projectiles will home in on your current position after he shoot off five of them.

Beating Storm Owl with Zero gives you Tenkuuha. This turns your Z-Saber from green to purple, allowing you to deflect certain enemy shots.

After beating all eight Mavericks, you'll find out the Repliforce is at the spaceport, and that they are planning to go to space!

But first...

Snow Cave


Remember the platform near the end of the snow platform slides you couldn't reach? Use your air dash followed by your double jump to get the EX-Tank. This allows you to start your game with five lives instead of three.

Also, you can go up at the start to find some energy to refill your Sub-Tanks with. You'll also find an extra life. Keep exiting and re-entering the level to get your fill of extra energy and lives!

Now to head to the Space Port.

Space Port


The shield robots can only be damaged from behind.

Despite being a short level, you'll be dealing with a whole lot of spiked ball robots and Repliforce soldiers.

At the end, you'll face Colonel...this time for real. He's much faster, and he has a new attack where he sends electricity across the ground that zaps into the sky. Stand near one of the green panels on the floor and jump to avoid both attacks. He also sends a purple wave on the ground, but it's easy to avoid.

Double jump to avoid the energy waves that he fires from his sword.

Houretsuzan will do the most damage on Colonel out of all the special weapons. Use it from above so you don't have to risk life and limb to hit him.

When you beat Colonel, you'll find out the Repliforce is already in space. You'll have to track them down and stop them!

Mega Man X4 - The OST

Since we've already gone through the game once, I'm posting the entire OST early. I've got something for the epilogue.

Thursday, October 19, 2017

ClementJ64 plays Mega Man X4 as Zero - Part 4 of 8


We're getting close to the Repliforce stages again...


All maps by X GOD.

Jungle (continued)


To beat Web Spider, avoid the webs that he throws. Use Ryuenjin to hit him from the ground and do the most damage. When he's down to half health, he'll make a huge web and climb around it, throwing webs at you. Avoid those and keep damaging him.

Beating Web Spider with Zero will give you Raijingeki. Press Triangle while on the ground for a powerful single strike of crackling lightning.

Bio Lab


You start at an endless flight of stairs. You'll want to go up the stairs quickly to avoid the indestructible spiked shield robot that chases after you. Shoot down the flying robots when they raise their shields. You'll eventually come across a teleporter. Step onto it. 

In the second section, you'll meet some flying enemies that look like small fish. These guys will fly towards you, hit you, then fly away. Be ready to slash them to bits!

The flower robots are just weak turrets, while the ladybug robots slowly fly back and forth. If they move off of a ledge, they'll gently fly straight down.

The black spiked robots will crash into each other in an attempt to crush you. At least they can't kill you, but nevertheless, make your move as they're separating.

Watch out for the thorns on the walls. They count as insta-kill spikes.

The mini-boss for the first area is a purple bug robot. Watch out when he stops for a brief second and activates its spikes. Every time he does this, he'll rise up and destroy the platform you're standing on, so move away, hit him with a fully-charged X-Buster shot and deal as much damage as you can before he drops back down. He'll stay up at your level for a few seconds, so before he drops back down for another platform to claim.

Once you've destroyed the mini-boss, the spikes below will disappear and you'll be able to head to Area 2.


You'll go up another stairway full of flying cannons and spiked bouncy balls...and of course, that stupid shield robot that follows you. Get on the teleporter.

The second section of the second area has the Heart Tank. The black spiked robots are back, and they're destroying the segments of the hallway you start in. One of them will succeed at the very beginning of the section. You'll want to get on the ceiling as that segment drops down, then wall jump up to the Heart Tank. You have only one shot to get this Heart Tank, and if you fail, you'll have to play through the entire level again to get back over there.

You'll then take an elevator. Shoot down the blue robot flowers that spit bombs at you, as well as anything else that gets in your way. There will also be blue platforms that will get in your way. They will be crushed whenever the elevator runs into them, so in case you're seemingly trapped, you'll still be able to re-position yourself if you're quick. Some of the flowers will pop out, but not bloom. They won't do anything except be in the path of the elevator, so just stay away from them.

When you meet Split Mushroom, you'll find out that he's under orders to destroy you. Unlike the other Mavericks, which have a Repliforce logo below their energy meter, he's got the Sigma logo. There's your wild guess.

When Split Mushroom latches onto the wall, slash at him and avoid the clones as they track you current location and jump right to it to attack you. He'll then create a clone, much like Gemini Man from Mega Man 3, and start running around the room while jumping over you in the same exact fashion as Gemini Man. The real one is more colorful and not as transparent as the fake one. Use Raijingeki on the real Split Mushroom to shock him and do the most damage. He'll leap to the other wall, but even then it's easy to keep track of him and turn him into fried mushroom for a few more hits. After three hits, the clone returns to Split Mushroom, and he'll return to the wall to make more clones and repeat his attack pattern.

Beating Split Mushroom with Zero gives you Kuuenbu. This allows you to double jump by pressing X after jumping. You'll also be able to perform Kuuenzan, a somersault sword attack that is much more powerful than your original aerial sword slice.

Cyberspace


Unlike other stages, this whole stage is a race against time. You'll have to get from the start of one section to the end. The faster you are, the better your letter grade. The highest is S, and that's the one you want to gun for. If you're ever told to hurry up, you'll lose a letter grade for every time the game does so. If you score any lower than an A rank, you'll have to re-do the section.

This area is where the air dash you learn from Slash Beast as well as the double jump and somersault slash you learn from 

The triangles will fly at you if you leave them on the screen long enough. You can destroy them with your new somersault sword slash that you got from Split Mushroom.

If you can get S rank on the first obstacle course, you'll get a Heart Tank. If you get S on the second, you'll get a Sub-Tank.

Getting S on the third as Zero will give you an extra life, since the Dr. Light capsules don't show up when you play as him. It's still better than nothing at all. 

You'll want to avoid touching the yellow energy balls, since all they'll do is slow you down for about four seconds.


You've got one more section to go. Hit the buttons to turn the room upside down, causing the balls that are in your path to drop down and out of your way. They'll roll down slopes, too.

ClementJ64 plays Mega Man X4 as Zero - Part 3 of 8


Three parts in, and we're halfway through the Mavericks!

All maps by X GOD.

Military Base


You'll be destroying crates and shooting Mettaurs at the beginning. When you reach the first car coupling, a soldier will bomb it. Quickly dash jump to the next car! You'll be doing this a couple of times.

The turrets will shoot lasers. When they charge up, stay away and low enough so that the lasers go right over your head.

The mini-boss is a purple car with three spikes. Shoot at the middle spike first, then go for the top and then the bottom. The spikes will still stab at you, but that's all they'll do. Once you've destroyed all three, you'll enter the tunnel leading to the second area.


You'll be taking on a lot of Robot Ride soldiers here. You'll also find a Robot Ride armor that you can ride. Get in it and destroy the brown train cars. One of them contains a heart tank.

The blue boxes with the lion head on them can only be destroyed with the Robot Ride armor.

When you reach the head car, the train will stop. Go to the next train, avoiding the bottomless pits as you go.

When you reach the long platform on the second car, you'll face Slash Beast. Dash around and hit him with your sword combos. When his first flashes, be ready to jump over him as he'll charge at you.

When he pulls his claws out, do not hit him. Otherwise he'll hit you with a nasty counter-attack.

Beating Slash Beast as Zero will give you Shippuuga. Press Triangle while dashing to hit enemies with a powerful dashing attack.

Memorial Hall


When you defeat four Mavericks, you'll face The Colonel after getting a message from him at Maverick Hunter HQ telling you to meet him at the Memorial Hall.

You'll get a cutscene where Zero and Colonel swordfight in the Memorial Hall, but Iris shows up and stops the fight. She still doesn't want either one to fight, as she is afraid one of them will end up destroyed, but Zero is unwavering in his quest to stop Repliforce, saying someone must stop them.

...and that's it! You don't battle Colonel as Zero at all, unlike in the X playthrough. You can go back to beating up more Mavericks!

Jungle


The fish robots as well as the robot fishmen want you dead. The fish leap up and come at you, while the mermen will shoot spikes out of their backs.

When you reach the waterfall, you'll see some wall-walking robots. They shoot singular shots and they're painfully slow.

The Dr. Light capsule that you'd be able to find after dropping down shortly after the beginning is absent, of course, due to your playing as Zero.

The logs on the waterfalls act as platforms.


You'll meet some new enemies here: worms and spiders. Worms move back and forth, while the spiders will shoot an electric web in one of two directions, repositioning themselves every so often to attempt to block your path.

The wasps are back, and this time you'll see their nests. It'll take a few slices to power through all the wasps and destroy the nests themselves.

After you drop down, equip Ryuenjin and attack the all-wood portions of the trees. One of them will contain a Heart Tank.

Wednesday, October 18, 2017

ClementJ64 plays Mega Man X4 as Zero - Part 2 of 8


As we re-fight the Mavericks as Zero, The Great Clement brings up an interesting question: whatever happened to Dr. Cain?

All maps by X GOD.

Snow Base


You'll see Blizzard Buffalo's frozen, battered body at the start of the stage. Blizzard Buffalo was in the third game.

The white gorilla robot will try to attack you with snow. Stay a good distance away when you shoot at him.

Use Ryuenjin the ice block above you shortly after the start to get a Heart Tank.

The snowman robots will try to dive at you when you're close enough to them.

The snow platforms will break when you wall-jump onto them or land on them. You'll have to wait a few seconds for them to reset. Some of the larger ones will be situated above spikes and will have snowboarding robots that will get in your way with their extreme sports escapades. Shoot them down with a charged shot.

The upper-right corner of the stage has an item that we can't get to quite yet...

Near the end, you'll be seeing ice platforms rising from a bottomless pit. Yes, there's a bottomless pit, so you want to make sure you have something to land on as you drop towards the door to the mini-boss.

The mini-boss here is a sphere-shaped robot that encases itself in ice and becomes a three-pronged ice claw. Dash under it as it flies around in a sine wave pattern. When it takes enough damage, it balls up, jumps through the ceiling and comes down on the floor hard, causing some of the icicles on the ceiling to fall down. It will also try to dash at you, trying to catch you and put you in a vice-grip, so you'll want to wall-jump over it when it does that.

At half-health, the mini-boss turns into a large ice crystal and bounces around the room at 45-degree angles, shooting diagonal ice crystal spikes every so often.

Throughout the battle, use Ryuenjin to tear it up in seconds. Just wait for it to be above you and let loose.


There are ice blocks to shoot down here. Some will contain Mettaurs and miniature flying enemies that fly back and forth and shoot at you, while others will contain bombs that take out whatever is above and below it.

There is also a whole field of ice blocks, and the upper-right most one contains the W-Tank of the game. This will collect weapon energy if all of your special weapons are full...even though Zero doesn't need it.

The ice birds will try to freeze the entire screen, and you'll want to destroy them as soon as possible. If they do freeze the screen, watch out for the icicles that are produced, as they will fall and cause damage. If any enemies are on the screen at the time, they'll be frozen.

To beat Frost Walrus, equip Rising Fire and fire it when you're right under his arm.

When Frost Walrus slides forward, do a dashing wall jump over him as he will not stop until he hits the wall.

Frost Walrus' freeze breath will create an icicle that he will shoot at you. Thankfully, it's very easy to take out, but if you can't get near where it lands so the six smaller icicles it splits into won't hit you.

Beating Frost Walrus as Zero will give you Houretsuzan. It is a downward ice saber stab. To perform it, hold Down and press Triangle while in mid-air.

Marine Base


Believe it or not, Area 1 and Area 2 maps are the same area.

You'll be on a jet-bike here. Keep on firing so you can take out any enemies when necessary. If you go up or down a slope, the projectiles will tilt upwards or downwards accordingly. Be ready to jump over pits.

Watch out for the bombs. If you run into them, you're going to take damage.

There are tons of ways to die, and you won't be able to heal yourself, so bring plenty of lives.

Halfway through this part, you'll see an upper path and a lower path. Jump and juke around so that you land on the lower path and get the Heart Tank.

Press the Dash button (Circle) while in the air to stay airborne a little longer.

The bridges explode when you take them. Shoot down the walls to get them out of your way.


Now for the second area.

You'll be outside and in the water, Shoot down all the jet bikers as well as any bombs that are in your way. Be ready to jump through gaps in the walls so you don't get crushed by the screen scrolling.

As you take to the water, you'll meet Jet Stingray. For the first time, you meet the stage boss before the end. Avoid or shoot down the miniature stingrays that he shoots at you.

Near the end, Jet Stingray will lower himself to the lower-left and attack you from behind with stingrays that skim the water. Stay away from him and the projectiles, and be ready to jump to a platform, then jump again and dash. You'll get a Sub-Tank if you can pull it off. Once you've seen three yellow boxes (a single box followed by a pair of them), you'll know when to gun it for the Sub-Tank.

Unlike the previous three games, you only get two Sub-Tanks and one W-Tank...so be careful.

Sadly, you won't be able to damage Jet Stingray until you take him on for real. (Sorry.) You'll be able to heal yourself fully before taking on Jet Stingray, so take the opportunity to do so after the hardest Maverick level in the game.

Jump up and get close to Jet Stingray, and whack him with the sword in mid-air

Jet Stingray will dive at you. When he does this, hit him with Hyouretsuzan before he comes back up to freeze him and do some extra damage. He'll also Ground Hunter at you and fly up and down the screen if you let him...but he's so easy to beat with as Zero and you can slash the Ground Hunter projectiles with the Z-Saber.

Beating Jet Stingray with Zero gives you Hienkyaku. You can now dash in mid-air, much like with X's leg enhancement in the third game.

ClementJ64 plays Mega Man X4 as Zero - Part 1 of 8


It's now time for the Zero playthrough of the game!

All maps by X GOD.

Unlike the last game, which lets you switch between X and Zero, X4 has you choosing one and forcing you to stick with that character for the entire game.

The game begins with Zero in a capsule. The silhouette of Dr. Wily tells him to go after Mega Man...but why? Suddenly, his head hurts. We see a shocked Sigma, a destroyed lab, destroyed robots...

Suddenly, at Hunter H.Q., an alarm is called for a Maverick sighting. Zero wakes up. They have taken over the Sky Lagoon with the most advanced weaponry available. The army appears to be that of the Repliforce. Zero heads down there without delay.

Sky Lagoon


Unlike last time, where you could use primarily the blaster and the Z-Saber only for the final attack of the full arm cannon charge, Zero is now restricted only to his sword.

Guess what? It's actually fun. By standing still, you can perform a three-hit combo by pressing Square while standing still. You'll be able to tear through tougher normal enemies with this, but you can also continuously slash at the air by pressing Square as you're airborne.

The roly-poly robots will throw grenades at you and shoot at you with guns, while the bulldozer enemies with the spikes will try to run into you. The ball robots walk towards you, while the dragonfly robots fly around.

Shoot down the doors that block your path. Do it quickly so the giant dragon robot in the background doesn't destroy you.

When you reach the reactor, you'll meet Magma Dragoon. He'll tell you that a Maverick destroyed the power reactor. As a result, the Sky Lagoon is about to come crashing down. Magma Dragoon escapes. and X has no choice but to head to the city below and get everyone out.


When you reach the city, you'll find out it's already been destroyed.

Wall-hanging robots will come out of the walls, blocking your path at times, and walls will drop down as you head to the right. Sometimes parts of the floor will rise up. If there are any cracked rock walls, destroy them with the Z-Saber.

Near the end, the floor will collapse on you. You'll find full health (red canister with yellow core inside) and an extra life (Zero's helmet). You'll want to get back up to solid ground with the wall kick before you get crushed by the wall to your left. The weapons pick-ups are blue balls with two horizontal lines, for future reference. Unlike previous games, the weapon and health pick-ups come in three sizes: small, medium and large. Small gives you a small amount, medium refills one-fourth of the respective meter and large is a complete refill.

Once you avoid being crushed to death, you'll meet Iris. She'll tell you a Maverick has shown up, and Zero makes up his mind to defeat it before she can explain further.

You'll soon take on that giant dragon boss from earlier. This dragon has two attacks: firing energy balls from its mouth as well as a flamethrower-style energy ball flurry that hits only if you're close to it. Keep jumping and slashing at its face with the Z-Saber, since that's all you've got for offensive measures. That's all you have to do.

Once you beat the intro stage boss, you'll meet Colonel, the Colonel of the Repliforce. He's only here to save his sister Iris and that the army responsible for all the carnage is not part of the Repliforce. He also thanks Zero for saving Iris. Zero wants him to come to Maverick HQ quietly, but Colonel refuses to lay down his arms, saying the only time the Repliforce will drop their weapons is if they cannot fight any longer. Colonel then teleports away after telling Zero to deem the Repliforce Mavericks if they wish, leaving the situation even more tense than before.

The large yellow Reploid from the introductory cutscene (identified in the following cutscene as General, the General of the Repliforce) soon tells his soldiers through the media that it is now time to create their own utopia for all Reploids and usher in a new golden age to advanced civil rights and liberties for Reploid-kind, also saying that this is not about insurrection or rebellion against their human creators. Meanwhile, the hooded figure laughs...

After the post-intro cutscene, you'll enter the stage select screen. Iris will show up at Maverick HQ, telling Zero that it was her brother Colonel who started the coup and telling him not to fight her brother. Zero must put a stop to this...even if it means fighting Colonel...

You'll then get acquainted with the eight Maverick stages and their missions, which have no bearing on the game whatsoever other than creating a reason as to why you're going there:

Jungle: Infiltrate enemy-occupied jungle and destroy the weapon under construction. (Web Spider)

Cyber Space: A bug has corrupted the network. Dive into cyberspace and exterminate it. (Cyber Peacock)

Air Force: The Repliforce shp has taken off. Pursue and blast it out of the air. (Storm Owl)

Volcano: Dragoon of the 14th unit is a traitor. Locate and bring him back to Hunter HQ. (Magma Dragoon)

Marine Base: Repliforce decimated the city and left. Pursue them aboard a Land Chaser. (Jet Stingray)

Bio Lab: The abandoned lab is now operational. Investigate and destroy the lab. (Split Mushroom)

Military Train: A military train is moving supplies. Cut off Repliforce's supply route. (Slash Beast)

Snow Base: We've discovered a hidden snow base. Halt production of their new weapon. (Frost Walrus)


Volcano


The spiked balls will bounce towards you, but if you can position yourself and time your movements carefully, you can walk under them.

Volcanic rocks will go up and down the bottomless pits soon after the start, so don't cocky and simply dash jump over every single one. You might get smacked by one of those rocks for your impatience.

If an energy pick-up is laying on its side, it's a small pick-up. If it's upright, it's a large one.

The bats will drop bombs, and the Mettaurs just move towards you. There are craters which spew volcanic lava out, which damages to the touch.

The squid robots have three cannons and will fire missiles at you. Fire a fully-charged X-Buster shot at it, then lay waste to it with regular shots. They always fire missiles high, low, both, and then repeat, so be prepared to jump over some missiles if you're not quick enough at destroying them.

Near the end of the first section, watch out for the rolling rocks. They drop down at the top of the slope and then go down the slope, and it can be tough to jump over them as they can sometimes comes down in pairs.

Shoot the wall to get to the second section.


If you're low on health at the end of one area, you'll be completely refilled at the next one.

In the second section, you'll have to dash jump from one platform to the next. You'll be dealing with the volcanic rocks shooting up and down the screen again, and some of them will destroy the platforms after enough of these rocks hit them, so you'll want to be a little quicker when you see that happening.

The Reploids in the Robot Ride armors will slash at you if you get close enough to them.

After the first Robot Ride enemy, dash jump off the left edge to get a Heart Tank and increase your maximum health.

At this point, you'll see volcanic rocks coming down from above like meteors. Keep an eye out while progressing.

When you make it to the lava, you'll find a free Robot Ride armor. You can use this to destroy any volcanic rocks and to traverse the lava, which is really awesome. The Robot Ride has an overhead slash attack as opposed to previous games, and despite being something to get used to, it's pretty efficient. You can even use it to take a lower path and go straight to Magma Dragoon. You'll find out he was the one to let the Sky Lagoon fall, making it official that he's gone Maverick.

There was originally an X capsule above where the Robot Ride armor is, but since Dr. Light didn't create Zero, the capsule won't be there.

Magma Dragoon is pretty easy to take on with the Robot Ride armor. Just pound away at him with it, since you'll have a lot of health on it to withstand more than enough punishment while whittling Magma Dragoon's health bar down. If you lose the Robot Ride armor, just slash at him with your Z-Saber.

Magma Dragoon will leap around the room, landing either at the center or one of the sides. He has a diving jump kick and will also shoot Street Fighter-esque Hadokens at you: one high and one low. He also has a Shoryuken, a flame thrower attack that covers the whole platform and can also be shot into the air, but more often than not, he'll be hitting you with Hadokens.

When you beat Magma Dragoon, you'll find out someone goaded him into joining Repliforce and giving him power. But who?

Beating Magma Dragoon with Zero will give you Ryuenjin. This allows Zero to leap into the air and slash with a flaming sword. To perform it, hold Up and press Triangle. Unlike Mega Man, you won't need energy for most of your special attacks.