In this video, we go underwater for the first (and only) time in the game, and it's different from moving around on land.
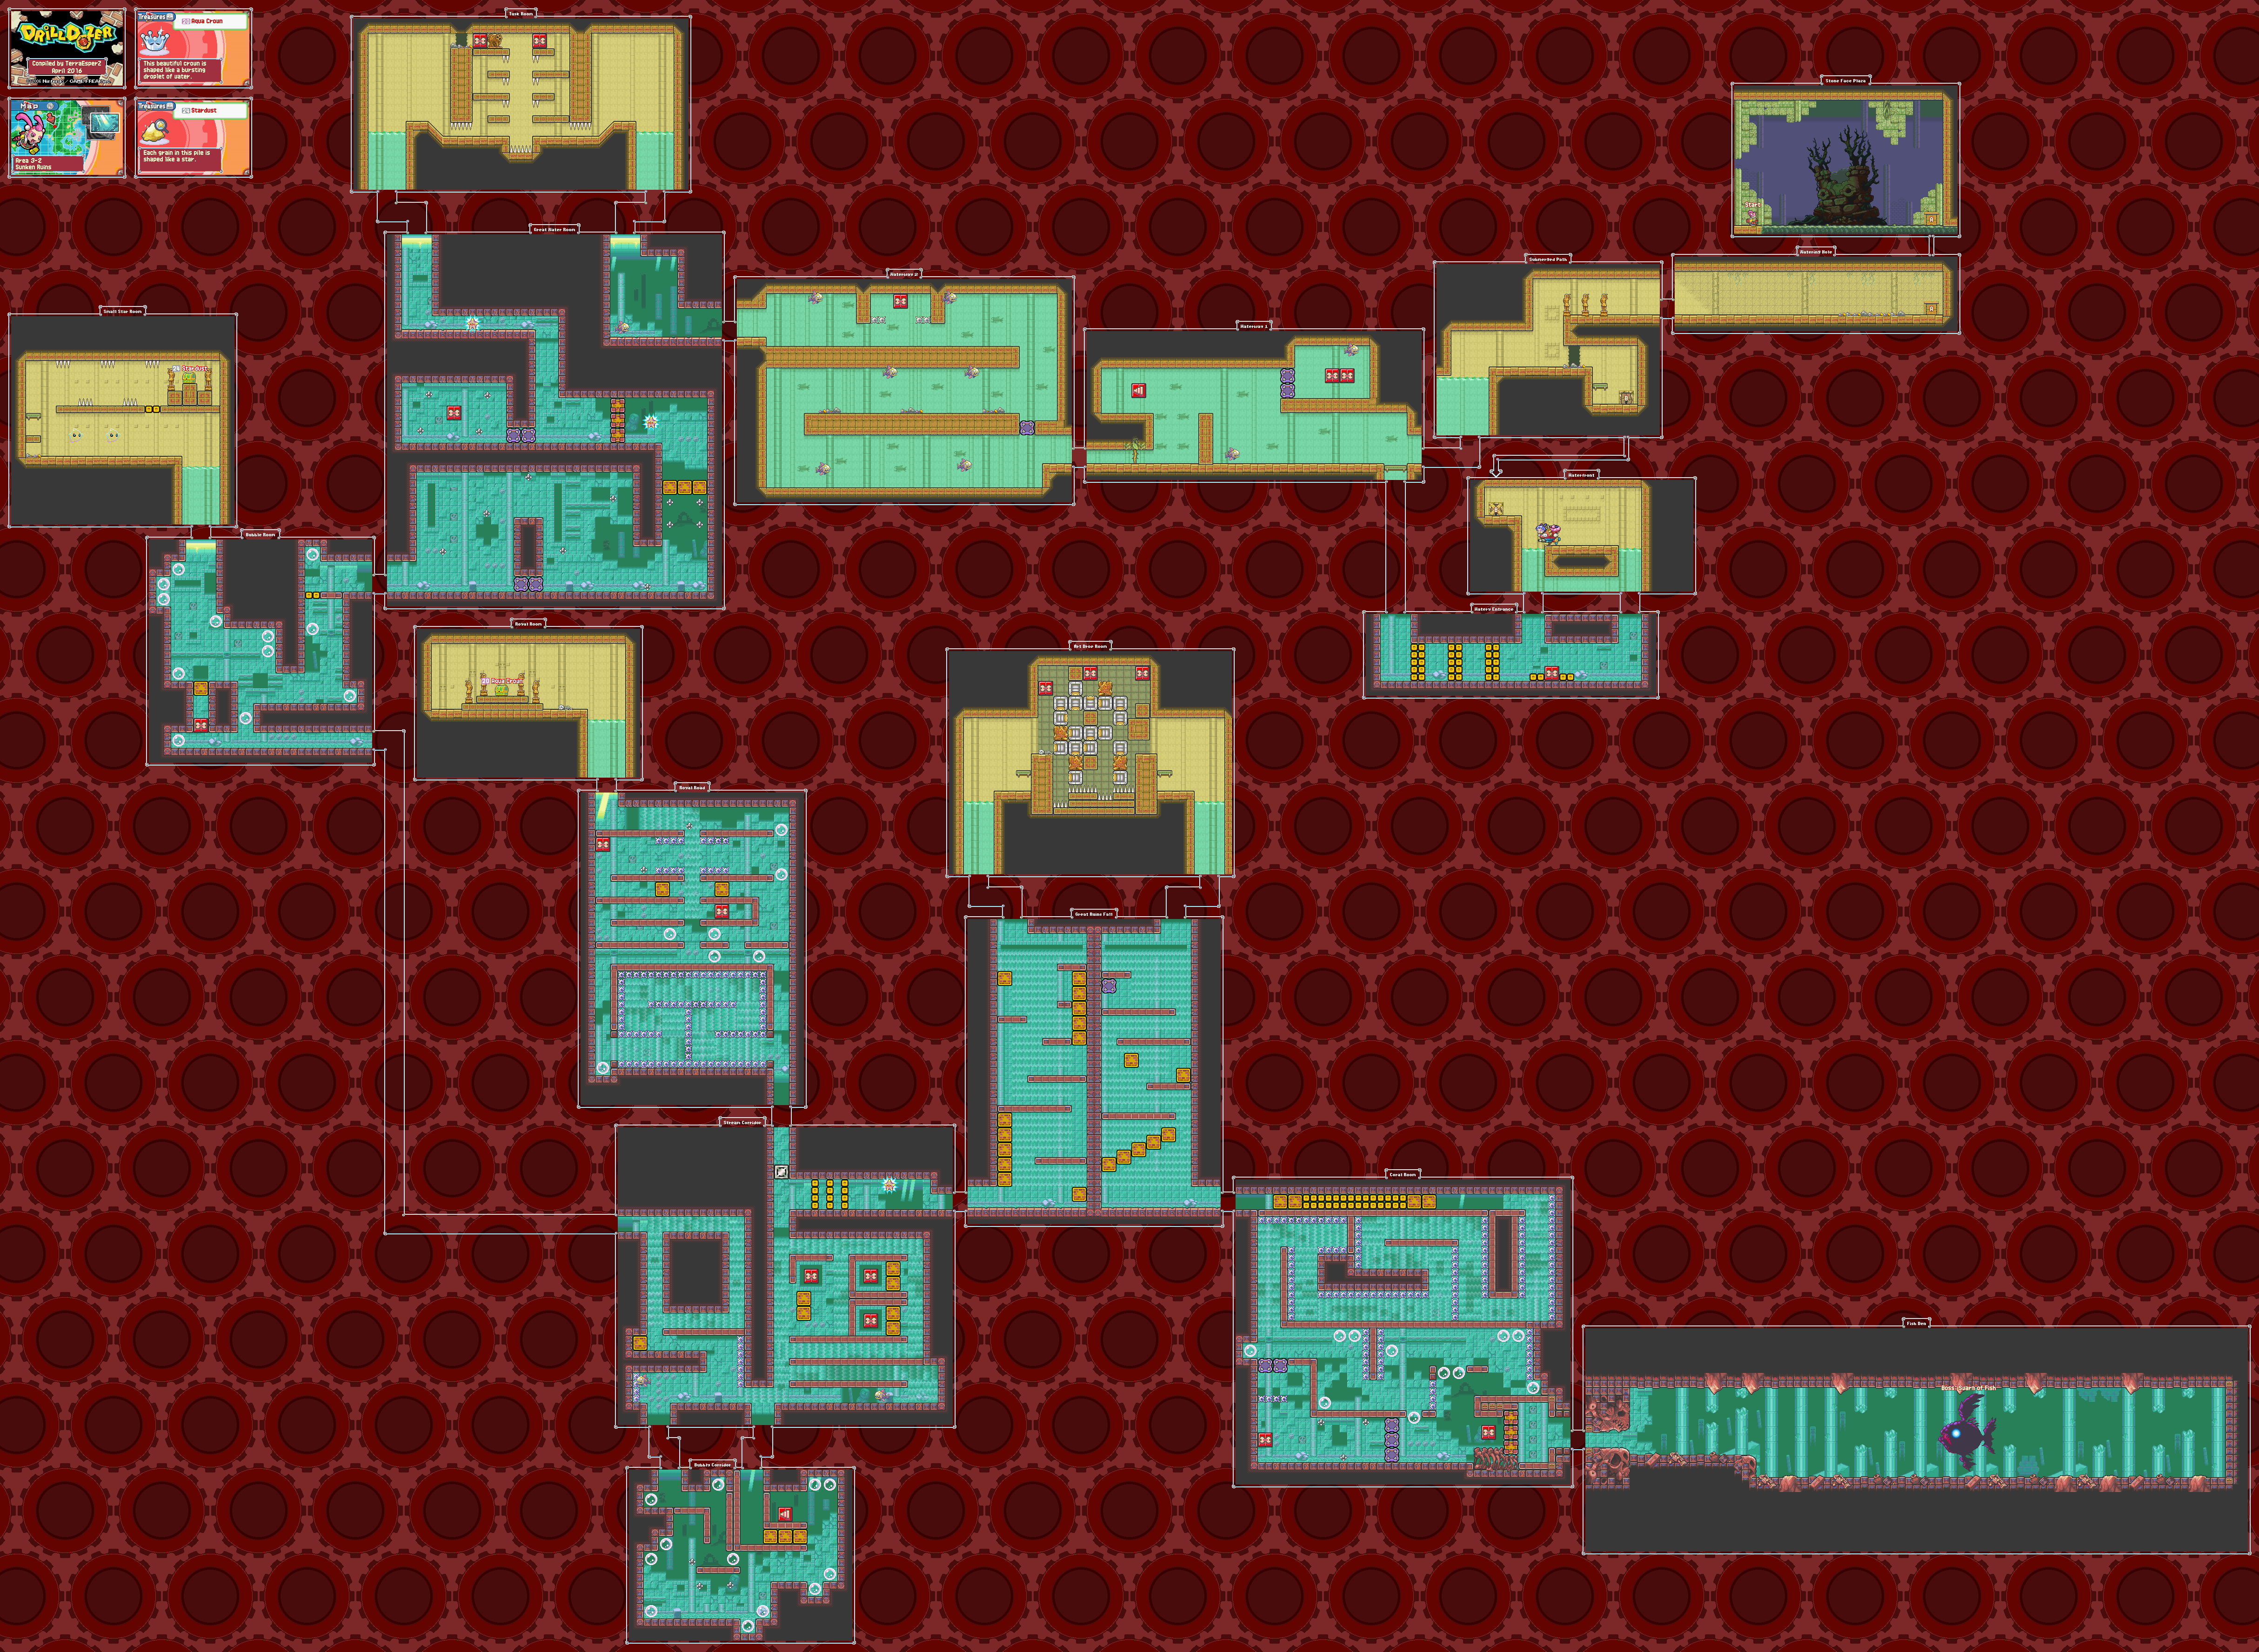
Area 3-2: Sunken Ruins
.png)
The area will start with you drilling through a wall and fighting more skeletons. Afterwards, you'll find a body of water, which you won't be able to swim in...yet. Head to the right and go through the wall when you see it, then you'll face the Magnet Twins again.
The Magnet Twins will dive into the water, then pop back out either from the left or the right. When they shoot a bullet, block the bullets with your shield, then drill the screw when it pops out. Once you remove the screw, you'll get the propeller, which will allows you to swim.
Once you jump into the water, you'll be in underwater mode. Staying in place just makes you sink, and the only way to move around is to run your drill with the shoulder buttons while holding the D-Pad in the direction you want to go, and your drill works exactly like it did on land. This can be a bit cumbersome, but once you have second gear, it gets a little easier to get used to.
The fish take a little bit of damage from the first before you can get rid of them.
Once you transition from the background wall to the columns and more evident columns and ruins, you can get some extra chips if you choose.
The starfish enemies will produce electricity to shock you with if you get close as it tries to suck you in. When it gets tired, move in and drill the starfish enemy. For best results, use first gear to keep away from the starfish when it tries to suck you in, and use the second gear for fighting.
There will be spikes you'll want to avoid, as well as spiked balls moving back and forth that explode when you run into them.
The bubbles will knock you back if you drill into them. If you know what you're doing, you can use them to get through areas quickly. When you go left and then up where you first see the bubbles, you'll find a path off from where you need to go to a treasure: the Stardust.
The currents will push you around pretty well, and you can move against the slow ones by shifting up to second gear. The faster currents will require third gear, but at least you can stay in third gear indefinitely as long as you have the shoulder button held down.
Afterwards, you'll have a maze made out of the blocks with the sandy sides you have to destroy. The wrench block there contains some chips, and the blocks with the hieroglyphs can act as platforms that make it easier to get over the spikes.
Near the end, you'll deal with a simple, maze-like corridor where you will have to derail with spikes on the walls and ceilings. Coming in here with two (or three) energy tanks is recommended, especially when you'll have a hard time not running into things.
The boss is the flashing blue light, and this time around, it takes control of a huge school of fish to make one big one. Drill the rocks that the fish spits at you so that they go back into the fish. When the big fish turns into the smaller school of fish, and you'll need to use your drill to avoid getting hit by them. You'll then see the flashing blue light teleport in at a random spot. Drill into it and shift up to third gear as you do for a ton of damage. After that, drill away to avoid the fish vortex that tries to drag you in. The boss' attack pattern will then repeat itself.
Once you beat the flashing blue light, you'll get the Blue Diamond. Gearmo will come to the realization that the Blue Diamond was the flashing blue light we had to deal with during our time in the Kuru Ruins.
No comments:
Post a Comment