Part nostalgia-bomb, part note-taking and part FAQ, what started in GameTrailers as a video game blog is now on Blogger. This blog is a look back at video games, both popular and obscure, from the video game industry's infancy all the way to the previous console generation.
It didn't take long to get to the final world. Let's finish this.
Round 5-1
Welcome to the ice level! You will be sliding around as you fight off the penguins again, this time on slopes. Once again, they will come at you from behind, so be careful. You'll also see spear guys around here, too, so pay attention to what is happening on-screen.
Round 5-2
Only a limited area around you is lit up. Keep throwing your weapons forward. If your screen is bright enough, you can see what's past the light. Be sure to take your time and jump over the spear pits when you see them; you'll see quite a few of them in a row.
Round 5-3
The ax makes it easier to fight off the small black blobs you will see in the beginning of the round; you'll be able to get the boomerang back when you're done with all of them. The drop-off after the candle enemies after the boomerang contains no enemies.
From there, it's more enemies, and the floating dragon heads make their return. Be sure to aim your weapon everywhere when you make it to the platforming part; you'll find hidden fruits and the final bonus area at the very beginning.
You'll then see moving platforms shortly after this. If you're wondering if enemies re-spawn, they do; you'll have to go out of your way and backtrack (intentionally) quite a bit before it happens, though.
The red X's are spikes. Don't touch them.
Round 5 Boss
It's Dark Cloak!
Dark Cloak has three attacks. The first is a trio of white orbs that petrify you if they touch you. Mash the buttons to break free. a running back-and-forth attack, and a running jump where he tries to jump into you. Watch him when he runs back and forth, and hit him in the head whenever possible.
When you beat Dark Cloak, you will learn he has a second form: some flying pink-elephant looking thing. Your best bet is to stay away from him. When he stomps on the bridge, the panels will change from brown to yellow to red. You'll want at least six in a row to be red, though you should go for seven or eight to give yourself some room. That way, when he stomps his way onto a very red area, he will cause the bridge under him to come down, taking him down into the fiery pit with him. When that happens, you've beaten the game! Tina is back to normal, and Master Higgins/Takahashi can go back to relaxing on the beach! Enjoy your ending!
More of the same...but that's not bad at all, considering that the game has good music and the control isn't total garbage.
Round 3-1
Here, you will be climbing up a tree and using your superjump fairly often. Throw your weapon wherever you an as you take out the bugs, as you can not only find hidden fruit, but also the bonus area (which I don't find here). Not much to be said about this place. Just keep your distance so the bugs that go in a circle don't surprise you.
Round 3-2
Now it's time to explore a deep, dark forest. The lizards on the balloons are back, and you'll also meet ghost dragon heads that will slowly float towards you.
There is a skateboard here, but once again, I avoid it.
Round 3-3
Now it's time to enter a cage. Be ready to duck down to kill off the small black blobs. When you get on the mine carts, be ready to jump so you don't fall into a pit. Be sure to use the mine carts to get through this stage faster, even though this stage (and all of them) are short.
The candle enemies from Round 1-3 also make a return appearance here.
Round 3 Boss
Here, you'll face a dragon. Stay on the dragon's body while staying as close to the head as possible. Thankfully, the head won't damage you, but the falling lava will. You'll want to beat this boss as quickly as possible so the lava as well as the increasing speed of the dragon that comes from doing a lot of damage won't become a problem.
Round 4-1
Now it's time to head to the desert. You go from left to right here, and there is also plenty of blocks that get in the way.
You'll meet the guys with the metal shields in greater numbers here, as well as the guys on balloons and the bugs that fly in figure eights. The best things to do is stay as low as you can so you don't get hit from above.
Round 4-2
Time to climb again. This time, you're on a mountain. Once again, stay as low as you can to take out the moving skulls, watch out for any skull enemies that show up from below, and avoid the rocks if you see them. Yep, the rocks from Round 1-1 make a return appearance here. Having the fireball version of the boomerangs works well here, since you'll have more range.
You'll see the balloon enemies near the summit. If you see one, stop to kill it.
Round 4-3
After this, you'll dive into a lake. It's time to swim again!
Once again, take out all the enemies you can, just in case you need another extra life. All the enemies you saw in the first swimming area make a return appearance here.
Round 4 Boss
The boss here is a skeleton warrior. When he stops, back away, super jump, and aim for the head. The head moves down when he swings his sword, so you'll have to throw your boomerang just before the top of your jump. After enough hits, he's done.
You may remember this one from Nick Arcade. While it's not the best Adventure Island game, it still has its moments and can still be fun if you give it a chance. Also, Yuzo Koshiro composed the music and also supplied the sounds, which is also a high spot here.
Takahashi/Master Higgins is alone with his wife Tina when Dark Cloak flies in and turns Tina into stone. Takahashi/Master Higgins gets on a giant bird and flies off after him to get Tina back to normal. Simple enough, right?
Round 1-1
The game is simple enough. Press Y to throw your weapon once you have one, press B to jump, and use the Control Pad to duck and move. Holding Down before you jump allows you to do a super jump. Unlike other games, holding down Y will not allow you to run.
The yellow bars in the upper-left corner is your stamina. Pick up any and all fruits that you can to keep your stamina up. The more stamina you have at the end of a stage, the more points you will be able to score when you get there. Your score is in the upper-right corner, and every 50,000 points, you can get extra lives. You can see how many lives you have in the lower-left corner.
The enemies in the grey shells are vulnerable when they open their eyes and start moving.
Just like in other games, you want to make sure not to run into the rocks; otherwise, you will trip and lose stamina.
The boomerang will replace the ax that you start the game with. Not only does the boomerang come back to you, but it has a slightly better range. Also, unlike the ax, you can aim it up and down with the Control Pad - which works wonders with the enemies dropping down on the balloons - but you will have to be in the air to aim the boomerang downwards and attack enemies below you.
You can get more weapons simply by picking more up. By picking up the boomerang halfway through the stage, you can suddenly throw two. You can have up to three projectiles at any given time, but be careful, as you will lose them when you die.
The red circle with the star in it is the goal. Touch it to end the stage.
Oh, and the skateboard lets you move faster through the stage with the drawback being that you can't stop; you can only merely slow down by holding back on the Control Pad. If you take a hit on it, you will lose it, but at least you can control yourself better that way. I usually just stay on foot the whole game.
Round 1-2
When you pick up another weapon after getting three in a row, your weapons will be fireballs, making them more powerful. They will still have the properties of whatever weapon you picked up last, whether it be the ax or the boomerang.
Watch out for the flies moving back and forth in the air, and be watchful of the spears thrown by the men with the shields.
Sometimes, if you throw your weapon into the air in random places, sometimes you will find a star. Picking up the star takes you to a bonus area. Jump on the platforms - which will disappear when you land on them - and collect all the items to uncover a 1-Up. If you know what you're doing, not only can you find the bonus stages, which are always hidden in the same spots every time you play, but you will also be able to rack up some 1-Ups pretty quickly.
You obviously don't want to jump into the bottomless pits where the waterfalls are, so don't do that.
The blue bugs run in circles in the air, but you can easily anticipate where they are going.
Round 1-3
If you duck before attacking the candle enemies, you can hit them better.
Shortly after the beginning of the round, you will be chased by a rock. You can jump over the first one, but a second one will show up soon after, so just keep running when the first one shows up.
The small black blobs not only jump up and down, but they will home in on your current position, meaning they can double back.
Be careful not to fall into the lava.
Round 1 Boss
The statue boss is easy. Alternate between sides and keep super jumping so you can hit the statue boss in the head and avoid the fireballs it spits out, as the fire will blaze towards you. Watch out when the ghosts become solid, as they will come after you. Thankfully, this can be a very quick and easy boss.
Round 2-1
This is a quick run-and-gun stage. The penguins will go for a tackle when you get close enough. You'll also want to watch out for penguins coming out from behind.
You can switch between the ax and the boomerang by picking up the weapon you want when you see it.
Aim up for the little gray guys as they fly up and down. As for the guys with the shield, stay close and duck, then throw your weapon when they start throwing spears. You can also hit them without having to wait if you can get behind them.
Round 2-2
Now it's time for some island hopping.
If any stationary platforms are in the air, you'll want to move quickly before you get sent into the water of instant death below.
The inflated walruses will float towards you. Aim up if you can to hit them.
When you beat the round, you will be on a boat and swallowed by a whale.
Round 2-3
Keep pressing B to swim so you don't accidentally fall into the pit below. Here, you can destroy those flying enemies from Round 2-1 as well as some eels to get points. Get them for the lives, since you'll need them.
Round 2 Boss
Don't grab the ax at the end of Round 2-3; you'll need the boomerangs here. Be ready to swim around the sea urchins at the beginning.
To beat the squid boss, stay near the bottom-left corner and aim for the eyes when the squid raises its tentacle. Keep shooting so that you can destroy the fish that the boss generates.
For this course, you have a moving platform, a lot of tracks and many ways to hit the wrong On/Off Switch at the wrong time and die...and that's the first half of the stage! You'll have to do a little bit of trial and error to see which path you will take when every time you turn an On/Off Switch on or off.
If you can somehow make it all the way to the yellow pipe while riding Yoshi, you can get a pair of wings that will allow you to skip to the next course if you go down. If you don't have Yoshi, you can skip all the way to the second half of the course.
The second half of the course involves more of those moving ropes and platforms while having to dodge those Fuzzies. After that, it's on to the next course.
This one has ice physics through an through. You'll be dealing with quite a few well-placed Naked Koopas ready to kich their shell at you as you make your way out of chasms, but once you get out of there, you'll have to deal with nice looking bridges that are also slippery, Banzai bills and moving ice platforms. When you reach the bridges, go get the Starman and try not to die in the process of running to the right. It's a pretty interesting course, but the best is yet to come..
Hey, it's the world from the demo! You can play it now!
Believe it or not, this is a pretty easy course. I do like how bright and happy the background looks, as well the four different-colored Koopas all in a row.
You can get Yoshi at the very beginning of the course by kicking a Koopa shell into the ? Block at the beginning. This will give you a lot of coins when it comes time to eat all the Pokeys.
Here's an interesting course: it looks like a normal course, but there is water rising in and out. It looks different from what you're used to throughout the rest of the game, but it does cause some slowdown, making taking out the flying Hammer Bros. a key strategy to alleviate the slowdown.
Having Yoshi here is a big plus, because he can walk on the Munchers and he provides you with a free hit. Plus, he'll move slowly in the water, so getting him back is easy. He can also eat the Cheep-Cheeps and get them out of your way, too.
It's another forest level! Here, you'll be dealing with quite a few Bullet Bill cannons as well as a new enemy: fireballs that leap back and forth, tracking you as they go and leaving smaller fireballs that stay one in place and burn to the touch if you get too close.
The hardest part is getting the springboard and making it to the bright red pipe so you can leap over it, thanks to the Bullet Bills. Having Yoshi around for an extra hit can be nice, but it can prove problematic.
You'll also deal with a couple of flying Hammer Brothers, but that won't happen until near the end. You'll also want to deal with the Jumping Piranha Plants here, since they can spit fireballs to the sides, making getting around quickly a bit of a hassle.
You'll only have a very limited time to get through this stage, so start running. If you need more time, bring Yoshi and eat the green berries. The berries will add about 20 seconds to your time, and eating all the berries will really help.
The Sumo Brothers will be the hardest part, as you will have to break some blocks with a spin jump to get away from one of them and you will have to run to avoid the fireballs.
One you're past the four Sumo Brothers, all that will be left are Koopas and Goombas. A few of the Chargin' Chucks will call out Caped Koopas that will swoop down from the sky if you let them live long enough. You'll also have three Chargin' Chucks sending balls your way, Once you somehow make your way past them, you will see a message in coins reading "YOU ARE A SUPER PLAYER!!"
That message is not just for show, because after you beat it, you will get a chance to save your game. Once you exit through the newly-revealed Starman portal, you'll end up back in Dinosaur Land...but everything is different colors now! Some of the enemies, such as the Jumping Piranha Plants and the Koopa Troopas, will look different. You'll be able to see all the changes if you beat the game again.
Speaking of which, I show off the Back Door of Bowser's Castle. As I have recently mentioned, you skip the labyrinth of doors and go straight to the final, darkened corridors before Bowser. I beat Bowser a second time to give some closure, then the credits roll.
Oh, and I didn't get the normal exit for Star World 4, hence why I didn't get the yellow star and 72. Just so you know. Until next time...
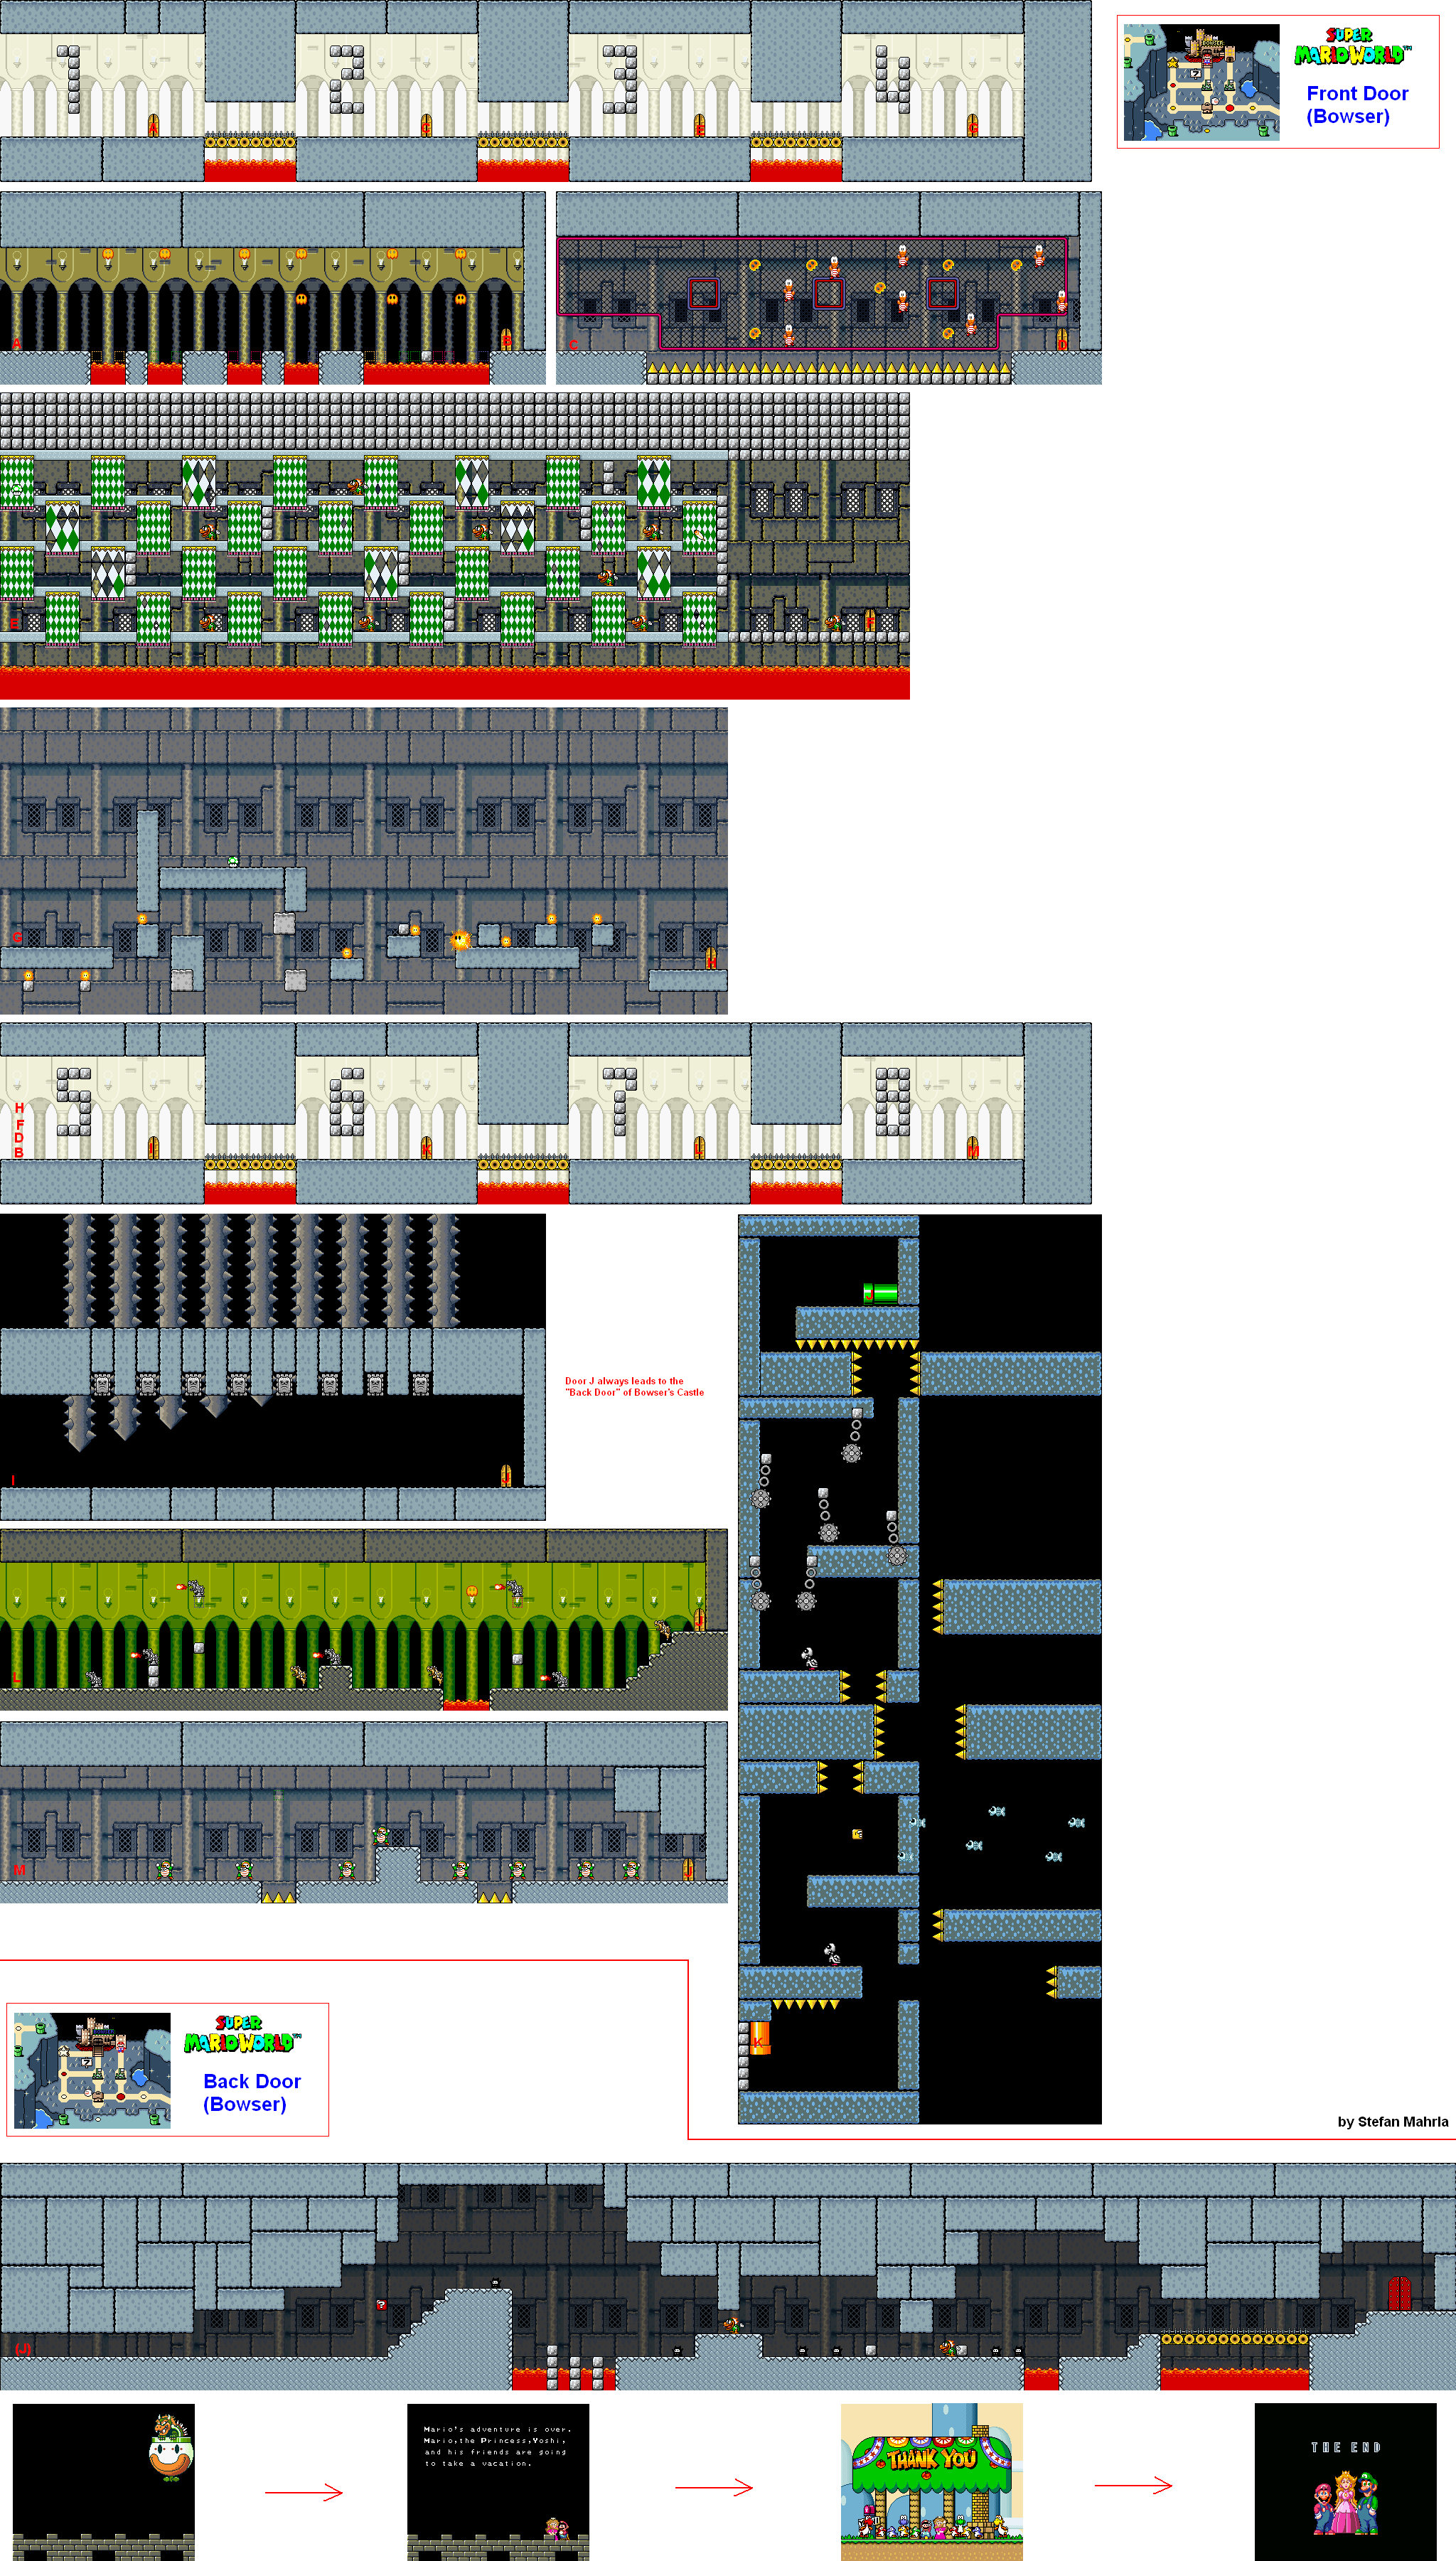
Now for the descriptions for the rest of the rooms!
Room 1 is "Crush." There will be Podaboos leaping in and out of the lava pits as well as crushers coming from the ceiling. If you have activated all four switch palaces, this room becomes a lot easier, because you won't have to jump across all the lava pits.
Room 3 is "Maze." Here, you will have an opportunity to meet the Mecha-Koopas before you enter the final chamber. There are numerous banners you can jump through - and Mecha-Koopas to hide behind - in order to get out of the maze. Your mission is to get to the right side of the maze. Thankfully, it isn't that hard. If you can see through the banner, you can jump through it to get somewhere else in the maze.
Room 4 is "Jump." Here. you have the sparks that travel around the walls while grey platforms move back and forth. Thankfully, this part is short just like all the others.
Room 6 is "Swim." Here, you will have to swim to the top to make your way to the final chamber. As if this kind of area could not look familiar enough, there will be walls - some bearing spikes - moving back and forth as you also deal with Dry Bones and Bony Beetles while avoiding Fishbones and ball and chains. I'm surprised an area like this didn't show up until the end, to be honest.
Room 7 is "Statue." The statues will shoot flames, and there will also be some gold ones that jump around and follow you as they do. As long as you stay away from the fireballs and watch the gold statues, you shouldn't have much trouble.
Room 8 is "Chucks." The room has a very simple layout, and there are five Chargin' Chucks. This is the easiest of the four rooms in the second set, since you can rush through this very easily if you know what you are doing.
Now that that's out of the way, it's time for Star Road. We have one level left, and you will soon see why it was left for last...
At the beginning of the level, you will be seeing a lot of Para-Troopas as you jump from one gray falling platform to another. Thankfully, there is a lot of room to run and jump around, so if you take any damage here, it'll definitely feel like your fault.
Once you make it to safe land, there will be a P Switch and a ? Block. Use Up and Right on the Control Pad to move the line of coins up and to the right after you hit the ? Block, and make sure it goes both high and long. Make sure not to accidentally fall off the edge of the platform as you do this. Once the music goes back to normal, hit the P Switch. If you got your staircase high, enough, you'll see pipes and a lot of ! Blocks. If you've activated all four switch palaces, you can take this path to the secret exit; otherwise, you will have to activate the switch palaces as there is no other way to get to the end.
The path to the normal exit (which includes a baby yellow Yoshi) will take you back to where Star World 1 is. Thankfully, the path to the normal doesn't get much harder from what the beginning of the course already was.
If you made it to the secret exit, then congratulations! You just opened up a path to a brand new area that is not readily made apparent until you get there: the Special Zone.
Special Zone
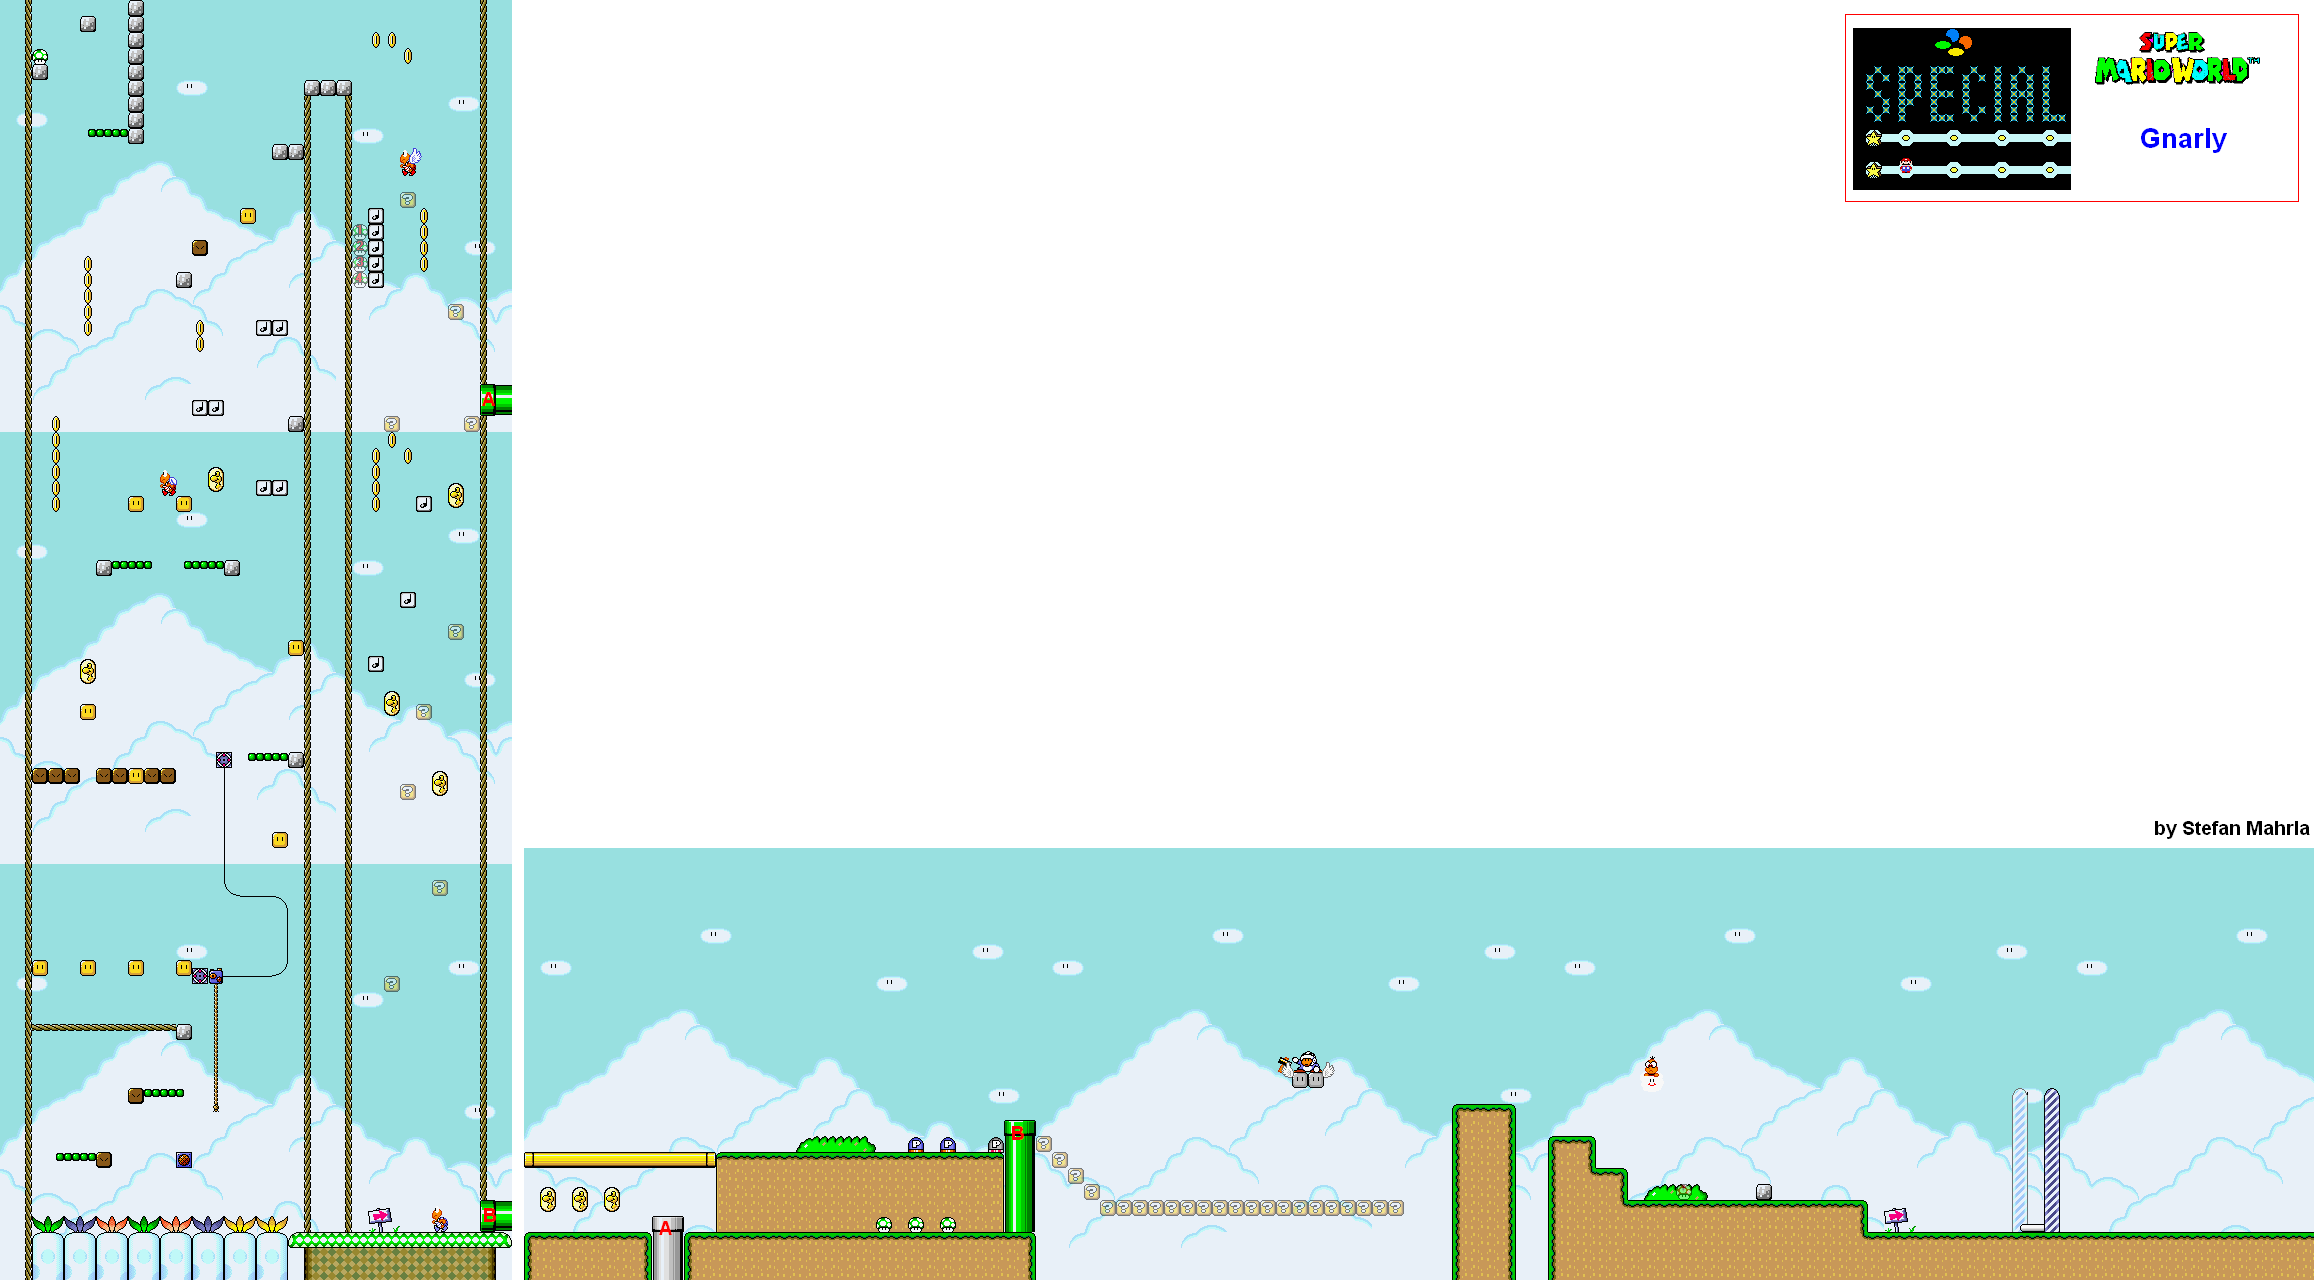
Welcome to the Special Zone! Here you will see eight of the craziest courses you'll see in the game. Some are fun, some have their share of difficulty, but all of them are truly something memorable.
Oh, and if you wait on the Special World map for two minutes, you'll get a remix of the Super Mario Bros. overworld theme.
The message block will be your welcome wagon for the Special Zone in case you want to read it. It will tell you of a big surprise
For this stage, you will be climbing all the way to the top, then falling back down. There are not a lot of enemies at all here; as a matter of fact, there are only two Para-Troopas and one regular Koopa in the stage. Thankfully, making your way up is easy as all you have to do is hit blocks to reveal vines that will take you upwards.
One of the blocks will create some ? Blocks on the way down. If you can take it to the top, activate it and go to the right on the drop down, you can enter another pipe that will take you to an alternate exit into the second section where the last three Dragon Coins will be next to each other. If you don't find it, you'll need Caped Mario to get the last three on the way down.
The second section is dead easy; just hit the P Switches, and then hit the flying Hammer Brother from underneath to get to the goal, which takes you to Tubular.
If you haven't played this one, you haven't played Super Mario World.
Everyone who has played this level has memories of finding this level and trying to play it, finding it to be pretty daunting. Turns out, it's not so bad if you know what to do.
The course starts out pretty easy for the most part; once you reach the P Switch, that's where things can get difficult. Underneath the P Switch is a P Balloon. Let it move to the right a little bit, then jump to it with the spring. From there, you'll have to keep flying to the right while avoiding the Chargin' Chucks, the Volcano Lotuses and the projectiles they produce.
If you get hit, or if you run out of P Balloon power, you're losing a life. There is no escaping that, unfortunately.
The boxes you need to hit are the one after the second baseball throwing Chuck and the one under the first football kicking Chuck. Avoid the rest. You're welcome.
If you take the back door, you will go straight to the final dark corridor before Bowser. If you go through the front door, you will have to go through two of eight areas before you can reach that final corridor.
The eight areas are numbered. You'll have to go through one of the first four, then you'll have to go through one of the second four before reaching the final stretch.
The first four areas all have code names that I have personally given them: Crush, Fence, Maze and Jump. In this video, I will go through #2 first.
#2 (Fence) is pretty easy. All you have to do is climb to the right to avoid the spikes. Punch out Koopas, and avoid the Podaboos when necessary.
After you complete one of the first four doors, you have to go through one of the second four, which I have respectively called Impale, Swim, Statue, and Chucks.
For this video, I do #5 (Impale). Here I wait for the spikes to come all the way down at the left end of the room, and when the tip of the one on the farthest right comes out of the ground, run to the right and never stop. You'll avoid all the spikes as well as all the Thwomps.
After completing your second door, you enter the dark corridor. If you take the Back Door, you will end up here at the start. The red ? Block turns on the light above that shines to and fro, allowing you to see the Ninjis (in the one area of the game where they appear after appearing constantly in Doki Doki Panic/the Western Super Mario Bros. 2) and the Mecha-Koopas, which are slow moving mechanical Koopas that track where you are slowly and double back when necessary in case you jump over them. Jumping on them squashes them temporarily, allowing you to carry them like Koopa shells and kick them into other enemies. Just make sure they're not shaking before you let go.
At the end, you'll finally meet Bowser. Stay on the ground and wait for Bowser to stop. Don't jump into the propellor on his air carrier He will throw two Mecha-Koopas out. Jump on them with a regular jump and kick them upwards so they hit Bowser in the head. After you do this with two Mecha-Koopas, he flies away by flying towards the screen, which scared me half to death as a kid after I found out that was what you were supposed to do.
When the flames come down, you can easily tell where to stand between flames so you don't get burned.
When Bowser comes back, Peach will poke out of Bowser's personal air carrier, crying for help. She then throws out a mushroom, which you can pick up for an extra hit.
On the second go-around, Bowser will turn upside down and drop a ball on you. Stay away from it - and spin jump off the top if you have to in order to avoid it - then send the two Mecha-Koopas at him. After that...more flames.
After the flames, Bowser's air carrier gets angry, and Bowser will try to crush you. When he stops in mid-air, he throws Mecha-Koopas. Two more Mecha-Koopas, and you've beaten Bowser!
After this, you are reunited with Princess Peach, we get the credits and enemy roll call, and we get the ending screen. But we're not done yet...