Here we are. The final world. Let's do this.
Overworld map by Rick Bruns. All other maps by Stefan Mahrla.
Valley of Bowser
Here it is: the final world of the game. Here, you'll take on the last few courses in the game, but they're not going to be easy.
Valley of Bowser
Here, you'll be entering a maze where you will see Mega Moles in greater number. You'll also see the occasional Chargin' Chuck, and even on occasion, they can be annoying.
There is a series of blocks if you take the low road. Be careful if you go through them with Caped Mario, as you can accidentally fall through the floor and die.
You'll want to take the high road through much of this maze, especially if you want to avoid a lot of the Chargin' Chucks and hit the checkpoint. Stand on the Mega Mole's head to avoid the Munchers.
There is another three-block mini-game if you enter the blue pipe near the end. You can fly up to reach it, but you can also hit a block at the bottom to find a vine to climb up.
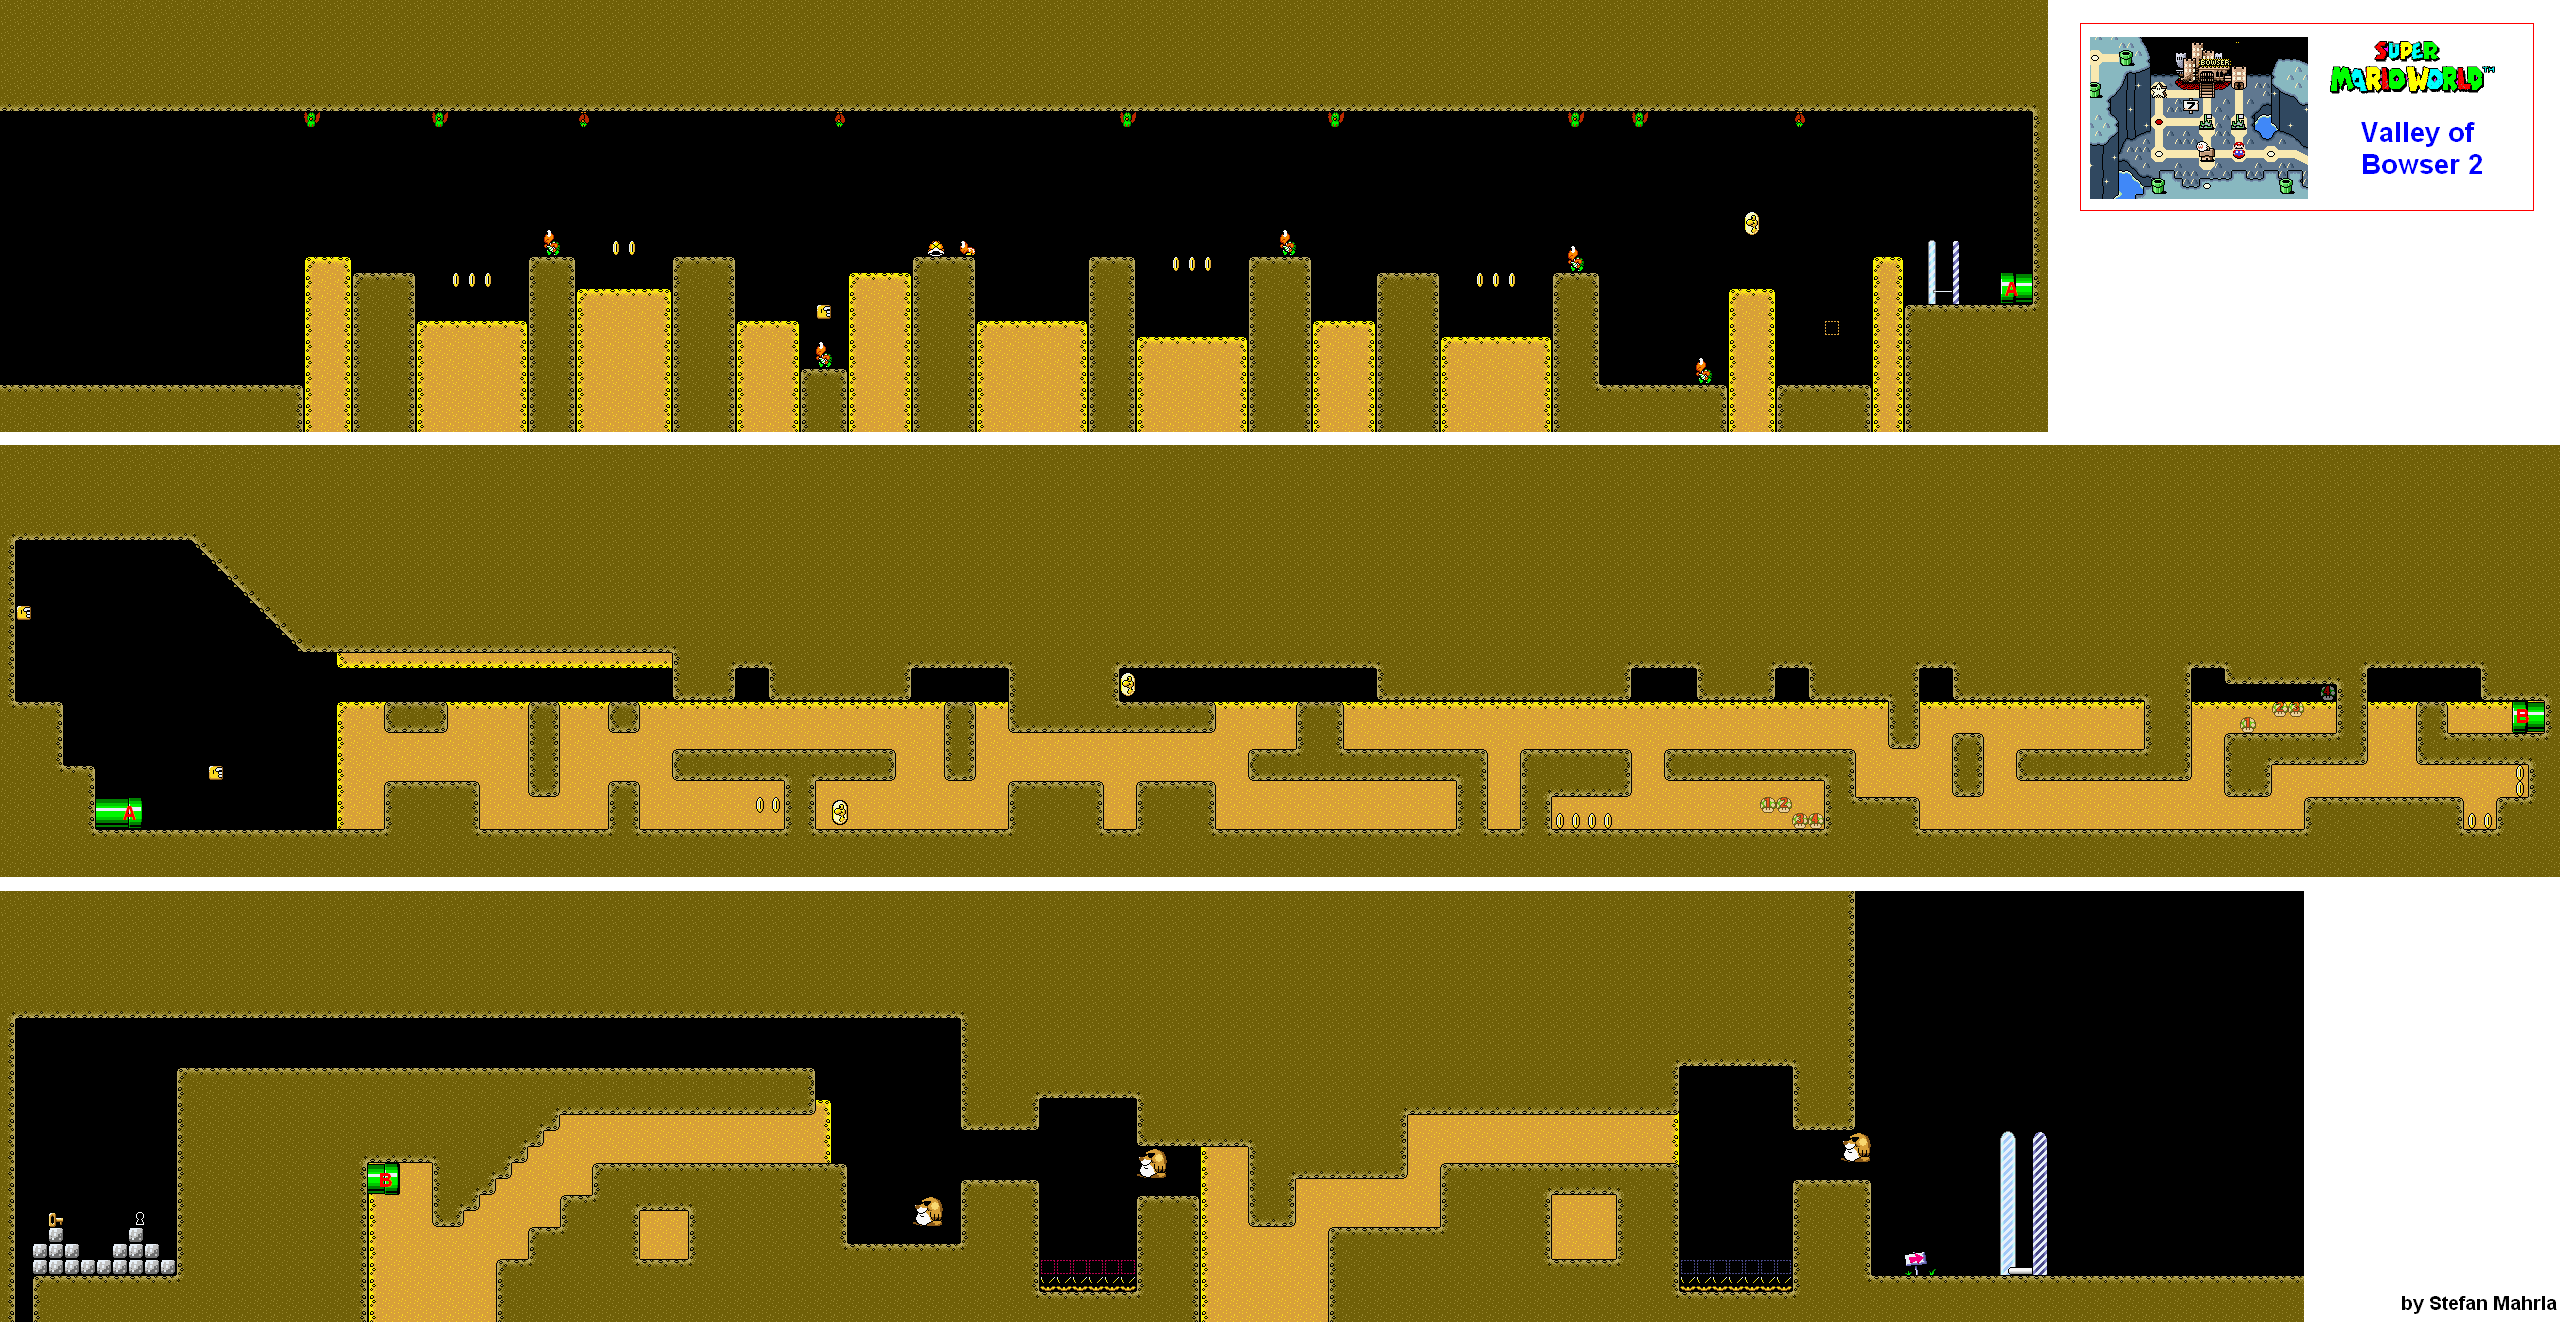
Valley of Bowser 2
The course starts out simply enough. You will see yellow platforms rising up and down while Swoopers and Koopas line the first section. Halfway through, there will be a Koopa entering a Yellow shell and sliding around while invincible.
The second section is where it starts getting nuts. Thankfully, you can get credit for the stage by hitting a block and getting the Wings to fly out, but we're doing this the hard way to get the secret exit. Here, you will have to watch the yellow floor and ceilings carefully, as they will go up and down and you do not want to be crushed while you are in the maze. There are two areas in the maze where you can get multiple 1-Ups, but do you really want them?
The third section is the last. To reach the secret exit, you will have to reach higher ground when you come out of the pipe. Don't drop into the next chasm; however, instead, wait for the rising floor to catch up with you when you get out. Make sure you're on it before it stops, then jump to the left and keep going in that direction. You'll reach the key and the keyhole, which will take you to Valley Fortress.
If you keep going right from here, you'll have to deal with more Mega Moles as well as the Munchers, assuming you haven't hit up the Red and Blue Switch Palaces. If you have, you'll just have the Mega Moles to deal with. Be sure to rush through the areas with the yellow floors so you don't get crushed and you should have no problem.
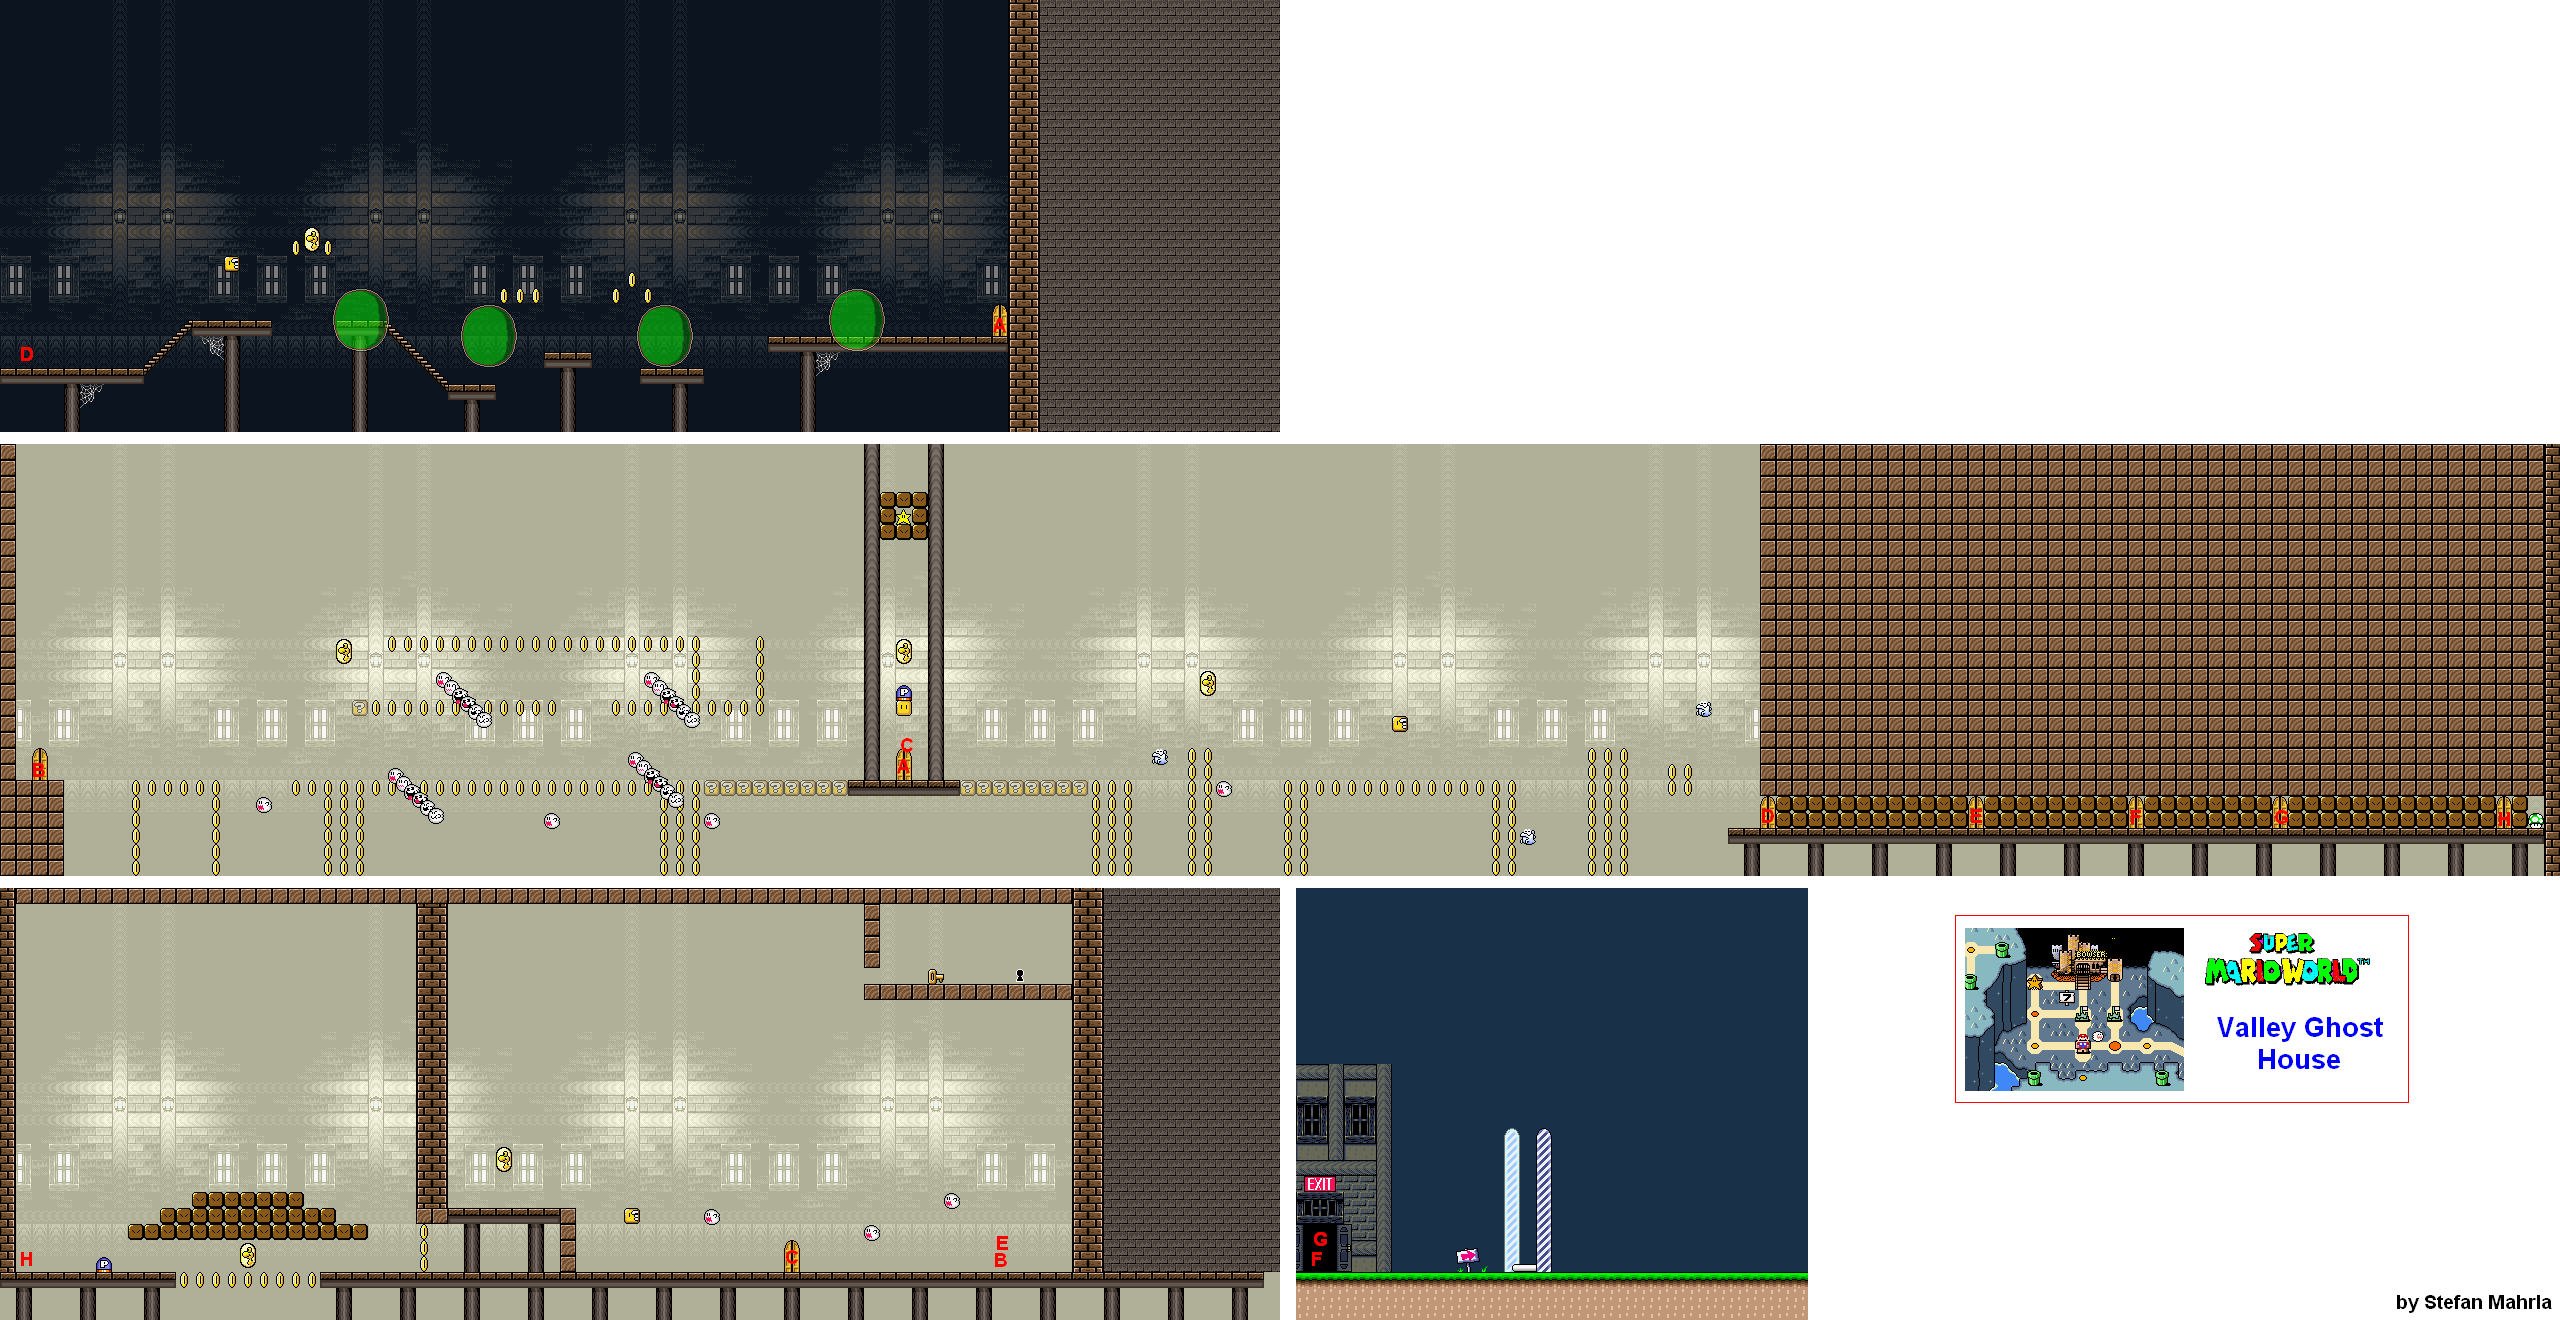
Valley Ghost House
For the beginning, make your way to the right, and spin jump off the green photoplasms if you have to. From there, enter the door at the end.
In the next section, straight up. This lets you grab the P Switch. Hit it, then run to the right as quickly as you can. After you make it across the bottomless pit, keep going right past all the doors. The third and fourth doors will take you to Valley of Bowser 3, but if you enter the fifth door, you'll enter another room.
Here, grab the P Switch and take it to the right. Jump to the platform above, then hit the nearby ? Block and use the Control Pad to make a staircase to the key and keyhole above. This may take several tries and re-entering the room a few times to make it work, but if you can do it, you can make a coin staircase upwards that will allow you to reach the key and keyhole when you hit the P Switch. Just make sure to duck when you get in that area, and try not to get hit by the Boo Buddies. The secret exit will take you to #7 Larry's Castle.
No comments:
Post a Comment