We may have beaten Bowser, but we're not done yet! We've got some post-game content, and it consists of the hardest courses yet!
Overworld map by Rick Bruns. All other maps by Stefan Mahrla.
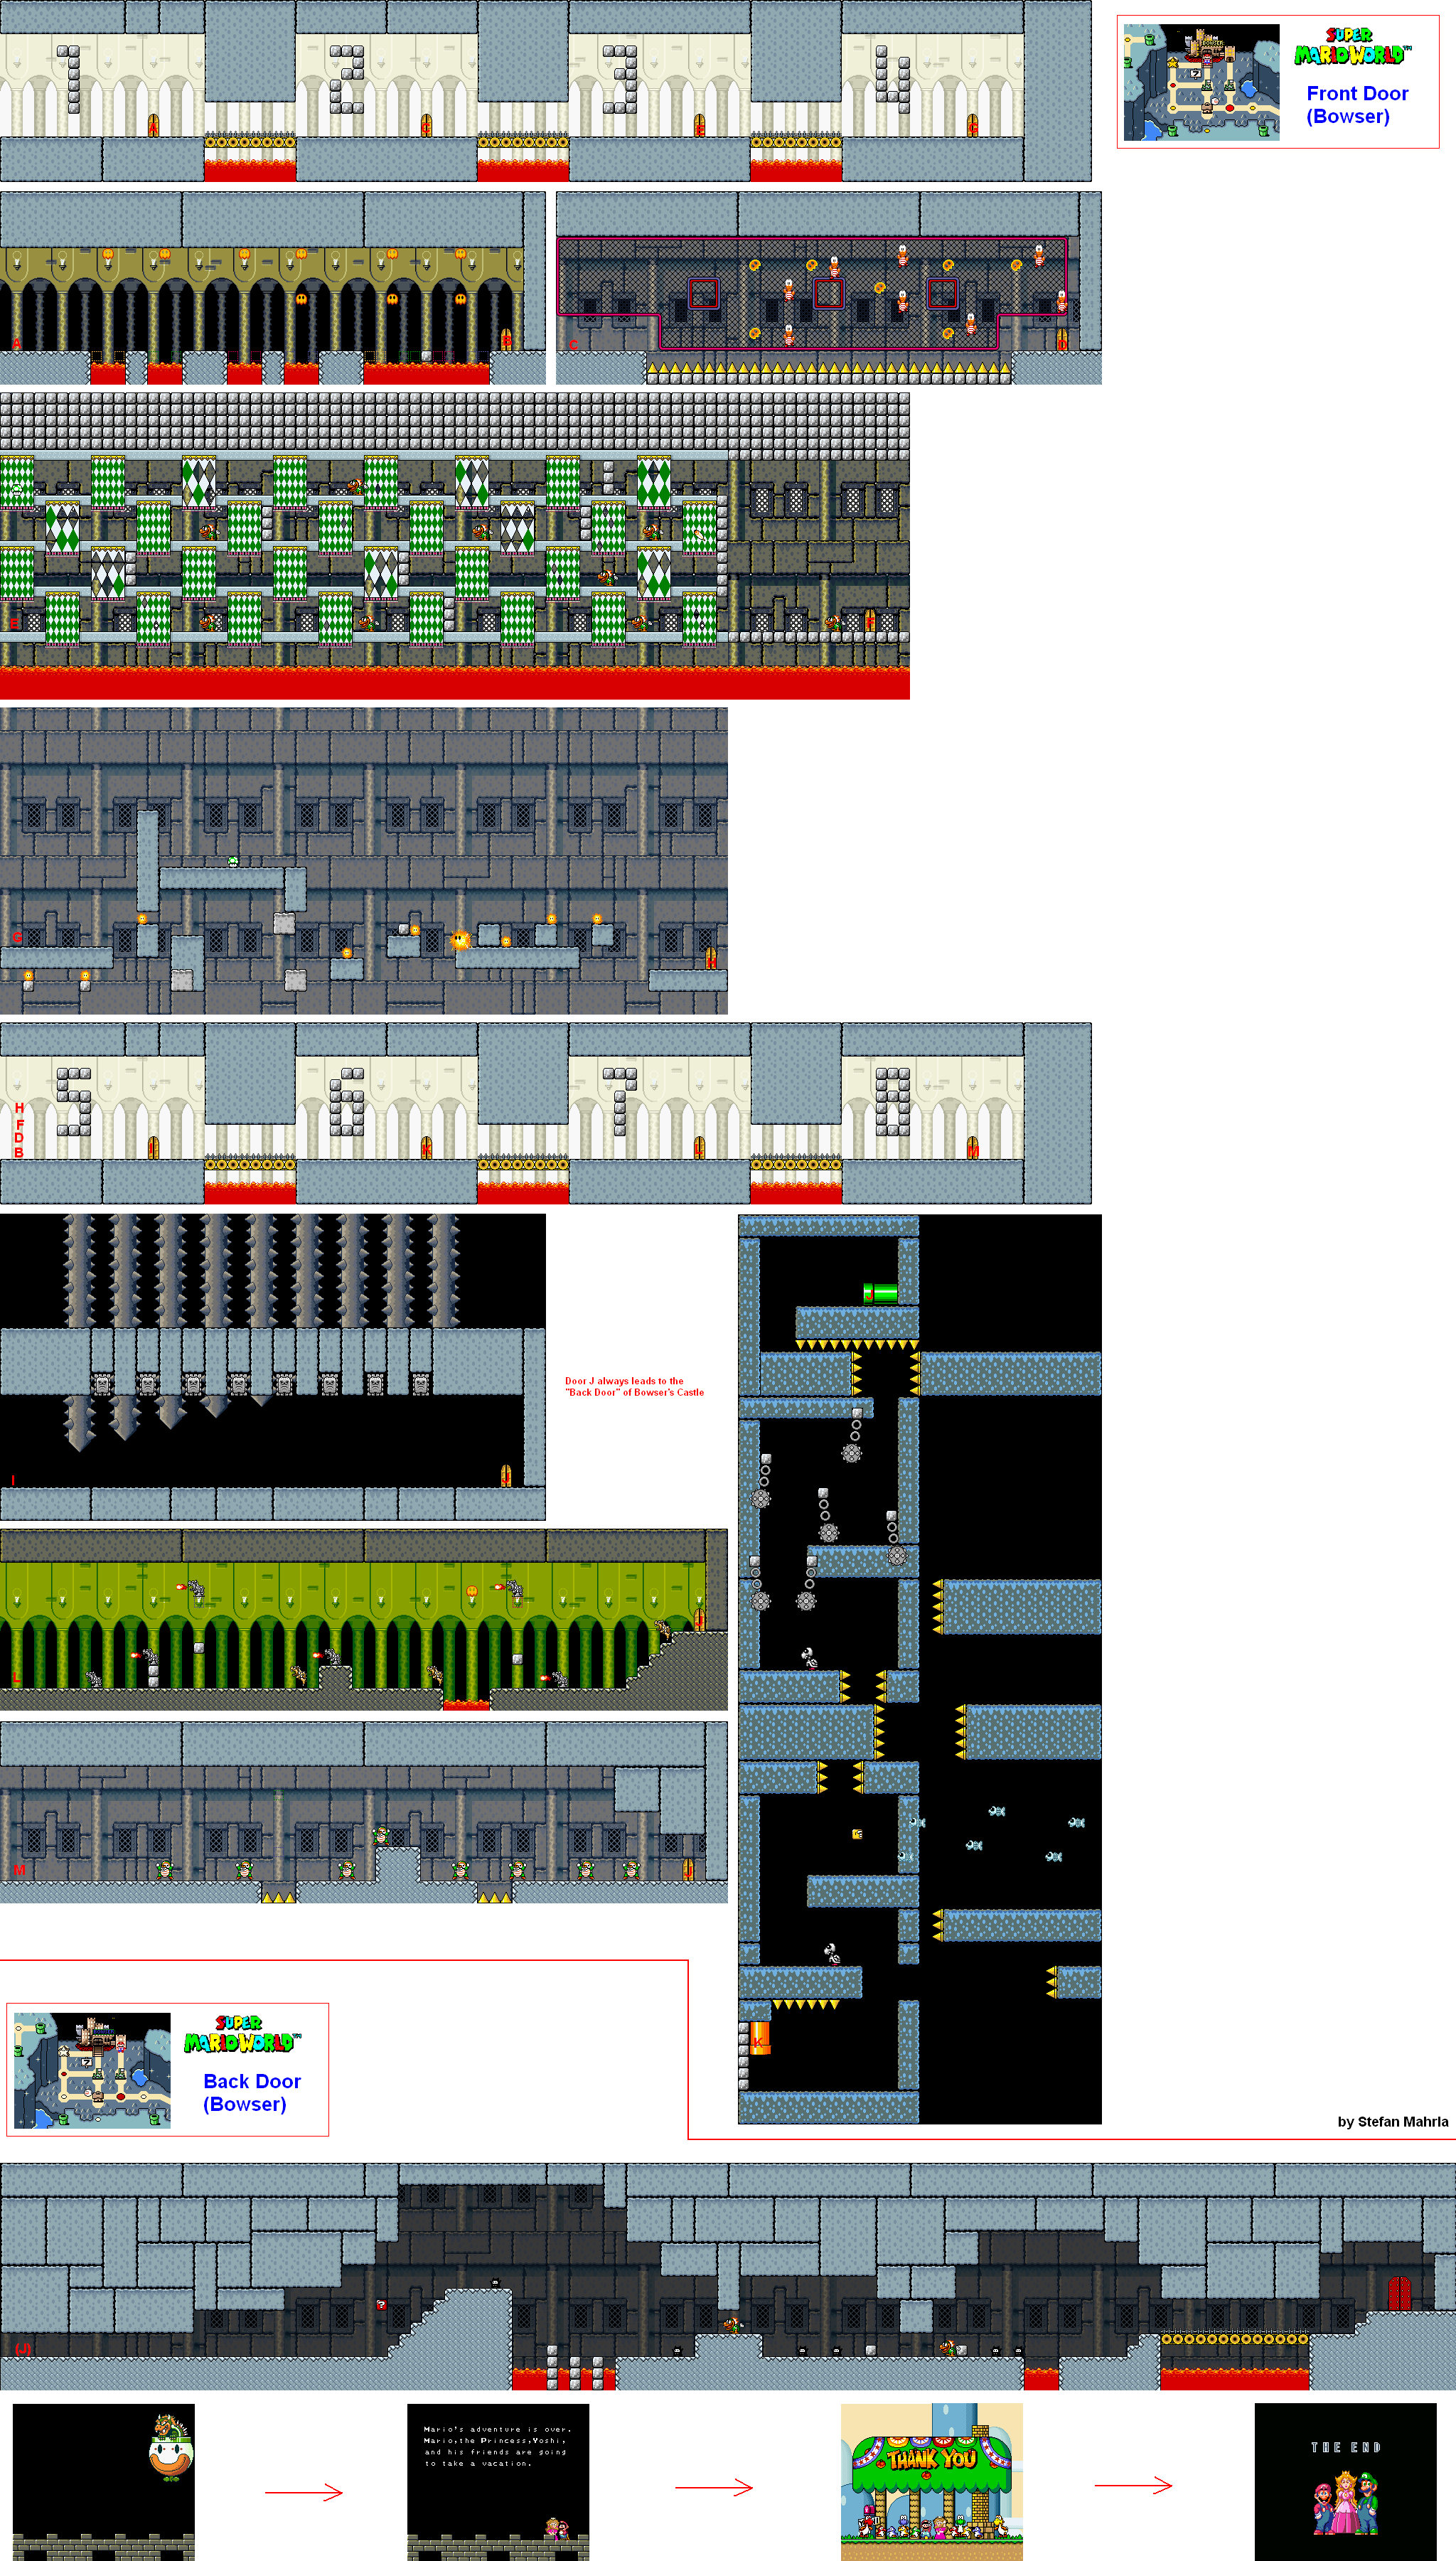
Front Door and Back Door
Now for the descriptions for the rest of the rooms!
Room 1 is "Crush." There will be Podaboos leaping in and out of the lava pits as well as crushers coming from the ceiling. If you have activated all four switch palaces, this room becomes a lot easier, because you won't have to jump across all the lava pits.
Room 3 is "Maze." Here, you will have an opportunity to meet the Mecha-Koopas before you enter the final chamber. There are numerous banners you can jump through - and Mecha-Koopas to hide behind - in order to get out of the maze. Your mission is to get to the right side of the maze. Thankfully, it isn't that hard. If you can see through the banner, you can jump through it to get somewhere else in the maze.
Room 4 is "Jump." Here. you have the sparks that travel around the walls while grey platforms move back and forth. Thankfully, this part is short just like all the others.
Room 6 is "Swim." Here, you will have to swim to the top to make your way to the final chamber. As if this kind of area could not look familiar enough, there will be walls - some bearing spikes - moving back and forth as you also deal with Dry Bones and Bony Beetles while avoiding Fishbones and ball and chains. I'm surprised an area like this didn't show up until the end, to be honest.
Room 7 is "Statue." The statues will shoot flames, and there will also be some gold ones that jump around and follow you as they do. As long as you stay away from the fireballs and watch the gold statues, you shouldn't have much trouble.
Room 8 is "Chucks." The room has a very simple layout, and there are five Chargin' Chucks. This is the easiest of the four rooms in the second set, since you can rush through this very easily if you know what you are doing.
Now that that's out of the way, it's time for Star Road. We have one level left, and you will soon see why it was left for last...
Star Road
Star World 5
At the beginning of the level, you will be seeing a lot of Para-Troopas as you jump from one gray falling platform to another. Thankfully, there is a lot of room to run and jump around, so if you take any damage here, it'll definitely feel like your fault.
Once you make it to safe land, there will be a P Switch and a ? Block. Use Up and Right on the Control Pad to move the line of coins up and to the right after you hit the ? Block, and make sure it goes both high and long. Make sure not to accidentally fall off the edge of the platform as you do this. Once the music goes back to normal, hit the P Switch. If you got your staircase high, enough, you'll see pipes and a lot of ! Blocks. If you've activated all four switch palaces, you can take this path to the secret exit; otherwise, you will have to activate the switch palaces as there is no other way to get to the end.
The path to the normal exit (which includes a baby yellow Yoshi) will take you back to where Star World 1 is. Thankfully, the path to the normal doesn't get much harder from what the beginning of the course already was.
If you made it to the secret exit, then congratulations! You just opened up a path to a brand new area that is not readily made apparent until you get there: the Special Zone.
Special Zone
Welcome to the Special Zone! Here you will see eight of the craziest courses you'll see in the game. Some are fun, some have their share of difficulty, but all of them are truly something memorable.
Oh, and if you wait on the Special World map for two minutes, you'll get a remix of the Super Mario Bros. overworld theme.
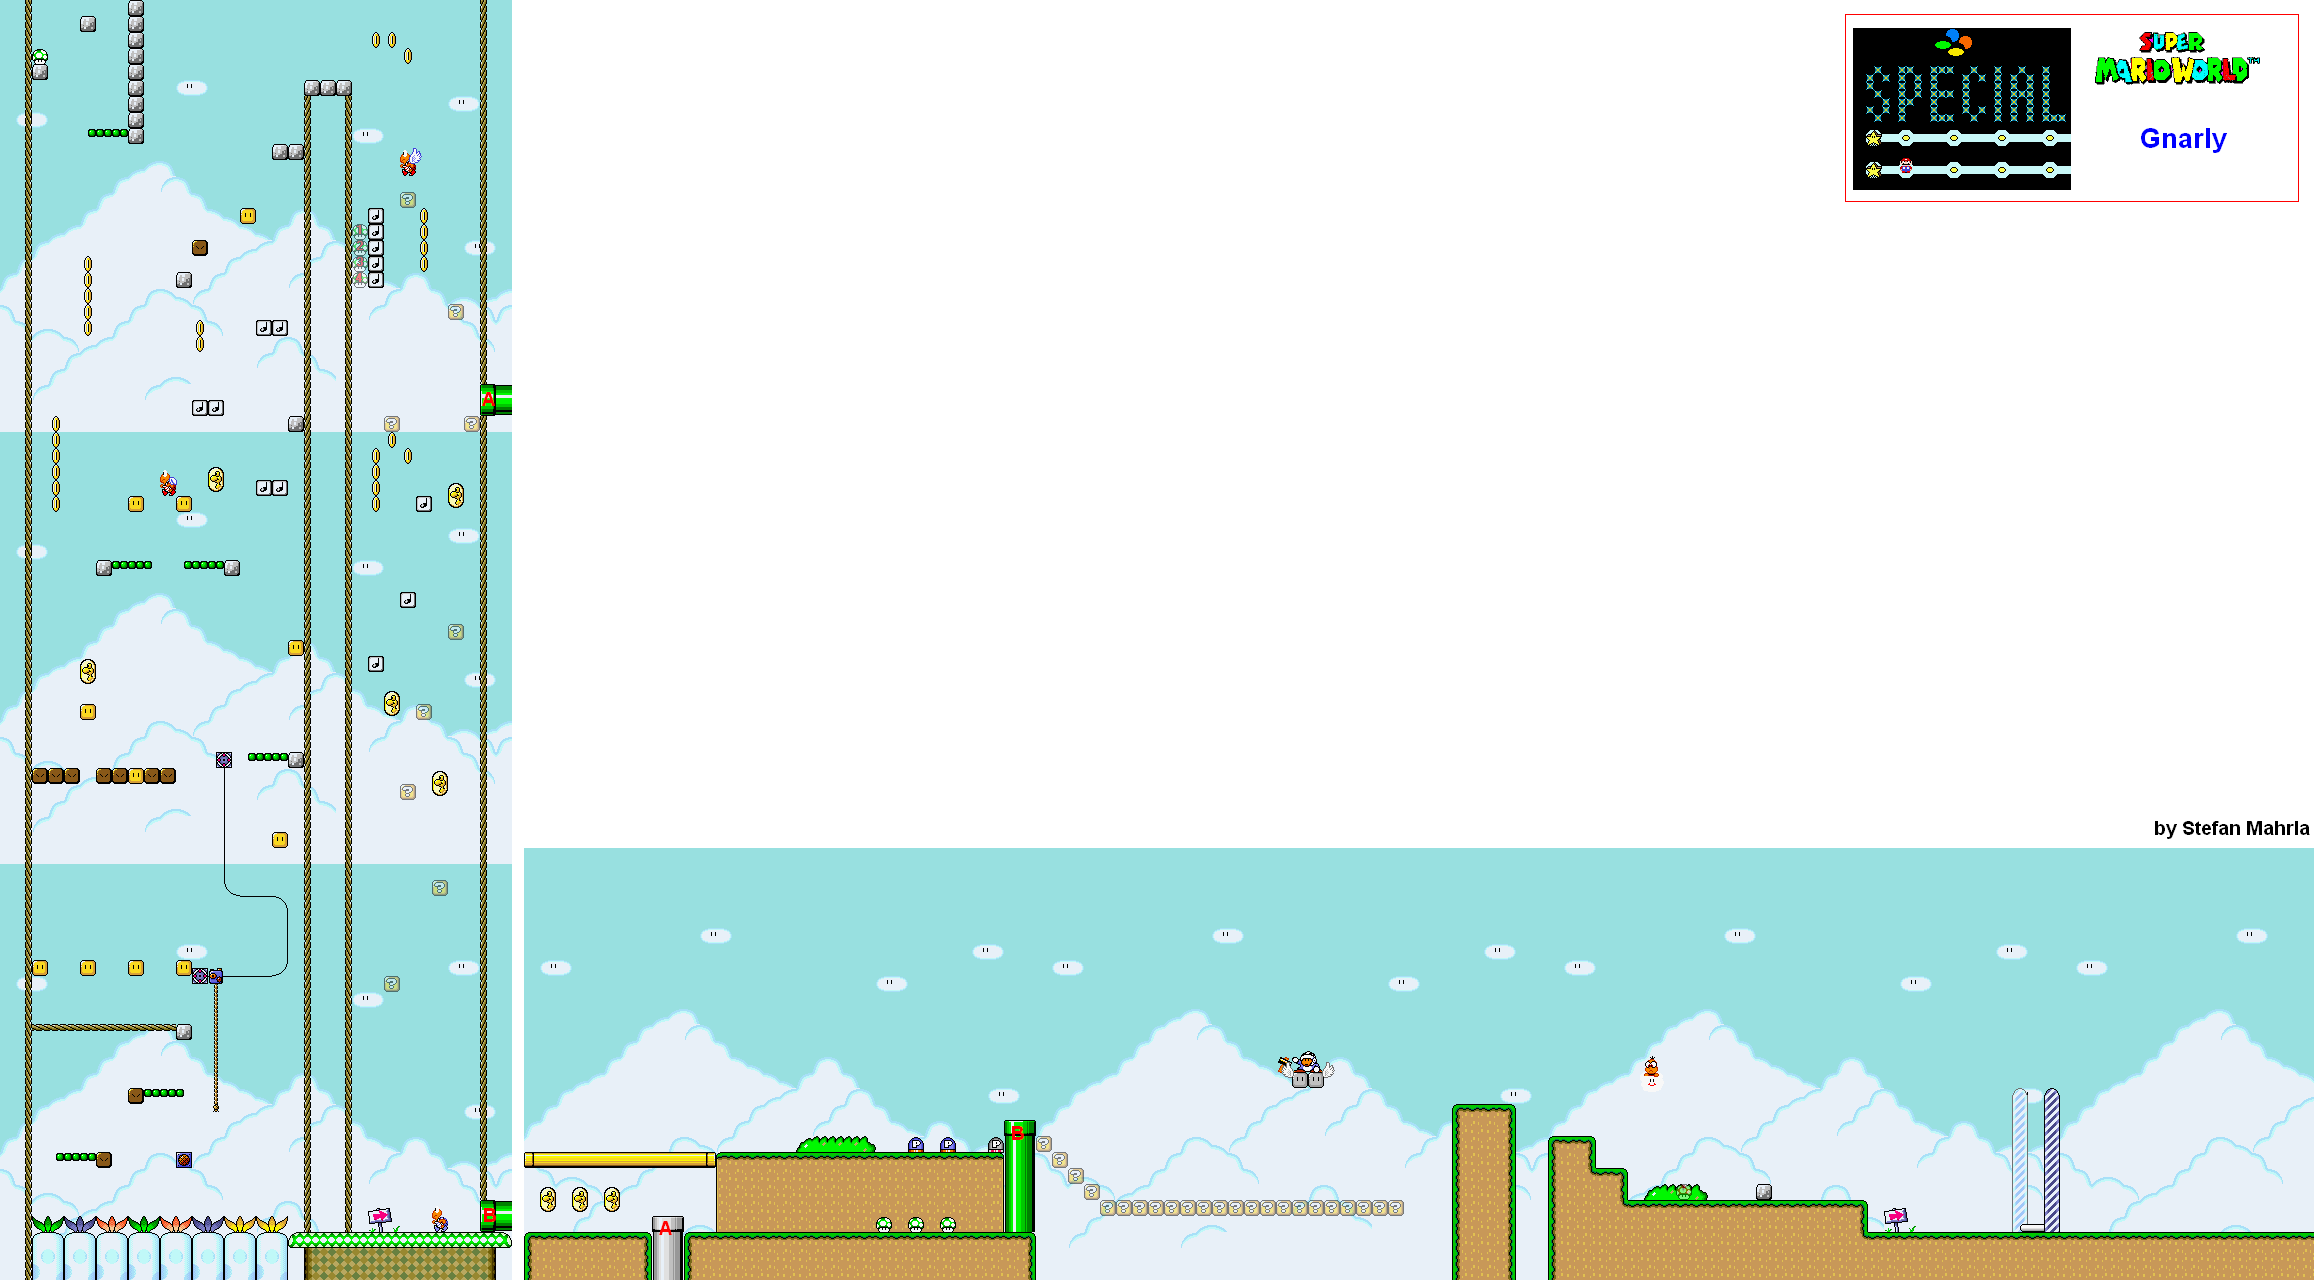
Gnarly
The message block will be your welcome wagon for the Special Zone in case you want to read it. It will tell you of a big surprise
For this stage, you will be climbing all the way to the top, then falling back down. There are not a lot of enemies at all here; as a matter of fact, there are only two Para-Troopas and one regular Koopa in the stage. Thankfully, making your way up is easy as all you have to do is hit blocks to reveal vines that will take you upwards.
One of the blocks will create some ? Blocks on the way down. If you can take it to the top, activate it and go to the right on the drop down, you can enter another pipe that will take you to an alternate exit into the second section where the last three Dragon Coins will be next to each other. If you don't find it, you'll need Caped Mario to get the last three on the way down.
The second section is dead easy; just hit the P Switches, and then hit the flying Hammer Brother from underneath to get to the goal, which takes you to Tubular.
Tubular
If you haven't played this one, you haven't played Super Mario World.
Everyone who has played this level has memories of finding this level and trying to play it, finding it to be pretty daunting. Turns out, it's not so bad if you know what to do.
The course starts out pretty easy for the most part; once you reach the P Switch, that's where things can get difficult. Underneath the P Switch is a P Balloon. Let it move to the right a little bit, then jump to it with the spring. From there, you'll have to keep flying to the right while avoiding the Chargin' Chucks, the Volcano Lotuses and the projectiles they produce.
If you get hit, or if you run out of P Balloon power, you're losing a life. There is no escaping that, unfortunately.
The boxes you need to hit are the one after the second baseball throwing Chuck and the one under the first football kicking Chuck. Avoid the rest. You're welcome.
No comments:
Post a Comment