Big Challenge! Gun Fighter is one of four games in Jaleco's Big Challenge! series exclusive to the Japan-only Famicom Disk System. Here, you play as a cowboy, and you shoot down all sorts of bad guys while taking on some tough customers that are taking over the Wild West.
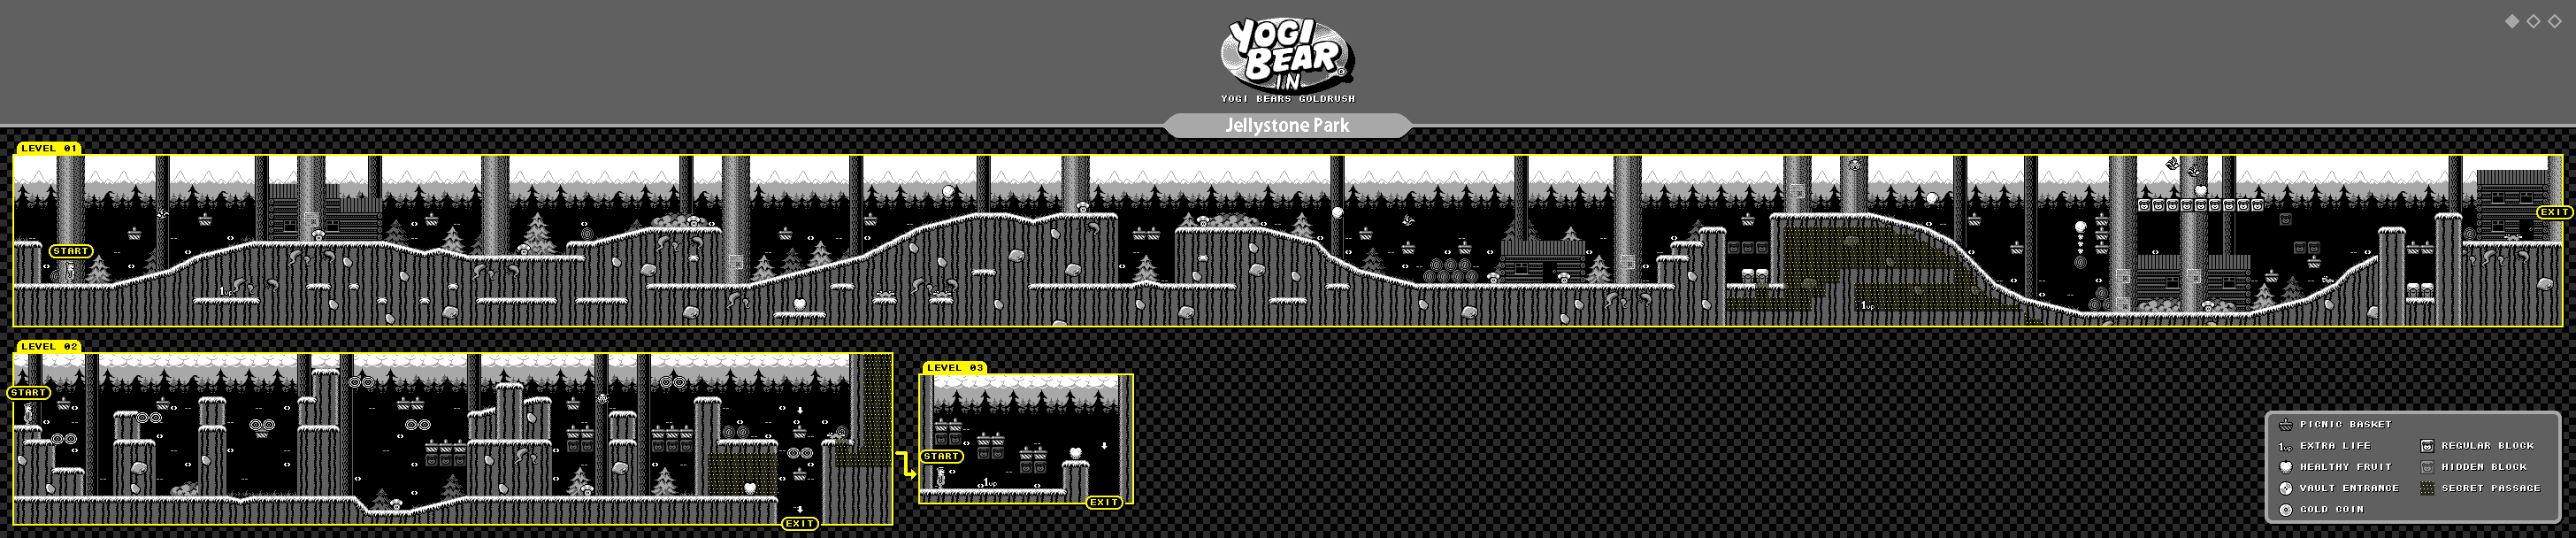
Level 1
Left and Right moves you left and right, Down ducks, A jumps and B shoots. Holding A will give you a little more hangtime than if you just tap it. At the bottom of the screen, you'll see your current health, current amount of money, current amount of bullets and the weapon that you currently have equipped. The number at the bottom-right corner of the weapons window indicates how many enemies you have left to kill before you can fight the enemy boss. If you make it to the end of the stage before reaching that enemy quota, you'll start the level over to fight more enemies and get more bullets. Once you reach the end with zero enemies left to kill, you'll face the level boss. Between the health and the weapons windows are your current amount of lives. You start with three, and if you lose them all, it's game over.
Holding Down and A will allow to switch weapons as well as pause the game. Press A to unpause.
The man you meet at the beginning will give you ten bullets for $50. By shooting down enemies, you can get medicine to refill three units of health, bullets for the gun or bags of money worth $10 each. When you shoot at enemy, wait for them to stop flashing before shooting and hitting them again, or else you will waste bullets.
Enemies include guys running around with guns, guys throwing barrels, snipers whose bullets will follow where you are when they shoot at you, and boxers that rush up to you and punch you.
If the tops of any crates are broken, do not stand on those crates. Those are basically spikes that will hurt you the longer you stand on them. There are also spikes that pop up on the ground, too, so watch out for those. If there's anything in any of the stages that look like odd ground or spikes, don't stand in it as a rule of thumb.
If you talk to the man at the beginning again after looping through the level once, you'll be able to buy ten bullets from him for $50.
To beat the boss, you'll need to press B to activate the target reticle, then move the target reticle over to the man's chest and shoot at him. If the black leather vest flashes, you got a hit in. Whenever you shoot, the target reticle moves to a random location above the boss' head, and you'll need to re-aim before you can fire at the boss again. If you're both quick and accurate, you can get through the boss battles relatively quickly and without harm. You'll also get $50 for beating the boss here.
Level 2
To select between the gun and the knife, hold Down and press A. Use the D-Pad to switch weapons so that the eagle symbol is above the one you want, then press A.
The knife goes quite a far distance when thrown, and it also get thrown upward at an angle. You'll need to get used to how the throwing arc works if you want to effectively use it. The best part about this weapon is that compared to the gun, you have unlimited uses of the knife.
The martial artist enemies can only be hit with the knife, as the gun will have no effect. They will only move to the left, and they will not double back. Since their jump kicks will cause them to be vulnerable to the knife's throwing arc, this makes the knife good to use against them from a distance.
Carefully inch your way forward so you don't get caught out by any snipers.
Any pits that are colored brown will hurt you, so don't fall into those.
When you see the guy that gives you ten bullets for $50, press B to advance the text, then press A to buy the bullets or B to refuse.
When you shoot down enough enemies, you'll take on the second boss. Just like with the first one, you'll need to press B to bring up the target reticle, then aim at the chest with the D-Pad and press B to shoot. Keep firing at the chest until the guy dies. You'll get $20 for beating this battle.
Level 3
You have a new weapon here: the boomerang. While the boomerang does not have the range of the gun or the knife, you can still use it to hit enemies through walls and hit enemies with on its way back.
The ninja jump back and forth, and they are easy to take out if you can anticipate where they are going to go. Some of the ninja enemies can also rush at you.
Unlike the other levels, the man who sells you ammo does not show up here, but if you know what you're doing, you can easily get to 99 bullets here. Since you'll need to loop through the level at least twice to get enough enemies to reach the boss, it's definitely possible.
The white floor damages you, so don't touch it.
The ninja boss may be kneeling, but you can still hit him easily in the chest. Beating him will net you $20, which isn't much unless you combine that with all the money you'll be getting (and saving) from beating up all the enemies around here.
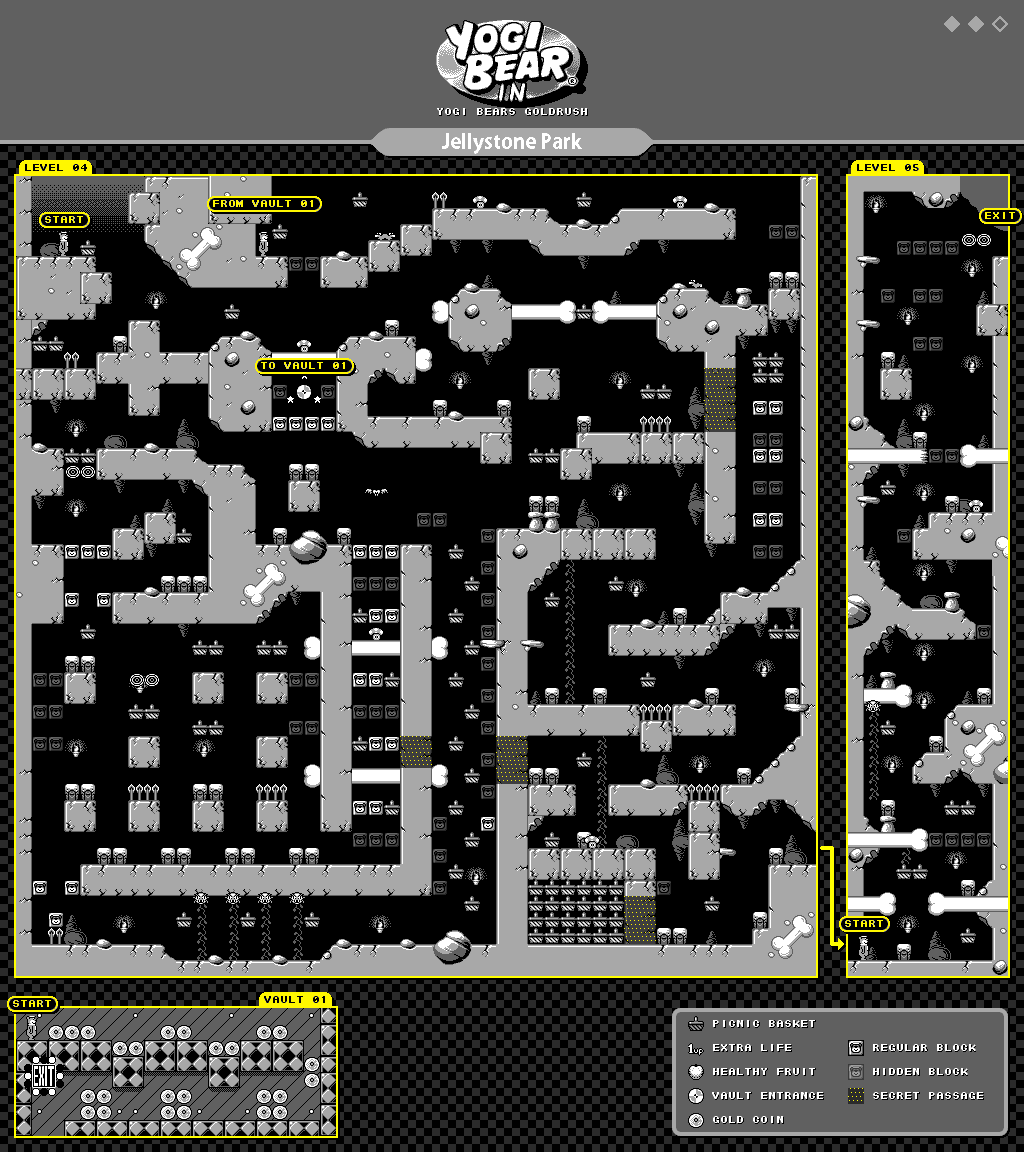
Level 4
In this level, you'll get your fourth and final weapon: the dynamite. This weapon does not travel very far, is thrown at an arc before exploding on the ground, uses five bullets to throw one, and is best for enemies below you. Not surprisingly, you won't get to use it very much outside of this level.
The boxers are back, as are the ninja. This stage is pretty short, but thankfully, the ammo man is back near the end of the stage, and it's easy to keep your ammo topped up as long as you're not playing around with the dynamite.
The boss here is a stranger in a red cloak. Once again, you'll want to shoot at the upper body just below the boss' covered face until he dies. Beating this boss will net you $50.
Level 5
While the ammo salesman is back again at the start of the stage, you'll be using the knife a lot just to take out all the snipers in this stage. Make sure you carefully make your way to the right and don't move forward too quickly, so you can take care of all the guys who have carefully positioned themselves to shoot at you.
The boss here is some guy in a mask and a spear. Once again, his torso is just as vulnerable as all the other bosses'. Beating him nets you $20.
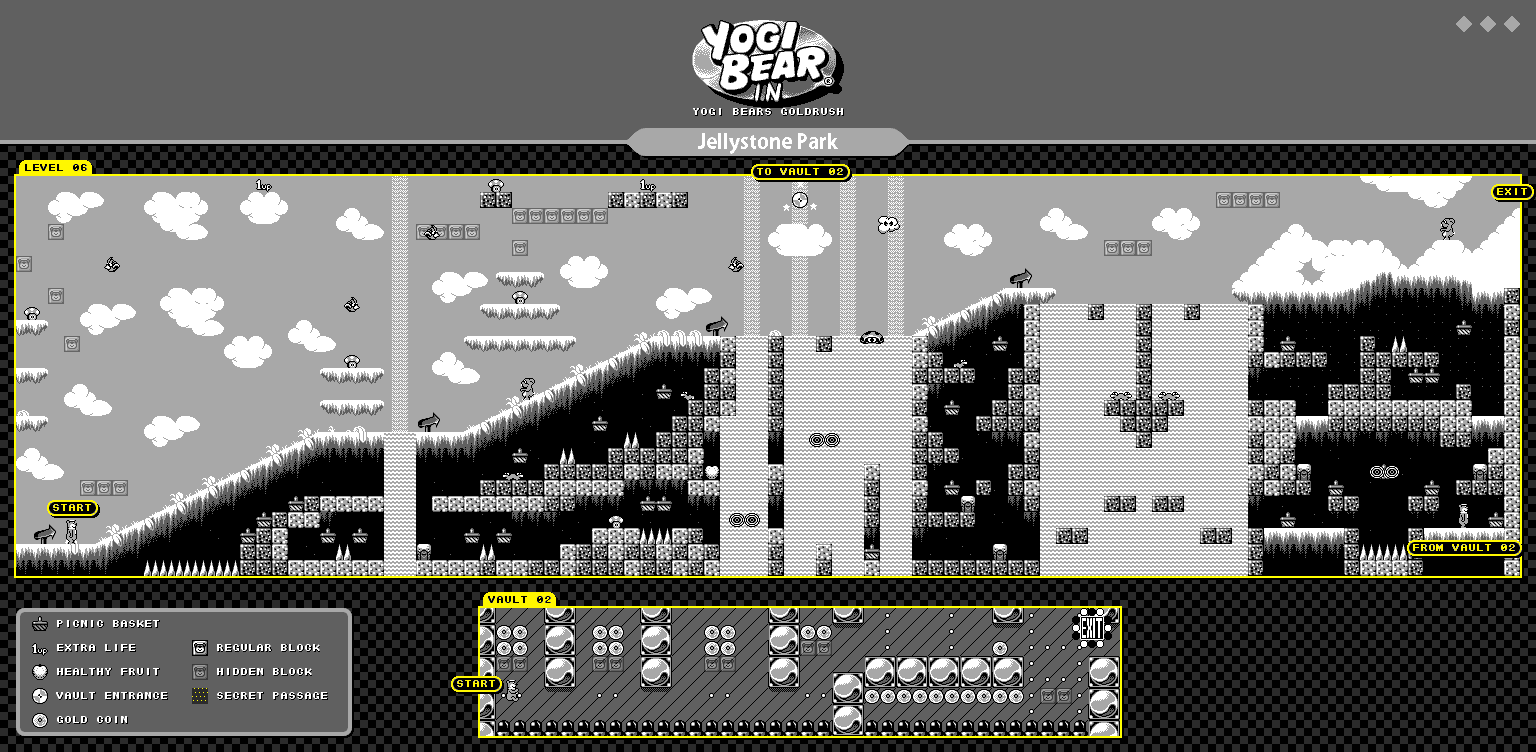
Level 6
For some reason, this is the smoothest level out of the six. If you can memorize the level, you can easily take out all of the enemies as soon as you see them, including the returning barrel throwers. I didn't even have to use the knife for this one!
The boss here seems to be protecting a cave, but since this game has not been translated, there's no way of knowing what's going on here. Just keep shooting this guy in the torso like you did all of the other bosses, and he'll go down. Just keep in mind that he has two guns, which makes it easier for him to get a shot on you.
When you beat this level, you'll beat the game! Congratulations!


